Welcome to my blog all about the things I love to grow and cook. You'll find a collection of seasonal gluten-free, dairy-free and vegan-friendly recipe posts, as well as a round up of my gardening throughout the year. I wish you good reading, happy cooking and perfect planting!
The last frosty morning of the year. Image: Kathryn Hawkins
Happy Hogmanay! I hope you’ve all had a good Christmas. And now it’s the end of another year. Where has the past 12 months gone?
Much like last New Year’s Eve here in central Scotland, it has been a chilly day with bright sun and a cloudless blue sky. In spite of the sunshine, most parts of the garden remained covered in a thick crisp, frosty coating.
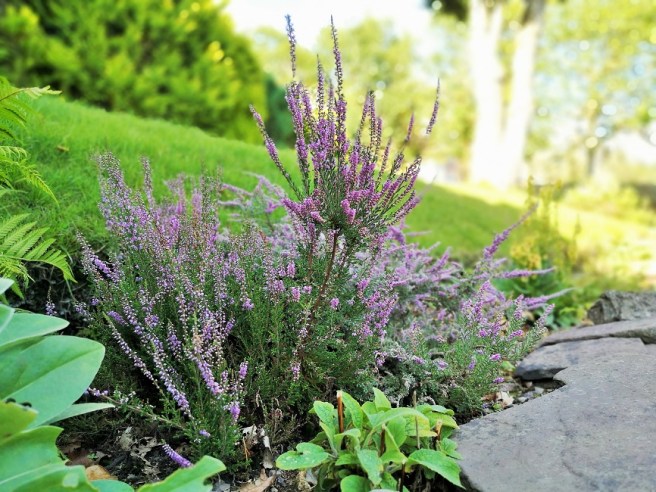
To end this short post, I photographed some “lucky” white heather out in the garden today with the hope that it would set us all on a good path for the year ahead. Whatever you’re up to this evening, I hope you have a good time. All my best wishes for a happy, healthy and prosperous year ahead. Happy New Year 2020!
Vegan and gluten-free, fruit cake for Christmas. Image: Kathryn Hawkins
Well, I admit, not quite “icing” on top of my Christmas cake this year, but a delicious layer of marzipan instead. If you’re not a fan of almond paste, then a layer of ready-to-roll white icing will do the trick just as well.
Cherries and fresh herbs make a simple festive decoration. Image: Kathryn Hawkins
This is the sugar and spice fruit cake I made back in November – recipe here. It’s turned out ok and smells divine. I can’t wait to tuck in.
If you want to marzipan or ice the top of a cake, it’s quite straightforward. For an 18cm round cake like this one, you’ll need 250g marzipan or ready-to-roll icing for a reasonably thick layer. Knead it gently to soften a little (this will make it easier to roll), then dust the work top lightly with icing sugar and roll out the marzipan or icing to form a rough 19cm circle. Use the base of the tin that you cooked your cake in as a template to cut yourself a neat round.
Making a marzipan round. Images: Kathryn Hawkins
Unwrap your cake, turn it upside down to give a smooth surface and brush with some smooth apricot jam – I like to add a splash of rum to the jam for an extra kick. Carefully transfer the marzipan or icing circle to the top of the cake and smooth it in place.
Covering the cake. Images: Kathryn Hawkins
Now your cake is ready to decorate and tie with ribbon for a finishing touch. I have used glacé cherries with fresh bay leaves and rosemary sprigs for a very simple yet festive decoration, but I’m sure you will have your own ideas.
This is my last post before Christmas. Thank you all for stopping by over the past 12 months and for your lovely comments. I hope you have a good time over the holidays and I send you my best wishes for a happy and healthy festive time. I look forward to posting again in the new year.
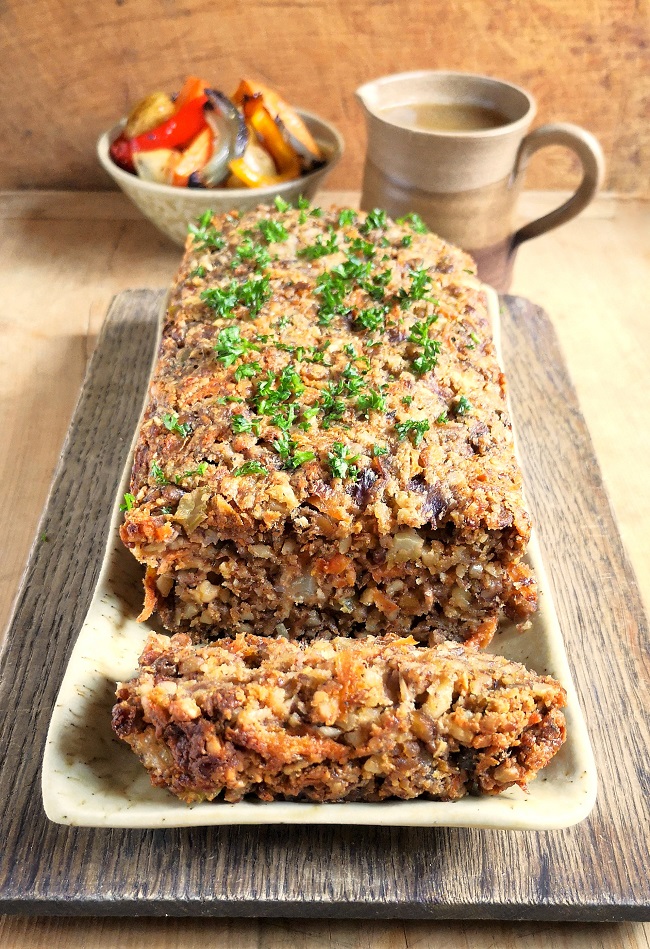
If you’re planning a meat-free Christmas menu for yourself or guests this year then my recipe this week maybe one to consider. Time to post my favourite nut loaf recipe. It is very easy to assemble, can be made in advance, and freezes well. What’s more, you can use any combination of nuts and seeds you fancy – it’s the perfect recipe to use up any nuts or seeds that you have already opened. And above all else, it’s very tasty 🙂
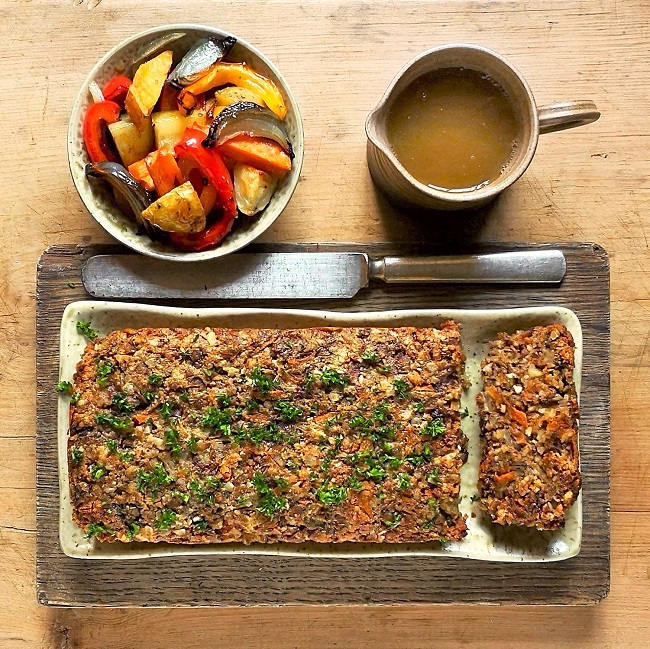
Serve with roast veg and veggie gravy. Image: Kathryn Hawkins
I prefer to use roasted peanuts and cashews if I have them, but pecans and almonds are favourites too. The mixture is bound together with lentils, flax seed “egg” and nut butter – choose whichever cooked pulses or nut butter you fancy to suit your taste. If you fancy some extra crunch, toast a handful of your favourite seeds and add to the mixture when you bind everything together.
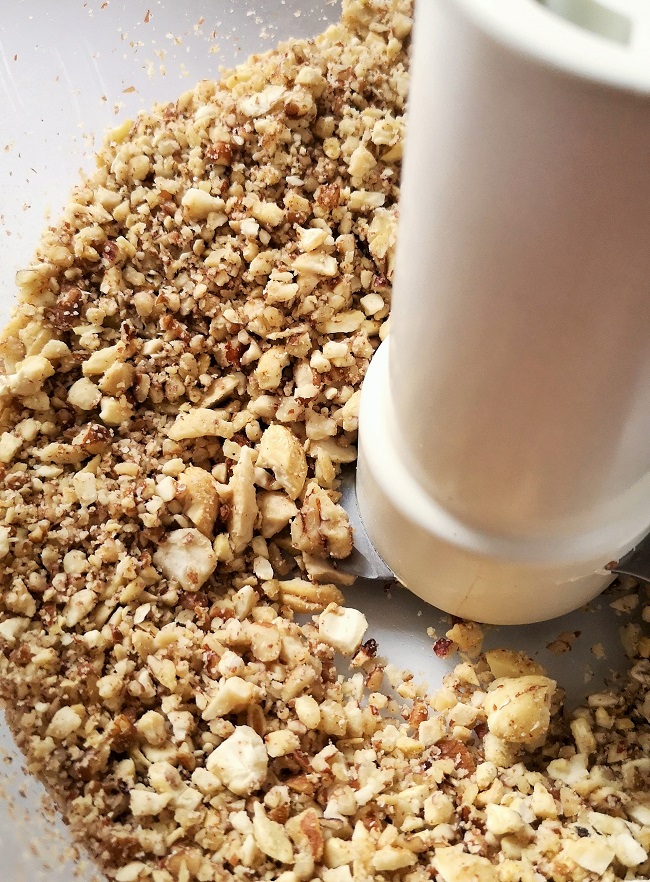
Ground peanuts and cashews. Image: Kathryn Hawkins
When grinding or chopping the nuts, I like to keep some bigger pieces amongst the finer grinds so that the loaf has some texture but you may prefer something smoother.
On with the recipe, and then on with the festive countdown.
Serves: 4 to 6
Ingredients
2 tbsp. olive oil + extra to drizzle
1 stick celery, trimmed and chopped
1 small onion, peeled and chopped
2 garlic cloves, peeled and chopped
115g grated carrot
115g cooked green lentils (cooked and mashed cannellini, butter or haricot beans work well too)
200g roasted peanuts and cashews (or your favourite nut and seed combination)
40g gluten-free sage and onion stuffing mix
1 tsp dried sage
1 tsp salt
125g whole nut peanut or other nut butter, softened
1 tbsp. flax seeds
Chopped parsley to garnish
Heat the oil in a small frying pan and add the celery, onion and garlic, mix well, cover, and cook gently for 10 minutes until softened. Cool for 20 minutes.
Preheat the oven to 200°C, 180°C fan oven, gas 6. Line a 1kg loaf tin with a paper liner or baking parchment. Put the remaining ingredients, except the flax seeds and parsley, in a bowl and stir in the softened mixture.
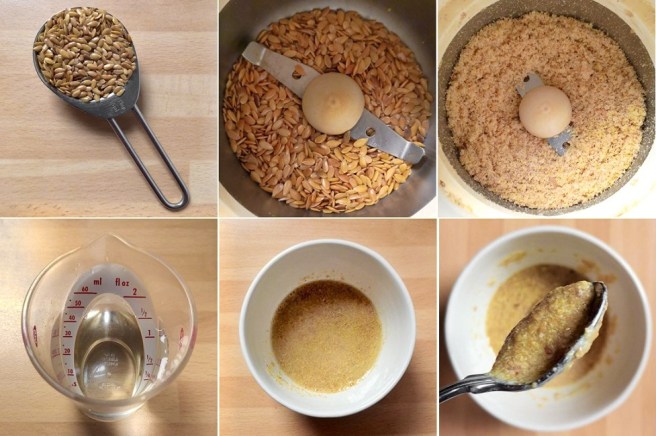
Now make the flax egg. Grind the flax seeds until powdery – I use a coffee grinder. Put in a small bowl and mix in 3 tbsp. water. Leave for about 5 minutes to thicken then stir into the nutty vegetable mixture to bind everything together.
Making flax “egg”. Images: Kathryn Hawkins
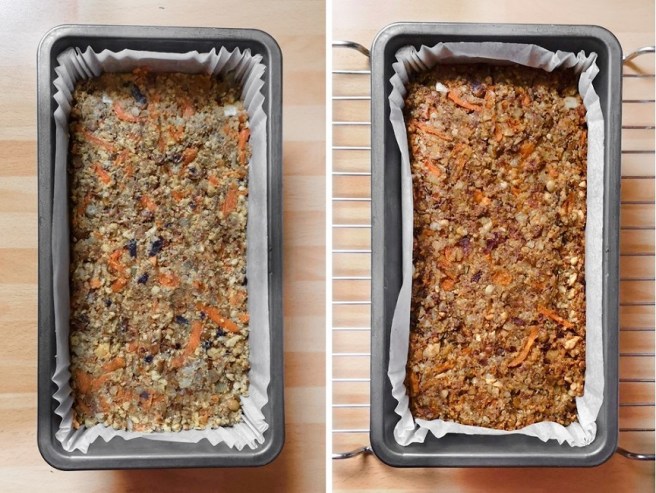
Spoon the loaf mixture into the prepared tin, smooth the top and drizzle with a little olive oil. Cover with foil and bake for 30 minutes, then remove the foil and bake for a further 25-30 minutes until lightly crusty on top.
Before and after baking. Images: Kathryn Hawkins
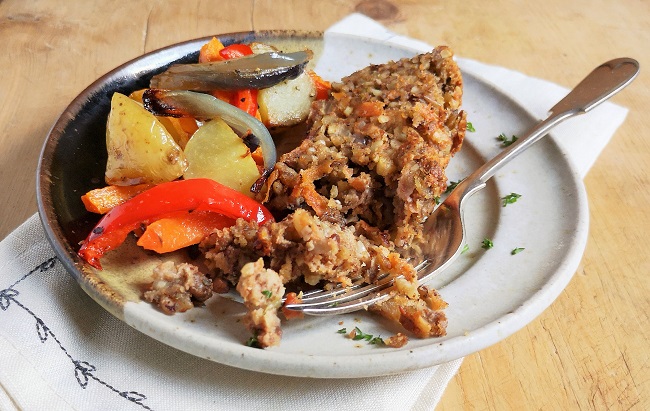
To serve, carefully remove the loaf from the tin. Discard the lining paper and transfer to a warmed serving plate or serving board. Sprinkle with parsley and serve immediately, sliced thickly and accompanied with roasted vegetables and vegetable gravy or a fresh tomato sauce.
Nut loaf serving suggestion. Image: Kathryn Hawkins
I hope you have a good few days and I look forward to seeing you again just before Christmas!
It’s the time of year when you might be thinking about making something edible for giving as a Christmas present so my post this week may be an idea for you. Last week I found large fresh mangoes for sale in the supermarket at a very reasonable price and decided to make mango chutney. This is a favourite preserve in our house; we get through lots of it, but I hardly ever get round to making it.
Fresh mango fruit. Image: Kathryn Hawkins
Choose slightly under-ripe mangoes for chutney so that you end up with some texture in your preserve. Very ripe mango will go very soft and will also increase the sweetness of the final chutney.
Spice and seasoning tray. Image: Kathryn Hawkins
You can go one of two ways when you make mango chutney: the spicy route, whilst or the smooth, sweet and jam-like. If you prefer the latter, you don’t need to add the spice bag or the chillis and onion seeds from the recipe below, but I do recommend keeping the ginger, bay and garlic as well as salt and pepper . Blend or mash the mango finely before you start, and for a more vibrant colour, add some paprika.
Toasting and grinding spices ready for a spice bag. Images: Kathryn Hawkins
For a spicy version, I prefer to keep the chutney as clear as possible so I avoid ground spices as these can give a murky result. Instead I opt for making a spice bag. It’s a bit of a faff but worth it to achieve a more “professional” appearance. Toast the cumin, coriander and black mustard seeds first in a dry frying pan for a couple of minutes. Cool and then grind them with the cardamom pods. Pile on to a small square of clean muslin and add the ground pepper. Tie up with a strip of muslin or clean cook’s string and you’re ready to go.
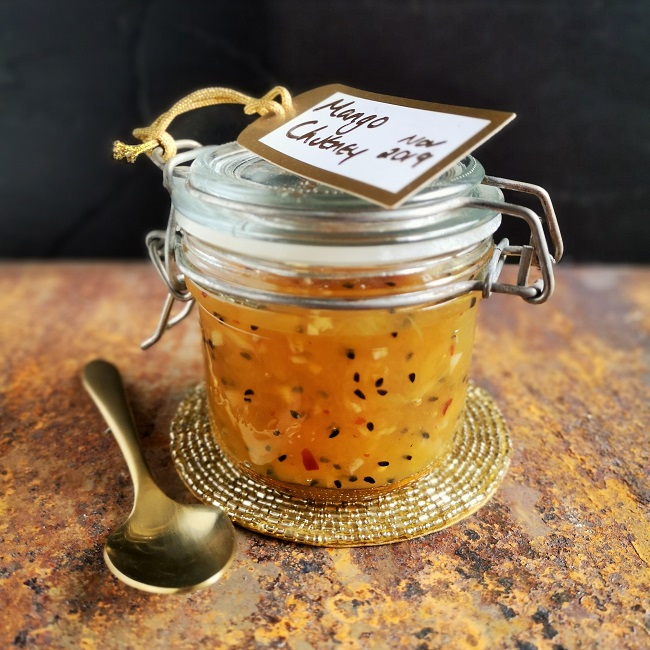
Ready for gifting. Image: Kathryn Hawkins
If you can bear to part with your preserve, it does make a lovely and impressive gift for any curry or Indian food lover. Make it now and it will be just about ready to eat at Christmas, but perfect for keeping into the new year. I haven’t decided what to do with my 3 jars yet – keep or gift? Probably the former 🙂
Homemade mango chutney ready for storage until Christmas. Image: Kathryn Hawkins
Makes: approx. 525g
Ingredients
½ tsp each cumin, coriander and black mustard seeds
4 cardamom pods
½ tsp coarse ground black pepper
2-3 large slightly under-ripe mangoes – see below
2 garlic cloves, peeled and finely chopped
20g piece root ginger, peeled and finely chopped
2 bay leaves
1 tsp dried chilli flakes
150ml cider vinegar
225g granulated sugar
2 tbsp. fresh lemon juice
1 tsp black onion seeds
½ tsp salt
First make up the spice bag as described above and put to one side. Next prepare the mango. Slice down either side of the large smooth, flat central stone. Peel off the skin and chop the flesh, then slice off the remaining flesh from around the edge of the stone. You will need 600g prepared fruit for this recipe.
Fresh mango preparation. Images: Kathryn Hawkins
Put the mango flesh in a large saucepan and add the spice bag, garlic, ginger, bay leaves and chilli. Pour over the vinegar, bring to the boil, cover and gently simmer for about 10 minutes until softened.
Stir in the sugar until dissolved, then add the lemon juice. Bring to the boil and cook for about 15 minutes until thick and jam-like, stirring occasionally as it may start to stick on the bottom of the saucepan. Turn off the heat, stir in the onion seeds and salt, cover and stand for 10 minutes, then discard the bay leaves and spice bag.
The 4 stages of chutney. Images: Kathryn Hawkins
Stir the mixture before spooning into hot, sterilised jars and sealing immediately. Leave to cool, then label and store in a cool, dry cupboard for at least a month to mature before serving.
That’s all for this month. I wish you a good few days. I’ll see you again in December on the run up to Christmas 🙂
A spoonful of sweet and spicy homemade mango chutney. Image: Kathryn Hawkins
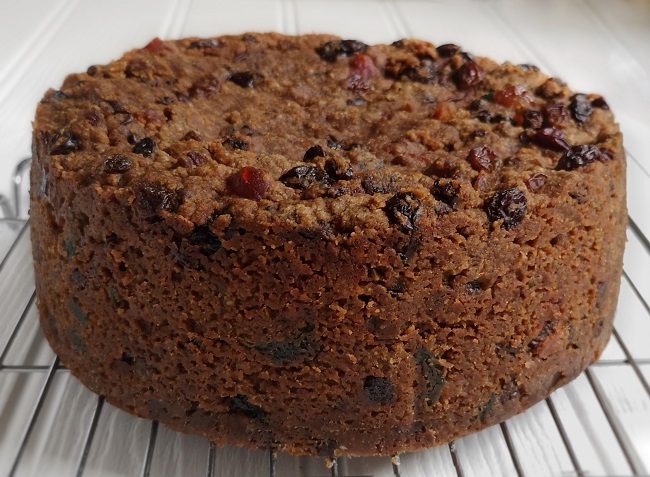
Getting ready for Christmas, gluten-free and vegan, this year’s Christmas fruit cake ready for wrapping and storing. Image: Kathryn Hawkins
In my kitchen, November marks the month that I bake a fruit cake for Christmas. I love the fragrant spicy and citrus aromas wafting from the oven as the cake bakes. Utterly delicious.
Making a rich fruit cake about 6 weeks before Christmas allows the spices chance to settle down, mellow and improve before serving up over the festive season.
Christmas cake fruit and flavourings. Images: Kathryn Hawkins
When it comes to fruit, I usually go with a mixture of dried vine fruits, chopped apricots and glacé cherries. Orange and lemon rind and juice add some zest and zing. I always use dark brown sugar and treacle for richness and colour. I usually vary the spices, one year I did mostly ginger and mixed spice for a classic “gingerbread” flavour, but this time around I’ve used cinnamon and allspice together with a classic mixed spice blend. I had white rum to use up this year, but most often I use the dark version.
Tin protection for prolonged baking. Image: Kathryn Hawkins
Fruit cakes do take a long time to cook, so you need to make sure the outside edges of the cake don’t over-cook. Double-line the sides of the tin inside with baking parchment and then wrap the outside of the tin with a double layer of brown paper and secure with string. I also put a circle of brown paper in the bottom of the tin before adding a couple of circles of baking parchment on top.
It is worth checking the oven temperature manually before you start baking any cake but especially before one that needs long, slow cooking – I always pop an oven thermometer in the oven before preheating to check the temperature is correct. My cooking time of 3 hours will produce a very moist and dense cake, but if you prefer something drier and more crumbly, extend the cooking time by 30 minutes up to 1 hour.
On with the recipe. If you’ve never made a Christmas cake before I understand that the list of ingredients will be completely daunting, but this is a very straightforward recipe, so I hope I can tempt you to have a go.
Serves: 16
Ingredients
900g mixed dried and glacé fruit such as raisins, sultanas, currants, chopped dried apricots, and cherries
Finely grated rind and juice 1 small lemon
Finely grated rind and juice 1 small orange
100ml white or dark rum + 2 – 4 tbsp. extra for feeding
225g coconut oil
150g dark brown sugar
2 tbsp black treacle
40g chia seeds
175g gluten-free plain flour blend
100g ground almonds
1 ½ tsp gluten-free baking powder
1 tbsp. ground mixed spice
2 tsp ground allspice
2 tsp ground cinnamon
2 tsp natural almond extract
1 tbsp. natural vanilla extract
Prepare a deep, 18cm round cake tin by double lining with baking parchment and brown paper – see above. Place on a baking tray.
Put the fruit in a large saucepan with the citrus rind and juice, rum, coconut oil, sugar and treacle. Heat gently, stirring occasionally, until melted, then bring to the boil and simmer gently for 2-3 minutes. Leave to cool for 30 minutes.
Preparing the fruit mixture. Images: Kathryn Hawkins
Preheat the oven to 150°C, 130°C fan oven, gas 2. Put the chia seeds in a bowl and add 125ml cold water. Stir and leave for 5 minutes to form a thick, gel-like mixture.
Making chia “egg”. Images: Kathryn Hawkins
Transfer the fruit mixture to a large bowl and mix in the chia “egg”. Add the remaining ingredients and mix well to make sure that there are no pockets of flour. Transfer to the tin, smooth the top and bake for 3 hours – see notes above for longer cooking.
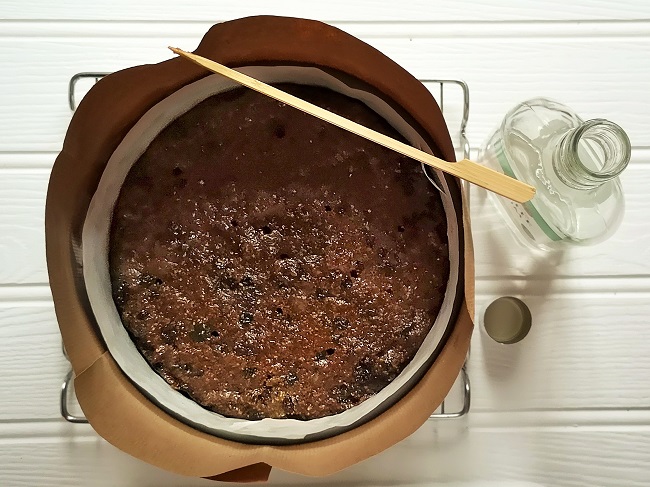
Remove from the oven and skewer the top deeply all over. Spoon over 2 tbsp. rum, then leave the cake to cool completely in the tin.
Rum-soaked cake. Image: Kathryn Hawkins
When the cake is completely cold, remove from the tin and discard all the wrappings. Wrap well in fresh baking parchment or greaseproof paper and then either wrap tightly in foil or store in an air-tight container.
Wrapping and storing fruit cake for Christmas. Images: Kathryn Hawkins
Keep the cake in a cool, dark, dry place for best results. If you want to give the cake a bit more of a kick you can feed it with more rum every 2 weeks. I find one more dose is fine for me. Avoid adding rum in the final few days before serving as it will not have time to mellow out and may spoil the overall flavour of the cake.
Feeding the cake. Image: Kathryn Hawkins
To feed, simply unwrap the cake and spoon over another tablespoon of rum. Let it soak in completely before wrapping up again and ontinue storing until you are ready to ice the cake for Christmas. I’ll follow up this post next month with the unveiling of the finished cake.
Steaks, barbecue dressing and salsa. Images: Kathryn Hawkins
Now that there’s a bit of a nip in the air and the daylight hours are limited, I feel the need for some comfort food. Very soon “bewitching” date in the calendar will be upon us, and the colours and flavours of my recipe this week make it a perfect dish to serve up on All Hallows Eve.
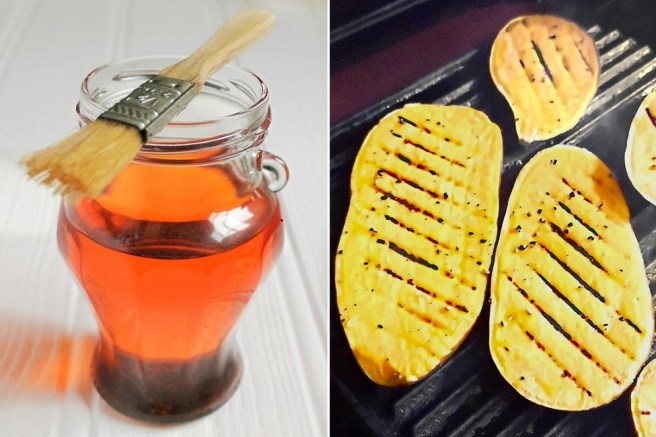
There is a little heat in my recipe coming from chilli oil to cook the steaks and sweetcorn; green chilli in the salsa, and some sweet chilli sauce in the dressing. I’m a chilli wimp so the flavours are relatively mild, you can add more to bump up the intensity if you prefer. I make my own chilli oil by adding Mexican chipotle seasoning to sunflower oil, and brush it over the steaks and sweetcorn just before cooking. Use plain oil if preferred.
Home-made chilli oil for brushing over sweet potato steaks. Images: Kathryn Hawkins
The salsa salad is consists of fresh sweetcorn flavoured with green chilli (use red for more heat), some spring onions for sharpness. and for nuttiness, toasted sesame seeds and sesame oil. To finish, I add white balsamic vinegar for a little sweetness. You can experiment with the balance of flavours to suit your taste-buds.
Sweetcorn salsa basics. Image: Kathryn Hawkins
On with the recipe. I hope you enjoy it, and have a Happy Hallowe’en 🙂
Serves: 4 to 6
Ingredients
900g medium-sized sweet potatoes, scrubbed
Chilli oil
Salt and freshly ground black pepper
For the salsa:
4 sweetcorn cobs, whole or halved
4 spring onions, trimmed and chopped
2 mild green chillies, deseeded and chopped
3 tbsp. toasted sesame seeds
1 tbsp. sesame oil
2 tbsp. white balsamic vinegar
For the dressing:
2 tbsp. tomato ketchup
3 tbsp. sesame oil
4 tbsp. Thai sweet chilli sauce
2 tsp smoked paprika
Chilli flakes to sprinkle
Leaving the sweet potatoes unpeeled, cut them into ½cm thick slices. Bring a large shallow pan of water to a gentle boil and cook the slices for 3-4 minutes in simmering water to soften them but not cook them completely. Drain well, pat dry with kitchen paper and leave them to air dry on a wire rack.
When ready to cook, heat a large griddle pan until hot. Brush the slices with chilli oil and season on both sides, then cook the slices a few at a time, for 3-4 minutes on each side, pressing them on to the griddle, until lightly charred. Drain, cover and keep warm until you have cooked all the slices.
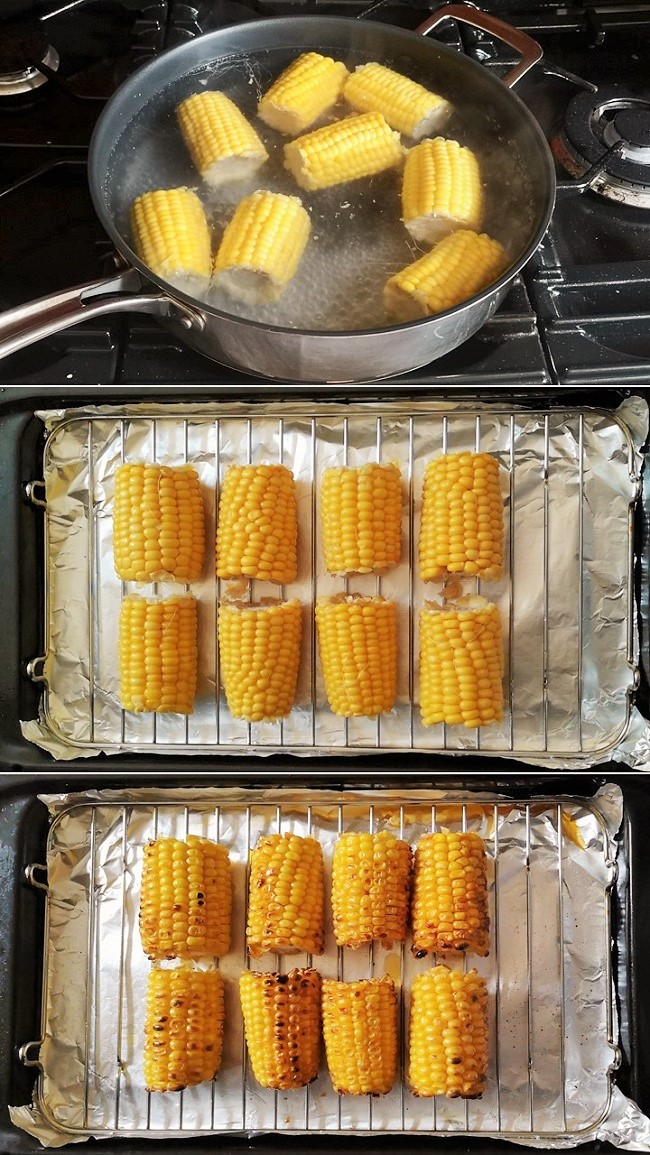
For the sweetcorn salsa, cook the cobs in boiling unsalted water (salt can toughen the kernels) for 4-5 minutes until tender. Drain well.
Preheat the grill to a hot setting. Arrange the sweetcorn on the grill rack and brush with chilli oil. Cook under the grill for about 5 minutes, turning frequently, until golden and lightly blistered. Drain well and leave to cool.
Sweetcorn preparation. Images: Kathryn Hawkins
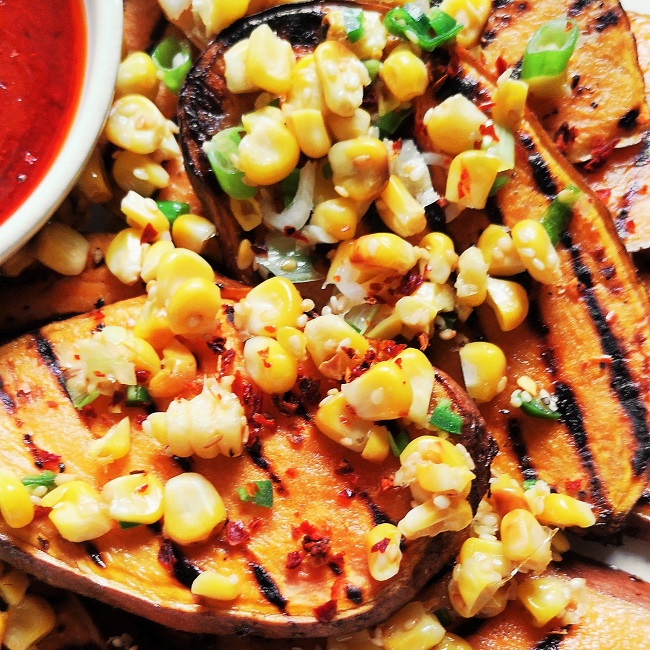
Strip the sweetcorn kernels from the cobs using a sharp knife and mix with the remaining salsa ingredients. Cover and chill until required.
Stripping kernels from the cobs. Image: Kathryn Hawkins
To serve, mix all the dressing ingredients together and place in a dipping bowl. Arrange the sweet potato steaks on a warm platter and serve with the salsa salad and the dressing. Sprinkle with chilli flakes if liked.
Up close on sweet potato steaks. Image: Kathryn Hawkins
Japanese maple in the Autumn sunshine. Images: Kathryn Hawkins
To be completely honest with you all, this really isn’t my favourite time of year. However, when it’s not raining and when the sun is out, I do spend a lot of time in the garden admiring the glorious colours that this month often has to offer.
The Japanese maple tree above is situated in the corner of my drive-way. It has leaves that seem to glow in the sunshine, and when the leaves mature and fall to the ground, they turn a vivid shade of red as they dry out.
Fallen maple leaves. Image: Kathryn Hawkins
There is more red to be seen elsewhere in the garden. The Cotoneaster is crammed full of berries this year. Standing in front of this hardy specimen is a more delicate Fuschia bush with pink and purple petals that clash spectacularly with the scarlet berries behind.
Pink Fuschia and berry-laden Cotoneaster. Images: Kathryn Hawkins
Another crop of Autumn crocus has sprung up in one of the flowerbeds. A later variety, these beauties are Crocus Sativus or the saffron-crocus. When the sun hits the golden stamens, the spicy aroma is quite mouth-watering.
Crocus Sativus. Images: Kathryn Hawkins
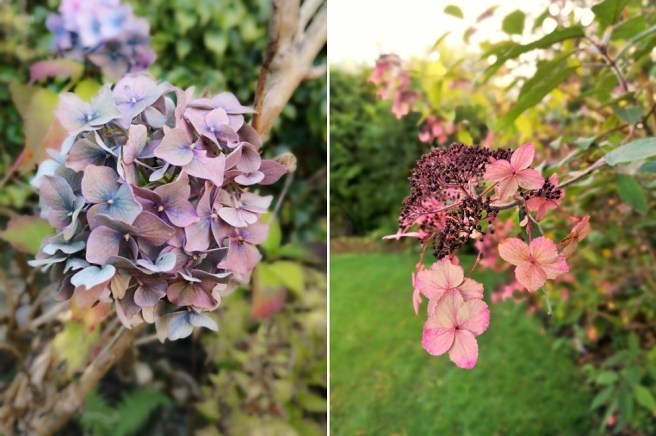
It’s been a good year for Hydrangeas; they have been in bloom for many weeks. I love the way that the blooms fade gradually and gracefully as the days draw in, and develop a “vintage” appearance.
Fading glory. Images: Kathryn Hawkins
A few plants are now on their second blooming of the year. This solitary Leucanthemum flower stem is the only one that has developed on the plant second time around. It does look a bit lonely. The variety is Bananas and Cream which is a great name for any plant in my opinion.
Have a good few days and enjoy the Autumn colours if you’re out and about 🙂
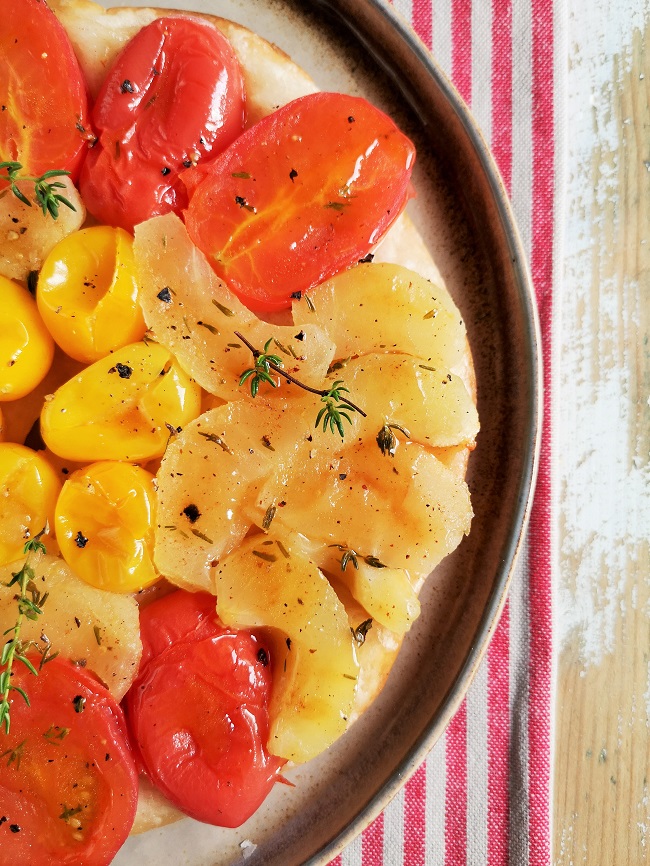
Apple and tomato tart tatin. Image: Kathryn Hawkins
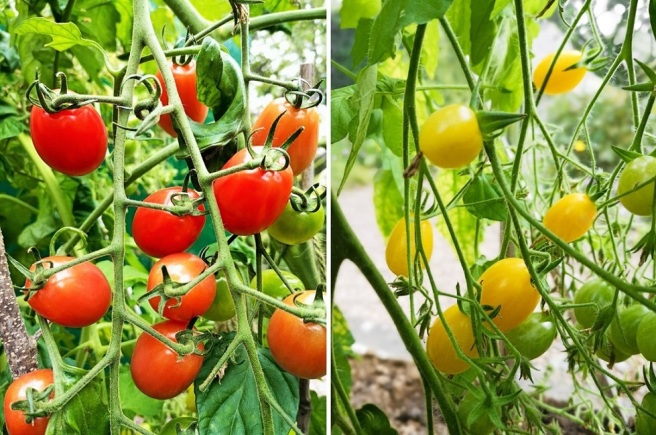
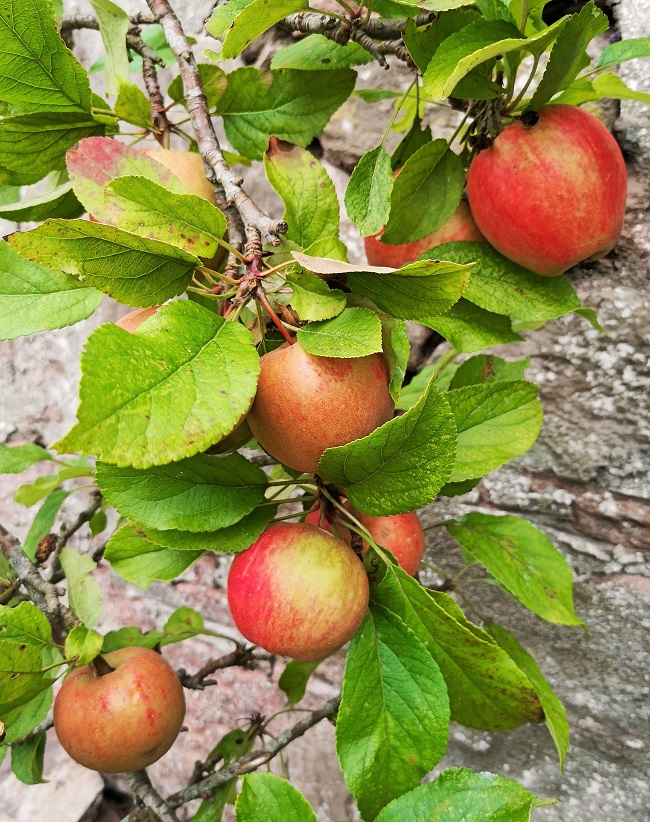
Here we are in the bewitching month of October already. Where does the time go? We’ve been enjoying some late season sunshine here in central Scotland which has been very welcome. Not only am I still able to garden and tidy up outside uninhibited by poor weather, the tomatoes are ripening off nicely in the greenhouse, and all the eating apples are ready for picking.
Flamingo and Ildi tomatoes. Images: Kathryn HawkinsMiniature eating apple tree (variety unknown). Image: Kathryn Hawkins
This week’s recipe is my twist on the well known French upside-down apple tart. So many tomato varieties are sweet to eat these days, they can easily be eaten as part of a dessert. However, I’ll leave it up to you to decide how you serve this recipe. The tart goes well either served simply dressed with olive oil and balsamic vinegar, or is equally as delicious served as a dessert with pouring cream or custard.
Served warm with olive oil and balsamic vinegar to dress. Image: Kathryn Hawkins
I use freshly grated nutmeg and fresh thyme to flavour the tart as well as salt, pepper and a little sugar. I use a crisp, layered pastry as a base so that it doesn’t crumble when you turn it out. Use readymade, chilled or frozen (gluten-free) puff pastry for convenience, but if you have the time, try my own recipe for a gluten-free rough puff pastry
Whole nutmeg and fresh thyme. Image: Kathryn Hawkins
I have made the tart with all tomatoes and, of course, just with apples, but mixing and matching both fruit is my favourite combination 🙂 I hope you think so too.
My favourite combination. Image: Kathryn Hawkins
Serves: 2
Ingredients:
Gluten-free flour for dusting
175g gluten-free puff or rough puff pastry
35g vegan margarine
1 tbsp. caster sugar
Freshly grated nutmeg, salt and freshly ground black pepper, to taste
A few fresh thyme leaves
2 small eating apples
4 large plum tomatoes
6 cherry or other small variety of tomatoes
2 tsp olive oil
Fresh thyme to garnish
Preheat the oven to 200°C, 180°C fan oven, gas 6. Line a 20cm round cake tin with baking parchment and lightly grease the sides.
Lightly flour the work top with gluten-free flour and roll out the pastry to a square slightly bigger than the tin. Using the tin as a template, cut a circle 1cm larger than the tin – keep the pastry trimmings for baking as croutons or use small tart bases – then chill the pastry circle until ready to use.
Dot the margarine all over the bottom of the tin, and sprinkle with sugar, seasonings and thyme leaves.
Peel, core and thickly slice the apples; halve the large tomatoes and leave the small ones whole. Arrange over the tin base in a decorative pattern.
9 steps to the perfect apple and tomato tart tatin. Images: Kathryn Hawkins
Carefully arrange the pastry circle over the fruit and press the pastry edges to the side of the tin to seal. Brush with olive oil and place on a baking tray. Bake for about 25 minutes until crisp and golden. Leave to stand for 5 minutes before inverting on to a warm serving plate. Spoon over any juices that remain in the tin. Best served hot or warm, garnished with fresh thyme sprigs if liked.
Hello again. As I sat down to write this post, it felt like summer was here again. Today has been gloriously warm and sunny with blue sky all over. A perfect day to do some tidying up in the garden before the weather turns more seasonal. Whilst the nights are drawing in and leaves on the trees are on the turn, spring bulb shoots and leaves are sprouting all round the garden.
Grape hyacinth foliage. Image: Kathryn Hawkins
The Japanese anemones have been in flower since early last month and are still going strong. Surviving batterings from both wind and rain, they are so hardy and yet so fragile looking.
Pink and white Japanese anemones. Images: Kathryn Hawkins
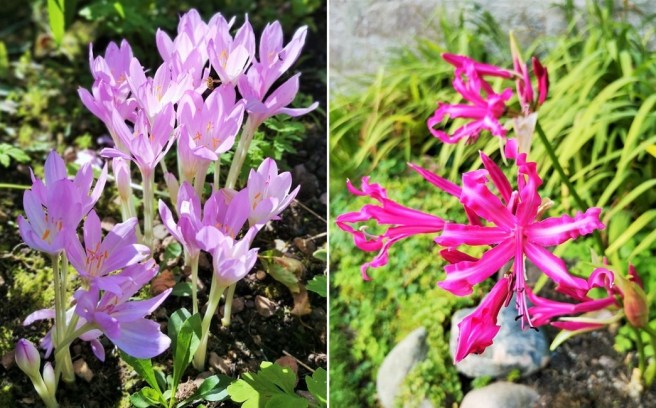
One indicator that Autumn is upon us is when the Autumn crocus appears. Towards the end of last month the tall, pale, leafless stems of the crocus first appeared in the shadier parts of the borders. Another leafless stem is the Nerine. These lilies have opened this week; they love the sunshine and their deep pink petals are a very welcome sight when most plants are dying back.
Autumn crocus and Nerines. Images: Kathryn Hawkins
In my garden, September is the time of year when a lot of produce is ready for harvest. This late sunny spell is very welcome particularly for the greenhouse tomatoes. I have so many green ones yet to ripen, but I am hoping that over the next couple of days more will start to redden, and herald the time to get the chutney pan out again.
September greenhouse tomatoes. Images: Kathryn Hawkins
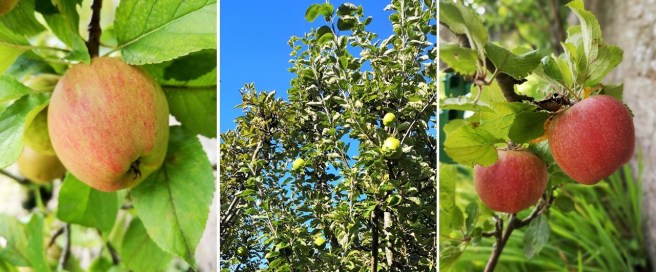
It’s not been such a good year for the old apple tree in the garden. In fact, you have to play spot the apple this year. I should have enough to put with the tomatoes for making chutney, but not enough to freeze. The miniature eating apples have done well though. The fruit is crispy, refreshing and sweet; they make a delicious tarte tatin.
This year’s eating and cooking apples. Images: Kathryn Hawkins
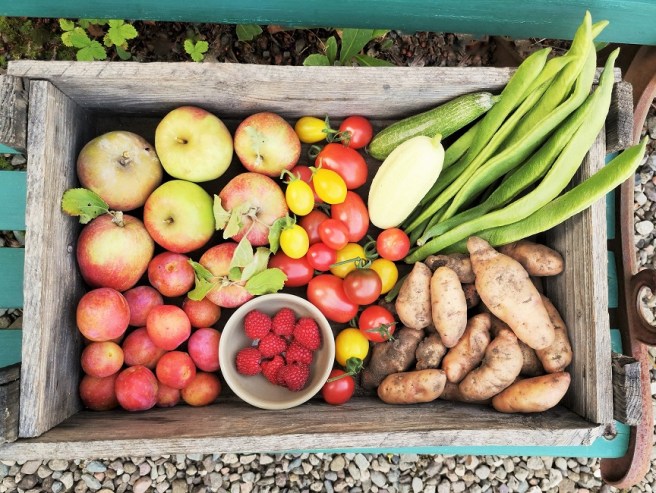
The runner beans had a slow start this year but have more than made up for it now. The plants are heaving with beans. I dug the first of the Pink Fir potatoes last weekend, and was very pleased with the yield. They store well, so I should have plenty for a few weeks ahead. That’s all from me this week. I’m looking forward to spending the weekend out of doors and enjoying the sunshine. A happy weekend to you what ever you are doing 🙂
Runner beans, Autumn raspberries and Pink Fir potatoes. Images: Kathryn HawkinsMy weekend harvest. Image: Kathryn Hawkins
I’ve had a great crop of home-grown cucumbers this year, and have been enjoying them since July. I’ve been growing 2 varieties in the greenhouse, a small green one called Mini Munch, and a pale yellow, more rounded variety, called Crystal Apple. The Mini Munch have almost finished now, but there are still a few more Crystal Apple come.
Mini Munch and Crystal Apple cucumbers. Images: Kathryn Hawkins
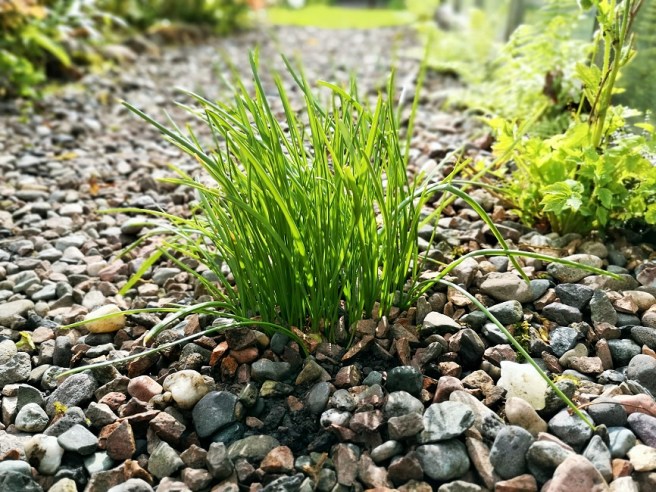
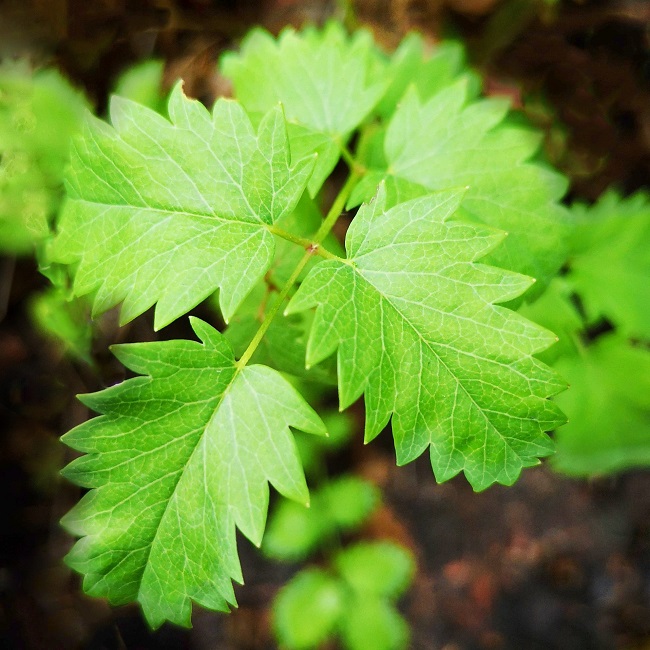
So to celebrate my cucumber-filled summer, this week’s recipe is my very simple, gluten-free version of the classic Middle Eastern salad, tabbouleh, and for good measure, to go with it, my favourite accompaniment, a super-speedy hummus recipe. You can add any combination of soft-leaved herbs to flavour your grains. The herb patch was looking a bit shabby at the weekend and I needed to pick off a few stalks of mint and chives to help rejuvenate the plants again. I also added some of the delicate zig-zag-edged herb salad burnet which has it’s own mild cucumber flavour, but parsley and coriander make good substitutes if you prefer.
Salad Burnet close-up. Image: Kathryn Hawkins
There are no set rules to this recipe. It is very simple. I cheat and use a ready-cooked pack of red and white quinoa grains. Very convenient and a perfect quantity for a couple of hearty portions. If you like, add tomato for extra colour and moisture to the salad, and spring onions will add a tasty, oniony bite. I hope you enjoy the fresh flavours.
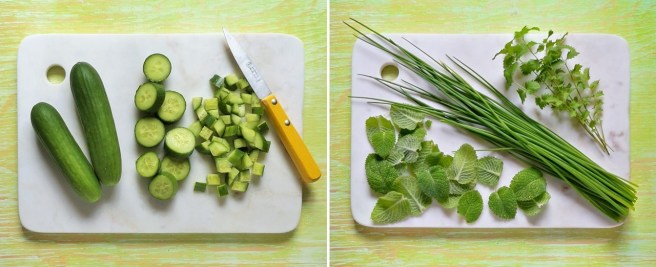
Home-grown cucumber, mint chives and salad burnet. Images: Kathryn Hawkins
Serves: 2-3
Ingredients
Tabbouleh
250g cucumber, washed
250g cooked quinoa
½ tsp salt
20g chives, chopped
7g mint leaves, chopped
A handful of salad burnet leaves (parsley or coriander)
Lemon wedges and extra virgin olive oil to taste
Male cucumber flowers to garnish
Hummus (serves 3-4)
400g can chickpeas
40g tahini
1 garlic clove, peeled
½ tsp salt
1 tbsp freshly squeezed lemon juice
1 tbsp. extra virgin olive oil
Paprika to dust
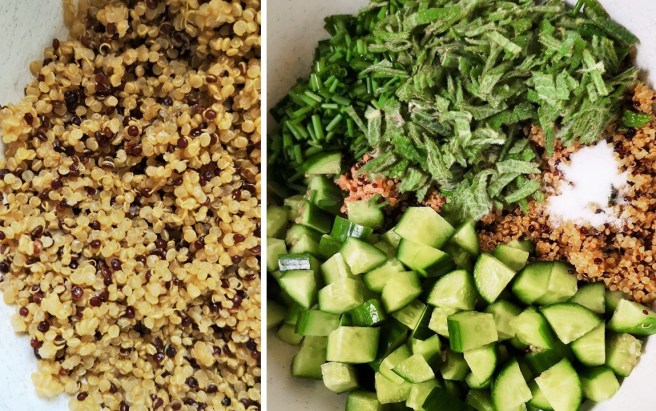
For the tabbouleh, cut the cucumber into small pieces. Put the quinoa in a bowl and mix in the cucumber, herbs and salt. Cover and chill for an hour to allow the flavours to mingle. Stand at room temperature for 30 minutes before serving.
Making gluten-free tabbouleh. Images: Kathryn Hawkins
For the hummus, open the can of chickpeas and drain the canning liquid into a jug. Pop the chickpeas in a blender or food processor along with the other ingredients and 3 tbsp. of the reserved liquid. Blitz for a few seconds until smooth. I like my hummus to have the consistency of thick porridge, but if you prefer something softer, just add a bit more canning liquid. Cover and chill until ready to serve. Don’t forget to keep the rest of the canning liquid for using as an egg white substitute – it freezes very well.
Making hummus. Images: Kathryn Hawkins
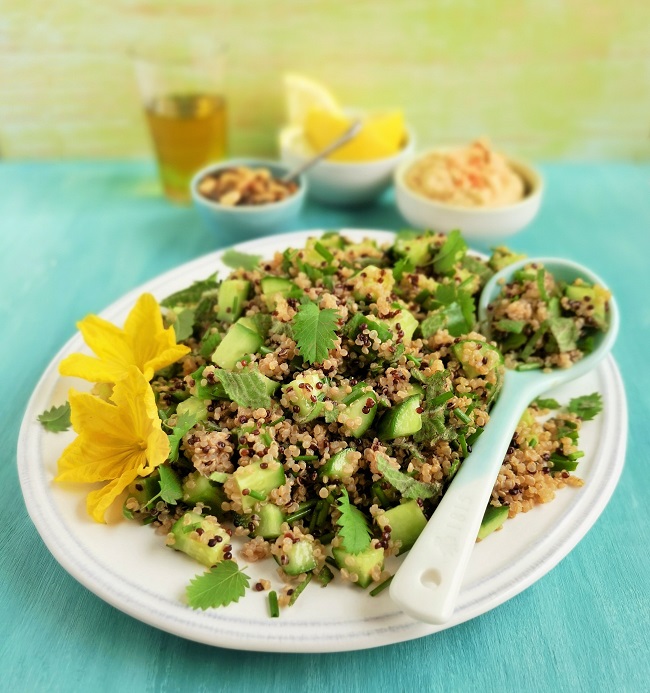
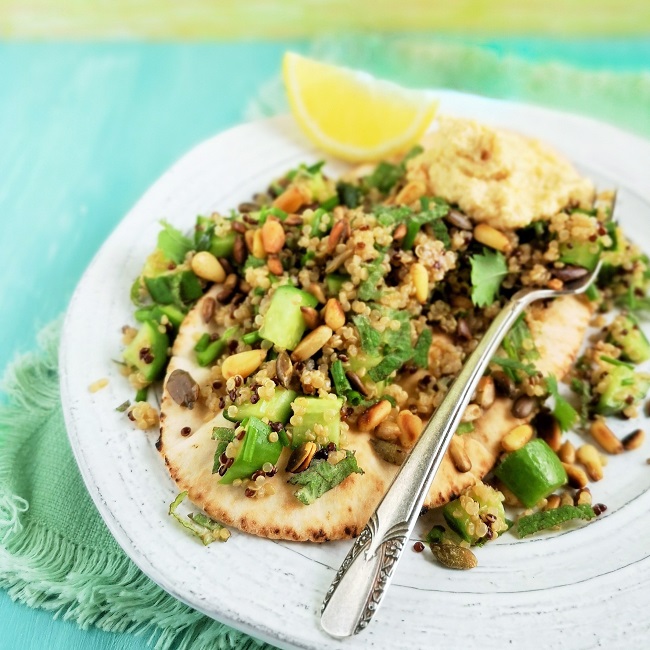
Serve the tabbouleh decorated with cucumber flowers; dress with a squeeze of fresh lemon and extra virgin olive oil to taste, and accompany with toasted seeds, home-made hummus (dusted with paprika if liked) and warm, gluten-free, toasted pitta breads. Perfect 🙂
A fresh and healthy salad. Image: Kathryn Hawkins
Ready to eat, quinoa tabbouleh with toasted seeds, home-made hummus and a squeeze of lemon. Image: Kathryn Hawkins