Welcome to my blog all about the things I love to grow and cook. You'll find a collection of seasonal gluten-free, dairy-free and vegan-friendly recipe posts, as well as a round up of my gardening throughout the year. I wish you good reading, happy cooking and perfect planting!
Fuschia-pink peonies in full bloom. Image: Kathryn Hawkins
I hope you have all been enjoying some warm sunshine these past few days. The temperature has shot up in the UK and we have all been experiencing long, hot, summer days, and records have been broken every day this week.
I am away from home this week and I know that when I return at the weekend, the lush garden I left behind last Saturday will probably be looking less so. This week’s post is a look back at one of my favourite garden flowers, the peony, which I captured before I headed away.
Sunlight through peony petals. Image: Kathryn Hawkins
There are 4 varieties of peony in the back garden. All have the delightful sweet fragrance that these blooms are renowned for, and to me, they are one of the quintessential old-fashioned blooms of and established flower garden.
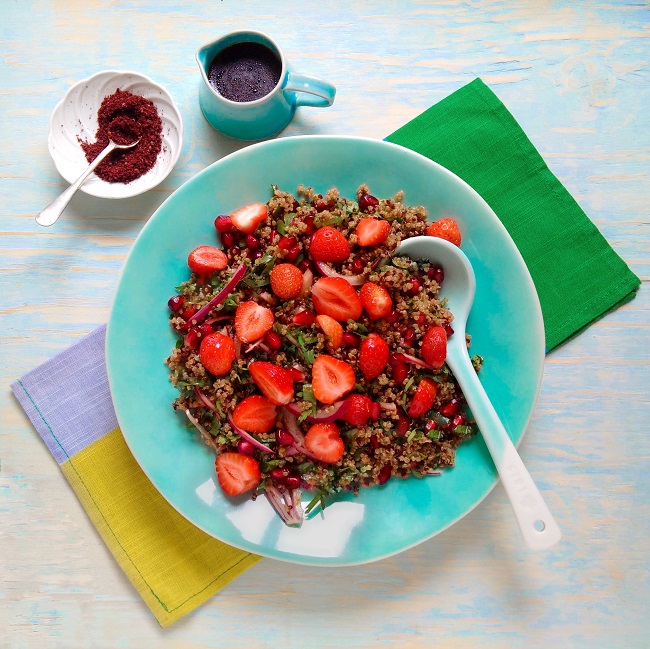
Sweet and savoury combination of fruit, grain and herbs. Image: Kathryn Hawkins
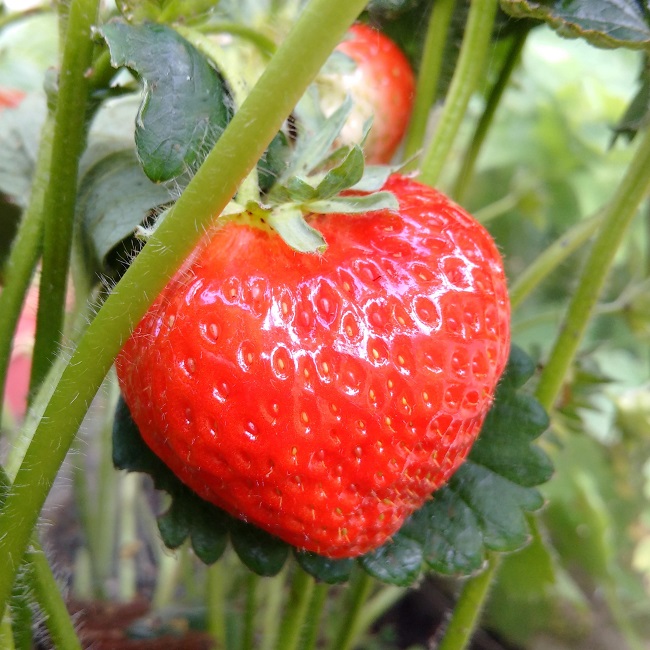
I’ve been enjoying home-grown strawberries for a couple of weeks now. They have grown quite small this year, but they are still sweet and tasty. As usual, I never have more than a handful to use at any one time (jam-making is out of the question) and I usually end up eating them on their own. However, following a recent trip to London’s Edgware Road, where I was able to stock up on a few of my favourite, more exotic, ingredients, I felt inspired to try something different.
My micro-harvest of home-grown strawberries. Images: Kathryn Hawkins
Pomegranate molasses make an ideal accompaniment to fresh strawberries. I love the thick texture and semi-sweet flavour. It reminds me of sherbet sweets as it has a light acidic fizz on the tongue. It makes a good ingredient for a salad dressing as it adds fruitiness as well as subtle sweetness and tempers any vinegar you may add. Its thick texture means you can cut down on the amount of oil you use without noticing.
Dressing ingredients for my strawberry and pomegranate salad. Image: Kathryn Hawkins
Choose a fruit vinegar or white balsamic to add extra sweetness, and use a mild tasting olive oil or other vegetable oil to help bring out the fruit flavours without dominating the dressing.
One of my other purchases was sumac powder. An astringent, fruity powder made from dried berries. It has a high tannin content and reminds me of rosehips. It is the perfect seasoning for sweet berries. Just sprinkle a little on before serving as you would black pepper. A final note on seasoning, I didn’t add any salt to my salad as I didn’t think it needed any. Everyone’s taste is different, so add a pinch to the dressing or mix some into the quinoa if you prefer a more savoury note.
Strawberry salad sprinkled with sumac powder. Image: Kathryn Hawkins
Serves: 2 as a main course; 4 as a side
Ingredients
250g cooked, cold quinoa
1 small red onion, peeled and thinly sliced
Small bunch fresh parsley and coriander, roughly chopped
A generous handful of pomegranate seeds
Dressing:
2 tbsp. pomegranate molasses
2 tbsp. fruit vinegar or white balsamic vinegar
2 tbsp. light olive oil
To serve:
150g fresh strawberries, washed and hulled
Sumac powder or freshly ground black pepper, to season
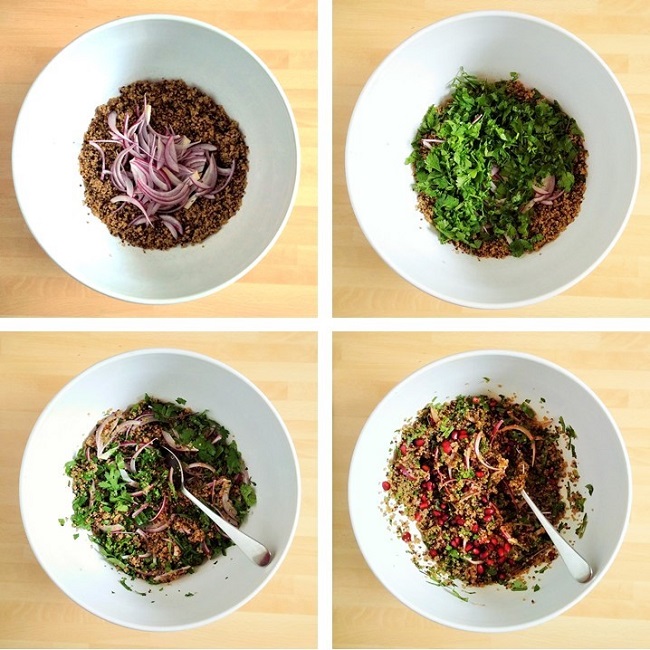
Mix the quinoa, onion, herbs and pomegranate seeds together, then whisk all the dressing ingredients together and toss half into the salad, and pile into a serving dish.
Preparing the salad. Images: Kathryn Hawkins
Halve or quarter larger strawberries, leave smaller ones whole, and sprinkle on top of the salad. Season with a little sumac and serve at room temperature for maximum flavour.
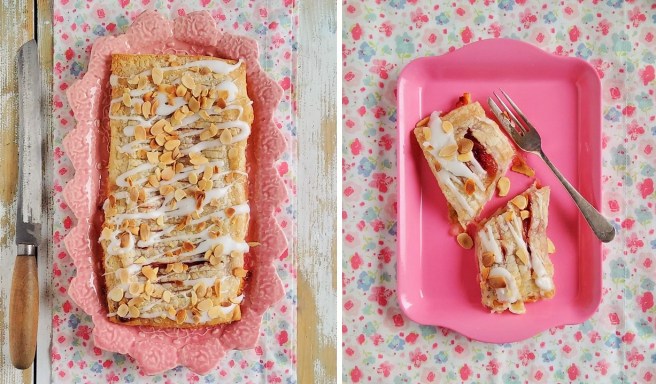
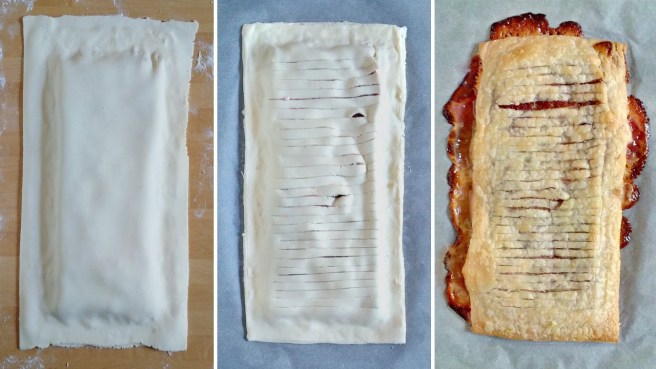
Iced and sliced, rhubarb and almond jalousie. Image: Kathryn Hawkins
I pulled my first stems of rhubarb at the weekend. The 3 crowns I re-planted back in the Autumn are doing well in their new patch (watched over by 2 stone rabbits), and it is looking likely that there will be plenty more stems before the summer is over.
My first harvest of home-grown rhubarb. Images: Kathryn Hawkins
To celebrate my first harvest, I have a simple rhubarb recipe to share this week. It’s a pastry classic, and gets its name from a slatted louvre window because it has thin slits cut across its top which give a glimpse of the filling inside. I’ve combined the tartness of the fresh rhubarb with the sweet, richness of marzipan, but I realise this is an ingredient not to everyone’s taste, so if you’re not a marzipan fan, simply leave it out altogether or make a thick vanilla custard instead and spread this across the pastry instead.
Iced and ready to serve. Images: Kathryn Hawkins
I gave a recipe for a Gluten-free rough puff pastry (with dairy-free & vegan variation) on my blog last year which you can use for this recipe, but if you don’t have time to make your own, SillyYak make a very good gluten-free, vegan-friendly pastry. Alternatively, for wheat eaters, roll out ready-made traditional puff pastry thinly and instead.
Serve this delicious pastry warm as a dessert with custard or leave to go cold and enjoy a slice as a pastry with a cup of coffee.
Serves: 6
Ingredients
300g fresh rhubarb
40g caster or vanilla sugar
325g gluten-free, vegan puff pastry (such as Silly Yak)
125g natural marzipan, coarsely grated
A little dairy-free milk, optional
50g icing sugar
A few drops almond extract
A few toasted flaked almonds
Trim the rhubarb and cut into short, even-thickness lengths. Place in a frying pan, sprinkle over the sugar and heat gently until steaming. Cover and cook gently for about 5 minutes until tender. Leave to cool completely. Cooking rhubarb this way means you will have little juice which is important in this recipe in order to keep the pastry crisp.
When ready to cook, preheat the oven to 220°C (200°C fan oven, gas 7). Line a large flat baking tray with baking parchment. Divide the pastry into 2 equal portions. On a lightly floured surface, roll out one piece of pastry to make a rectangle 28 x 15cm.
Sprinkle over the marzipan, leaving about 2cm pastry showing all round the edge, and spread the rhubarb on top. Brush the pastry edge with water or little dairy-free milk if preferred.
Preparing the bottom layer of the jalousie. Images: Kathryn Hawkins
Roll the other piece of pastry to a rectangle slightly larger than the bottom piece and carefully lay the pastry on top. Press down the edges well to seal them together and slice off any ragged pastry to neaten the edge.
Using a sharp knife, cut thin slashes through the top of the pastry to make the slatted effect. Carefully transfer the pastry to the baking tray, brush with dairy-free milk if liked and bake for about 30 minutes until browned. Leave on the tray to cool for 30 minutes before transferring to a wire rack to cool further.
Finishing and baking the jalousie. Images: Kathryn Hawkins
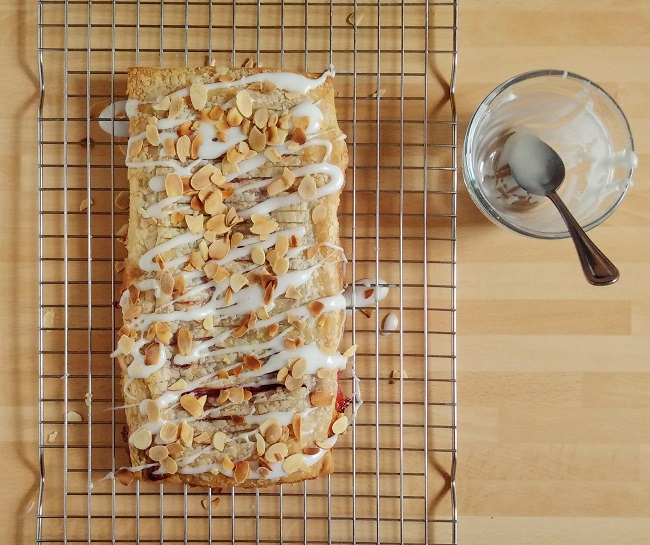
To decorate, sieve the icing sugar into a small bowl and mix in a few drops of almond extract and about 2 teasp warm water to make a smooth, drizzling icing. Use a teaspoon to drip the icing all over the top of the warm or cold pastry and then scatter with almonds. Transfer to a serving plate or board to slice and serve.
Freshly drizzle-iced jalousie, sprinkled with toasted flaked almonds. Image: Kathryn Hawkins
An iced slice, ready to eat. Image: Kathryn Hawkins
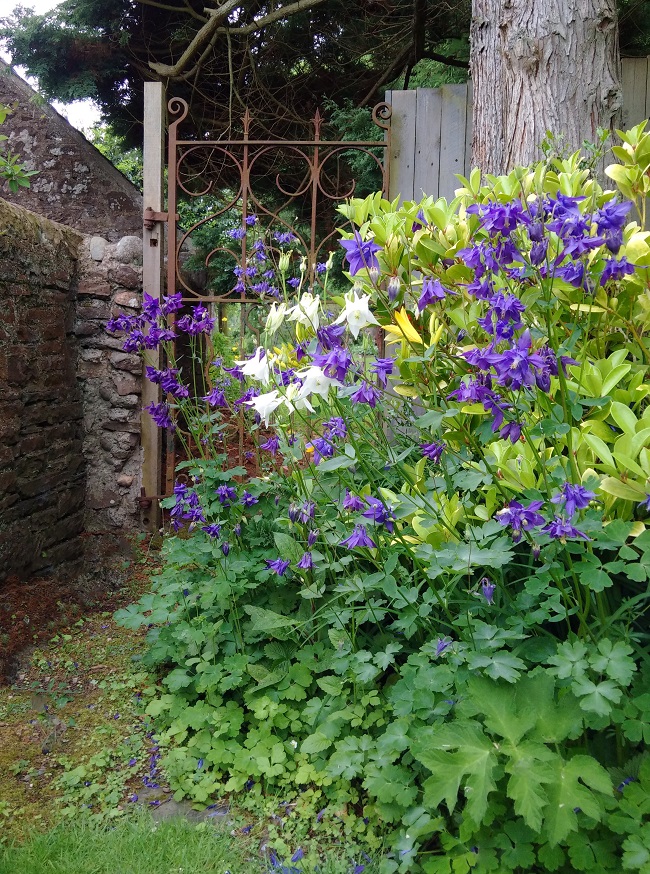
Blue and white Columbine (Aquilegia). Image: Kathryn Hawkins
This slideshow requires JavaScript.
It’s been quite a week in the garden. Long, warm days, plenty of sunshine, no rain, and everything is flourishing. As the spring colours fade and the bluebells diminish, the garden has come alive with all things blue.
Columbine (Aquilegia) grow very well in the garden and seed themselves each year. They are a great value flower, and fill in lots of the spaces in the borders and beds with their delicate broad-clover-like leaves and dainty ballerina-like flowers. They are also flower for a long time.
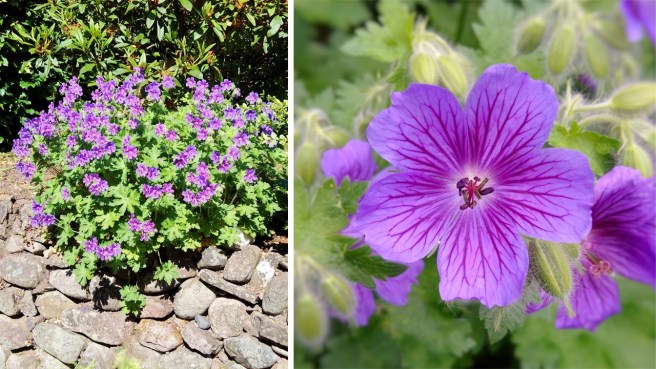
Hardy Geranium or Cranesbill. Images: Kathryn Hawkins
Also long flowering are the geraniums which grow over the walls and trim the pathways round the garden. They love all the sunshine we’ve been having. The lupins are also doing well, and with no wind to blow them over (so far!) they are growing tall and straight and look truly magnificent.
Blue-mauve Lupins. Image: Kathryn HawkinsBusy bee collecting pollen from a Meadow Cornflower (Centaurea). Image: Kathryn Hawkins
There are plenty of bees around in the garden which is a good sign. They seem to like lots of the flowers in the garden, but the Meadow Cornflowers are a particular favourite and the many clumps around the garden are alive with activity from lots of buzzing wee winged creatures.
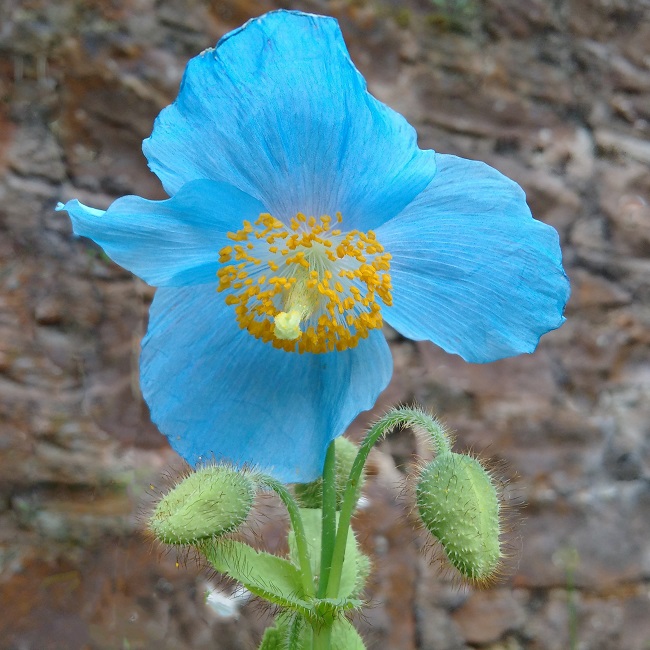
Last spring I planted a couple of Himalayan poppies (Mecanopsis). I love these delicate, unusual coloured flowers but have been unsuccessful in getting them to flower. I was delighted to see that one has produced a long flower stem with lots of buds. The other is very much alive, so fingers crossed, it will flower next year. These poppies prefer a shady situation, my 2 are growing deep in a flower bed which doesn’t get direct sunlight. The flower is such a stunning shade of blue, you can see it right across the garden.
Delicate and delightful, Mecanopsis. Image: Kathryn Hawkins
One final image, my gorgeous blue iris has opened up this week. It stands alone in a corner of a flower bed in the front of the house, and is greatly admired. I just can’t resist inhaling the bubble-gum aroma every time I walk past. Have a good week and enjoy the sunshine 🙂
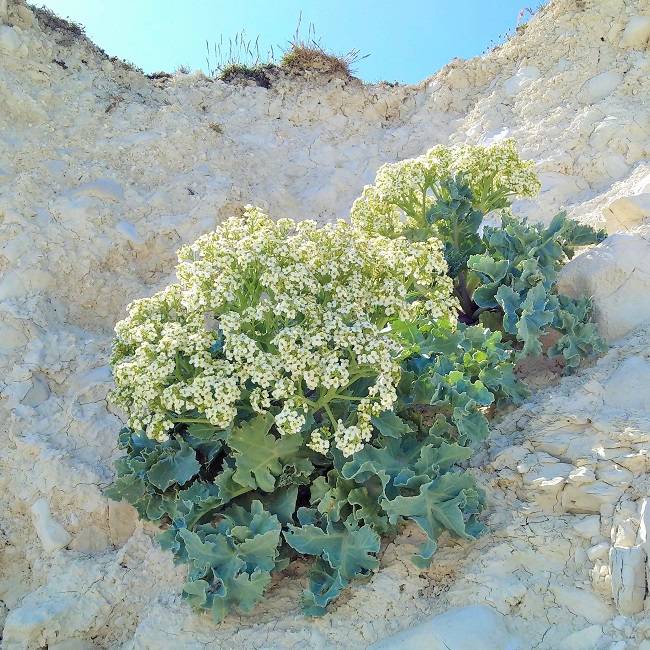
Sea kale growing on chalky cliff face. Image: Kathryn Hawkins
A bit of a departure from my usual blog posts this week. I’ve had some time away from my home in Scotland, and spent a few days in Sussex, where I grew up, visiting friends and family, and enjoying some fine late spring weather.
On a walk along the South Downs, I climbed down to a secluded cove, only accessible when the tide is low, to discover sea kale growing on the sand and shingle beach and out of the chalky cliffs. The afternoon was still and warm, and the frilly edged, grey/blue-green leaves of the kale appeared silvery in the bright sunlight; the sweet smell of honey hung in the air from its many flowers which grow in clusters above the leaves.
I’ve never discovered sea kale growing wild before, and have never cooked nor eaten it. The opportunity and temptation was too great and I picked 2 or 3 of the smaller leaves from a few established plants. I knew that sea kale kept well – sailors used to take it on voyages as a source of vitamin C – so I put the leaves in a jug of water, in the fridge for a couple of days, before taking them back to Scotland to experiment in the kitchen.
As with most leafy vegetables, I guessed that the smaller leaves would be the most edible. Apparently, sea kale (Crombemaritima) is not actually kale, it’s a type of chard and belongs to the cabbage family. All parts are edible, raw and cooked. but in the interests of conservation, I picked just a few leaves.
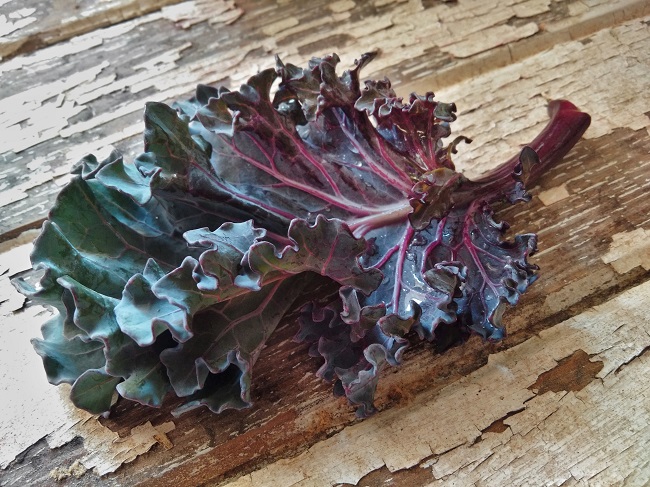
Small sea kale leaf. Image: Kathryn Hawkins
And so, to the kitchen. I treated the sea kale as if it were a leafy cabbage or curly kale. I gave it a good soak to remove any sand, etc, and then sliced out the stems. I shredded some of the leaves, and decided to roast the rest whole as I do with kale.
Preparing sea kale. Images: Kathryn Hawkins
Stems with balsamic vinegar – trim the ends and then slice the stems down the centre, lengthways. Blanch in boiling water for 1 minute, drain well and pat dry with kitchen paper. Heat a frying pan until hot, drizzled with a little olive oil and stir fry the stems for 2-3 minutes until softened and browned a little. Turn off the heat, season with balsamic vinegar, salt and black pepper. Cover with a lid and stand for 5 minutes. Serve sprinkled with freshly chopped chive stems and flowers.
Leaves with garlic, chilli and soy – shred the leaves as you would Savoy cabbage and cook in boiling water for 3 minutes. Drain well. Stir fry chopped leek and garlic in a little oil until softened and then add the boiled sea kale and stir fry for 2-3 minutes until tender. Season with dark soy sauce and sweet chilli sauce.
Cooked sea kale stems and leaves. Images: Kathryn Hawkins
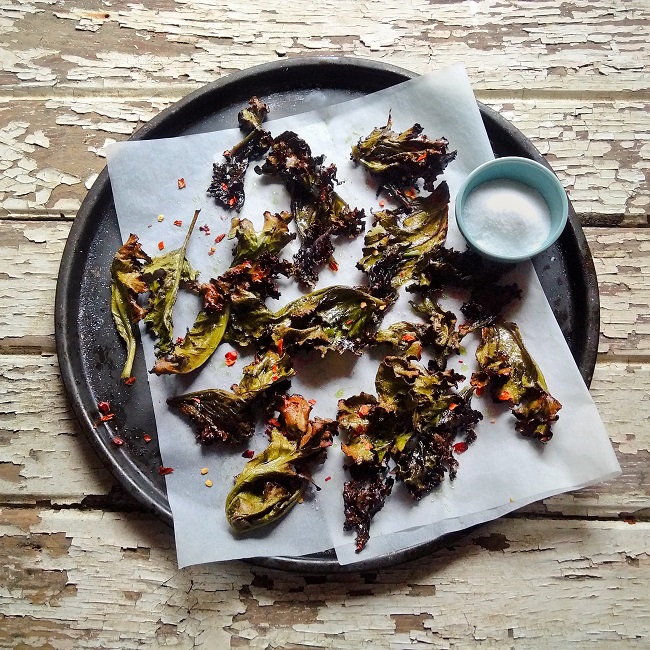
To bake sea kale, choose the thinnest leaves, remove the stems if coarse, and pat dry with kitchen paper. Place in a bowl and toss in a little olive oil, and massage it through the leaves to coat them lightly. Spread out on a baking tray lined with baking parchment and season well with smoked salt, pepper and caster sugar. Bake at 200°C (180°C fan oven, gas 6) for 10 minutes, turn the leaves and bake for a further 5-10 minutes until dark and crispy. Season with chilli flakes and serve with extra sugar and smoked salt for dipping.
Roast sea kale leaves with smoked salt, chilli and sugar. Image: Kathryn Hawkins
The verdict: if you like strong-tasting cabbage and seaweed ( which I do), then you’ll like sea kale. It’s not a flavour for the faint-hearted that’s for sure. It can be also be seasoned with other strong flavoured ingredients. I was surprised that it is not salty at all. Some of the slightly larger leaves had a slight medicinal bitterness to them, which makes me think that the much larger leaves would be inedible.
If you’re lucky enough to find some, it’s definitely worth trying. I feel fortunate to have stumbled across such a fabulous freebie courtesy of Mother Nature 🙂
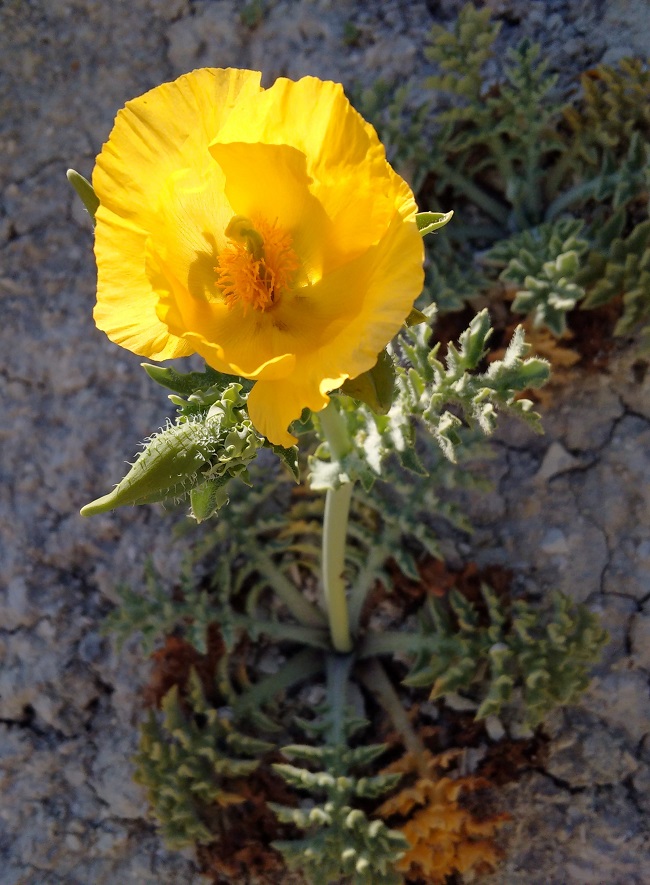
Also growing out of the chalky cliffs, a beautiful sea poppy. Image: Kathryn Hawkins
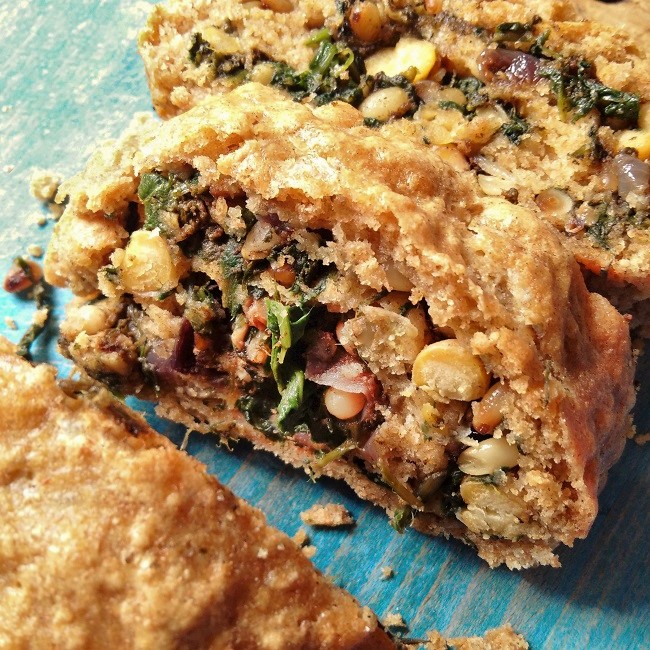
Packed full of flavour, spiced chickpea, spinach and sorrel roll. Image: Kathryn Hawkins
Hello everyone 🙂 Hope you’ve had a good week. The sun’s been shining a lot with me and everything in the garden has taken off, especially in the herb garden. Lots of fresh new growth and lush looking bright green leaves. Delicious.
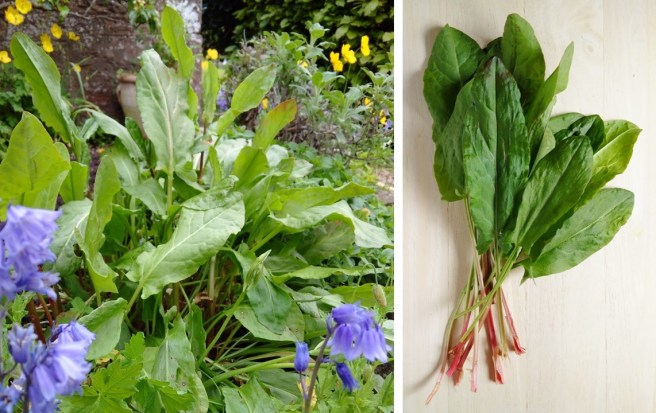
I can find everyday uses for all of the herbs I grow, but the clump of sorrel often remains untouched. I pick off any little leaves to throw into a salad, but the larger leaves I admit, I seldom use. However, this week, as I was cooking up some spinach for my planned bake, I remembered to mix in a few of the larger leaves to add a slightly sharp and acidic tang to the filling.
Spring greens – fresh garden sorrel. Images: Kathryn Hawkins
I’ve turned to spelt flour to make the suet-crust pastry for my bake this week, although I have mixed it with some gram flour. I haven’t tried the recipe with all gluten-free flour; I can image it would work ok, but it would be more challenging to roll up. I have fond memories of sweet and savoury roly-poly puddings from my childhood and school cookery classes. Suet-crust is one of the easiest pastries to make, and it takes next to no time to put together. It is light and fluffy in textue, and when baked, has a crispy, crunchy outer shell.
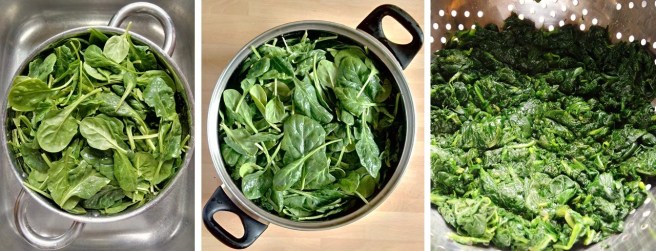
The key to this recipe’s success is to make sure you dry the cooked spinach as much as possible. Cook it in only a minimum amount of water and then squeeze out the excess by pressing it against the side of the strainer as it drains, and then blot with kitchen paper. This will help keep the bake as crisp as possible. If you don’t have fresh sorrel, then just cook up a little bit more spinach. I hope you enjoy it.
Preparing and cooking fresh spinach. Images: Kathryn Hawkins
Serves: 6
Ingredients
For the filling:
1 tbsp. olive oil
1 small red onion, peeled and thinly sliced
2 garlic cloves, peeled and crushed
2 teasp ground cumin
1 teasp each of ground coriander and ground cinnamon
25g fresh garden sorrel leaves, well washed and stems removed
250g fresh spinach
100g cooked chickpeas
40g toasted pine nuts
40g sultanas
1 teasp salt
1 – 2 tbsp. extra virgin olive oil (optional)
For the pastry:
150g spelt flour
50g gram flour
12g baking powder
100g vegetable suet
Approx. 150ml cold chickpea cooking water, canning water or plain water
First make the filling. Heat the oil in a small frying pan and gently fry the onion, garlic and spices over a gentle heat, with a lid on, for 15 minutes until softened but not browned. If you’re using sorrel, rip up the leaves and once the onion is cooked, add to the mixture, cover and leave to wilt in the steam. Leave to cool completely.
Meanwhile, rinse the spinach, shake off the excess water and pack into a saucepan whilst still wet. Heat until steaming, cover, and cook over a medium heat, for 5-6 minutes, stirring occasionally, until wilted. Drain well, pressing out the excess water, and leave to cool. Chop and blot away the excess water using kitchen roll.
Put the cold onion mixture in a bowl, mix in the cooked spinach, chickpeas, pine nuts and sultanas. Season with salt. Cover and chill until required.
When ready to assemble, the roll, preheat the oven to 190°C/ 170°C fan oven/ gas 5. Line a baking tray with baking parchment. Mix the flours in a bowl with the baking powder and suet. Pour in sufficient water to make a soft, scone-like dough. Roll out on a lightly floured surface to make a rectangle approx. 30 x 25cm.
Spread over the filling, right to the edge, and the roll up from one of the shorter sides. Carefully transfer to the prepared baking tray, seam-side down, and bake for about 45 minutes until golden brown.
Roly-poly preparation. Images: Kathryn Hawkins
The pastry will probably crack during baking – I have rarely made one that hasn’t split slightly on one side. For extra richness, brush generously with extra virgin olive oil as soon as it comes out of the oven. Best served hot or warm.
Out of the oven, and ready to serve. Image: Kathryn Hawkins
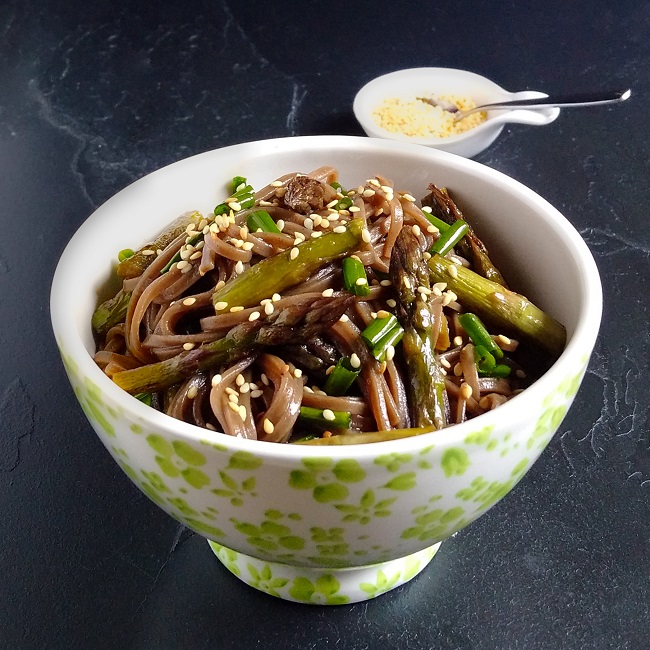
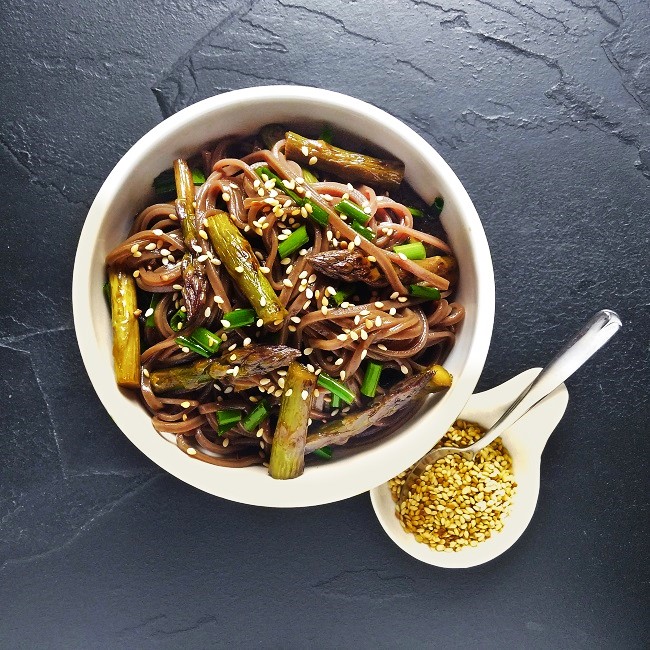
Soba noodles with asparagus. Image: Kathryn Hawkins
It is the height of the home-grown British asparagus season right now, and I’m eating as much as I can while these fresh, green, juicy stems are available to buy. I rarely do anything fancy with asparagus, just enjoy it on its own, steamed, griddled, or baked in the oven, and seasoned simply with a little salt and pepper. Delicious.
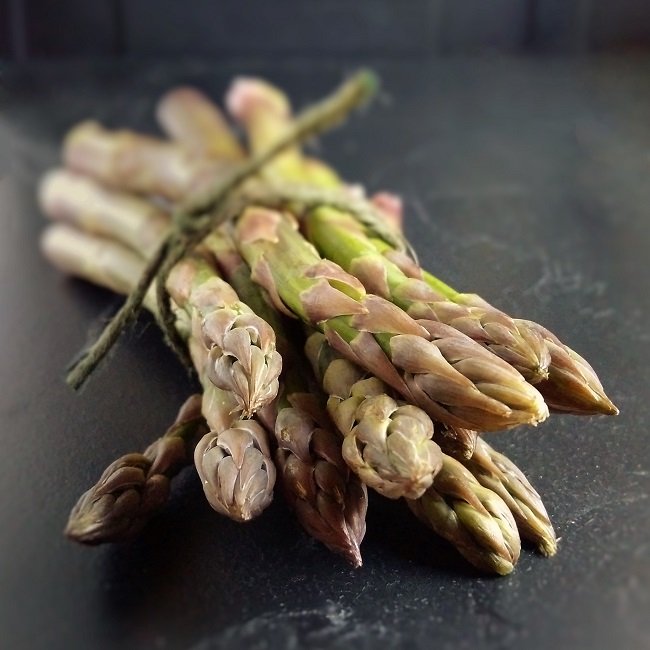
In season. British asparagus. Image: Kathryn Hawkins
This is a very simple, yet very tasty, combination that makes a lovely light lunch or quick supper dish. If you want to make it in advance, it’s just as good eaten cold as a salad, or boxed up for a picnic or packed lunch.
Three favourite seasonings for soba noodles. Images: Kathryn Hawkins
To serve 2: prepare 200g fresh asparagus spears by trimming away about 3cm of the stem – this is usually a bit woody and tough to eat. Then cut the rest of the stems into short lengths. Brush a non-stick frying pan with a little sunflower oil and heat until hot. Stir fry the asparagus for 3-4 minutes until just tender. Turn off the heat and add a good glug of gluten-free teriyaki marinade. Immediately cover with a lid and leave to stand. Leave to one side while you cook the noodles, or leave to cool completely for serving as a salad.
Trimming fresh asparagus, and stir-frying. Images: Kathryn Hawkins
Meanwhile, bring a large saucepan of unsalted water to the boil and add 100g soba (buckwheat) noodles. Cook for about 5 minutes until tender, then drain well and place in a heatproof bowl, or rinse in cold running water, and leave to drain and cool completely.
When ready to serve, toss the asparagus and pan juices into the noodles along with 4 tbsp. freshly chopped chives, 2 teasp sesame oil and 1 tbsp. mirin. Pile into serving bowls and sprinkle with toasted sesame seeds. Enjoy 🙂
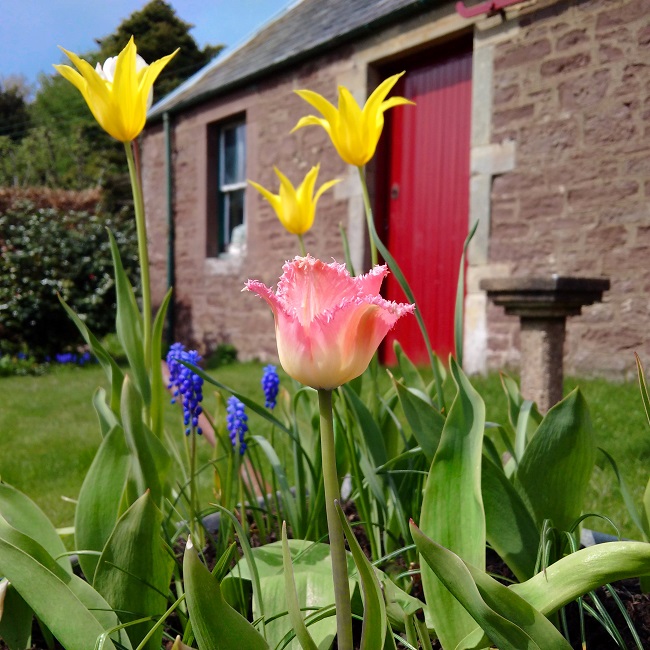
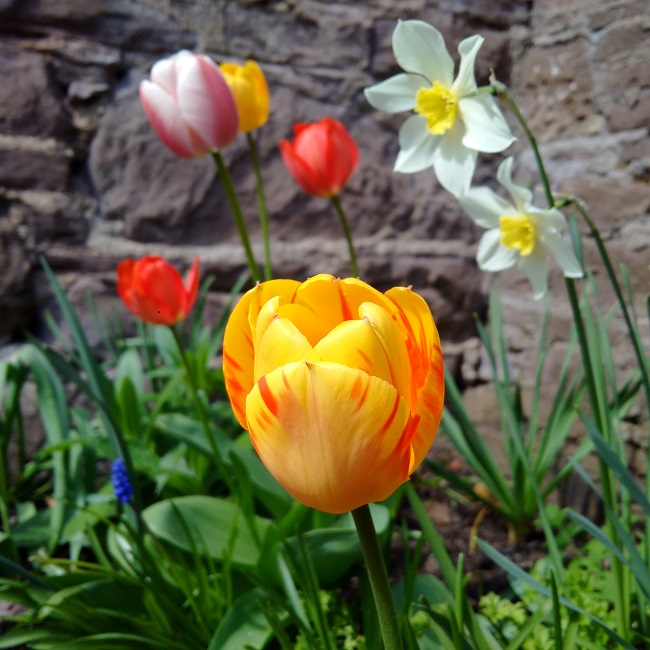
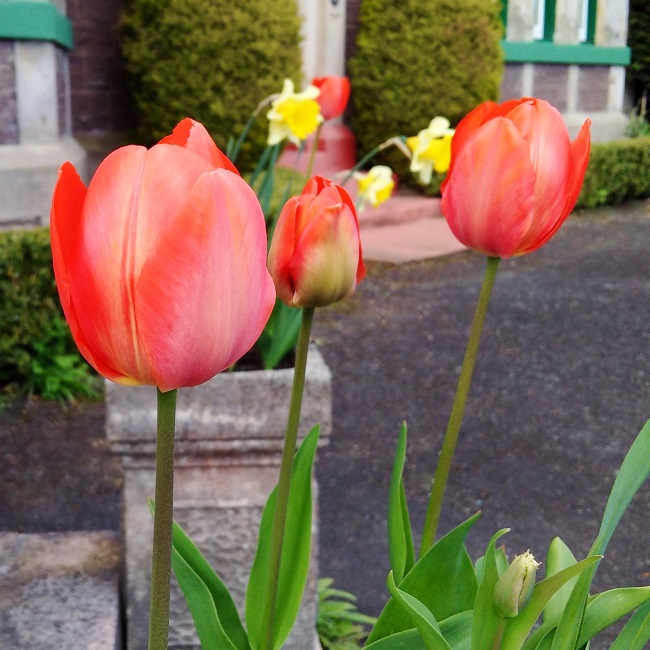
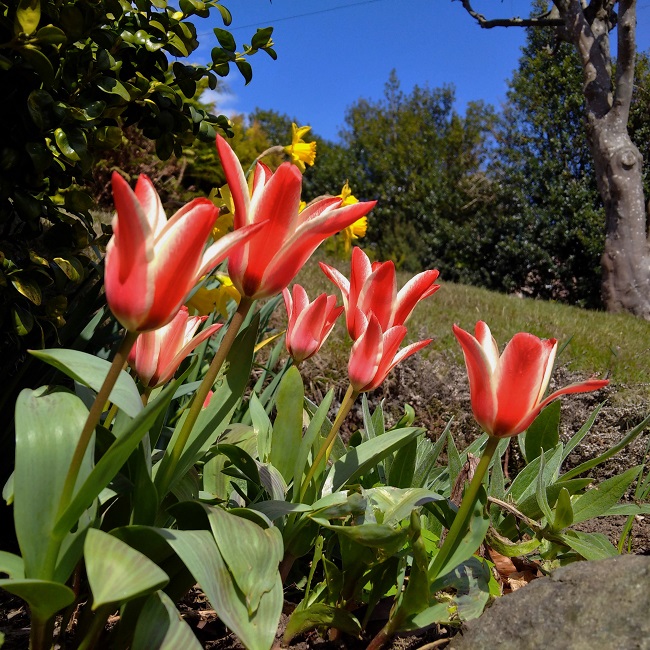
I’ve been working away from home since my last post. When I arrived back at the weekend (a gloriously sunny one), I was delighted to see the garden so full of colour, and the tulips looking particularly magnificent. The extended winter/late spring has done wonders for the flowering bulbs this year. All of them have emerged strong and bold, and are lasting longer than usual.
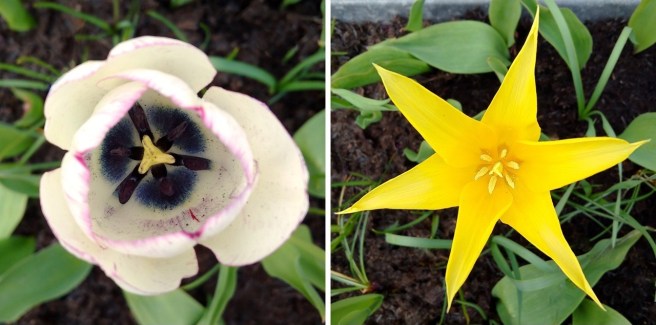
Tulips have been a favourite flower of mine for many years. I love their simplicity. Whilst I have few words to share with you this week, I have some colourful images of these lovely, elegant blooms. I’ll be back in the kitchen again this weekend, getting ready for my next post in a few days time. Until then, have a good week.
The colours of spring. Image: Kathryn HawkinsTall, red tulips in planters. Image: Kathryn HawkinsSix of the best. Images: Kathryn HawkinsTulips overhead. Images: Kathryn Hawkins
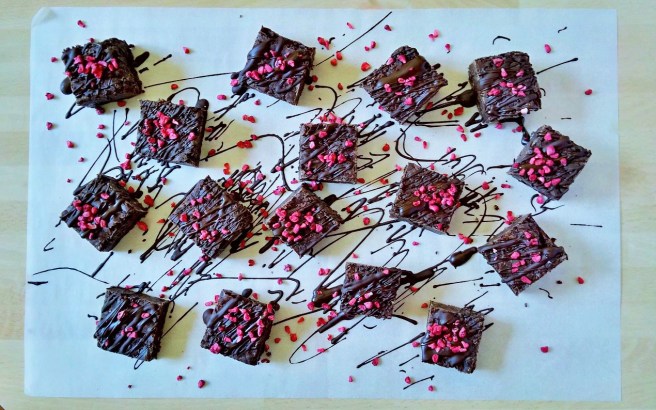
Dark chocolate brownie bites. Image: Kathryn Hawkins
Something a little bit on the indulgent side for you this week. I am working my way through a hoard of classic baking recipes, converting them into vegan versions, and recently I got to a chocolate brownie recipe.
There are so many variations on this particular bake, and everyone has their own personal favourite. My version gives a texture which is soft and gooey when eaten warm, but when cold, it firms up to something more like chocolate fudge. I find it quite rich, and cut it into small squares, but that’s a question of personal taste.
Warm dark chocolate brownie. Image: Kathryn Hawkins
I use coconut oil now instead of the butter in my traditional recipe. This does give a slightly nutty flavour, so if you’re not a fan, use a solid vegetable fat such as Trex instead, or choose a vegan margarine with a high fat content. Other than that, it’s a very straightforward recipe, with a minimum amount of ingredients. I hope you like it.
Makes: 20 small squares
Ingredients
150g 85% cocoa extra dark chocolate (dairy-free)
150g extra virgin coconut oil
140g silken tofu
225g light Muscovado sugar
2 teasp vanilla paste
100g gluten-free plain flour (such as Dove’s Farm)
To decorate:
50g 85% cocoa extra dark chocolate (dairy-free)
Freeze-dried raspberry pieces
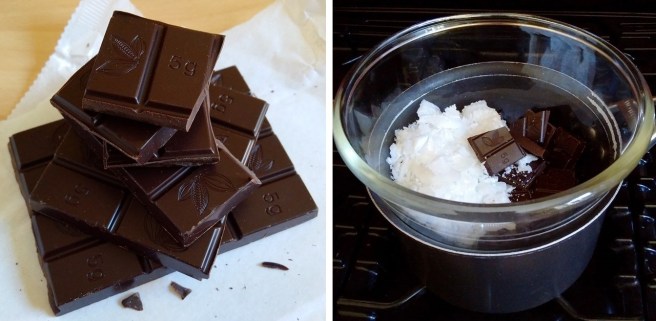
1. Preheat the oven to 170°C (150°C fan oven, gas 3). Grease and line a 20cm square cake tin. Break up the chocolate and put in a heatproof bowl with the coconut oil. Place the bowl over a saucepan of barely simmering water until melted. Remove the bowl from the water and leave to cool for 10 minutes.
Melting dark chocolate with coconut oil. Images: Kathryn Hawkins
2. Whisk the tofu and sugar together until well blended and creamy and stir in the vanilla paste. Mix in the melted chocolate and coconut oil, and gradually mix in the flour. Transfer to the prepared tin and bake for about 45 minutes until marbled and crackled on top, just set in the middle but still with a slight wobble underneath. Leave to cool completely before removing from the tin.
Vegan chocolate brownies, from tin to bake. Image: Kathryn Hawkins
3. To decorate, carefully the bake remove from the tin and discard the lining paper. Cut into 20 bite-sized pieces and arrange on a sheet of baking parchment. Melt the chocolate as above and drizzle over each piece of brownie using a teaspoon. Scatter with raspberry pieces and leave for a few minutes to set before serving.
Just decorated, vegan brownie bites. Image: Kathryn Hawkins
Snakeshead Fritillary under a blue spring sky. Image: Kathryn Hawkins
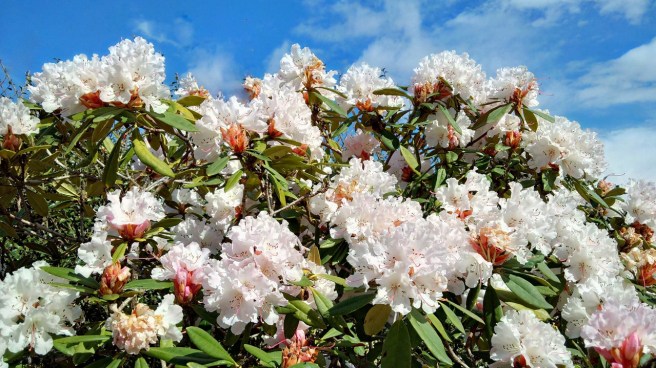
It really was a glorious day today. After a few April showers this morning, it was a sunshiny blue-sky afternoon. It was very pleasant to take a stroll, breathe in the fresh air and enjoy the sunshine. Out of the sun, it is still chilly, and the night-time temperature is low, but the spring flowers are at their best right now, and I couldn’t resist another post showing how the garden is looking at this very colourful and fragrant time of year. The scent from some of the flowers is intoxicating, I only wish there was some way of posting the aromatics as well as the images!
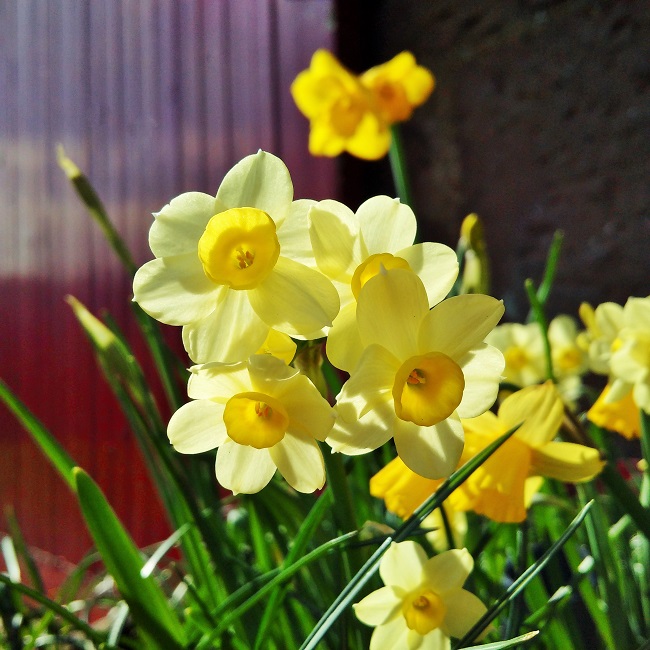
Bold and brash, candy-striped tulips. Image: Kathryn HawkinsPale lemon Narcissus, each tiny stem has 4 very fragrant blooms. Image: Kathryn Hawkins
I’m in the throes of a very busy period with my work and subsequently, I have had little time to spend trying new recipes in the kitchen. I will have a recipe post ready for next week though, so in the meantime, I hope you enjoy the glorious multi-colours of my Scottish spring garden. See you next week.
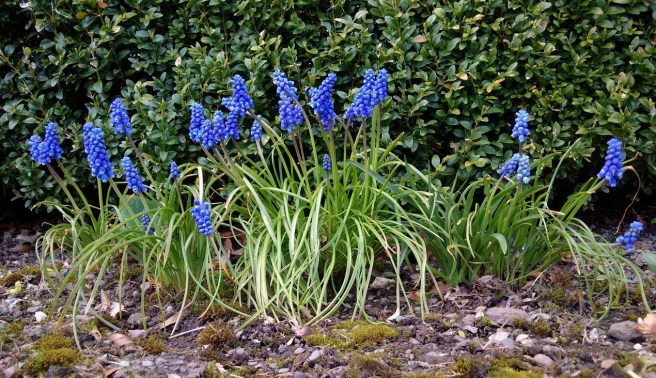
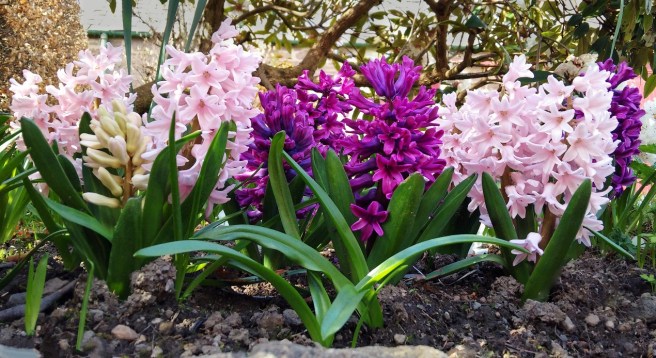
Pale pink rhododendron. Image: Kathryn HawkinsGrape hyacinths (Muscari) by a privet hedge. Image: Kathryn HawkinsHighly fragrant, double-blooming pink and magenta hyacinths. Image: Kathryn Hawkins