Welcome to my blog all about the things I love to grow and cook. You'll find a collection of seasonal gluten-free, dairy-free and vegan-friendly recipe posts, as well as a round up of my gardening throughout the year. I wish you good reading, happy cooking and perfect planting!
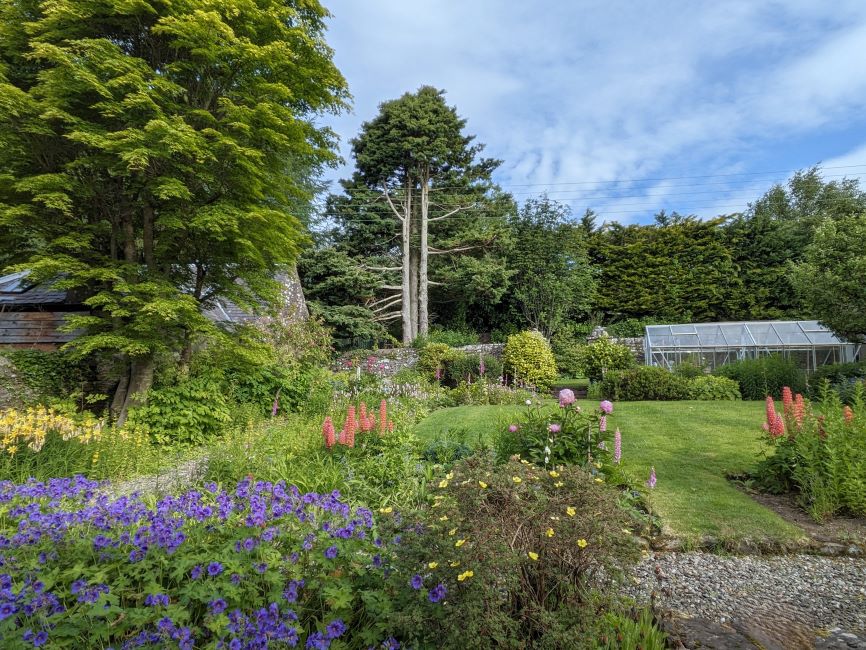
Scottish garden Lupins on a sunny day in early June. Image: Kathryn Hawkins
Hello again. I hope you are well and enjoying better weather than we are at the moment. Fortunately I took my photos of the garden earlier in the week before the weather turned unseasonably chilly and wet. Aside for the glorious colours outside right now, it has been hard to believe that it is actually June!
Peachy-orange Lupin. Images: Kathryn Hawkins
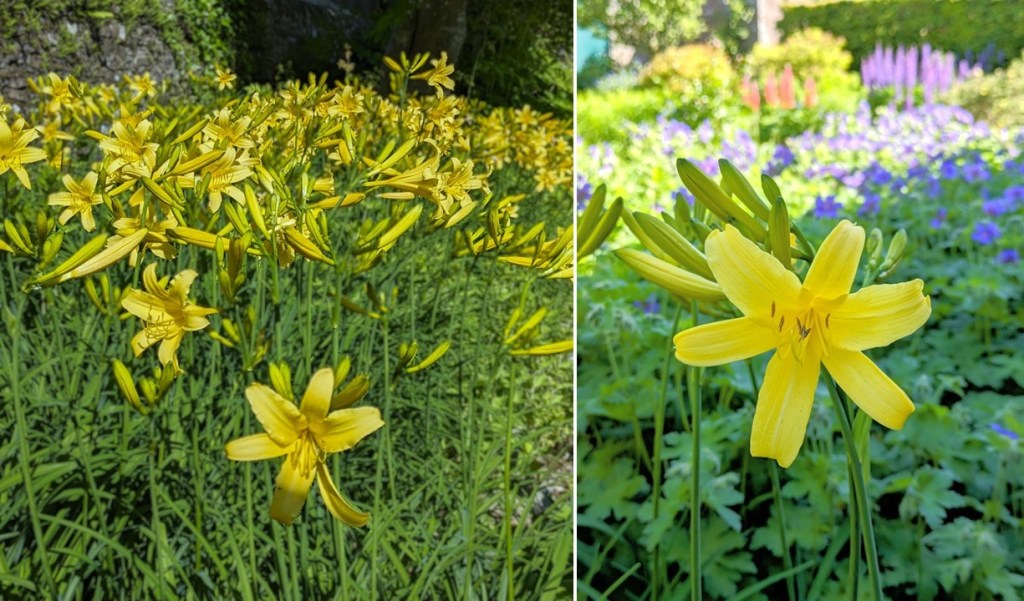
The Lupins started flowering earlier this year and subsequently many of the flowers are now going over, especially after getting a pounding by the heavy showers. Behind the Lupins, the yellow daylilies grow. For the short time they are in flower, the contrast with the blues of the lupins and geraniums is glorious, and their scent is very perfumed.
Bold and bright, yellow daylilies. Images: Kathryn Hawkins
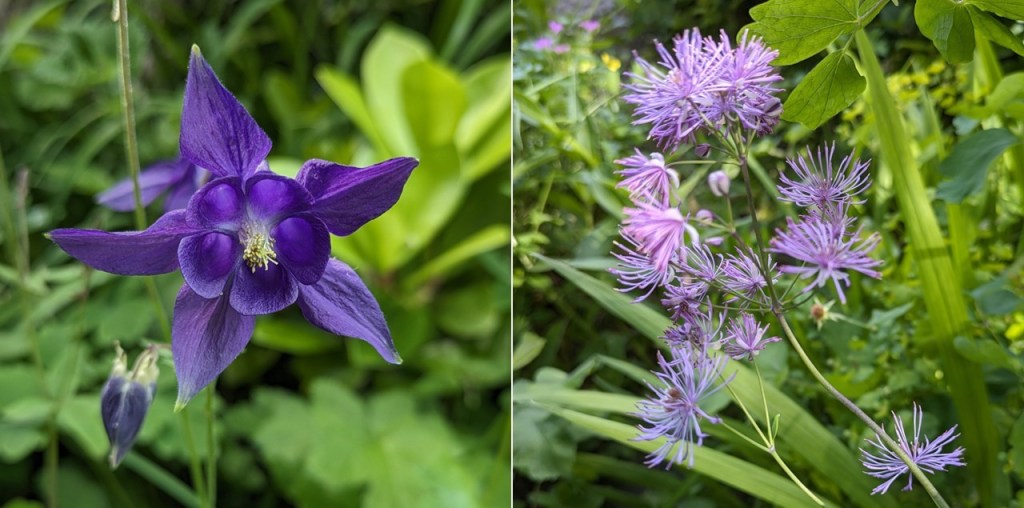
The garden was full of Aquilegia in May this year which is unusual, 2-3 weeks before they usually flower. Most were over quite quickly, but these ones are lingering on in a shadier part of the garden. The one growing on top of the wall is very hardy and seems to enjoy being “king of the castle”. I have tried to sow the seeds elsewhere but it never seems to take anywhere else.
Violet Aquilegia growing on the top of an old wall; a deep blue Aquilegia and delicate lilac-coloured Meadow Rue. Images: Kathryn Hawkins
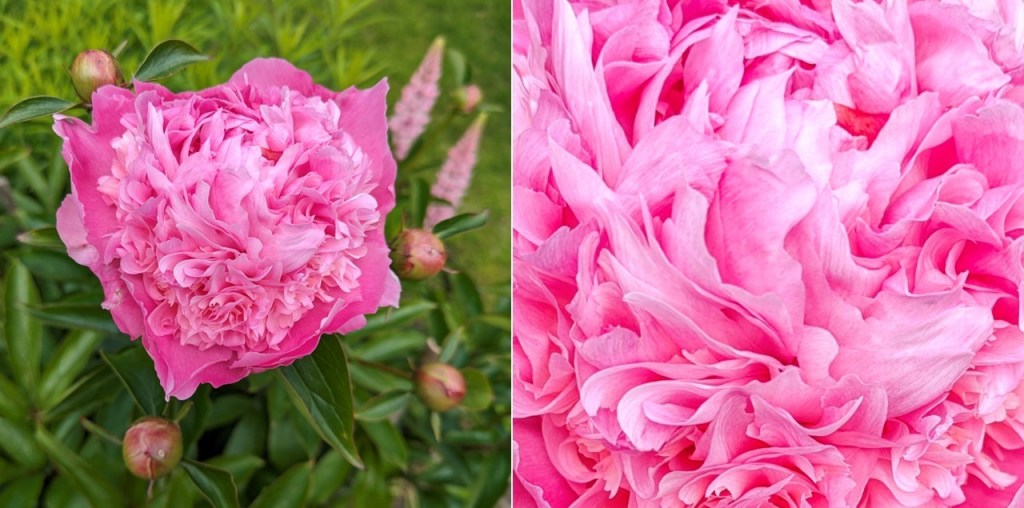
At last the peonies are coming out. Just a few single blooms at the moment with their delicious sweet and perfumed scent wafting around the flowerbeds.
Fragrant June Peonies. Images: Kathryn Hawkins
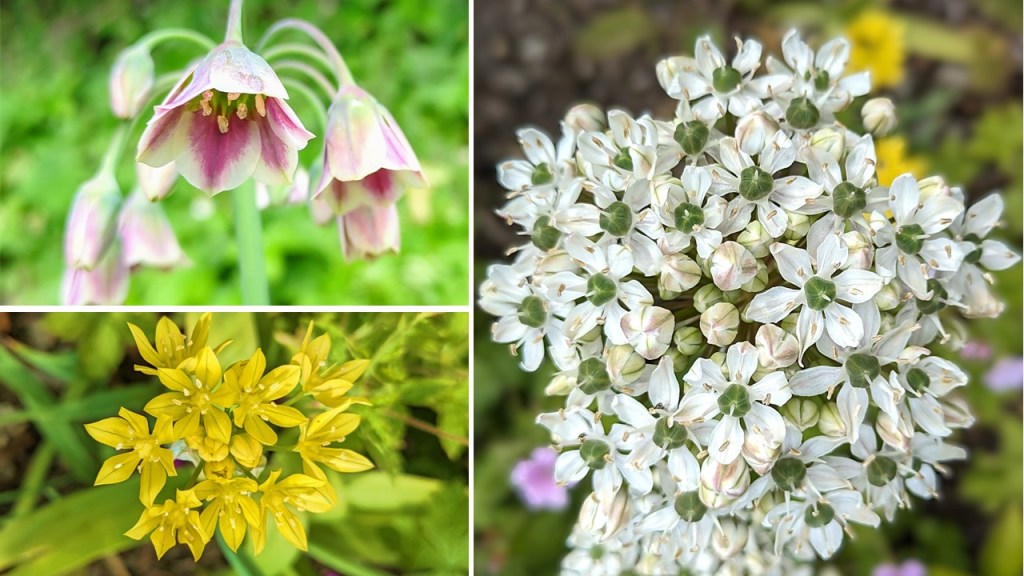
I lost quite a few of the lilac globe Alliums this year. Only a couple came up and they got blown over quite quickly. These 3 varieties seem to be a bit more hardy and are coping well with the elements.
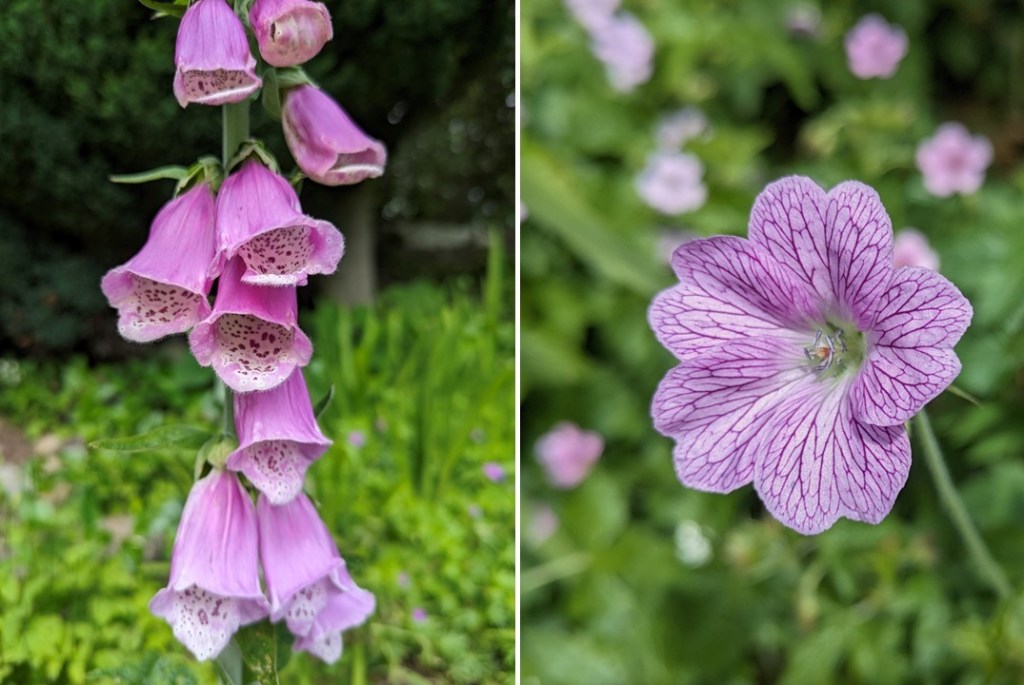
This pale pink Lupin was one of the first to flower this year, brought on by the sunshine of last month and better weather at the beginning of the month, it is a little bit more sheltered than the others. The pink Bistorta grows very well in the garden and the bees love it. The foxgloves and pink cranesbill geraniums are also favourites of our little flying friends.
All the pinks. Top: Pink Lupins and Bistorta. Bottom: close-up on pink foxglove and cranesbill geranium. Images: Kathryn Hawkins
That’s my garden round up for this month. I’m back in the kitchen for my next post. I hope to see you in a couple of weeks when hopefully the summer will have returned 🙂
The most colourful time of the year. Image: Kathryn Hawkins
Hello there. I have a super sunny recipe for you this week which I hope matches the weather where you are (sadly not here today as I type this). I really like tortilla wraps but find the readymade ones a bit on the doughy side. Homemade corn wraps have more texture and flavour, and make a great base for toppings or fillings if you fold them to make taco shells, and are utterly delicious fried as chips.
Loaded and ready to eat. Image: Kathryn Hawkins
A little bit of patience is required to roll the perfect tortilla – I guess that’s why someone invented the tortilla press – but as with everything, practice makes perfect. You’ll see that mine have a raggedy edge, for a neat round edge you’d need to trim with a sharp knife, but I quite like the more characterful look 🙂
The basic wrap is a very simple recipe which I hope you will enjoy trying. Enjoy them warm – they will become drier and firmer as they cool. You can reheat them by popping in the microwave for a few seconds. If you want to turn them into chips, the recipe is further down, below the basic wraps recipe.
Makes: 6
Ingredients
125g gluten free plain bread flour blend plus extra for dusting (Note: bread flour contains Xanthan gum so if you use a standard plain flour, add a little Xanthan gum to make the dough easier to work with)
125g fine cornmeal (Masa farina)
½tsp salt
2tbsp corn oil
1. Put the flour, cornmeal and salt in a bowl and make a well in the centre. Ad the oil and mix in, then gradually pour and mix in about 115ml water to bring the ingredients together into a soft clump.
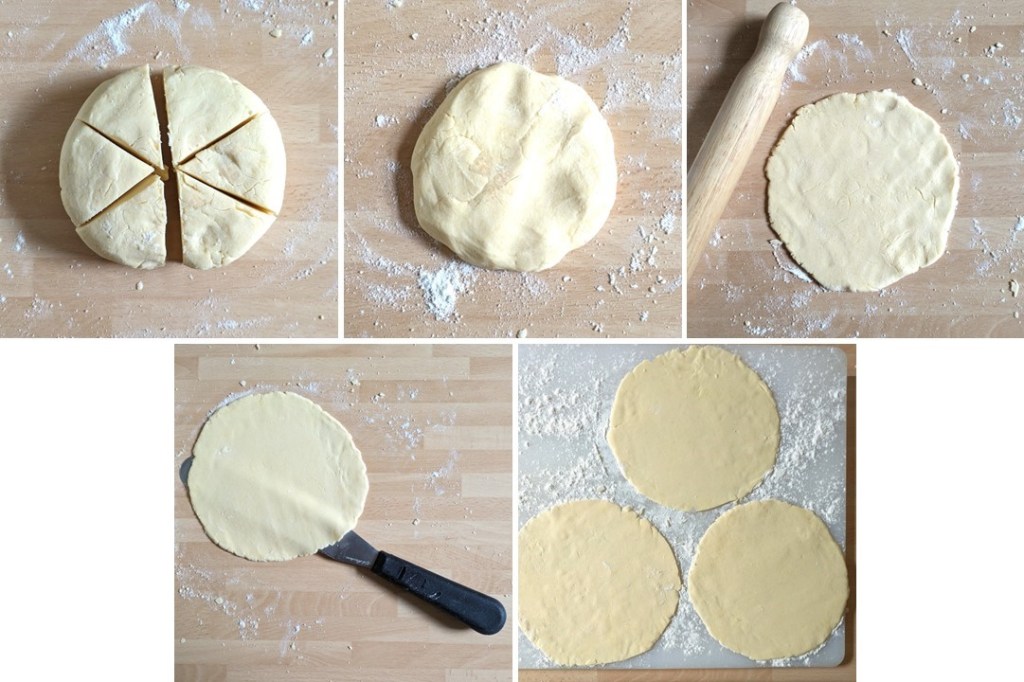
2. Lightly flour the work top and gently knead the dough for a short time to make a smoothish ball of dough. Form into a neat round, cover lightly and leave to rest for 15 minutes.
Making gluten-free tortilla dough. Images: Kathryn Hawkins
3. Cut into 6 equal wedges. Working on one piece at a time, dust the work top lightly with flour, form a portion into a round and then roll and turn to make an approx. 18cm thin round. You will probably need to slide a palette knife underneath to turn the dough as it gets thinner.
4. Transfer to a lightly floured board and cover whilst you roll out the other 5 pieces in the same way.
Shaping tortilla dough. Images: Kathryn Hawkins
5. To cook, heat a dry frying pan until hot. Carefully add a tortilla and cook over a medium heat for about 2 minutes until it starts to bubble up. Flip over and cook for a further 1-2 minutes until lightly golden and toasted. Wrap them in a clean tea towel to keep them soft and warm whilst you cook the remaining rounds.
Cooking the tortillas. Images: Kathryn Hawkins
Serve the tortillas warm, topped with your favourite salsa or salads. I made up this very simple combination of chopped tomato mixed with canned beans, cooked sweetcorn and a little spring onion, all mixed together with sweet chilli sauce. Pile on top of a freshly made corn tortilla, sprinkle with fresh red chilli and fresh coriander, and add a dollop of vegan mayo on the side 🙂
Corn and bean salsa. Image: Kathryn Hawkins
To make your own corn chips, cut cold tortillas into 8 neat triangles – I found it easier to use kitchen scissors to do this. Pour corn oil into a deep frying pan or saucepan to a depth of about 5cm and heat to 180˚C. Fry a few chips at a time for about 2 minutes, turning in the oil, until crisp and lightly golden. Drain well and season whilst still warm – I used onion salt.
Cutting and cooking corn chips. Images: Kathryn Hawkins
Freshly fried and seasoned. Image: Kathryn Hawkins
These homemade chips are really the crunchiest chips I’ve ever tasted. They store well for several days in an air tight container (if you can leave them alone!).
Gateway to the bluebell woods. Image: Kathryn Hawkins
Hello again. I hope you are enjoying some fine weather and the colours of spring. At last, it stopped raining here this week, and the temperature rose by a few degrees. It was the perfect time to get out and about and see what is going on in the local countryside.
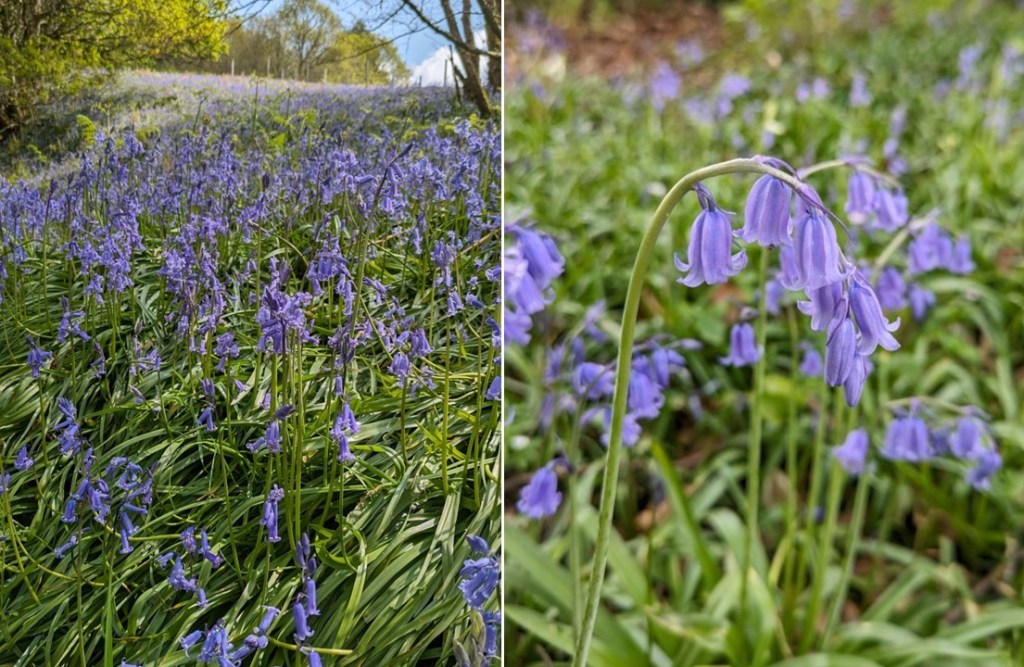
Hillside bluebells under a blue sky. Image: Kathryn Hawkins
Just a few miles down the road from where I live in central Scotlans, is an area of woodland called Strowan Woods. It is a peaceful place, in fact it is the site of a woodland cemetery. As you follow the path through the cemetery, you come across an area called Bluebell View, and what an amazing sight it was this weekend. So many bluebells growing on the side of the hillside, and in the sunshine the perfume was quite intoxicating.
Down the bluebell path. Image: Kathryn Hawkins
Follow the path into the woods and there are bluebells as far as the eye can see. It was a beautiful sight, and so peaceful and quiet, just the birds singing.
Bluebells as far as the eye can see. Image: Kathryn Hawkins
The path follows the river and you can see the flowers stretching over the other side of the water into the distance.
On the riverbank. Image: Kathryn Hawkins
More bluebells across the river. Image: Kathryn Hawkins
As well as the scent of bluebells, the aroma nearer the river was of wild garlic. Now in bud, a few of the pretty allium flowers had started to blossom.
Wild garlic flower buds. Image: Kathryn Hawkins
Wild garlic flowers. Images: Kathryn Hawkins
In amongst the bluebells and wild garlic, I found a few other species of woodland flowers hidden away in the shelter of the trees. From left to right, top: wild Primroses; buttery yellow Celandines; and the tiny veined petals of Wood Sorrel, and in the row below: white wood Anemones; pink Purslane, and tiny wild violets.
May woodland wild flowers. Images: Kathryn Hawkins
The Yellow Archangel plant, Lamium galeobdolon, was growing quite prolifically in one area. The plant is a member of the mint family, and I know if you have that herb planted in your garden, it runs all over the place. The yellow flower heads of the plant remind me of rather sinister-looking open mouths which doesn’t quite ring true with its altogether more godly name.
Yellow Archangel. Images: Kathryn Hawkins
I’m going to sign off with a couple more images of my woodland walk. I hope you have a good few days ahead, and I look forward to getting back into the kitchen again for my next post at the end of the month. Happy Spring 🙂
Nature’s blue and green woodland carpet. Image: Kathryn Hawkins
New season asparagus on sesame toast. Image: Kathryn Hawkins
Hello again. It’s that time of year again when I welcome the arrival of the British asparagus season. From around the middle of April to the end of May/beginning of June, I have just a few weeks to feast on my favourite green vegetable.
New season British asparagus. Image: Kathryn Hawkins
I have suggested a few accompaniments to this delicious vegetable over the years. I like to keep it simple and enjoy the stems for their own unique flavour, and this year’s offering is no exception. Delicious crispy fried toasts dipped in a sesame batter and served with a sesame flavoured mayo dressing.
Tip top British asparagus. Image: Kathryn Hawkins
When the asparagus season is over, make and cut the toasts into triangles and serve as a crunchy and very moreish snack – they really are very tasty.
Crisp and crunchy sesame triangles. Image: Kathryn Hawkins
Makes: 4 servings of asparagus on toast, or 16 sesame triangles
Ingredients
2tbsp chickpea canning water (aquafaba)
20g gram (chickpea) flour
20g ground flaxseeds
Pinch of salt
4tbsp plant milk
4 slices free-from bread
40g toasted sesame seeds
Vegetable oil for shallow frying
6tbsp vegan mayonnaise
1tbsp Teriyaki marinade
2tsp sesame oil
Chopped spring onion to serve
300g new season fine asparagus spears
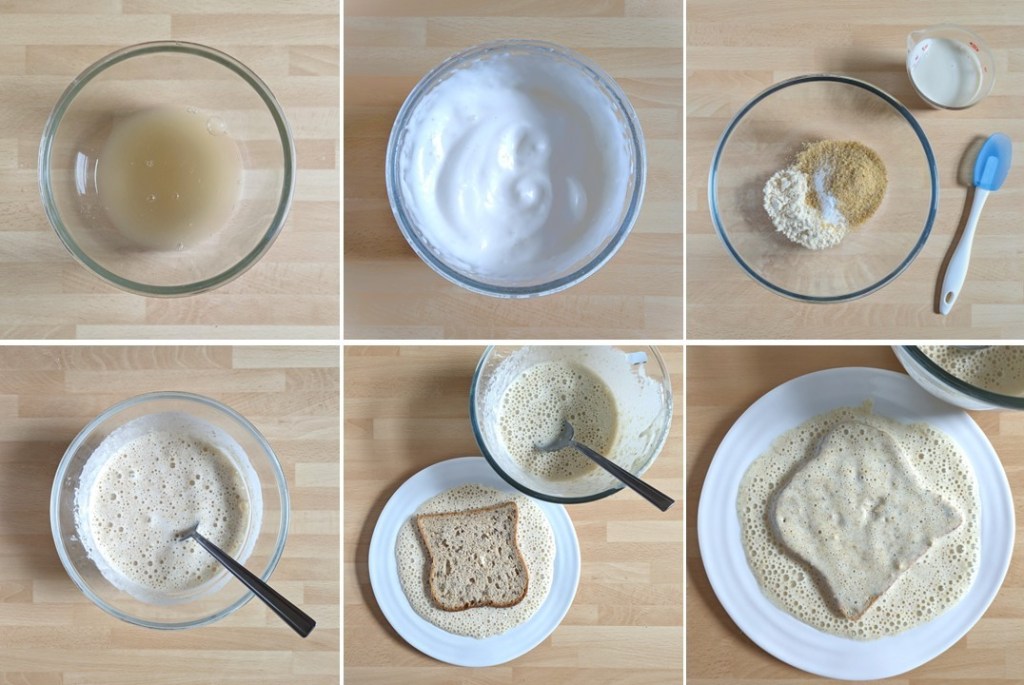
1. Put the chickpea water in a bowl and whisk with an electric mixer until very thick and foamy.
2. Mix the flours and salt in a bowl. Make a well in the centre and add the milk. Gradually mix everything together then fold in the chickpea foam.
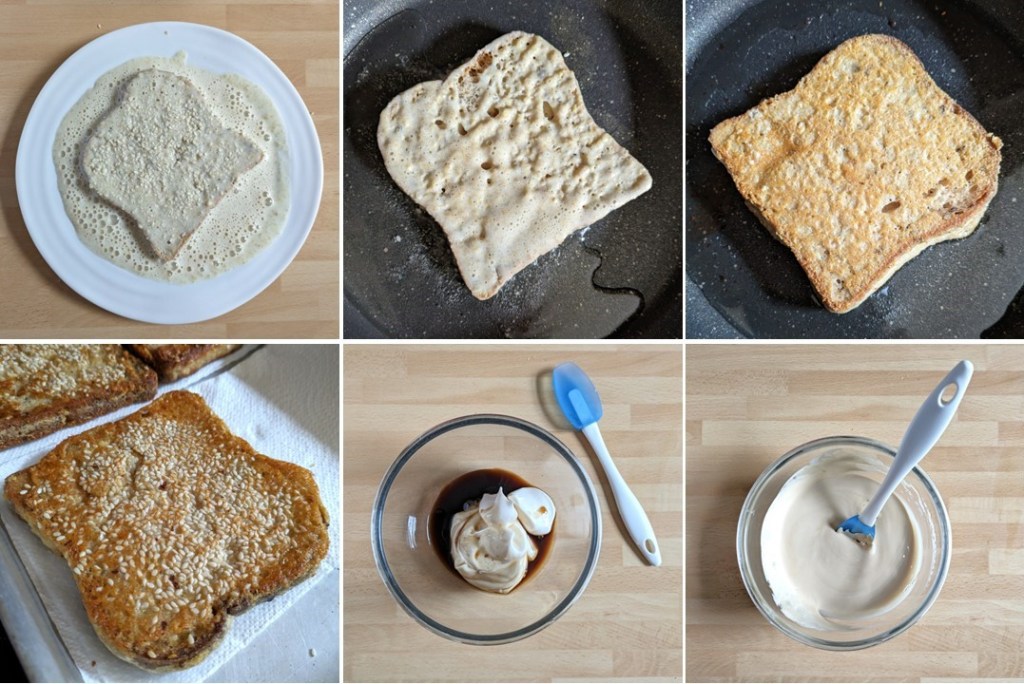
3. Put some of the batter on a plate or in a shallow dish. Working on one piece of bread at a time, dip the bread on both sides and sprinkle the top with a few seeds.
Making the sesame toast batter. Images: Kathryn Hawkins
4. Pour sufficient vegetable oil to just cover the base of a large frying pan and heat until hot. Cook the battered bread over a medium to low heat for about 2-3 minutes on each side until crisp and golden. Drain and keep warm whilst coating and cooking the other 3 slices.
Cooking the toasts and making the dip. Images: Kathryn Hawkins
5. For the dip, mix the mayonnaise with the marinade and 1tsp sesame oil. Cut the toasts into triangles, sprinkle with spring onion and serve warm with the mayo to dip.
Sesame toasts with freshly chopped spring onion. Image: Kathryn Hawkins
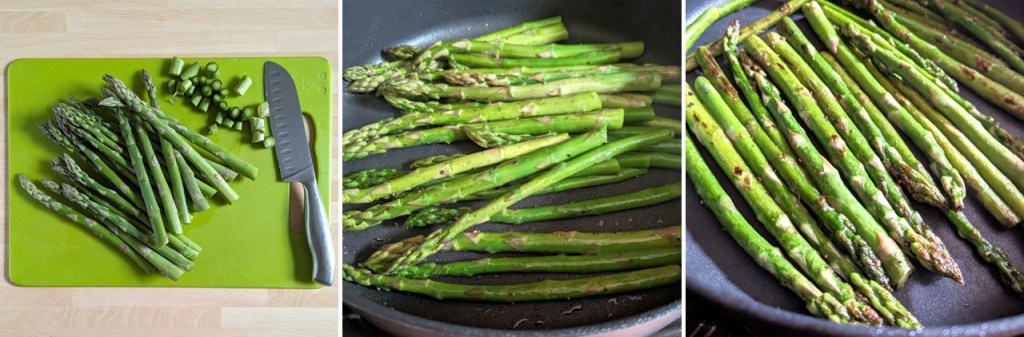
To serve topped with asparagus, trim a little from the ends of the asparagus stems. Heat a little vegetable oil in a large frying pan until hot and stir fry the stems for about 5 minutes until just tender and lightly browned.
Pan-frying new season asparagus. Images: Kathryn Hawkins
Turn off the heat, season with a little salt and drizzle over a little sesame oil. Stand for 5 minutes before serving on sesame toast with a drizzle of the sesame mayo.
Dressed and ready for eating. Image: Kathryn Hawkins
Thanks for stopping by. I hope to see you again in a couple of weeks. Until then, take care and enjoy the season 🙂
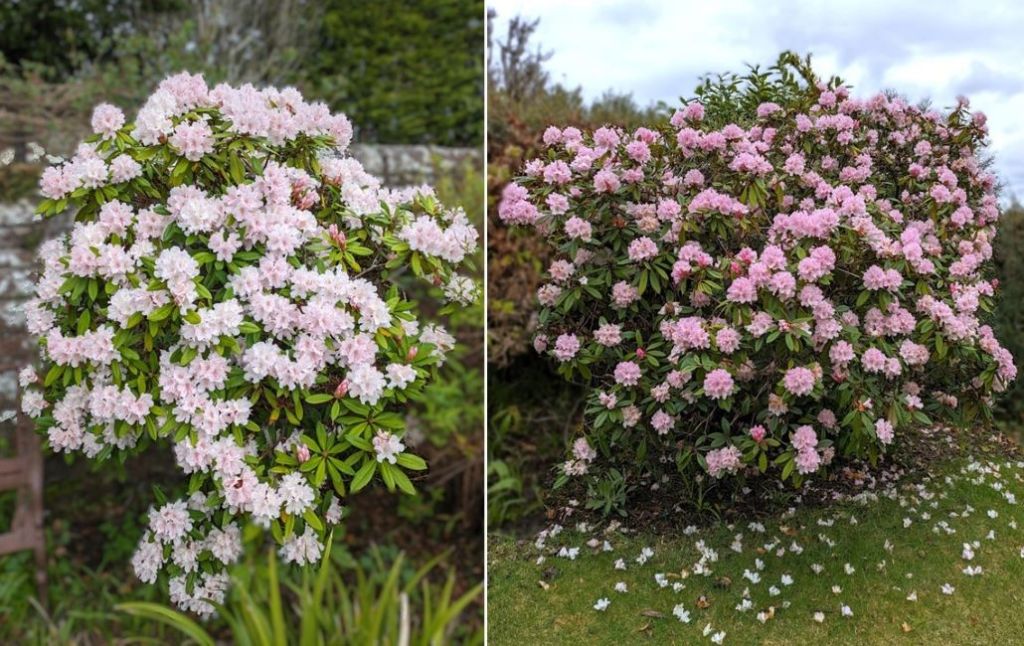
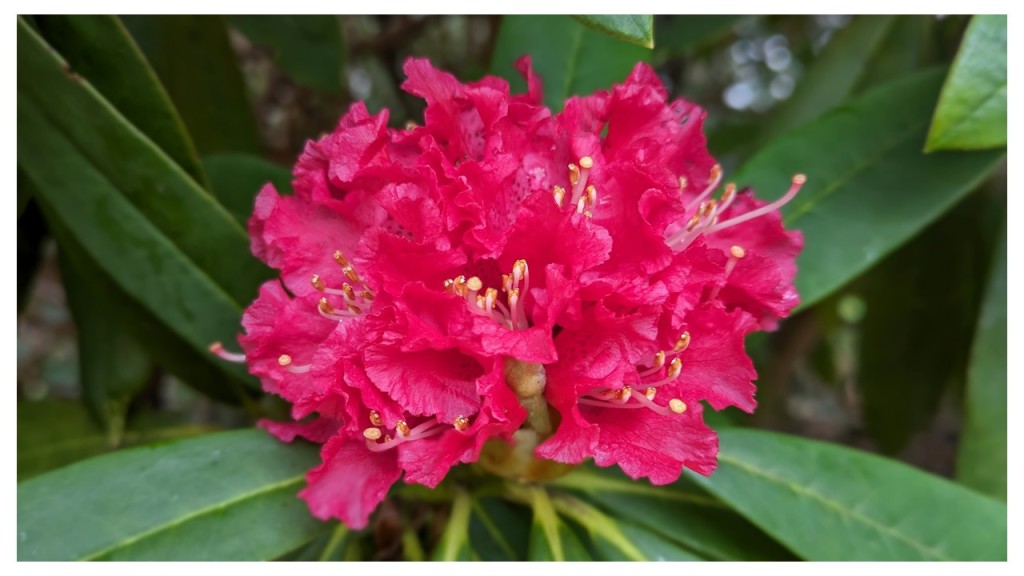
Hello again. This was the scene here at the beginning of the week. A bit of an unexpected start to the new month. I’m happy to report that the snow was quickly washed away by rain and none of the spring flowers appear to have been damaged by this wintry blast. You can just make out the pale pink Rhododendron behind the seat in the picture above, and below is the same plant taken yesterday, alongside a pinker variety from the front garden 🙂
Rhododendrons in the pink. Images: Kathryn Hawkins
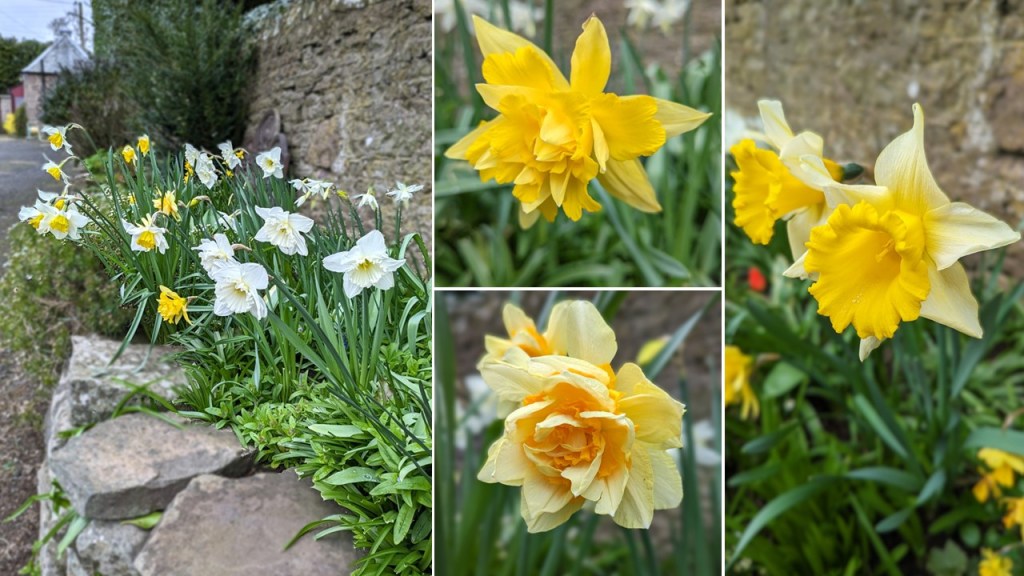
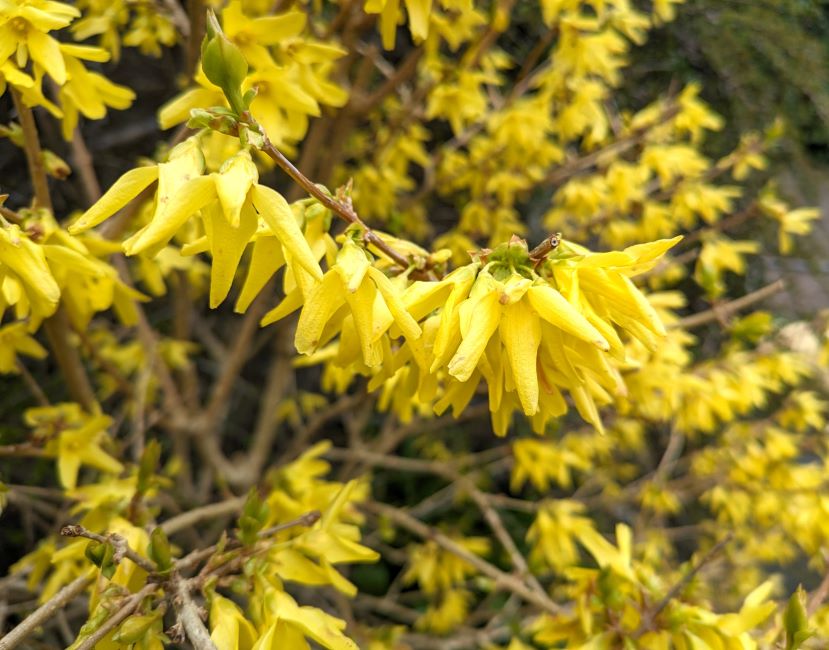
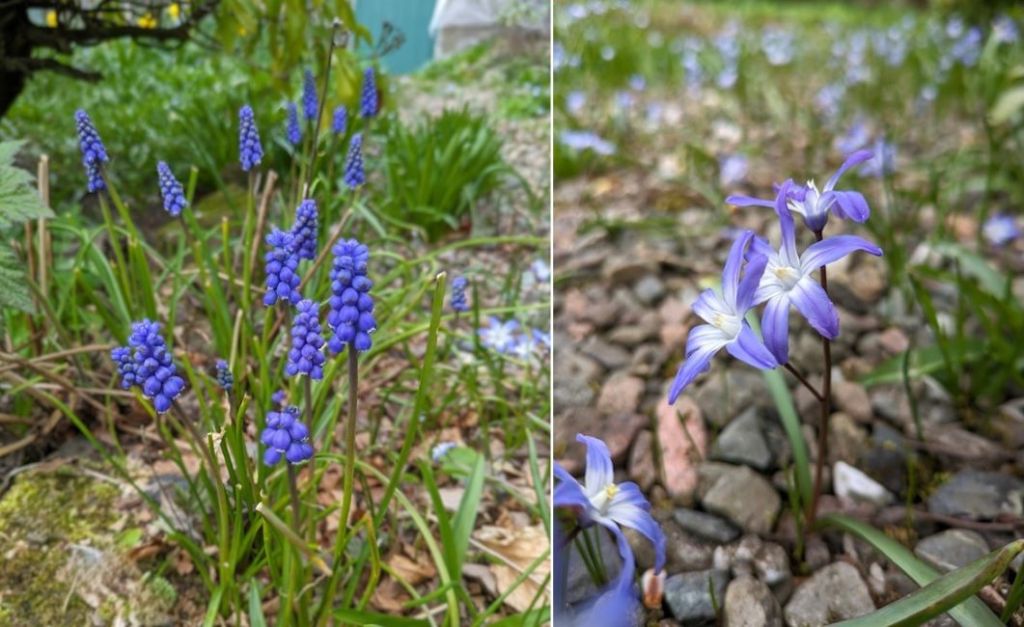
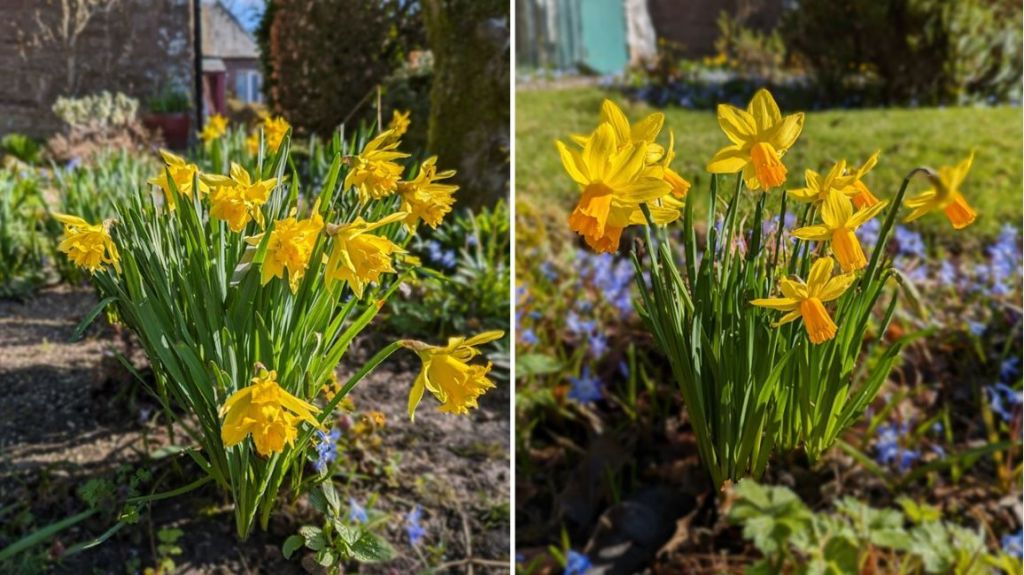
April and May are two of the most colourful months in the garden, and I never tire of the different flowers around at this time of the year. From the golden yellow Daffodils, Forsythias and Primroses, to the cool blue Muscari and Chionodoxa, with plenty of shades in between.
Delightful Daffodils. Images: Kathryn Hawkins
Golden Forsythia. Image: Kathryn Hawkins
New season garden primroses. Images: Kathryn Hawkins
Spring blues. Images: Kathryn Hawkins
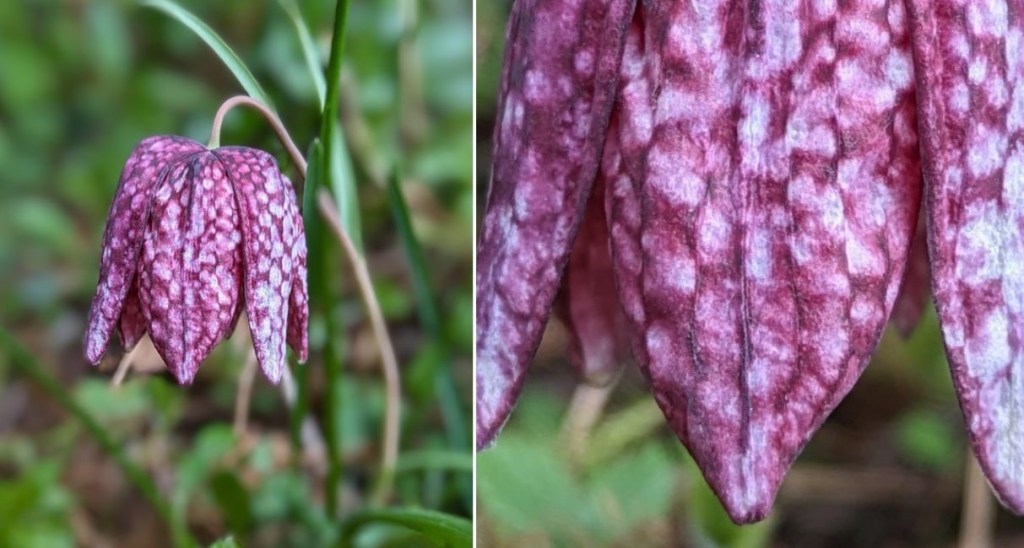
One of my all time Spring favourites is the exotic looking Snakeshead Fritillary. There are a few dotted around the garden, and this is the first one to “hatch” its wonderous mottled petals.
My Spring favourite. Images: Kathryn Hawkins
The Camellia bushes don’t usually produce that many flowers and often get affected by the weather. I managed to capture these blooms before anything happens to them. I love their waxy-looking petals, and I hope they stay around for a while longer.
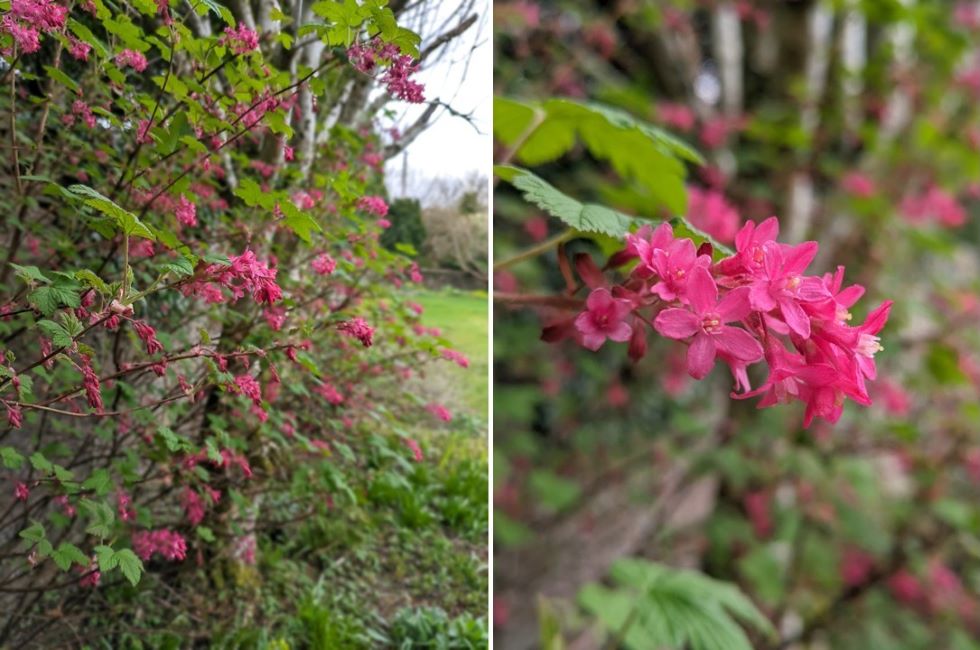
There are two plants in the garden that have the most delicious aromas at this time of the year. The first is Skimmia Japonica with its spicy, floral scent, and the other is Ribes Sanguineum which has a fruity and peppery fragrance. It is a real pleasure to work in the parts of the garden where these two grow.
Skimmia Japonica with its very fragrant flowers. Images: Kathryn Hawkins
More fragrant flowers in bloom. Images: Kathryn Hawkins
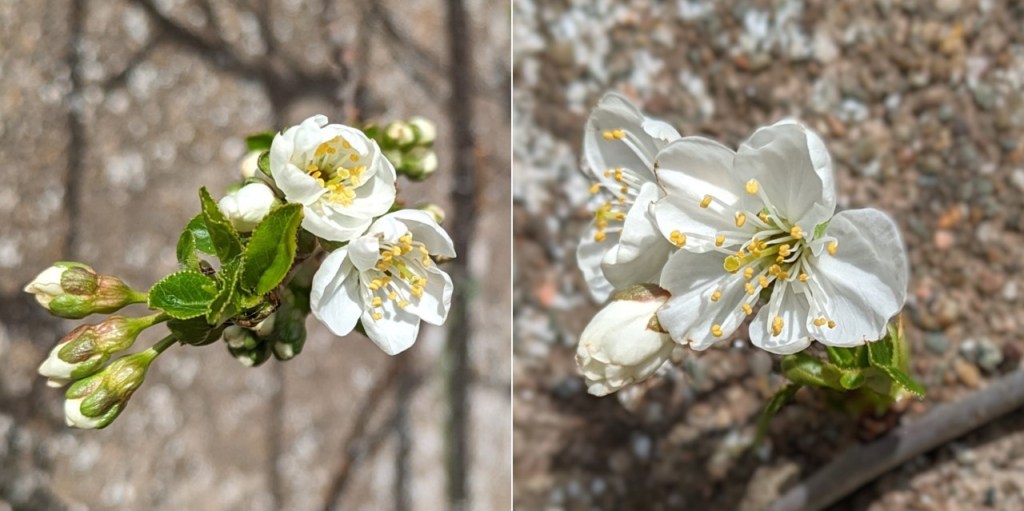
To round off my post this week, the first signs of garden produce are on the horizon with the bursting of a few buds from the Morello Cherry tree. I can see lots of buds on the pear and plum trees as well, so it looks like the bees will have plenty more pollen to collect very soon.
The first cherry blossoms. Images: Kathryn Hawkins
I’ll be back in the kitchen at the end of the month, so I look forward to seeing you again in a couple of weeks. Thanks for stopping by 🙂
Hello again. It’s nearly Easter which is one of my favourite times of the year. Lots of wonderful spring flowers everywhere with longer days and (usually) warmer temperatures. The garden is full of spring bulbs at the moment, and on a rare sunny day last week, I managed to capture some of them in all their bright and bold glory.
Golden glow. Images: Kathryn Hawkins
My recipe this month is a bake, inspired by Easter and the season, it’s a no-fuss cake mix baked in a loaf tin, flavoured with Chai Masala mix and marzipan. You can use any regular spice mix but if you fancy the Chai blend, here’s a link to making your own from a previous Easter post of mine Chai masala biscuits for Easter (gluten-free, dairy-free, vegan)
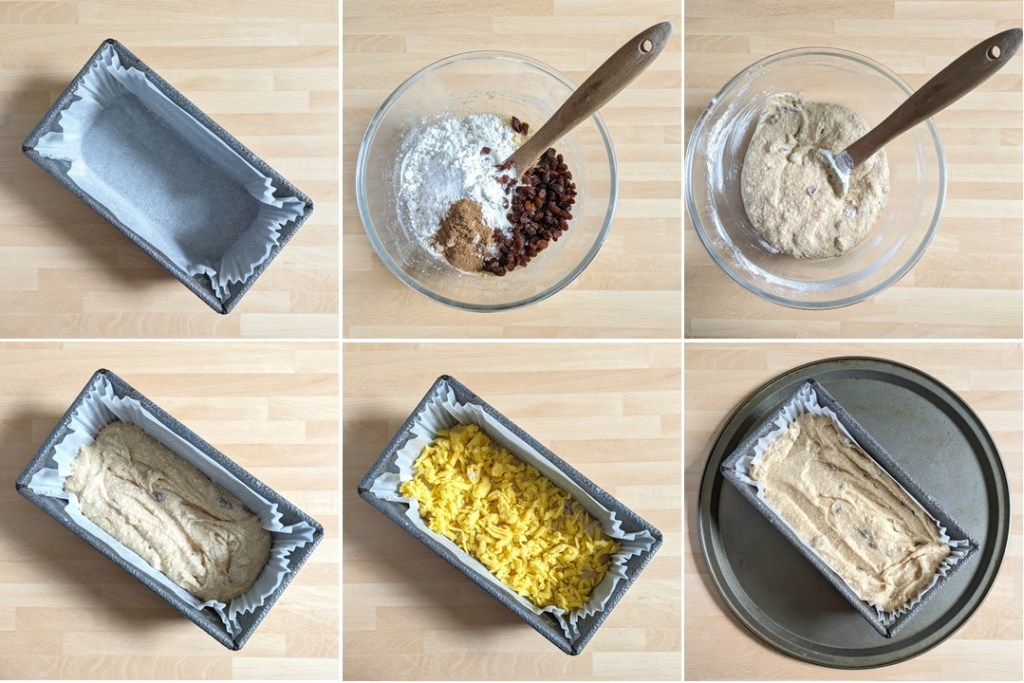
Key ingredients and flavours. Images: Kathryn Hawkins
I used a white gluten-free bread flour for this recipe but you can use a standard blend and either add your own Xanthan gum or leave it out altogether. The raising agent is baking soda and the liquid is buttermilk which is quick and easy to make at the beginning of the recipe along with a flax egg.
Marzipan centre. Image: Kathryn Hawkins
I have put a layer of grated golden marzipan running through the cake which you can leave out or replace with extra dried fruit pieces if you prefer. The flowers on top are also made from marzipan, but use coloured ready to roll icing if you prefer.
Easter baking in one slice. Image: Kathryn Hawkins
Serves: 8
Ingredients
5tsp fresh lemon juice
185ml plant milk (I used oat milk)
1tbsp ground flax seed (linseed)
200g golden marzipan
115g lightly salted plant butter, softened
150g light soft brown sugar
250g gluten-free white bread flour
¾tsp bicarbonate of soda
1½tsp Chai Masala or other ground spice mix
75g sultanas
Orange food colour gel
75g icing sugar
1. For the buttermilk, mix 2½tsp lemon juice into the plant milk and leave to stand for 15 minutes until thickened slightly. For the flax egg, mix the ground flax seed with 3tbsp water and leave for a few minutes to thicken.
2. Grate half the marzipan and set aside. Grease and line a 1kg loaf tin. Preheat the oven to 180°C, 160°C fan oven, gas 4.
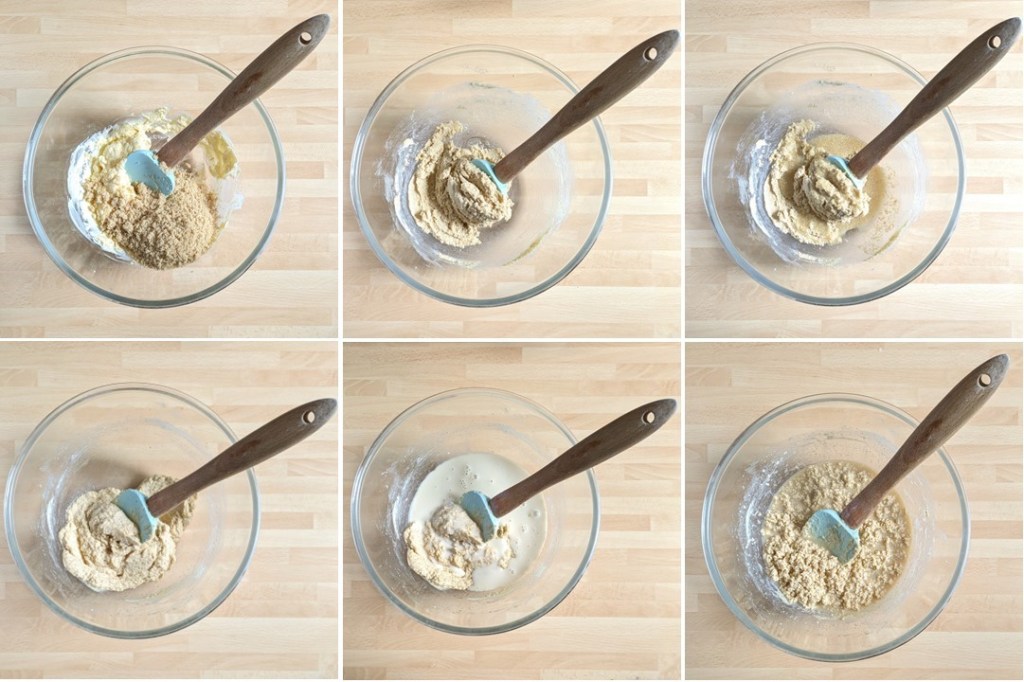
3. Put the butter and sugar in a bowl and mix together until thick and creamy. Stir in the flax egg and then mix in the buttermilk – it will look a bit lumpy and separated at this stage.
Making the batter. Images: Kathryn Hawkins
4. Stir in the flour, bicarbonate of soda, spice and sultanas and mix until everything is well blended and smooth.
5. Spoon half of the cake batter into the tin and smooth the surface. Sprinkle over the grated marzipan and spread the rest of the batter on top. Stand the tin on a baking tray and bake for about 1 hour 15 minutes until risen and firm to the touch – test the centre with a skewer to make sure it completely cooked. Cool in the tin for 30 minutes before removing and placing on a wire rack to cool completely.
Easter loaf ready for baking. Images: Kathryn Hawkins
5. While the loaf is cooling, make the decorations. Break off a small piece of the remaining marzipan and blend in a little orange food colour gel. I used a 4cm star cutter to make the outer yellow petals of the Daffodils, and a 1½cm flower shaped cutter to make the central orange petals.
6. Roll out the marzipan thinly and cut out stars and flower shapes. You should be able to make 12 of each. Transfer to a lined board until ready to decorate the cake.
7. For the icing, sift the icing sugar into a bowl. Add 2-2½tsp of the remaining lemon juice to make a spreadable consistency, then spread over the top of the cake, allowing it to drip down the sides. Arrange the marzipan flowers on top.
Ready for slicing. Image: Kathryn Hawkins
The cake keeps well, and improves in flavour and texture if you make it at least 24 hours before decorating and serving. Store in an airtight container once decorated.
I hope you have a good Easter weekend and enjoy some spring sunshine whatever you are doing. Until next time, thanks for stopping by 🙂
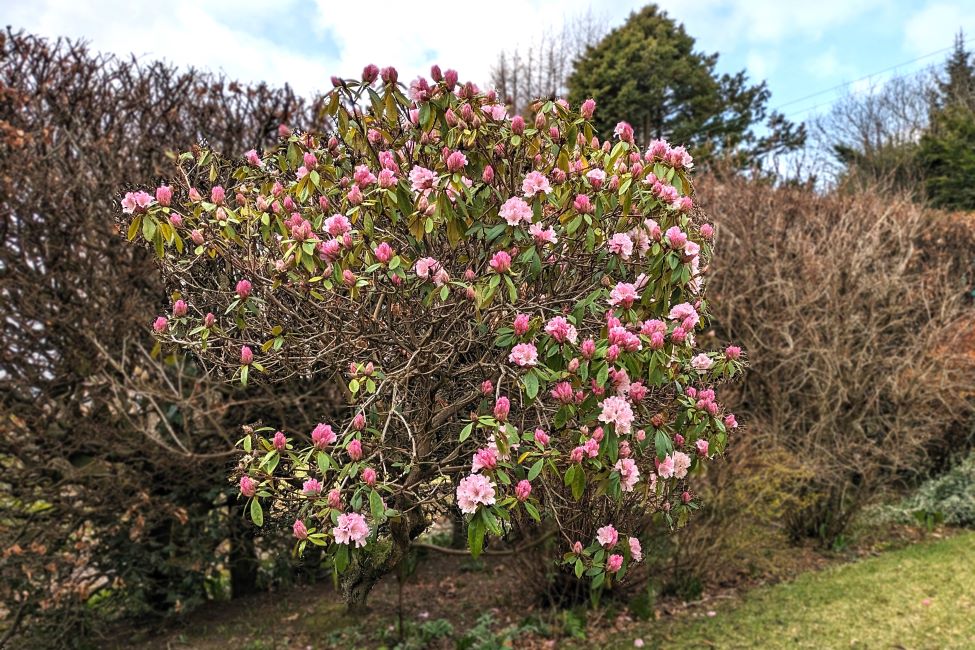
March flowering Rhododendron. Image: Kathryn Hawkins
Happy March everyone! I hope you are keeping well and enjoying some better weather than we are here in the UK. It’s been a dull, damp start to the month so you’ll see little blue sky in my images from the garden this month. However, even though the temperatures have been chilly, the spring flowers are beginning to bloom and the garden is slowly coming to life.
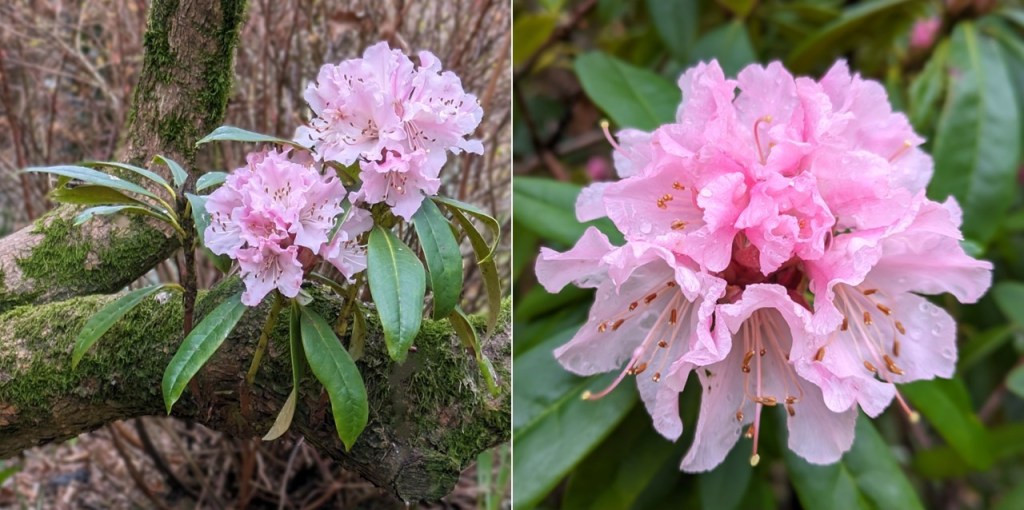
Candy floss-like blooms. Images: Kathryn Hawkins
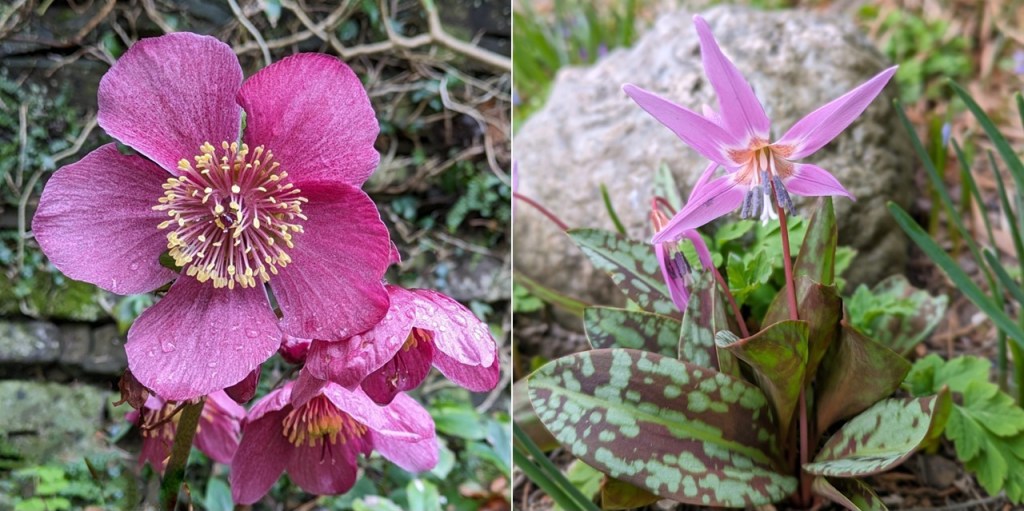
The Hellebores are taking shape and there are one or two clusters of Erythroniums in the rockery sprouting now.
Hellebore and Erythronium. Images: Kathryn Hawkins
The first of the tiny brilliant blue Chionodoxa are popping up in the paths and in the nooks and crannies of the stone steps, and I found this clump of Muscari just taking shape when I was clearing some leaves in the flower bed. They remind me of little blue toadstools at this stage, perhaps something a little fairy or pixie might sit on or under 🙂
The first of the spring blues. Images: Kathryn Hawkins
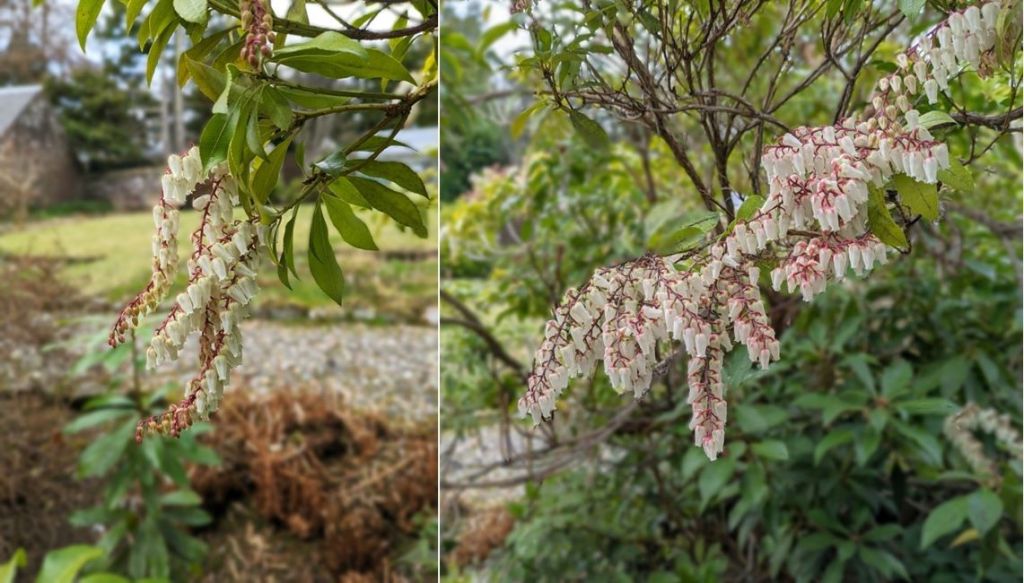
One of the first shrubs to flower in the garden each year is the Pieris, which always amazes me because it seems so dainty and delicate. Usually I am able to capture these bell-like flower clusters under a glorious blue sky, but sadly not this year.
Early spring clusters of the Pieris shrub. Images: Kathryn Hawkins
If you were looking at my blog a few weeks ago, you’ll perhaps remember the photo of a pheasant at the bird feeder. Phil, as he is known, is now a regular in the garden and is becoming less timid. There have also been a lot of young deer visiting as well. At the moment, they only seem to be eating the heather, but no doubt it will only be a question of time before they find tasty new buds to eat.
March visitors. Images: Kathryn Hawkins
That wraps up my post for this week. I’ll have an Easter recipe to share with you in a couple of weeks, so until then, enjoy the new season. Thanks for stopping by 🙂
Hello there. I’ve been back in the kitchen for my post this month and I have a very tasty recipe to share, perfect for this time of year when it’s still a bit on the chilly side.
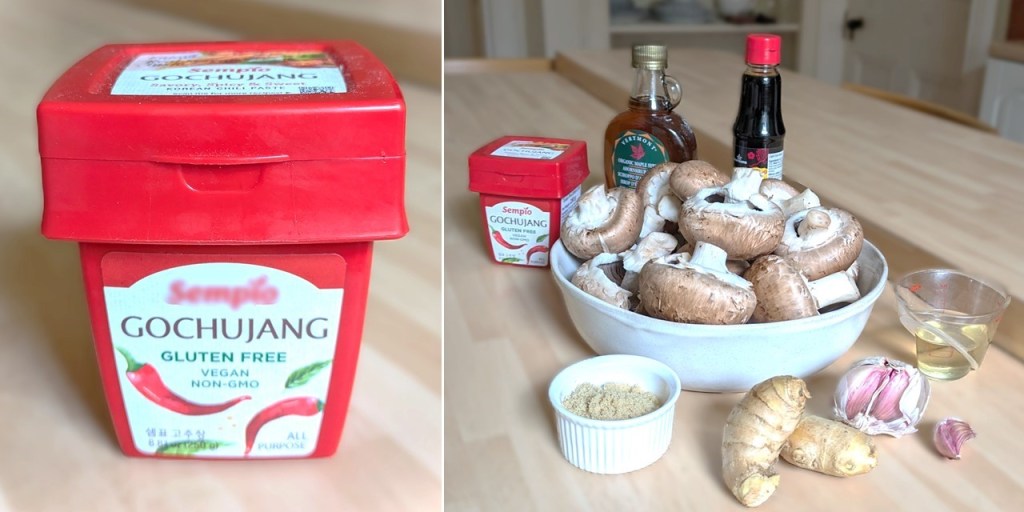
If you’re a regular reader of my recipes you’ll know that I’m not a huge fan of fiery food. However, I discovered this Korean paste a while ago and really enjoy it’s rich umami flavour and spicy chilli heat. I’m sure there are brands on the market which are very hot but this blend is just right for me, and it’s gluten-free and vegan as well 🙂
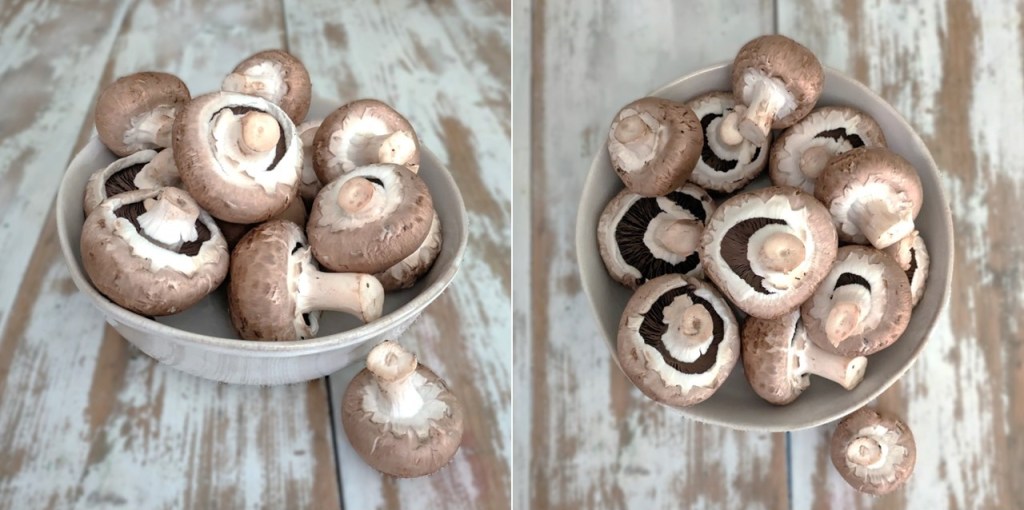
A bowl of chestnut mushrooms. Images: Kathryn Hawkins
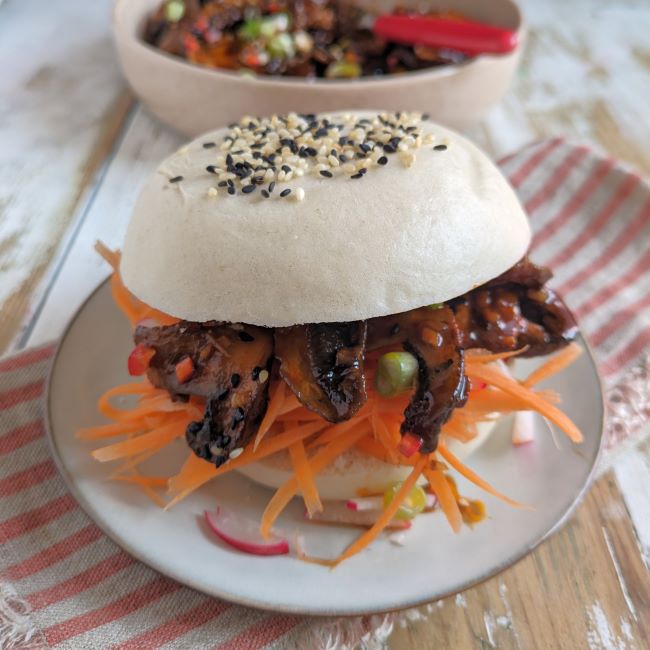
I chose chestnut (or brown) mushrooms for this recipe because they have a “meaty” texture but large flat or Portobello mushrooms will work just as well I’m sure. Prepare the ingredients the day before you want to serve the mushrooms. This will allow the marinade time to draw out some of the moisture from the mushrooms. Serve them as a side dish for 4 people or as a main course for 2-3. They also make a delicious filling for steamed sesame buns – see my recipe here Steamed sesame buns (gluten-free; dairy-free; vegan)
Sesame seeds, chopped red chilli and spring onion to serv
1.Peel and finely chop the garlic and ginger. Place in a large bowl and mix in all the ingredients except the mushrooms.
2. Slice the mushrooms thickly, and add to the bowl in batches, mixing with the marinade ingredients to make sure all the slices are coated. Cover and chill overnight.
Making the marinade. Images: Kathryn Hawkins
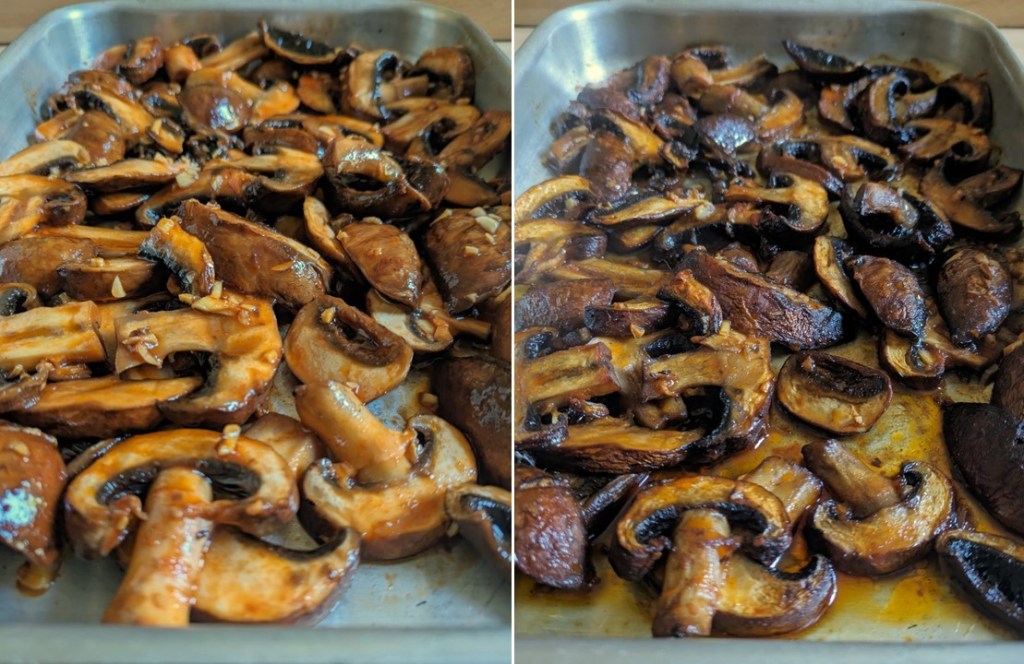
3. The next day, drain the mushrooms, reserving the marinade and pouring into a small saucepan. Put the mushrooms into a shallow roasting tin and place in the oven. I don’t preheat my oven for recipes like this, I just set it to 200°C, 180°C fan oven, gas 6 and leave the mushrooms for 30 minutes until tender and cooked through.
Ready to roast. Images: Kathryn Hawkins
Before and after roasting. Images: Kathryn Hawkins
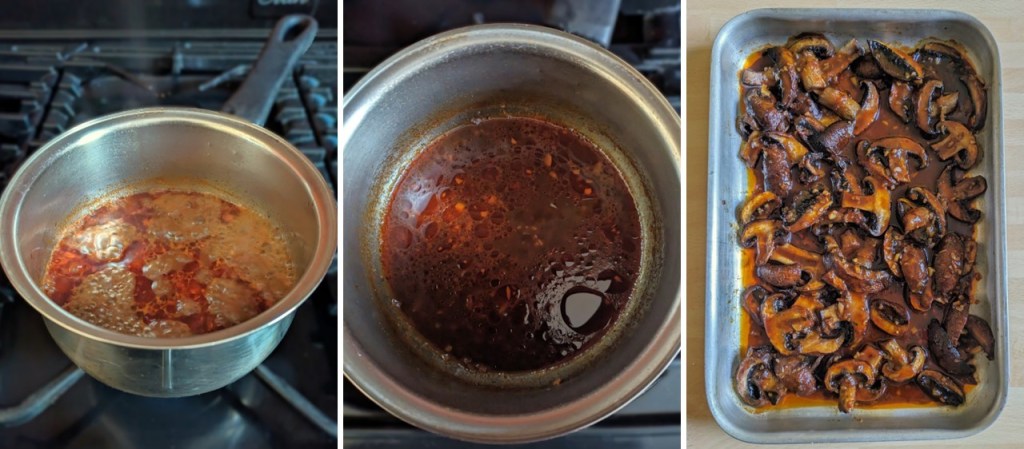
4. While the mushrooms are cooking, bring the marinade to the boil and simmer for about 10 minutes until reduced by half. When the mushrooms are ready, pour the reduced mixture over them and mix well.
Reducing the marinating juices. Images: Kathryn Hawkins
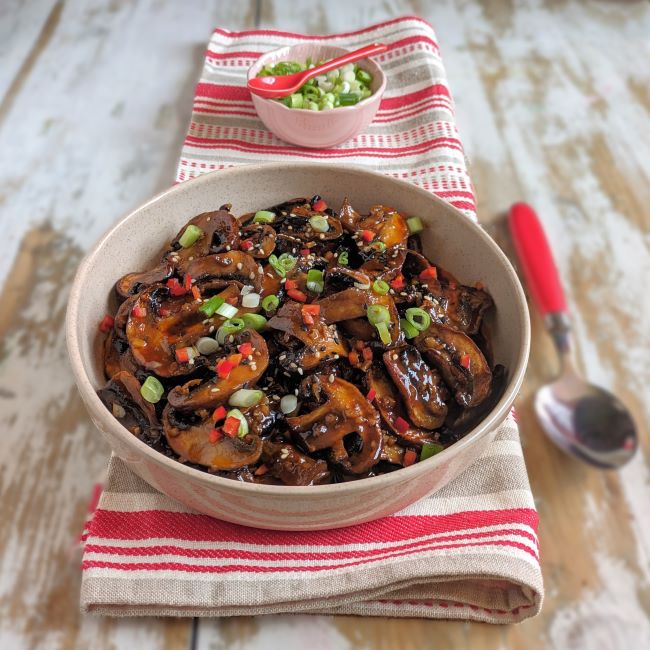
5. Serve the mushrooms with sesame seeds, chopped chilli and spring onion. Great spooned over rice, pasta or noodles. I hope you enjoy this recipe as much as I do. I hope to see you again next month and thanks as always for stopping by 🙂
Warming, spicy and very, very tasty. Image: Kathryn Hawkins
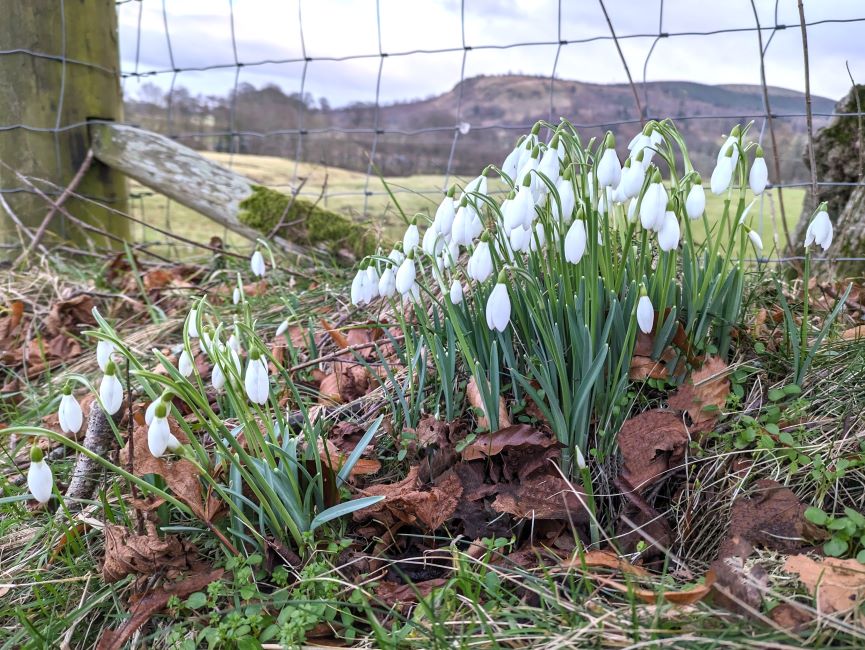
Hello again. It’s good to see that the garden and surrounding countryside are slowly coming to life here in central Scotland after some wild and wintry weather these past few weeks. I took a short trip out to my favourite local spot in search of snowdrops on one of the brighter days this month and am happy to report that there is an abundance of these pretty little white flowers all along the roadside and verges, a little earlier than recent years.
Roadside snowdrops. Image: Kathryn Hawkins
In the garden as well, right on cue, on the first day of the month, the first snowdrops opened up in the weak, wintry sunshine.
The first of this year’s garden snowdrops. Images: Kathryn Hawkins
We’ve had some heavy frosts, a little snow and plenty of wind and rain since then, and subsequently some of the other flowers in the garden have become a bit bedraggled.
Light dust of early February snow. Image: Kathryn Hawkins
Rain-soaked February flowers. Images: Kathryn Hawkins
I took this photo of the glorious red Rhododendron in the garden when it first opened at the beginning of the month. Sadly it looks a bit less radiant now it has been rained on and frosted all over.
Red Beauty. Image: Kathryn Hawkins
There have been survivors of all this bad weather I’m pleased to say. The first Hellebore is up and open, and this little Periwinkle was a surprising find last week. The rhubarb is looking healthy as well.
The first flowerings. Images: Kathryn Hawkins
This year’s rhubarb is on its way. Image: Kathryn Hawkins
To brighten up this gloomy month, I recently acquired a new houseplant, a Mimosa, and in the last week it has opened up it’s tiny tight buds into fluffy, bright yellow balls of sunshine. I have everything crossed that it is hardy enough to survive until the temperature and sunshine levels increase later in the year.
Indoor sunshine. Image: Kathryn Hawkins
I’ll see you again at the end of the month when I will be back in the kitchen. Thanks for stopping by 🙂
Hello again. I don’t know about you, but I’m always looking for ways to cut back on the amount of energy I use especially in the kitchen. I have certainly changed the way I cook my everyday meals and only put the oven on if I can fill it.
One of the things I do every now and then is have a big bake up of all the bits and pieces of vegetable I have in the veg rack or fridge and I have taken a few images over the past few months of the combinations I have cooked depending on what I have to hand.
Veg prep for roasting. Images: Kathryn Hawkins
Most vegetables require only simple prep, just peeling and cutting into uniform pieces so that they all bake evenly. The only vegetable I par-cook is turnip (swede) because it is denser than other vegetables. Just a quick cook of 10 minutes in boiling water, then drain and cool before mixing into the other prepared veg.
For best results, choose vegetables that take roughly the same amount of time to cook, or add quicker-cooking vegetables later on once the other have had a bit of a head start.
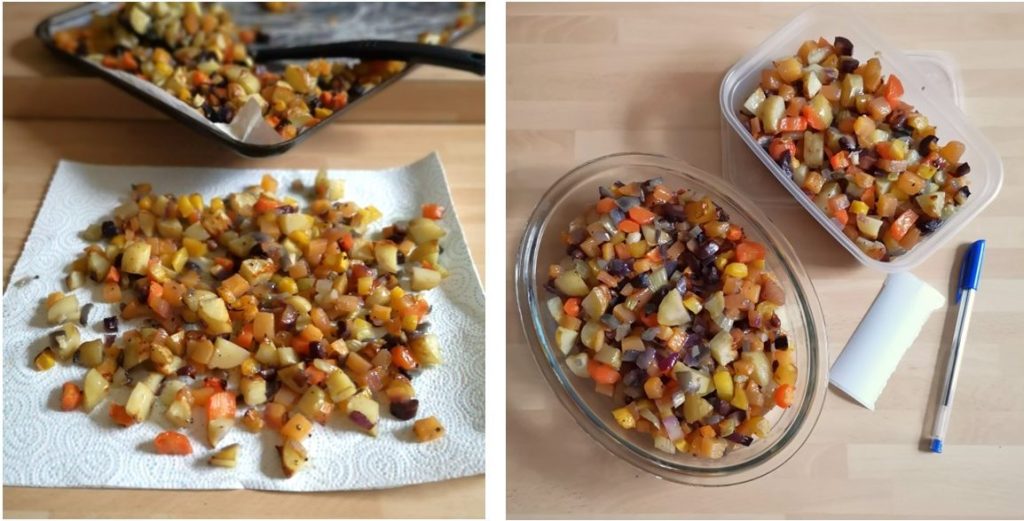
Seasoned diced roots, ready for roasting. Images: Kathryn Hawkins
Use what ever oil you prefer too cook your vegetables with. Toss a generous amount into the prepared veg, season with plenty of salt and ground black pepper and mix well. Add herbs and spices to taste. Spread out evenly on lined baking trays and put the trays in a cold oven – no need to waste energy on preheating the oven for this type of cooking. Set the dial to 200°C, 180°C fan oven, Gas 6. After about 25 minutes, turn the vegetables and cook for a further 15-25 minutes depending on how finely you have chopped them, until they are tender.
Roasted and ready for freezing. Images: Kathryn Hawkins
When they are cooked, drain off the excess oil, blot with kitchen paper and they are ready to serve straightaway. Alternatively, leave them to cool after draining and pack into containers for later use. In the fridge, the cooked vegetables will keep for 3-4 days, or freeze them for up to 6 months. Most vegetables freeze fine and can be added to soups, sauces and stews at a later date (usually I add them still frozen directly to hot stock or sauce and just heat them through).
Tray-roast peppers, onion, celery, garlic and herbs. Images: Kathryn Hawkins
Tray-roast carrots, onion, celery, garlic and herbs. Images: Kathryn Hawkins
Potatoes, mushrooms, garlic and herbs. Images: Kathryn Hawkins
Until next time, have a good rest of the month and I hope that I will see you again in February. Thanks for stopping by 🙂