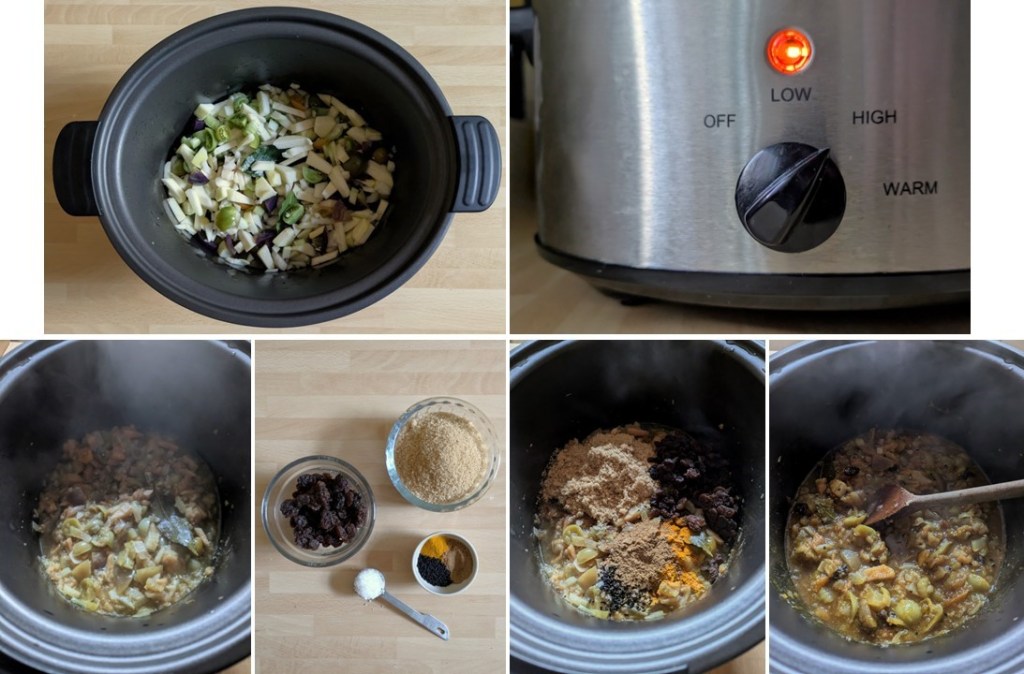
Hello there. Welcome to my latest recipe post. So far this month, it’s been the weather for staying indoors here in central Scotland. I’ve been using my slow cooker a lot and eating lots of comforting food in an endeavour to stay warm – well that’s my excuse anyway 🙂

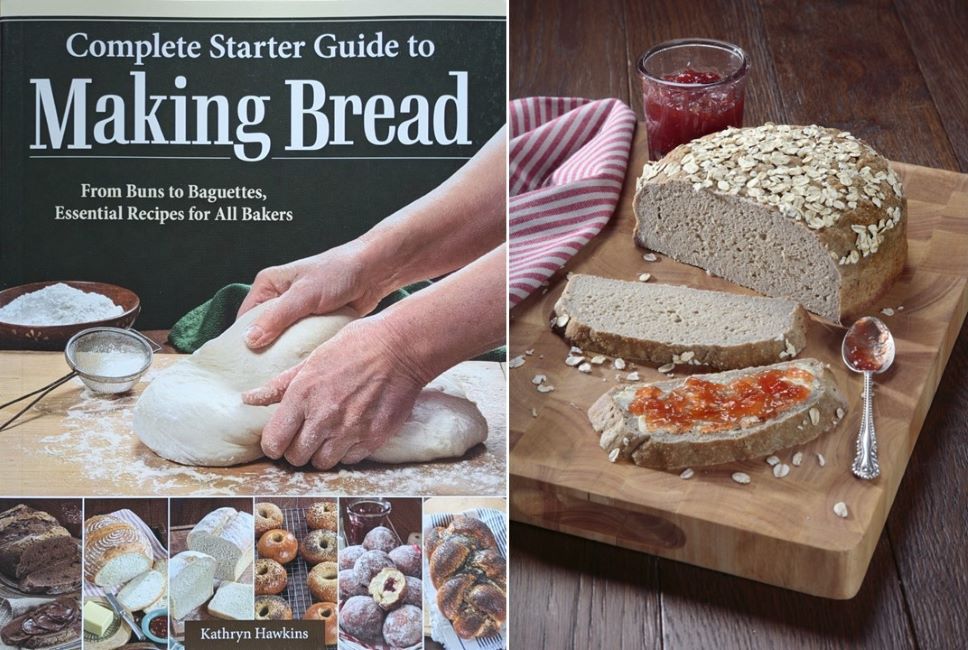
This week has been Real Bread week here in the UK so I thought I’d join the party and make my latest recipe post a bready one. If you’ve been reading my blog for a few months, you’ll know that I had a book on breadmaking published back in November – here’s the link to the post My new book: Complete starter guide to making bread, published by IMM Lifestyle Books 2024. When researching my recipes, I had been experimenting on cooking bread in the slow cooker and created a simple traditional loaf for inclusion. Sadly, I ran out of pages to feature this gluten-free and vegan slow-cooked loaf, so I’m giving it an airing here instead.
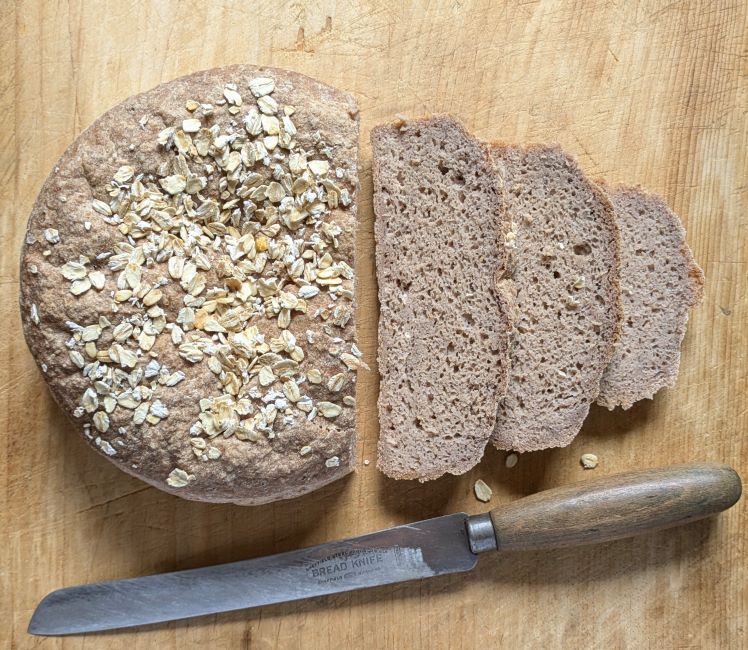
If you’ve never made bread before and are a bit daunted at the prospect, this is a very straightforward loaf to make. As with all gluten-free bread doughs, there is no kneading just a bit of mixing. You can omit the garlic, olives and rosemary to make a plain version if you prefer. I added psyllium husk for some extra texture. This gives the dough a slightly beige tone but adds some chewiness to the crumb. You may want to try making it without for a whiter dough but the texture will be more crumbly.

My slow cooker has a capacity of 5l and the dish is oval shaped – approx. 22 x 18cm. The temperature reached when on the High setting is 120°C. You may need to adapt the quantity of dough to fit your own slow cooker and adjust the cooking time if necessary. Other than that, all the information you need is below. Happy “slow” baking!
Makes: 1 approx. 22 x 18cm oval loaf
Ingredients
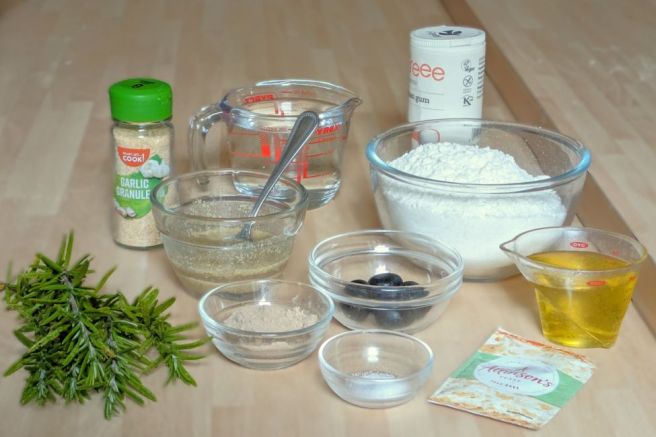
- 1tbsp ground linseeds
- 300g gluten free plain flour
- 7g sachet easy blend dried yeast
- 2tsp xanthan gum
- 15g gluten free psyllium husk powder
- ½tsp salt
- 2tsp finely chopped rosemary leaves
- ½tsp garlic granules
- 25g pitted black olives, chopped
- 80ml good quality olive oil
- Sea salt flakes for sprinkling
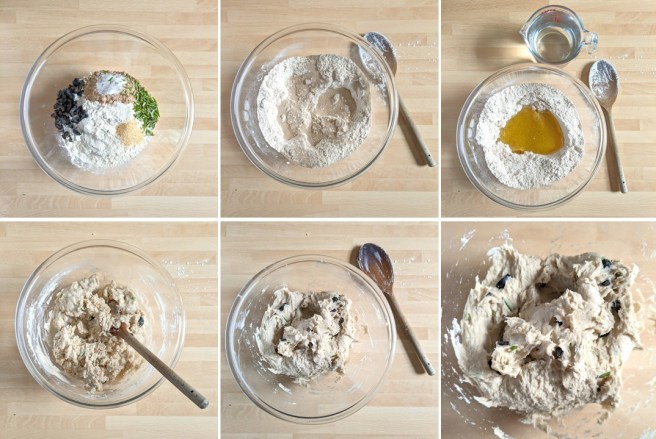
1. Mix the linseeds with 3tbsp cold water and leave for a few minutes to thicken and make a vegan egg.
2. Put the flour in a bowl and mix in the yeast thoroughly, then add the xanthan gum, husk powder, salt, rosemary, garlic and olives and mix well.
3. Make a well in the centre and add 60ml olive oil and the vegan egg. Begin mixing and pouring in 300ml warm water. Continue mixing until you have a thick, sticky batter. Cover the bowl and leave to stand for 10 minutes. In this time the batter will become thicker and less sticky. Give it a thorough mix through.
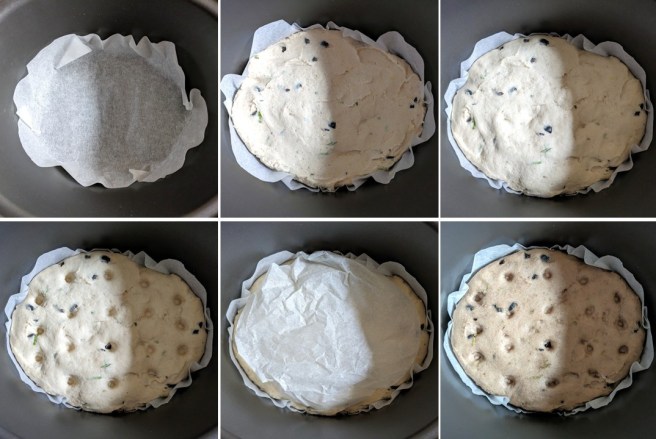
4. Line the base of your slow cooker dish so that the parchment paper comes a little way up the sides of the dish.
5.Scoop the dough on top and press and smooth to fit the dish. Cover with the lid and set the cooker to the Warm setting. Leave to prove for 1½hours until puffed up and spongey in texture. If your cooker doesn’t have a Warm setting, simply cover with the lid and place the whole dish in a cool to warm place to rise.
6. Once the dough is risen, push the end of a wooden spoon into the dough all over to give a dimpled effect. Lay a scrunched up piece of baking parchment loosely on top (this helps prevent the dough getting wet from any water droplets that form inside the lid) and set the cooker to High. Leave to cook for 3 hours until firm on top and crusty round the edge. It can be quit challenging to know when the bread is completely cooked so if in doubt err on the side of caution and cook for a bit longer to avoid a dense texture above the bottom crust. As a rule, the base of the loaf should sound hollow when tapped.
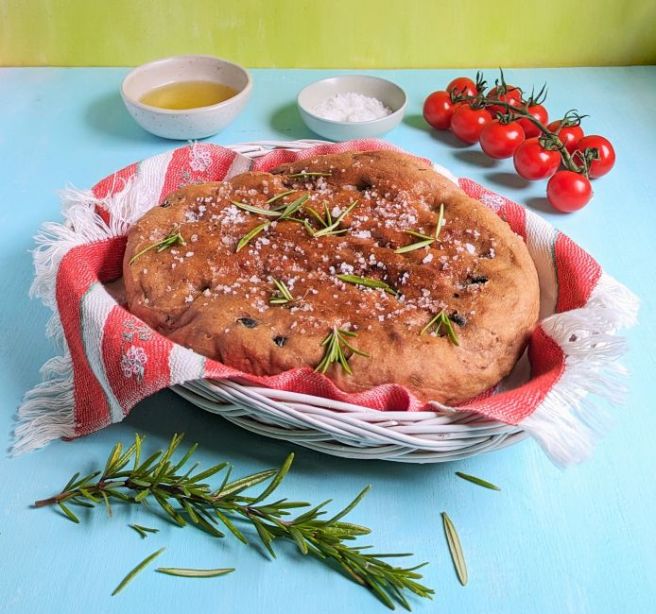
7. Transfer the loaf to a wire rack and discard the lining paper. Brush with remaining olive oil and sprinkle with sea salt. Leave to cool for a few minutes then serve warm. If you prefer a browner top, remove the bread from the slow cooker and place on the grill rack. Cook under a preheated medium/hot grill for 1-2 minutes to brown the top then oil, salt and cool as above.

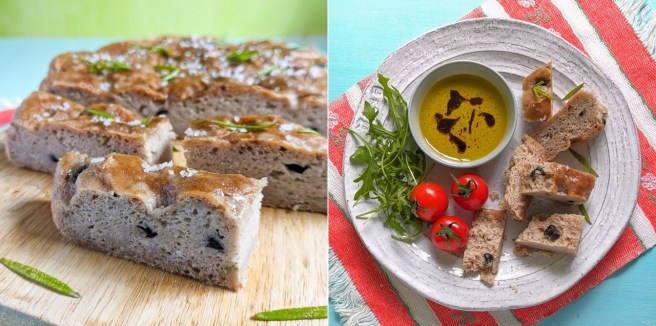
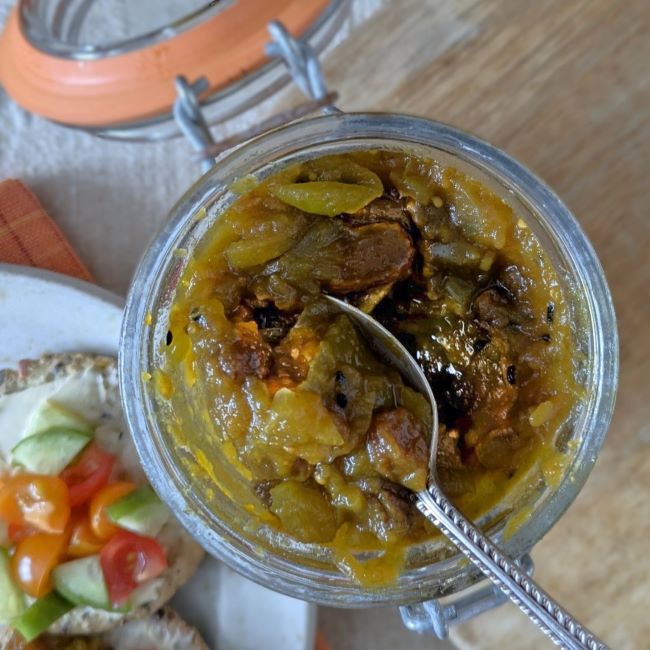
This bread is best served warm. If you want to freeze the loaf, omit the salt from the top, and wrap well. Once defrosted, simply reheat the loaf in a medium oven for a few minutes, and sprinkle with salt before serving.
Thanks for reading my post. I hope to see you again next month 🙂