Welcome to my blog all about the things I love to grow and cook. You'll find a collection of seasonal gluten-free, dairy-free and vegan-friendly recipe posts, as well as a round up of my gardening throughout the year. I wish you good reading, happy cooking and perfect planting!
Hello again. I don’t know about you, but I’m always looking for ways to cut back on the amount of energy I use especially in the kitchen. I have certainly changed the way I cook my everyday meals and only put the oven on if I can fill it.
One of the things I do every now and then is have a big bake up of all the bits and pieces of vegetable I have in the veg rack or fridge and I have taken a few images over the past few months of the combinations I have cooked depending on what I have to hand.
Veg prep for roasting. Images: Kathryn Hawkins
Most vegetables require only simple prep, just peeling and cutting into uniform pieces so that they all bake evenly. The only vegetable I par-cook is turnip (swede) because it is denser than other vegetables. Just a quick cook of 10 minutes in boiling water, then drain and cool before mixing into the other prepared veg.
For best results, choose vegetables that take roughly the same amount of time to cook, or add quicker-cooking vegetables later on once the other have had a bit of a head start.
Seasoned diced roots, ready for roasting. Images: Kathryn Hawkins
Use what ever oil you prefer too cook your vegetables with. Toss a generous amount into the prepared veg, season with plenty of salt and ground black pepper and mix well. Add herbs and spices to taste. Spread out evenly on lined baking trays and put the trays in a cold oven – no need to waste energy on preheating the oven for this type of cooking. Set the dial to 200°C, 180°C fan oven, Gas 6. After about 25 minutes, turn the vegetables and cook for a further 15-25 minutes depending on how finely you have chopped them, until they are tender.
Roasted and ready for freezing. Images: Kathryn Hawkins
When they are cooked, drain off the excess oil, blot with kitchen paper and they are ready to serve straightaway. Alternatively, leave them to cool after draining and pack into containers for later use. In the fridge, the cooked vegetables will keep for 3-4 days, or freeze them for up to 6 months. Most vegetables freeze fine and can be added to soups, sauces and stews at a later date (usually I add them still frozen directly to hot stock or sauce and just heat them through).
Tray-roast peppers, onion, celery, garlic and herbs. Images: Kathryn Hawkins
Tray-roast carrots, onion, celery, garlic and herbs. Images: Kathryn Hawkins
Potatoes, mushrooms, garlic and herbs. Images: Kathryn Hawkins
Until next time, have a good rest of the month and I hope that I will see you again in February. Thanks for stopping by 🙂
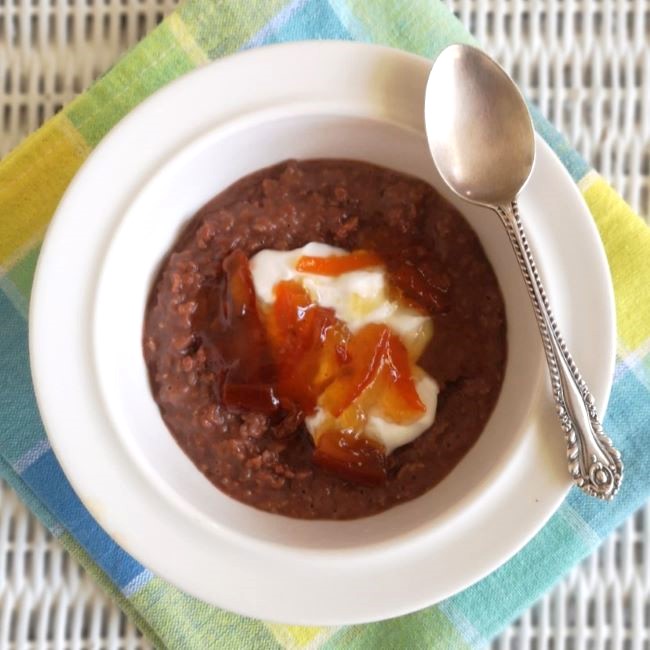
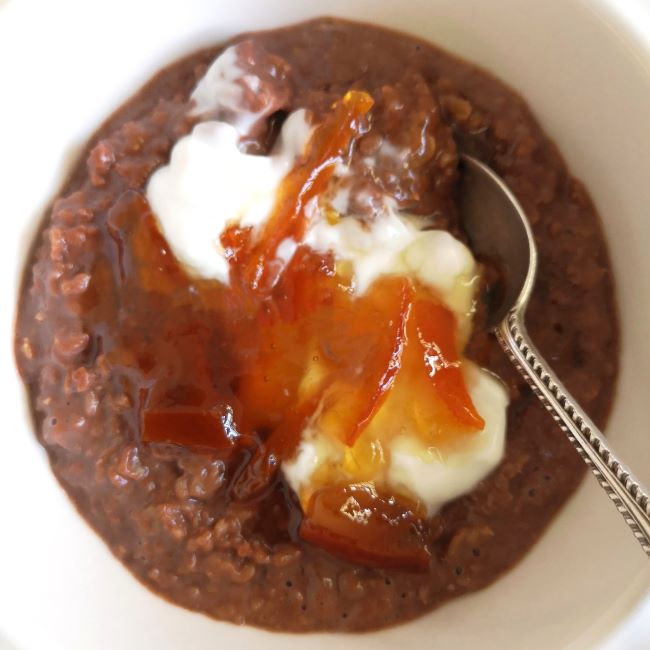
Chocolate and marmalade porridge. Image: Kathryn Hawkins
Happy new year to you! 2024 has begun with chilly, frosty weather here in central Scotland and elsewhere in the UK. But it’s that time of year when the Seville oranges are in the shops, marmalade-making is underway and the sweet smell of citrus wafting round the kitchen makes me think of sunnier climes and warmer days.
Even with the best planning, I always have leftover preserve once I have filled the jam jars I have cleaned and got ready. However, it does mean that I get to taste what I’ve made straight away without feeling guilty about opening a jar of freshly made preserve too soon. I call the surplus “The Cook’s Privilege”, after all the effort, you deserve the first pickings 🙂
Marmalade leftovers for the cook. Images: Kathryn Hawkins
My recipe this week is a simple way to enjoy such spoils for your breakfast the day after your toils. The ingredients below make enough for one portion. I cook my porridge in the microwave, but you can just as easily pop everything in a saucepan and cook it on the stove top.
Chocolate porridge: put 40g gluten-free porridge oats in a large microwave-proof bowl. Sift 1½ teaspoons of cocoa on top and stir in 2 teaspoons maple syrup and a pinch of salt. Mix in 200ml plant-based milk. Cover and microwave on High for 2½ minutes (my microwave is 900W so adjust the cooking time accordingly if necessary). Stir well then cook for a further 1 minute on High. To serve, stir in extra plant milk (or plant cream for extra indulgence) if you prefer a thinner consistency and top with plant-based yogurt and a generous dollop of your leftover marmalade. Delish 🙂
Well the festive season is almost upon us, and it’s time to share a suitably Christmassy recipe with you. I’ve turned to an old favourite as the base for my edible holly garland: shortbread 🙂
Simple enough to make, shortbread is much loved by many and a staple bake at this time of year. I’ve flavoured my shortbread with cocoa powder and iced it with peppermint flavoured icing, which make these cute little nibbles a perfect treat to serve as an after dinner alternative to accompany coffee and liqueurs. If you don’t fancy peppermint, try adding orange or lime zest, or enhance the cocoa flavour by adding some cinnamon or vanilla.
After dinner coffee and nibbles. Images: Kathryn Hawkins
If you are going to display the leaves as a garland you’ll need to bake a good number, so my recipe makes 40, but cut the quantities in half if you just want a few nibbles to serve with coffee. The shortbread leaves can be made a couple of days in advance of serving, but I’d advise not to ice them more than a day before serving as the icing often softens the shortbread.
By the way, I couldn’t find the right shade of green for my biscuits, so I am including instructions for colouring white icing. If you do have ready prepared green icing, all you need do is add some flavour.
Makes: 40
Ingredients
100g lightly salted plant or dairy butter
50g caster sugar
20g cocoa powder
175g gluten-free plain flour blend plus extra for dusting
225g white ready to roll icing
Green food colour gel
Icing sugar to dust
A few drops peppermint extract
75g readymade royal icing or similar white pipeable icing
Red sugar balls or icing to decorate
1. Beat the butter and sugar together until light and creamy. Sift the cocoa powder and flour on top and mix well, then bring everything together with your hands to make a firm dough.
2. Lightly flour the surface and roll out the dough to a thickness of about ½cm. Use a 6cm holly-shaped cutter to stamp out shapes, re-rolling the dough as necessary, to make around 40 leaves.
3. Arrange on lined baking trays, prick the tops with a fork and chill for at least 30 minutes before baking.
4. Preheat the oven to 180°C, 160°C fan oven, gas 4. Bake the shortbread leaves for about 15 minutes until firm to the touch. Leave to cool on the trays.
Just out of the oven. Image: Kathryn Hawkins
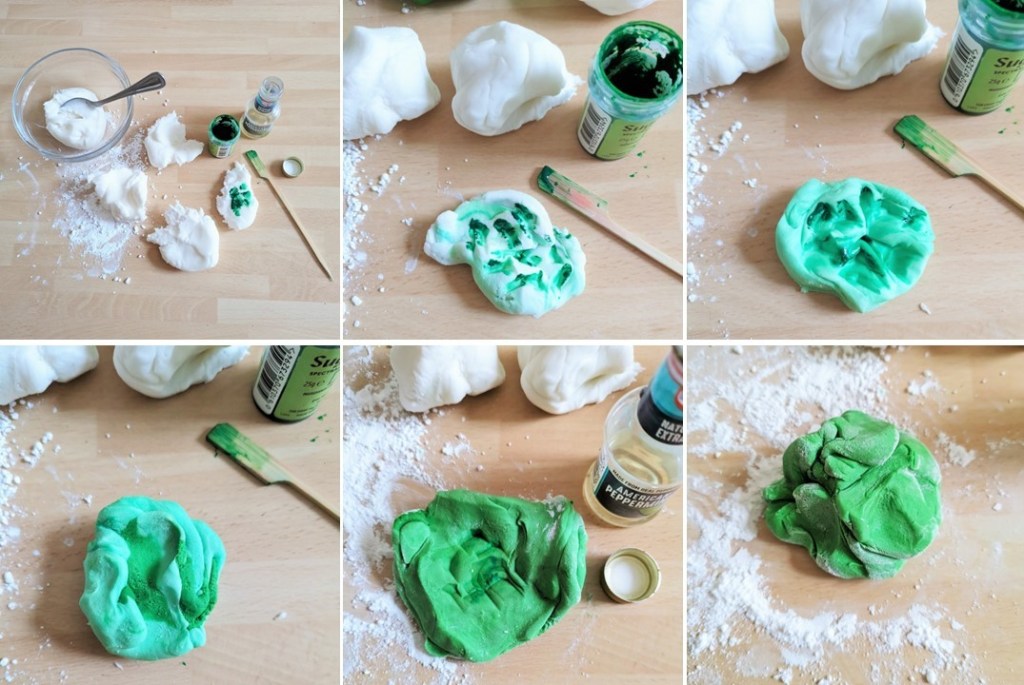
5. For the icing, knead the white ready to roll icing to make it more pliable. Break it into smaller pieces and add a little green colouring to each piece. Work each batch of colouring into the icing before adding a little bit more. When you have a few pieces of the same colour, blend them altogether into one piece. Although this takes a bit of time, it is much easier than trying to colour a big piece of icing in one go. If things get a bit sticky, add a little icing sugar.
6. To add flavouring, flatten the icing and sprinkle with a few drops of peppermint extract, then work into the icing. Repeat until you have the desired amount of flavouring, adding a little icing sugar if the mixture becomes sticky.
Making the icing. Images: Kathryn Hawkins
7. Add some colour and flavour to the royal icing and mix well to achieve an even colour. Now you are ready to decorate.
8. Dust the work surface with a little icing sugar and roll out the green icing thinly. Cut out holly shapes using the same cutter.
9. Spread a little smear of the green royal icing over each biscuit and fit a holly icing shape on top.
10. Spoon the remaining royal icing into a small piping bag fitted with a plain writing nozzle and pipe leaf detail. If piping is not your forte, you can score a leaf pattern on the icing using the blade of a small knife.
11. Pipe a little extra icing at the stalk end of the leaves and attach sugar balls or red icing berries. Leave for at least an hour to set before arranging.
Christmas decorating. Images: Kathryn Hawkins
12. To serve as a garland, choose a large board or flat serving plate and arrange a layer of the shortbread leaves at different angles in a circle, and arrange more shortbreads on top. Add a ribbon bow as a finishing touch just before serving.
This is my last recipe post of 2023. Thank you for stopping by and for all your nice comments over the past 12 months. I hope you have a lovely Christmas and I look forward to posting more throughout the new year ahead. Merry Christmas!
It has turned much colder here since my last post. Frosty mornings and an increasing number of sub-zero nights. Back in late August, I planted a few Arran Pilot seed potatoes in the green house. With the wintry feel in the air and knowing potatoes are not frost-hardy, I decided it was time to dig them up.
Late season greenhouse-grown potatoes. Images: Kathryn Hawkins
The foliage had all but withered away over the month, but under ground a few little potatoes had formed. I was a couple of weeks later planting them than usual and subsequently, the plants hadn’t had time to develop properly before the days got shorter and the temperature lower. No matter, there were enough to make one of my favourite potato dishes, and they tasted just as delicious as the potatoes grown earlier in the year.
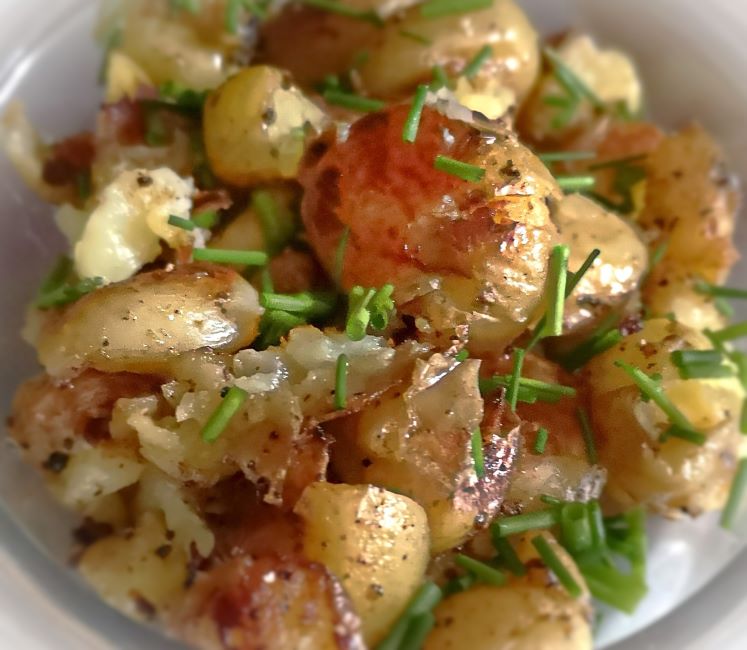
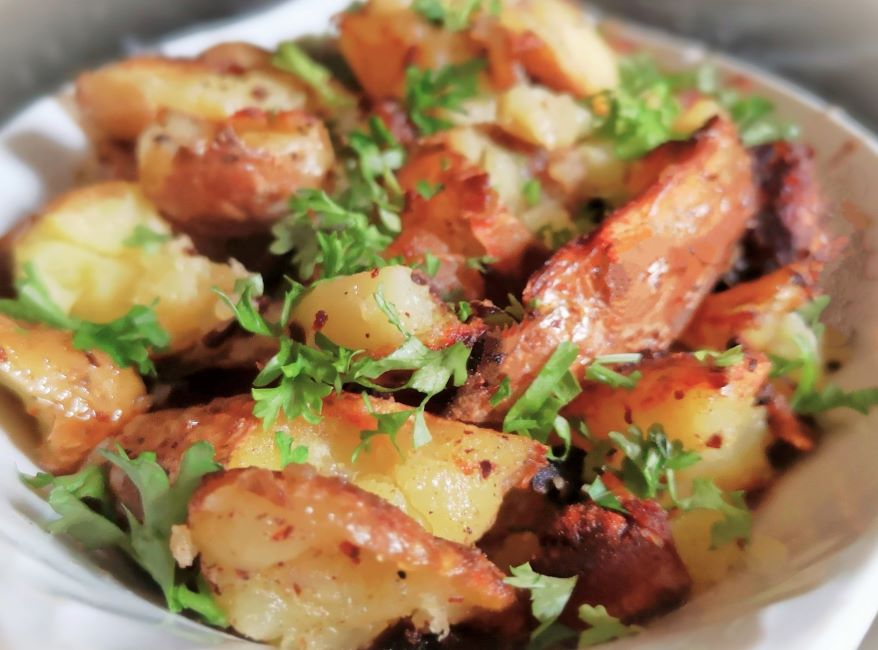
Smashed new potatoes sprinkled with chives. Image: Kathryn Hawkins
I took a few images of the preparation of this potato dish back in the late summer when I had some pink fir potatoes. Choose a waxy or floury textured potato for best results. Scrub the potatoes and boil them in their skins until tender, then drain well and cool for about 10 minutes. Transfer them to a board and squish them with a masher or large fork.
Smashed pink fir potatoes. Images: Kathryn Hawkins
I usually melt butter with some olive oil in a pan and heat until bubbling – either will work on their own, it’s personal taste which you use. Add the potatoes and seasoning and cook over a fairly high heat, turning them until they are crispy. Towards the end of cooking, I add chopped garlic and cook it for a couple of minutes until just cooked through. Serve straight from the pan, sprinkled with chopped parsley or chives.
Smashed pink fir potatoes with garlic and parsley. Image: Kathryn Hawkins
Well there’s just one more post before Christmas – I can’t believe it will all be over by this time next month. Until then, take care and thanks for stopping by 🙂
Hello again. It’s officially the time of year when the slow-cooker is permanently on the work top in my kitchen. With daylight hours becoming fewer and the temperature getting lower and lower, in my mind, “comfort food” is an important aid to get me through the next few months.
Golden quince. Image: Kathryn Hawkins
I’ve been saving these beautiful quince for a few weeks, making sure they are perfectly ripe for maximum flavour and aroma before I cook them. I chose a selection of my favourite aromatics to add to a sugar syrup: rose water, lemon, vanilla and cinnamon, all perfect companions for this fabulous autumn fruit.
Fresh qunice and flavourings. Images: Kathryn Hawkins
This is a very straightforward recipe for the slow-cooker. Once the quince are prepared it’s just a case of making the syrup to pour over. When the cooking is done, I reduced the cooking juices down to make a more intensely flavoured syrup to pour back over the fruit. If you don’t have quince, try using slightly under-ripe pears instead.
Serves: 4-6
Ingredients
750g ripe quince
1 unwaxed lemon
1 cinnamon stick, split
1 vanilla pod, split
50g caster sugar
2tbsp carob or maple syrup
Rosewater to taste
Pistachios and pomegranate seeds to sprinkle
1.Using a vegetable peeler, carefully peel away the outer lemon zest without taking too much white pith. Set aside. Cut the lemon in half and extract the juice. Place in a large bowl along with the squeezed out lemon shells. Top up with cold water.
2.Peel the quince thinly. Cut into quarters and slice out the core. As soon as you prepare each quarter, push it down into the lemony water to help prevent discolouration.
3.When all the fruit is prepared, drain well, discard the lemon shells and place the quince in the slow-cooker dish. Add the reserved lemon zest, cinnamon and vanilla.
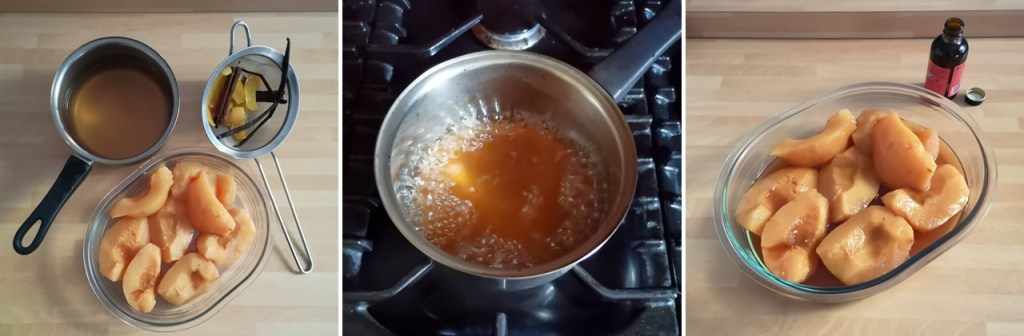
4.Put the sugar in a saucepan with 400ml water. Heat gently to dissolve, then bring to the boil and cook for 5 minutes. Pour over the fruit, place the lid on top and cook on High for 2 hours, turning the fruit halfway through, until tender.
5. Turn off the power and leave to cool for 2 hours before draining the fruit and straining the cooking liquid into a saucepan. Put the fruit in a heat proof dish and cover with foil.
6. Add the maple or carob syrup to the cooking juices, bring to the boil and simmer for 7-8 minutes until syrupy. Cool for 10 minutes. Add a few drops of rosewater to taste then pour over the fruit and leave to cool completely.
Making the syrup. Images: Kathryn Hawkins
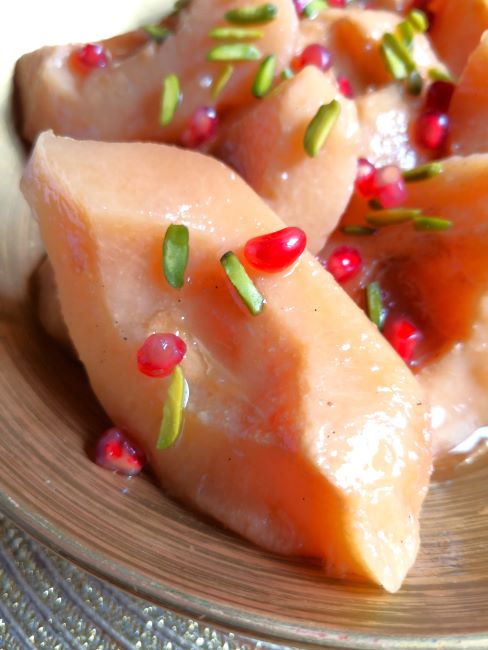
7. Cover and chill until ready to eat. Serve at room temperature for maximum flavour. Sprinkle with pistachios and pomegranate seeds for crunch. The quince freezes well in the syrup for later enjoyment.
Hello again. I have something tasty and sweet for you this week. With the weather cooling down here, I have felt more like being in a cosy kitchen rather than the great outdoors. These cookies are an absolute winner if you like a crunchy textured bake. If you can leave them alone long enough, they retain their crispness perfectly when stored in an air-tight container.
Too tempting to ignore, crunchy homemade cookies. Image: Kathryn Hawkins
I made up the dough using my own blend of gluten-free favourite flours but a readymade combination will work just as well. Whether you add fruit or not is up to you – I have just made a batch without fruit, and added some caramel flavouring instead; there aren’t that many left is all I’ll say! Use small pieces of fruit for best results, like currants or dried berries. If you only have larger dried fruit, like apricots or raisins, chop into small pieces before using. This is a really easy recipe so I hope you might give it a go.
Crunchelicious cookies. Image: Kathryn Hawkins
Makes: 12
Ingredients
105g plain gluten-free flour blend (I used a combination of white rice flour, tapioca flour and cornflour (cornstarch))
90g gluten-free porridge oats
40g desiccated coconut
¾teasp bicarbonate of soda
115g soft light brown sugar
90g plant butter, softened and cut into small pieces
50-75g small dried fruit (depending on how fruity you want them to be)
25g golden syrup (corn syrup)
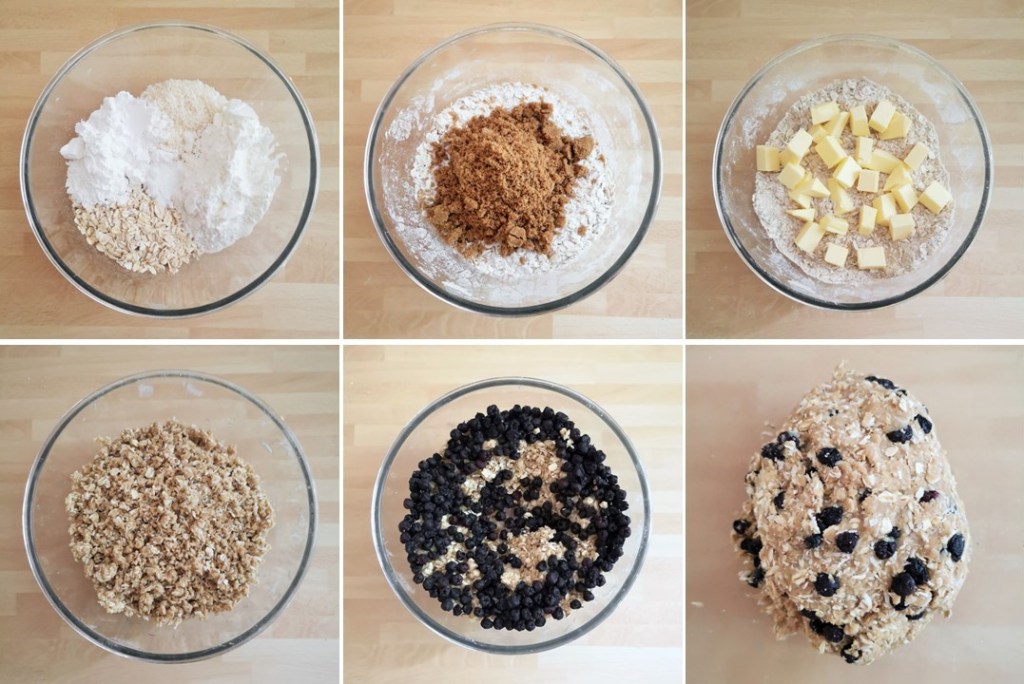
1.Preheat the oven to 190°C, 170°C fan oven, gas 5. Line 2 large baking tray with baking parchment. Put the flour in a bowl and mix in the oats, coconut and bicarbonate of soda. Stir in the sugar.
2. Add the butter and work into the dry ingredients until well blended, the stir in the fruit and bind together with the syrup, bringing the mixture together with your hands to make a firm dough.
Making cookie dough. Images: Kathryn Hawkins
3. Divide the dough into 12 pieces. Form each into a ball and place on the trays spaced well apart – the mixture does spread during baking.
4. Press each piece of dough gently to make a 6cm round, then bake for about 20 minutes until golden. Leave to cool on the tray for 10 minutes before transferring to a wire rack to cool completely.
Freshly made tomato confit. Image: Kathryn Hawkins
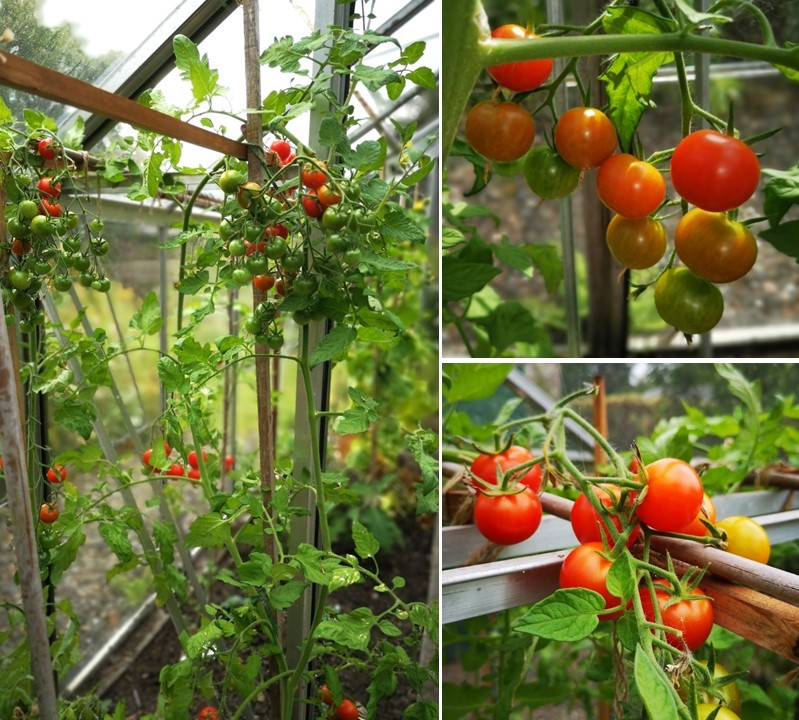
Hello again. I hope you have had a good few days since my last post. After lousy weather here in the UK in August, September started with a mini heatwave. The high temperatures have come to an end now but the extra heat and sunshine certainly helped ripen off the fruit and vegetables. It’s been a bumper year for tomatoes, and I’ve been exploring new ways to serve and preserve them.
My recipe this week is a very simple one. It’s an easy and energy-efficient way to cook small tomatoes. All you need is a slow-cooker and an amount of small tomatoes to fit neatly in a single layer over the base of the cooking dish. You can adapt the quantities you cook to fit the size of your cooker.
Confit ingredients. Images: Kathryn Hawkins
I have kept the flavours simple, using fresh herbs from the garden, some garlic and a few coriander seeds. Add chilli for some heat, or experiment with your favourite spices. The confit can be served on its own as a sauce for pasta or blitzed and used as a base sauce for other dishes. If you want to keep it for a few days, place in a sealed container, covering the tomatoes with extra oil as necessary, and store it in the fridge. For longer storage, it freezes fine.
Tomato confit, fresh basil and black pepper. Images: Kathryn Hawkins
This really is a great way to enjoy the flavour of freshly picked sweet baby tomatoes with the minimum of effort. I hope you enjoy the recipe 🙂
Serves: 4-6
Ingredients
650g whole, same size, small or cherry tomatoes – or a weight that fits neatly in a single layer inside the base of your slow-cooker dish
A few sprigs of fresh thyme and oregano
1 bay leaf
1tsp coriander seeds, crushed
3 garlic cloves, peeled
1tsp sea salt
Freshly ground black pepper
2tsp caster sugar (optional)
100ml good quality olive oil + extra for storing
1. Remove the stalks from the tomatoes and wash well. Pat dry using kitchen paper and place in a single layer in the slow-cooker dish.
2. Add the remaining ingredients, cover with the lid and set the cooker to Low. Cook for 4hrs or until the tomatoes are soft but still holding shape. Leave to cool completely.
Preparing the confit. Images: Kathryn Hawkins
3. For storing, discard the herbs and ladle into a clean, sealable storage container – I used a 750ml Kilner jar. Add more oil as necessary to cover the tomatoes, then seal and store for up to 10 days in the fridge. Alternatively, portion into containers and freeze. The oil can be drained off before serving and re-used to cook with or flavour salad dressings.
Filling a storage jar with tomato confit. Images: Kathryn Hawkins
That’s me for another week. I have just picked another haul of tomatoes after coming back home after a few days away. I’ll have to get creating again. Until next time, thanks for stopping by 🙂
My back-from-holiday tomato haul. Image: Kathryn Hawkins
Hello again. It’s been a busy couple of weeks since my last post. The season is subtly shifting from late summer to early autumn. There is a bit of a nip in the air first thing in the morning and some of the leaves on the trees are beginning to turn. Out and about, the hedges are full of ripening fruit, and I have been out foraging a couple of times this month. Two weeks ago I went on a recce for brambles (blackberries), and was happily surprised to see that so many were ripe and ready. Thank goodness I went prepared with a large container (just in case), and came home with 2.7kg of the glistening berries which I have now frozen 🙂
Scottish brambles. Images: Kathryn Hawkins
Whilst on my walk, I had noticed that there were also sloes and elderberries, although not quite ripe. I gave it a week and went back. The birds had eaten a few elderberries, and I think another forager had found the sloes, but I still managed a container-full as well as a few more brambles.
Blackberries, dewberries, sloes and elderberries. Images: Kathryn Hawkins
Always wash wild fruit well before using. Brambles and sloes need little preparation, but elderberries can be a little fiddly to remove from their fine stems. I find a fork is quite useful to help prise them away.
Freshly washed and prepared wild fruit. Images: Kathryn Hawkins
All of these hedgerow fruits will freeze fine in case you are unable to use them immediately. Lay them out on lined trays and freeze until solid, then pack them into bags or containers, seal, label and store until ready to cook.
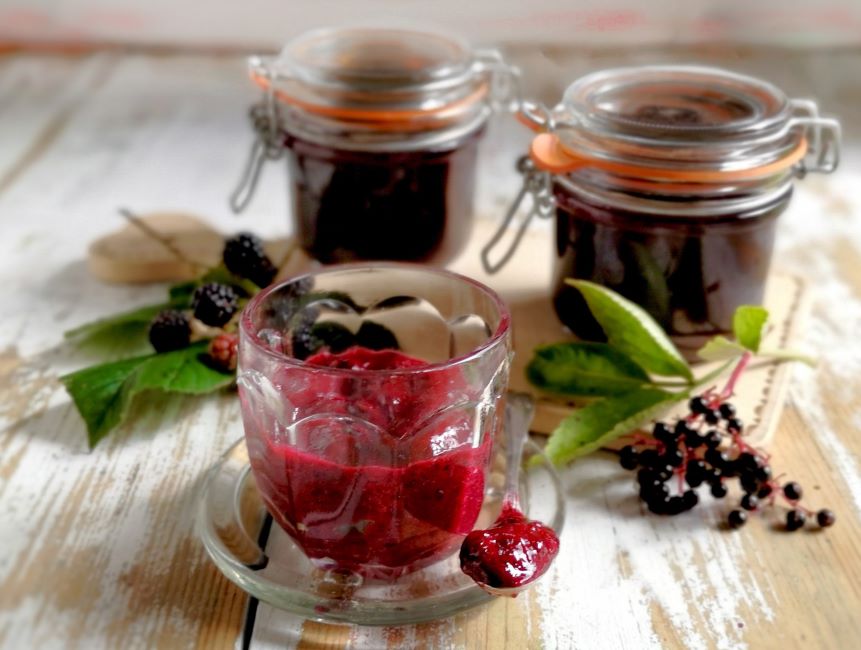
My hedgerow harvest preserve. Image: Kathryn Hawkins
My preserve recipe can be adapted to use any combination and quantity of wild berries you have picked. Sloes have a bitter/sour flavour whilst brambles and elderberries are sweeter and juicier. I ended up with about 700g prepared fruits in total, 200g of which were sloes, and this gave a good balance of sharp and sweet, with a deliciously rich and intense flavour overall.
Packed full of flavour and colour. Image: Kathryn Hawkins
The yield of preserve in this recipe is slightly lower than for other jams because I removed the seeds. Brambles do tend to be very seedy, and sloes are impossible to pit before cooking, so sieving (or straining) seemed like the logical thing to do. Alternatively, you could make a jelly by straining the cooked fruit through muslin. This would result in an equally delicious preserve, but with a much smaller yield. I’ll probably make a jelly with some of my freezer brambles later in the year and mix them with some apples from the tree in the garden. Delish.
Makes: approx. 700g
Ingredients
700g prepared hedgerow berries and fruit, washed
Approx. 400g granulated sugar
2tbsp lemon juice
1. First cook the sloes. Place in a saucepan with 250ml water. Bring to the boil, cover and simmer for 6-7 minutes until softened.
2. Stir in the berries, bring back to the boil, re-cover and cook gently for 10 minutes until everything is very soft and juicy.
Cooking the fruit. Images: Kathryn Hawkins
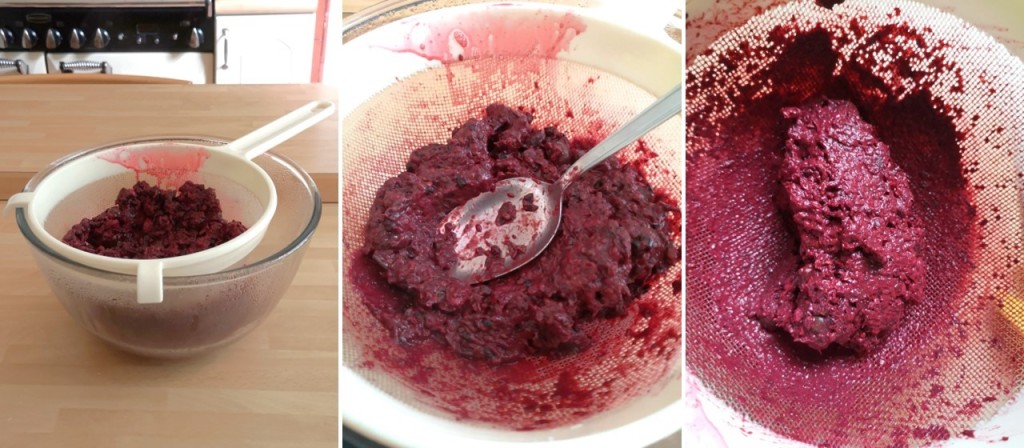
3. Put a large nylon sieve (strainer) over a large bowl or jug and carefully pour in the cooked fruit and juices. Leave to strain for 30 minutes then use the back of a spoon to push and press the pulp against the side of the sieve to squeeze out as much juice as possible. Do this until you end up with a dryish pulpy mass of seeds and fibres in the sieve. Discard.
Getting rid of the seeds. Images: Kathryn Hawkins
4. Measure the juices – I ended up with 500ml. You will need 400g sugar per 500ml juice. Pour into a saucepan and heat gently to warm through, then add the sugar and lemon juice. Stir until dissolved.
Cooking the pulp. Images: Kathryn Hawkins
5. Bring to the boil and cook for several minutes until the correct level of set is achieved – between 104°C and 105.5°C on a sugar thermometer. I cooked my preserve to the higher temperature and ended up with a very firm set – almost like a fruit cheese. For something more spreadable, cook to the lower temperature.
6. Spoon the hot mixture into sterilised jars and seal immediately. Leave until cold then label and store in the usual way.
For the storecupboard. Image: Kathryn Hawkins
Because I achieved such a firm set, I melted the leftover preserve with a little more water and when it cooled, it was much more spreadable. It made a delicious topping for toasted crumpets. This preserve also makes an excellent accompaniment to serve with grilled, roasted and barbecued food.
Tangy, tasty and freshly made, hedgerow preserve. Images: Kathryn Hawkins
Until next time, I hope you have a good few days, and I look forward to posting again in a couple of weeks. Thanks for stopping by 🙂
Freshly baked scone round ready to serve. Image: Kathryn Hawkins
Hello there. I hope the month of August is going well for you. I have a simple recipe for you this week, although it is one that has been challenging me for a while. I do like a nice scone but my attempts to make a gluten-free version of this very familiar and much-loved favourite have been disappointing up until now.
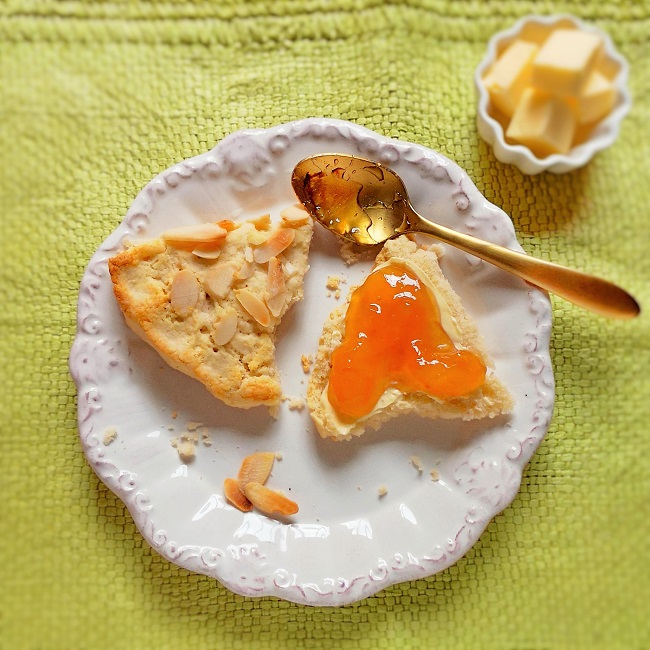
A simple pleasure: scone, butter and jam. Image: Kathryn Hawkins
The recipe below is my best attempt yet and worth a share I think. Adding ground almonds to the mixture helps make the texture more moist, and adding a pinch of xanthan gum helps bind the crumb together. I think I have added too much XG in the past which has made the scones quite hard and dry. I’m not a huge fan of adding XG to my bakes but without it, the mixture falls apart completely. Here’s the recipe and I hope you enjoy them.
Makes 1 round; serves: 6
Ingredients
150g gluten-free self raising flour
50g ground almonds
¾tsp gluten-free baking powder
⅛tsp or a large pinch xanthan gum
50g salted plant-based butter
1tbsp caster sugar
A few drops natural almond extract (optional)
Approx.75ml plant-based milk
15g flaked almonds
1. Preheat the oven to 220°C, 200°C fan oven, gas 7. Sift the flour into a bowl. Add the ground almonds, baking powder and xanthan gum. Mix well.
2. Rub in the butter until well blended and stir in the sugar. Add a few drops of almond extract, if liked, and gradually mix in between 50 and 60ml milk to make a softish dough.
3. Turn on to a lightly floured work surface and knead lightly until smooth. Roll or press into a 15cm round, neaten the edge and score into 6 equal portions.
Making and shaping scone dough. Images: Kathryn Hawkins
4. Transfer to a non-stick baking tray and brush the top lightly with the remaining milk. Scatter with the almonds and bake for 15-20 minutes until risen and lightly golden.
5. Stand for 10 minutes then re-cut the indents and transfer to a wire rack. Cool for about an hour before pulling apart to serve. Best served slightly warm.
Glazing and baking. Images: Kathryn Hawkins
Delicious spread with soft butter and topped with homemade jam. Best eaten on the day of baking but scones freeze well for enjoying later on.
Jammy scone. Image: Kathryn Hawkins
Thanks for stopping by and I hope to see you again soon. All the best for now 🙂
Chilled rhubarb and rice risotto decorated with edible flowers. Image: Kathryn Hawkins
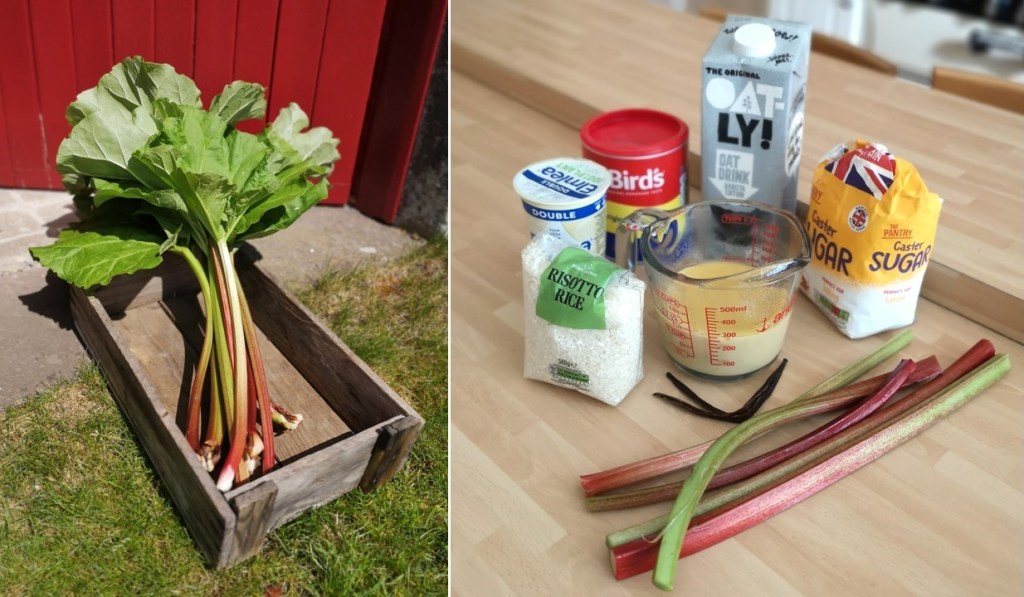
Hello again. The garden fruit and veg supply is beginning to mount up. This week I picked some more rhubarb stems and made them into a compote to eat with a creamy rice dessert. At this time of year, I prefer to serve this combo cold, but in Autumn/Winter, the same rice mix makes a comforting winter pudding to serve with any fresh or cooked fruit you like.
Freshly pulled rhubarb and sweet risotto ingredients. Images: Kathryn Hawkins
It’s a simple enough recipe for the rice mixture, but it takes a little bit of time to cook through, so allow plenty of time to make it. It’s well worth the wait 🙂 I flavour my rice with vanilla but cinnamon or ginger would also work. And, of course, if you’re not vegan, the recipe works just as well with dairy products.
Creamy, sweet risotto, chilled and ready to serve. Image: Kathryn Hawkins
Serves: 4
Ingredients
275g prepared fresh rhubarb
50g caster sugar
500ml plant-based milk (I use oat milk)
100ml plant-based double cream (for a less rich version, replace the cream with extra milk)
1 vanilla pod, split
15g plant-based butter
150g risotto (arborio) rice
250ml free-from custard
1. Chop the rhubarb into lengths about 4cm long and place in a pan. Add 2tbsp water, sprinkle with 25g sugar and heat until steaming. Cover with a lid and cook gently for 6-8 minutes until tender but still holding shape. Leave to cool.
Cooking the rhubarb. Images: Kathryn Hawkins
2. For the risotto, put the milk and cream in a saucepan with the vanilla pod and heat until very hot. Reduce the heat to low and keep the mixture hot.
3. In another saucepan, melt the butter. Add the rice and mix well until coated in the butter. Add a ladleful of the hot creamy milk and stir until thoroughly absorbed.
4. Keep adding the creamy milk, ladle by ladle, stirring in between, until each batch is absorbed, and the rice is just tender – this may take anywhere between 30 to 50 minutes depending on how quickly the rice absorbs the liquid. Don’t be tempted to raise the heat too much as the liquid may evaporate before being absorbed.
How to make sweet and creamy vegan risotto. Images: Kathryn Hawkins
5. Once the rice is tender, thick and creamy, transfer to a heatproof bowl and stir in the sugar. Cover with a layer of greaseproof paper to prevent a skin forming and leave to cool completely, then mix in the custard.
6. To assemble, divide the rhubarb between 4 x 225g dessert glasses and spoon the rice mixture on top. Chill until ready to serve.
Completing the dish. Images: Kathryn Hawkins
Let the desserts stand at room temperature for 20 to 30 minutes before serving to allow the flavours to develop. Decorate with edible flowers if liked.
Creamy vanilla rice and fresh rhubarb compote. Image: Kathryn Hawkins
Thanks for stopping by. That’s me for this week. I hope to see you again soon 🙂