Welcome to my blog all about the things I love to grow and cook. You'll find a collection of seasonal gluten-free, dairy-free and vegan-friendly recipe posts, as well as a round up of my gardening throughout the year. I wish you good reading, happy cooking and perfect planting!
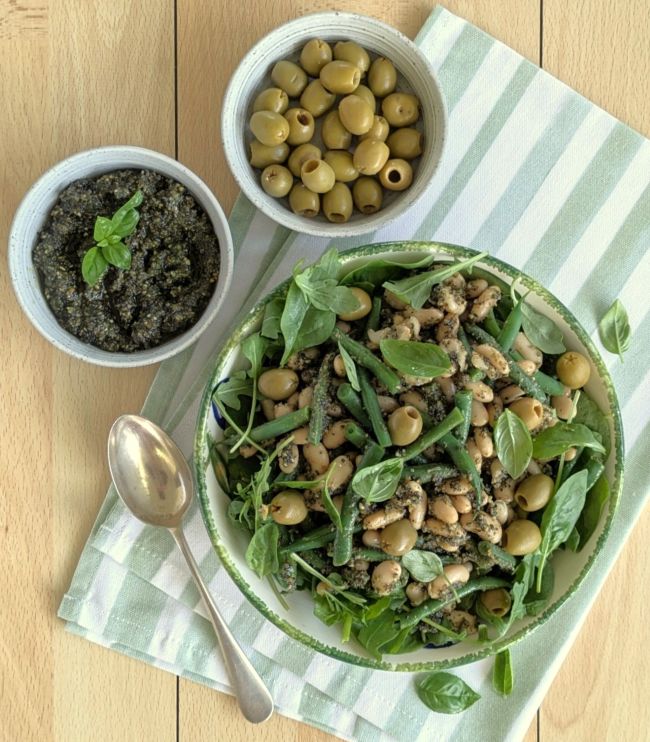
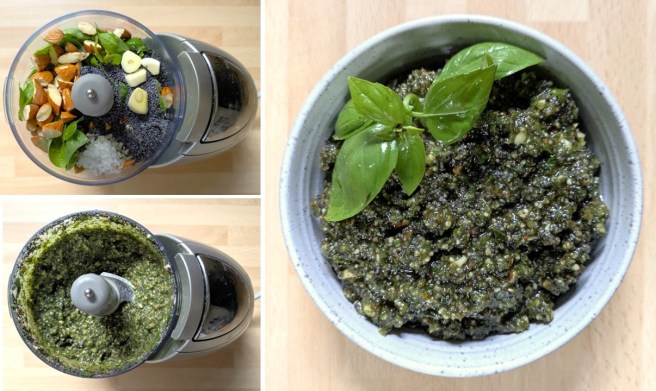
Bean salad flavoured with almond and poppy seed pesto. Image: Kathryn Hawkins
Hello there. I hope you are enjoying some good weather this season. It’s been very hot here in the UK again, and so salads are very much still on my daily menu. To follow on from my post last month which you can read here , I have another recipe which can help towards increasing your calcium levels if you are on a gluten-free, dairy-free and/or vegan diet.
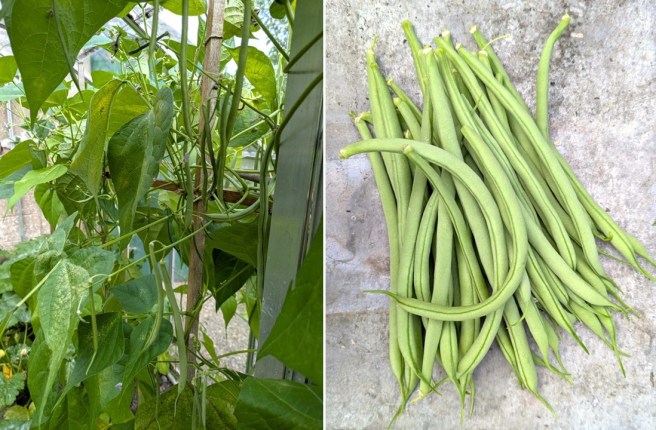
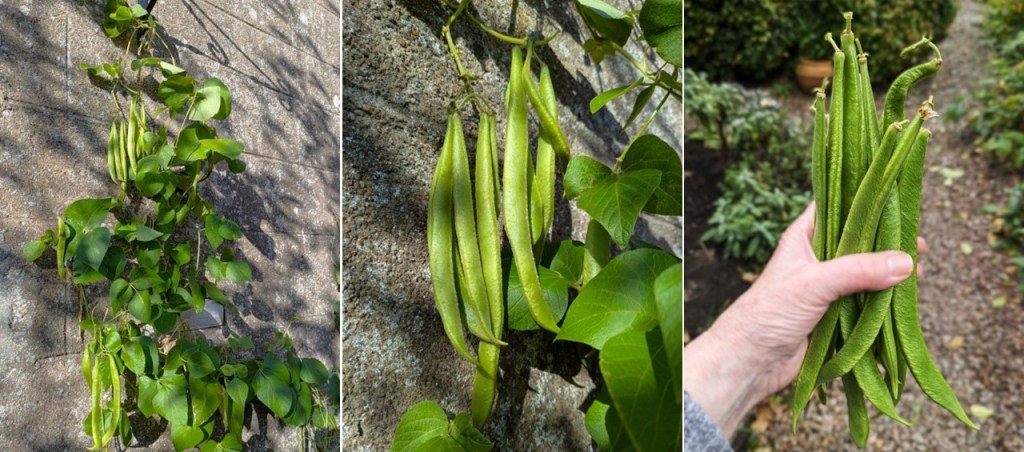
Gorgeous greenhouse green beans. Images: Kathryn Hawkins
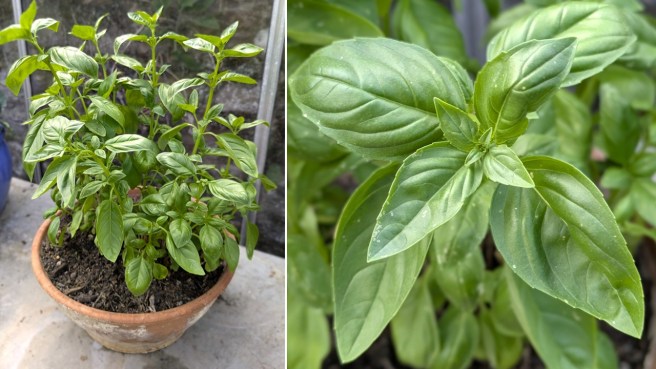
Summery greenhouse basil. Images: Kathryn Hawkins
It’s been a bumper season for the green (French) beans (Cobra variety) in my greenhouse. The vines have been producing an abundance of beans for several weeks now, and the basil plant loves all the heat and sunshine as well. To my delight, I discovered that both green beans and basil offer useful amounts of calcium, and that’s how my recipe this month began.
Combined with some other calcium-rich ingredients, this tasty salad is delicious on its own or as a side dish. The table below gives you a breakdown of which ingredients contain the most calcium so that you can make up your own combinations.
Rocket
216mg calcium/100g
Baby spinach
119mg calcium/100g
Cooked cannellini beans
93mg calcium/100g
Cooked green beans
61mg calcium/100g
Green olives
61mg calcium/100g
Fresh basil
250mg calcium/100g
Whole almonds
269mg calcium/100g
Poppy seeds
1580mg calcium/100g
Garlic
19mg calcium/100g
Source: McCance and Widdowson’s The Composition of Foods
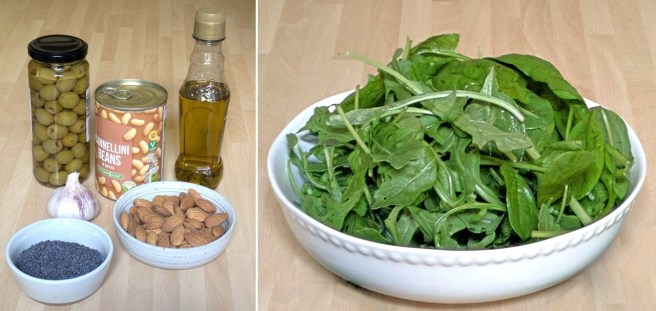
For the pesto, put 20g fresh basil in a food processor with a peeled garlic clove and add 50g roughly chopped whole almonds, 20g poppy seeds and some salt. Pour over 60ml extra virgin olive oil and blitz until smooth.
Making almond and poppy seed pesto. Images: Kathryn Hawkins
For the salad, I combined 240g canned cannellini beans with 100g chopped cooked green beans and half the pesto sauce above. I lined a salad bowl with 40g wild rocket and 20g baby spinach and piled the bean mixture on top. Serve with 100g pitted green olives and extra basil leaves, with the remaining pesto on the side.
Assembling the salad. Images: Kathryn Hawkins
The salad serves 4, and each portion will provide 238mg calcium and 330 calories.
That’s me for another month. Hope to see you again soon. Thanks for stopping by 🙂
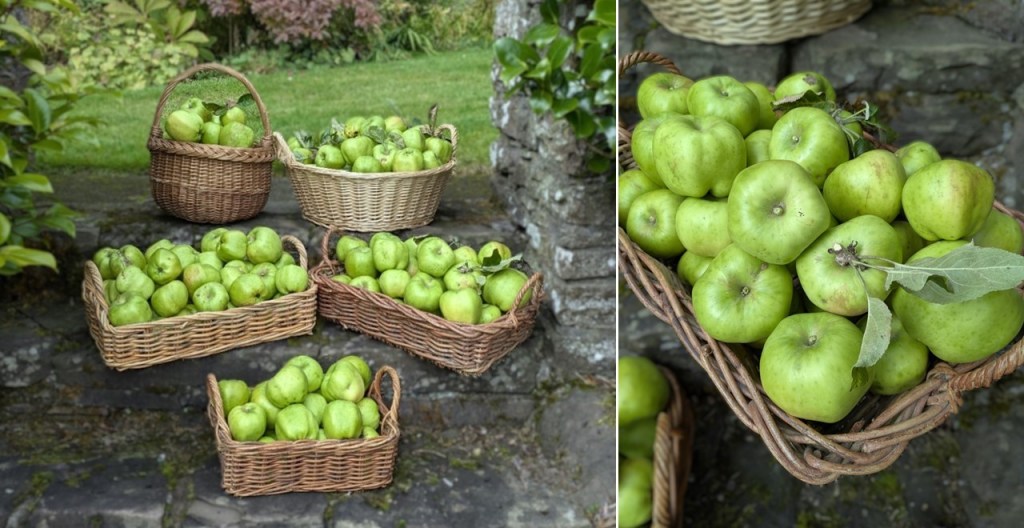
Another bumper year from the old apple tree. Images: Kathryn Hawkins
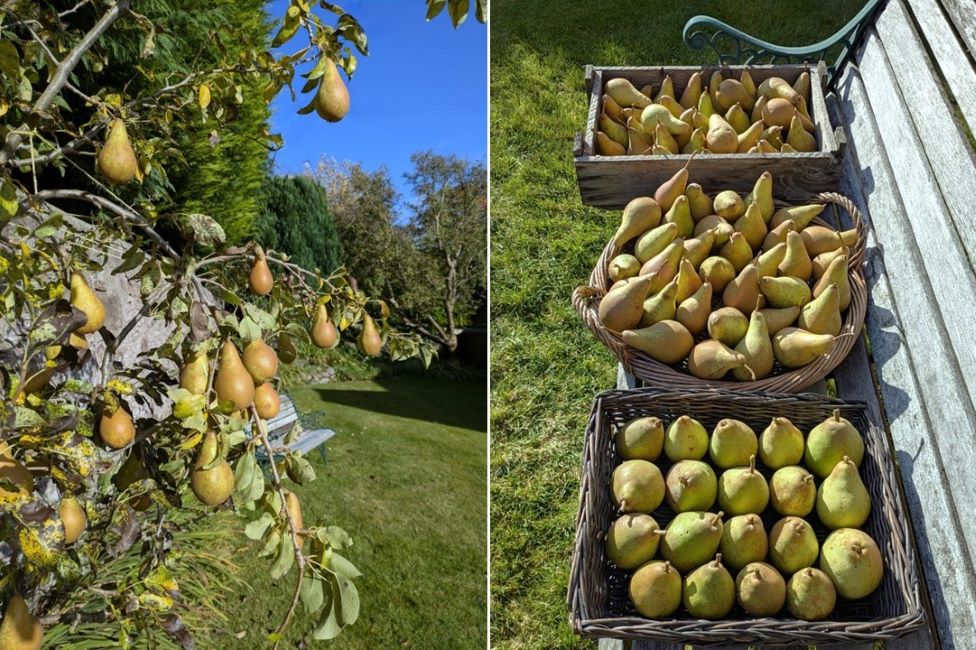
Hello again. Well, that’s just about everything edible in from the garden for another year. It was a fine bright day yesterday, perfect weather for apple and pear picking. What a bumper harvest this year: 35kg apples and 10kg pears – woo hoo!
This year’s Concorde and Comice pear harvest. Images: Kathryn Hawkins
I’m glad to report on the back of last month’s post, there have been runner beans to enjoy at last. I picked off the last of them yesterday and took the plants down. As I type, the weather has become very stormy and I am pretty sure that the beans wouldn’t have survived a pounding from gale force winds.
Runner beans at last! Images: Kathryn Hawkins
In the greenhouse, some plants are shutting down like the French beans, cucumber and tomatoes. There are a few tomatoes left on the vines to ripen, but I was pleased with this basket full. The baby sweetcorn I planted (almost too) late is also about ready to pick.
Last of the runner beans. Image: Kathryn Hawkins
The sweetcorn fairies are coming. Image: Kathryn Hawkins
Looking forward to next spring, the potted mimosa plant is doing well in the greenhouse and has set lots of flower buds. Now all I need to do is keep it from the harm of a potentially very cold Scottish winter.
A hint of spring. Mimosa flower buds. Images: Kathryn Hawkins
Outside the garden is alive with beautiful colours of the Japanese maple and Autumn crocuses.
Glorious Autumnal shades. Images: Kathryn Hawkins
Sunny Autumn crocus. Images: Kathryn Hawkins
The deliciously scented pink rose is out flowering again. Such a heady aroma when you catch the scent in the air.
In the pink in October. Images: Kathryn Hawkins
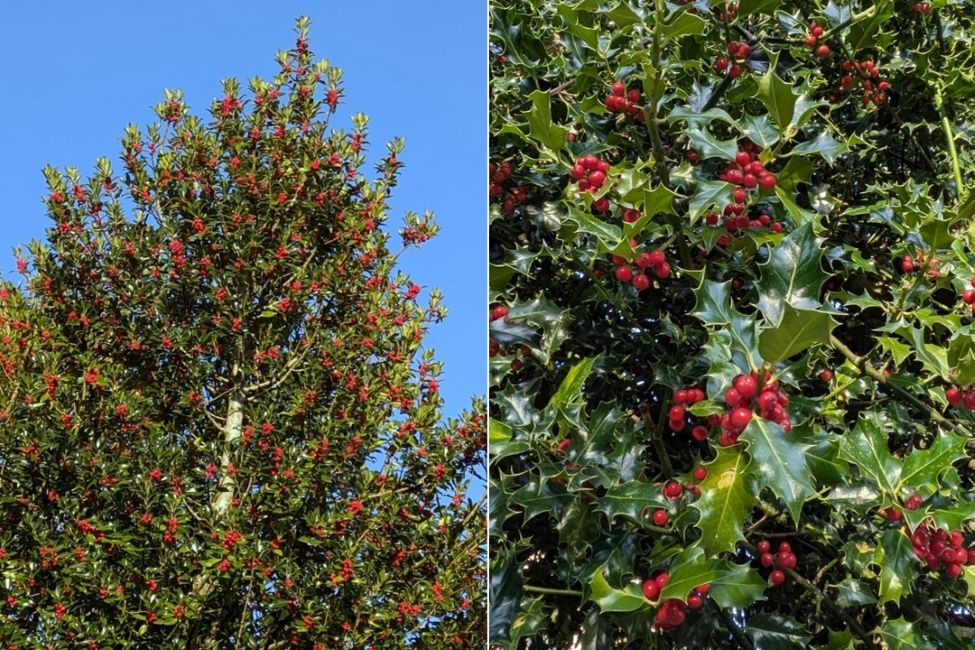
I’ll end my post with a nod to the next season. I’ve been working on Christmas projects for a few weeks already but in the garden the holly trees are bursting with berries this year. Some would say that this means we’re in for a cold winter, but I’d prefer to believe that it simply means that this year has given the trees just the right growing conditions to produce a huge amount of fruit. We’ll see…..fingers crossed I’m right.
Bursting with berries. Images: Kathryn Hawkins
I’ll be back recipe posting in a few days, something suitably spooky for Hallowe’en. Until then, thanks for stopping by.
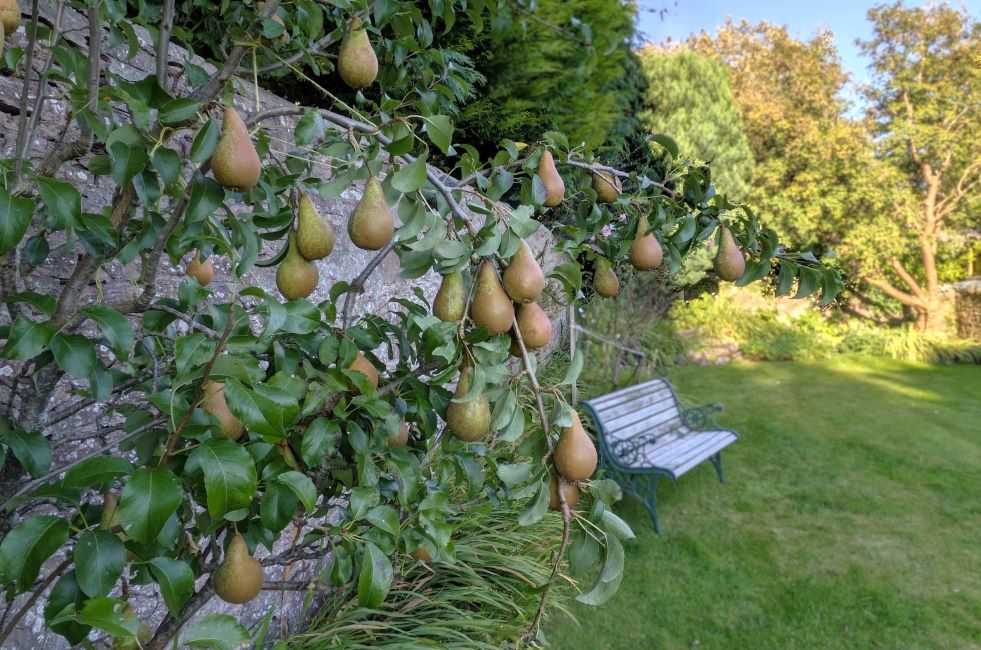
End of September and the pears are almost ready for harvest. Image: Kathryn Hawkins
Hello there. It’s nearly the beginning of a new month, and Autumn will soon be in full swing. September has been a pretty dry month here in central Scotland, unlike other parts of the UK. So dry in fact that the water butt is almost empty which is almost unheard of at this time of year. But no doubt Mother Nature will make up for it next month and you’ll be reading about it in my next garden post!
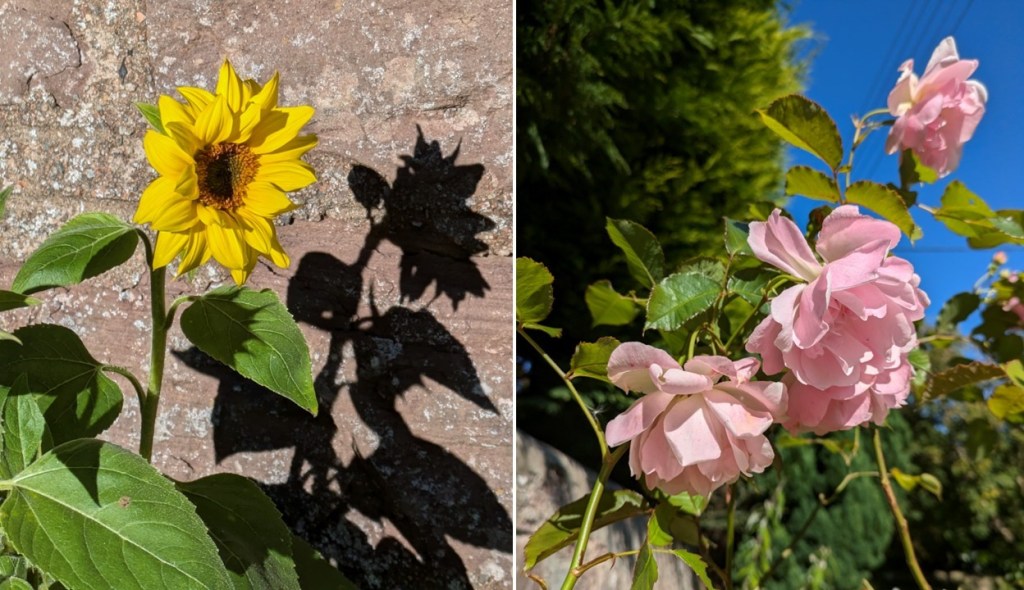
The day and night temperatures have lowered as the month has gone on. A few days ago, it was gloriously sunny and warm, and the sunflowers and rose opened up in response.
Sunshiny flowers. Images: Kathryn Hawkins
In the greenhouse, the Cobra French beans are still producing flowers and juicy green beans. Such a tasty treat.
A very beany harvest. Images: Kathryn Hawkins
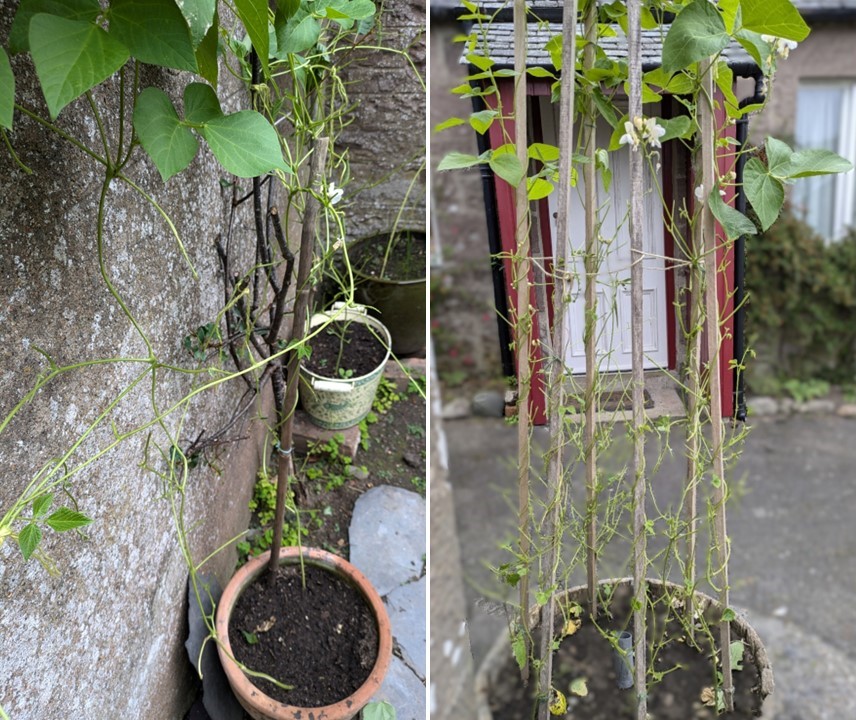
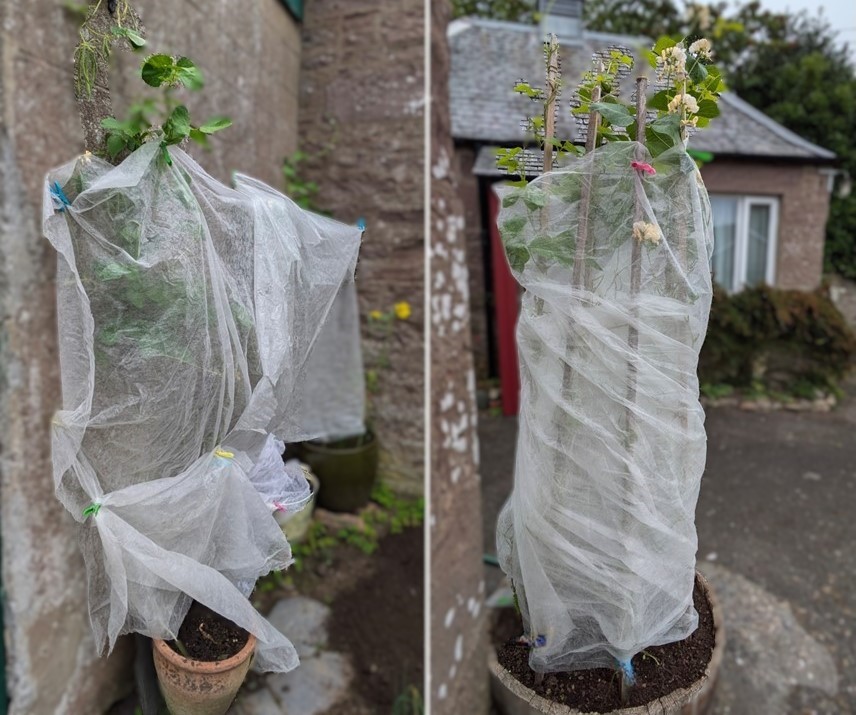
And so to my tale. I was late planting runner beans this year and ended up leaving them in the greenhouse in large pots for quite some time. In mid August, the beans were failing to pollinate behind glass, I carefully moved them outside. After a few days of warm sunshine, regular watering and some feed, the beans started to form and began to develop very quickly. So pleased was I, I had a whole post planned on how to successfully grown runner beans late into the season.
Late starting runner beans. Images: Kathryn Hawkins
Then, early one morning in the middle of this month………
Deer oh deer! Images: Kathryn Hawkins
……this is what I woke up to! And here’s the culprit. Now a frequent visitor, he/she has also taken a liking to Salal berries (amongst many other plants!). I’m not too bothered about the berries as they are very hardy, but, the beans, I could have cried!
Bean and berry eating Bambi. Images: Kathryn Hawkins
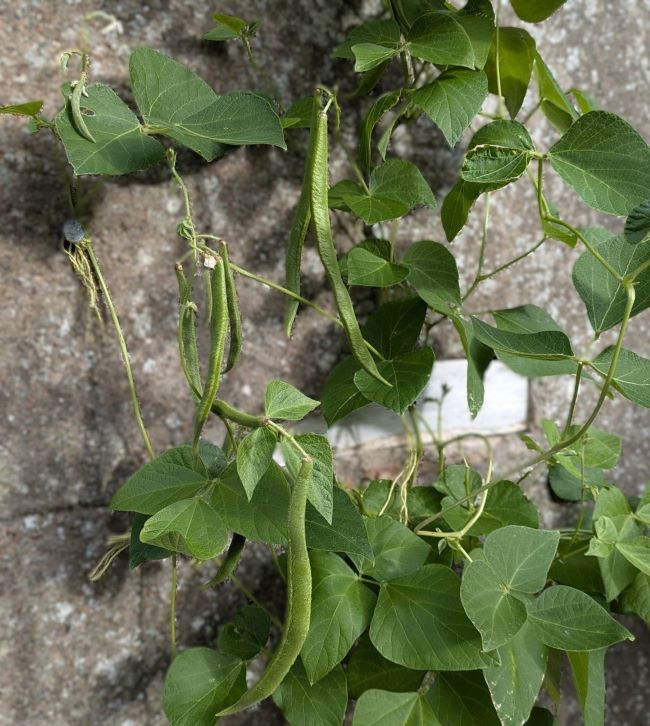
After some hasty fleece wrapping, a few days on, the beans seem to be thriving again. The foliage and beans further up the stems were undamaged, and this is how they look this weekend; I may get to taste homegrown runner beans after all this year 🙂
Beans in recovery. Image: Kathryn Hawkins
Another garden visitor who does no damage, is this delightful Robin who has started singing his heart out most days in the holly tree. Not the greatest of photos, but his song is an absolute delight to hear, and it is so loud!
Singing his heart out. Images: Kathryn Hawkins
I’m ending my post this week with an image of a radiant September sunset I captured this week. No sooner had I taken this picture, than the colours faded and it became dark very quickly. It was a glorious sight for a few short minutes at the end of a busy day. Until next month, thanks for reading my post. Best wishes 🙂
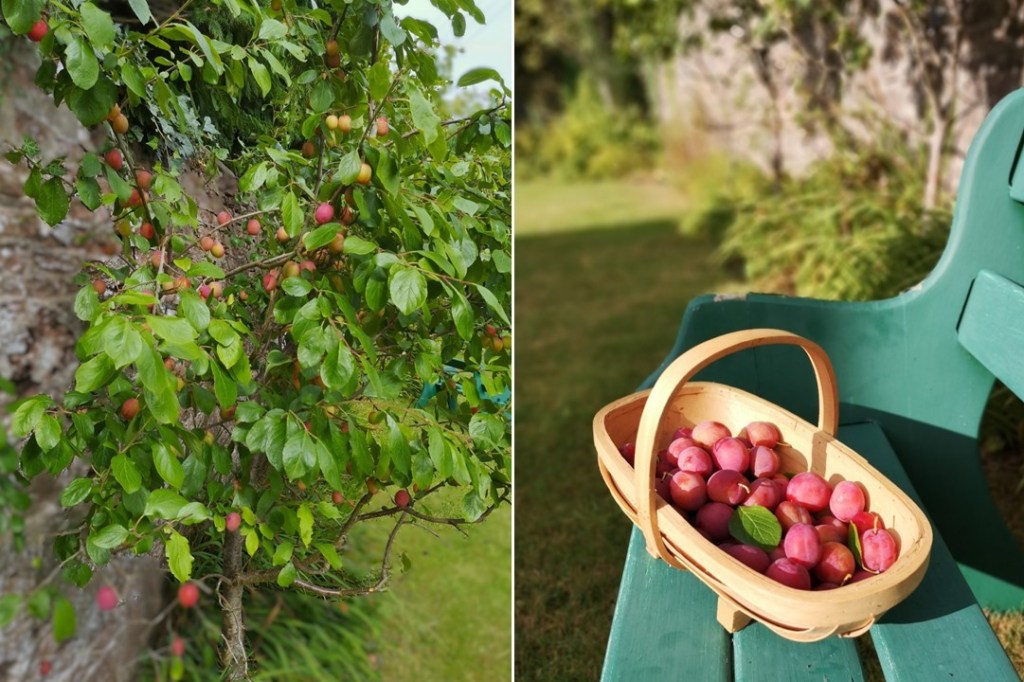
Hello again. The sunshine here in central Scotland last weekend helped ripen off the Victoria plums on the small tree in the garden. And this year, I managed to get them picked before the wasps moved in:)
This year’s Victoria plum harvest. Images: Kathryn Hawkins
Not a bad haul, and there are still a few left on the tree for later in the month. I’ll admit that plums are not my favourite fruit but they do make a lovely jam, and are also delicious flavoured and baked with almonds. Hence, my two recipes this week.
Simply plum jam. Images: Kathryn Hawkins
The jam recipe is very straightforward, just 2 ingredients, fruit and sugar. Victoria plums, if not too ripe, set well without needing to add lemon juice to the mix. If the plums are very ripe, then add 1tbsp juice per 500g fruit.
Makes: approx. 1.5kg
Ingredients
1kg ripe Victoria plums
Approx. 850g granulated sugar
1. Wash the plums then cut them in half and prise out the stones. Put the stones to one side, and weigh the prepared fruit and make a note. You should use the same amount of sugar to fruit. If the plums are too firm to cut cleanly in half, you can cook them whole and then remove the stones once the fruit has softened – it is worth counting the whole plums before you cook them so that you know how many stones to fish for!
2. Put the stones on a piece of muslin. Gather up the sides and then bash with a rolling pin to crush the stones. Tie the muslin tightly to secure the crushed stones inside. You don’t have to do this, but I think the jam has better flavour and setting qualities if you add the stones.
3. Put the plums in a large saucepan. If they are ripe, you don’t need to add any water. If they are firm, add about 100ml. Heat until steaming, add the muslin bag, then cover with a lid and cook gently until very soft. If you’ve cooked whole plums, now is the time to do a little stone fishing.
4. Add the quantity of sugar to match the weight of the prepared fruit, and stir until dissolved, then raise the heat and boil rapidly until setting point is reached – around 104 to 105°C on a jam thermometer. Squeeze out the juices from muslin bag and discard, and stir the jam to distribute the fruit pieces before packing into clean jars and sealing whilst hot.
Making plum jam. Images: Kathryn Hawkins
Easy peasy jam pot covers. Images: Kathryn Hawkins
For a simple finishing touch, if you are thinking about gifting some of your jam, I often cut out rounds of paper napkin to cover the jar lids. Use a saucer or plate a few centimetres larger than the lid and draw round using a pencil. Secure the covers in place with a small rubber band and then tie with string or ribbon. Don’t forget the label.
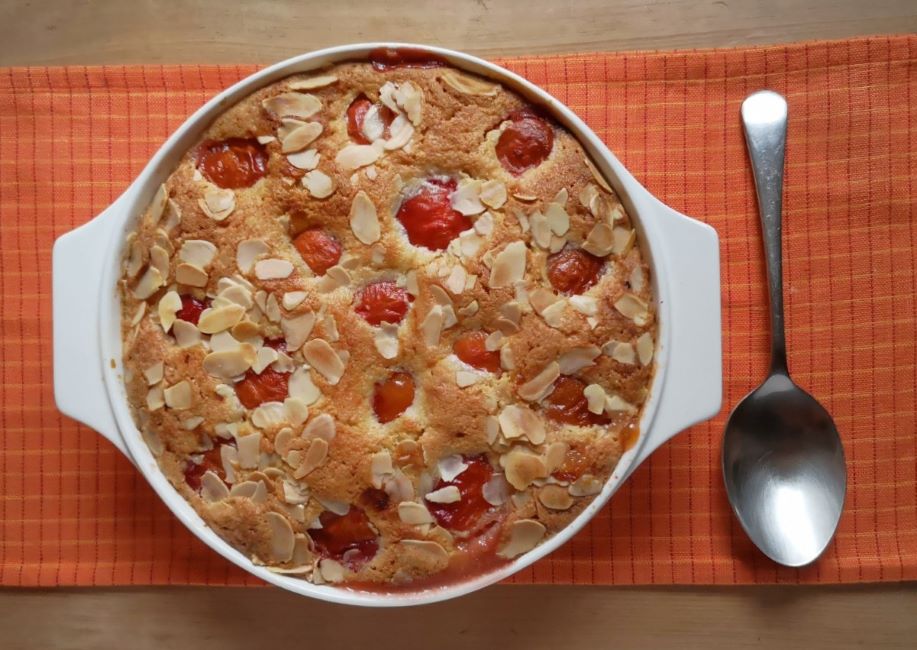
Plum pudding perfection. Image: Kathryn Hawkins
My second plummy recipe is also very easy to make. You’ll need 850g plums and a dish about 1.7l in capacity. The bake will serve about 6 people.
Victoria plums, ripe and ready for pudding. Images: Kathryn Hawkins
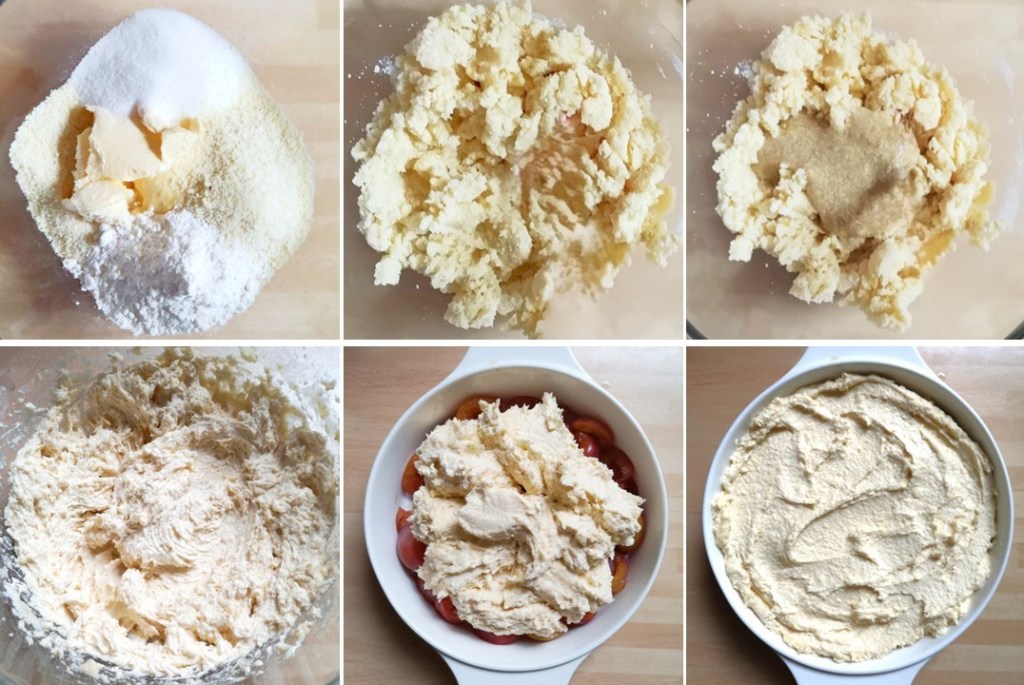
How to make almond plum pudding. Images: Kathryn Hawkins
1. Wash and stone the plums as for jam, but discard the stones this time. Put two thirds of the prepared fruit in the dish and put to one side while you make the topping.
2. Mix 3tbsp ground flax seed with 135ml water and leave for a few minutes until thickened.
3. Whisk together 155g lightly salted, soft plant butter with 155g caster sugar, 155g ground almonds, 30g gluten-free plain flour and 1tsp almond extract until well blended and creamy. Stir in the flax egg and whisk to make a smooth cake batter.
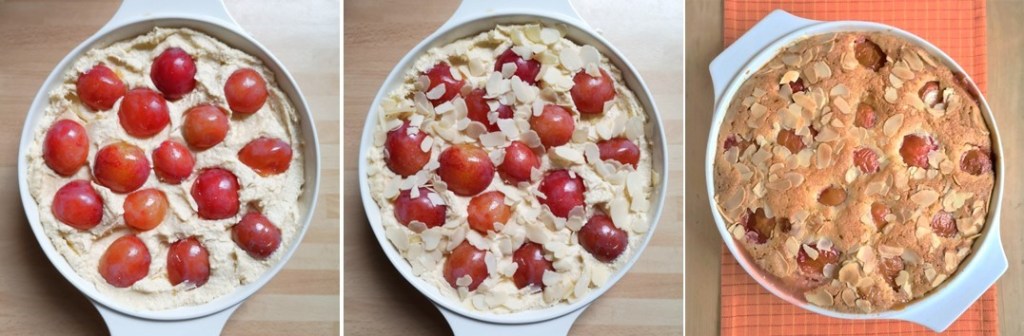
4. Spoon over the plums in the dish and smooth the top. Push the remaining plums into the mixture on top and sprinkle with a few flaked almonds. Pop the dish on a baking tray and bake in a preheated oven at 180°C, 160°C fan, gas 4, for about 1hour 15 minutes until firm to the touch and golden. Best served hot with custard.
Ready for custard. Images: Kathryn Hawkins
If you have any leftover jam, add a layer in the bottom of the dish for extra sweetness.
Until next time, enjoy the autumn colours and I’ll hope to see you again in a couple of weeks or so.
A promising harvest awaits. Image: Kathryn Hawkins
Hello again. It certainly feels like the season is beginning to change here in central Scotland. The daylight hours are shortening and there is a distinct nip in the early morning and late evening air.
Ripening orchard fruit. Images: Kathryn Hawkins
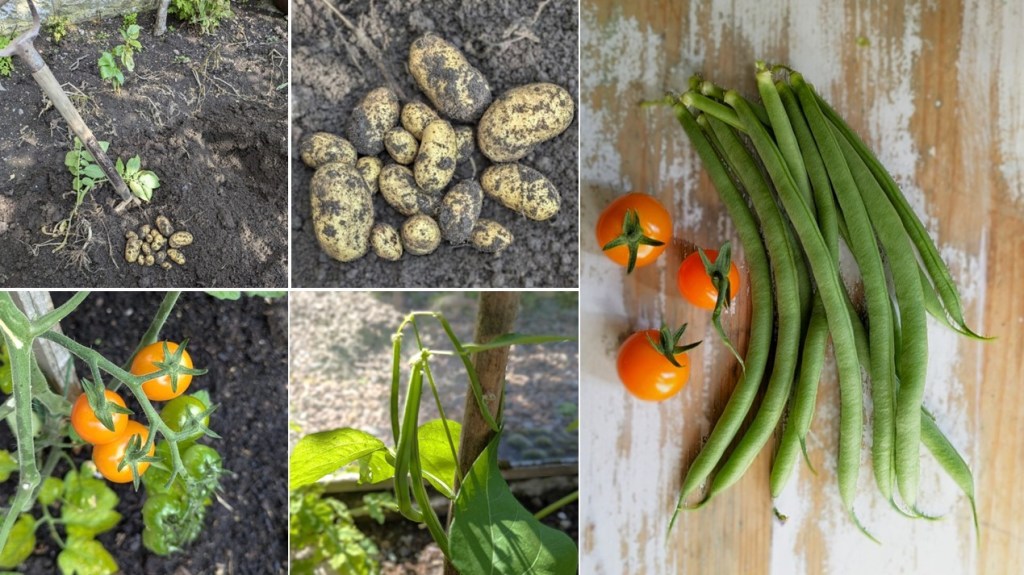
Really happy to see so much fruit on the pear, apple and plum trees this year. It must have been all the rain we have had. Not long to wait until the picking starts 🙂 I have already harvested a few potatoes, and a few greenhouse tomatoes and French beans. Such a treat, and there is plenty more to come.
Garden and greenhouse treasures. Images: Kathryn Hawkins
Around the garden, there are still some signs of Summer like the orange lupin flowering for the third time, and such a large bloom. Usually the second and third flowers are small, but this one is a real beauty.
Late Summer flowering Crocosmia and a late blooming Lupin. Images: Kathryn Hawkins
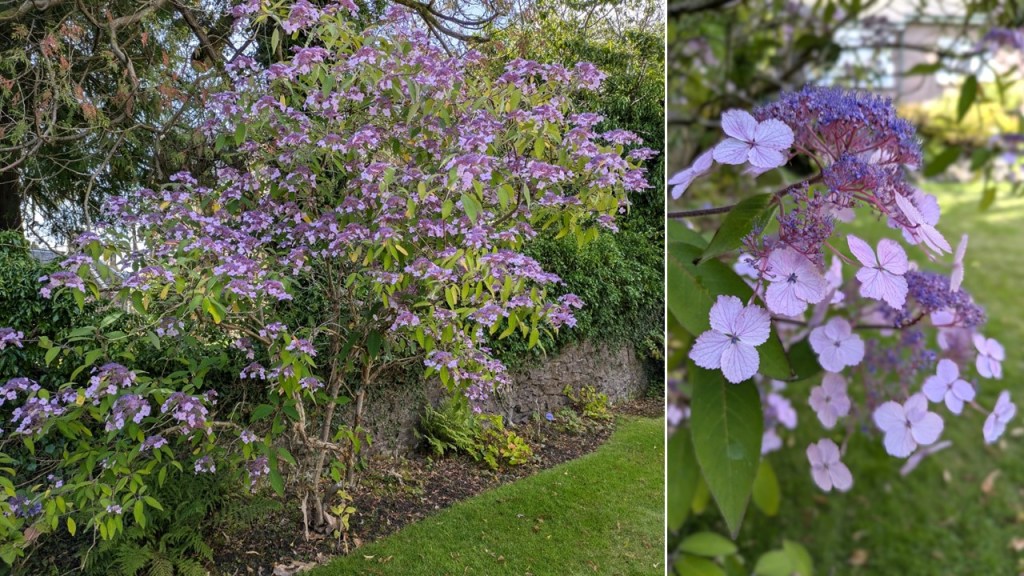
Lovely Lacecap Hydrangea. Images: Kathryn Hawkins
And the bees are still very busy, especially around the Echinops and Golden Rod.
Busy bees in the sunshine. Images: Kathryn Hawkins
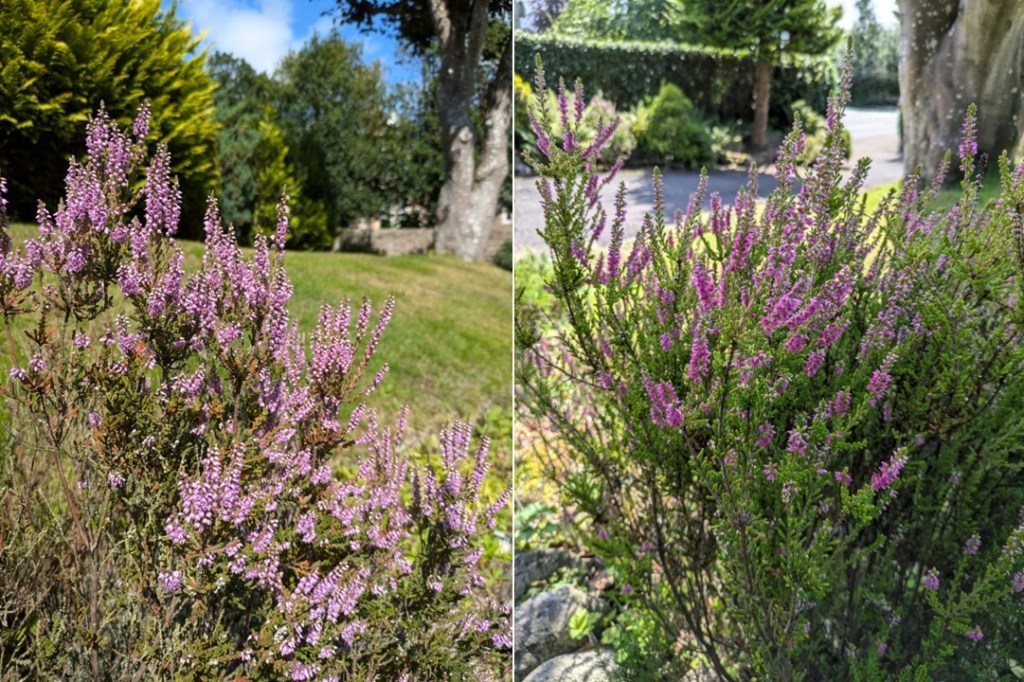
But you know the season is changing when the first Autumn crocus emerges in a darker corner of the garden, and the late flowering heathers are in full flower.
A few nights ago, as the daylight was fading, a new visitor came up the driveway and started tucking into the fallen sunflower seeds from the bird feeder. He/she stood on their hindlegs to reach a few seeds caught on the stone wall. You’ll see it is quite a chunky fellow, and is obviously finding enough food to keep its strength up:) The other image is of a magnificent Peacock butterfly absorbing the warmth from the sandstone wall outside my office the other day. What a beauty.
Night and day time visitors. Images: Kathryn Hawkins
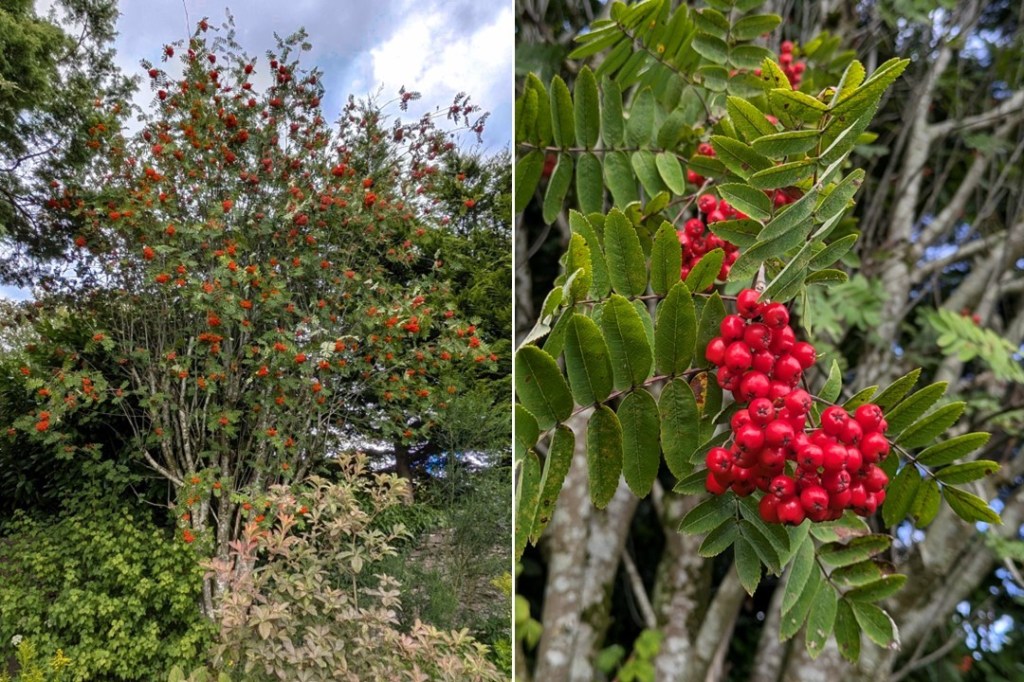
My final images this month are of the Rowan tree in the back garden which has been quite bereft of berries for several years. This year it is laden, and so much so that they are beginning to fall to the ground before the birds have started to eat them!
Ripe Rowan berries. Images: Kathryn Hawkins
That’s me for another month. See you in September! Thanks and best wishes until then.
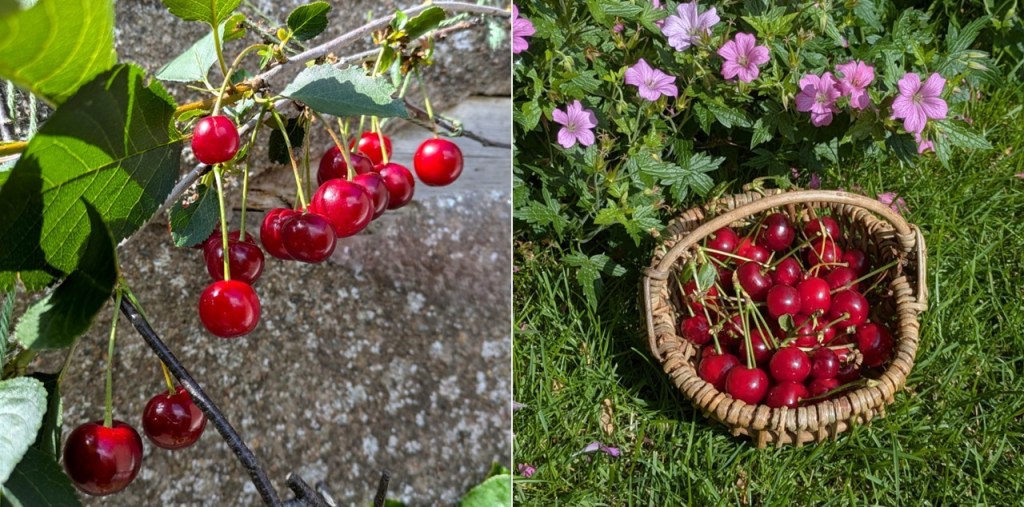
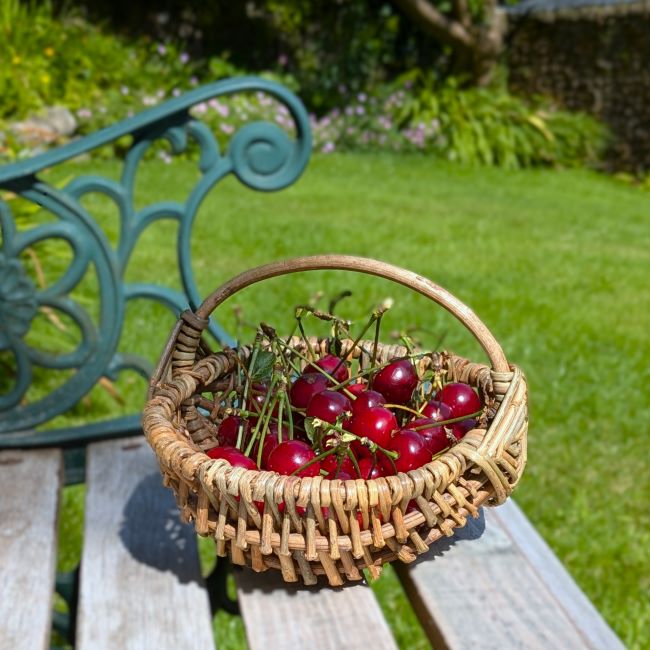
Hello again. I thought I’d take a look back at the month and post a few pics of what’s been happening in the garden. This is the time of year when the soft fruit is ready. The cherries were picked a few days ago. The Morello tree is only very small, but I picked enough for a pie and managed to keep them protected from our feathered friends.
Ripe and juicy pickings. Image: Kathryn Hawkins
Only a few of the original canes of raspberries remain in the garden now. PLanted about 18 years ago, they still produce a fair few berries over the month. There are still a few left to ripen.
This year’s raspberry haul so far. Images: Kathryn Hawkins
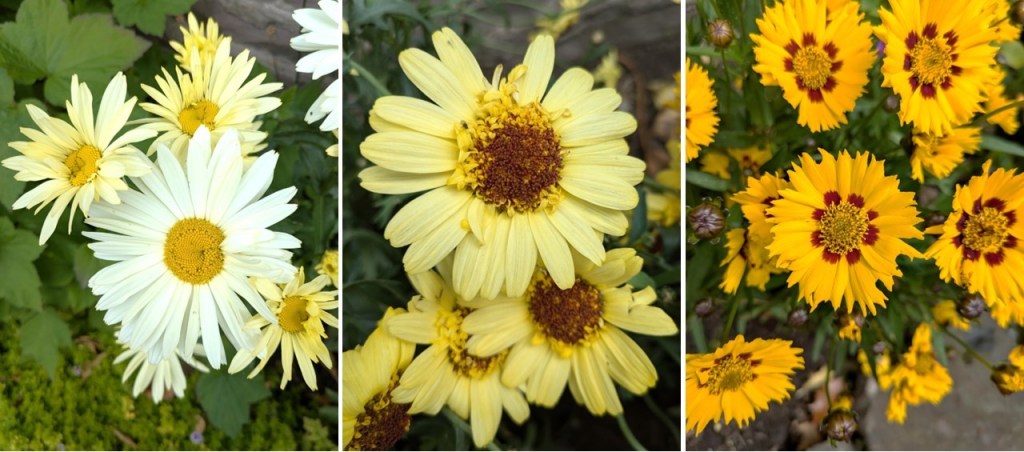
Brightening up what continues to be a very up and down summer season this year, are some very colourful blooms. These 3 golden beauties produce new flowers right through until early Autumn.
Left to right: Bananas cream Leucanthemum, Argyranthemum, and Sunfire Coreopsis. Images: Kathryn Hawkins
All the lavenders and bellflowers (Campanulas) in the garden have done very well this year – they obviously appreciate the mix of sunshine and showers we’ve been having for the past few weeks. Very popular with our little winged, buzzing friends as well.
Lovely lavender and beautiful Bellflowers. Images: Kathryn Hawkins
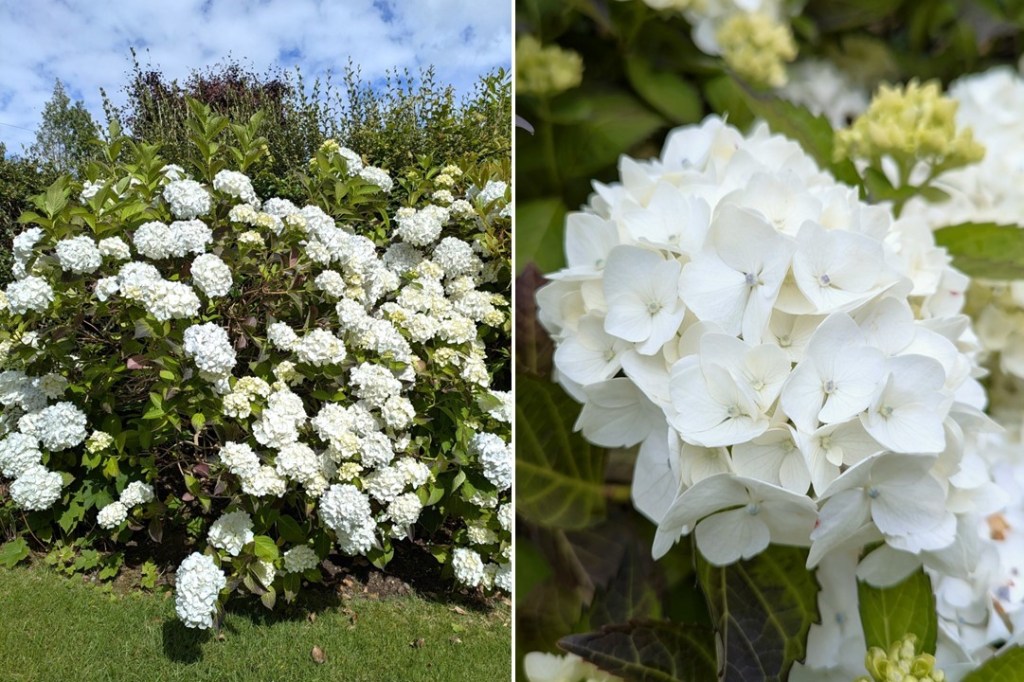
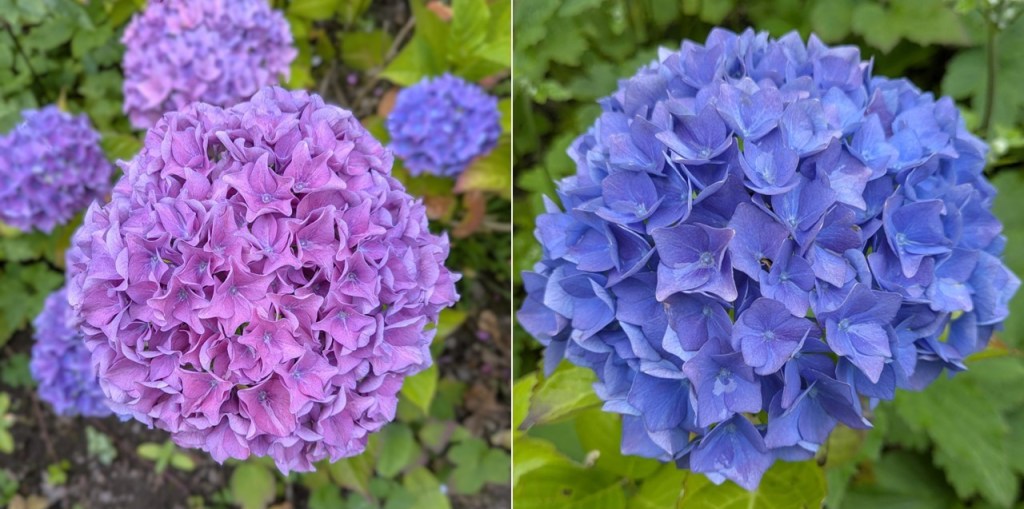
The old white Hydrangea bush is putting on a great display of blooms this year. Elsewhere in the garden, these more recently planted mauve and blue varieties are also thriving. The colours are at their most vivid at the moment.
Gloriously white Hydrangea blooms. Images: Kathryn Hawkins
Cool coloured Hydrangeas. Images: Kathryn Hawkins
Last year a white Delphinium was added to this flowerbed which did so well, another one was planted a few weeks ago. The tall stems add great height to the beds and make the Hydrangeas look even bolder in colour.
Bold and bright Summer shades. Images: Kathryn Hawkins
And that’s me for another post. Looking forward to the month ahead, I’ll be back in the kitchen for my next post. Until then, thanks for taking the time to stop by 🙂
It has turned much colder here since my last post. Frosty mornings and an increasing number of sub-zero nights. Back in late August, I planted a few Arran Pilot seed potatoes in the green house. With the wintry feel in the air and knowing potatoes are not frost-hardy, I decided it was time to dig them up.
Late season greenhouse-grown potatoes. Images: Kathryn Hawkins
The foliage had all but withered away over the month, but under ground a few little potatoes had formed. I was a couple of weeks later planting them than usual and subsequently, the plants hadn’t had time to develop properly before the days got shorter and the temperature lower. No matter, there were enough to make one of my favourite potato dishes, and they tasted just as delicious as the potatoes grown earlier in the year.
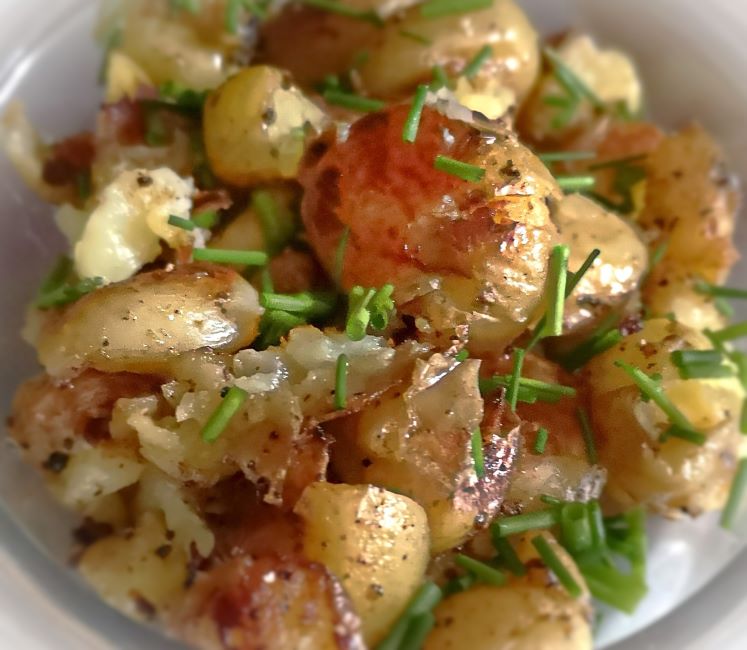
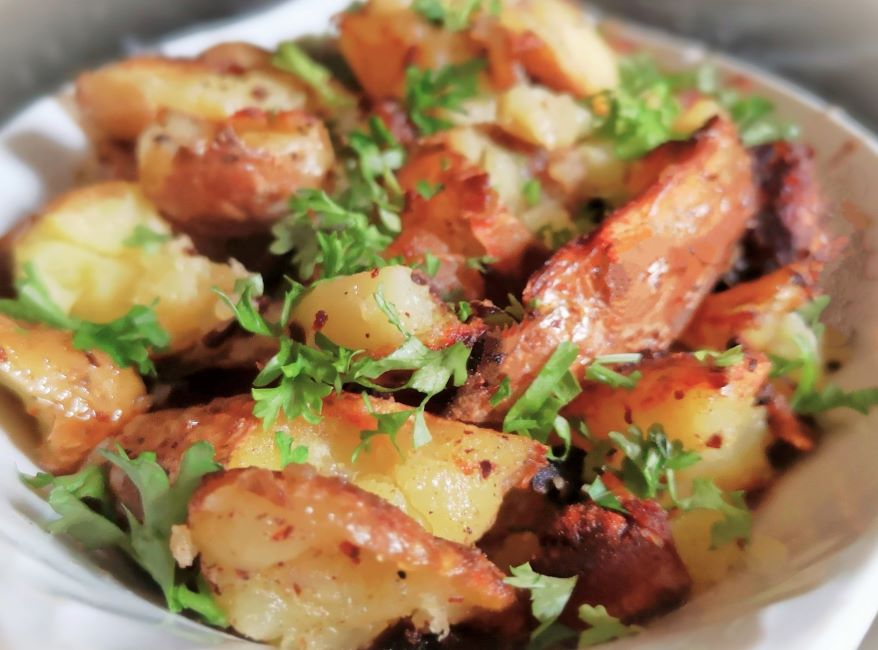
Smashed new potatoes sprinkled with chives. Image: Kathryn Hawkins
I took a few images of the preparation of this potato dish back in the late summer when I had some pink fir potatoes. Choose a waxy or floury textured potato for best results. Scrub the potatoes and boil them in their skins until tender, then drain well and cool for about 10 minutes. Transfer them to a board and squish them with a masher or large fork.
Smashed pink fir potatoes. Images: Kathryn Hawkins
I usually melt butter with some olive oil in a pan and heat until bubbling – either will work on their own, it’s personal taste which you use. Add the potatoes and seasoning and cook over a fairly high heat, turning them until they are crispy. Towards the end of cooking, I add chopped garlic and cook it for a couple of minutes until just cooked through. Serve straight from the pan, sprinkled with chopped parsley or chives.
Smashed pink fir potatoes with garlic and parsley. Image: Kathryn Hawkins
Well there’s just one more post before Christmas – I can’t believe it will all be over by this time next month. Until then, take care and thanks for stopping by 🙂
Freshly made tomato confit. Image: Kathryn Hawkins
Hello again. I hope you have had a good few days since my last post. After lousy weather here in the UK in August, September started with a mini heatwave. The high temperatures have come to an end now but the extra heat and sunshine certainly helped ripen off the fruit and vegetables. It’s been a bumper year for tomatoes, and I’ve been exploring new ways to serve and preserve them.
My recipe this week is a very simple one. It’s an easy and energy-efficient way to cook small tomatoes. All you need is a slow-cooker and an amount of small tomatoes to fit neatly in a single layer over the base of the cooking dish. You can adapt the quantities you cook to fit the size of your cooker.
Confit ingredients. Images: Kathryn Hawkins
I have kept the flavours simple, using fresh herbs from the garden, some garlic and a few coriander seeds. Add chilli for some heat, or experiment with your favourite spices. The confit can be served on its own as a sauce for pasta or blitzed and used as a base sauce for other dishes. If you want to keep it for a few days, place in a sealed container, covering the tomatoes with extra oil as necessary, and store it in the fridge. For longer storage, it freezes fine.
Tomato confit, fresh basil and black pepper. Images: Kathryn Hawkins
This really is a great way to enjoy the flavour of freshly picked sweet baby tomatoes with the minimum of effort. I hope you enjoy the recipe 🙂
Serves: 4-6
Ingredients
650g whole, same size, small or cherry tomatoes – or a weight that fits neatly in a single layer inside the base of your slow-cooker dish
A few sprigs of fresh thyme and oregano
1 bay leaf
1tsp coriander seeds, crushed
3 garlic cloves, peeled
1tsp sea salt
Freshly ground black pepper
2tsp caster sugar (optional)
100ml good quality olive oil + extra for storing
1. Remove the stalks from the tomatoes and wash well. Pat dry using kitchen paper and place in a single layer in the slow-cooker dish.
2. Add the remaining ingredients, cover with the lid and set the cooker to Low. Cook for 4hrs or until the tomatoes are soft but still holding shape. Leave to cool completely.
Preparing the confit. Images: Kathryn Hawkins
3. For storing, discard the herbs and ladle into a clean, sealable storage container – I used a 750ml Kilner jar. Add more oil as necessary to cover the tomatoes, then seal and store for up to 10 days in the fridge. Alternatively, portion into containers and freeze. The oil can be drained off before serving and re-used to cook with or flavour salad dressings.
Filling a storage jar with tomato confit. Images: Kathryn Hawkins
That’s me for another week. I have just picked another haul of tomatoes after coming back home after a few days away. I’ll have to get creating again. Until next time, thanks for stopping by 🙂
My back-from-holiday tomato haul. Image: Kathryn Hawkins
Hello again. July has been a busy month in the garden and greenhouse. The weather’s been cooler than usual, with a mix of bright days and rain showers, but the plants have really been growing very well and yielding lots of goodies throughout the month.
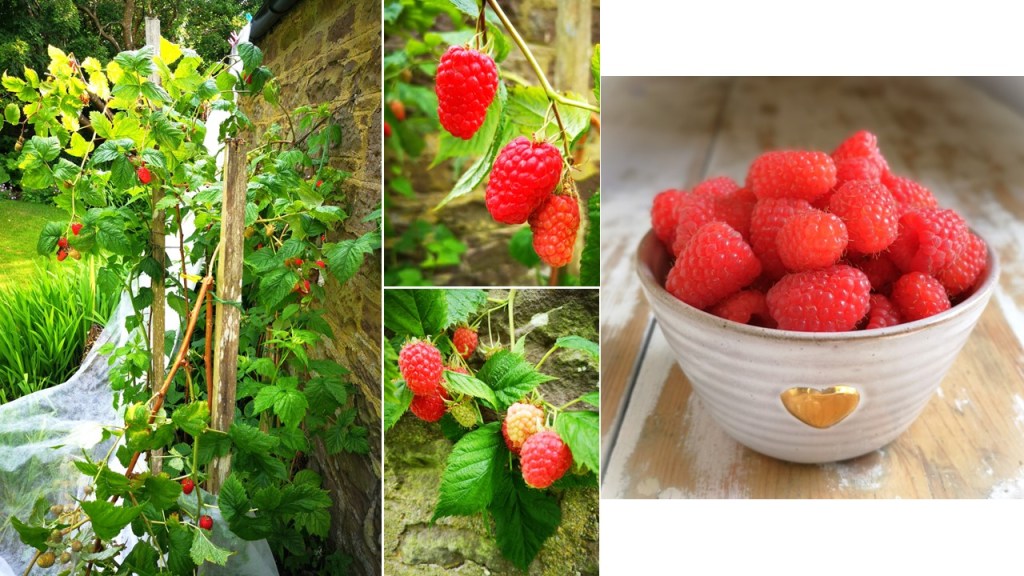
July here in central Scotland is the month for raspberries and cherries. I have been training some new raspberry canes for a couple of years and the rewards are starting to show. Sadly the older canes suffered storm damage earlier in the month, so this may be their last season. Not bad going really, they were planted some 18 years ago! Berries are still ripening on the new canes, so it looks like I’ll be picking for a couple more weeks yet.
Broken canes but still a good harvest. Images: Kathryn Hawkins
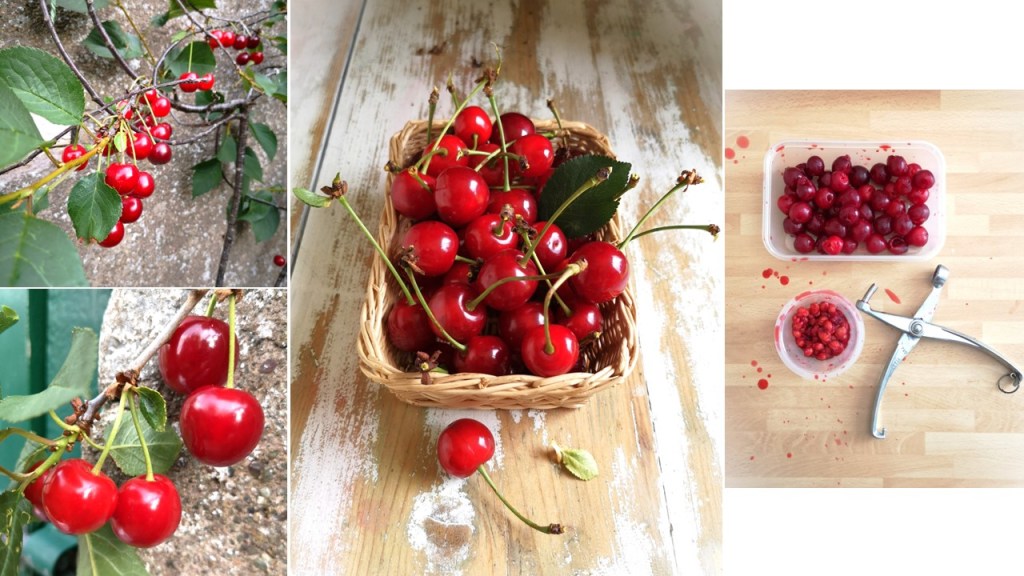
The small espalier Morello tree didn’t produce quite as many cherries this year, but I did manage to get the fleece on earlier enough to stop the birds having a lovely feast. I have enough for a pie later in the year, and that’s good enough for me 🙂
2023 Morello harvest. Images: Kathryn Hawkins
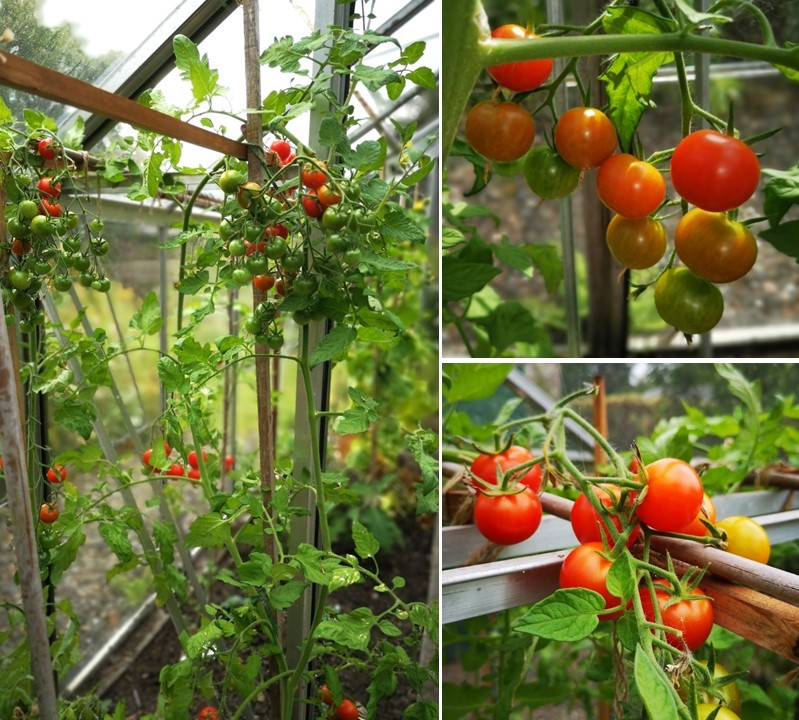
In the greenhouse, I’ve been picking mini cucumbers throughout the month. The tomatoes have started to turn colour, and the aubergine (eggplant) plants have a few flowers on them now – I hope they form fruit.
A plentiful greenhouse. Images: Kathryn Hawkins
The greenhouse yielded a few surprises earlier in the year when small seedlings started appearing in the soil. I realised after a while that they were sunflower seedlings. I think a mouse must have stashed some of the bird seed in the soil and perhaps had forgotten to retrieve it. Anyway, I ended up with several seedlings which I planted outside back in May, and this month they have started flowering. Not the biggest sunflowers you’ll ever see, but a quirky addition to the garden nonetheless.
Mini sunflowers. Images: Kathryn Hawkins
None of my garden produce would be possible without the help of the gardener’s best friend, the bees. They have clearly been busy since the spring blossom was out, and now they have all the garden flowers to feast on.
Bees at work in July. Images: Kathryn Hawkins
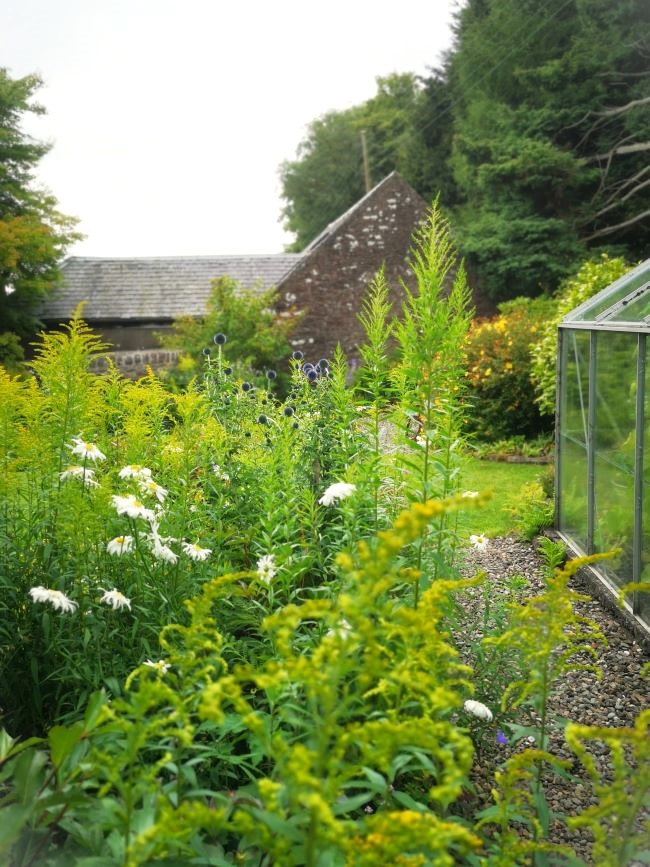
My last image for this post is another view of the garden. It’s been cool and mostly cloudy this past week, and at times it has felt a little bit autumnal. I think this image captures the mood, especially as the globe thistles (Echinops) are beginning to open up and the later summer flowers are coming into bloom. Until next time, thanks for stopping by and I hope to be posting again soon.
Everything in the garden is blooming. Image: Kathryn Hawkins
Hello again. It’s been a very different June this year here in central Scotland. Having had a very warm May with little significant rain, the first 3 weeks of June followed along the same lines. Subsequently, many of the flowers that are usually around for at least a couple of weeks have bloomed early and only lasted a few days in the heat and drought. The weather has broken now, but it has left me wondering what the garden will look like in July and August with so many favourites having bloomed early.
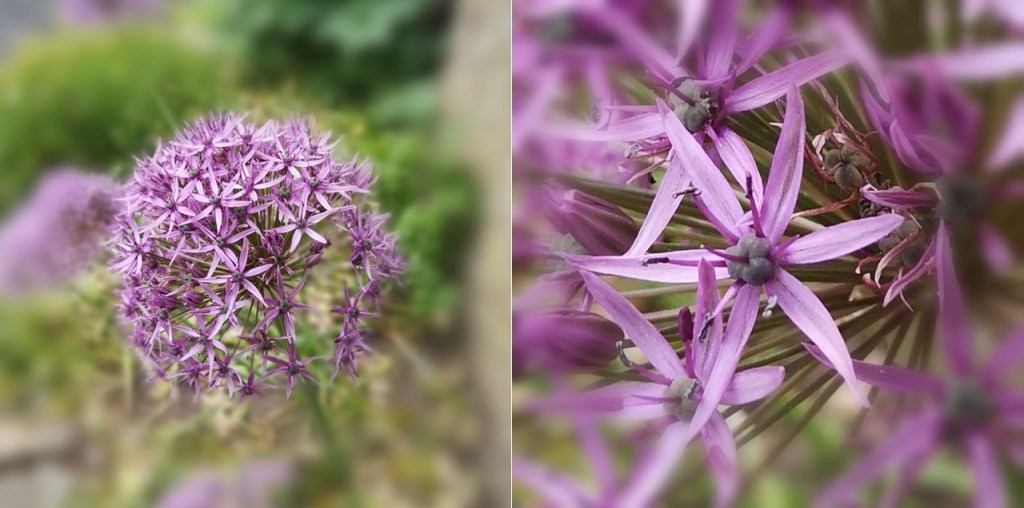
Early June Allium. Images: Kathryn Hawkins
Back at the beginning of the month, the Alliums were blooming proudly and looked striking with their tall long stems and intricate star-shaped flower heads. Usually, June is all about Lupins and foxgloves. This year they began flowering in May, and sadly by the middle of the month, they had faded and dried, and the few second flowers also came and went. The foxgloves still have a few flowers at the top of their very long stems, and the bees are still managing to collect pollen from the bell-shaped blooms that remain.
Purple, orange, pink and white lupins earlier in the month. Images: Kathryn Hawkins
Flowers and bees in early June. Images: Kathryn Hawkins
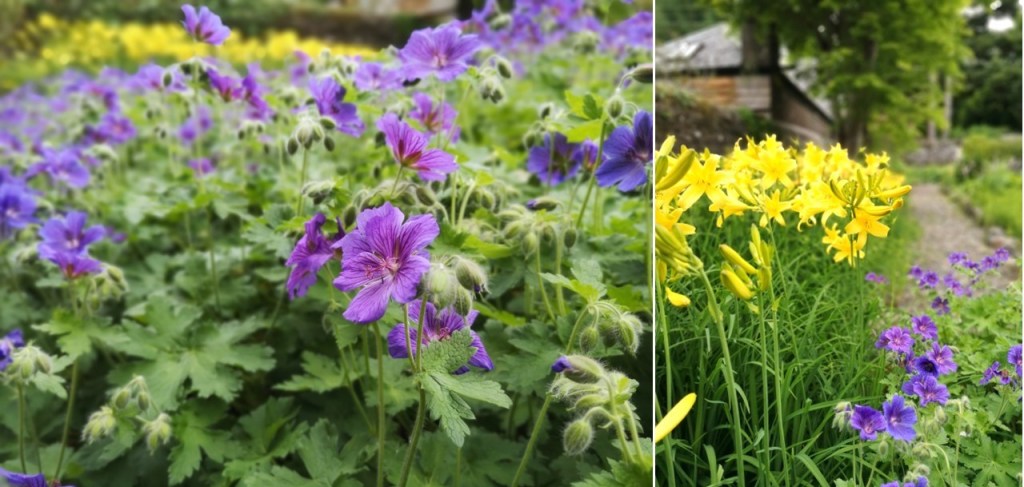
I think the biggest mark of difference in the garden this summer, are the geraniums and day lilies. Both usually provide colour into July, but all the geranium petals have fallen, and only a very few day lilies are left to flower.
Midsummer blue and gold. Images: Kathryn Hawkins
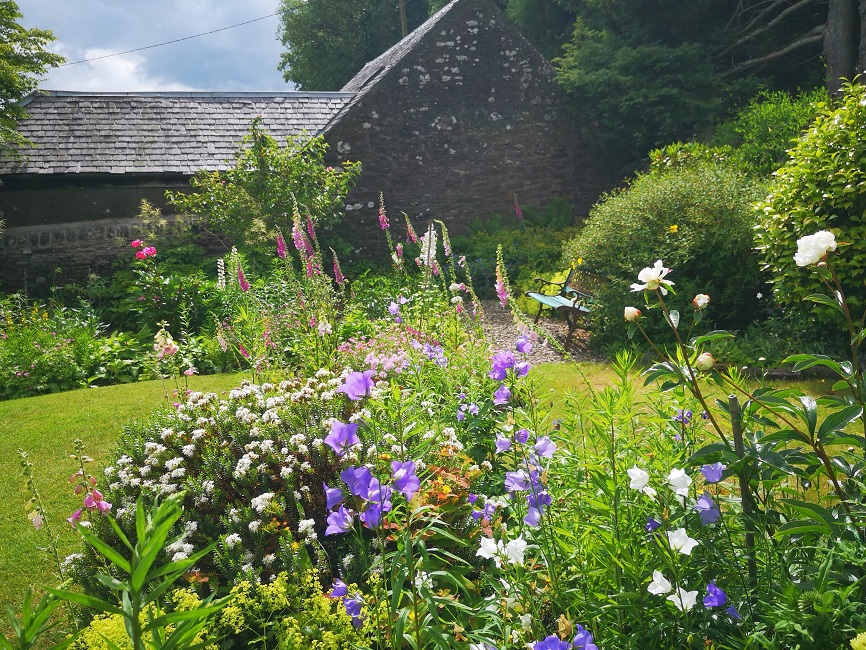
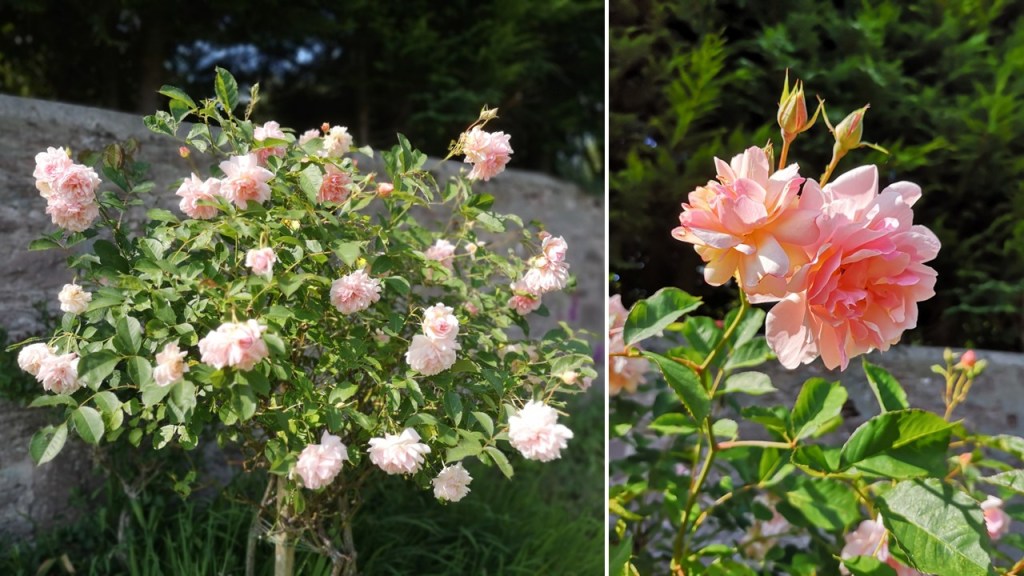
So here we are at the end of the month. There are still a few peonies in bloom providing rich colour and delicious fragrance, and the old rose bush (which hasn’t failed yet) is looking and smelling wonderful at the moment.
Mid June Peonies. Images: Kathryn Hawkins
Bloomin’ marvellous. Images: Kathryn Hawkins
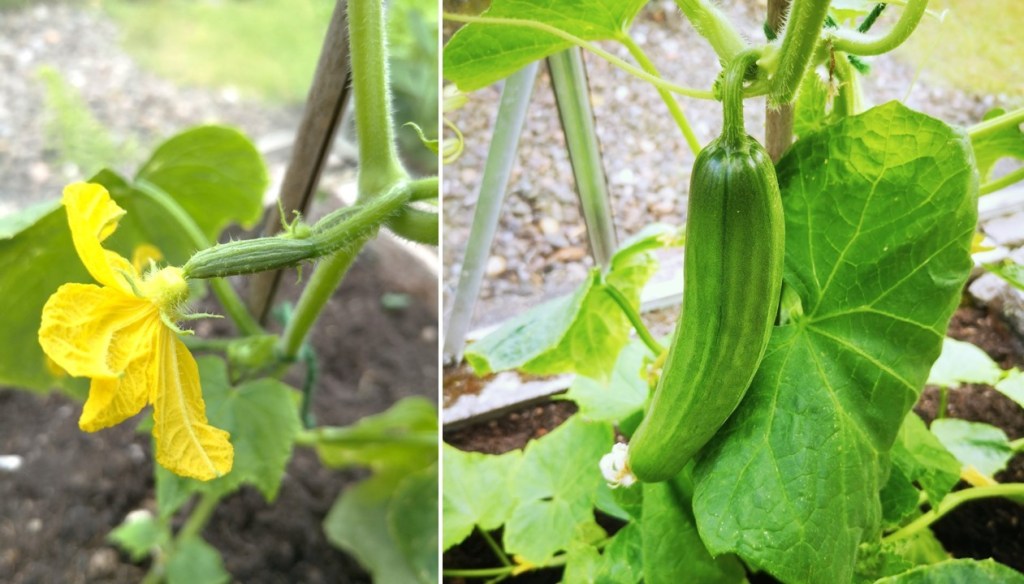
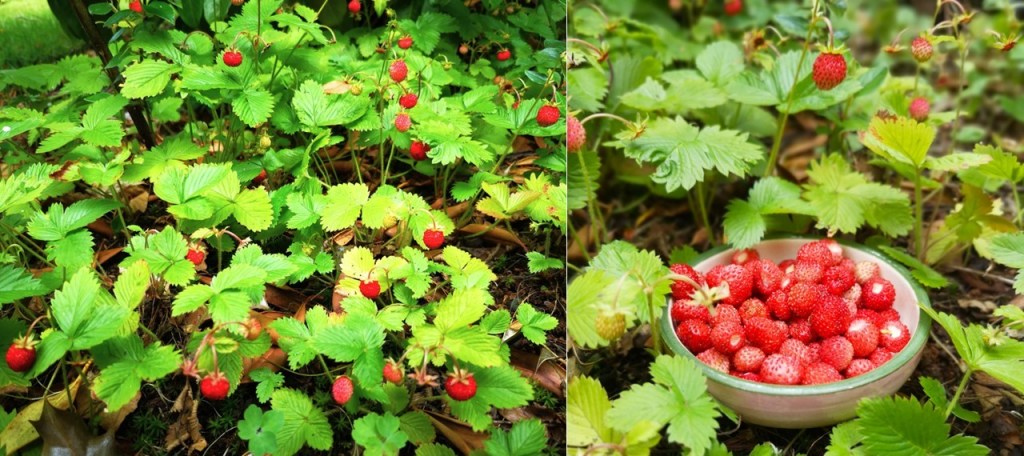
I’ve started harvesting produce from the greenhouse. The baby cucumbers I’m growing were about 3cm long at the beginning of June, and this week, I picked the first couple of fully formed fruit. In the shady parts of the garden, the wild strawberries have done well again this year.
First pickings. Images: Kathryn Hawkins
June 2023 wild strawberry harvest. Image: Kathryn Hawkins
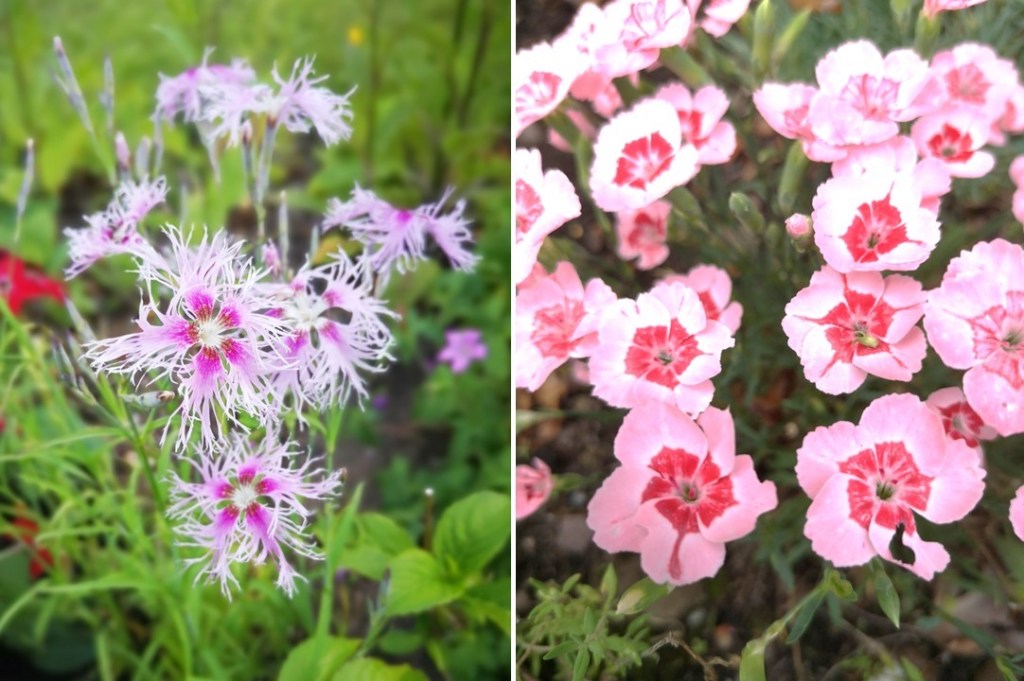
At ground level, these two Dianthus varieties are my favourite plants in the garden at the moment. If I keep removing the spent heads, I am hoping that new buds will keep forming and that there will be flowers for a couple more weeks yet.
Lilac and pink Dianthus. Images: Kathryn Hawkins
I’m closing my post with a flower that’s just opened up this week. The first of many (I hope) Japanese Anemones in the garden. This one’s about 2 weeks ahead of schedule. And that’s me, until next time, have a great few days and thanks for stopping by 🙂
Early white Japanese Anemone. Image: Kathryn Hawkins