Aubergine (egg plant) in spicy tomato sauce (gluten-free; dairy-free; vegan)

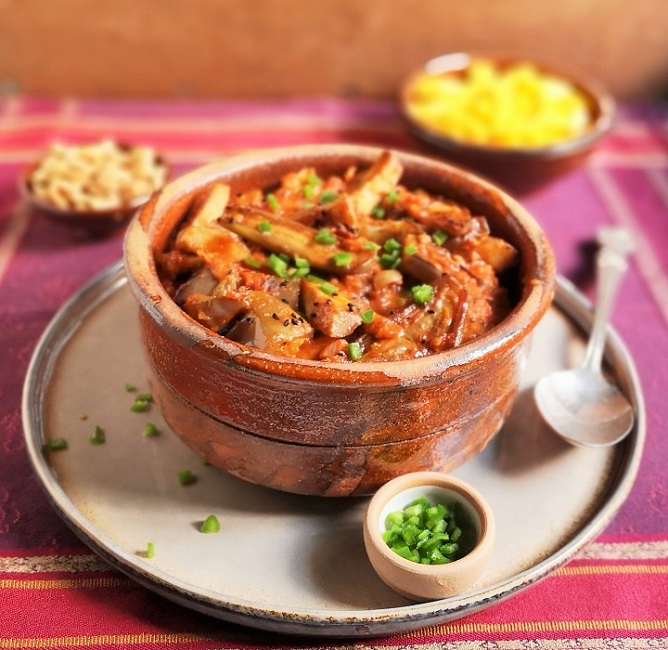
Serving_dish_of_freshly_cooked_aubergines_in_spiced_tomato_sauce
Aubergine in spicy tomato sauce with green chilli sprinkle. Image: Kathryn Hawkins

With a nod to the widely adopted new name for the first month of the year, Veganuary, I have for you this week a tasty, warming and comforting dish which fits the season very well. Aubergine (egg plant) is one of my favourite vegetables and I especially like eating it in a garlicky tomato or curried sauce. In this recipe, I combine these two flavours in one sauce to make a dish that can be served as a main meal or as a side to go with other spicy foods. It’s tasty cold as a salad as well.
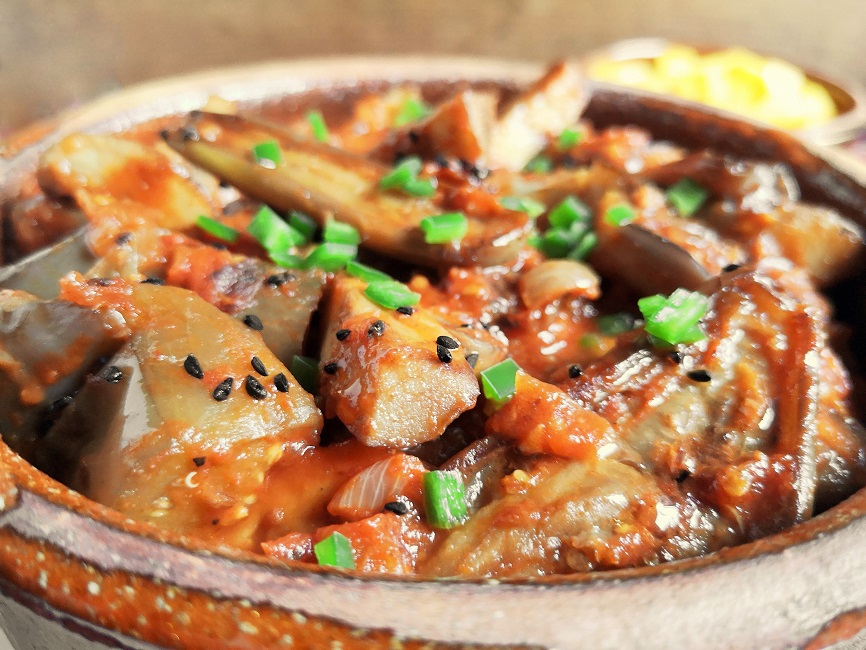
Close-up_on_aubergines_in_spiced_tomato_sauce
Up close on spiced aubergine (egg plant). Image: Kathryn Hawkins

November seems like a long time ago now, but that is when I harvested my homegrown aubergines (egg plants). I grew the variety Slim Jim in my greenhouse; just a couple of plants as a trial. They got off to a slow start but by the autumn both plants were doing well, and produced several small and neat, very pretty, lilac-coloured fruits.

November_harvest_of_Slim_Jim_aubergines_(egg plant)
Home-grown Slim Jim aubergines (egg plant). Images: Kathryn Hawkins

You can use any variety of aubergine for this recipe. I always salt before cooking, regardless of variety. I find that drawing out some of the water before cooking helps to soften it so that it cooks to a melting tenderness. By the way, replace the mushrooms with more aubergine if you prefer. I hope you enjoy the recipe.

Serves: 2 as a main meal or 4 as a side dish

Ingredients

  • 1tsp each of cumin and coriander seeds
  • ½tsp ground fenugreek
  • ¼tsp ground black pepper
  • 5tbsp vegetable oil
  • 1 onion, peeled and chopped
  • 2 cloves garlic, peeled and finely chopped
  • 1tsp freshly grated root ginger
  • 1 bay leaf
  • 400g tomatoes, canned or fresh, chopped
  • 2tbsp tomato purée
  • Salt
  • 250g aubergines (egg plant), chopped or sliced
  • 200g brown (chestnut) mushrooms, wiped and quartered
  • 1tsp black onion seeds
  • Chopped green chilli and fresh mango to serve

1. Toast the spice seeds lightly in a small hot, dry frying pan for 2-3 minutes until lightly golden. Cool, then grind finely with the fenugreek and black pepper.

2. Heat 2tbsp oil in a frying pan and stir fry the onion, garlic, ginger and spices with the bay leaf for 1-2 minutes, then cover with a lid and cook gently for 20 minutes until soft.

3. Add the tomatoes, purée and a pinch of salt, bring to the boil, cover and simmer gently for about 15 minutes until soft. Leave aside.
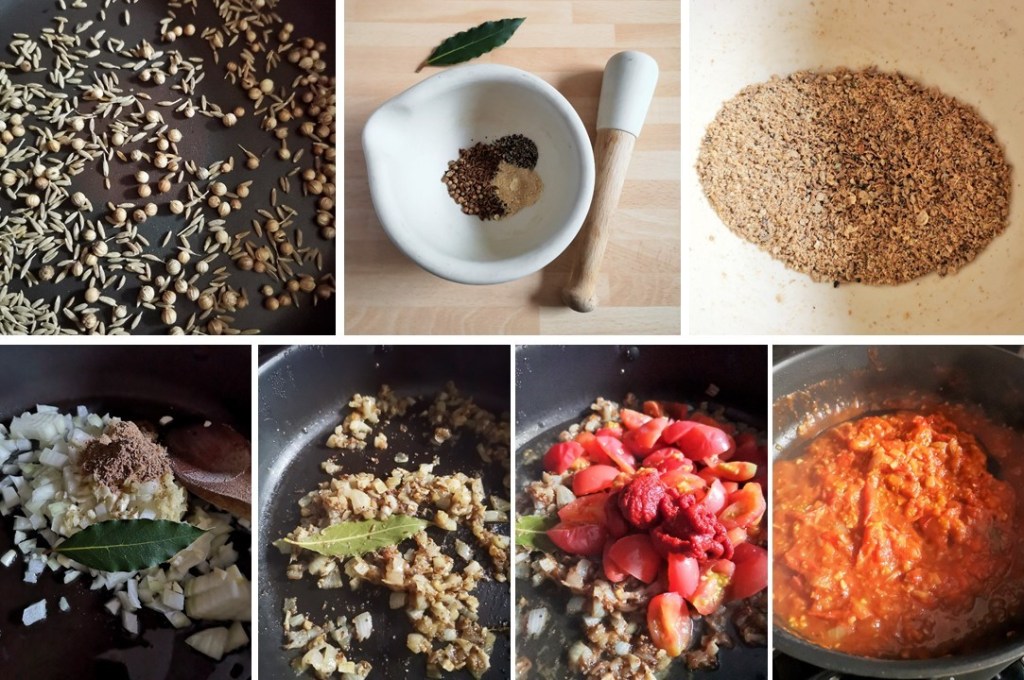
Making_spiced_tomato_sauce
Preparing spiced tomato sauce. Images: Kathryn Hawkins

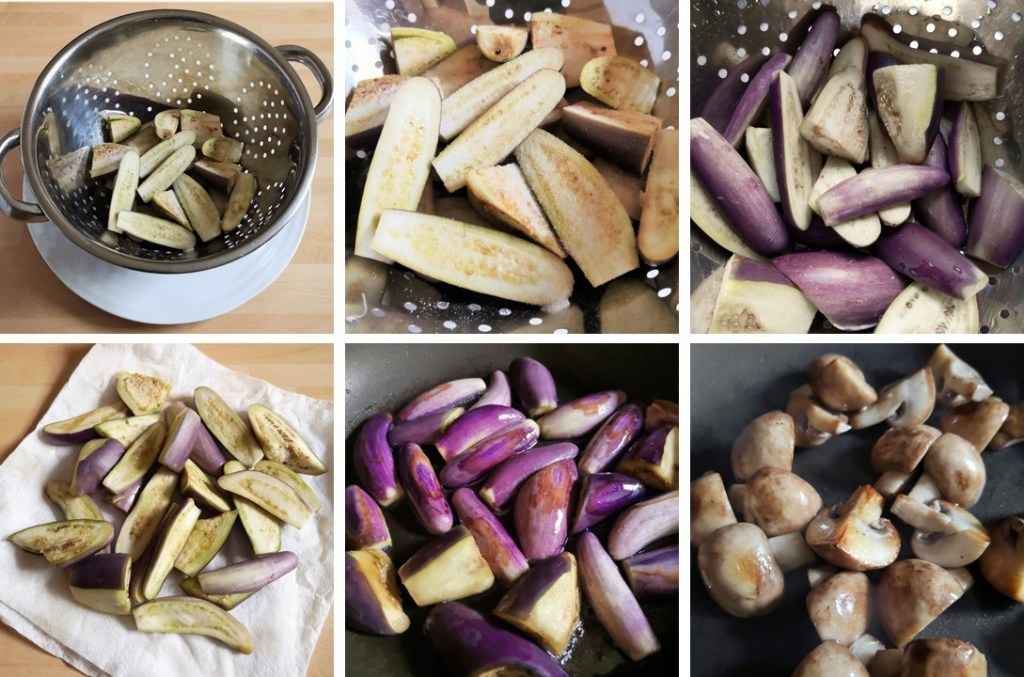
4. Meanwhile, stand a colander or strainer on a plate or over a bowl. Layer the aubergine, sprinkling generously with salt as you go, and leave to stand for 30 minutes. Drain and rinse very well, then pat dry with kitchen paper.

5. Heat 2tbsp oil in a frying pan until hot and stir fry the aubergine pieces for 2-3 minutes until lightly browned. Drain on kitchen paper. Heat the remaining oil and cook the mushrooms in the same way. Drain.
Salting_aubergine_(egg_plant)_before_cooking
Preparing aubergine (egg plant). Images: Kathryn Hawkins

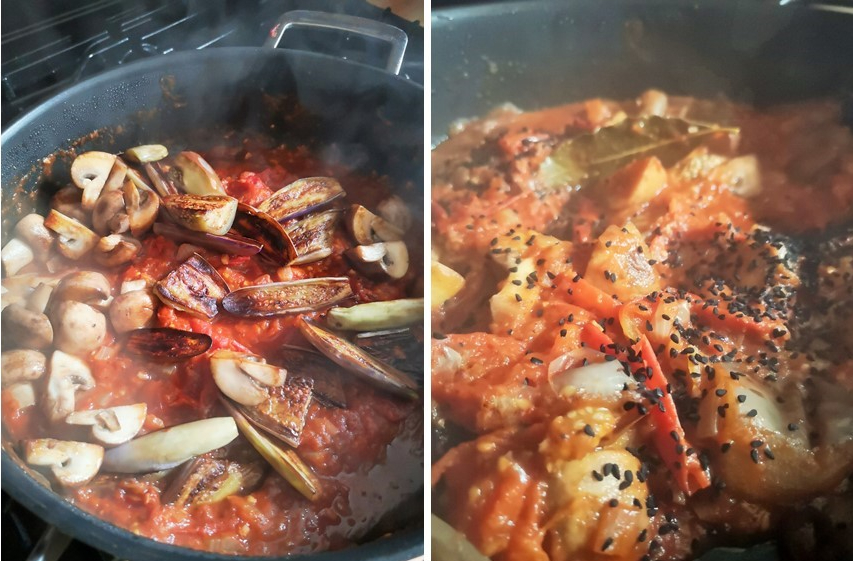
6. Add the vegetables to the spiced tomato sauce, mix well and bring to the boil. Cover and simmer gently for 20-30 minutes until tender and cooked through. Turn off the heat, sprinkle with black onion seeds then cover and stand for 10 minutes. Discard the bay leaf.
Cooked_mushrooms_and_aubergine_in_spiced_tomato_sauce
Cooking the vegetables in the sauce. Images: Kathryn Hawkins

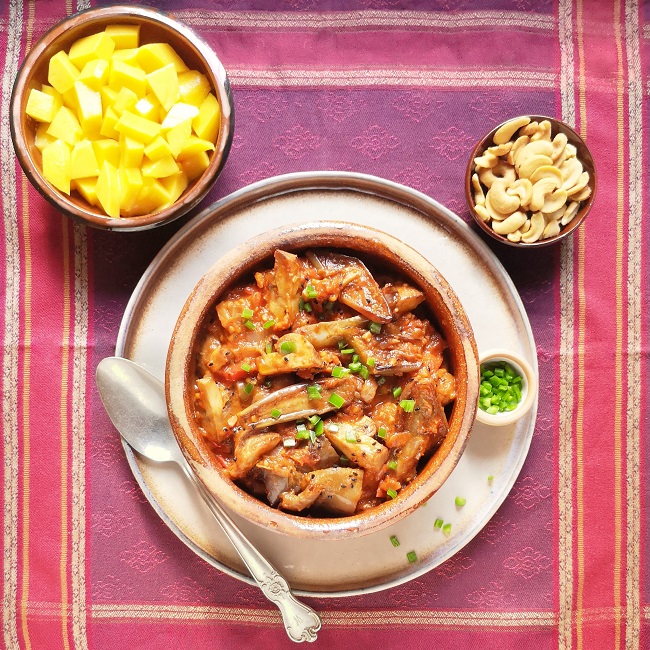
Serve sprinkled with freshly chopped green chilli and accompanied with fresh mango. Delicious over rice or with naan breads with a sprinkling of roasted cashew nuts for crunch.
Overhead_image_of_aubergine_and_mushrooms_in_spiced_tomato_sauce
A spicy feast. Image: Kathryn Hawkins

That’s all from me this week. I’ll be back towards the end of the month with something suitably Scottish to celebrate Burns Night. Until then, best wishes and keep safe.
New Year 2022

Happy New Year! I hope you have enjoyed a good Christmas and new year holiday. Now it’s time to get on with 2022. Let’s hope it’s a good year for all of us.

It’s been very mild here in the UK all over the holiday period. I believe the warmest UK New Year’s Day temperature on record was recorded. Sadly it’s also been mostly damp, misty and wet, so not much fun being outside. However, it’s all set to change, with colder air moving in, clearer skies on the horizon, and snow and ice in the forecast. Brrrrrr…………
I haven’t spent much time that much time out in the garden recently, but I have noticed a few changes this year compared to other years. I expected to have some nice images of snowdrops or the perennial primrose to show you, but no sign so far. No rhododendron blooms nor hellebore buds either. Instead, I found a few surprises.

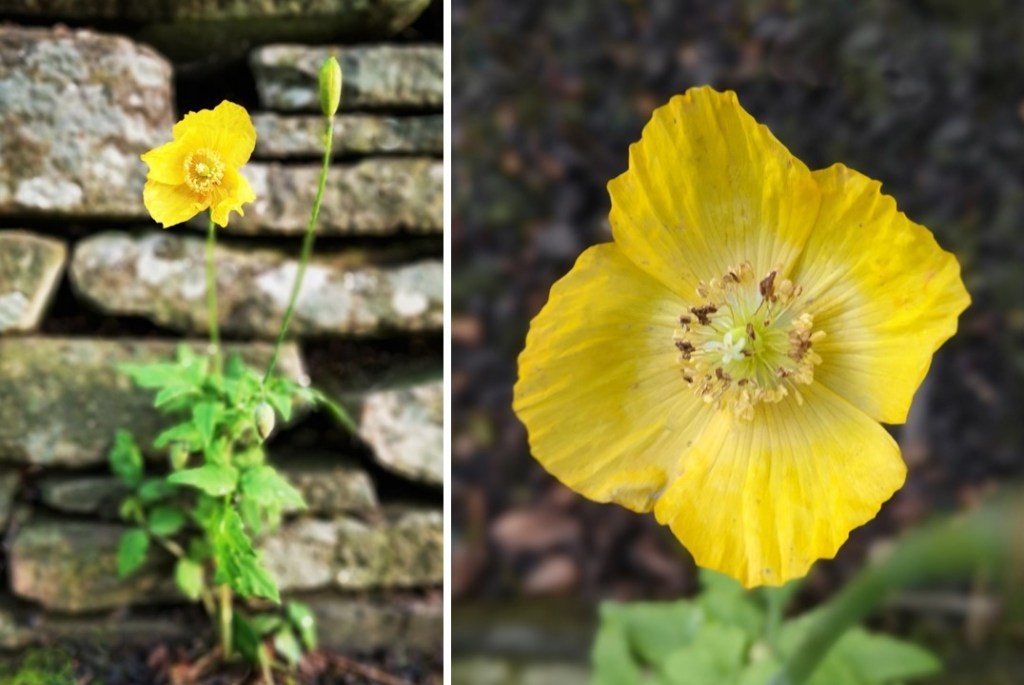
Yellow_poppy_flowering_in_winter_2022
New year poppy. Images: Kathryn Hawkins

This poppy was in flower at the beginning of December and you can see the buds of flowers yet to come. The second image was take on New Year’s Eve when the last of the buds opened.

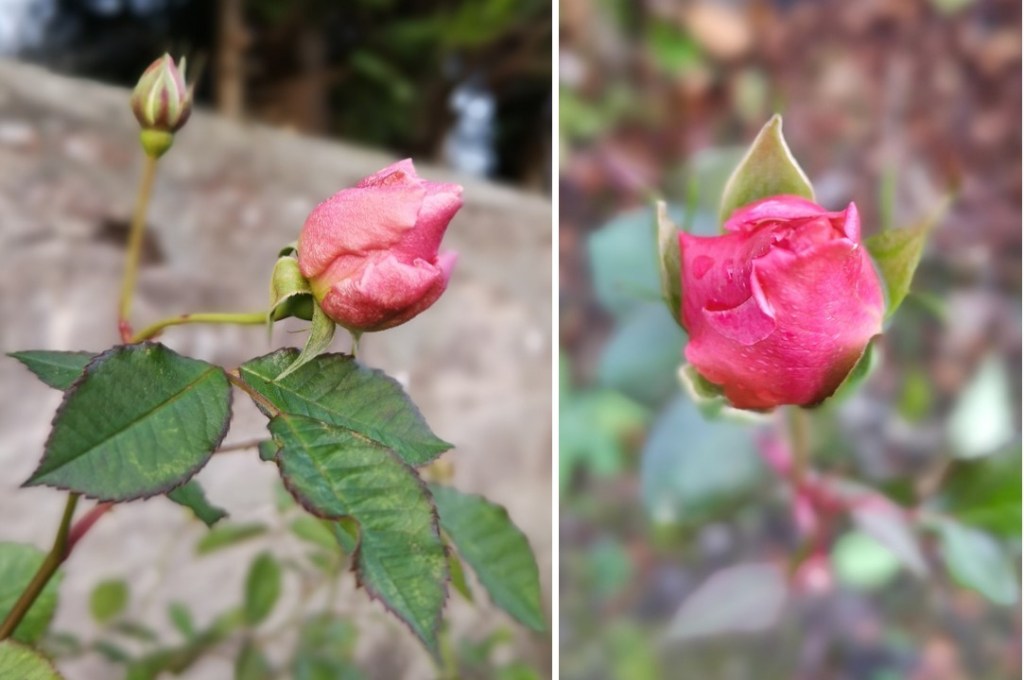
Pink_rose-buds_flowering_in_winter_2022
January rose-buds. Images: Kathryn Hawkins

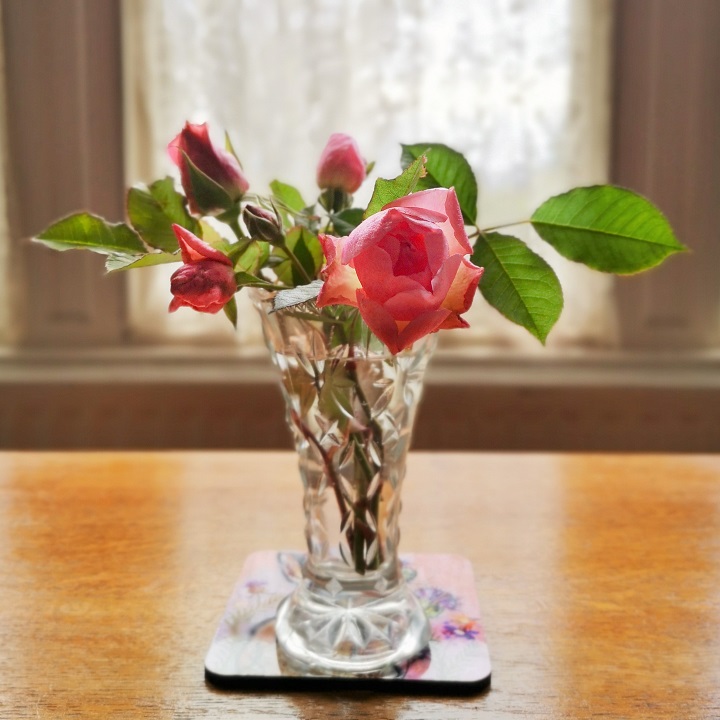
These buds are on 2 different rose bushes in different locations in the garden. I had thought that the buds might open up, but I suspect that the lack of sunshine and shorter daylight hours have kept them closed tight. With the temperature on the way down now, I picked them today and now have a delightfully fragrant, home-grown posy on my desk 🙂

Freshly_picked_pink_roses
New year roses. Image: Kathryn Hawkins

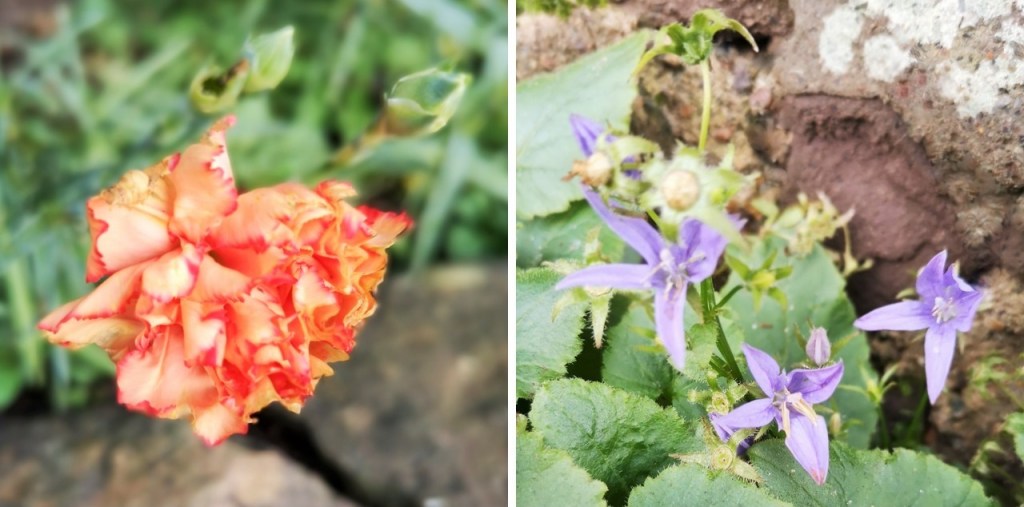
Looking a wee bit sad now, this is the last of the carnations. The plants have been in flower since early September so I think they deserve a rest now. And, flowering on and off for many weeks now, the trailing campanula is still producing fresh flowers in the more sheltered parts of the garden.

Orange-red_carnation_and_trailing_purple_campanula
January Carnation and Campanula. Images: Kathryn Hawkins

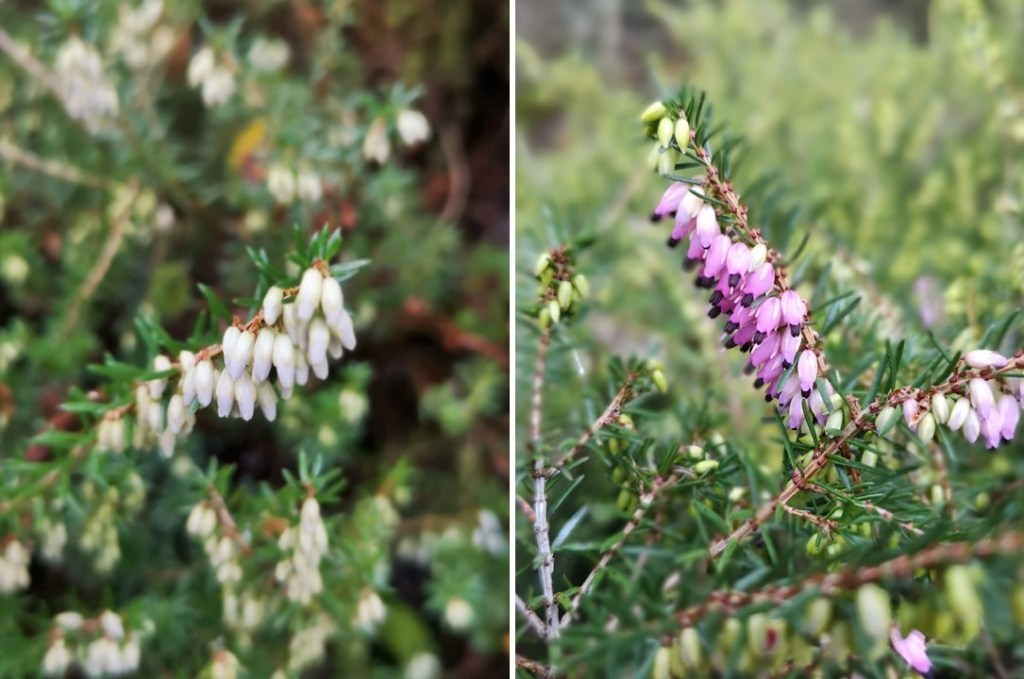
Something more seasonal to end my post with, the winter-flowering heathers have started to open up. Usually, the plants are covered in flowers by now, but this year, there are only a few sprigs in bloom at the moment.

White_and_pink_winter_flowering_heather_2022
Winter flowering heathers. Images: Kathryn Hawkins

I will be in the kitchen again for my next post, so until then, I hope you keep well and stay safe, and I send you my very best wishes for the year ahead.

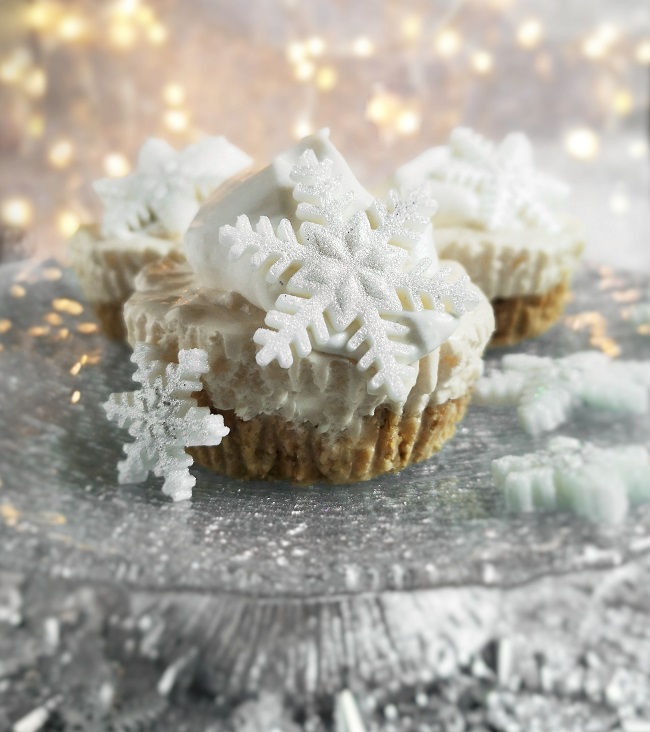
Snowflake pies (gluten-free; dairy-free; vegan)

Very Christmassy, snowflake pies. Image: Kathryn Hawkins

Hello again. With the Christmas break just a few days away, my post this week is a very simple and very seasonal dessert recipe which is easy to make and pretty to look at. With little snow in the forecast for the UK this year so far, this sweet treat is probably the closest I will come to experiencing a White Christmas.

Close-up_on_snowflake_pie
Light and fluffy, snowflake pie. Image: Kathryn Hawkins

Assembled in paper cupcake cases, the pies have a biscuit crumb base, and a topping simply made from vegan marshmallows and plant-based double cream. All very straightforward. I flavoured the topping with vanilla extract but you could add some citrus zest or Christmas spice. As you can image, the pies are quite sweet, but I found they paired perfectly with cooked cranberries. I think orange, rhubarb or raspberries would also work very well – something with a bit of acidity is ideal. OK, on with the recipe…..

Makes: 8

Ingredients

  • 115g free-from Digestive biscuits
  • 65g plant-based butter
  • 175g white vegan marshmallows
  • 400ml plant-based double cream, at room temperature
  • 1tsp good quality vanilla extract
  • Icing snowflakes and edible silver glitter to decorate

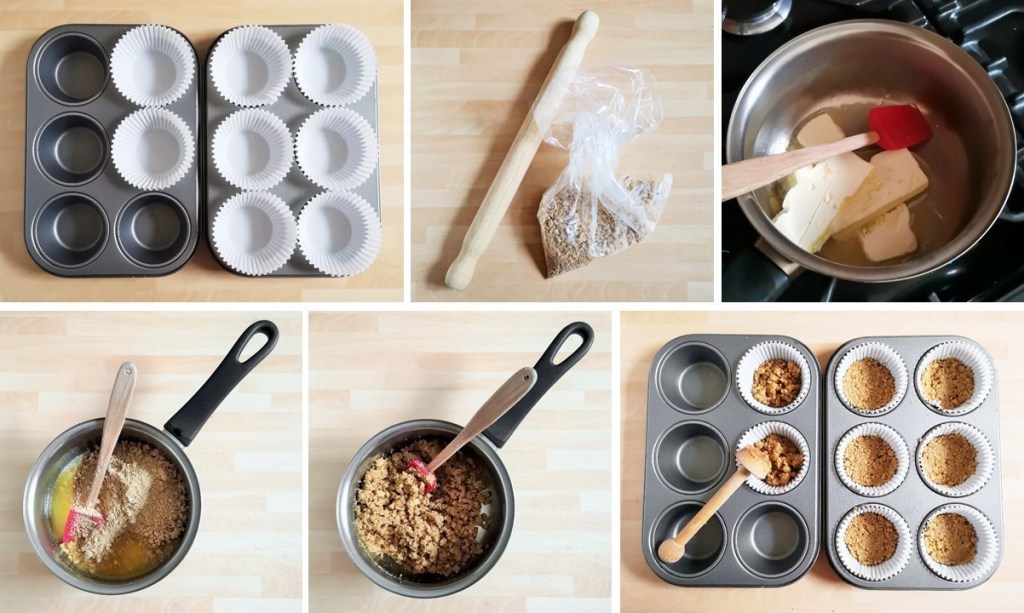
1. Line 8 muffin tins with plain cupcake paper cases – you don’t need to use anything fancy; the cases are being used as tin liners to help you turn the pies out more easily. Put the biscuits in a clean bag and crush finely with a rolling pin.

2. Melt the butter, remove from the heat and stir in the crumbs until evenly coated. Divide the mixture between the cases; press down well and chill until required.

How_to_make_snowflake_pie_bases
Making the bases. Images: Kathryn Hawkins

3. For easier melting, cut the marshmallows into small pieces – kitchen scissors are good for this. Place in a saucepan and pour over 100ml of the cream and add the vanilla.

4. Heat very gently, stirring occasionally, until the marshmallows melt into the cream. This will take about 5-8 minutes. Keep the heat as low as possible to avoid boiling. Then whisk until smooth.

Melting_vegan_marshmallows_with_plant-based_cream_to_make_snowflake_pies_filling
Making the filling. Images: Kathryn Hawkins

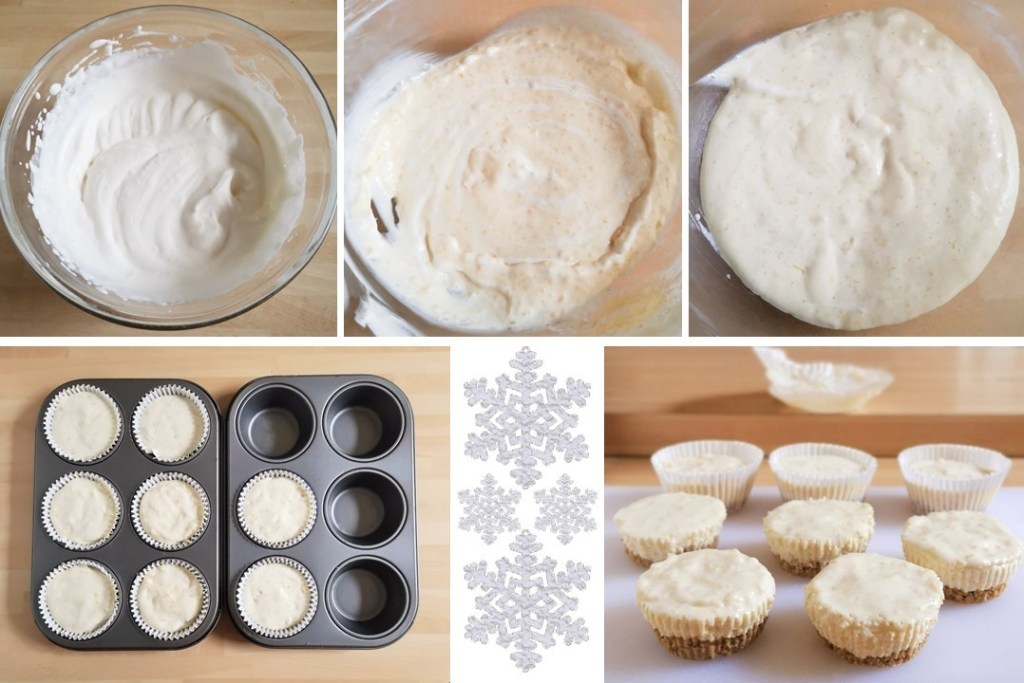
5. While the marshmallows are melting, whip a further 225ml cream until just peaking.

6. Working quickly, scrape the molten marshmallows mixture on top of the cream and gently mix the 2 together to make a fluffy, light mixture. The marshmallows will start to set again as soon as they meet the cream, so make sure the cream isn’t too cold.

7. Divide between the cases and chill for about 2hr until completely set, then remove from the tins and peel away the paper cases.

5_steps_showing_the_assembly_of_snowflake_pies
Assembling the pies. Images: Kathryn Hawkins.

8. To serve, whip the remaining cream and spoon a little on top of each pie. Decorate with snowflakes and glitter. Delicious accompanied with a cranberry, or other fruit, compote.

Single_serving_snowflake_pie_with_cranberry_compote
Cranberry compote. Image: Kathryn Hawkins

This is my last recipe post of the year. Thank you for your continued interest in my blog. I hope you have a very happy and healthy Christmas and I look forward to returning to my blog in the new year.

Sweet chilli jelly (naturally gluten-free; dairy-free; vegan)

Homemade_sweet_chilli_jelly_for_Christmas
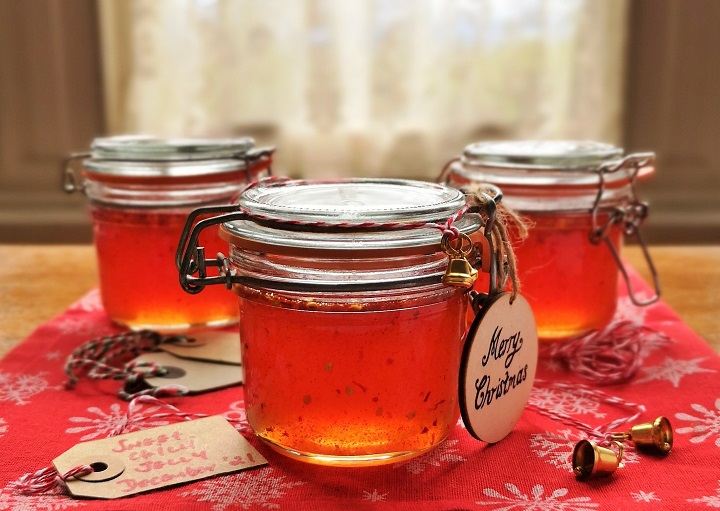
Sweet chilli jelly. Image: Kathryn Hawkins

Hello again. I hope you are keeping well. Are you beginning to feel Christmassy yet? We’ve had some snowfall here, not very much but it certainly feels like winter is upon us.

I haven’t had much time for making preserves this year and most of my harvested garden produce is still buried deep in the freezer waiting for me to get cooking. However, I did find some time a few days ago to make one of my favourites. I love the combination of sweet and smoke with a hint of chilli spice in this savoury jelly. It’s one of those preserves that goes with lots of things and makes a great gift for a food lover. It’s also ready to eat immediately or will store for up to a year.

You might want to scale back the recipe to make a smaller quantity but I wanted a few jars for myself as well as a couple to give away. Add more chillies for a spicy-hot jelly or use hot smoked paprika instead.

Makes: approx. 1.4kg

Ingredients

  • Approx. 1.5kg cooking apples, washed and left whole
  • Approx. 750g red (bell) peppers or capsicum, washed and stalks removed
  • 50-100g red chillies, washed and stalks removed
  • 6-8 garlic cloves, peeled
  • 2 large sprigs of fresh sage
  • 5 bay leaves
  • approx. 1.1kg granulated white sugar
  • 175ml cider vinegar
  • 2tsp smoked paprika
  • 1½tsp salt
  • 1-2tsp dried chilli flakes

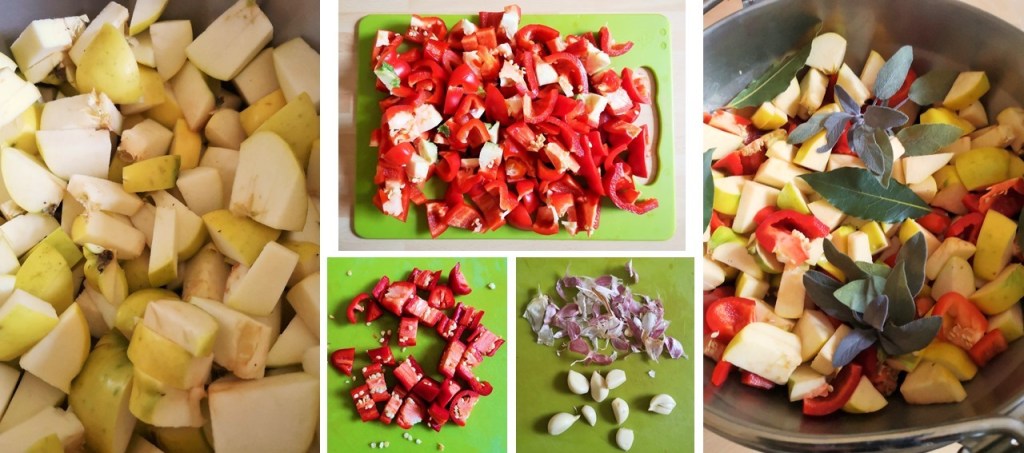
1. Chop the apples and place in a large preserving pan – seeds, core, skin, everything. Do the same with the peppers and chillies, then add to the pan along with the garlic, sage and bay leaves.

Prepared_fruit_and_veg_for_smoky_apple_jelly
Main ingredients: apples, peppers, chillies and garlic. Images: Kathryn Hawkins

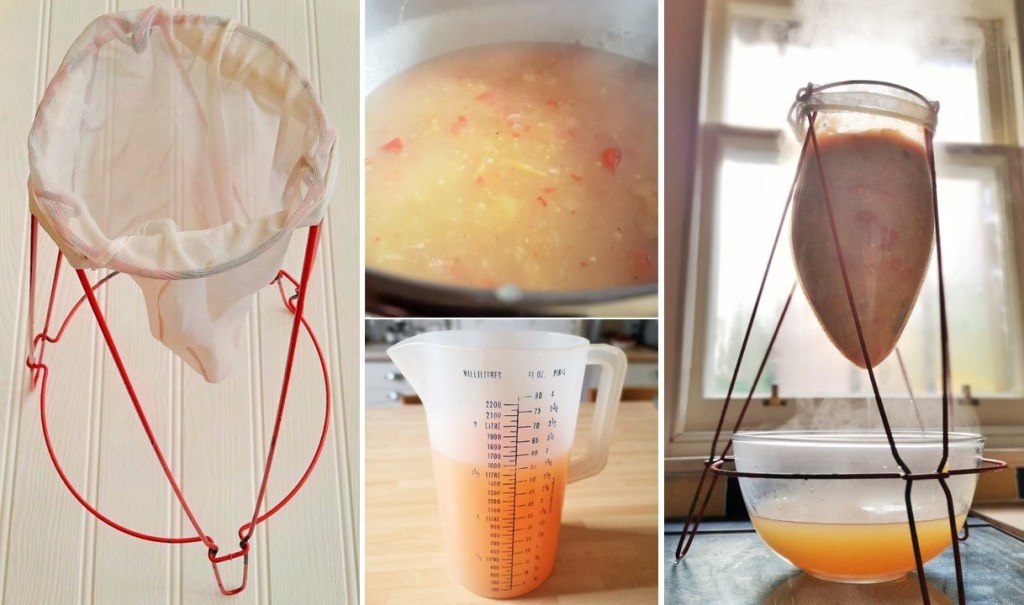
2. Pour over 1.7l water, bring to the boil, cover and simmer for about 40 minutes, mashing with a spoon occasionally, until everything is soft and pulpy. Leave to cool for 30 minutes.

3. Carefully ladle the pulp into a jelly bag suspended over a bowl and leave in a cool place to drip over night. Discard the pulp and measure the juice.

Jelly_bag_showing_straining_collected_juice_from_cooking_apples_and_vegetables
Making and straining the cooked fruit and veg. Images: Kathryn Hawkins

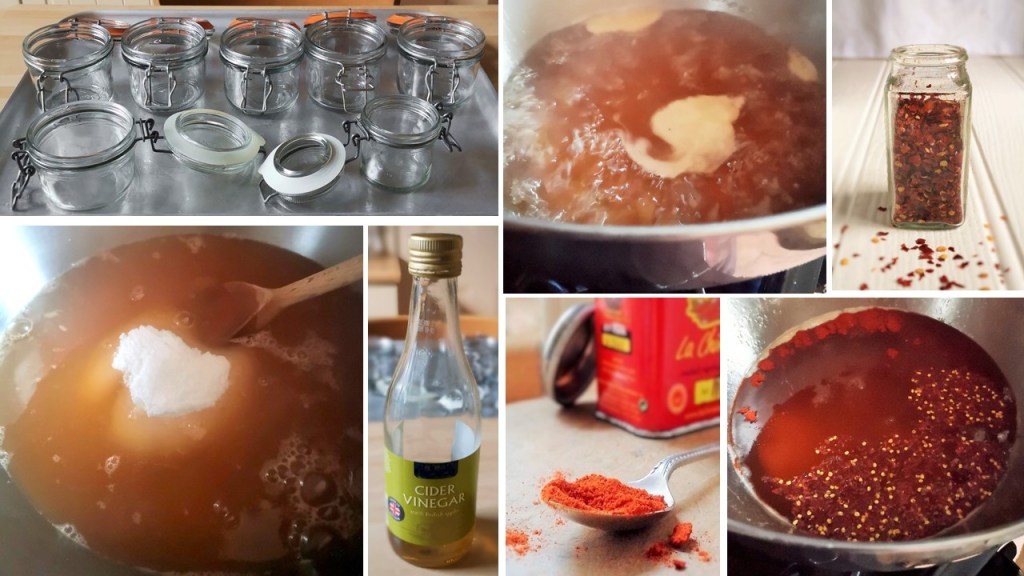
4. Pour the juice into a clean preserving pan and heat until hot. Add 450g sugar for every 650ml juice collected – I had 1.6l juice and added 1.1kg sugar. Pour in the vinegar and stir until the sugar dissolves, then raise the heat and boil rapidly until setting point is reached – 105°C on a sugar thermometer. Turn off the heat and stir in the salt, paprika and chillies. Leave to stand for 10 minutes.

Cooking_smoky_apple_jelly_and_flavouring_with_vinegar_smoked_paprika_and_chillies
Cooking and flavouring the jelly. Images: Kathryn Hawkins

4. Stir the jelly mixture and ladle into sterilized jam jars. Seal tightly while hot, then leave to cool before labelling. Store in a cool, dry, dark cupboard for up to 1 year.

Small_kilner_jars_of_homemade_sweet_chilli_jelly
Freshly cooked sweet chilli jelly in the jar and on the spoon. Images: Kathryn Hawkins

That’s me for another week. One more recipe post before the holidays. I’ll see you again in a few days. All the best until then 🙂

Golden November

Golden_yellow_Japanese_maple_tree_under_blue_sky
Japanese maple tree lit up in November sunshine. Image: Kathryn Hawkins

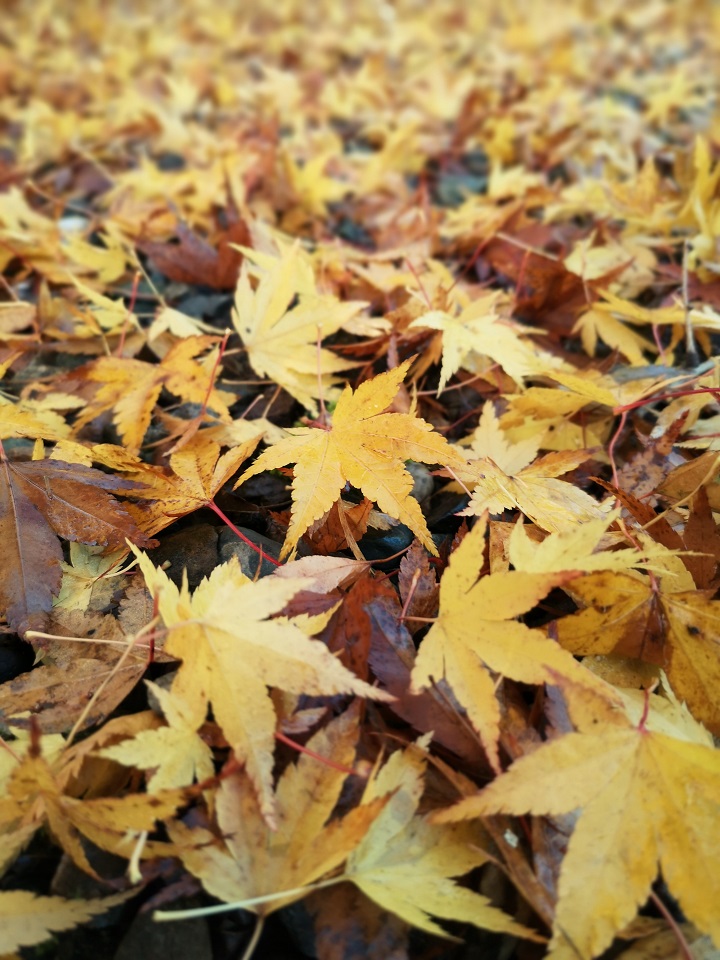
It’s been a late Autumn here in central Scotland. The leaves stayed on the trees longer than I anticipated and the weather has been fine. Most of the month has been mild with glorious blue-sky days which highlighted the golden tones in the garden a few days ago. Fortunately I got to the Japanese Maple tree before the rain fell and captured the rich yellow leaves before they were washed off the branches. The next day, the paths and lawns were covered in a leafy carpet.

Golden_leaved_Japanese_maple_before_and_after_the_rain
Japanese Maple before and after the rain. Images: Kathryn Hawkins
Fallen_yellow_Acer_leaves
Golden leafy carpet. Image: Kathryn Hawkins

Accompanying the fair-weather days have been glowing sunrises and blazing sunsets. Both come and go with speed but are truly spectacular if you are in the right place at the right time. The front of the house faces the sun rising over the Ochil Hills, then in the back garden, a few hours later, you are able to see the sun setting.

2_Scottish_sunrises_over_Ochil_Hills_Perthshire
Sun-up in mid November. Images: Kathryn Hawkins
2_spectacular_November_sunsets_from_a_Scottish_garden
Blazing November sunsets. Images: Kathryn Hawkins

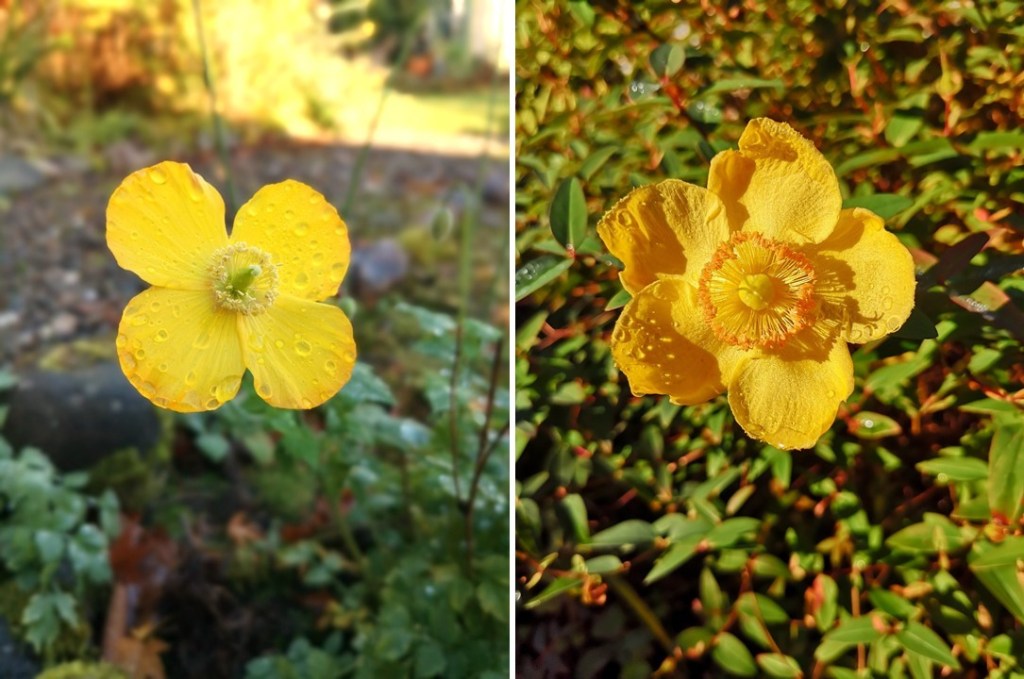
In the garden, here and there, signs of life continue. Some of the plants and shrubs have been confused by the warm weather this month and there are unseasonal second and third flowerings taking place.

Unseasonal_flowering_of_a_Welsh_poppy_and_Sharon_rose
A November Welsh poppy and Sharon Rose. Images: Kathryn Hawkins
3_lavender_plants_in_flower_in_November
November lavender, Images: Kathryn Hawkins

I cleared out the greenhouse a couple of weeks ago and picked off the last few tomatoes. They are now ripening indoors. I also harvested my first basket of greens; they haven’t done that well and got badly attacked by caterpillars, but there is enough for a few meals. A few more baby purple carrots as well.

End_of_season_tomatoes_and_homegrown_cabbages
Last of the tomatoes, some baby carrots and the first of the greens. Images: Kathryn Hawkins

It’s been a wonderful autumn for fungus of all kinds. I have seen so many images on social media, I never realised that there were so many different mushrooms and toadstools out there. Each year, to varying degrees, this bracket fungus grows on a old tree stump in the garden. I think this year it has surpassed itself. I love the arch of colours on each piece.

Rainbow_bracket_fungs_growing_on_an_old_tree_stump
Rainbow bracket fungus. Images: Kathryn Hawkins

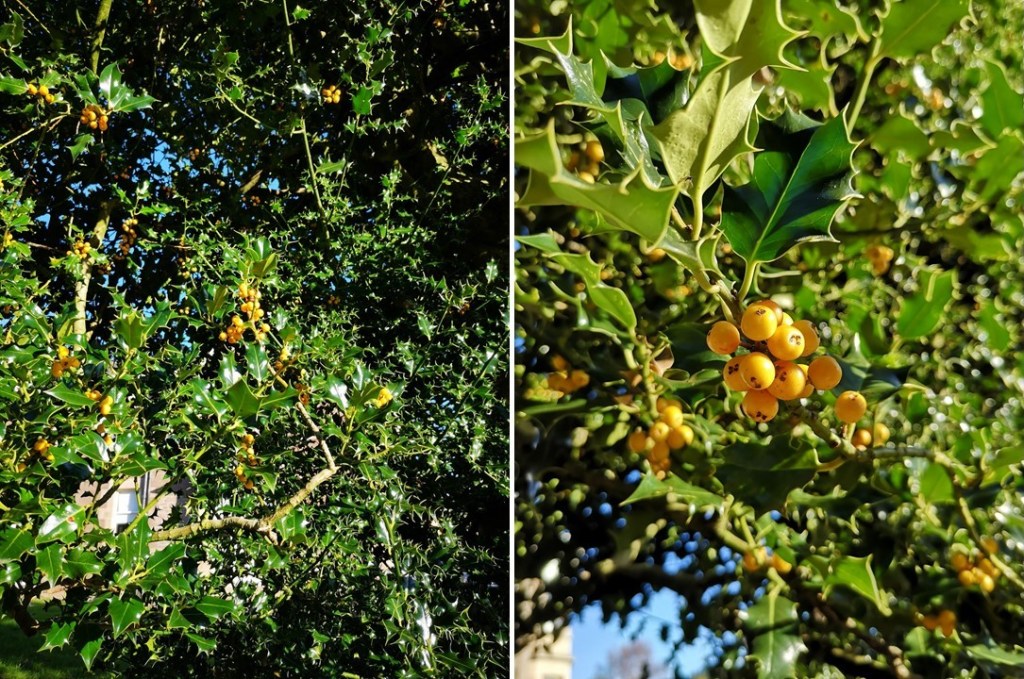
I’m going to finish my post with something a little bit festive. Most of the fruiting trees around and about the garden are covered in berries this year, and the holly is no exception. The red berries seem to get picked off first leaving the yellow variety behind. Perhaps they taste different? No matter, I am happy for them to remain on the tree to give a great splash of colour to the garden and look magnificent against a blue sky. Until next time, take care and keep safe 🙂

November_yellow_holly_berries_on_a_sunny_day
Golden yellow holly berries. Images: Kathryn Hawkins

Sweet and sour red cabbage (naturally gluten-free and vegan)

China_serving_dish_with_sweet_and_sour_red_cabbage
Sweet and sour red cabbage. Image: Kathryn Hawkins

Hello there. I hope you are well and enjoying Autumn. With the days getting shorter and the temperature dropping a few degrees here in the UK, my thoughts have turned to comfort food. There are some deliciously leafy seasonal vegetables around just now which make an ideal accompaniment to an autumnal stew or roast. I have a tasty red cabbage dish to share with you this week which is perfect for batch cooking as it freezes very well.

Whole_and_halved_fresh_red_cabbage_
Fresh red cabbage. Images: Kathryn Hawkins

Most often, I braise red cabbage slowly with fresh apple or pear and some vinegar, sugar and cinnamon, but to ring the changes this time I have used a different combination of sweet and sour flavours.

Sumac_raspberry_vinegar_barberries_and_plum_cheese
Sweet and sour flavours: sumac, raspberry vinegar, barberries and plum cheese. Images: Kathryn Hawkins

For the sour flavours, I used sumac powder with its tart astringent flavour, reminiscent of lemon juice; dried barberries, another tartly flavoured ingredient which add a sharp tang to the dish (chopped dried unsweetened cranberries would also work), and homemade raspberry vinegar. For sweetness, I added some of the plum cheese I made about a month ago – Plum, sloe and apple cheese (naturally gluten-free and vegan) or you can use plum jam if you prefer. To add a splash of sparkle, juiciness and texture, I sprinkled over one of my favourite ingredients, fresh pomegranate seeds, to finish. All in all, a delicious flavour combination which tastes as good as it looks. I hope you enjoy the recipe.

Serves: 4

Ingredients

  • ½ red cabbage
  • 1 large red onion
  • 25g plant butter
  • 2tbsp raspberry vinegar (or balsamic if you prefer)
  • 2tbsp plum cheese or jam (or redcurrant jelly works well)
  • Salt and freshly ground black pepper
  • 1tbsp dried barberries (or finely chopped unsweetened cranberries
  • Sumac to taste
  • Pomegranate seeds to sprinkle

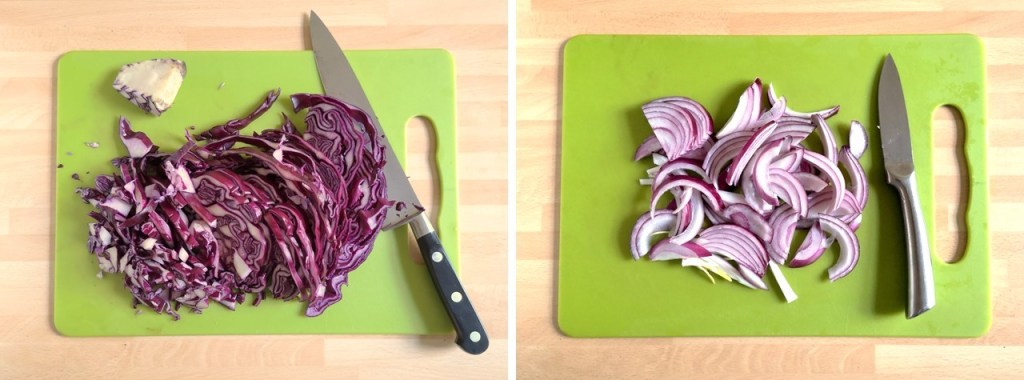
1. Cut out the cabbage stump, then finely shred or slice the remainder of the cabbage. If you slice everything finely, you can use up the tougher stems of the cabbage as well. I ended up with about 400g prepared cabbage. Peel and thinly slice the onion.

Preparing_red_cabbage_and_red_onion
Red cabbage and onion preparation. Images: Kathryn Hawkins

2. Melt the plant butter in a large deep frying pan or saucepan and gently fry the cabbage and onion, stirring, for about 5 minutes until well coated in the butter.

3. Add the vinegar, plum cheese or jam and plenty of seasoning. Mix well, lower the heat, then cover and simmer gently for 40-50 minutes, stirring occasionally, until very tender. Stir in the barberries and sumac to taste. Turn off the heat, cover and let stand for 10 minutes.

3_stages_to_cooking_sweet_and_sour_red_cabbage
Cooking sweet and sour red cabbage. Images: Kathryn Hawkins

4. To serve, spoon into a warm serving dish and sprinkle the top with extra sumac and pomegranate seeds if liked.

Close-up_on_freshly cooked_red_cabbage_with_pomegranate_seeds
Red cabbage close-up. Image: Kathryn Hawkins

It’s been a glorious day here in central Scotland today. Perfect weather for enjoying the autumnal colours. I hope you have a good few days until my next post. All the best for now 🙂

Apples and pears

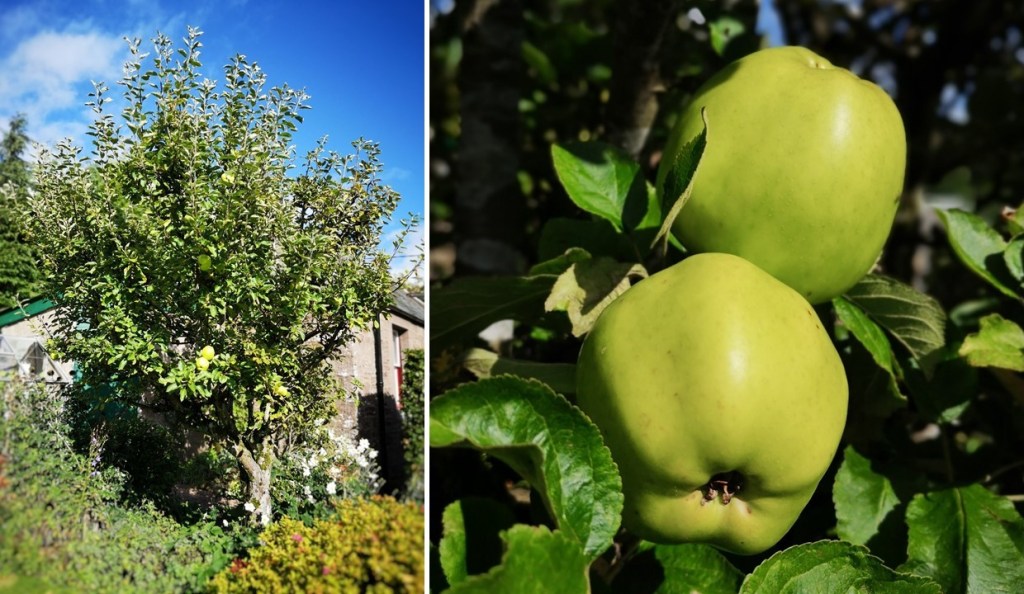
Old_Lord_Derby_cooking_apple_tree_late_October
Aged cooking apple tree. Images: Kathryn Hawkins

Hello there. So here we are at the end of another month. I hope you have had a good couple of weeks since my last post. I had been intending to show you round my garden at this point in time, but to be honest, there is not a lot to see. Most things are looking rather soggy and bedraggled after recent heavy rain . It feels like Autumn has been cut short this year by the rain washing the leaves from the trees.

No matter, I have some cheery images of my apple and pear harvests earlier in the month. I was able to capture the images under mostly blue skies which should make for better viewing. I hope you enjoy them 🙂

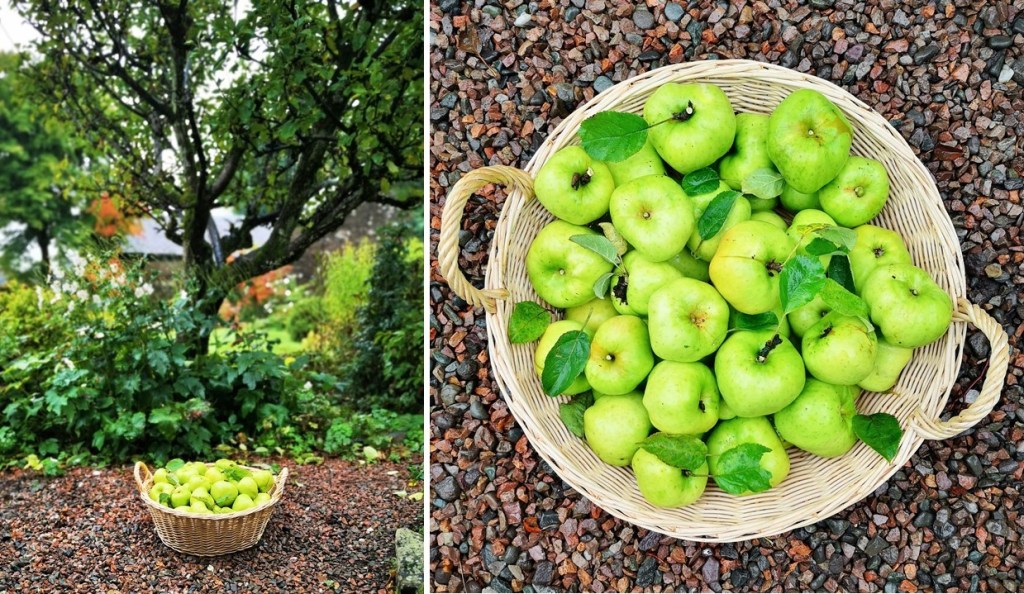
Large_basket_of_Lord_Derby_cooking_apples
Lord Derby cooking apple harvest 2021. Images: Kathryn Hawkins

The old apple tree in the garden produced a fraction of the apples it provided last year. In 2020, I had at least 4 times the amount. However, I still have a good basketful and have started cooking them down. I think they will last a few weeks yet.

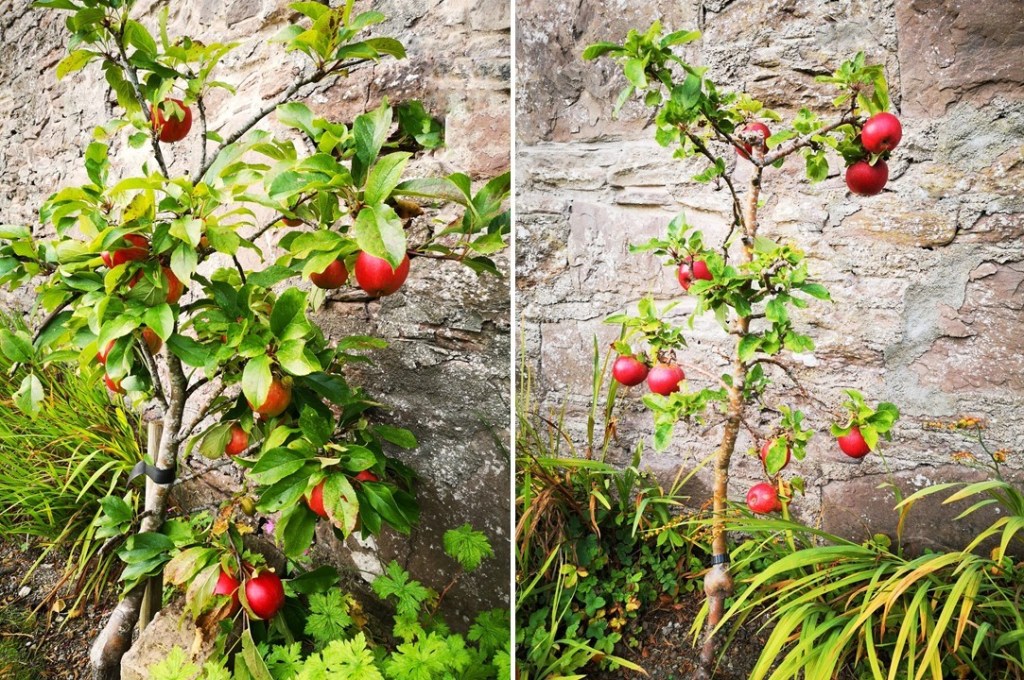
2_miniature_apple_trees_with_fruit
Miniature eating apple trees. Images: Kathryn Hawkins
Freshly_picked_eating_apples_in_a_wooden_box
Harvested eating apples. Images: Kathryn Hawkins

It’s been a bumper year for eating apples. Only a handful from one tree last year and nothing from the other, but this year I have been rewarded with a huge crop by comparison. The very red apples are called Katy but sadly I can’t remember the other variety now, however both varieties are sweet, juicy and very delicious, and they keep well.

Small_Concorde_pear_tree_with_fruit
Concorde pear tree and fruit. Images: Kathryn Hawkins
Comice_pear_tree_October_2021_with_fruit
Espaliered Comice pear tree. Images: Kathryn Hawkins

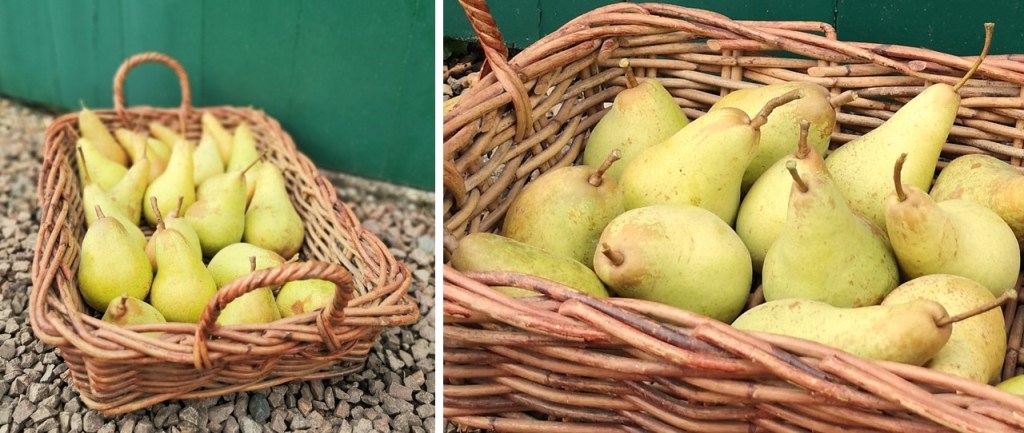
And so to the pears trees. They have also had a good year, providing a generous basketful after a very poor crop last year. Both trees are still small although they have been planted in the garden for about a decade now. The pears store well so there will be fruit to enjoy for a while yet.

Rectangular_basket_of_homegrown_Concorde_and_Comice_pears
Homegrown Concorde and Comice pears. Images: Kathryn Hawkins

I have posted many apple and pear recipes over the years, but these are my top 3 which you might like to try – just click on the links for the recipes:

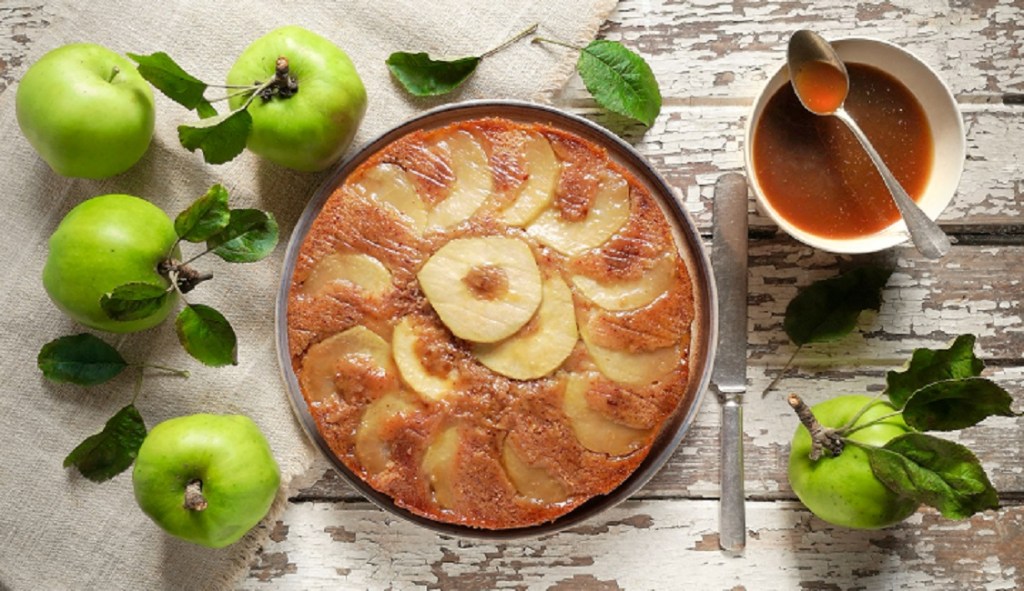
  1. Toffee upside down cake – Toffee apple upside-down cake (gluten-free; dairy-free; vegan)
Overhead_image_of_toffee_apple_upside_down_cake
Apples, cake and toffee sauce. Image: Kathryn Hawkins

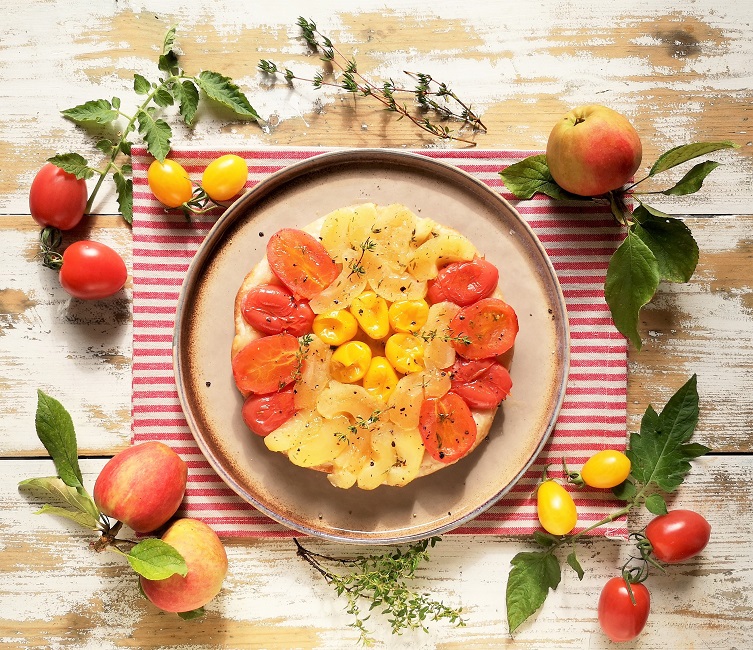
2. Apple and tomato tart tatin – Apple and tomato tart tatin (gluten-free; dairy-free; vegan)

Overhead_image_of_apple_and_tomato_tart_tatin
A fruit tart as pretty as a picture. Image: Kathryn Hawkins

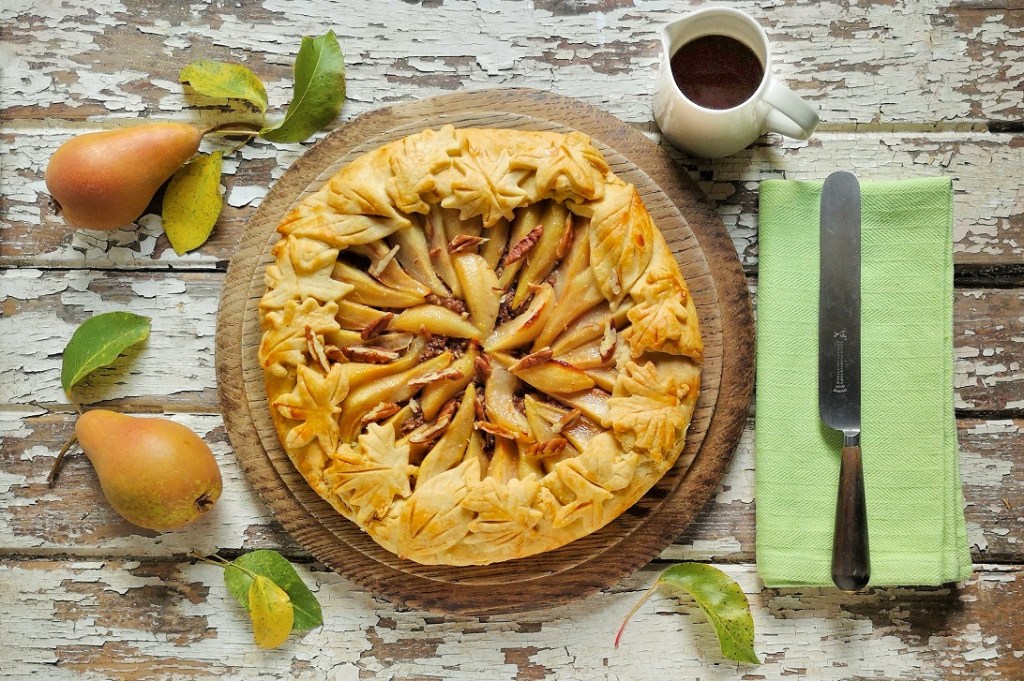
3. Pear, pecan and maple crostata – Pear, pecan and maple crostata (dairy-free and vegan)

Pear_and_pecan_crostata_with_maple_syrup
Pear, pecan and maple crostata. Image: Kathryn Hawkins

I hope you are enjoying Autumn/The Fall wherever you are and I look forward to sharing some more recipes and images with you in my next post. My best wishes to you until then.

Plum, sloe and apple cheese (naturally gluten-free and vegan)

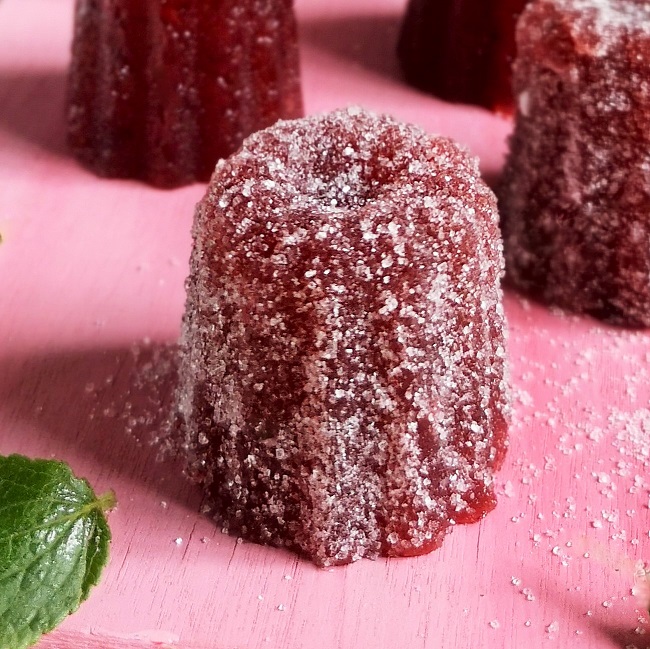
Homemade_plum_sloe_and_apple_cheeses_arranged_on_a_pink_board_with_sugar
Homemade plum, sloe and apple cheese. Image: Kathryn Hawkins

Hello again. I have a very seasonal recipe to share with you this week. I have been out and about enjoying the autumnal colours. On one of my walks, I was fortunate enough to find some sloe berries still in situ on a wild blackthorn hedge. They were growing so thickly that they looked like bunches of grapes. I had a small bag with me and was able to fill it with a precious harvest of these dark blue-skinned fruits with their fine silvery bloom.

Sloe_berries_ripe_and_ready
Scottish sloe foraging. Images: Kathryn Hawkins

Finding the sloes coincided with the last few Victoria plums ripening in the garden, and the beginning of the apple season. What better way to use them all than to combine them in a delicious thick and fruity preserve, the perfect colour to match the season.

Early_autumn_Victoria_plums_and_Lord_Derby_cooking_apples
End of the season Victoria plums and new season Lord Derby cooking apples. Images: Kathryn Hawkins

I have posted a similar recipe to this one, before using only plums. You can find the recipe here: Plum and bay membrillo (naturally gluten-free and vegan) This year’s version is very fruity and makes a delicious sweet treat on its own or with cream or yogurt. Serve it as an accompaniment to roasted, grilled or barbecued food, and if you eat cheese, it’s good served with just about any variety.

Sprinkling_plum_sloe_and_apple_cheeses_with_white_sugar
Sugar-coating fruit cheeses. Image: Kathryn Hawkins

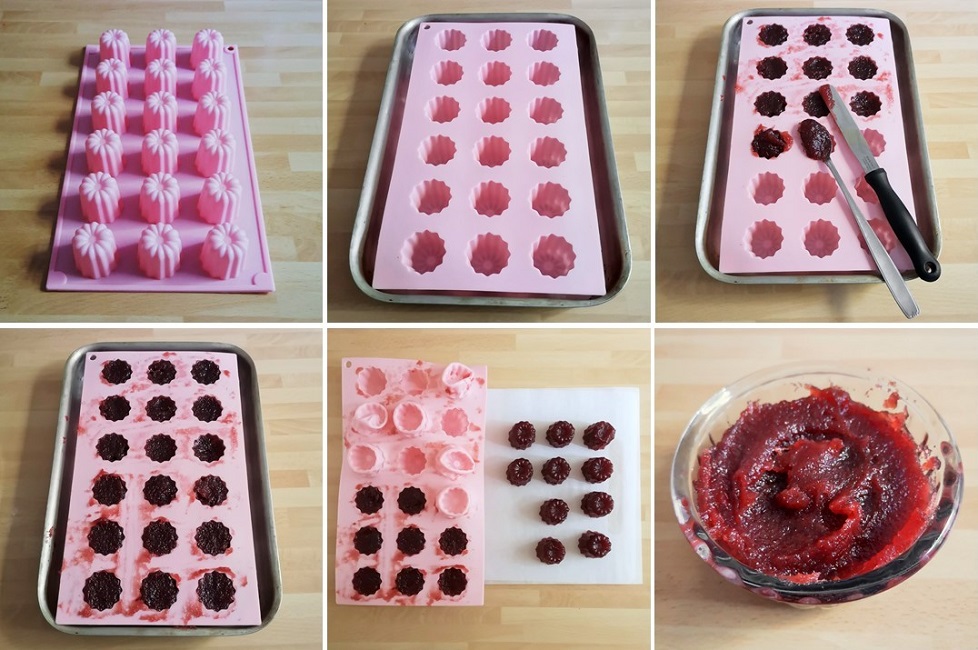
I set the fruit cheese in individual silicone moulds and dusted them with more sugar; the remaining cheese went into a ramekin dish. Choose anything heatproof like a tin or ovenproof dish; line the container and then once it is cold you can slice it or turn it out. Keep the cheese wrapped up in the fridge for up to a month or it can be frozen. Set in a pretty little dish, I think it would make a lovely edible gift – if you can bring yourself to hand it over to anyone else!

Close-up_on_an_individual_plum_sloe_and_apple_cheese_coated_in_sugar
Sugar-coated fruit cheese. Image: Kathryn Hawkins

Makes: approx. 750g

Ingredients

  • 275g plums, stones removed, chopped
  • 275g sloes, washed
  • 500g cooking apples, cored and chopped
  • approx. 550g granulated white sugar + extra for dusting (optional)

1. Put all the fruit in a large saucepan and pour over 200ml water. Bring to the boil, cover and then simmer for 15-20 minutes until very soft.

2. Mash the fruit and push through a nylon sieve positioned over a large bowl until you have only dry matter left in the sieve. Weigh the purée. My yield was around 850g of fruit purée.

Steps_1_to_6_cooking_the_fruit_to_make_cheese
Cooking the fruit for cheese. Images: Kathryn Hawkins

3. Clean the saucepan and put the purée back inside. Bring to the boil and cook, stirring occasionally, for about 20 minutes to reduce the pulp by about one third – it should be thick enough to hold a “slice” in the bottom of the sauce.

4. To make the preserve, you need to stir in the same quantity of white sugar to the amount of thickened purée – I had 550g purée so I added 550g white sugar.

5. Stir the mixture until the sugar dissolves and then bring back to the boil and continue cooking for a further 20 minutes, stirring frequently to prevent the mix sticking on the bottom of the pan, until very thick. If you have a jam thermometer, cook the mixture to 105°C. I use a spatula for the stirring because it gets right into the edges of the pan which helps to prevent the mixture sticking and burning.

Reducing_down_fruit_purée_to_make_cheese
Cooking the fruit purée. Images: Kathryn Hawkins

6. Working quickly, spoon the mixture into whatever you have chosen to set the cheese. As the mixture cools, it becomes thicker and more solidified making it more challenging to shape. However, you can reheat the mixture gently to soften it if you need to.

7. Allow the cheese to cool and set completely before attempting to turn it out or to slice it. I would suggest chilling it for an hour after cooling if you want to turn it out cleanly.

Preparation_steps_for_setting_and_turning_out_fruit_cheese
Moulding and unmoulding the fruit cheese. Images: Kathryn Hawkins

If you are making individual cheeses, you will find that a sugar coating sticks easily to the surface. Simple sprinkle over or gently roll the cheeses in a pile of sugar. The sugar coating does make smaller pieces easier to wrap in waxed paper and helps prevent the cheese sticking to the wrapping.

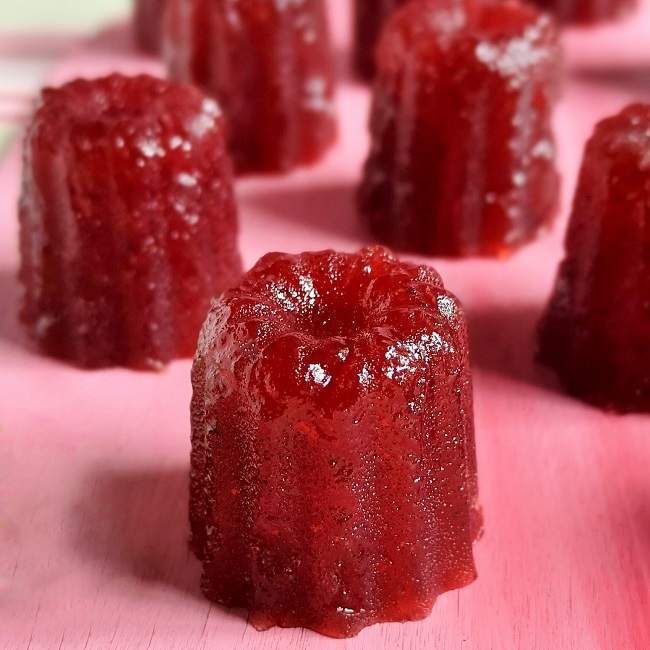
Plum_sloe_and_apple_cheese_set_in_small_moulds
Fruit cheeses up close. Image: Kathryn Hawkins

I hope you have a good few days ahead and that you are able to get out and about to enjoy the beautiful shades of the season. Until next time, my best wishes to you 🙂

Homegrown coriander (cilantro) seeds

Small_blue_bowl_of_freshly_picked_coriander_seed
Harvested coriander (cilantro) seed. Images: Kathryn Hawkins

Hello again. Well it’s certainly feeling much more autumnal since my last post. After a few bright and sunny days, the weather has turned much cooler and, as I type this, it is pouring with rain.

Towards the end of last month, I harvested my first crop of coriander (cilantro) seed. When I sowed the herb seeds back in late spring, my only intention was to grow the herb for its leaves for use in salads, curries and salsas. However, once the seedlings appeared, I never quite got round to thinning out the crop. I kept them all in the same pot, in the greenhouse, just picking off a few leaves here and there, and never quite finding the time to separate them and plant them outside.

Fresh_coriander_flowers
Coriander (cilantro) flowers. Image: Kathryn Hawkins

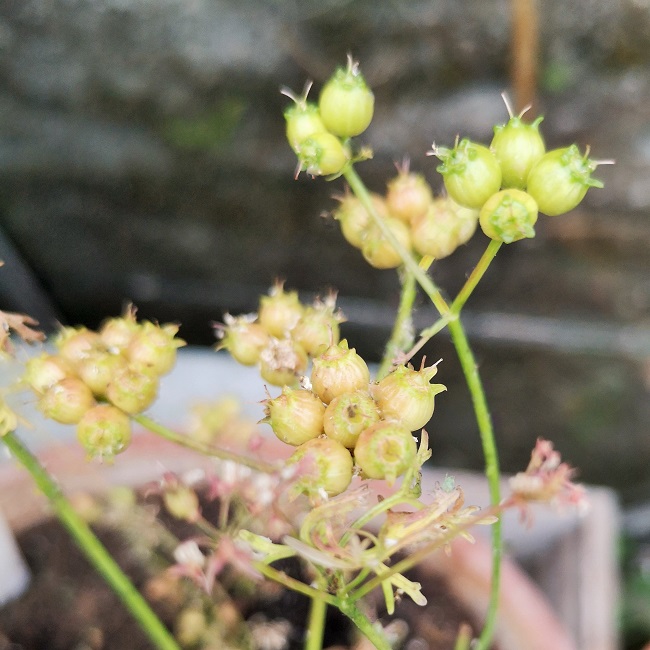
After a while, the individual plants became leggy and formed flower stalks. I enjoyed the flowers for their aroma and the splash of brightness they offered. The leaves had started to become coarser in texture and had a bronze edge, and weren’t quite so appealing to eat. In early August, I decided it was time to get rid of them altogether as the flowers had dried and were falling. However, on closer inspection, the fallen petals had left behind bright green “berries”.

Bright_green_coriander_seeds
Bright green seeds. Images: Kathryn Hawkins

After a bit of research and a quick change of plan, I decided to keep the plants with the hope of being able to harvest the seeds. You can pick the green fruit and use it in cooking, but they don’t store well. I tried one or two, the flavour was mild, fresh and slightly sweet, and would be good chopped up in a salad or added to a relish. The green berries can be pickled as well.

However, I read that if you leave the fruit on the stems long enough, the berries will dry naturally and can be harvested for longer storing, and used as the familiar fragrant spice.

Coriander_seeds_semi_dried
Beginning to dry out. Image: Kathryn Hawkins

By the end of August the seeds had turned light gold, and in another month, they had dried out completely. At the time, we were blessed with some dry weather so I think this helped with the drying process. I guess that a damp atmosphere could cause the seeds to turn mouldy.

Coriander_seed_dried_on_the_stem
Coriander seed dried and ready for harvesting. Images: Kathryn Hawkins

I found it easier to pull the stems from the soil and pick off the seeds into a small bowl. I left them in the greenhouse for a few more days to finish ripening naturally in the sunshine.

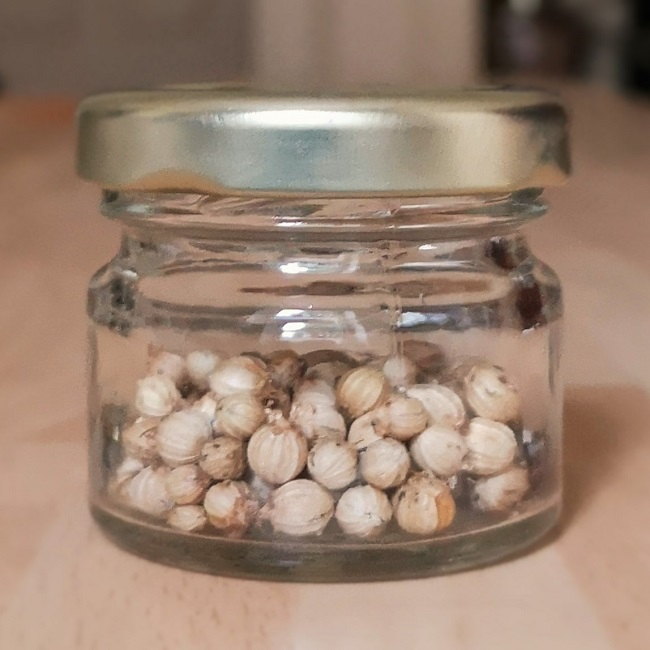
It was a very small harvest, accidental by nature but rewarding all the same. Now the seeds are in a tiny jam jar in my spice cupboard waiting for the right recipe to include them in.

Small_jar_of_freshly_picked_dry_coriander_seed
Precious seed harvest ready for storing. Image: Kathryn Hawkins

Until next time, take care, my best wishes to you, and thank you for stopping by again 🙂

Just peachy: Peach and almond bake (gluten-free; dairy-free, vegan)

Peach_and_almond_bake_freshly_cooked
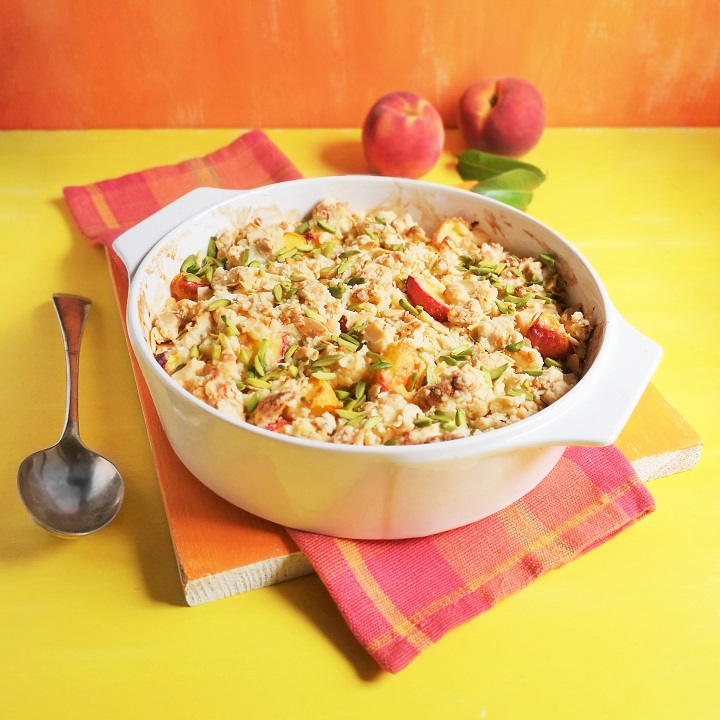
Fresh out of the oven. Image: Kathryn Hawkins

Hello everyone. I hope life is treating you well. Time for a foodie post this week, and something to celebrate the fabulous fruit around at the moment. I picked Victoria plums from the garden last weekend and have been busy making compote and jam, and it won’t be long now until the apples and pears are ripe and ready. One of the most delicious fruits I have eaten recently have been fresh peaches (sadly not homegrown). As well as enjoying them just as they are in all their juicy-sweet deliciousness, I made this bake which I thought to share with you.

Fresh_peach_still-life
Just peaches. Image: Kathryn Hawkins

The bake will work with other seasonal fruits like plums and greengages – you’ll just need to adjust the sweetness accordingly. As well as adding flaked almonds to the topping, I have added my beloved marzipan but this can be left out and sweeten the topping with sugar instead. If you’re not an almond fan, try pecans or toasted hazelnuts and maple syrup, and add finely grated orange rind or vanilla extract for extra flavour.

Fresh_peach_halves_and_slices_with_lemon_juice
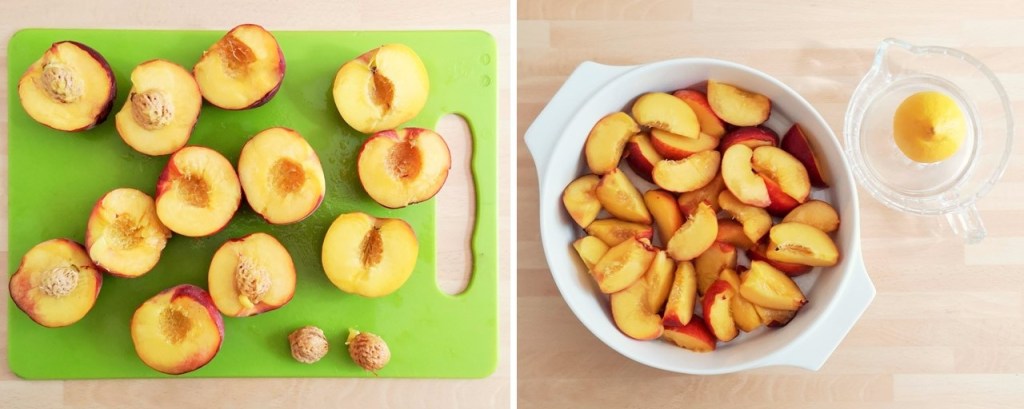
Preparing fresh peaches. Images: Kathryn Hawkins

I did struggle a bit to remove the stones from the fruit as they were a little bit soft, so slightly less ripe work better for neat slices. I add lemon juice to the slices before sweetening as I find that peaches often discolour when cooked.

Overhead_and_scooped_out_peach_and_almond_bake
Looking peachy. Image: Kathryn Hawkins

Serves: 6

Ingredients

  • 6 firm to ripe peaches
  • Juice of 1 lemon
  • 2 tbsp caster sugar
  • 1 tbsp cornflour (cornstarch)

For the topping:

  • 150g gluten-free plain flour blend
  • 75g dairy-free block margarine (or butter), cut into pieces
  • A pinch of salt
  • 75g marzipan, grated
  • 50g toasted flaked almonds
  • 15g chopped pistachios

1. Preheat the oven to 200°C, 180°C fan oven, gas 6. Wash and pat dry the peaches, then cut in half and remove the stones. Cut into thick slices and place in a baking dish. Toss in the lemon juice to help prevent browning. Set aside.

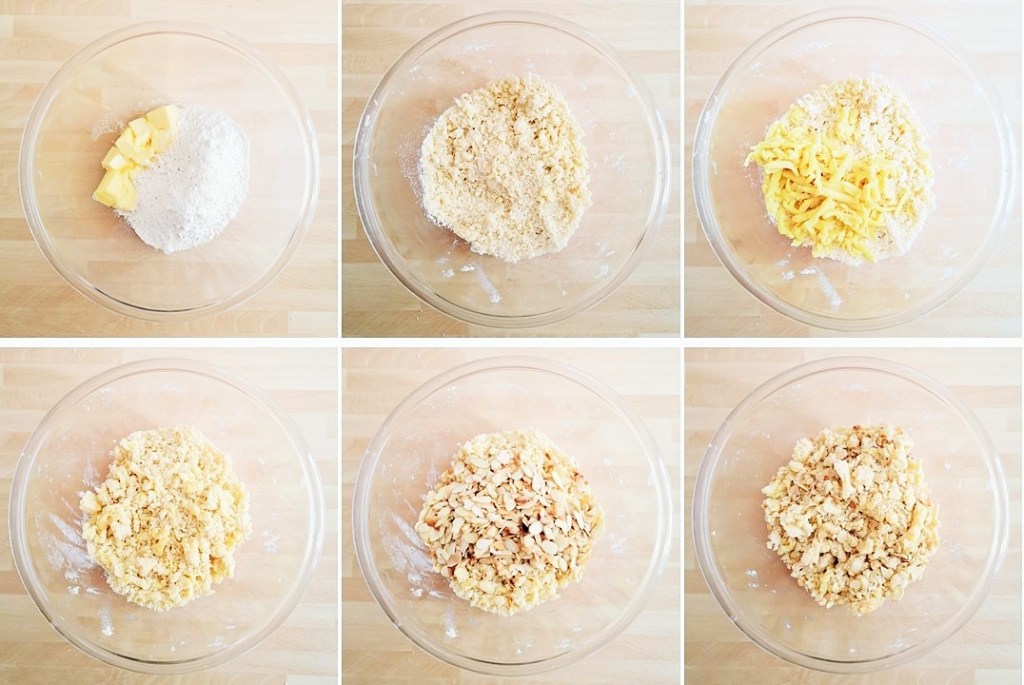
2. For the topping, put the flour in a bowl and add the margarine and salt. Rub the margarine into the flour until well blended. Stir in the marzipan making sure it is well distributed and then stir in the flaked almonds.

6_steps_to_making_the_almond_topping_for_peach_and_almond_bake
Almond topping preparation. Images: Kathryn Hawkins

3. Mix the sugar and cornflour (cornstarch) into the peaches and sprinkle the topping over the fruit. Put the dish on a baking tray and bake for 30-35 minutes until lightly golden. Best served warm, sprinkled with pistachios.

Prepared_peaches_and_peaches_with_almond_topping
Peaches and almond topping. Images: Kathryn Hawkins
Serving_of_peach_and_almond_bake
Inside peach and almond bake. Images: Kathryn Hawkins

That’s all for another week. I hope enjoy the recipe and I look forward to posting again in a few days time. Until then, take care and stay safe 🙂