For several weeks, every now and again, I have been trying to make eggless meringues. The meringues I prefer are the large, pillow-like ones made with brown sugar and lots of chopped nuts and a drizzle of dark chocolate, and not the plain white, dainty variety. Sadly, I haven’t been successful so far. However, my experimentation has led me to find other uses for vegan “egg white”, hence, I come to this week’s post.
Next time you open a can of cooked white beans or chickpeas in water, keep the canning liquid, for this is vegan “egg white”. Amazing as it sounds, the liquid whips up into a thick foam and can be used (with care) as a substitute for fresh egg whites. You may find it referred to as aqua fava for after all, that is what it is: bean water!
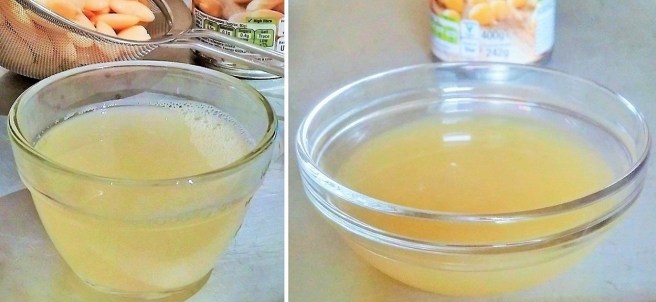
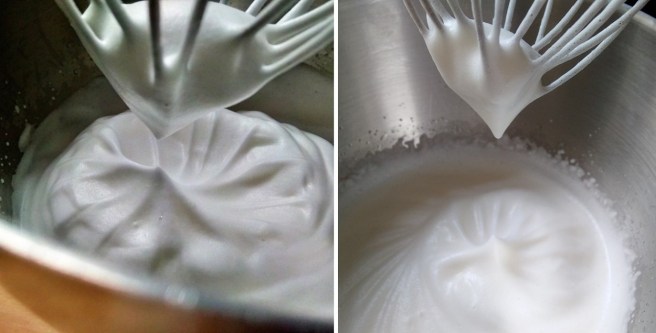
The drained liquid content of a 400g can is approx. 140ml which equates to 3 medium egg whites. It freezes well so you don’t need to use all of it in one recipe – an ice cube tray is perfect for individual egg-sized amounts, but don’t forget to label it otherwise your G&T may taste a little strange! As with fresh egg white, place in a clean, grease-free bowl and whisk in the same way. I add a pinch of cream of tartar to assist the volume when whisking up.
Once I have cracked a decent meringue recipe and got my sugar and nut quantities correct, I look forward to sharing it with you. Until then, here is my recipe for Italian amaretti cookies. These are the soft variety, and are truly delicious (and very moreish). They make a lovely gift too.
Makes: 18
- A few sheets of gluten-free edible paper (optional)
- 45ml chickpea or white bean canning water
- Pinch of cream of tartar
- 225g ground almonds
- 100g glacé cherries, chopped
- 125g + 2 tsp icing sugar
- 2 tsp natural almond extract
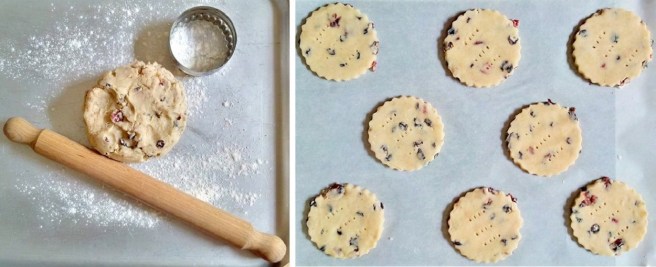
- Preheat the oven to 180°C (160°C fan oven, gas mark 4). Line 2 large baking trays with baking parchment. Using a 4cm diameter round cookie cutter, trace and cut out 18 rounds of edible paper if using, and place on the trays, spaced a little apart.
- Put the canning water in a clean, grease-free bowl and whisk until softly foaming. Add the cream of tartar and continue whisking until the beaters leave an impression in the foam – this takes about 3-4 minutes of whisking.
- Put the almonds and cherries in a bowl. Sift 125g icing sugar on top. Mix well and then add the almond extract and whisked foam. Carefully mix together to make a softish dough.
- Divide into 18 portions and form each into a ball. Place one on top of each paper circle and press down gently to flatten slightly – if you’re not using the paper, just space them out directly on the lined trays.

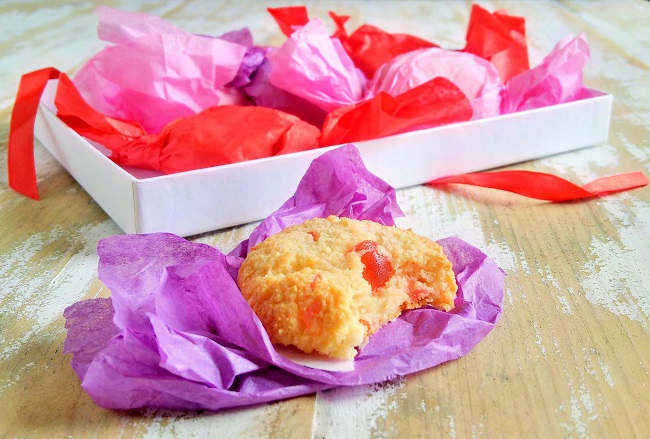
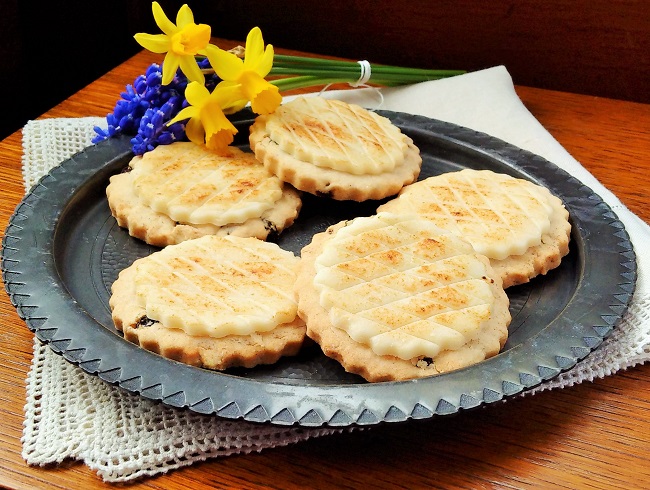
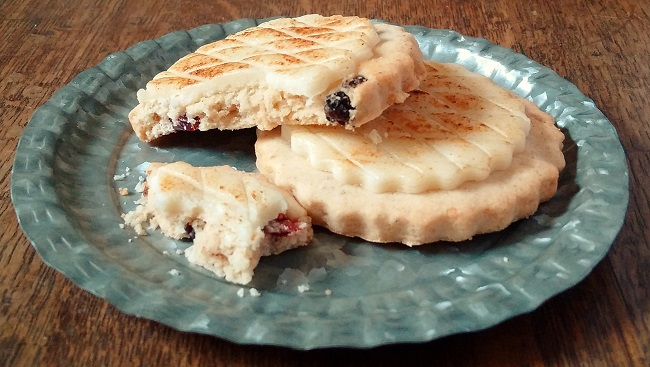
Amaretti making. Images: Kathryn Hawkins - Bake in the oven for 15-20 minutes until lightly golden and firm to the touch. Cool for 5 minutes then transfer to a wire rack to cool completely. The biscuits will store for up to 2 weeks in an airtight container. Serve lightly dusted with icing sugar.
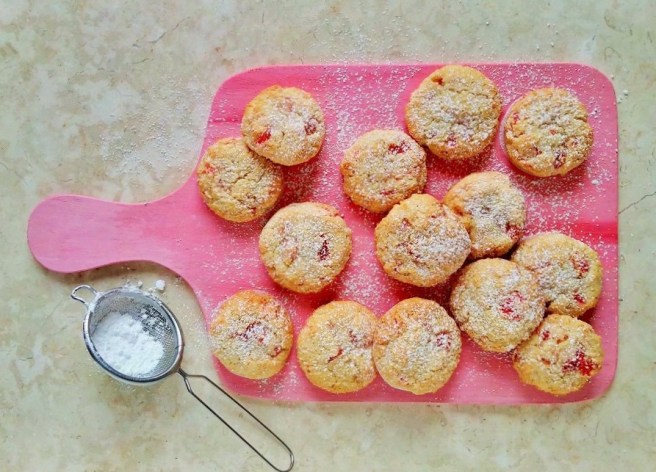
For gifting, wrap each amaretti cookie in a small, clean square of tissue paper, and twist the ends on each side to seal the wrapping. Arrange in a shallow box and tie with ribbon to present. Perfect for serving with coffee.