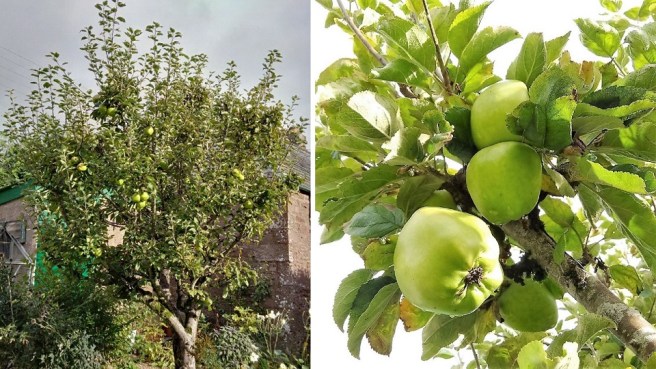
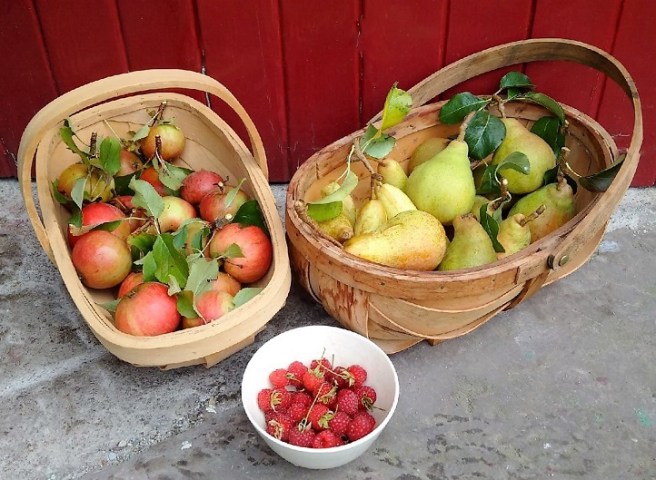
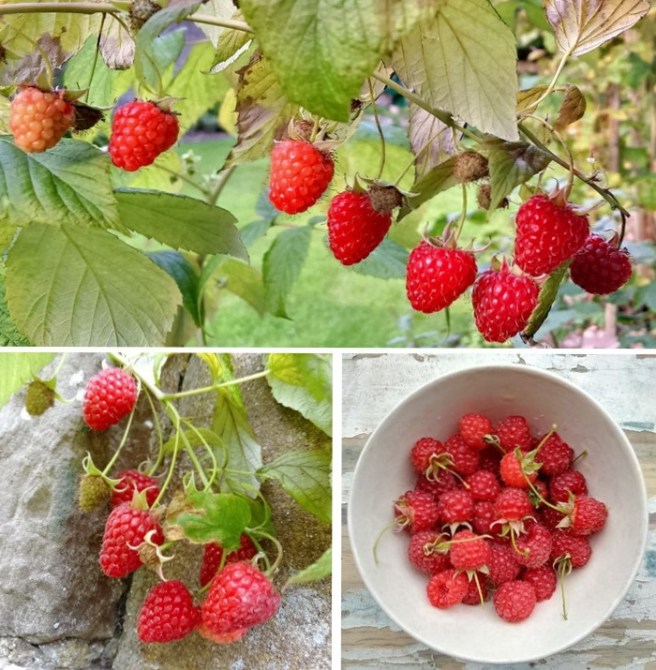
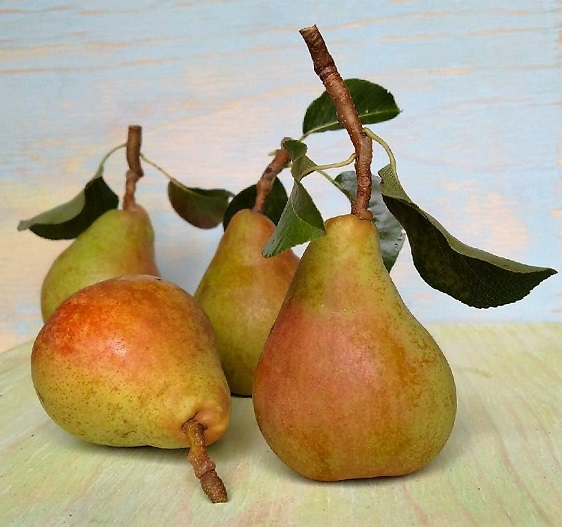
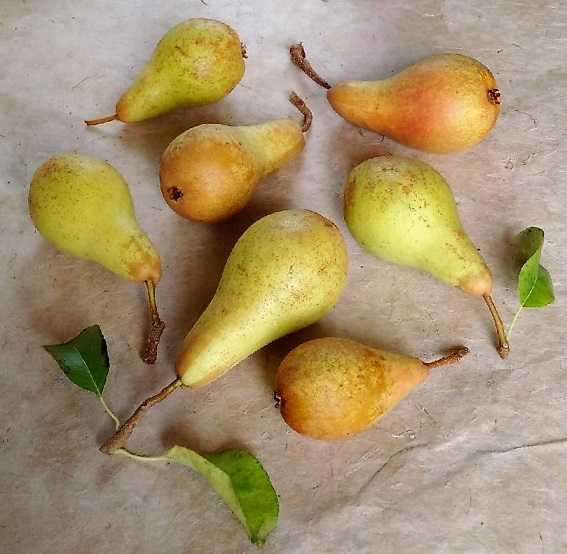
Apple crumble cake (gluten-free, dairy-free, vegan)

Old_Scottish_apple_tree
Lord Derby cooking apples. Images by Kathryn Hawkins

A couple of weeks ago, I picked a bumper crop of cooking apples from the old tree in my garden. I have no idea how old the tree is, but it’s gnarly and interesting to look at, and each year produces large, bright green apples with a slightly tart taste. The variety is called Lord Derby. The apples keep their texture when cooked and are perfect for thinly slicing and layering in a deep filled apple pie or peeled and quartered for a tart tatin. Kept in the cool and dark, this variety of apple stores for about 3 months – until about Christmas-time.

This is one of my favourite apple recipes. It keeps well if you can leave it alone, and becomes more cake-like as time goes on. Serve the cake hot or cold, for pudding or with coffee. I guarantee you’ll love it!

Serves: 10-12

  • 225g vegan margarine ( or lightly salted butter if you prefer),  softened
  • 165g + 2 tbsp Demerara sugar
  • 1 tsp natural vanilla extract
  • 350g gluten-free plain flour (such as Dove’s Farm)
  • 10g gluten-free baking powder (such as Dr Oetker)
  • 500g cooking apples
  • Juice 1 small lemon
  • 1 tbsp cornflour
  • 1 tsp ground cinnamon
  • 50g thick milled oats
  • 1 tsp icing sugar
  1. Preheat the oven to 180°C (160°C fan oven, gas mark 4). Grease and line a 5cm deep x 23cm round, cake tin. In a mixing bowl, beat the margarine with 165g sugar and the vanilla, until well blended and creamy.
  2. Sift the flour and baking powder on top and bring together to form a crumbly mixture. Press about two-thirds evenly into the base of the tin to make a smooth, thick base. Prick all over with a fork and bake for 20 minutes until lightly golden and slightly crusty.
  3. Meanwhile, prepare the filling. Put the lemon juice in a bowl. Thinly peel and core the apples, and chop into small pieces. Toss in the lemon juice to help prevent browning. Drain away the excess juice and toss in the cornflour and cinnamon.
  4. Spread the apple evenly over the baked base. Mix the oats into the remaining crumble and spoon on top, making sure all the apple is covered. Sprinkle over the remaining Demerara sugar. Bake in the oven for about 40 minutes until golden brown and firm to the touch.

    Step_by_step_preparation_for_apple_crumble_cake
    Preparation of apple crumble cake. Images: Kathryn Hawkins

If you want to serve the cake as a pudding, leave it to firm up for 15 minutes before removing from the tin; otherwise leave it to cool completely and enjoy cold. Dust lightly with icing sugar just before serving. Enjoy!

Freshly_baked_gluten_free_apple_crumble_cake
Homemade gluten-free apple crumble cake. Images by Kathryn Hawkins


My harvest festival

Homegrown_apples_pears_raspberries
Today’s harvest of homegrown apples, pears and raspberries. Image by Kathryn Hawkins

Today has been my first opportunity to get into the garden for a while. Work has got in the way, and the weather has been pretty grim, so I seized the opportunity this morning and spent a couple of hours getting some fresh air and taking stock.

I was delighted to pick a bowl of late ripening raspberries – a delicious breakfast treat for tomorrow morning. I had expected that the birds would have been tucking in during my absence, but they are obviously feeding elsewhere.

Scottish_raspberries
Autumn Bliss – late fruiting raspberries. Image by Kathryn Hawkins

We have had an unusually mild September, and it’s really only been these past couple of weeks that the temperature has gone down a few degrees, but we have yet to have a frost. As a result, my runner beans flowered again, and tonight I will be enjoying freshly picked, homegrown beans with my supper – a first for me at this time of year.

Homegrown_Autumn_runner_beans
Second time around, October runner beans. Image by Kathryn Hawkins

Scotland has an ideal climate for growing potatoes, and the Pink Fir variety I planted this year have done very well. Not usually a high yielding potato, I have been pleasantly surprised by how many potatoes the plants have produced so far, and I have plenty more to dig. Their cream coloured flesh is flaky and dry, and the pink, knobbly skin adds nuttiness to the flavour; they boil and roast well.

Homegrown_Pink_Fir_potatoes
Trug of freshly dug pink fir potatoes. Image by Kathryn Hawkins

Last year, I didn’t get the chance to try any eating apples from the garden. One of my trees produced no fruit at all, and the apples from on other tree were enjoyed by the birds before I got a look in! I have victory over my feathered friends this year, although I did leave a few of the really wee ones on the tree for the colder weather, when the birds do finally get peckish. I am looking forward to trying the apples; they are quite small but look very enticing with their shiny scarlet blush.

Homegrown_red-skinned_eating_apples
Cute little eating apples – variety unknown. Image by Kathryn Hawkins

Homegrown aubergine (eggplant)

Fresh_aubergine_(eggplant)_fruit
Freshly picked aubergines (eggplant). Image by Kathryn Hawkins

I have been working away from home for a few days so that means no cooking or enjoying homegrown goodies from the garden. Whilst I was happy not to cook for a while, I did miss my garden. No matter, what a fabulous treat awaited me when I got back: 3 ripe aubergine.

I only planted one wee seedling back in June, so these 3 fruits are a somewhat mammouth production for one plant. And, even better, there are a couple more fruits to come.

Growing aubergine (eggplant) fruit
Homegrown aubergine (eggplant) fruit.

The plant itself is a beauty with glossy black stems and bright green, soft, downy leaves. The delightful purple flowers of “scrunched up tissue paper” petals, appeared back in August, followed by the first tiny, fairy-sized fruit a couple of weeks later. The plant has thrived unprotected in my unheated greenhouse all summer.

Fruit_forming_in_aubergine_(eggplant)_flower
Aubergine (eggplant) flower. Image by Kathryn Hawkins

Aubergine is one of my favourite vegetables. I love the melting texture of the flesh once it is cooked, and the mild, nutty flavour. I don’t do anything special, no pre-salting or soaking, just trim, slice and griddle. Most usually I chop them up with onions, peppers and courgettes, scatter them with oil, fresh herbs and salt and pepper, and then roast them to serve hot as an accompaniment to serve with meat or fish, or leave them to cool and serve cold with fresh tomatoes and balsamic vinegar. Mmmm……

Assortment_of_ vegetables_and_herbs_freshly_roasted
Tray baked vegetables. Image by Kathryn Hawkins

October flowerings

Flowerbed_with_fruit_bushes_and_flowers
October foliage and flowers. Image: Kathryn Hawkins

It has been a mild and reasonably bright few weeks since my last garden posting. I am pleasantly surprised that so much is still in bloom in the garden. In fact, there are very few signs of Autumn here at all, and the garden hasn’t changed that dramatically from last month, the colours are just a little faded and more muted. The large trees are barely turning, so I had to look to smaller bushes and shrubs for some typical October colour. The blueberry bushes have finished fruiting now and are the only real hint of the season, having turned from bright green to deep red-orange colour.

More Autumn crocus have found their way to the surface this week, and make a pretty splash of colour on the increasingly barren soil as the other foliage dies back.

3_Autumn_crocus
Autumn flowering crocus. Images: Kathryn Hawkins

It was also good to see that we still have plenty of bees around the garden. Yesterday, they were buzzing round the Hebe and dahlias as I took my photos, still busy gathering pollen from the flowers and shrubs.

Purple_Hebe_ with honey_bee
Hebe bee-bee. Image: Kathryn Hawkins
2_varieties_dahlia:_white_and_burgundy
White petal dahlia with busy bee, and Burgundy pom-pom dahlia. Images:Kathryn Hawkins

Usually at this time of year, there is only one splash of colour in one a particular flowerbed in the back garden; it prompts me to think every year that I must plant a companion ready for next Autumn (and of course, I never do). Sedum “Autumn Joy” is very reliable, multi-headed with tiny pink flowerets and succulent bright green leaves, I think it must be very happy having its moment of glory every year, when it stands out alone amongst its fading neighbours, so who am I to spoil its fun?

Sedum_variety:_Autumn_Joy
Sedum “Autumn Joy”. Image: Kathryn Hawkins

I will finish this post with an image of a flower I spotted in bud a couple of weeks ago. Yesterday, it was in full bloom. It is a well established shrub and should have flowered back in June, when it is normal to do so, but for some reason it has decided to break flower now. Fingers crossed we don’t get any frost………

Lilac_flowered_rhododendron
Rhododendron in bloom in October. Image: Kathryn Hawkins

Smoky Tomato Jam (gluten-free, dairy-free, vegan)

Late_ripening_homegrown_tomatoes
Homegrown early Autumn tomatoes. Image copyright: Kathryn Hawkins

This is the time of year when I often get very busy with my work and have little time to spend in the garden or the kitchen (outside work hours). However, making preserves is something I try to find time for no matter what else needs to be done. There is so much produce around at the moment, practically begging to be put in the pot and made into jam or chutney, I can’t ignore it.

One of my most popular preserves is, thankfully, one of the easiest to make, so this weekend I got the large preserving pan out of the cupboard and set about cooking up this year’s first batch of Smoky Tomato Jam. It’s really a smooth chutney, but the texture lends itself better to being called jam. One of the best thing about this particular preserve is that it’s ready to be eaten immediately, as well as being a good “keeper”.

Fresh_fruit_and_vegetables_for_jam_making
Ingredients for tomato jam making. Image copyright: Kathryn Hawkins

Makes 5 x 325ml jars

  • 700g fresh prepared ripe, but firm, tomatoes, roughly chopped
  • 350g prepared red onion, roughly chopped
  • 550g prepared cooking apples, roughly chopped
  • 350ml red wine or cider vinegar
  • 2 bay leaves
  • 2 large sprigs rosemary
  • 275g granulated sugar
  • 2 tsp each of salt, ground cumin and smoked paprika
  1. Put the tomatoes and onion in a food processor and blitz for a few seconds until well chopped and pulpy. Transfer to a large saucepan.
  2. Put the apples in the food processor with half the vinegar and blitz for a few seconds until well chopped. Transfer to the saucepan containing the tomato and onion mixture.
  3. Pour over the remaining vinegar and add the bay leaves and rosemary. Bring to the boil, stirring occasionally, and then simmer gently for 10 minutes until softened.
  4. Stir in the sugar over a low heat, until dissolved, then raise the heat and simmer steadily for 15 to 20 minutes, stirring occasionally, until it reaches the consistency of thick jam. Turn off the heat, discard the herbs and stir in the salt and spices.
  5. Ladle into warm, sterilised jars and seal with non-corrosive lids. Allow to cool and store for 6-8 months in a cool, dark cupboard. Once opened, keep in the fridge and use within 2 weeks. Delicious with all cured meats, smoked fish, and cheese dishes.
Homemade_tomato_preserve
Jars of freshly made Smoky Tomato Jam. Image copyright: Kathryn Hawkins

Fresh turmeric root – how to grow

Fresh_turmeric_root
Peeled, fresh turmeric root. Image copyright: Kathryn Hawkins

A few weeks ago, a “foodie” friend came to stay. He lives in rural Yorkshire, and just before he left home to head north to Scotland, he was amazed to find fresh turmeric root in his local village shop.

I haven’t cooked with fresh turmeric since I left London, over 12 years ago, so to be gifted some of this wonderful root was a real treat. Turmeric is most usually used as a dry, yellow powder in a curry dish; it has a pleasant fragrant/pungent flavour, and gives a warm glow to whatever it is cooked with. Used fresh, it has the same qualities, but the flavour is more earthy, flowery and mellow. Take care when preparing, as it stains anything it comes into contact with. I peeled the root with a vegetable peeler and cooked a few strips with some Basmati rice (see below – it tasted delicious!). Realising how much I missed this fresh spice, I decided to try to grow the remaining  roots to see if I might have my own fresh supply in the future.

Fresh_turmeric_rice
Cooked Basmati rice with fresh turmeric. Image copyright: Kathryn Hawkins

Keeping in mind that I live in central Scotland, I wondered whether I might have trouble getting germination underway – I discovered that the roots need 20-30°C to get sprouting and I don’t have a heated greenhouse or a propagator. However, I believed that time was on my side: I was given the roots in June. Here’s how I went about it.

How_to_grow_turmeric_roots
Image copyright: Kathryn Hawkins

Plant the roots, bud side uppermost, in loose, well draining, potting soil and cover with a layer of the same soil about 5cm deep. I wrapped the pots in fleece and them covered them with 3 plastic cloches. If you live in a warmer place, a plastic bag over the top of each pot would probably be sufficient. Keep the pots in full sun or partial shade. The pots need regular watering, and need a temperature range between 20 to 30°C to germinate.

So, all the above happened back in the middle of June. Finally, at the very end of August, I noticed 2 wee green shoots poking out 2 of the pots. Success! I have managed to germinate 2 out of the 5 roots I planted, and this is what they look like just now…….

Fresh_turmeric_plants
New shoots of fresh turmeric. Image copyright: Kathryn Hawkins

As Autumn is on the way, the days are shortening, and the nights are getting cooler, I will have to bring them indoors and try to keep them alive throughout a Scottish winter – apparently it doesn’t survive below 9°C. Fingers crossed….I’ll keep you posted.

In a bit of a pickle

Cucumber_harvest
Homegrown cucumbers. Image copyright: Kathryn Hawkins

For several years now, I have been a successful cucumber grower. So much so, that even though I reduce the amount of plants I raise each year, I always end up with a glut. Whilst I enjoy eating cucumber raw in salads, and they are very good lightly cooked in a stir fry, I have been at a loss as to what else to do with them.

Whilst leafing through an old cookery book for inspiration, I came across an intriguing recipe called Bread and Butter pickle. The name drew me in, and to my delight, it is a real gem. It is one of the best pickles I have ever made, and so easy to make. I hope you like it as much as I do.

Makes 5 x 325ml jars

  • 1kg prepared cucumbers, chopped into 1.5cm pieces
  • 250g prepared red onion, finely chopped
  • 3 tbsp sea salt
  • 550ml white wine vinegar
  • 175g granulated sugar
  • 2 bay leaves
  • Pinch of dried chilli flakes
  • ¼ tsp ground black pepper
  • 1 tsp each of mustard seeds, coriander seeds and cumin seeds, coarsely ground
  1. Mix the cucumber, red onion and salt together in a large, clean, china or glass bowl. Leave to stand at room temperature, lightly covered, for 1 hour.
  2. Drain the vegetables in a fine-holed colander or strainer. Rinse very well in cold running water, then dry very well on absorbent kitchen paper. Pack into 5 x 325ml sterilised jam jars.

    Preparation_of _vegetables_for_cucumber_pickle
    Preparation of vegetables for Bread and Butter Pickle. Image copyright: Kathryn Hawkins
  3. Put the vinegar in a saucepan and add the remaining ingredients. Heat gently, stirring, until the sugar dissolves. Raise the heat and boil for 3 minutes. Discard the bay leaves.
  4. Pour the hot vinegar over the vegetables, making sure they are completely covered. Seal tightly with non corrosive, screw-top lids. Leave to cool, then label, and store in a cool, dry place for at least 3 months before opening. Delicious served with smoked fish or cold cuts. I spoon the pickle over chilli beef tacos – delicious!

    Homegrown_cucumber_pickle
    Homemade cucumber pickle. Image copyright: Kathryn Hawkins

My garden in September

Globe_thistles_(Echinops)
Globe thistles in early September sunlight. Image copyright: Kathryn Hawkins

So another month has passed, and now we are heading towards a season change. We have had some wild winds and heavy rains, on and off, this last month, but everything is just about standing. The Echinops (Globe thistles) are looking magnificent just now.

Much of my garden is in shades of blue and pink, but the greenery is still lush and the trees are barely turning. One obvious sign of Autumn are the mauve crocus that appear without any leaves (the foliage comes afterwards). They are quite delicate and aren’t in flower for very long. They thrive in shady areas and are quite easy to miss, usually hiding under shrubbery. These, however, are blooming, bold as brass, on the corner of one of the borders.

Autumn_crocus
Autumn crocus (Colchicum autumnale) in full bloom. Image copyright: Kathryn Hawkins

Throughout the year, different heathers come into flower, but from late Summer going into Autumn, I think the heathers are at their finest. I have many varieties growing around the garden, ranging in shade from bright white and the palest pink, to deep pink and red.

Scottish_White_and_pink_heather_plants
Autumn flowering heathers in my Perthshire garden. Image copyright: Kathryn Hawkins

One last plant that I am particularly proud of is my Himalayan Hydrangea. I planted it about 10 years ago and it is now very well established; this year is has flowered particularly well. I love the flowers of this variety (Lacecap); the larger petals look like pink butterflies perching on top of tiny mauve flower heads.

Himalayan_Hydrangea_(hygrangea_macrophylla_lacecap)_with_bloom
Himalayan Hydrangea (Hygrangea macrophylla lacecap). Image copyright: Kathryn Hawkins

Rhubarb and custard ice lollies (gluten-free)

Homegrown_rhubarb
My final rhubarb harvest of the year. Image copyright: Kathryn Hawkins

Another sign this weekend that summer is fading fast, I picked my final stems of rhubarb for the year. Rather than freeze it for later use, I decided to cheer myself up and make a batch of delicious rhubarb and custard ice lollies. Here’s the recipe.

Makes: 6 x 100ml lollies

  • 250g prepared rhubarb stems, washed and chopped
  • 75g granulated sugar
  • 6 tbsp water
  • 150ml ready-made (gluten-free) custard – at least double the sweetness of your usual custard (you need the extra sugar to prevent the custard from freezing too solid and icy)
  • 150ml double cream
  • 1 tsp vanilla paste
  1. Put the rhubarb in a shallow pan with the sugar and water. Heat gently, stirring occasionally, until the sugar has dissolved and the rhubarb is beginning to steam.
  2. Cover and simmer gently for 7-8 minutes until soft and collapsed. Remove from the heat and mash with a fork. Leave to cool completely. If preferred, blitz in a blender for a few seconds to make a purée.
  3. Mix the custard with the cream and vanilla paste, and chill until required.
  4. Using a long-handled teaspoon, divide the rhubarb between 6 x 100ml ice lolly moulds. Pour in the custard mix and then marble the 2 layers together a little using the spoon or a skewer.

    Spooning_in_stewed_rhubarb_and_custard_mix
    Assembling rhubarb and custard ice lollies. Image copyright: Kathryn Hawkins
  5. Place the lolly moulds in the freezer for 1 ½ to 2 hours until semi frozen, then push a wooden lolly stick into the centre of each. Put back in the freezer for at least 2 hours until frozen solid.
  6. To unmold, dip the lolly moulds in very hot water for a few seconds, and then pull out by the stick. Serve immediately or pop back in the freezer on a tray lined with baking parchment until ready to serve.

    Frozen_rhubarb_and_custard_ice_lollies
    Rhubarb and custard ice lollies. Image copyright: Kathryn Hawkins


Preserving the Summer (Semi-cuit tomatoes – gluten-free, dairy-free, vegan)

Freshly_picked_homegrown_tomatoes
Home-grown tomatoes ready for the dryer. Image copyright: Kathryn Hawkins

I’ve been picking tomatoes from my greenhouse for over a month now, and there are still plenty to ripen. Whilst I am enjoying them fresh, I do like to make preserves, and first up this year is to steep a few tomatoes in olive oil. A couple of years ago I bought myself a dehydrator, and  I have been drying various homegrown produce ever since. Semi-cuit (semi-dry) tomatoes make a sweet, indulgent and delicious out-of-season treat for later in the year, so these wee treasures are heading for the dehydrator right away.

Dehydrating_tomatoes
My Stockli dehydrator and prepared tomatoes. Image copyright: Kathryn Hawkins

Dehydrating is a very straightforward process. Wash and pat dry the tomatoes; if they are small to medium size, cut them in half – you may want to slice larger tomatoes or just “cook” them for longer. My dehydrator has 3 shelves; I divide up the tomatoes between the shelves, making sure there is some air space between them, pop the lid on and set the temperature to 70°C (158°F). This batch of 650g will take 6-7 hours to dry down so that they are still a bit fleshy and not too leathery. The final yield will be about 150g.

Once the tomatoes have cooled, I will pack them into a sterilised jam jar with a screw top lid, and add a few sprigs of fresh rosemary, bay and thyme from the garden. Pour over good quality extra virgin olive oil to cover the tomatoes completely and screw on the lid tightly. Stored in a cool, dark, dry cupboard, they will keep for about 6 months – so perfect for festive eatings. Once opened, store them in the fridge for up to 6 weeks – the oil will turn cloudy and clumpy when chilled, but becomes liquid again at room temperature. Roll on Christmas!

Semi-cuit_tomatoes_preserved_in_olive_oil_with_herbs
Semi-cuit tomatoes with olive oil and rosemary. Image copyright: Kathryn Hawkins