Welcome to my blog all about the things I love to grow and cook. You'll find a collection of seasonal gluten-free, dairy-free and vegan-friendly recipe posts, as well as a round up of my gardening throughout the year. I wish you good reading, happy cooking and perfect planting!
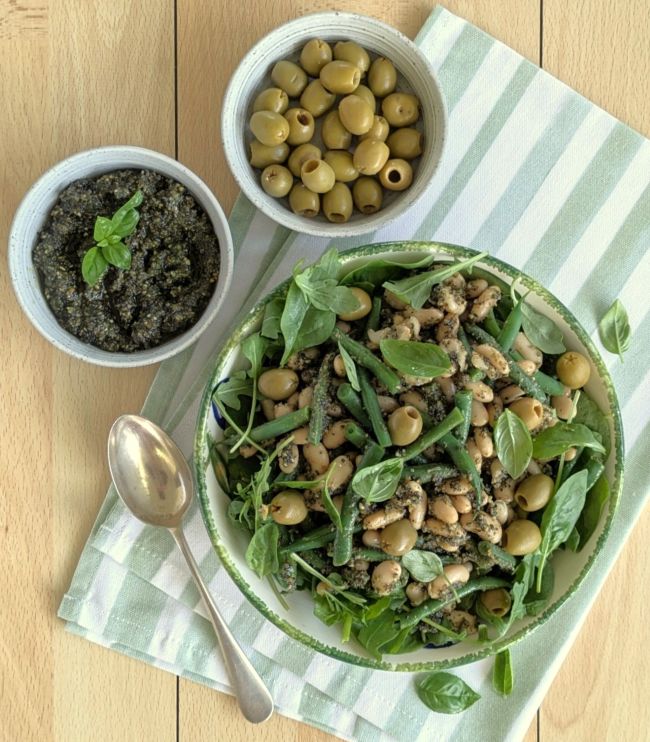
Bean salad flavoured with almond and poppy seed pesto. Image: Kathryn Hawkins
Hello there. I hope you are enjoying some good weather this season. It’s been very hot here in the UK again, and so salads are very much still on my daily menu. To follow on from my post last month which you can read here , I have another recipe which can help towards increasing your calcium levels if you are on a gluten-free, dairy-free and/or vegan diet.
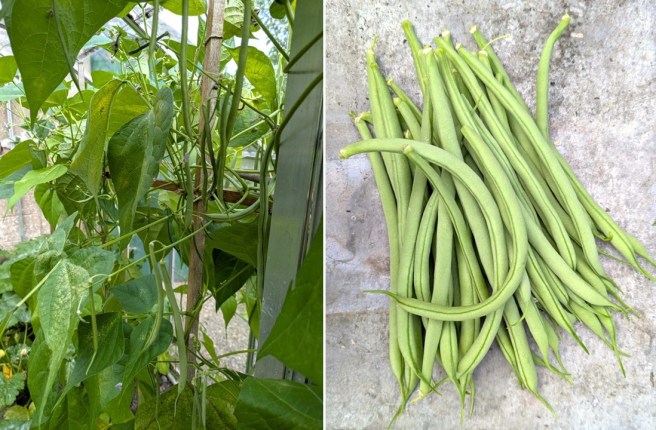
Gorgeous greenhouse green beans. Images: Kathryn Hawkins
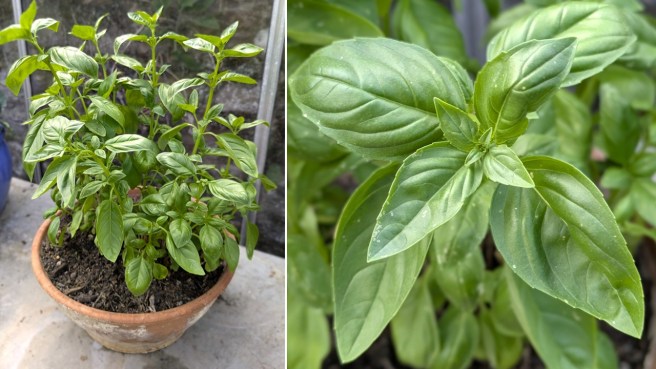
Summery greenhouse basil. Images: Kathryn Hawkins
It’s been a bumper season for the green (French) beans (Cobra variety) in my greenhouse. The vines have been producing an abundance of beans for several weeks now, and the basil plant loves all the heat and sunshine as well. To my delight, I discovered that both green beans and basil offer useful amounts of calcium, and that’s how my recipe this month began.
Combined with some other calcium-rich ingredients, this tasty salad is delicious on its own or as a side dish. The table below gives you a breakdown of which ingredients contain the most calcium so that you can make up your own combinations.
Rocket
216mg calcium/100g
Baby spinach
119mg calcium/100g
Cooked cannellini beans
93mg calcium/100g
Cooked green beans
61mg calcium/100g
Green olives
61mg calcium/100g
Fresh basil
250mg calcium/100g
Whole almonds
269mg calcium/100g
Poppy seeds
1580mg calcium/100g
Garlic
19mg calcium/100g
Source: McCance and Widdowson’s The Composition of Foods
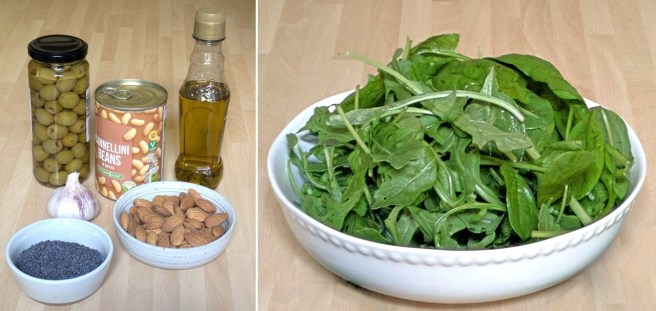
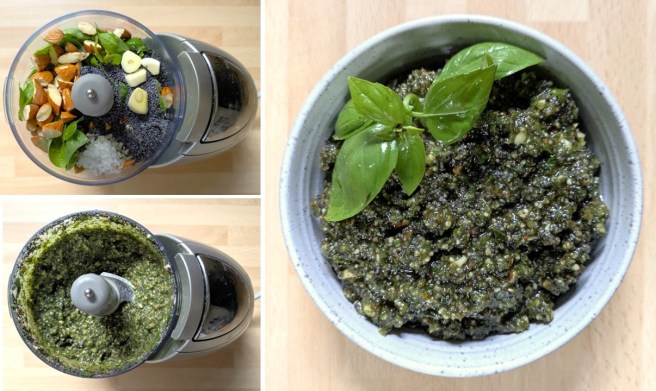
For the pesto, put 20g fresh basil in a food processor with a peeled garlic clove and add 50g roughly chopped whole almonds, 20g poppy seeds and some salt. Pour over 60ml extra virgin olive oil and blitz until smooth.
Making almond and poppy seed pesto. Images: Kathryn Hawkins
For the salad, I combined 240g canned cannellini beans with 100g chopped cooked green beans and half the pesto sauce above. I lined a salad bowl with 40g wild rocket and 20g baby spinach and piled the bean mixture on top. Serve with 100g pitted green olives and extra basil leaves, with the remaining pesto on the side.
Assembling the salad. Images: Kathryn Hawkins
The salad serves 4, and each portion will provide 238mg calcium and 330 calories.
That’s me for another month. Hope to see you again soon. Thanks for stopping by 🙂
Welcome to my first recipe post of the year. I hope you’ve all had good Christmas and New Year celebrations. It has seemed like a good long holiday this year. Not only have I had plenty of time to recharge my batteries, but the longer holiday gave me the opportunity to spend time in the kitchen experimenting with different ingredients.
I have noticed that many of the blogs I follow have started the year with spicy offerings. Something about this time of the year usually gets me delving into the spice cupboard too, in search of different flavours to liven up my repertoire of recipes.
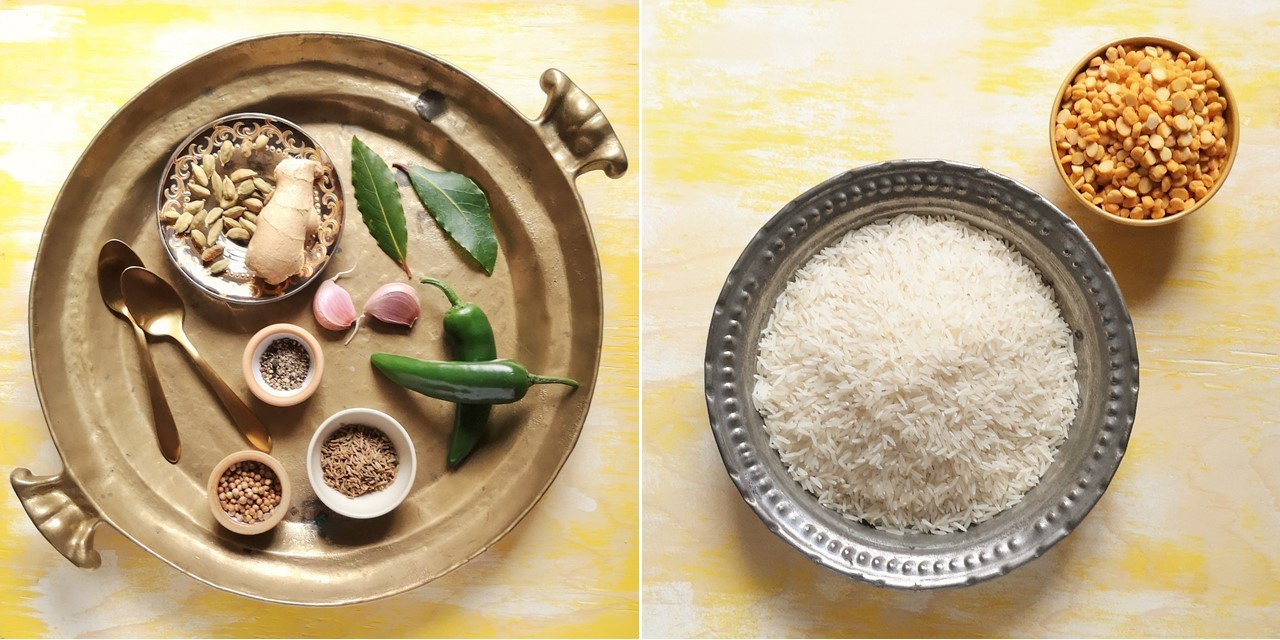
Tray of spices and flavourings for basmati rice and chana dal. Images: Kathryn Hawkins
My recipe this week is based around 2 basic and ordinary ingredients: rice and dried peas. But cooking with some spices, onion and other flavours, they can be transformed into something quite sensational.
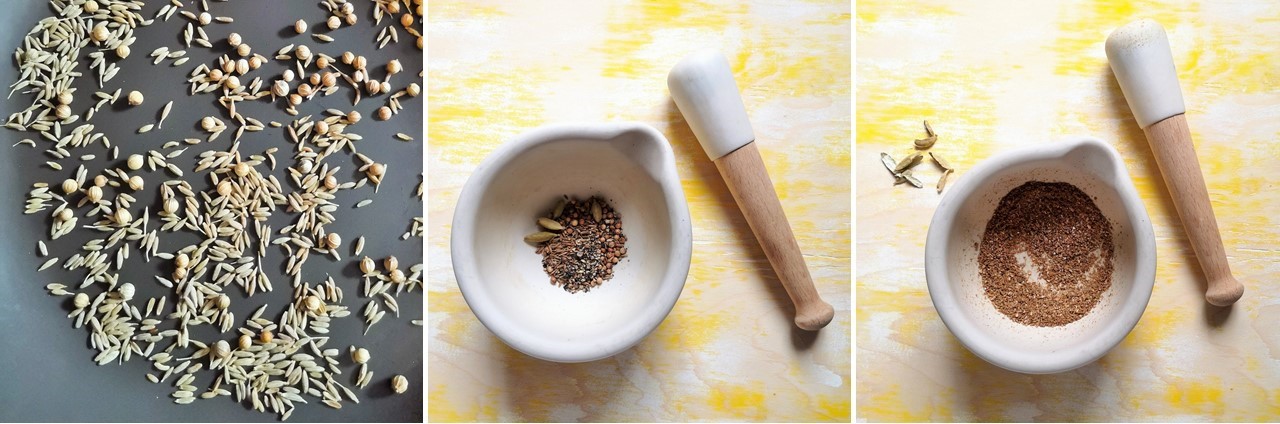
The combination of spices I have used in this dish are more fragrant and comforting than spicy. You may want to add something with heat to give it more of a kick if you prefer e.g cayenne pepper or dried red chilli. To mellow the flavour, toast the whole spices first in a dry frying pan, just for a couple of minutes, and then cool and grind them up before using. If you don’t have the time to make your own spice mix, use 2-3 tsp curry powder or garam masala.
Preparing the spice mix. Images: Kathryn Hawkins
The combination of spiced chana dal (yellow-split peas) and fragrant basmati rice makes this a very tasty accompaniment to serve with a vegetable curry sauce, or you can sprinkle it with roasted cashew nuts or almonds to make a deliciously comforting meal. It freezes well too, so is worth making up as a batch-bake and then portioning up for the freezer, ready to serve at a later date. The recipe takes a bit of time to organise but being able to make it for the freezer is a good incentive to have a go.
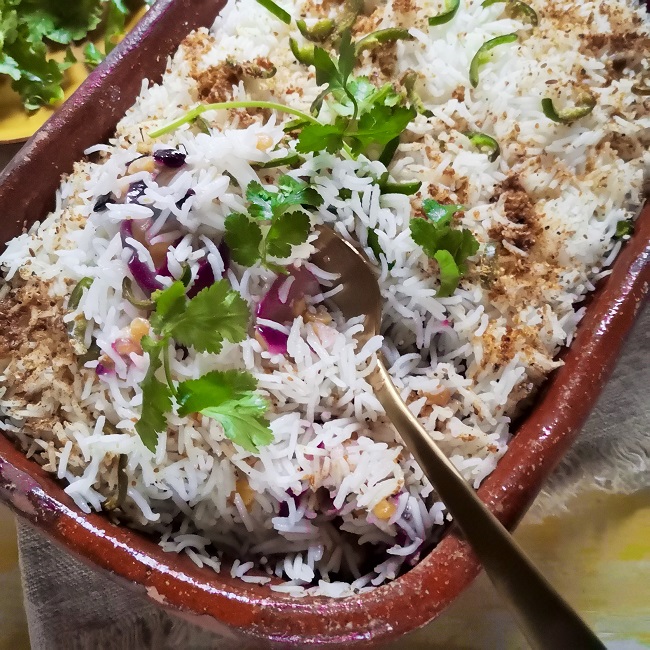
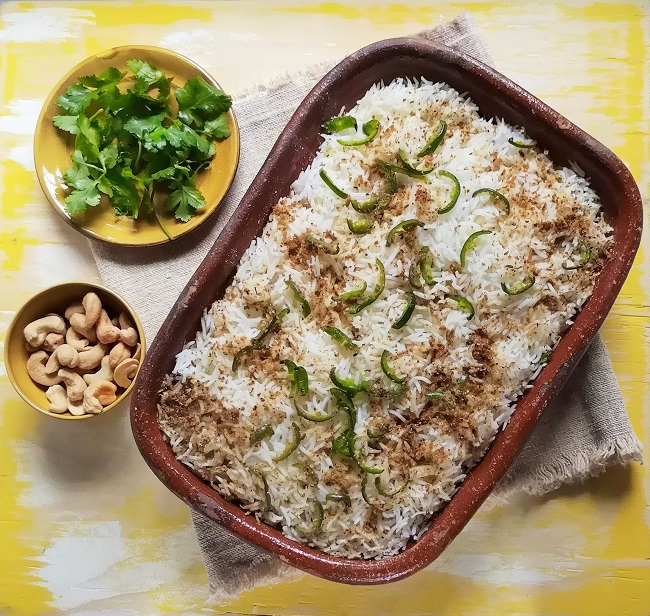
Ready to serve, Indian-style rice and peas. Images: Kathryn Hawkins
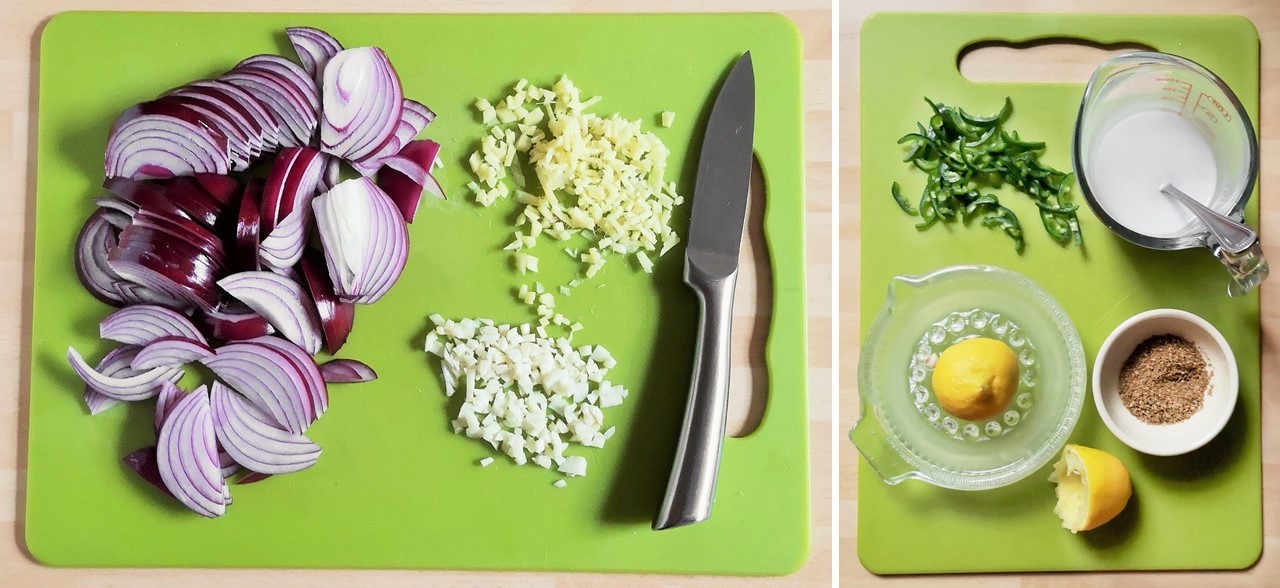
The dish is made up of 2 layers of basmati rice, top and bottom, with an onion, garlic and ginger chana dal layer in the middle, enriched with coconut yogurt. To finish the dish, the spice mix is sprinkled on top along with lemon juice, coconut milk, green chilli and butter (or coconut oil or dairy-free margarine).
Rice and pea flavourings. Images: Kathryn Hawkins
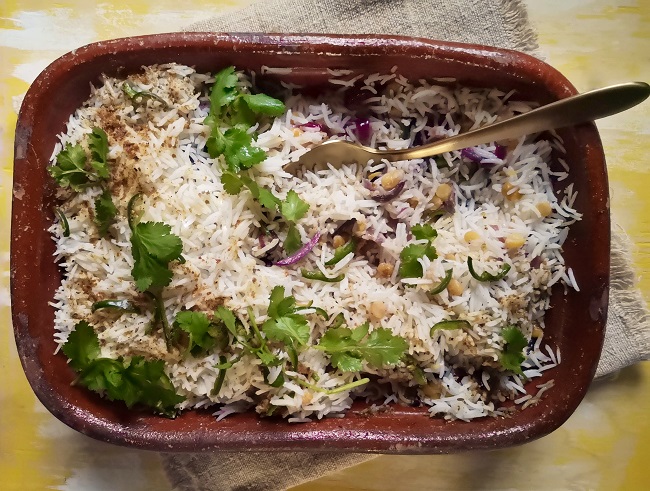
Once the dish is baked, leave it to stand for a short while, then stir it up before serving so that all the wonderful flavours mingle together.
All mixed up and ready to serve. Image: Kathryn Hawkins
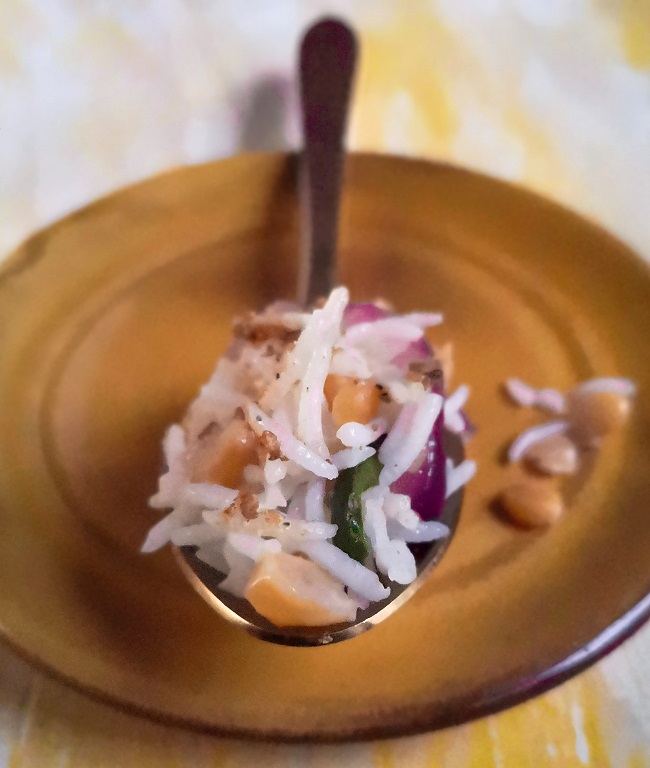
A spoonful of rice and peas. Image: Kathryn Hawkins.
Serves: 3 to 4 as a main dish, or 4 to 6 as an accompaniment
Ingredients
100g chana dal (yellow split peas)
350g basmati rice
4 tbsp vegetable oil
2 red onions, peeled and thinly sliced
2 garlic cloves. peeled and finely chopped
25g root ginger, peeled and finely chopped
2 fresh bay leaves or 1 dried bay leaf
5 tbsp dairy-free coconut yogurt
1 tsp salt
40g butter or ghee if you eat it, or use coconut oil or dairy-free margarine instead
Juice 1 small lemon
3 tbsp coconut milk
1 or 2 large mild green chillies, deseeded and sliced
1 tsp each cumin and coriander seeds, toasted and ground
¼ tsp crushed black peppercorns
Seeds of 4 cardamom pods, crushed
Fresh coriander and cashew nuts to serve
Rinse the chana dal in cold running water. Place in a bowl and cover with cold water. Leave to soak for 45 minutes. Then drain, rinse and place in a saucepan. Cover with fresh water, bring to the boil and cook in simmering water for 25 minutes until tender but not mushy. Drain well.
Rinse the rice in cold running water. Place in a bowl and cover with cold water. Leave to soak for 30 minutes. Bring a large saucepan of water to the boil. Drain and rinse the rice and then add to the water. Bring back to the boil and cook for 5 minutes only. Drain, rinse and leave to one side.
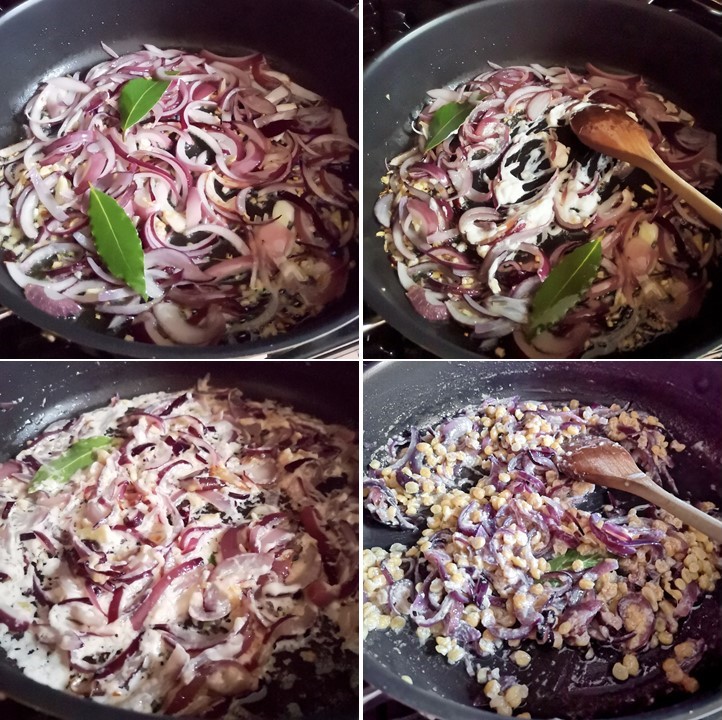
Heat the oil in a frying pan and fry the onion, garlic and ginger with the bay leaves for 5 minutes over a medium heat until lightly golden. Add the yogurt 1 tbsp at a time, stirring the mixture in between additions, until the liquid is absorbed. Stir in the salt and cooked chana dal. Leave aside. Discard bay leaves if preferred.
Preparing the chana dal and onion layer. Images: Kathryn Hawkins
Preheat the oven to 180°C, 160°C fan oven, gas 4. Spoon half the rice into an ovenproof dish and spread to form an even layer. Top with the oniony chana dal mixture and then the remaining rice. Pat down gently.
Dot the top with butter, ghee, coconut oil or margarine, and drizzle with lemon juice and coconut milk. Sprinkle with sliced chilli to taste. Mix the spices together and sprinkle over the top of the rice. Cover the dish tightly with aluminium foil.
Layering the rice and peas. Images: Kathryn Hawkins
Stand the dish on a baking tray and cook for 45-50 minutes until piping hot. Leave the covering in place and allow to stand for 10 minutes before removing the foil and gently mixing everything together. Serve with fresh coriander and cashew nuts.
Out of the oven and ready to serve. Image: Kathryn Hawkins
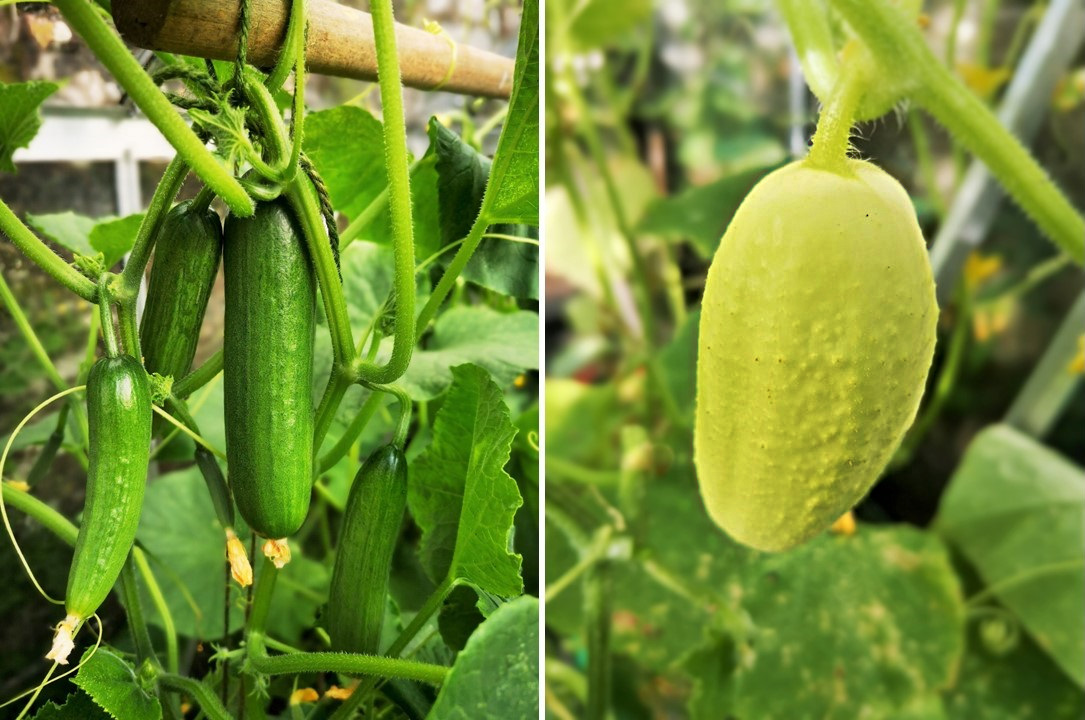
I’ve had a great crop of home-grown cucumbers this year, and have been enjoying them since July. I’ve been growing 2 varieties in the greenhouse, a small green one called Mini Munch, and a pale yellow, more rounded variety, called Crystal Apple. The Mini Munch have almost finished now, but there are still a few more Crystal Apple come.
Mini Munch and Crystal Apple cucumbers. Images: Kathryn Hawkins
So to celebrate my cucumber-filled summer, this week’s recipe is my very simple, gluten-free version of the classic Middle Eastern salad, tabbouleh, and for good measure, to go with it, my favourite accompaniment, a super-speedy hummus recipe. You can add any combination of soft-leaved herbs to flavour your grains. The herb patch was looking a bit shabby at the weekend and I needed to pick off a few stalks of mint and chives to help rejuvenate the plants again. I also added some of the delicate zig-zag-edged herb salad burnet which has it’s own mild cucumber flavour, but parsley and coriander make good substitutes if you prefer.
Salad Burnet close-up. Image: Kathryn Hawkins
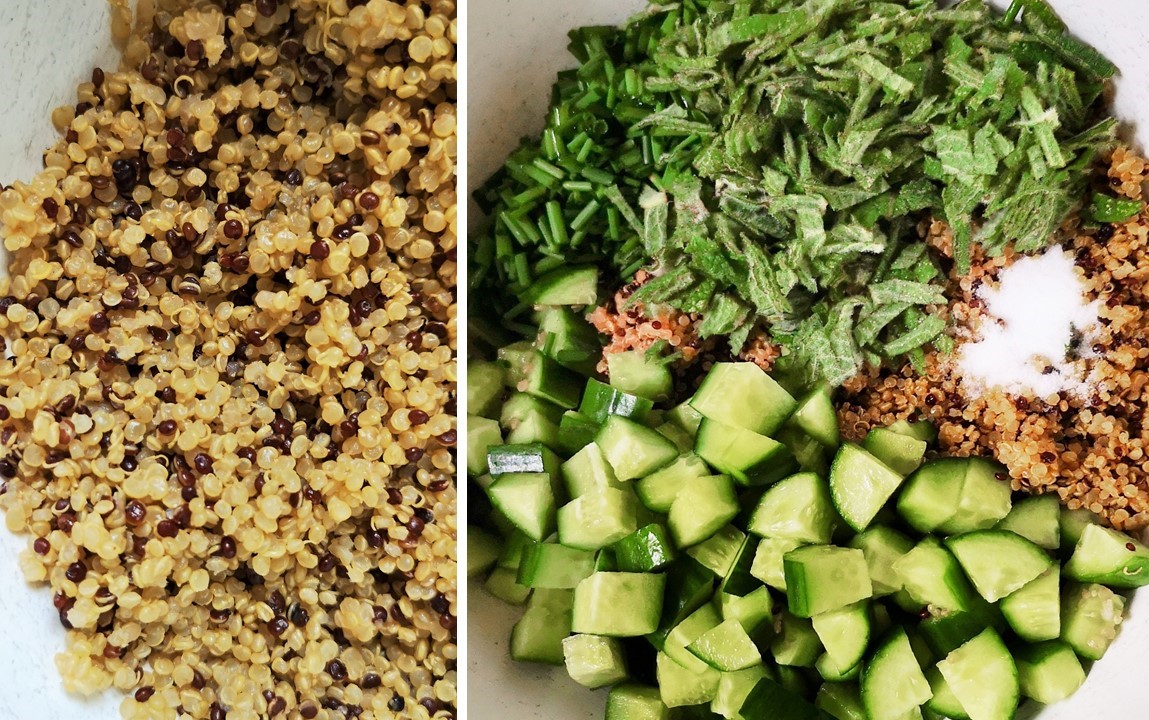
There are no set rules to this recipe. It is very simple. I cheat and use a ready-cooked pack of red and white quinoa grains. Very convenient and a perfect quantity for a couple of hearty portions. If you like, add tomato for extra colour and moisture to the salad, and spring onions will add a tasty, oniony bite. I hope you enjoy the fresh flavours.
Home-grown cucumber, mint chives and salad burnet. Images: Kathryn Hawkins
Serves: 2-3
Ingredients
Tabbouleh
250g cucumber, washed
250g cooked quinoa
½ tsp salt
20g chives, chopped
7g mint leaves, chopped
A handful of salad burnet leaves (parsley or coriander)
Lemon wedges and extra virgin olive oil to taste
Male cucumber flowers to garnish
Hummus (serves 3-4)
400g can chickpeas
40g tahini
1 garlic clove, peeled
½ tsp salt
1 tbsp freshly squeezed lemon juice
1 tbsp. extra virgin olive oil
Paprika to dust
For the tabbouleh, cut the cucumber into small pieces. Put the quinoa in a bowl and mix in the cucumber, herbs and salt. Cover and chill for an hour to allow the flavours to mingle. Stand at room temperature for 30 minutes before serving.
Making gluten-free tabbouleh. Images: Kathryn Hawkins
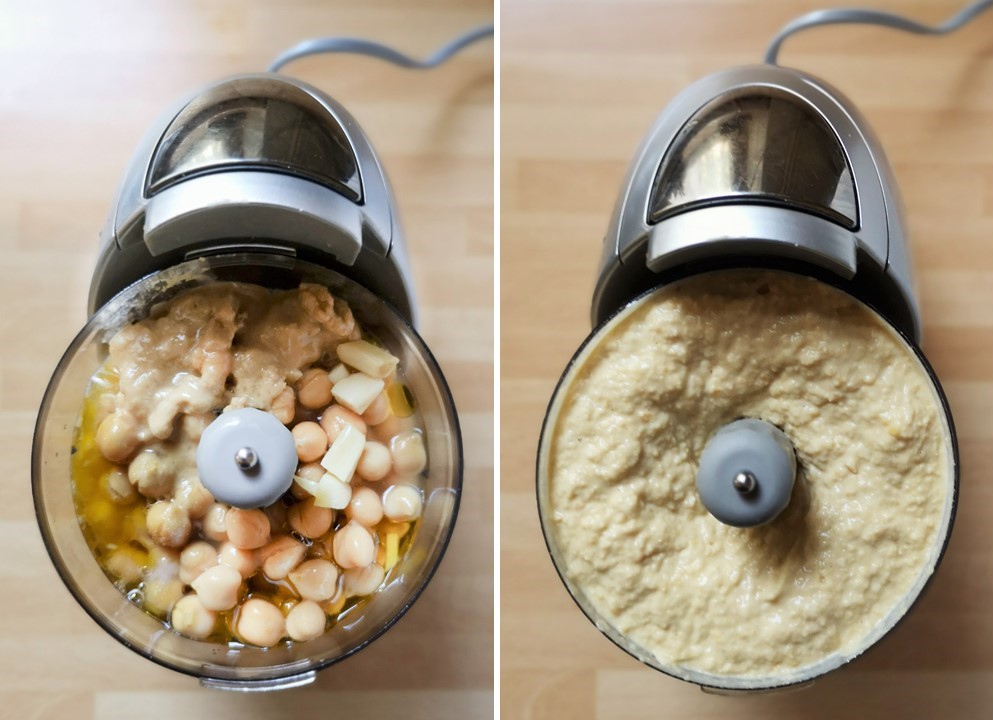
For the hummus, open the can of chickpeas and drain the canning liquid into a jug. Pop the chickpeas in a blender or food processor along with the other ingredients and 3 tbsp. of the reserved liquid. Blitz for a few seconds until smooth. I like my hummus to have the consistency of thick porridge, but if you prefer something softer, just add a bit more canning liquid. Cover and chill until ready to serve. Don’t forget to keep the rest of the canning liquid for using as an egg white substitute – it freezes very well.
Making hummus. Images: Kathryn Hawkins
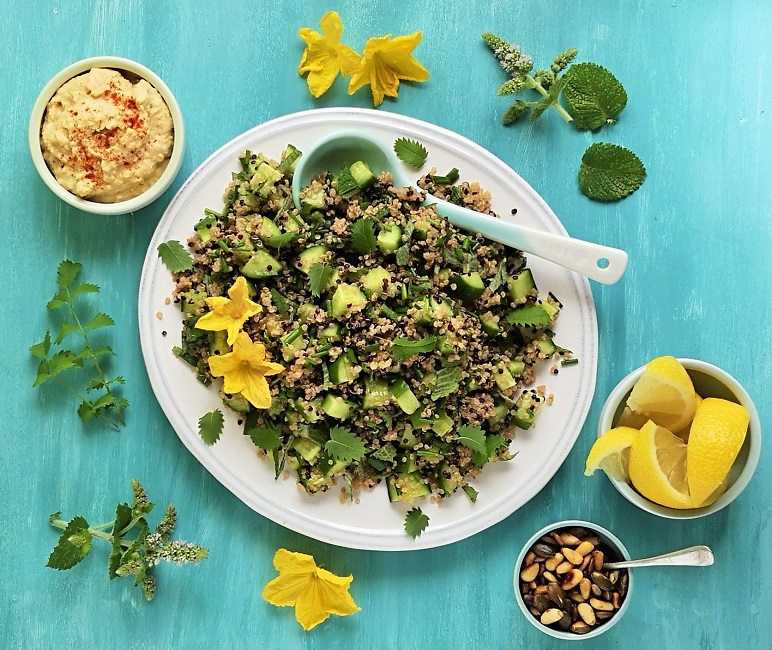
Serve the tabbouleh decorated with cucumber flowers; dress with a squeeze of fresh lemon and extra virgin olive oil to taste, and accompany with toasted seeds, home-made hummus (dusted with paprika if liked) and warm, gluten-free, toasted pitta breads. Perfect 🙂
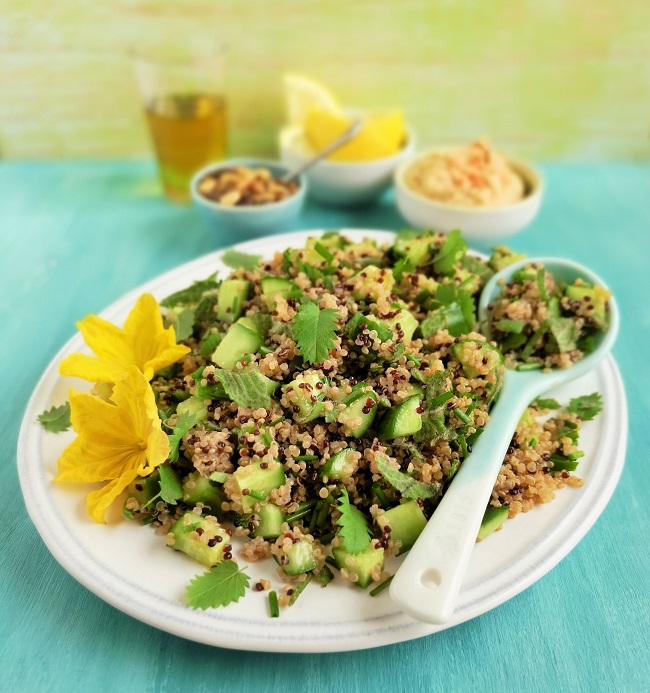
A fresh and healthy salad. Image: Kathryn Hawkins
Ready to eat, quinoa tabbouleh with toasted seeds, home-made hummus and a squeeze of lemon. Image: Kathryn Hawkins
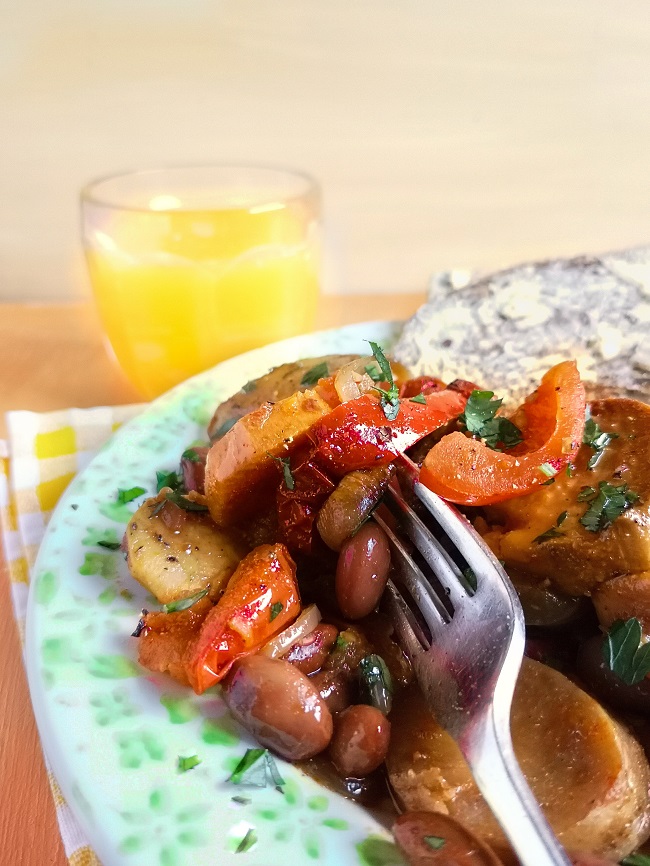
Rise and shine, bean and vegetable hash with fresh toast. Image: Kathryn Hawkins
Welcome to my first post of the new year. On the menu this week is a hearty (and healthy) breakfast/supper dish cooked in the slow-cooker, perfect for the time of year and for Veganuary, as this month has become known 🙂
A hearty, healthy start to the day. Image: Kathryn Hawkins
The recipe takes next to no time to prepare, and once it’s all mixed up and in the cooker, you’ve got 9 hours to get on with your life. The hash is a simple combination of vegetables that slow-cook well, some cooked beans and a mix of spices to pep things up.
Hash vegetables. Image: Kathryn Hawkins
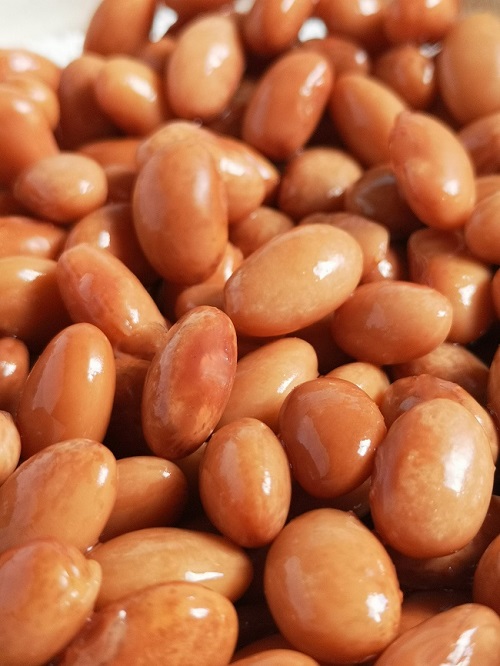
Cooked borlotti beans. Image: Kathryn Hawkins
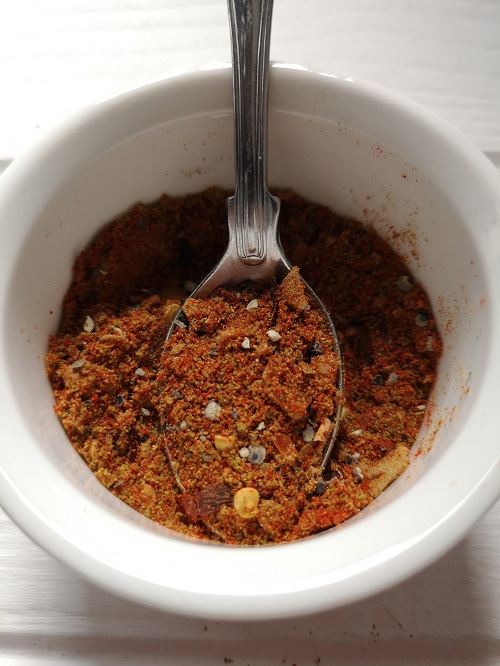
Hash seasoning. Image: Kathryn Hawkins
So with no more blurb from me, here’s what to do……
Serves: 4
Ingredients
225g sweet potato
225g general purpose potatoes
1 red onion
1 each yellow and red pepper
3 tbsp. vegetable oil
350g ripe tomatoes
240g cooked pinto, kidney or borlotti beans
1 tsp each ground cumin and smoked paprika
½ tsp dried chilli flakes
½ tsp smoked or regular salt
Freshly ground black pepper
Freshly chopped parsley
Peel the potatoes and cut into approx. 0.75cm thick pieces. Peel and slice the onion. Deseed and slice the peppers.
Prepared hash vegetables. Image: Kathryn Hawkins
Heat the oil in a large frying pan and stir fry the prepared vegetables for 5 minutes. Transfer to the slow cooker dish.
Quarter the tomatoes and mix into the vegetables along with the beans, spices and seasonings.
Hash preparation. Images: Kathryn Hawkins
Cover with the lid. switch the slow-cooker on to the Low setting and leave to cook undisturbed overnight or up to 9 hours, until the vegetables are meltingly tender.
My slow cooker. Image: Kathryn Hawkins
To serve, stir the mixture well. Pile on to warm serving plates and sprinkle with parsley. For breakfast, some freshly grilled toast is all the extras you need; for supper, the hash is great spooned over rice or pasta.
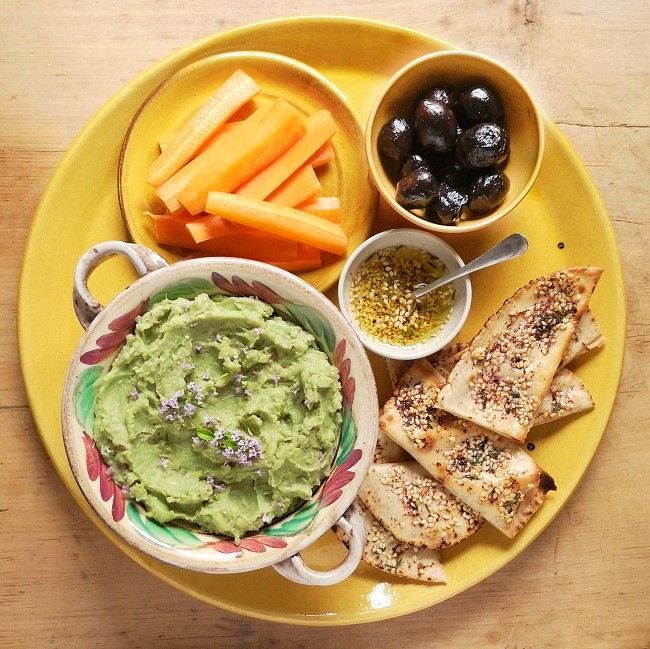
Broad bean byessar served with fresh thyme za’atar on flat breads, with carrots and black olives. Image: Kathryn Hawkins
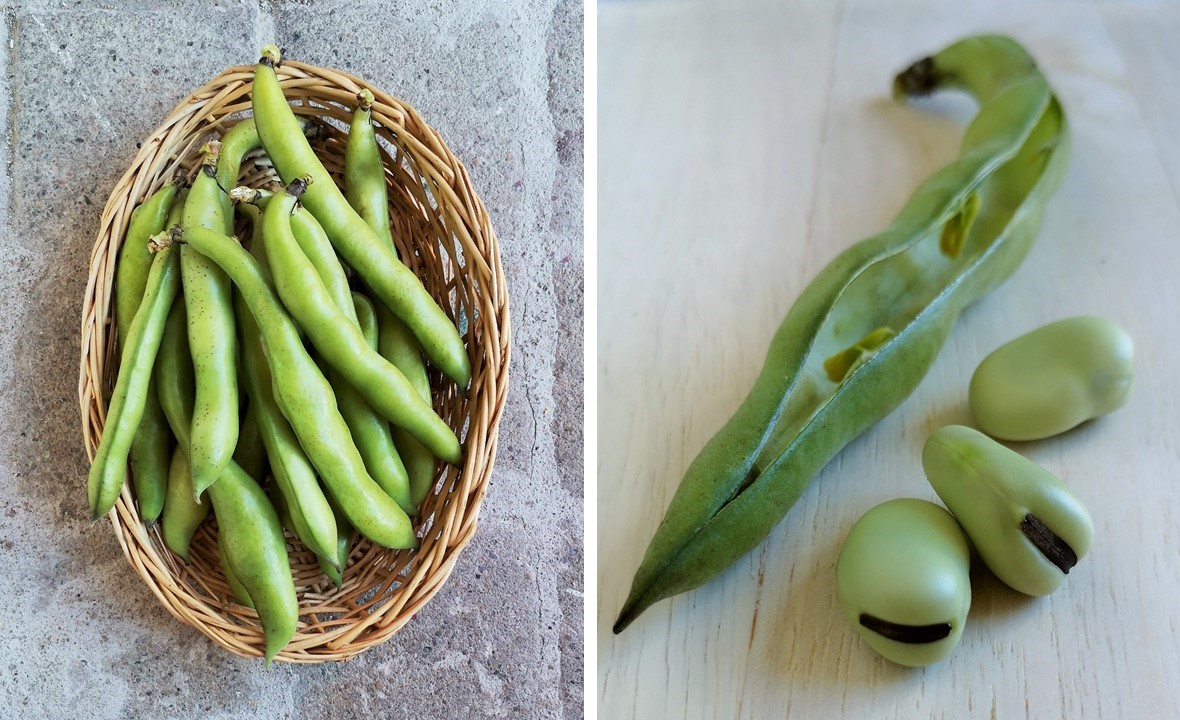
This is a great time of year for fresh fruit and vegetables. The first of the home-grown beans, broad beans, have arrived in the shops these past couple of weeks, and I have made one of my favourite dips with my first batch. If you like hummus (houmous), you’ll love byessar. Usually made with dried broad beans (fava beans), I prefer to make my version with fresh when the beans are in season, or frozen, at other times of the year.
Fresh broad beans. Images: Kathryn Hawkins
To accompany the dip, I have made up a batch of za’atar (zaatar or zahtar), a blend of thyme, sesame seeds and sumac powder. This is a traditional blend from the Middle East and it is used as a seasoning for lots of meat dishes; it is sprinkled over salads and vegetable dishes, and used as a topping for breads. Simply make it into a paste with olive oil, spread it on flat breads or pittas and pop under the grill to toast. As I have lots of fresh thyme in the garden, I’m using fresh leaves, but dried thyme is more traditional. Using dried also means that you can keep it for longer as a dry mix, in a sealed container as you would any other spice blend.
Za’atar ingredients. Images: Kathryn Hawkins
If you can’t find sumac powder, something tangy and zesty like lemon rind would bring a bit of zing to the mix.
Free-from flat breads, carrot sticks and olives to serve
1. To make byessar, bring a small saucepan of lightly salted water to the boil, and cook the beans with the thyme, garlic and cumin or curry powder for 4-5 minutes, until tender. Drain, reserving the cooking liquid, and cool for 10 minutes. Discard the thyme.
2. Put the beans and garlic in a food processor or blender. Add 75ml of the cooking liquid and the oil. Blitz until smooth. Taste and season with salt. Transfer to a serving bowl and leave to cool, then chill until ready to serve. Accompany with bread and carrots to dip; garnish with fresh thyme flowers or leaves, if liked
Making byessar. Images: Kathryn Hawkins
To make za’atar, mix the dry ingredients together. When ready to serve, mix with sufficient olive oil to make a paste. Lightly toast flat breads, cut into strips, then spread lightly with the za’atar paste. Toast under a hot grill for a few seconds to warm through. Serve as an accompaniment to dips and salads.
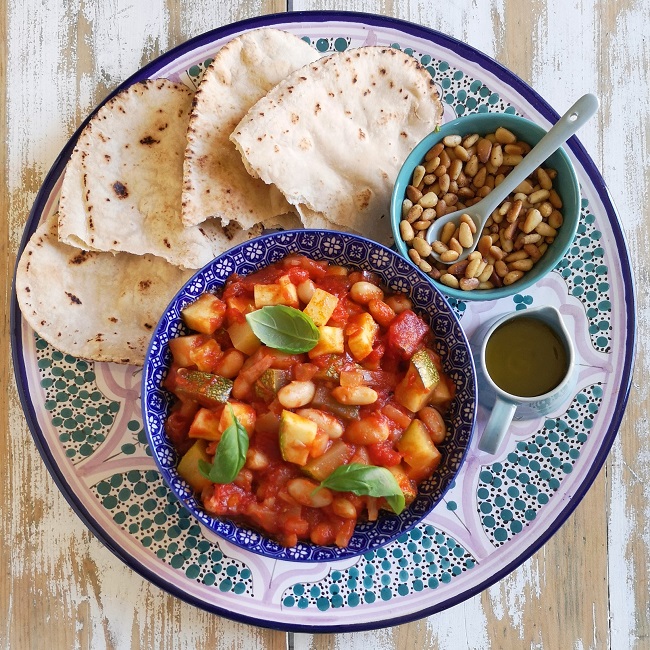
Courgette and white bean salad with fried pine nuts, basil, gluten-free flat bread and extra virgin olive oil. Image: Kathryn Hawkins
Amazingly, the heat is still on full blast here in the UK. The sky has been gloriously blue, day after day, and the sun is shining down strongly. No rain in the forecast; the water butt has been dry for days!
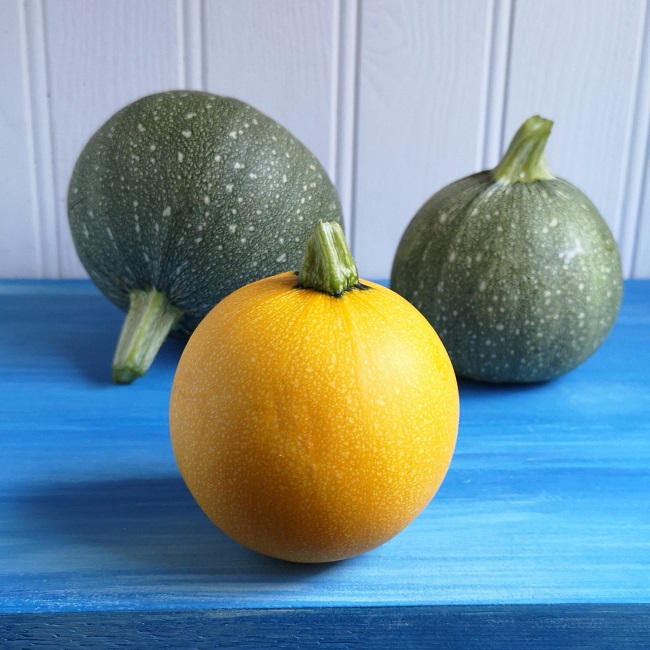
Plenty of time to enjoy the garden at a more leisurely pace. The thought of preparing and eating hot food is not so appealing at the moment, so salads are featuring heavily on my menu. I picked my first courgettes this week – all the extra watering by hand has been worth it – and made an exception by doing a little bit of cooking. I made them into a tasty cold dish with some canned beans and a rich tomato sauce.
The first of this year’s home-grown courgettes. Image: Kathryn Hawkins
You can adapt the recipe to use other vegetables and pulses – aubergine and chickpeas make a good combination too, especially seasoned with some cumin and fresh coriander. The salad makes a good sauce for pasta when served freshly made, and I have also served it as a filling for a warmed pastry case.
Platter of salad and accompaniments. Image: Kathryn Hawkins
Serves: 4
Ingredients
2 tbsp. olive oil
2 onions, peeled and chopped
2 garlic cloves, peeled and chopped
2 fresh bay leaves or 1 dried
2 sprigs fresh rosemary
150ml dry white wine
400g can chopped tomatoes
2 tbsp. tomato purée
2 teasp caster sugar
1 teasp salt
Freshly ground black pepper
250g cooked cannellini beans
500g courgettes, trimmed and chopped into 2cm dice
Fresh basil, fried pine nuts, gluten-free flat bread and extra virgin olive oil to serve
Heat the oil in a large covered frying pan and gently fry the onion, garlic and herbs, with the lid on, over a low heat, for 15 minutes, to soften without browning.
Prepared onion and garlic with fresh bay and rosemary, ready for the pot. Image: Kathryn Hawkins
Pour in the wine and stir in the chopped tomatoes, tomato purée, sugar, salt and pepper. Bring to the boil, then simmer for 5 minutes. Remove the rosemary and bay leaves.
Courgette cut into 2cm dice. Image: Kathryn Hawkins
Stir in the beans and courgette, making sure they are well covered in the sauce. Bring to the boil, cover, reduce the heat, and simmer gently for 7-8 minutes until the courgette is just tender. Leave to cool completely.
Making the sauce and cooking the salad. Images: Kathryn Hawkins
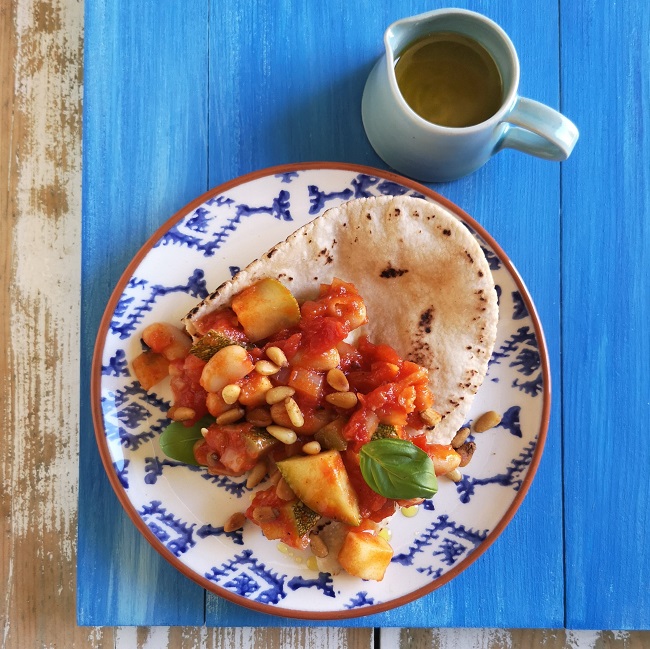
Transfer to a bowl and chill until ready to serve. Best served at room temperature for more flavour. Delicious spooned over warm flat breads, sprinkled with fresh basil, fried pine nuts and a drizzle of extra virgin olive oil. Bon Appétit 🙂
The perfect lunch for a sunny day. Image: Kathryn Hawkins
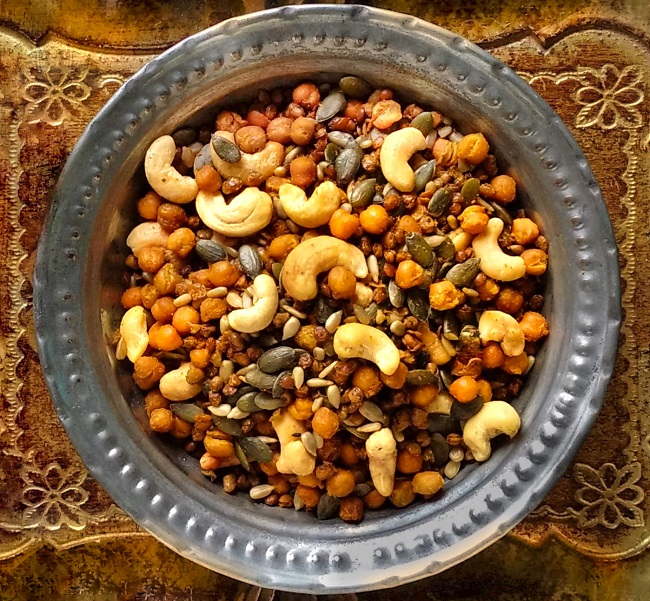
Spiced roast chana and dal. Image: Kathryn Hawkins
A mix of roast pulses, nuts and seeds flavoured with warming spice is a tempting snack, a delicious sprinkle for soups and salads, and a great diversion if, like me, you are forever fighting a battle against a sweet-tooth.
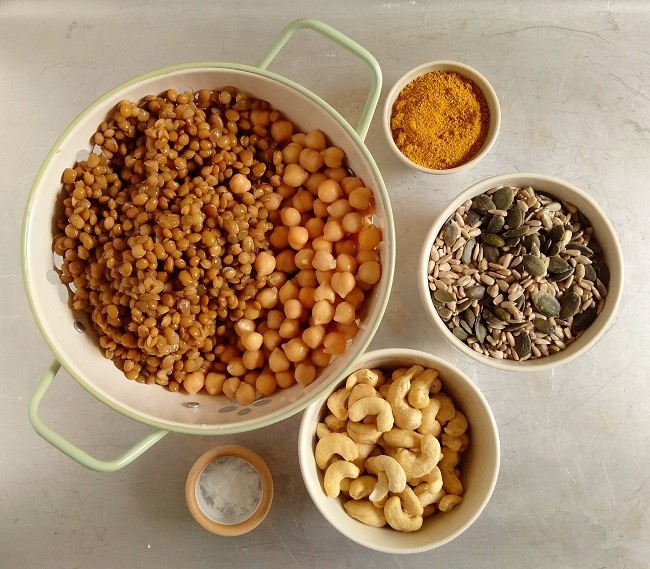
Ingredients ready for mixing and roasting. Image: Kathryn Hawkins
Easy to make, tasty and less fatty than the shop-bought mixes, this is my interpretation of the Asian snack, Bombay Mix. The bulk of the mix is made up of cooked chickpeas (chana) and green split lentils (dal). You can add any nut or seed, but choose the unsalted, natural varieties so that you can adjust the seasoning to suit your taste. I use Madras curry powder but garam masala is also a good blend to use. Here’s what to do:
Makes: 300g
Ingredients
250g cooked chickpeas
250g cooked green lentils
2 tbsp. vegetable oil
4 teasp Madras curry powder
1 teasp salt
65g pumpkin seeds
65g sunflower seeds
100g unsalted cashew nuts
Preheat the oven to 150°C (130°C fan oven, gas 2) . Line a large baking tray with baking parchment. Dry the chickpeas and lentils thoroughly on kitchen paper.
Transfer them to a large bowl and toss in the oil and curry powder. Spread evenly over the baking tray and bake for 1 hour, turning occasionally.
Mix in the seeds and cashews, turning them well on the tray so that they become flavoured with the spices and oil. Spread out evenly again and put back in the oven to roast for a further 30 minutes, turning halfway through, until everything is golden and the pulses have dried out. Leave to cool on the tray.
Drying, flavouring and roasting. Images: Kathryn Hawkins
When the mix is completely cold, pack into an airtight container or storage jar, and keep in a cool, dry place. The mix should stay fresh for about 2 weeks, after this time, the pulses may begin to soften.
Storage jar of home-made “Bombay Mix”. Image: Kathryn Hawkins
I’m always on the look-out for interesting bakes. I have a large folder of recipe articles saved from magazines and newspapers going back many years, along with various scraps of note paper, tucked in between, containing my culinary jottings from articles that have taken my fancy. Every now and then I go through the folder and decide which idea to experiment with next.
And so to this week’s post. A cake that came to my attention a few months ago when I was experimenting in the kitchen and making vegan meringue from the canning water in a tin of beans. This recipe uses the beans as well as the canning liquid. Sounds weird, but eating is believing, and I was pleasantly surprised by the texture and how good it tasted.
Vanilla bean torte, sliced and ready for eating. Image: Kathryn Hawkins
Canned cannellini beans for cake-making. Image: Kathryn Hawkins
Apart from the beans, the other ingredients are mainstream. The flavour can be varied depending on your preference. I used a generous amount of vanilla paste, but fresh orange and lemon rind would work well, as would almond extract if you like a marzipan flavour. I think the mixture could take about 15g cocoa powder added to it for a chocolate version. My cake is soaked in a vanilla flavoured syrup but the syrup can be adapted to suit your chosen cake flavour. There is no added fat or oil in the recipe which makes the syrup an important addition as it not only adds extra sweetness and flavour, but it helps keep the cake moist too. I hope you enjoy it 🙂
Serves: 8-10
Ingredients
400g can cannellini beans in water
50g polenta
75g silken tofu
215g caster sugar
55g ground almonds
1 tbsp vanilla bean paste
Pomegranate seeds to decorate
Preheat the oven to 180°C (160°C fan oven, gas mark 4). Grease and line an 18cm diameter cake tin. Open the can of beans and drain well, reserving the canning liquid. Put the beans in a blender or food processor. Add the polenta and blitz for several seconds until well ground. Leave to one side.
Whisk the tofu with 115g sugar until well blended and creamy. Add the ground almonds, half the vanilla paste and the ground bean mixture and stir to form a thick cake batter.
In another bowl, whisk the bean canning liquid until stiff and foamy, then gently fold this into the cake batter. Transfer to the prepared tin, smooth the top and bake for about 1 to 1 ¼ hours, until golden and firm to the touch.
Making bean torte. Images: Kathryn Hawkins
While the cake is in the oven, prepare the syrup. Put the remaining sugar in a small saucepan and add 150ml water. Heat, stirring, until the sugar dissolves then bring to the boil and simmer for 8-10 minutes, until reduced and syrupy. Remove from the heat and stir in the remaining vanilla paste. Keep warm.
Once the cake is cooked, skewer the top all over and slowly pour over the vanilla syrup so that it soaks into the cake evenly. Leave to cool completely in the tin.
Making and adding vanilla syrup. Images: Kathryn Hawkins
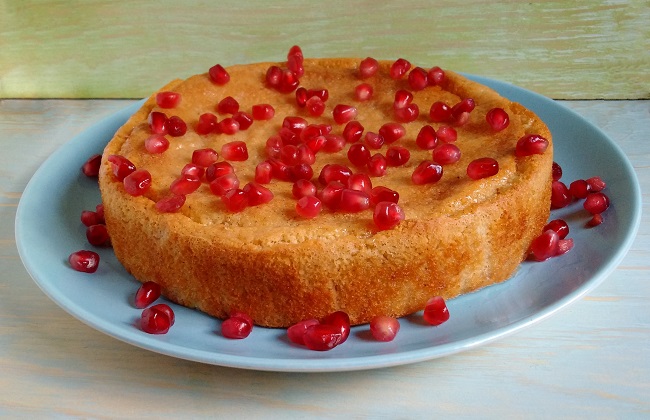
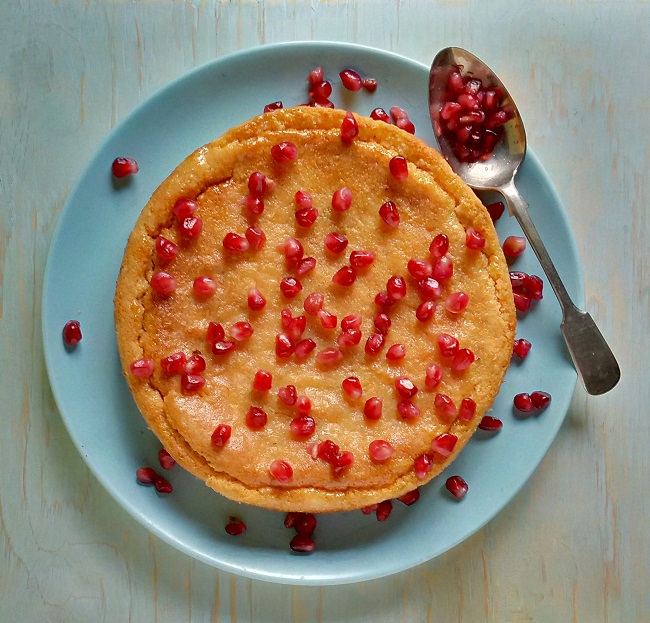
To serve, carefully remove the cake from the tin and place on a serving plate. Sprinkle with pomegranate seeds just before slicing. The cake will keep, covered, in a cool place or the fridge, for 3 to 4 days.
Decorating the torte with pomegranate seeds. Image: Kathryn Hawkins
Vanilla bean torte, deliciously moist and full of flavour. Image: Kathryn Hawkins