Sugar and spice fruit cake for Christmas (gluten-free; dairy-free; vegan)

Gluten-free_dairy-free_vegan_Christmas_cake
Getting ready for Christmas, gluten-free and vegan, this year’s Christmas fruit cake ready for wrapping and storing. Image: Kathryn Hawkins

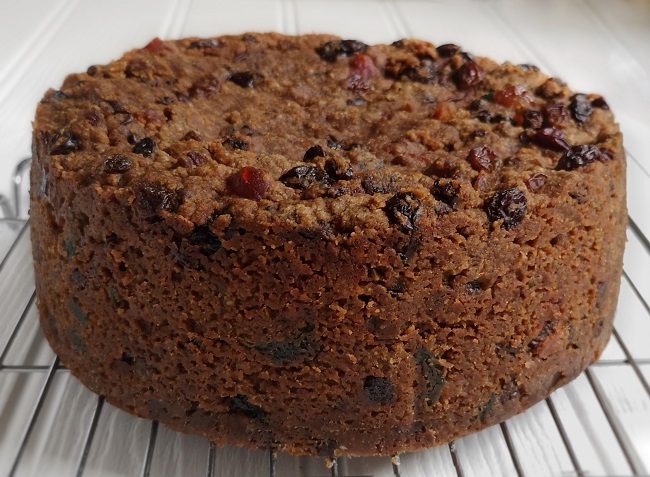
In my kitchen, November marks the month that I bake a fruit cake for Christmas. I love the fragrant spicy and citrus aromas wafting from the oven as the cake bakes. Utterly delicious.

Making a rich fruit cake about 6 weeks before Christmas allows the spices chance to settle down, mellow and improve before serving up over the festive season.

Assorted_dried_fruit_alongside_typical_fruit_cake_flavourings
Christmas cake fruit and flavourings. Images: Kathryn Hawkins

When it comes to fruit, I usually go with a mixture of dried vine fruits, chopped apricots and glacé cherries. Orange and lemon rind and juice add some zest and zing. I always use dark brown sugar and treacle for richness and colour. I usually vary the spices, one year I did mostly ginger and mixed spice for a classic “gingerbread” flavour, but this time around I’ve used cinnamon and allspice together with a classic mixed spice blend. I had white rum to use up this year, but most often I use the dark version.

Lined_cake_tin_wrapped_in_brown_paper
Tin protection for prolonged baking. Image: Kathryn Hawkins

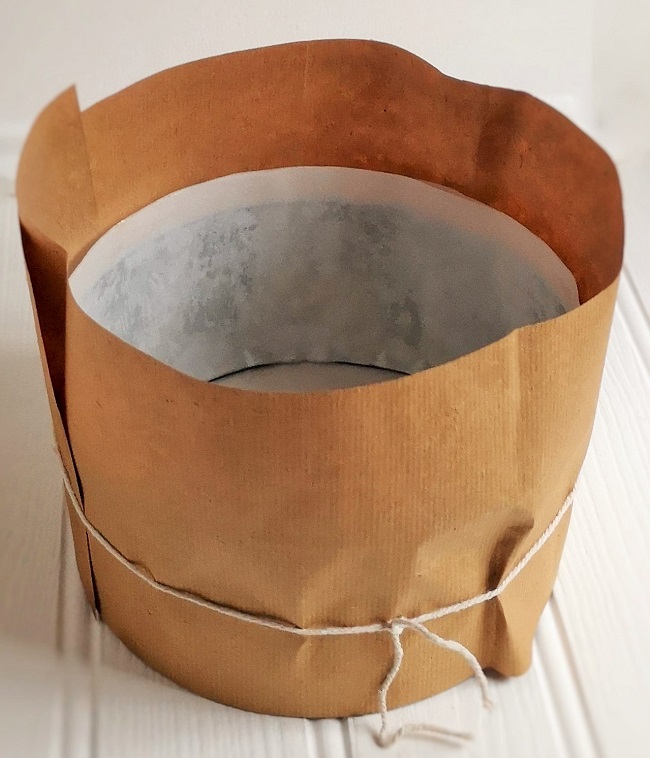
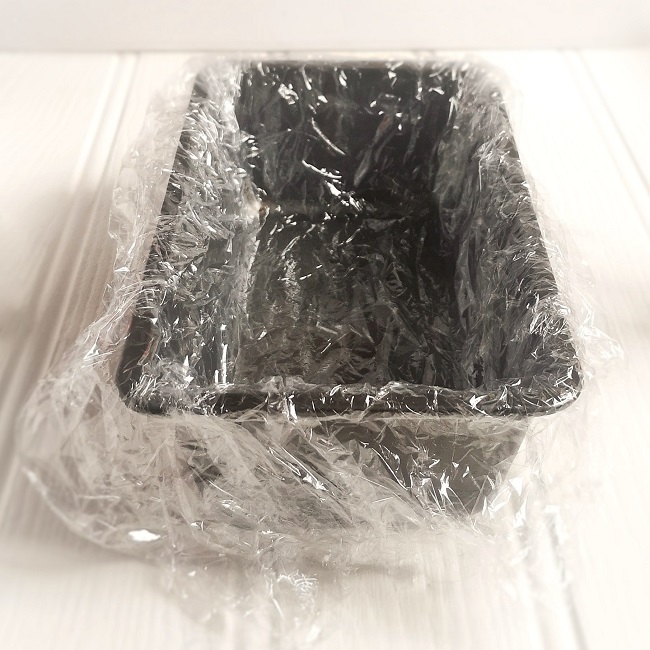
Fruit cakes do take a long time to cook, so you need to make sure the outside edges of the cake don’t over-cook. Double-line the sides of the tin inside with baking parchment and then wrap the outside of the tin with a double layer of brown paper and secure with string. I also put a circle of brown paper in the bottom of the tin before adding a couple of circles of baking parchment on top.

It is worth checking the oven temperature manually before you start baking any cake but especially before one that needs long, slow cooking – I always pop an oven thermometer in the oven before preheating to check the temperature is correct. My cooking time of 3 hours will produce a very moist and dense cake, but if you prefer something drier and more crumbly, extend the cooking time by 30 minutes up to 1 hour.

On with the recipe. If you’ve never made a Christmas cake before I understand that the list of ingredients will be completely daunting, but this is a very straightforward recipe, so I hope I can tempt you to have a go.

Serves: 16

Ingredients

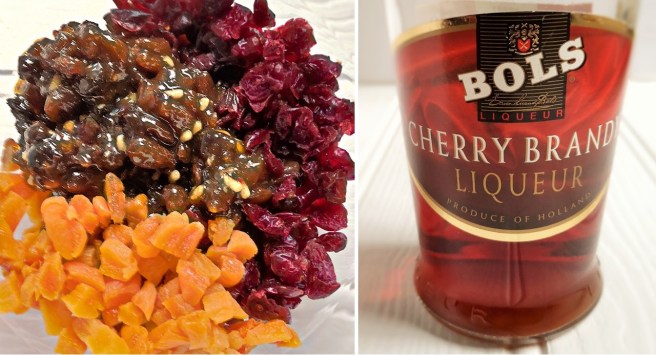
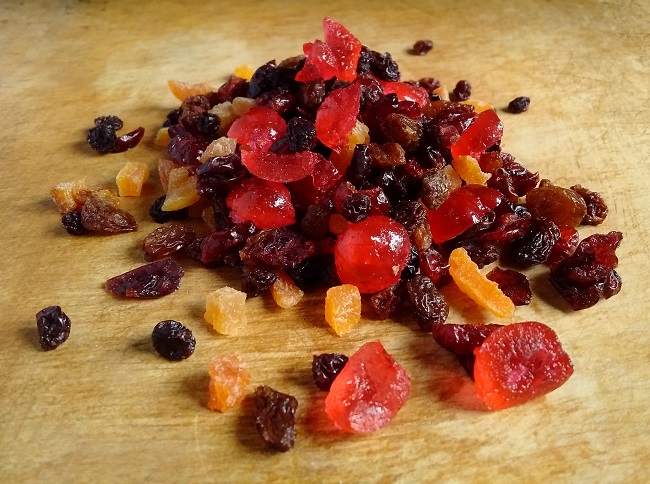
  • 900g mixed dried and glacé fruit such as raisins, sultanas, currants, chopped dried apricots, and cherries
  • Finely grated rind and juice 1 small lemon
  • Finely grated rind and juice 1 small orange
  • 100ml white or dark rum + 2 – 4 tbsp. extra for feeding
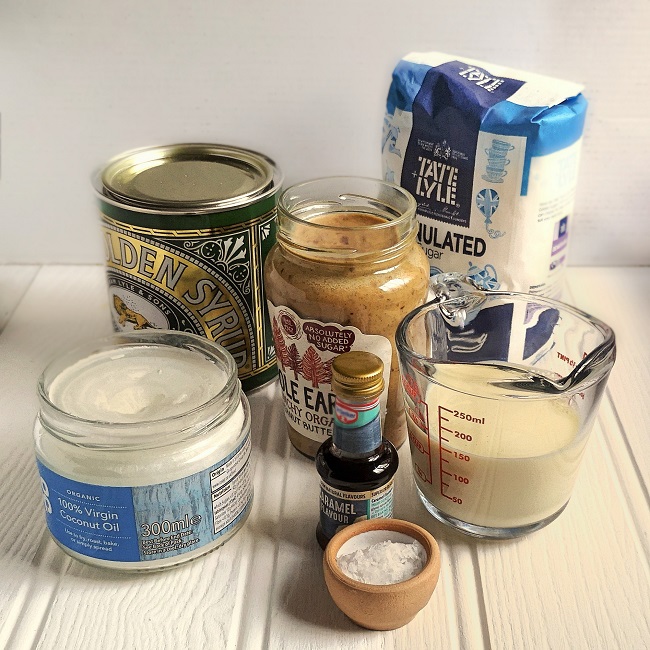
  • 225g coconut oil
  • 150g dark brown sugar
  • 2 tbsp black treacle
  • 40g chia seeds
  • 175g gluten-free plain flour blend
  • 100g ground almonds
  • 1 ½ tsp gluten-free baking powder
  • 1 tbsp. ground mixed spice
  • 2 tsp ground allspice
  • 2 tsp ground cinnamon
  • 2 tsp natural almond extract
  • 1 tbsp. natural vanilla extract
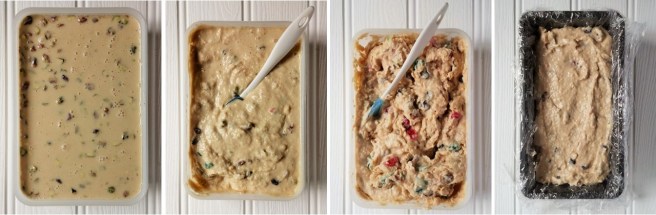
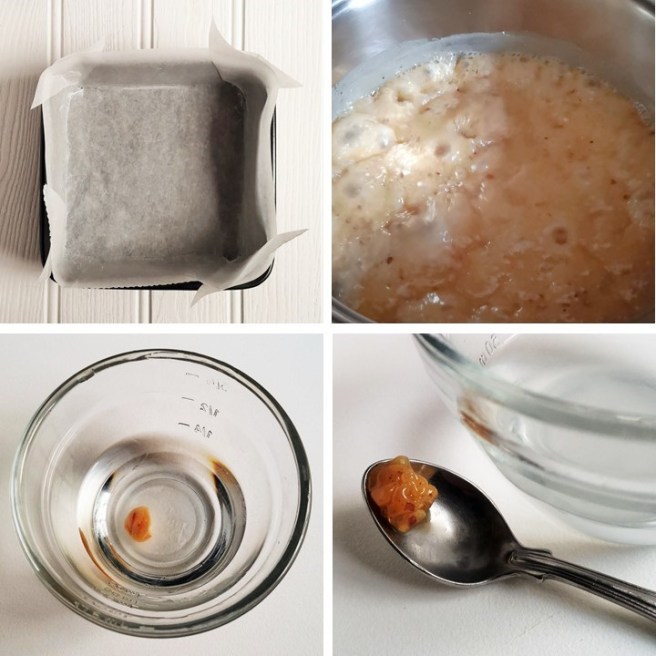
  1. Prepare a deep, 18cm round cake tin by double lining with baking parchment and brown paper – see above. Place on a baking tray.
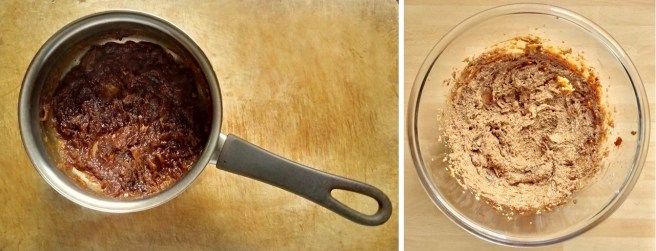
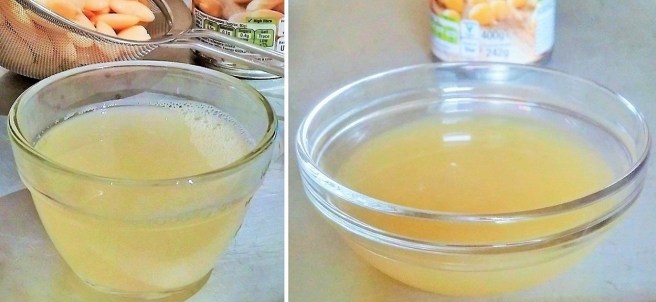
  2. Put the fruit in a large saucepan with the citrus rind and juice, rum, coconut oil, sugar and treacle. Heat gently, stirring occasionally, until melted, then bring to the boil and simmer gently for 2-3 minutes. Leave to cool for 30 minutes.

    Melting_ingredients_for_gluten-free_and_vegan_Christmas_cake
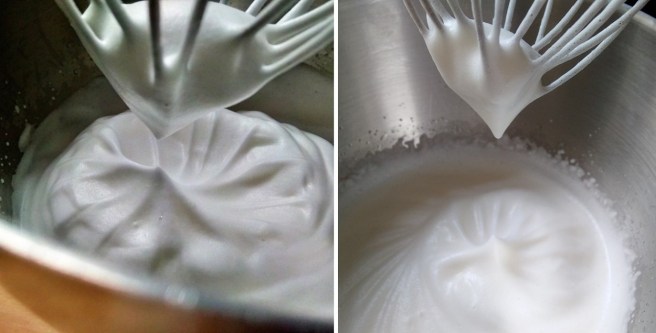
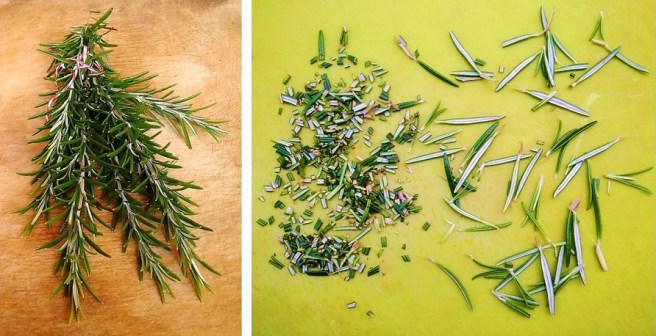
    Preparing the fruit mixture. Images: Kathryn Hawkins
  3. Preheat the oven to 150°C, 130°C fan oven, gas 2. Put the chia seeds in a bowl and add 125ml cold water. Stir and leave for 5 minutes to form a thick, gel-like mixture.

    Chia_seed_"egg"
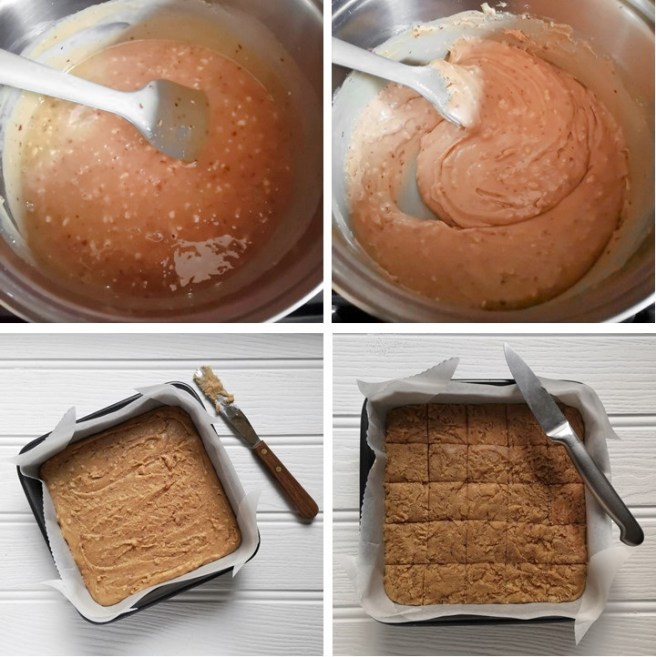
    Making chia “egg”. Images: Kathryn Hawkins
  4. Transfer the fruit mixture to a large bowl and mix in the chia “egg”. Add the remaining ingredients and mix well to make sure that there are no pockets of flour. Transfer to the tin, smooth the top and bake for 3 hours – see notes above for longer cooking.
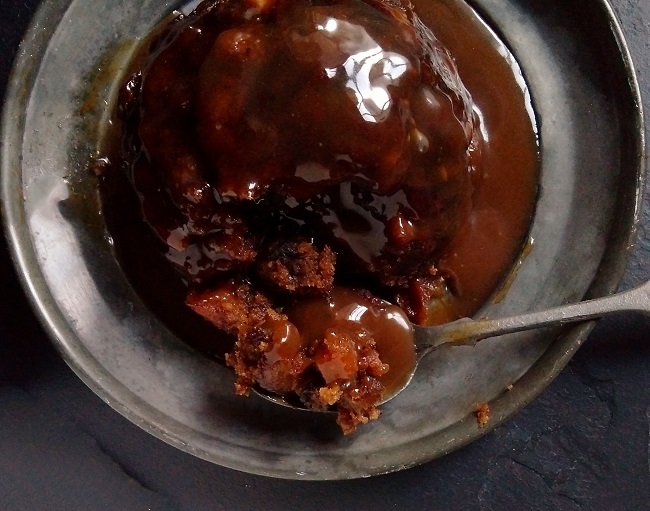
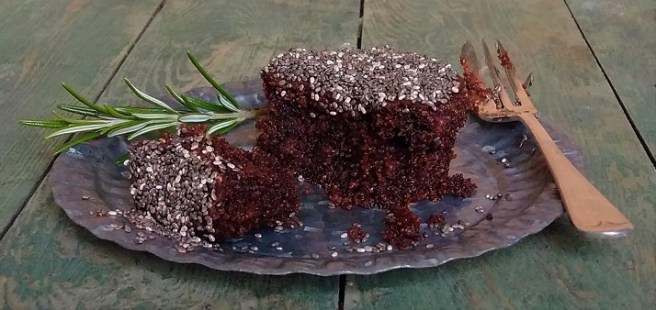
  5. Remove from the oven and skewer the top deeply all over. Spoon over 2 tbsp. rum, then leave the cake to cool completely in the tin.

    Skewering_hot_fruit_cake_and_spooning_over_rum
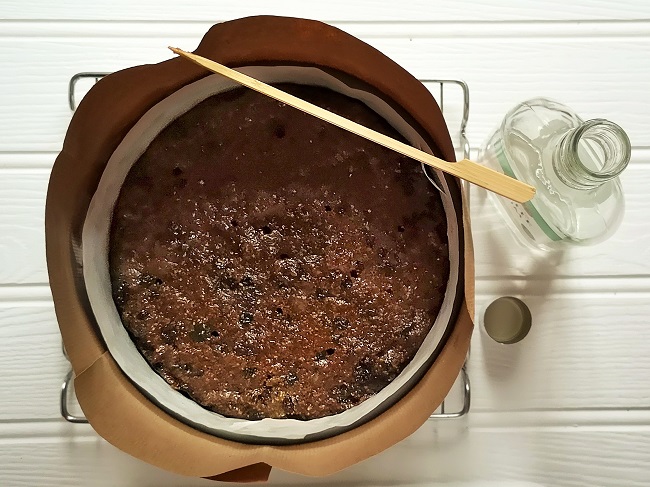
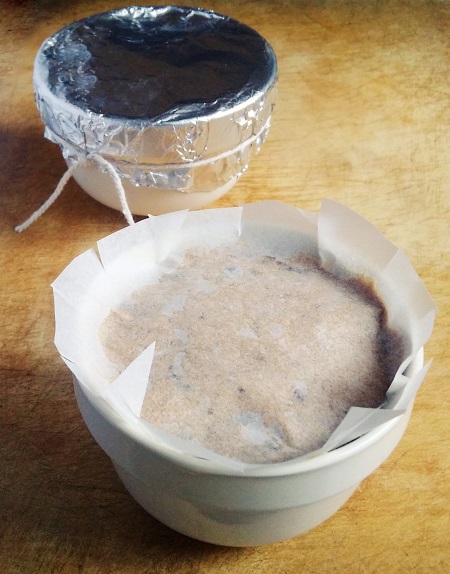
    Rum-soaked cake. Image: Kathryn Hawkins
  6. When the cake is completely cold, remove from the tin and discard all the wrappings. Wrap well in fresh baking parchment or greaseproof paper and then either wrap tightly in foil or store in an air-tight container.
    Fuit_cake_wrapped_in_paper_and_stored_in_air-tight_tin
    Wrapping and storing fruit cake for Christmas. Images: Kathryn Hawkins

    Keep the cake in a cool, dark, dry place for best results. If you want to give the cake a bit more of a kick you can feed it with more rum every 2 weeks. I find one more dose is fine for me. Avoid adding rum in the final few days before serving as it will not have time to mellow out and may spoil the overall flavour of the cake.

    Feeding_a_fruit_cake_with_rum_during_storing
    Feeding the cake. Image: Kathryn Hawkins

    To feed, simply unwrap the cake and spoon over another tablespoon of rum. Let it soak in completely before wrapping up again and ontinue storing until you are ready to ice the cake for Christmas. I’ll follow up this post next month with the unveiling of the finished cake.

Tutti frutti semifreddo (gluten-free; dairy-free; vegan)

Tutti_frutti_semi_freddo_dairy-free_iced_dessert
Easter dessert. Image: Kathryn Hawkins

I’ve been back in the kitchen this week, making something deliciously sweet and impressive for the Easter holidays. I’ve come up with a  dessert that is very easy to make, inspired by the flavours of Italy, and is everything you want to round off a celebratory Easter meal (but with no chocolate in sight – gasp, shock, horror!).

Tutti_frutti_semifreddo_iced_loaf_with_slice
Iced tutti frutti loaf. Image: Kathryn Hawkins

You can add your own choice of chopped dried or candied fruit and nuts – it’s a great recipe to use up the bits and pieces you have leftover (and you could even add chunks of chocolate if you really want to!). Flavoured with marzipan, mincemeat and Marsala wine, it’s a dessert that would also be right at home on the Christmas table as well.

Italian_inspired_tutti_frutti_semifreddo_ingredients
Easter semifreddo ingredients. Images: Kathryn Hawkins
Up_close_on_tutti_frutti+semifreddo_spoonful
A spoonful of semifreddo. Image: Kathryn Hawkins

Here’s what to do:

Serves: 8

Ingredients

  • 115g golden marzipan (use plain if you prefer but the golden variety adds a little colour to the semifreddo), chopped
  • 600ml dairy-free single “cream” (I use oat cream, but soya cream or canned coconut milk would also work)
  • 150g vegan mincemeat
  • 100g glacé cherries, chopped
  • 25g pistachio nuts, chopped
  • 3 tbsp. Marsala wine (or use sweet sherry or cherry brandy)
  • Extra cherries and pistachios to decorate
  1. Line a 1kg loaf tin with a double layer of cling film. Put the marzipan in a saucepan and pour over the dairy-free “cream”. Heat gently, stirring, until melted together.

    1kg_loaf_tin_lined_with_cling_film
    Cling film lined load tin. Image: Kathryn Hawkins
  2. Remove from the heat, mix well then stir in the remaining ingredients and leave to cool completely.
  3. Transfer to a freezer container at least 1.1l capacity, cover and freeze for 2 to 2½ hours until starting to turn slushy. Mix well then freeze for a further hour or so until icy and stiffened. Mix well to distribute all the pieces and pack into the loaf tin. Freeze for at least 2 hours to firm up enough to slice. For prolonged freezing, fold over the cling film and wrap in foil. Keep in the freezer for up to 3 months.

    4_steps_showing_freezing_process_of_tutti_frutti_semifreddo
    Freezing semifreddo. Images: Kathryn Hawkins
  4. To serve, gently ease the semifreddo from the tin using the cling film. Place on a serving plate and discard the cling film. Scatter with more cherries and pistachios. Slice, serve and enjoy! Happy Easter everyone 🙂

    Two_slices_tutti_frutti_semifreddo_ice_on_individual_serving_plates
    Sliced and ready for eating. Image: Kathryn Hawkins

Hogmanay in the garden

Pine_and_witer_foliage_door_hanging
Welcoming in 2019. Image: Kathryn Hawkins

A very happy new year to you all. I wish you good health and every success in the year ahead. I hope that you have had a good Christmas holiday, and now we wait to see what 2019 brings to us all.

My Christmas holiday has been very peaceful and relaxed. The weather has been mild considering the time of year and has given me the opportunity to get out in the garden and tackle a few jobs like pruning the old apple tree.

Lord_Derby_apple_tree_after_Winter_pruning
Recently pruned gnarly old apple tree. Image: Kathryn Hawkins

The holidays started on a very chilly note with a heavy frost on Christmas Eve which made everything look very festive and sparkly in the sunshine and crisp, fresh air. Frosted_Hydrangea_lawn_paths_and_greenhouse_glass

Frosted_berries_herbs_and_fallen_leaf
Frosty garden on Christmas Eve. Images: Kathryn Hawkins

Out in the garden today, things were looking a little different from a week ago. No frost, just mild, breezy air and patches of blue in a heavily clouded sky. 2018 has certainly given us some unusual weather and I think this is having an impact on the garden now. Several plants are much more advanced than usual: the snowdrops are almost out in flower; the buds on the early spring flowering rhododendron are breaking open, and one Hellebore is already in full bloom. The usual oddities are around too: a solitary stalk of fresh flowers on a very sad-looking, bedraggled lavender bush, and a few new red-fringed orange carnation buds are about to open for a second flowering. Snowdrops_in_bud_and_a_white_hellebore_in_bloom

Pink_rhododrendron_in_bud_orange_carnation_in_bud_lavender_flowers
Hogmanay flowers. Images: Kathryn Hawkins

I’ll sign off this post with an image of some “lucky” white winter-flowering heather to bring us all good fortune over the next 12 months 🙂

Winter-flowering_white_heather
Hogmanay white heather. Image: Kathryn Hawkins


Mince pie crumbles (gluten-free; dairy-free; vegan)

Cake_stand_piled_high_with_mince_pie_crumbles
Mince pie crumbles. Image: Kathryn Hawkins

I love a good mince pie, and this recipe is one of easiest and tastiest you can make. No rolling pin or tart tins required, just a square cake tin and a pair of (clean) hands.

You can use homemade or readymade mincemeat for the filling and any combination of dried fruit or nuts you have – it’s a good way to use up leftover bits and pieces. Grated apple also works well added to the mincemeat. Add a splash of your favourite tipple and you have something very festive indeed!

Dried_apricots_cranberries_and_vegan_mincemeat_with_cherry_brandy
Mincemeat and fruit filling with a splash of cherry brandy. Images: Kathryn Hawkins

The crumbles keep well for up to a week when stored in an airtight container – they will become softer and more cake-like a time goes by, but the flavour intensifies – and they also freeze well. Enjoy them warm, straight out of the tin, as a hot pudding, or let them cool and serve as a delicious bake. Here’s what to do:

Makes: 16

Ingredients

  • 115g solid white vegetable fat (such as Trex or coconut oil), softened
  • 115g dairy-free margarine or spread
  • 115g soft light brown sugar
  • ½ tsp salt
  • 1 tsp good quality almond extract, optional (or use 1 tsp ground cinnamon or mixed spice to flavour)
  • 100g ground almonds
  • 250g gluten-free plain flour blend (such as Doves Farm)
  • 10g gluten-free baking powder (such as Dr Oetker)
  • 500g vegan mincemeat
  • 100g dried cranberries
  • 100g chopped dried apricots
  • 2 tbsp. cherry brandy or your favourite tipple
  • 50g golden marzipan (optional)
  • 1 tsp icing sugar, to dust
  1. Preheat the oven to 180°C, 160°C fan oven, gas 4. Grease and line a deep 21cm square cake tin. In a mixing bowl, beat together the fat. margarine, sugar and salt until well blended. Stir in the ground almonds and extract or spice, if using.
  2. Sift the flour and baking powder on top and mix everything together to form a soft, crumbly mixture. Press 350g of the mix into the base of the tin – I find using a floured back of spoon is a good way to achieve a smooth, thick base. Prick all over with a fork and bake for 20 minutes until lightly golden and firm.
  3. Mix the mincemeat, cranberries, apricots and brandy together and spread over the base. Sprinkle the remaining crumble on top, gently packing it down but making sure you retain the crumbly texture.
  4. Bake for about 40 minutes until lightly golden and firm to the touch. Leave to cool for 10 minutes, then slice into 16 squares. Leave in the tin to cool completely before removing and arranging the pieces on a board or tray.

    How_to_make_mince_pie_crumbles
    Making mince pie crumbles. Images: Kathryn Hawkins
  5. To decorate, roll out the marzipan thinly and cut out as many stars or festive shapes as you are able, re-rolling the marzipan as necessary. Arrange the stars on the squares and dust lightly with icing sugar.
    Serving_of_a_single_square_of_mince_pie_crumbles
    Ready for the eating. Image: Kathryn Hawkins


    This is my last post for 2018. I’d like to thank all of you who have stopped by my blog and read my posts. It is a pleasure to write my posts and receive such lovely feedback.

    It’s beginning to feel a lot like Christmas as the song says, we had our first snowfall last night and I woke to the garden transformed into Narnia. On this wintry note, I’d like to wish you all a very happy Christmas and new year when it comes. I will be back up and running in a few weeks.

    A_snow_covered_Perthshire_garden_in_mid_December
    Festive snowfall. Image: Kathryn Hawkins

Salt and caramel nut butter fudge (gluten-free; dairy-free; vegan)

Gift-box_of_salt_and_caramel_nut_butter_fudge
Salt and caramel nut butter fudge. Image: Kathryn Hawkins

I’ve had a hectic few days since my last post. I have got a bit behind with my festive preparations, but I’m pleased to report that back on track again now. I’ve been in the kitchen this weekend and here is the first of my 2 festive posts.

Home-made_squares_of_salt_and_caramel_nut_butter_fudge_in_gift-box_for_Christmas
Home-made fudge, a perfect gift for Christmas. Image: Kathryn Hawkins

I am a huge fan of homemade sweeties, especially fudge, but I have found it difficult to find a recipe that works well as a dairy-free version. I have made the super-easy chocolate-based fudge recipes from time to time, but they do have a different texture to the fudge I remember from childhood.

For this week’s recipe, I have turned to an old recipe book and adapted a traditional recipe which produces the flaky, melt-in-the-mouth texture I really like, and it makes a lovely edible gift too, perfect for the time of year – if you can bare to give it away!

Close-up_on_texture_of_homemade_fudge
Melt-in-the-mouth home-made fudge. Image: Kathryn Hawkins

I used peanut butter as the main flavouring, but any nut butter (or tahini) will work just as well. To get the right consistency, you do need to use a butter replacement with a high fat content; I used coconut oil but a solid white vegetable fat like “Trex” would work if you don’t want the extra flavour from using coconut.

As with most traditional sweet making, a sugar thermometer is a vital piece of kit, but if you don’t have one, I’ve included a quick tip which will help determine whether the fudge is ready or not.

Ingredients_for_making_home-made_fudge
Ingredients for making home-made fudge the traditional way. Image: Kathryn Hawkins

Makes: 25 to 36 pieces

Ingredients

  • 450g granulated sugar
  • 1 ½ tsp salt (use less or none if you don’t want the salty flavour)
  • 50g coconut oil or white vegetable fat
  • 150g no added salt or sugar peanut or other nut butter
  • 150ml unsweetened dairy-free milk (I use unsweetened soya milk)
  • 2 tbsp. golden syrup
  • 2 tsp caramel flavour (or vanilla extract to taste if you prefer a different flavour)
  1. Line an ungreased 18cm square cake tin with baking parchment or waxed paper. Put all the ingredients except the flavouring in a large saucepan and heat gently, stirring, until the sugar dissolves and the coconut oil melts.
  2. Bring to the boil and continue boiling for about 5 minutes until a temperature of 116°C is reached on a sugar thermometer. Alternatively, drop a little of the mixture into a cup of cold water. If it forms a soft ball when rolled between your finger and thumb, the cooking is complete. It is important to keep stirring the boiling mixture to prevent it sticking and burning on the bottom of the pan.

    Steps_showing_the_cooking_and_testing_of_fudge_mixture
    Cooking and testing the fudge mixture. Images: Kathryn Hawkins
  3. Turn off the heat, add the flavouring and stir well. Keep stirring the mixture occasionally as it cools. After about 20 minutes or so, the mixture will begin to thicken and lose its shine, this is the time to mix thoroughly until the texture becomes grainy and stiffer – this is how the perfect texture is achieved.
  4. Transfer to the prepared tin, smooth off the top and leave to cool for about 30 minutes until almost set. Score the top with a sharp knife into 25 or 36 squares, then leave to cool completely for 2 to 3 hours.

    Steps_showing_fudge_texture_and_setting_in_tin
    Cooling and setting cooked fudge mixture. Images: Kathryn Hawkins
  5. Cut through the pieces completely and remove from the tin. Store between sheets of baking parchment or waxed paper in an airtight container for up to 3 weeks.
    Home-made_salt_and_caramel_nut_butter_fudge_cut_into_sqaures_in_tin
    Ready for sampling. Image: Kathryn Hawkins
    Stack_of_home-made_fudge_pieces
    Traditional home-made fudge. Image: Kathryn Hawkins

    Have a good few days and good luck with all your festive preparations. I have my second festive post to put up before Christmas, so I will be with you again in a few days time 🙂

Sticky toffee Christmas pudding (gluten-free; dairy-free; vegan)

Individual_sticky_toffee_Christmas_pudding
Sticky toffee Christmas pudding. Image: Kathryn Hawkins

Just a few days to go before the festive feasts begin, and what could be more appropriate for my last post before Christmas, than a delicious alternative Christmas pudding. I do enjoy a traditional, steamed fruit pudding, but this year I fancied a change, and have developed an alternative recipe. This pudding is fruity, but a little wee bit lighter in texture, and with the emphasis on toffee flavour rather than spice; I guarantee, it is utterly divine 🙂

Pile_of_dried_fruit_for_Christmas_pudding
Cherries, apricots, sultanas and currants. Image: Kathryn Hawkins

The recipe makes 2 x 250ml puddings, which I think serve between 2 and 4 people, depending on how large an appetite you have. If you prefer,  put the mixture in a 500ml basin and cook it for about an hour longer. I usually steam puddings in a slow cooker, this way I can forget about them and don’t end up with a steamy kitchen. If you prefer, put the puddings on a trivet, in a saucepan or in a steamer compartment, cover tightly with a lid, and then cook in the steam for about 1 1/2 to 2 hours. You can use any combination of fruit (or nuts) you have to make up the weight in the ingredients list, it’s a great pudding to use up any odds and ends you have.

Makes 2 x 250ml puddings

Ingredients

  • 75g dried dates
  • 50g dairy-free margarine
  • 50g light Muscovado sugar
  • 50g silken tofu
  • 65g self-raising gluten-free flour
  • ½ teasp bicarbonate of soda
  • 125g mixed dried fruit

For the sauce:

  • 85g light Muscovado sugar
  • 30g dairy-free margarine
  • 110ml canned coconut milk
  • ½ teasp good quality vanilla extract
  1. Grease and flour 2 x 250ml pudding basins. Put the dates in a small saucepan with 75ml water. Bring to the boil, cover and simmer gently for 5 minutes until very soft. Beat well with a wooden spoon until smooth, then leave to cool completely.
  2. When you are ready to mix up the puddings, put the slow cooker on High and leave to preheat for 20 minutes. Meanwhile, put the margarine, sugar and tofu in a bowl. Add the cold date mixture and whisk everything together until smooth and creamy.

    Preparing_the_pudding_mixture
    Preparing the date mixture and blending the ingredients. Images: Kathryn Hawkins
  3. Sieve the flour and bicarbonate of soda on top. Add the fruit and gently mix all the ingredients together. Divide between the 2 basins and smooth the tops.

    2_china_basins_covered_with_parchment_and_foil
    Preparing the puddings for steaming. Image: Kathryn Hawkins
  4. Cover the puddings with a layer of baking parchment, and then foil, and tie securely with string. Put the basins in the slow cooker, side by side, pour in sufficient hot water to come halfway up the sides of the basins, cover and leave to cook for 2 hours. A skewer inserted into the centre of each pudding will come out clean when the puddings are ready.
  5. For the sauce, put the sugar, margarine and half the coconut milk in a small saucepan. Heat gently, stirring, until melted together, then raise the heat and simmer for about 5 minutes until richly golden and caramelised. Remove from the heat and stir in the remaining coconut milk and vanilla extract.
    Making_dairy-free_vegan_toffee_sauce
    Making the toffee sauce. Images: Kathryn Hawkins


  6. When the puddings are ready, remove them from the slow cooker and leave them to stand for 5 minutes. Remove the wrappings and turn out on to warm serving plates. Pour over sauce and serve immediately.

    A_spoonful_of_sticky_toffee_Christmas_pudding
    Ready to eat, sticky toffee Christmas pudding. Image: Kathryn Hawkins

    That just leaves me to pass on my very best wishes to you for a happy, healthy and enjoyable Christmas holiday. Happy festive feasting!


Tutti frutti loaf cakes (gluten-free, dairy-free, vegan, no added sugar)

Mini_gluten-free_vegan_fruit_loaf_cakes
Tutti frutti loaf cakes. Images: Kathryn Hawkins

No eggs, no added fat nor added sugar, gluten-free and dairy-free, these loaf cakes will probably sound either a bit boring, or too good to be true, depending on your point of view. Actually, they are extremely tasty and a wee bit too eatable for my liking!

This recipe is a great way to use up all those odds and ends of dried fruit you often have leftover. You can add nuts and seeds to the mix too if you like. Just after Christmas, I made up a bag of dried and candied fruit that was getting towards its use-by date, and put it in a tub the freezer, where it stayed until this week, when a craving for fruit cake came upon me. Combined with a recently opened bag of dried cranberries I had in the fridge, the frozen mix of chopped dried apricots, red and green glacé cherries and golden sultanas made up a colourful addition to my cake mix.

Combination_of_sultanas_candied_cherries_and_apricots
Post-Christmas homemade tutti frutti mix. Image: Kathryn Hawkins

The recipe below will fill 8 mini loaf tins or 1 large (1kg) loaf tin. The cakes taste better if left until the day after baking – the flavour and texture improves on keeping. You will be rewarded if you can leave it alone for a few hours! They also freeze well. I find that the lower content of fat in this recipe means that after 3 or 4 days, the cakes begin to lose their freshness; it is well worth freezing any that you’re not going to eat within a couple of days of baking, in order to enjoy them at their best.

8_individual_loaf_tins
Mini loaf tins. Image: Kathryn Hawkins


Makes: 8 minis or 1 x 1kg loaf

  • 250g stoned dried dates, chopped
  • 2 tsp good quality vanilla extract
  • 150g gluten-free plain flour blend (such as Dove’s Farm)
  • 15g gluten-free baking powder (such as Dr Oetker)
  • 10g arrowroot
  • 2 tsp chai masala or ground mixed spice
  • 75g ground almonds
  • 500g mixed dried and candied fruit
  1. Preheat the oven to 170°C (150°C fan oven, gas mark 3). Grease 8 x mini loaf tins or 1 x 1kg loaf tin, or line with paper loaf tin liners, if preferred. Put the chopped dates in a saucepan and pour over 350ml water. Bring to the boil, simmer for 2 minutes, then turn off the heat and leave to cool completely. Blitz with a hand blender or in the food processor to make a smooth purée. Stir in the vanilla extract.
  2. Sieve the flour, baking powder, arrowroot and chai masala or spice into a bowl and stir in the ground almonds and dried fruit. Add the date purée and then mix until well blended.
  3. Divide equally between the prepared tins and smooth over the tops. Place on a baking tray and bake for about 35 minutes for the individual cakes or about 1 hour for a larger loaf cake – a skewer inserted into the centre will come out clean when the cake mixture is cooked. Cool for 10 minutes, then turn onto a wire rack to cool completely.  For best results, wrap the cakes well or store in an airtight container until the next day before serving.
Tutti_frutti_cake_mix_divided_between_8_mini_loaf_tins
Tutti frutti cake mix ready for baking. Image: Kathryn Hawkins
Inside_a_tutti_frutti_loaf_cake
Packed full of colour and flavour. Image: Kathryn Hawkins


Cherry almond amarettis (Gluten-free, dairy-free, vegan)

Cherry_almond_vegan_amaretti_cookies
Vegan cherry almond amaretti cookies. Image: Kathryn Hawkins

For several weeks, every now and again, I have been trying to make eggless meringues. The meringues I prefer are the large, pillow-like ones made with brown sugar and lots of chopped nuts and a drizzle of dark chocolate, and not the plain white, dainty variety. Sadly, I haven’t been successful so far. However, my experimentation has led me to find other uses for vegan “egg white”, hence, I come to this week’s post.

Next time you open a can of cooked white beans or chickpeas in water, keep the canning liquid, for this is vegan “egg white”. Amazing as it sounds, the liquid whips up into a thick foam and can be used (with care) as a substitute for fresh egg whites. You may find it referred to as aqua fava for after all, that is what it is: bean water!

Vegan_egg_white_(aqua_fava)
Bowls of butter bean and chickpea canning water. Images: Kathryn Hawkins

The drained liquid content of a 400g can is approx. 140ml which equates to 3 medium egg whites. It freezes well so you don’t need to use all of it in one recipe – an ice cube tray is perfect for individual egg-sized amounts, but don’t forget to label it otherwise your G&T may taste a little strange! As with fresh egg white, place in a clean, grease-free bowl and whisk in the same way. I add a pinch of cream of tartar to assist the volume when whisking up.

Freshly_whsked_vegan_egg_white_(aqua_fava)
Whipped butter bean and chickpea canning water. Images: Kathryn Hawkins

Once I have cracked a decent meringue recipe and got my sugar and nut quantities correct, I look forward to sharing it with you. Until then, here is my recipe for Italian amaretti cookies. These are the soft variety, and are truly delicious (and very moreish). They make a lovely gift too.

Makes: 18

  • A few sheets of gluten-free edible paper (optional)
  • 45ml chickpea or white bean canning water
  • Pinch of cream of tartar
  • 225g ground almonds
  • 100g glacé cherries, chopped
  • 125g + 2 tsp icing sugar
  • 2 tsp natural almond extract
  1. Preheat the oven to 180°C (160°C fan oven, gas mark 4). Line 2 large baking trays with baking parchment. Using a 4cm diameter round cookie cutter, trace and cut out 18 rounds of edible paper if using, and place on the trays, spaced a little apart.
  2. Put the canning water in a clean, grease-free bowl and whisk until softly foaming. Add the cream of tartar and continue whisking until the beaters leave an impression in the foam – this takes about 3-4 minutes of whisking.
  3. Put the almonds and cherries in a bowl. Sift 125g icing sugar on top. Mix well and then add the almond extract and whisked foam. Carefully mix together to make a softish dough.
  4. Divide into 18 portions and form each into a ball. Place one on top of each paper circle and press down gently to flatten slightly – if you’re not using the paper, just space them out directly on the lined trays.

    Edible_paper,_amaretti_dough_and_shaped_cookies
    Amaretti making. Images: Kathryn Hawkins
  5. Bake in the oven for 15-20 minutes until lightly golden and firm to the touch. Cool for 5 minutes then transfer to a wire rack to cool completely. The biscuits will store for up to 2 weeks in an airtight container. Serve lightly dusted with icing sugar.
Board_of_cherry_amarettis_duted_with_icing_sugar
Sugar-dusted cherry amarettis. Image: Kathryn Hawkins

For gifting, wrap each amaretti cookie in a small, clean square of tissue paper, and twist the ends on each side to seal the wrapping. Arrange in a shallow box and tie with ribbon to present. Perfect for serving with coffee.

Cherry_almond_amarettis_individually_wrapped_in_tissue_paper
Gift-wrapped amarettis. Image: Kathryn Hawkins


Chocolate, rosemary and orange muffins (gluten-free, dairy-free, vegan)

Gluten-free_vegan_chocolate_rosemary_and_orange_muffins
Chocolate, rosemary and orange muffins. Image: Kathryn Hawkins

On the shortest day of the year, here’s a little something baked to brighten up the barely light hours. I picked rather too much rosemary the other day, and spent a few days pondering on how best to use it up. It doesn’t freeze very well and I’m not a fan of the dried stuff. After admiring the stems as a herbal arrangement in my kitchen for a while, I decided to do some flavour experimentation, and these muffins are the result.

I wasn’t really intending them to be so festive looking, but the sprigs reminded me of tiny pine trees and then my mind started going into creative mode. I hope you enjoy them. The flavour is really rich and perfect for the time of year. You only need to use the leaves for this recipe – the stems are too tough – and try to chop the leaves as small as possible for the best flavour and better eating.

Fresh_rosemary_sprigs_and_leaves
Fresh rosemary. Images: Kathryn Hawkins

Makes: 10

  • 150ml sunflower oil
  • 150g dark brown sugar
  • 150g silken tofu
  • 45g cocoa powder
  • 2 level tsp gluten-free baking powder (such as Dr Oetker)
  • 1 level tbsp ground arrowroot (I often add this to help bind gluten-free cake mixtures together)
  • 100g ground almonds
  • 75g polenta
  • Finely grated rind 1 unwaxed orange
  • 2 level tsp finely chopped rosemary leaves
  • Pinch of salt
  • 125g icing sugar + extra to dust
  • Approx. 40ml freshly squeezed orange juice
  • 10 tsp Chia or poppy seeds
  • 10 small sprigs of fresh rosemary
  1. Preheat the oven to 180°C (160°C fan oven, gas mark 4). Line a muffin tin with 10 paper cases. Put the oil, sugar and tofu in a bowl and whisk together with an electric mixer until well blended and thick.
  2. Sieve 25g cocoa, baking powder and the arrowroot on top. Add the almonds, polenta, orange rind, chopped rosemary and salt. Mix all the ingredients together until thoroughly combined.
  3. Divide the mixture equally between the cases. Smooth the tops and bake for about 35 minutes until just firm to the touch – the cakes may look slightly sunk in the middle. Cool in the tins for 5 minutes then transfer to a wire rack to cool completely.
  4. To decorate, sieve the icing sugar and remaining cocoa powder into a small bowl and mix together with sufficient orange juice to make and smooth, spreadable icing. Spoon sufficient icing on top of each muffin and spread to cover the top completely.
  5. Sprinkle the top of each muffin with 1 tsp seeds. Leave for a few minutes to set before adding the finishing touches.
    Icing_and_topping_muffins_with Chia_seeds
    Decorating the muffins. Image: Kathryn Hawkins

    Just before serving, carefully put the muffins into small flower pots. Push a sprig of rosemary into the top of each and if liked, dust the rosemary lightly with a little icing sugar for a frosted look.

    The muffins freeze well once iced and seeded, and will also keep for 4-5 days in an airtight tin once decorated. Simply decorate with fresh rosemary and icing sugar just before serving.

    Chocolate_and_rosemary_muffin_dusted_with_icing_sugar
    Frosty-looking chocolate, rosemary and orange muffin. Image: Kathryn Hawkins

    Gluten-free_vegan_baking:_chocolate_and_rosemary_muffin
    Gluten-free and vegan, a deliciously dark and tasty chocolate, rosemary and orange muffin. Image: Kathryn Hawkins

Festive Floretines (gluten-free, dairy-free, vegan)

Edible_gift:_gluten-free_and_vegan_Florentines
Festive Florentines. Image: Kathryn Hawkins

I’m spoilt for choice at this time of year as to what sweet treats and edible goodies to make, but Florentines have to be up there in my Top 10 of all time favourites. These thin, crisp, Italian, chocolate-spread morsels are jammed packed with fruit and nuts, and they are just as delicious served with a spoonful of your favourite ice cream or sorbet, as they are with a cup of coffee.

I have chosen to use a combination of candied green fruits, seeds and nuts, but you can use any dried or candied fruit, and any unsalted, roasted nuts and seeds – in fact these biscuits are one of the best ways to use up any bits and pieces of dried fruit, nuts and seeds you have leftover. They will also work with all fruit or all nuts and seeds, so you can make up your own combinations to suit your personal preference.

Traditionally, Florentine biscuits are spread with melted dark chocolate on the back, but they are good left as they are. Cover the backs with 90% extra dark chocolate for a less sweet finish, and, if you can bring yourself to give them away, they make a lovely gift.

Main_ingredients_for_Florentine_cookies
Angelica, green-coloured cherries, pistachio nuts and pumpkin seeds. Image: Kathryn Hawkins

Makes: 20

  • 75g coconut oil or vegan margarine
  • 75g golden syrup
  • 50g gluten-free plain flour blend (such as Dove’s Farm)
  • 60g pumpkin seeds
  • 60g unsalted shelled pistachio nuts, lightly crushed
  • 100g green glacé cherries, roughly chopped
  • 25g angelica, finely chopped
  • 1 tsp good quality natural almond or vanilla extract (such as Dr Oetker)
  • 200g milk free, vegan white “chocolate”
  1. Preheat the oven to 180°C (160°C fan oven, gas mark 4). Line 2 large baking trays with baking parchment. Melt the oil or margarine with the syrup in a saucepan. Remove from the heat and stir in the remaining ingredients except the white “chocolate”.
  2. Drop 20 heaped teaspoonfuls, spaced well apart on to the prepared trays, and flatten each mound slightly. Bake for 10-12 minutes until flattened and lightly golden. Leave to cool for 10 minutes on the trays, then transfer to a wire rack to cool completely.Preparation_of_mixture_for_baking_Florentines
  3. To cover the biscuits with chocolate, put just over half the amount of chocolate in a heatproof bowl and melt over a saucepan of barely simmering water. Line a large board with baking parchment.
  4. Working on one biscuit at a time, carefully dip and roll the edge of the biscuit all the way round in chocolate and place on the lined board. Leave to set.

    Covering_gluten-free_Florentines_with_vegan_white_"chocolate"
    Covering the sides and backs of Florentines in melted white “chocolate”. Images: Kathryn Hawkins
  5. Once all the biscuits are dipped and set, melt the remaining chocolate as above. Turn the biscuits over and spread a little chocolate thinly over the backs. Leave to set. Note: If you can leave them alone, these biscuits will store well in an airtight container for up to 1 week.
Gluten-free,_vegan_Florentine_cookie
Vegan, gluten-free, chocolate-dipped Florentine biscuit. Image: Kathryn Hawkins