Garden Sorrel (Rumex acetosa)

New_season_spring_garden_sorrel
New season garden sorrel. Image: Kathryn Hawkins

I have more books on the subject of herbs and spices than on any other. I love growing my own herbs and experimenting with new flavours. It’s lovely to see that my herb garden is coming back to life again, now that the days are getting lighter and the sun is slowly warming up.

One of the best culinary friends from the herb garden is garden sorrel. A hardy perennial – I’ve noticed that even in the depths of a Scottish winter, there are always a few leaves poking their way through the earth – it is easy to grow and is very versatile. Related to spinach and the wild, leafy plant, Dock, garden sorrel is a real favourite with cooks and chefs alike.

A_small_garden_trug_of_fresh_sorrel_leaves
Freshly picked sorrel leaves. Image: Kathryn Hawkins

Spring is the time to start picking a few leaves here and there – the more you pick, the more the plant will regenerate, and you’ll have a succession of young leaves right through until autumn. At this time of year, the new leaves are juicy and fresh tasting. Larger leaves have more of the classic, astringent lemony flavour associated with the herb. As the season progresses, tougher, red flowering stems will form with clusters of tiny red flowers at the end, and a few of the leaves will become very large. Whilst the flowering stem should be cut down,  the large leaves, which are too coarse to eat, make perfect wrappings for tenderising meat and flavouring fish during cooking.

Very_young_tender_leaves_ and_more_mature_sorrel_leaves
Baby sorrel and larger sorrel leaves. Image: Kathryn Hawkins

If you fancy growing your own, buy some seed now and get sowing. You may also find potted clumps at the garden centre. Garden sorrel likes rich, moist soil, and the sun or semi-shade. And that’s about it; it will look after itself. If you want a supply for winter, either cover the clump with a cloche, or split the roots in autumn and pot some up – I usually keep a pot in my unheated greenhouse over the winter months to tide me over until the next spring.

Growing_garden_sorrel
New season sorrel in my herb garden. Image: Kathryn Hawkins

Garden sorrel serving suggestions and tips

  • Sorrel is best picked as required. Treat like spinach if you do need to store it: place in a plastic bag and keep in the fridge for a couple of days maximum. It can be frozen successfully, but loses its flavour if dried.
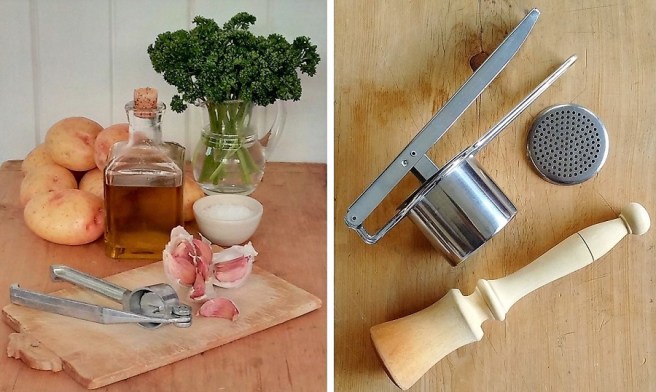
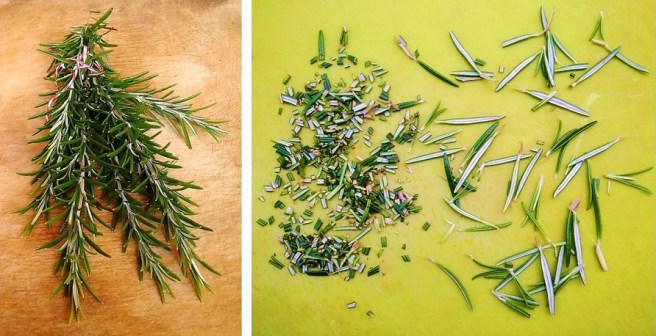
  • Because of the acid content, sorrel is affected by cast iron cookware and will discolour. Use a stainless steel knife blade for cutting, and only shred just before using to avoid discolouration and flavour loss.

    Chopping_fresh_sorrel_with_a_stainless_steel_blade
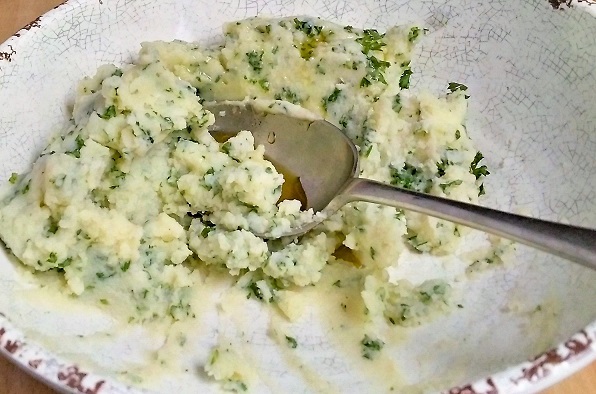
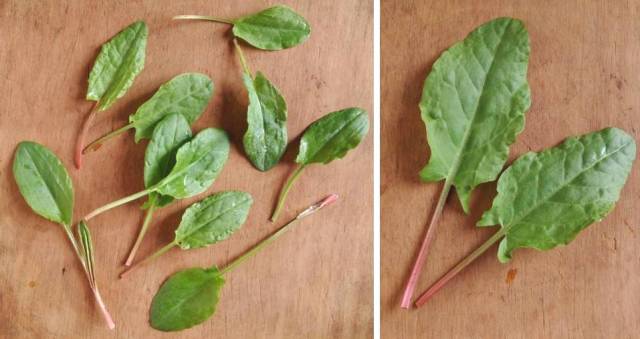
    Garden sorrel preparation. Image: Kathryn Hawkins
  • Young garden sorrel leaves are delicious mixed with other green salad leaves and soft-leaved herbs; they add a tangy lemony flavour to the plate, and reduce the need for vinegar or lemon juice in a salad dressing.
  • Used by the Greeks and Romans as an aid to digestion, garden sorrel is the perfect accompaniment to rich foods such as soft cheese (especially goat’s and sheep’s cheeses), oily fish, lamb and pork.

    Pork_and_pancetta_patties_flavoured_with_garden_sorrel
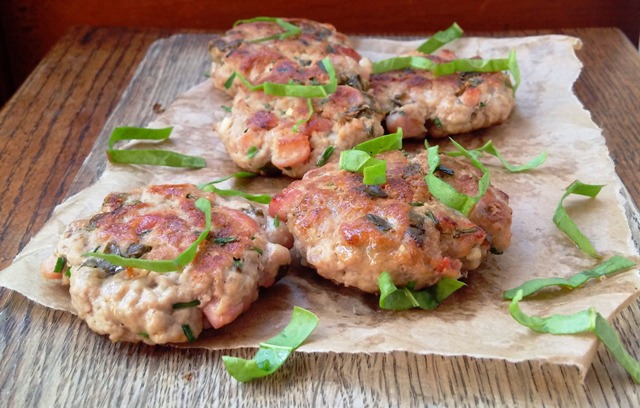
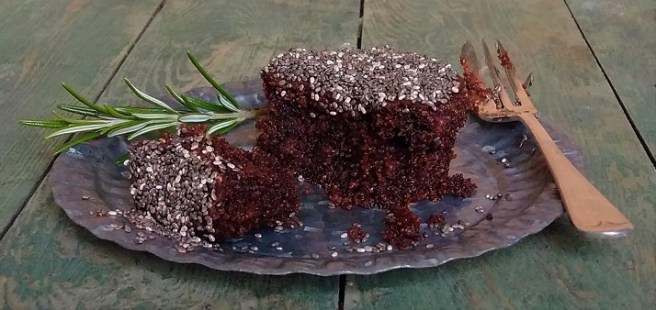
    Patties of minced pork and pancetta mixed with salt, pepper, garlic, freshly chopped chives and shredded garden sorrel. Image: Kathryn Hawkins
  • Garden sorrel is commonly used in egg dishes. Try adding to pancake batter, or a quiche filling; stir into scrambled eggs, or add as an ingredient to an omelette fines herbes. Pep up an egg mayonnaise sandwich filling by adding a few fresh leaves – much zingier than mustard and cress!
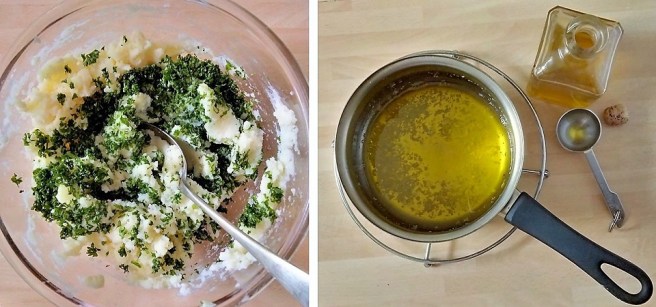
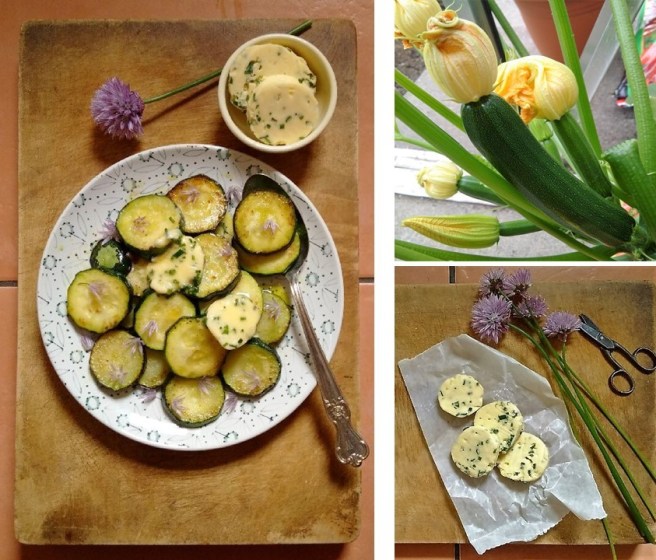
  • Add some chopped leaves to soft butter or margarine along with some black pepper and a little salt. Melt over hot grilled fish, barbecued chicken or steaks. See my recipe for chive butter if you fancy making some  Homegrown courgettes with chive butter (gluten-free)
  • As well as all the culinary uses, sorrel leaves are rich in potassium and the vitamins A, B1 and C.

    Bright_green_lance_shaped_leaves_of_garden_sorrel
    Broad, arrow-shaped leaf of garden sorrel. Image: Kathryn Hawkins

My favourite mash (gluten-free, dairy-free, vegan

First_snowfall_of_2017_in_Perthshire_garden
The first snow of 2017. Image: Kathryn Hawkins

It’s been a cold week all over the UK; the first snow of the year settled in the garden a few days ago, transforming it into a “Winter Wonderland” overnight. As soon as a chill sets in, my thoughts immediately turn to comfort food.

I am a huge potato fan and this week seemed like the perfect excuse to make my favourite mash potato recipe. Perfectly cooked potatoes, a generous handful of chopped parley, lashings of good quality olive oil, a good pinch of sea salt and some fresh garlic. It’s a delicious that mash seems to go with everything.

Ingredients_and_essential_equipment_for_making_the_perfect_mashed_potato
Ingredients and equipment for olive oil and garlic mash. Images: Kathryn Hawkins

For the best result, you need to choose a potato that mashes well. My preference is King Edward, it’s got good flavour and a dry, floury texture when cooked. Cook the prepared potatoes until they are completely tender. Drain well and then give them a good thump with a potato masher. If you don’t mind a few lumps, leave it at that, but if I’ve got the time, I like to press the mash through a ricer for the smoothest, silkiest texture possible. It’s up to you how much garlic, parsley and seasoning you add, but do use a really tasty olive oil. A good quality extra virgin (cold pressed is even better) oil will not only add flavour and colour, but will add to the indulgence of the finished mash. Only warm the oil, never heat it beyond warm, otherwise the health and flavour benefits will be lost.

Mashed_potato_with_parsley_olive_oil_and_garlic
Olive oil, parsley and garlic mash. Image: Kathryn Hawkins

Serves: 4

  • 900g main crop potatoes, such as King Edward or Maris Piper
  • Sea salt
  • 4 plump garlic cloves, peeled and crushed
  • 1 tbsp sunflower oil
  • Large handful of fresh curly parsley, washed, thick stalks removed, and finely chopped (I like to add about 25g chopped parsley to this quantity of potato)
  • 6 tbsp good quality, extra virgin cold pressed olive oil + extra for serving, if liked
  1. Thinly peel the potatoes. Cut into chunky pieces and rinse in cold water. Place in a large saucepan and cover with cold water. Add a pinch of salt, bring to the boil and cook until completely tender (12-15 minutes, depending on how thick you’ve cut them up). Drain well through a strainer, and leave to air dry for 5 minutes.
  2. Meanwhile, heat the sunflower oil in a small saucepan and very gently fry the garlic for 1-2 minutes until tender but not browned. Remove from the heat.
  3. Return the potatoes to the saucepan and mash well. If you’re not using a ricer, stir in the parsley and cover. If you are ricing the mash, press the potato into a warm bowl, stir in the parsley, and cover the whole bowl with foil.
  4. Stir the olive oil into the cooked garlic and place the saucepan over a very low heat for 2-3 minutes to gently warm the oil.
    Chopped_parsley_garlic_and_olive_oil_being_added_to_mashed_potato
    Adding the flavourings to mashed potato. Images: Kathryn Hawkins


  5. Stir the warm oil into the parsley mash. Taste and season. Pile into a warm serving dish. Drizzle with more olive oil if liked, and serve immediately. Mmmm…mmmmm.

    Single_serving_of_mashed_potato_with_parsley,_olive_oil_and_garlic
    The last spoonful of my favourite mash. Image: Kathryn Hawkins


Moroccan mint tea jellies (gluten-free, dairy-free, vegan)

Jug_of_fresh_mint_and_Moroccan_tea-set
Fresh mint and Moroccan tea-set. Images: Kathryn Hawkins

Mint tea is something I enjoy everyday, usually in the afternoon as an uplifting brew and sometimes, after dinner as a “digestif”. The refreshing taste of mint makes it the perfect herbal choice for this time of year, after over-indulging on rich food, and for anyone looking to make healthier choices for the new year.

I’ve been to Morocco a couple of times and loved the experience. I brought back the tea-set above from my first trip almost 30 years ago. The country’s cuisine is one of my favourites. If you have mint tea made by the locals, it is served piping hot and mouth-tinglingly sweet, which seems utterly contradictory when the air temperature is so warm, but it seems to work and, the restorative powers of a glass or two are amazing.

Moroccan mint tea is made with green or Indian tea and loads of fresh mint. I prefer white tea as I find it has softer tannins. If you don’t want the caffeine hit, you can make the jellies using a couple of peppermint infusion sachets or bags, but do add the fresh mint as well for the extra fresh flavour. I have reduced the sugar to keep it healthy, but you don’t have to add it at all. The recipe can be also be made using traditional gelatine if preferred – 4 leaves would be sufficient.

Makes: 4 small glasses

  • 2 white, green or Indian tea bags
  • A good handful or a small bunch of fresh mint, washed and shaken dry
  • 1 sachet Vege-Gel (I use Dr Oetker)
  • 60ml sugar syrup – see below
  1. Put the tea bags in a heatproof jug with all but 4 sprigs of mint. Add freshly boiled water to the 350ml level on the jug and leave to steep for 5 minutes. Strain the tea into another jug without squeezing the tea bags, and leave to one side. Meanwhile, put a mint sprig into each of 4 x 125ml tea glasses or heatproof dishes.

    Making_mint_tea_jellies
    Mint tea jelly preparation. Images: Kathryn Hawkins
  2. Pour 200ml cold water into a bowl and sprinkle over the Vege-Gel. Stir well until dissolved. Transfer to a small saucepan and heat, stirring, until just boiling. Remove from the heat and stir in the mint tea and sugar syrup.
  3. Leave the tea jelly mixture to cool for 20-30 minutes before pouring into the glasses to cover the mint – this will help stop the mint sprigs discoloring. You need to work with the jelly mix whilst it is still warm – it sets quite quickly as it cools. Leave to cool completely, then chill for at least 1 hour before serving. If you are making a real tea-based jelly, it will turn slightly cloudy no matter what setting agent you use. Herbal tea bags will give a clearer set.
Moroccan_mint_tea_jellies_made_in_tea_glasses
Moroccan mint tea jellies. Image: Kathryn Hawkins

To make your own sugar syrup: put 350g granulated sugar in a saucepan and over pour over 600ml water. Heat, stirring, until the sugar dissolves. Increase the heat and bring to the boil, then simmer without stirring for 10 minutes. Leave to cool. This syrup stores well in a cool place – just pour into a bottle and seal. It is a useful base for adding to ice creams, sorbets, fruit salad syrups and of course, cocktails!

Chocolate, rosemary and orange muffins (gluten-free, dairy-free, vegan)

Gluten-free_vegan_chocolate_rosemary_and_orange_muffins
Chocolate, rosemary and orange muffins. Image: Kathryn Hawkins

On the shortest day of the year, here’s a little something baked to brighten up the barely light hours. I picked rather too much rosemary the other day, and spent a few days pondering on how best to use it up. It doesn’t freeze very well and I’m not a fan of the dried stuff. After admiring the stems as a herbal arrangement in my kitchen for a while, I decided to do some flavour experimentation, and these muffins are the result.

I wasn’t really intending them to be so festive looking, but the sprigs reminded me of tiny pine trees and then my mind started going into creative mode. I hope you enjoy them. The flavour is really rich and perfect for the time of year. You only need to use the leaves for this recipe – the stems are too tough – and try to chop the leaves as small as possible for the best flavour and better eating.

Fresh_rosemary_sprigs_and_leaves
Fresh rosemary. Images: Kathryn Hawkins

Makes: 10

  • 150ml sunflower oil
  • 150g dark brown sugar
  • 150g silken tofu
  • 45g cocoa powder
  • 2 level tsp gluten-free baking powder (such as Dr Oetker)
  • 1 level tbsp ground arrowroot (I often add this to help bind gluten-free cake mixtures together)
  • 100g ground almonds
  • 75g polenta
  • Finely grated rind 1 unwaxed orange
  • 2 level tsp finely chopped rosemary leaves
  • Pinch of salt
  • 125g icing sugar + extra to dust
  • Approx. 40ml freshly squeezed orange juice
  • 10 tsp Chia or poppy seeds
  • 10 small sprigs of fresh rosemary
  1. Preheat the oven to 180°C (160°C fan oven, gas mark 4). Line a muffin tin with 10 paper cases. Put the oil, sugar and tofu in a bowl and whisk together with an electric mixer until well blended and thick.
  2. Sieve 25g cocoa, baking powder and the arrowroot on top. Add the almonds, polenta, orange rind, chopped rosemary and salt. Mix all the ingredients together until thoroughly combined.
  3. Divide the mixture equally between the cases. Smooth the tops and bake for about 35 minutes until just firm to the touch – the cakes may look slightly sunk in the middle. Cool in the tins for 5 minutes then transfer to a wire rack to cool completely.
  4. To decorate, sieve the icing sugar and remaining cocoa powder into a small bowl and mix together with sufficient orange juice to make and smooth, spreadable icing. Spoon sufficient icing on top of each muffin and spread to cover the top completely.
  5. Sprinkle the top of each muffin with 1 tsp seeds. Leave for a few minutes to set before adding the finishing touches.
    Icing_and_topping_muffins_with Chia_seeds
    Decorating the muffins. Image: Kathryn Hawkins

    Just before serving, carefully put the muffins into small flower pots. Push a sprig of rosemary into the top of each and if liked, dust the rosemary lightly with a little icing sugar for a frosted look.

    The muffins freeze well once iced and seeded, and will also keep for 4-5 days in an airtight tin once decorated. Simply decorate with fresh rosemary and icing sugar just before serving.

    Chocolate_and_rosemary_muffin_dusted_with_icing_sugar
    Frosty-looking chocolate, rosemary and orange muffin. Image: Kathryn Hawkins

    Gluten-free_vegan_baking:_chocolate_and_rosemary_muffin
    Gluten-free and vegan, a deliciously dark and tasty chocolate, rosemary and orange muffin. Image: Kathryn Hawkins

Pesto pea pastries (gluten-free)

Gluten-free_pesto_pea_pastries
Freshly baked pesto pea pastries. Image: Kathryn Hawkins

Peas are one of my favourite vegetables. When they’re not in season, I always have a bag in the freezer; they are my “go to” emergency vegetable.

The filling for these pastries is very versatile. You can use it as a dip, spread it thickly on warm toasted bread or, it makes a lovely fresh filling for wraps or sandwiches with some crisp green leaves and cooked chicken. Make your own pesto if you have time, it really does make all the difference.

Makes: 9

  • Gluten-free plain flour, for dusting
  • 400g block ready-made gluten-free puff pastry (such as Silly Yak)
  • 225g cooked peas, mashed with a fork or potato masher
  • 50g fresh pesto sauce (recipe below)
  • 1 medium egg
  • 100ml whole milk or soya milk
  • Salt and freshly ground black pepper
  1. Preheat the oven to 200°C (180°C fan oven, gas mark 6). Line a large baking tray with baking parchment.
  2. Lightly dust the work surface with flour and roll out the pastry to make 30cm square. Cut out 9 x 10cm rounds using a pastry cutter.
  3. Mix the peas and pesto sauce together and pile a spoonful in the centre of each round. Pinch the edges of the pastry round the pea filling to make a tartlet shape. Transfer to the baking tray.
  4. Mix the egg and milk together and season well. Carefully pour a little over the top of the pea mixture. Bake in the oven for about 25 minutes until lightly golden. Best served warm.
How_to_make_pesto_pea_pastries
Assembly of pesto pea pastries. Images: Kathryn Hawkins

To make your own pesto sauce: in a blender or food processor, blitz together 125g pine nuts (kernels), 2 peeled garlic cloves, 60g freshly grated Parmesan cheese , 15g fresh basil leaves, pinch of salt and 90ml good quality olive oil. Unused pesto sauce will keep in the fridge, in a sealed container for up to 1 week. Homemade pesto sauce is also suitable for freezing.

Pesto_pea_pastries_serving_suggestion
Gluten-free pesto pea pastries. Image: Kathryn Hawkins

Preserving the Summer (Semi-cuit tomatoes – gluten-free, dairy-free, vegan)

Freshly_picked_homegrown_tomatoes
Home-grown tomatoes ready for the dryer. Image copyright: Kathryn Hawkins

I’ve been picking tomatoes from my greenhouse for over a month now, and there are still plenty to ripen. Whilst I am enjoying them fresh, I do like to make preserves, and first up this year is to steep a few tomatoes in olive oil. A couple of years ago I bought myself a dehydrator, and  I have been drying various homegrown produce ever since. Semi-cuit (semi-dry) tomatoes make a sweet, indulgent and delicious out-of-season treat for later in the year, so these wee treasures are heading for the dehydrator right away.

Dehydrating_tomatoes
My Stockli dehydrator and prepared tomatoes. Image copyright: Kathryn Hawkins

Dehydrating is a very straightforward process. Wash and pat dry the tomatoes; if they are small to medium size, cut them in half – you may want to slice larger tomatoes or just “cook” them for longer. My dehydrator has 3 shelves; I divide up the tomatoes between the shelves, making sure there is some air space between them, pop the lid on and set the temperature to 70°C (158°F). This batch of 650g will take 6-7 hours to dry down so that they are still a bit fleshy and not too leathery. The final yield will be about 150g.

Once the tomatoes have cooled, I will pack them into a sterilised jam jar with a screw top lid, and add a few sprigs of fresh rosemary, bay and thyme from the garden. Pour over good quality extra virgin olive oil to cover the tomatoes completely and screw on the lid tightly. Stored in a cool, dark, dry cupboard, they will keep for about 6 months – so perfect for festive eatings. Once opened, store them in the fridge for up to 6 weeks – the oil will turn cloudy and clumpy when chilled, but becomes liquid again at room temperature. Roll on Christmas!

Semi-cuit_tomatoes_preserved_in_olive_oil_with_herbs
Semi-cuit tomatoes with olive oil and rosemary. Image copyright: Kathryn Hawkins

Geranium leaf sugar (gluten-free, dairy-free)

pelargoneum _graveolens
Potted rose geranium (Pelargoneum graveolens). Image copyright: Kathryn Hawkins

I’m not a huge fan of cultivated geraniums growing in pots, but I do like the wild pelargoniums and the fragrant, culinary variety, pictured above. The leaves smell of exotic, spiced rose and the petals are not only very pretty, but make a lovely addition to a summer salad – see my post: Salad herbs and edible flowers on July 16th, 2016. The leaves make a lovely flavouring for syrups and sugars, perfect for livening up a fruit salad.

The plants aren’t hardy enough to survive outside without shelter and consistent good weather, so for convenience, in the summer months, they most often stay in my greenhouse, in pots. I bring them indoors once the temperature drops and the days get shorter in length.

Homemade_rose_geranium_sugar
Ingredients for rose geranium sugar. Image copyright: Kathryn Hawkins

Choose small to medium sized leaves, undamaged, and snip off the stalks. Rinse gently in water, then pat dry with kitchen paper, taking care not to bruise them, and making sure they are completely dry. Put 125g caster sugar into a small bowl and mix in the leaves, then transfer to a small clean, dry, sealable jar. Cover securely and label. Store in a cool, dark cupboard for about a month before using. Discard the leaves before serving. Ideal for sprinkling over berry fruits – especially raspberries and strawberries – pancakes and cakes. The sugar will keep for 3 to 4 months; the sugar will form clumps if condtions are damp.

Rose_geranium_sugar_in_a_jar
Homemade rose geranium sugar. Image copyright: Kathryn Hawkins
Rose_geranium_sugar_sprinkled_over_fresh_raspberries
Fresh raspberries with rose geranium sugar. Image copyright: Kathryn Hawkins

Salad herbs and edible flowers


seasonal_salad_herbs_and_ edible_flowers
Summer salad herbs and edible flowers. Image copyright: Kathryn Hawkins

It seems a bit weird writing a post about salads today when it’s gloomy, grey and lashing down with rain. No matter, it is the time of year when a salad is on my menu just about every day of the week, regardless of what’s happening with the weather!

I stopped growing my own lettuce and salad leaves a while ago because they were taking up too much space in my greenhouse. Instead, I started to grow some more interesting herbs and edible flowers that you can’t buy very easily. Now, I have a variety of lovely looking plants in the garden, with the added advantage of alternative flavours, textures and colours for my dinner plate.

Smoked_salmon_with_salad_herbs_and _edible_flowers
Scottish smoked salmon salad with sweet wild strawberry vinegar.          Image copyright: Kathryn Hawkins

At the end of my post, I have compiled an ID photo of the herbs and flowers in my salad above. Below is a brief description of what each one tastes like (by the way, you can make the strawberry vinegar by following the same instructions on my previous post for Sweet Lavender Vinegar):

  • Land cress (American cress) – looks and tastes like watercress; grows in small clumps of glossy green leaves; loves damp soil. Leaves are best eaten small (the larger ones can be bitter and very pungent).
  • Sorrel – larger leaves are cooked like spinach, but the smaller ones are delicious raw in salads. They have a citrusy, tangy taste.
  • Salad burnet – one of my favourites; serrated leaves and tufty pinkish-red flowers, both with a mild cucumber flavour. Makes a lovely potted plant. Prefers limy soil.
  • Nasturtium – you can eat the leaves large or small, and also the flowers if you like – I find them a bit big for my palate and I prefer their vibrant splash of colour in my garden. I prefer to eat the smaller leaves which have a cress-like, earthy flavour. Very refreshing.
  • Herb flowers – herbs with tougher leaves like thyme and rosemary are a bit chewy and pungent to eat with soft salad leaves, but if you pick the flowers, they will add a subtle flavour of the herb, and are much easier to eat.
  • Edible flowers – these add a splash of colour to any dish. Flowers from scented plants like rose geranium are often slightly sweet or earthy with a faint flavour of the plant scent. Flowers such as Viola or Garden pansy have very little flavour but do make a pretty addition amongst the green leaves and herbs. If whole flowers seem a bit daunting, break up the petals and sprinkle “confetti”-style over your plate – they make a beautiful natural decoration on iced cakes and cookies as well.
Salad_herbs_leaves_and_flowers
An assortment of the Summer salad herbs and edible flowers from my Perthshire garden. Copyright: Kathryn Hawkins


Home-grown courgettes with chive butter (gluten-free)

homegrown_Tristar_courgette_with_homemade_chive_butter
Home-grown courgette with chive butter. Images copyright: Kathryn Hawkins

One of the vegetables I have great success in raising is the courgette. This year I have a couple of varieties on the go: Tristar and Jemmer. My single Tristar plant has produced 6 courgettes already and there’s a few more to come. It is in a grow-bag on the floor of my greenhouse. Jemmer is a yellow variety; the first courgettes are just forming.

To enjoy the delicate, slightly earthy, flavour of my “home-grown” courgettes, I cook them very simply: either sliced and gently fried in sunflower oil, or as bigger chunks, lightly seasoned and roasted in the oven. The slices only take a few minutes on each side, just cooked until lightly golden round the edge.

To liven things up a wee bit, I make a herb or spice butter which I allow to melt over the cooked vegetable just before serving. At the moment, the chive bush in the garden is a combination of soft, juicy stems and pretty flower balls, and is the obvious choice for flavoured butter these past couple of weeks.

I make up a small batch at a time which will keep, well wrapped, in the fridge for 2-3 weeks or can be frozen for up to 6 months. Use half a pack of lightly salted, soft butter with 2-3 tablespoons of freshly chopped chives – snip the stalks into small pieces using kitchen scissors to avoid bruising the stems.

Beat the butter well to start with and then mix in the chives. Pile onto a small square of baking parchment and chill until firm enough to roll.

Pop the parchment square on a small sheet of cling film, and wrap the paper round the butter to make  rough tube. Continue rolling until you have made a cylinder of butter, to the thickness you prefer. Wrap tightly in the cling film and chill until required.

homegrown_chives_in_flower
Fresh chives in flower. Image copyright: Kathryn Hawkins

Chive butter is lovely melted over grilled salmon, pan-fried chicken or tossed into freshly cooked seafood and pasta. Don’t forget the flowers: gently pull the flower heads apart and scatter the delicate lilac star-shaped petals over salads, pasta or your finished dish for a subtle oniony flavour.