Welcome to my blog all about the things I love to grow and cook. You'll find a collection of seasonal gluten-free, dairy-free and vegan-friendly recipe posts, as well as a round up of my gardening throughout the year. I wish you good reading, happy cooking and perfect planting!
Hello there. I’ve been back in the kitchen for my post this month and I have a very tasty recipe to share, perfect for this time of year when it’s still a bit on the chilly side.
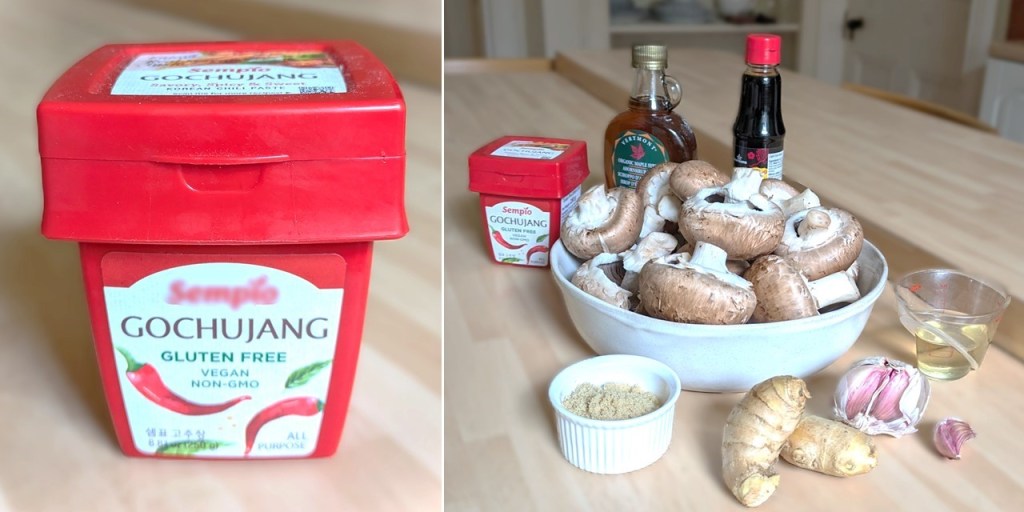
If you’re a regular reader of my recipes you’ll know that I’m not a huge fan of fiery food. However, I discovered this Korean paste a while ago and really enjoy it’s rich umami flavour and spicy chilli heat. I’m sure there are brands on the market which are very hot but this blend is just right for me, and it’s gluten-free and vegan as well 🙂
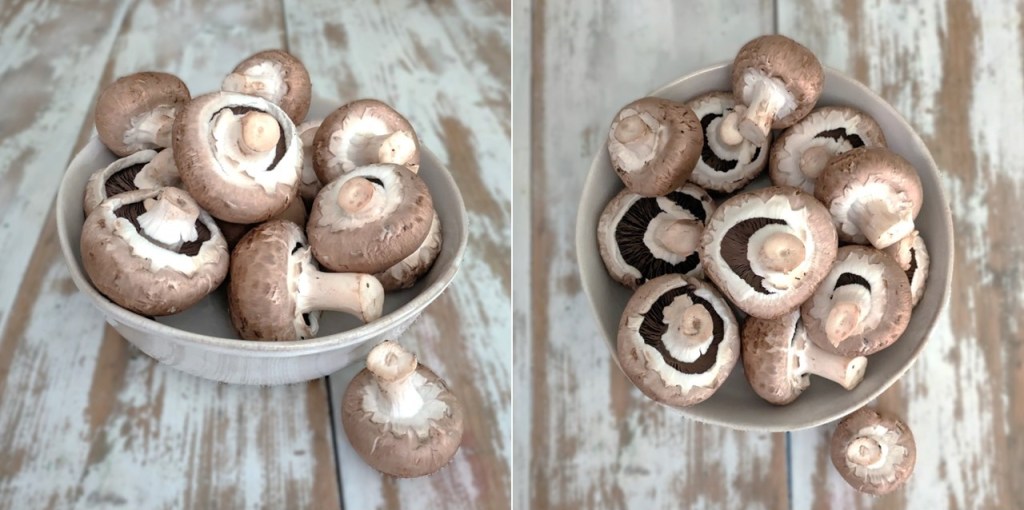
A bowl of chestnut mushrooms. Images: Kathryn Hawkins
I chose chestnut (or brown) mushrooms for this recipe because they have a “meaty” texture but large flat or Portobello mushrooms will work just as well I’m sure. Prepare the ingredients the day before you want to serve the mushrooms. This will allow the marinade time to draw out some of the moisture from the mushrooms. Serve them as a side dish for 4 people or as a main course for 2-3. They also make a delicious filling for steamed sesame buns – see my recipe here Steamed sesame buns (gluten-free; dairy-free; vegan)
Sesame seeds, chopped red chilli and spring onion to serv
1.Peel and finely chop the garlic and ginger. Place in a large bowl and mix in all the ingredients except the mushrooms.
2. Slice the mushrooms thickly, and add to the bowl in batches, mixing with the marinade ingredients to make sure all the slices are coated. Cover and chill overnight.
Making the marinade. Images: Kathryn Hawkins
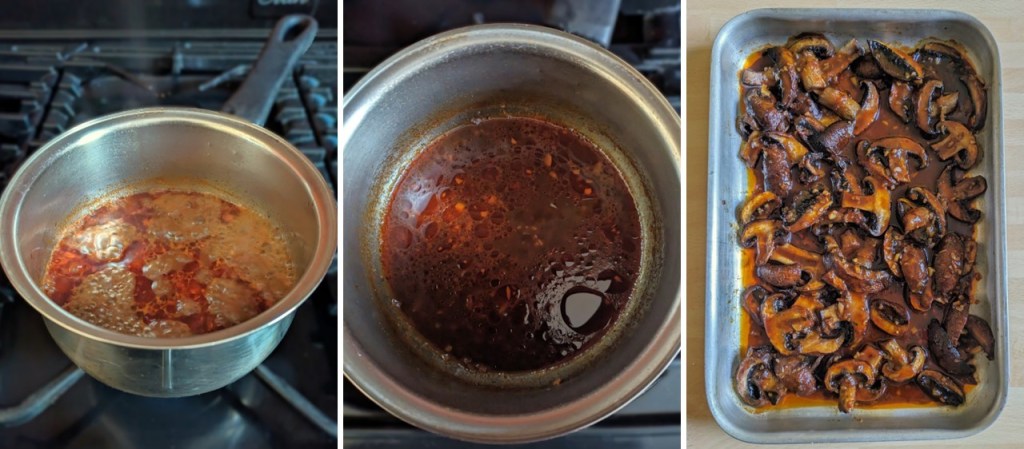
3. The next day, drain the mushrooms, reserving the marinade and pouring into a small saucepan. Put the mushrooms into a shallow roasting tin and place in the oven. I don’t preheat my oven for recipes like this, I just set it to 200°C, 180°C fan oven, gas 6 and leave the mushrooms for 30 minutes until tender and cooked through.
Ready to roast. Images: Kathryn Hawkins
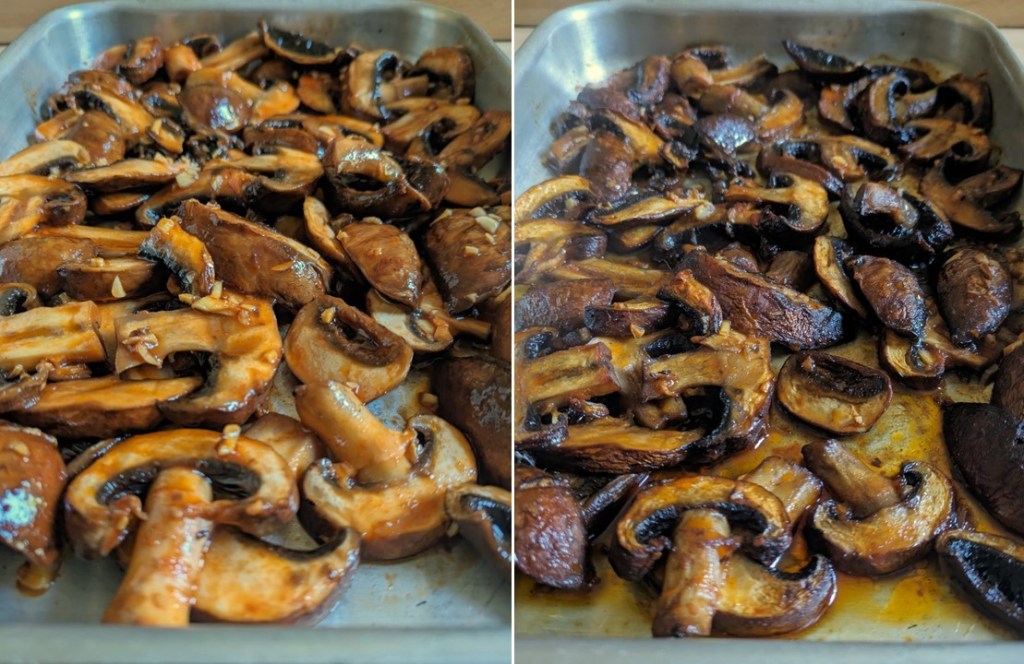
Before and after roasting. Images: Kathryn Hawkins
4. While the mushrooms are cooking, bring the marinade to the boil and simmer for about 10 minutes until reduced by half. When the mushrooms are ready, pour the reduced mixture over them and mix well.
Reducing the marinating juices. Images: Kathryn Hawkins
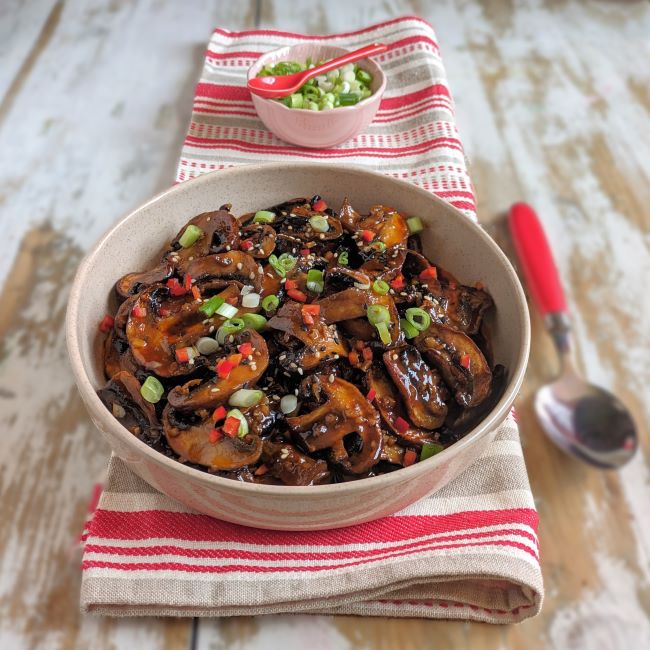
5. Serve the mushrooms with sesame seeds, chopped chilli and spring onion. Great spooned over rice, pasta or noodles. I hope you enjoy this recipe as much as I do. I hope to see you again next month and thanks as always for stopping by 🙂
Warming, spicy and very, very tasty. Image: Kathryn Hawkins
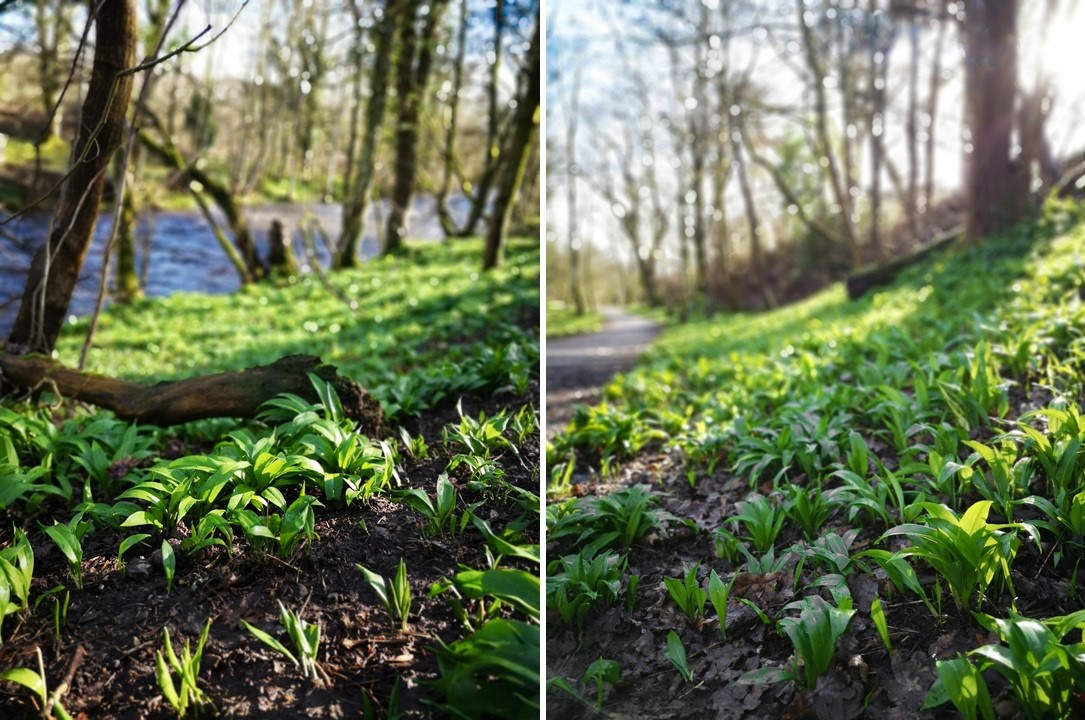
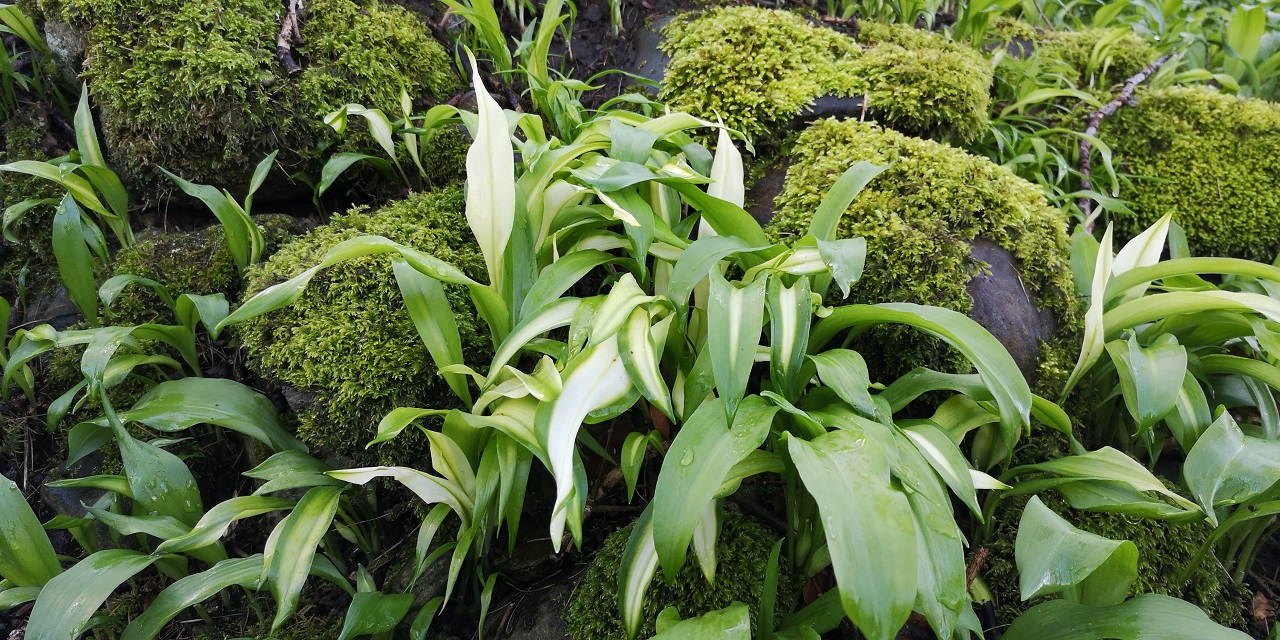
Every year at this time my local river bank becomes swathed in lush greenery and develops a distinctive oniony aroma. A walk on a sunny afternoon can make you feel very hungry indeed.
River-side wild garlic. Images: Kathryn Hawkins
On a bright afternoon at the end of last week, I went on a foraging expedition and picked a small bag of the fresh, lush wild garlic leaves, also known as Ramsons (Allium ursinum). As with any wild food, only ever pick if in abundance. Take leaves from several plants rather than stripping leaves from just one or two. Pick the vibrant green, broad leaves (shaped rather like those of the tulip) when young and before the delicate white star-shaped flowers bloom to enjoy them at their sweetest.
Fresh Ramsons leaves. Images: Kathryn Hawkins
For safetys sake, take extra care to make that sure you are only picking the leaves of wild garlic. Wash very well before using. I usually put the leaves in a colander and dunk several times in a bowl of cold water before shaking dry.
Washing wild garlic. Images: Kathryn Hawkins
As with most soft herbs, wild garlic is best used within 24 hours of picking, but once rinsed and shaken dry, I find it well for a few days sealed in a plastic bag in the fridge.
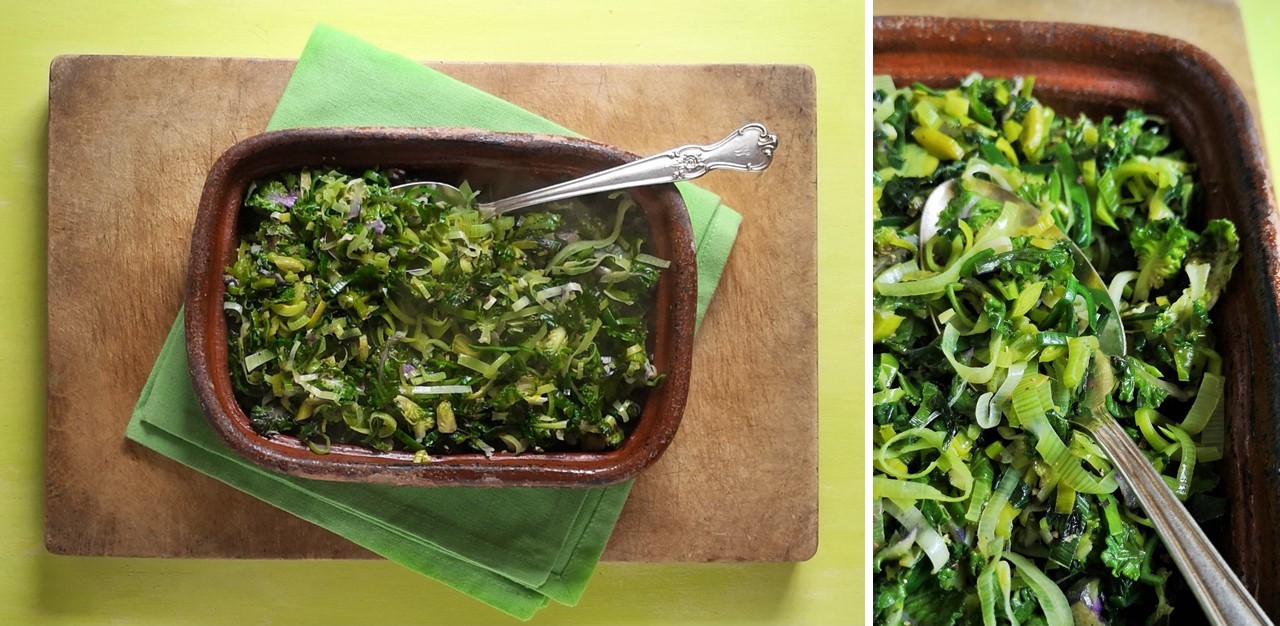
My recipe this week combines the wild garlic leaves with baby kale leaves (or kalettes) and leek in a stir fry. It is delicious served as a vegetable dish in its own right, but is also makes a delicious stirred to a mushroom risotto.
Spring greens. Images: Kathryn Hawkins
Serves: 4
Ingredients
For the stir fry:
1 medium leek
30g wild garlic, washed
175g baby kale (or kalettes)
2 tbsp. olive oil
Salt and freshly ground black pepper
For the risotto:
1l vegetable stock
2 tbsp. olive oil
250g chestnut mushrooms, wiped and chopped
400g Arborio rice
200ml dry white wine
Salt and freshly ground black pepper
25g wild garlic, washed and finely shredded
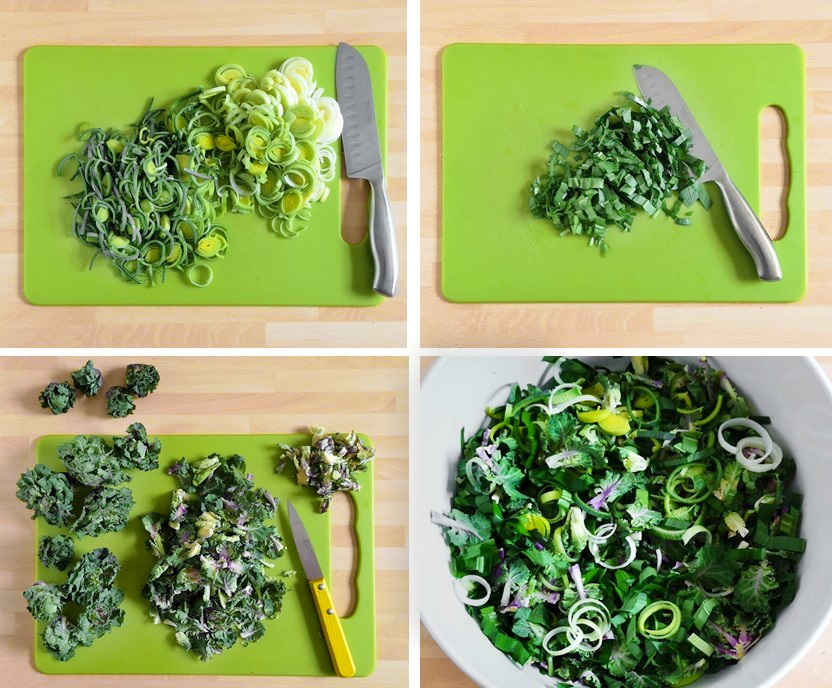
Trim the leek. Split lengthways and rinse well to remove any trapped earth. Shake well to remove excess water, then shred finely.
Shred the wild garlic leaves. Strip the leaves of baby kale from the central stalks. Mix all the vegetables together.
Preparing spring greens. Images: Kathryn Hawkins
Heat the oil in a large frying pan or wok, add the greens and stir fry for 2 minutes. Season well, reduce the heat to low, and cover and cook gently for 4-5 minutes until tender. Serve immediately as a vegetable accompaniment, or put to one side whilst preparing the risotto.
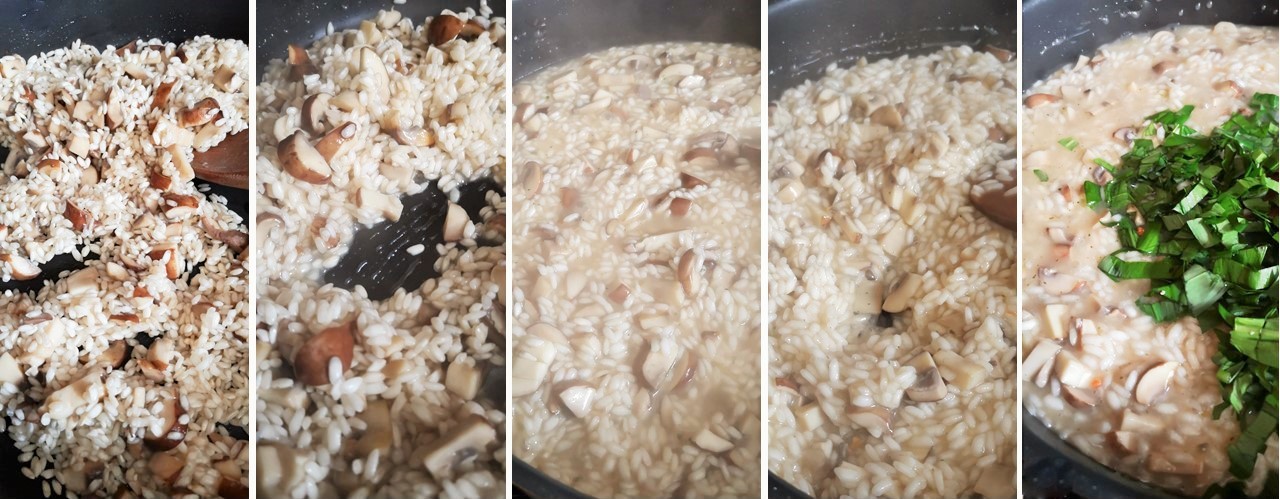
For the risotto, pour the stock into a saucepan and bring to the boil. Reduce to a very gentle simmer. Meanwhile, heat the oil in a large frying pan and gently fry the mushrooms for 2-3 minutes. Add the rice and cook, stirring, for 2 minutes until everything is well mixed.
Pour in half the wine and cook gently, stirring, until absorbed. Add the remaining wine along with a ladleful of stock. Cook gently until absorbed.
Continue adding the stock in this way, until all the liquid is absorbed and the rice is thick, creamy and tender. This will take about 25 minutes and should not be hurried. Keep the heat moderate throughout the cooking.
Making risotto. Images: Kathryn Hawkins
Season the risotto to taste, stir in all but a few shreds of wild garlic, and cook for a further minute until the garlic has wilted. To serve, reheat the spring greens and gently mix into the risotto, then serve sprinkled with the remaining wild garlic.
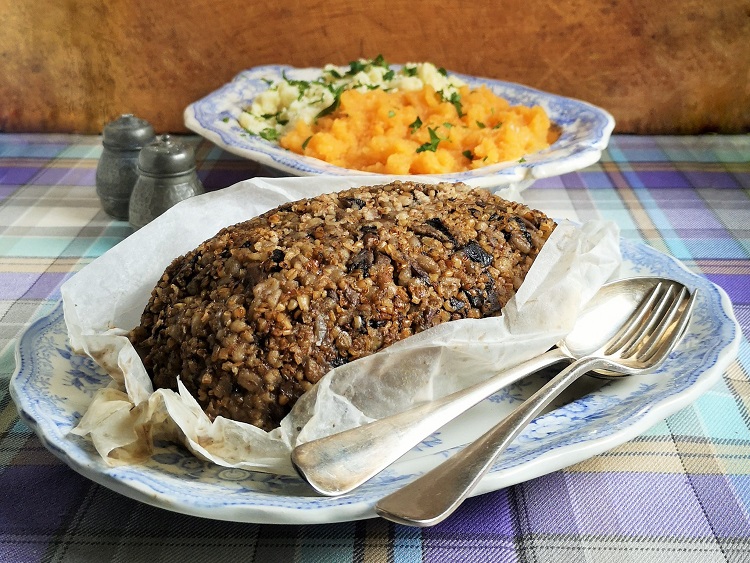
Haggis, neeps and tatties the vegan way. Image: Kathryn Hawkins
Hello again. I hope 2019 is going well for you so far. There’s a wee bit of forward planning gone into this week’s recipe. Next Friday, January 25th, is the Scottish feast of Burns Night, which is traditionally celebrated in a very meaty way with the dish of haggis accompanied with the only vegetarian part of the meal: “neeps and tatties” (mashed turnip (swede) and potatoes). I’ve been working on a meat-free version for a while, and finally I think I’ve cracked it this year. The flavour and texture is not that far off the traditional version and much nicer than any commercially made veggie haggis I have tried. I hope I might tempt you into making one for yourself.
You’ll need to allow at least a day in advance before you cook the haggis, but it will keep wrapped up in the fridge for 3 or 4 days before cooking if you want to prepare ahead.
Burns supper. Image: Kathryn Hawkins
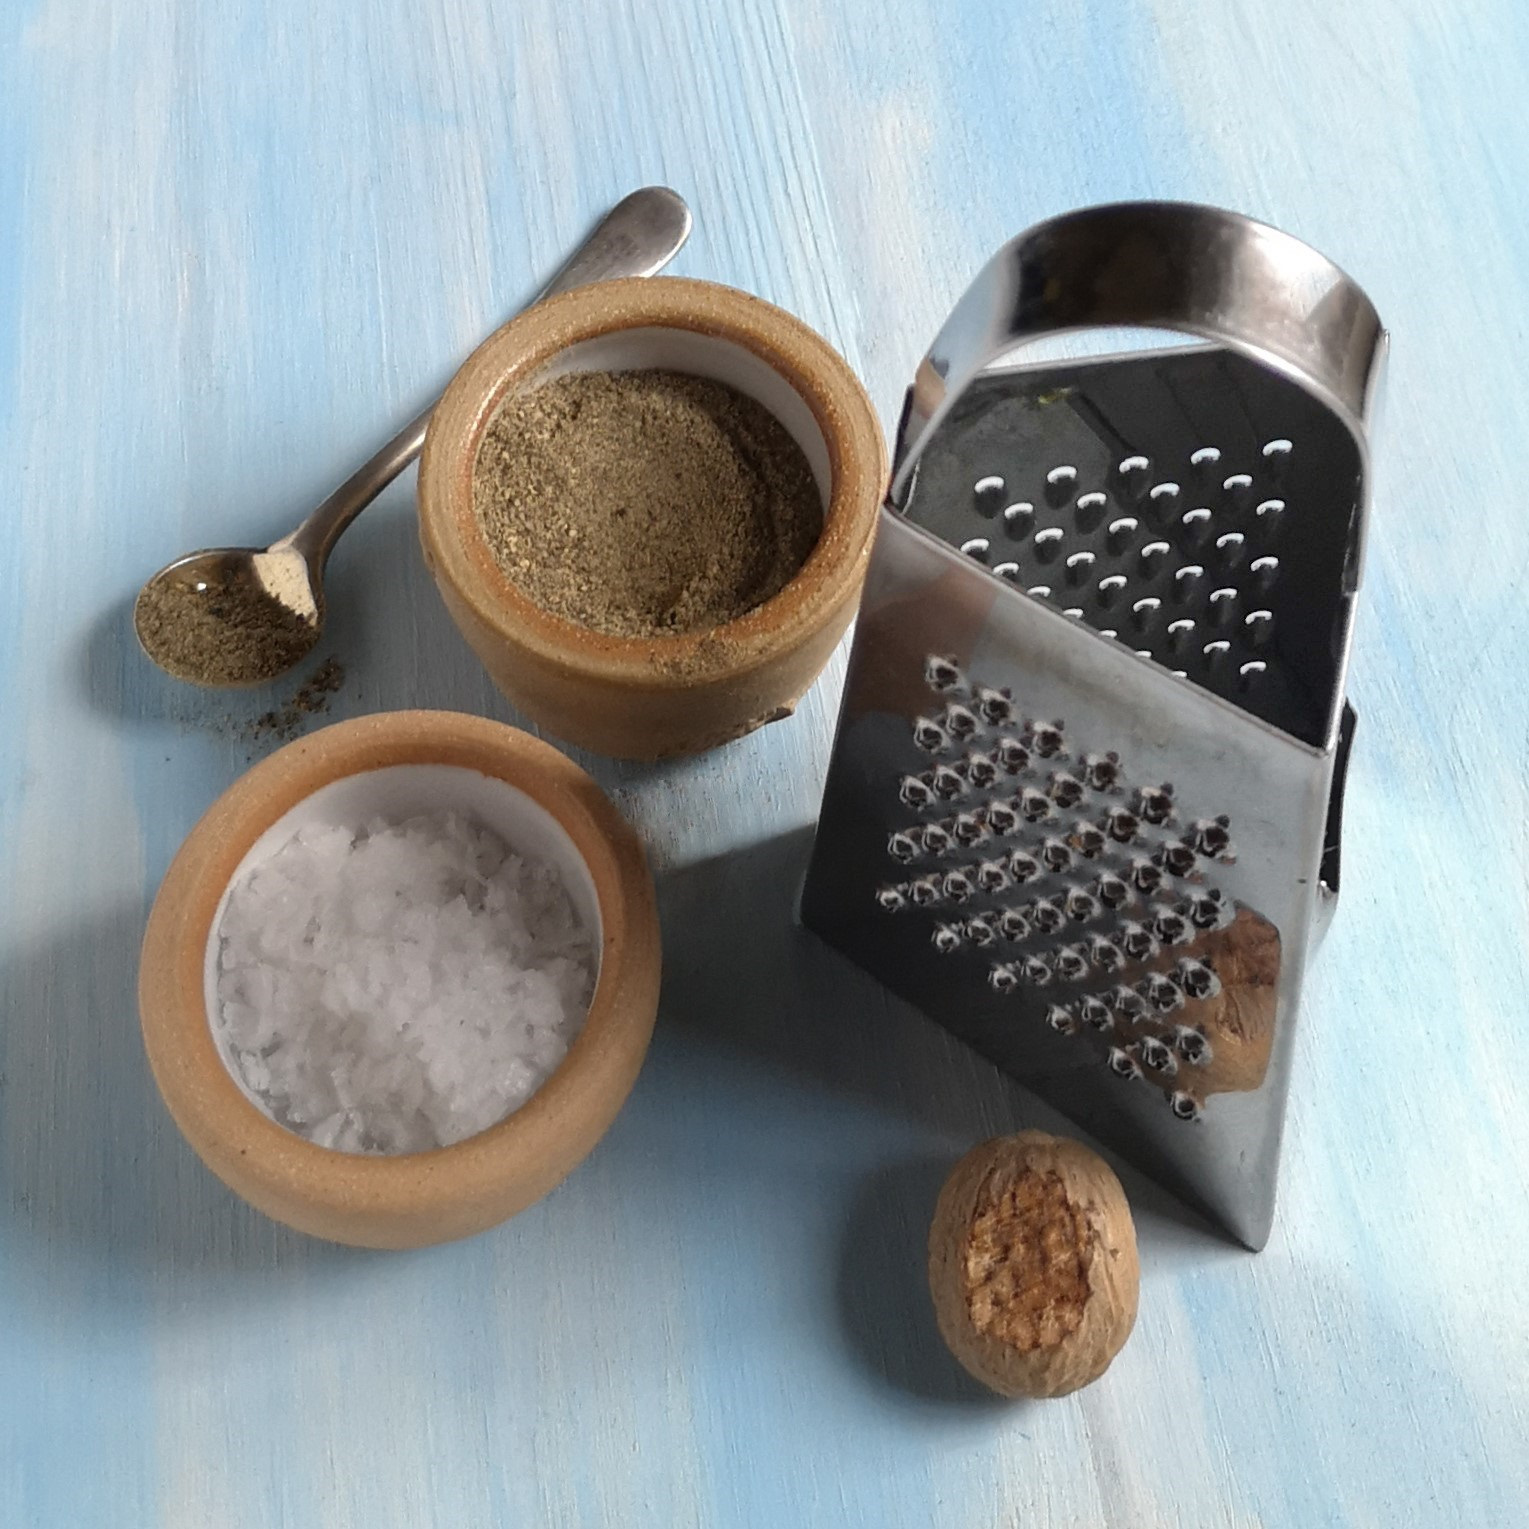
Without going into the grim details of what’s in a traditional haggis, I’ve replaced the meat, etc. with mushrooms, red lentils and pearl barley which give the texture in the dish. Other than that, the bulk of the haggis is made up in the traditional way with toasted oatmeal. For a completely gluten-free version, replace the pearl barley with well-cooked white or brown rice, and use certified free-from oatmeal. I’ve stuck to the traditional haggis seasonings of plenty of black pepper, nutmeg and salt.
Traditional haggis seasoning: salt, pepper and nutmeg. Image: Kathryn Hawkins
Because there is no outer “skin” to contain the vegan haggis mixture, the assembly method is quite long, however the recipe itself is pretty straightforward. I’ve included plenty of step-by-step images to help with the assembly. Let me know how you get on 🙂
Serves: 3-4
Ingredients
1 tbsp. vegetable oil
1 medium onion, peeled and finely chopped
1 bay leaf
225g large flat mushrooms. peeled and chopped
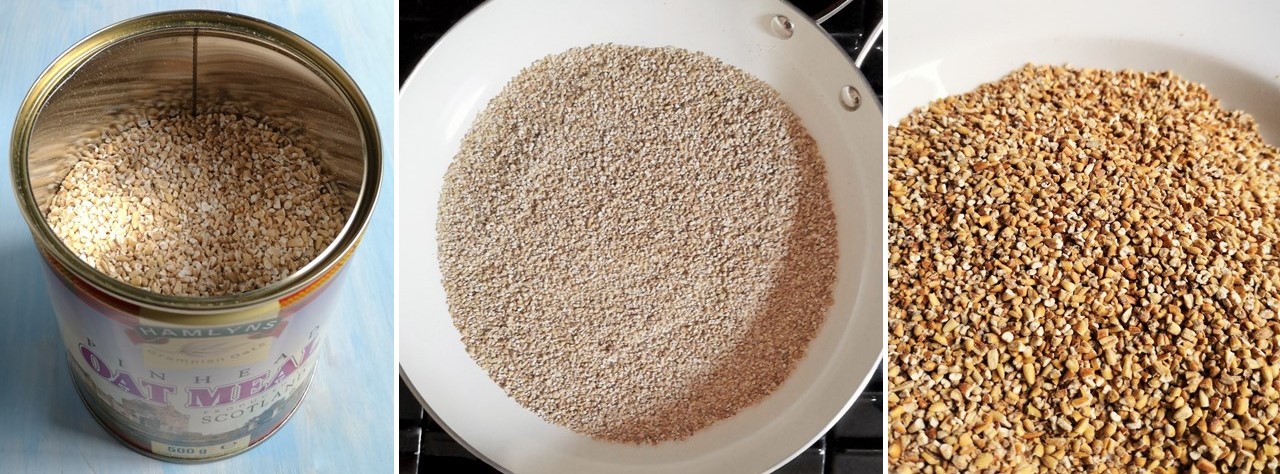
100g pinhead oatmeal or groats (use certified gluten-free if Coeliac)
150g cooked, well-drained red lentils
150g cooked, well-drained pearl barley (use well-cooked brown or white rice to make completely gluten-free)
1 tsp salt
½ tsp ground black pepper + extra to serve
A large pinch grated nutmeg
Approx. 4 tbsp. cold vegetable stock
50g vegetable suet
Heat the oil in a lidded frying pan and gently fry the onion with the bay leaf, stirring, for 2 minutes. Cover with the lid, reduce the heat to low and cook for 15 minutes until soft. Add the mushrooms, raise the heat and stir fry for 2 minutes. Cover again, reduce the heat and cook gently for 10 minutes until tender. Leave to cool completely. Discard the bay leaf.
Cooking mushrooms for vegan haggis. Images: Kathryn Hawkins
Meanwhile, heat a dry frying pan until hot. Sprinkle over the oatmeal, and cook, stirring the oatmeal over a medium heat, for 7-8 minutes, to “toast”, without over-browning. Leave to cool.
Cooking oatmeal. Images: Kathryn Hawkins
To assemble the haggis, mix the oatmeal, lentils and barley or rice into the cold mushroom mixture. Add the seasoning, and sufficient stock to bind the mixture together without making it too wet – how much you need will depend on how juicy the mushrooms are – then mix in the suet – it is important that everything is cold otherwise the suet will melt.
Mixing the haggis ingredients. Images: Kathryn Hawkins
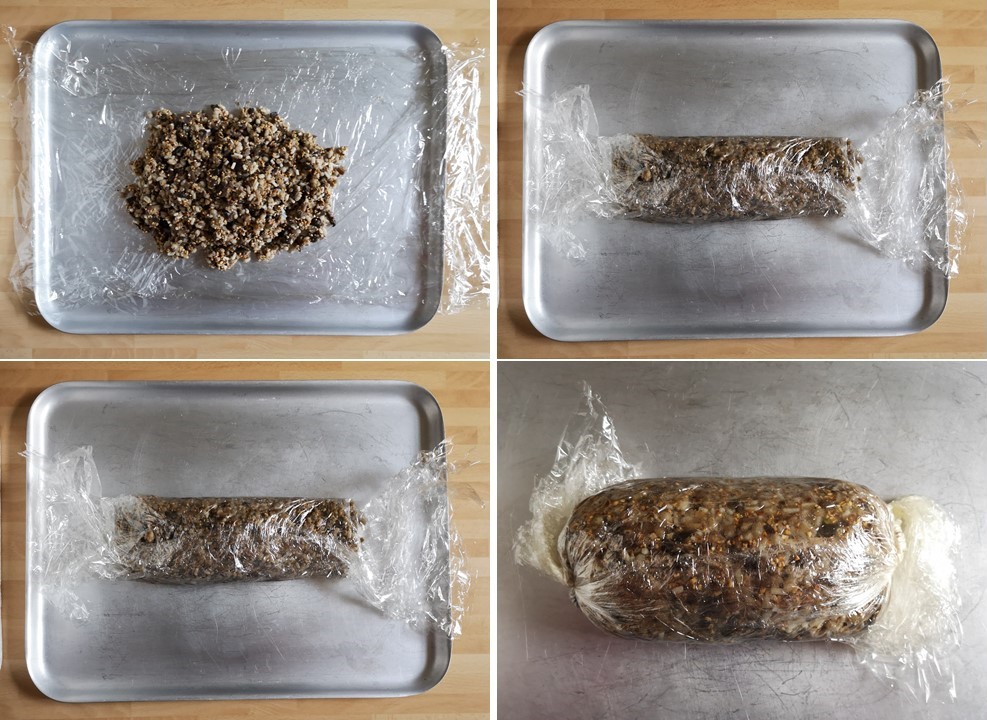
Lay 3 large sheets of cling film, approx. 44 x 32cm, on top of each other on a tray or work surface. Pile the haggis mixture in the centre. Fold the longest sides of cling film tightly over the mixture and then twist the ends tightly closed to form a chunky haggis shape, approx. 16cm long. Put in the fridge to firm up overnight.
Shaping the haggis. Images: Kathryn Hawkins
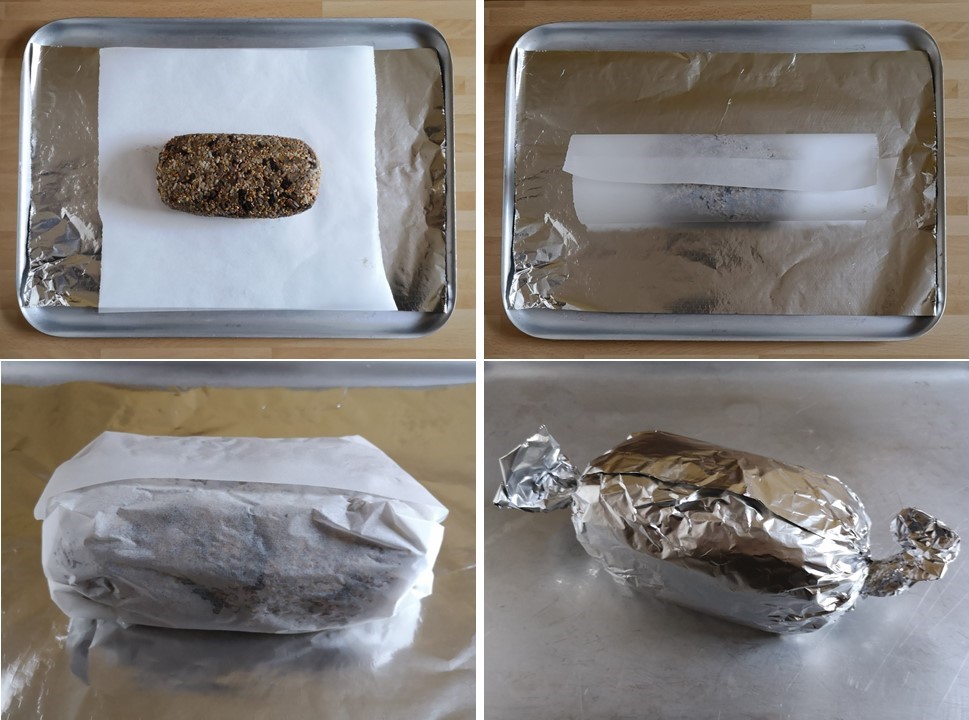
To cook the haggis, Lay a sheet of foil on a tray or work surface (same size as the cling film) and then place a sheet of baking parchment on top. Carefully unwrap the haggis and carefully place it in the centre of the parchment. It should its hold shape but won’t be completely solid. Fold the parchment over the haggis as you did with the cling film; scrunch the ends gently together and fold the parchment underneath the haggis. Wrap the foil over and twist the ends tightly to retain the haggis shape.
Preparing vegan haggis for cooking. Images: Kathryn Hawkins
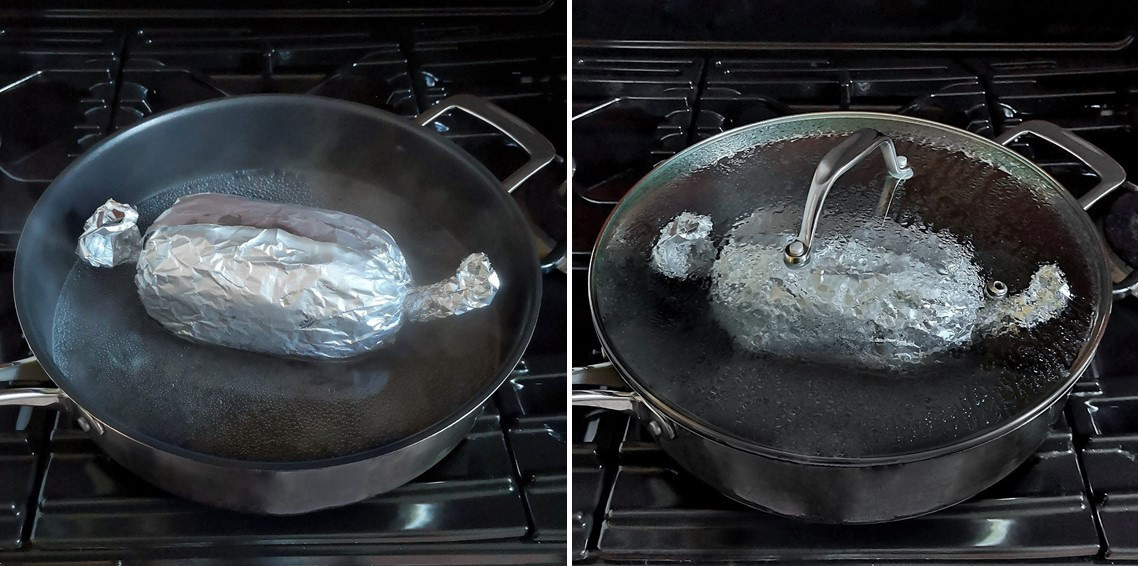
Pour a 1cm depth of water into the bottom of a deep, lidded frying pan or a large saucepan. Bring to the boil, then place the haggis in the water, seam-side up; cover with the lid, reduce to a gentle simmer and cook for 1 ¼ hours until piping hot – if you have a food probe, test the centre, it should be at least 75°C to serve.
Cooking the haggis. Images: Kathryn Hawkins
Carefully drain the haggis and leave to stand for 10 minutes. Remove the foil and place the haggis, still in the parchment, on a warmed serving platter. Open out the parchment and serve straight away, accompanied with mashed turnip and potatoes, and more black pepper if liked.
Note: if you have any haggis leftover, let it cool and chill it down for the next day. Cut into chunky slices and fry for a few minutes on each side until crisp, brown and hot. Serve with tomatoes and oatcakes. This is my favourite way of serving and eating haggis, the oatmeal becomes crunchy and deliciously nutty when fried. Have a good week!
Vegan haggis, even better the next day. Image: Kathryn Hawkins
It feels like the right time of year for a mushroom dish. This is one of my favourites. I usually make it with just fresh mushrooms, but I had a pack of dried porcini mushrooms in the cupboard and this seemed like the perfect dish to add them to. They were a present from my Mum who went to northern Italy this summer, for a holiday. Porcini mushrooms do add an extra rich flavour to the dish but if you don’t have them, just use a few more fresh mushrooms and more vegetable stock.
Dried porcini mushrooms. Images: Kathryn Hawkins
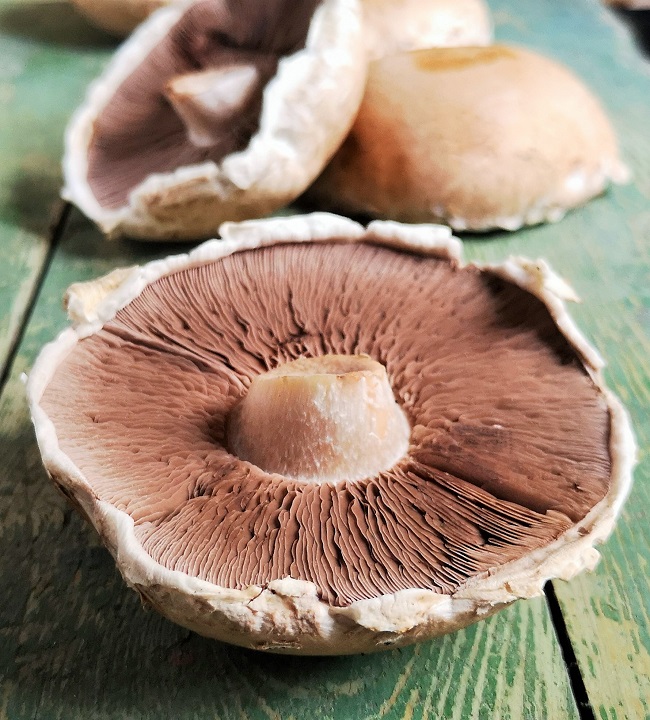
The fresh mushrooms I used were small Portobello mushrooms which have a firm texture and good, nutty flavour. I find them ideal for longer cooking techniques as they hold their shape and texture well. Brown chestnut mushrooms work well too.
Portobello mushrooms. Image: Kathryn Hawkins
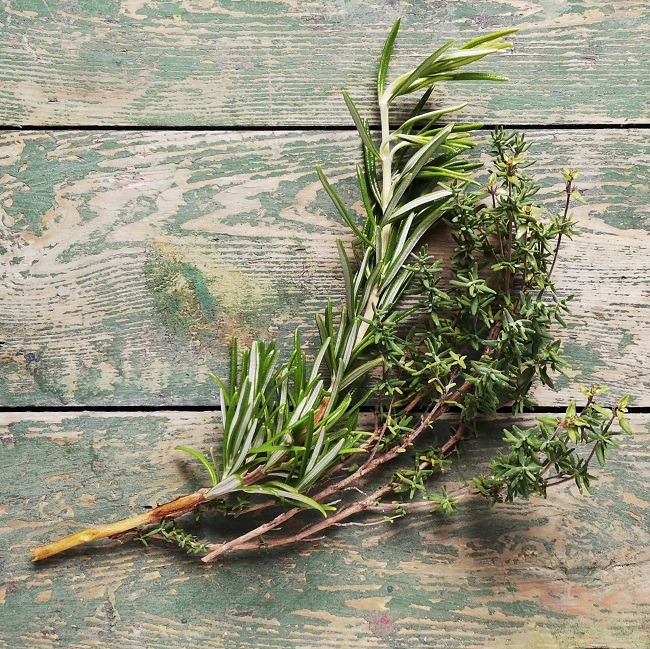
To flavour the dish, I added garlic, a splash of wine, and some sprigs of fresh rosemary and thyme – strong, woody aromatics that go well with earthy mushroom flavours.
Home-grown fresh rosemary and thyme. Image: Kathryn Hawkins
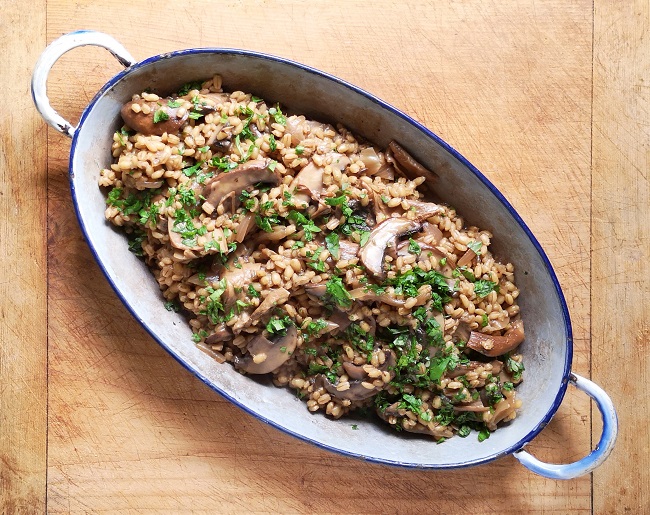
In terms of making the dish, if you’ve ever made a risotto with Arborio rice, then it’s the same technique of adding the liquid to the grain, little by little, to ensure an even cooking. It’s take a bit of time, but the effort is worthwhile, and I find it strangely therapeutic, especially if accompanied with a glass of wine!
A hearty autumnal supper. Image: Kathryn Hawkins
Serves:4
Ingredients
35g dried porcini mushrooms
2 tbsp. olive oil
1 red onion, peeled and sliced
2 cloves garlic, peeled and crushed
Large sprig of rosemary
A few sprigs thyme
300g Portobello mushrooms, wiped and sliced
300g pearl barley, rinsed
150ml dry white wine
Approx. 750ml vegetable stock
Salt and freshly ground black pepper
Freshly chopped parsley
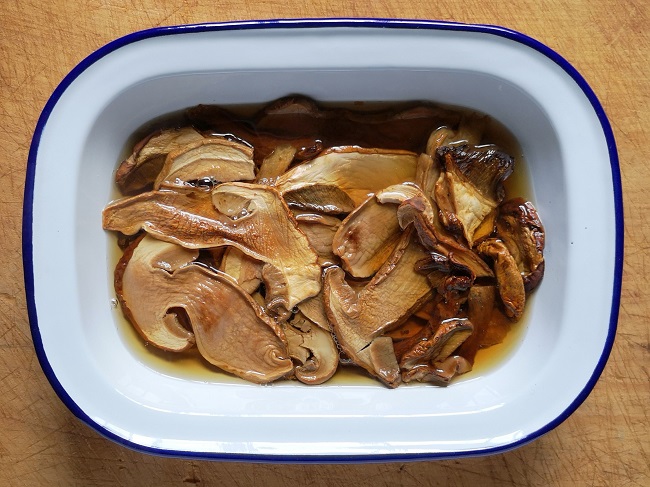
Put the dried mushrooms in a heatproof dish and pour over 350ml boiling water. Leave to soak for at least 30 minutes until tender, then drain well, reserving the soaking liquid, and slice.
Soaking porcini mushrooms. Image: Kathryn Hawkins
Meanwhile, heat the oil in a large, lidded frying pan and gently fry the onion for 10 minutes with the lid on, until tender. Stir in the garlic, herbs and Portobello mushrooms and stir fry for 3-4 minutes.
Stir in the sliced porcinis and pearl barley, mix everything well, then pour over the wine. Bring to simmering point, and cook gently until the wine has reduced by half, stirring occasionally.
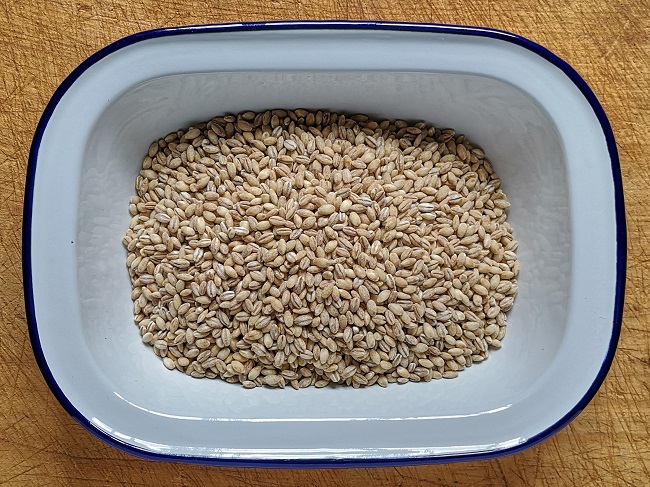
Pearl barley. Image: Kathryn Hawkins
Pour the mushroom soaking liquid into a jug and make up to 1l with vegetable stock, then pour into a saucepan and heat until hot. Keep on a low heat.
Add one ladleful of hot stock to the barley and mushrooms, and simmer gently, stirring, until the stock has been absorbed before you add in another. Continue the ladling and simmering until all the stock is used up – this will take about 40 minutes – by which time the barley should be perfectly tender. Turn off the heat, season, cover and leave to stand for 10 minutes for the last of the stock to be absorbed.
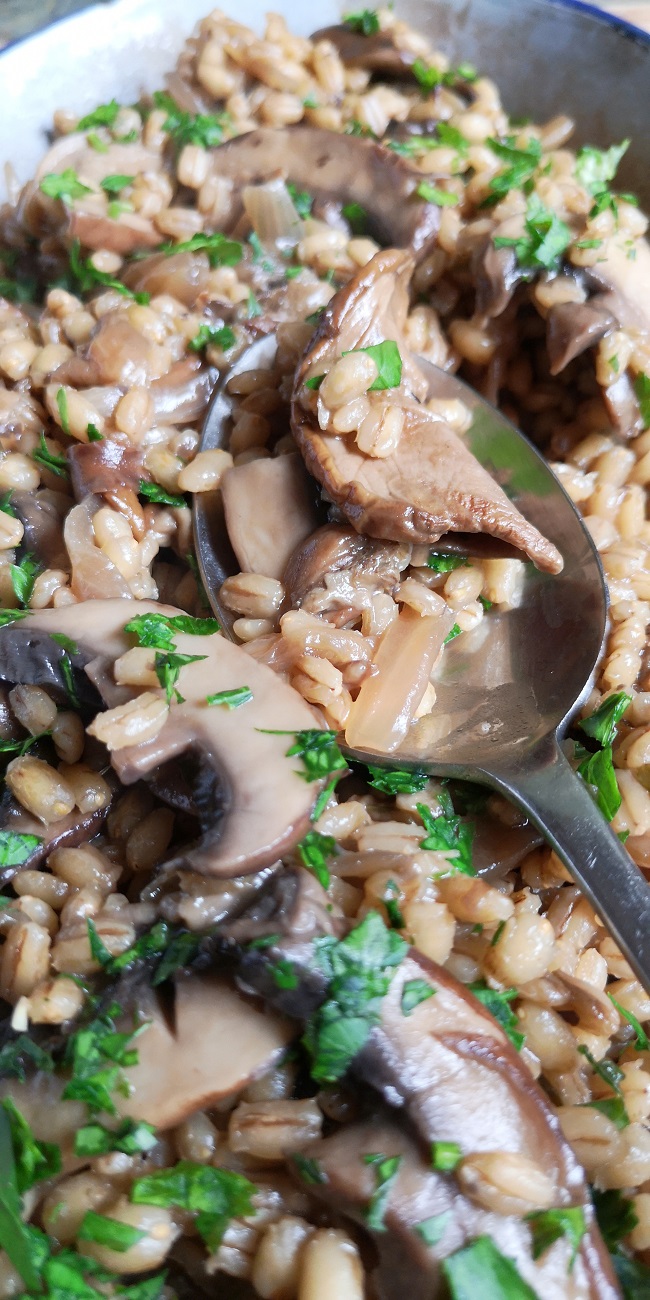
To serve, discard the rosemary and thyme and sprinkle with parsley. Delicious topped with handfuls of rocket or watercress.