Natural calcium booster for gluten-free, dairy-free and vegan diets.

Chia_sesame_and_poppy_seeds_with_whole_almonds
My top 4 natural calcium boosters. Images: Kathryn Hawkins

Hello again. I hope you are keeping well and enjoying the Summer season. My post is a little different this month but hopefully helpful to anyone whose diet contains no gluten, dairy or animal products.

I had a bit of a dietary come-uppance a few weeks ago. Having a background in food and nutrition, I know what I should be eating to keep me fit and healthy. It happened when I switched from my regular plant-milk to an organic version. After a few days I Happened to notice that the organic milk was not fortified. This raised my concern as fortified plant milk was one of the main sources of calcium in my diet. Once I had reviewed the other foods I regularly consume, I realised that my daily intake of this vital mineral was coming up short.

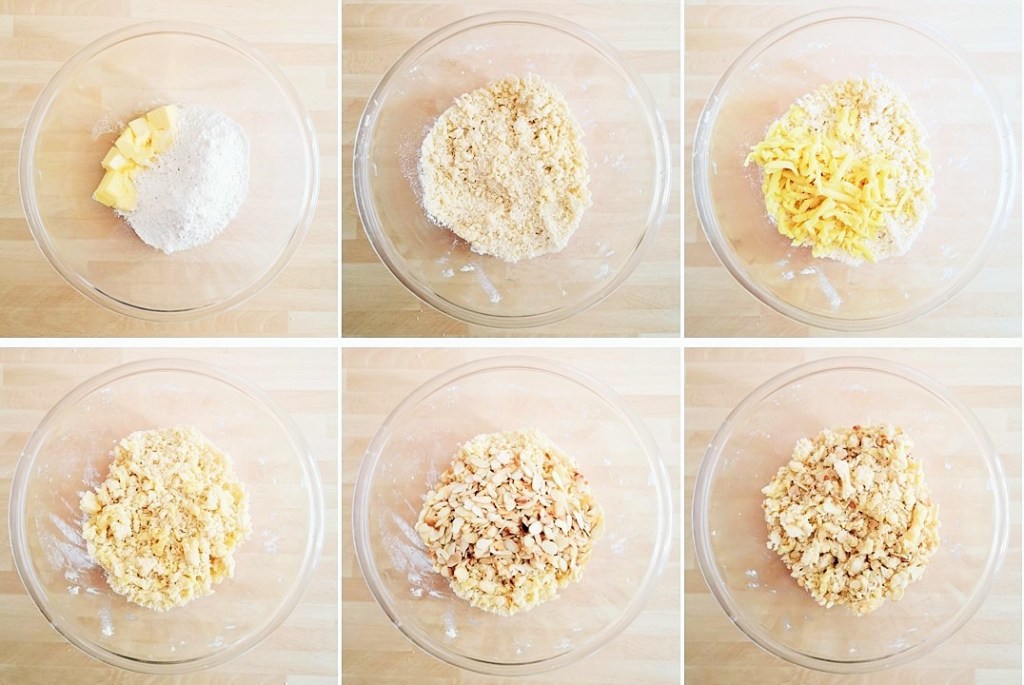
As part of my work as a recipe writer, I am used to working out the calories and other nutritional content of my recipes, and I have some comprehensive nutritional books and tables to help me do this. I studied the calcium content for lots of foods and worked out some useful dietary calcium boosters which are easy to include in my meals on a daily basis.

Poppy seeds1580mg calcium/100g
Sesame seeds670mg calcium/100g
Chia seeds631mg calcium/100g
Flax seeds255mg calcium/100g
Whole almonds269mg calcium/100g
Brazil nuts170mg calcium/100g

Source: McCance and Widdowson’s: The Composition of Foods

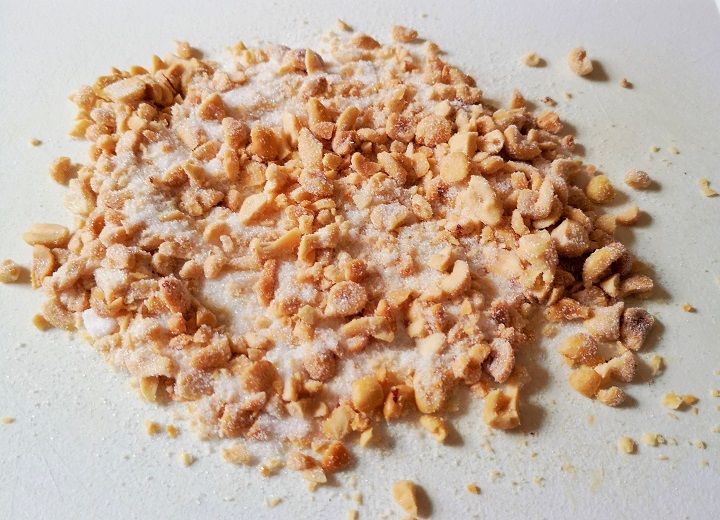
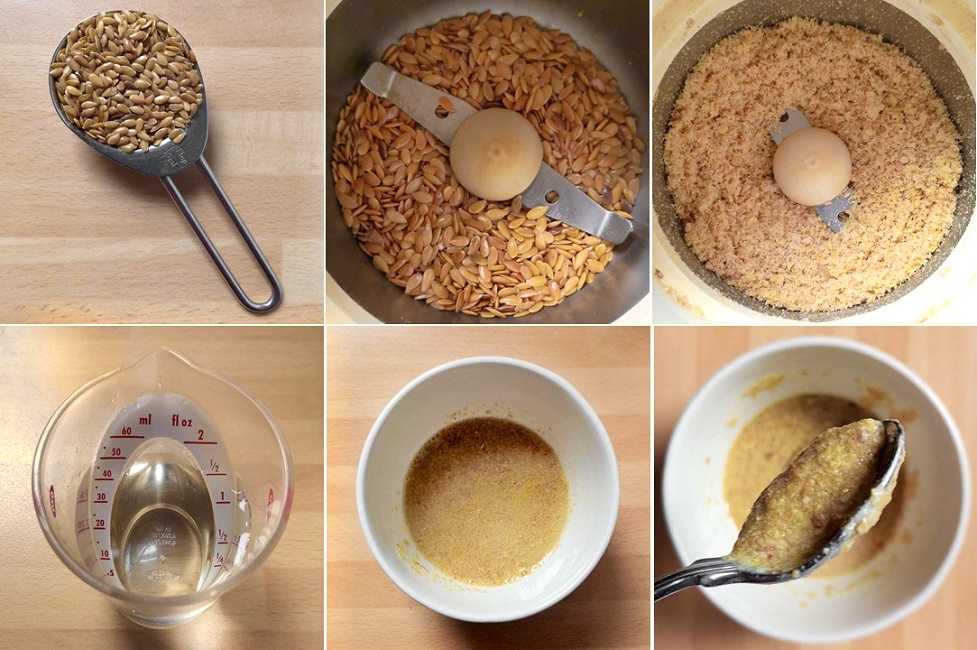
As you can see from the chart above, poppy seeds are by far the super-hero of the calcium world but like other small seeds, not necessarily the easiest of foods to eat, so I ground them up in my coffee grinder to make a fine “flour”.

Poppy_seeds_in_coffee_grinder
Grinding poppy seeds. Images: Kathryn Hawkins

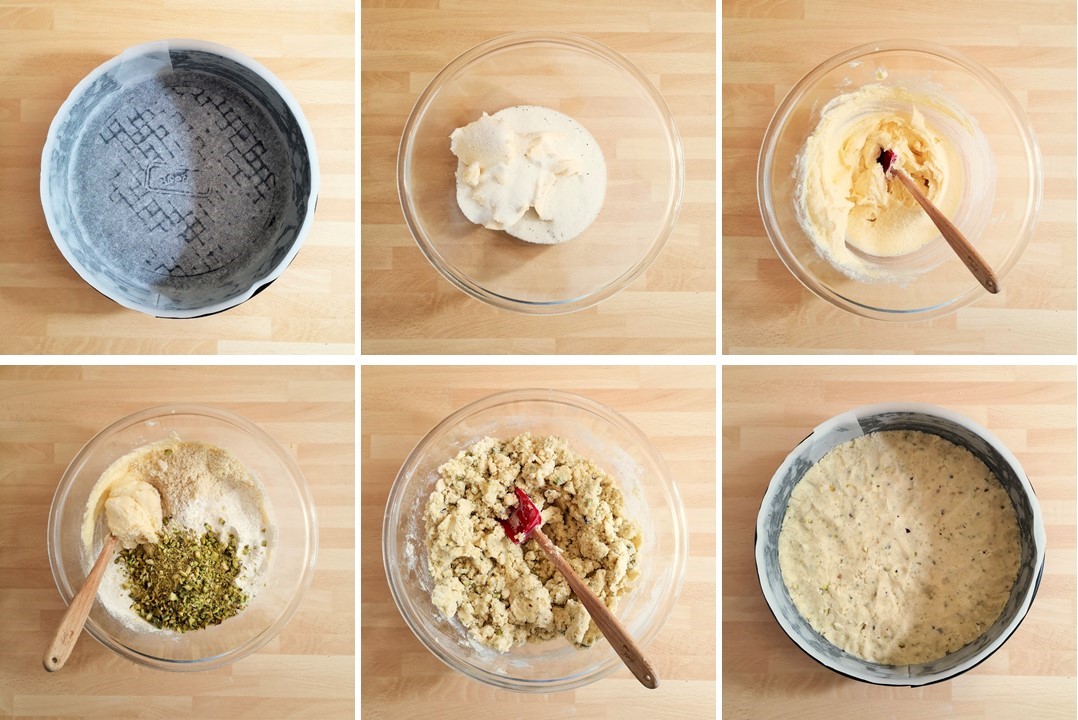
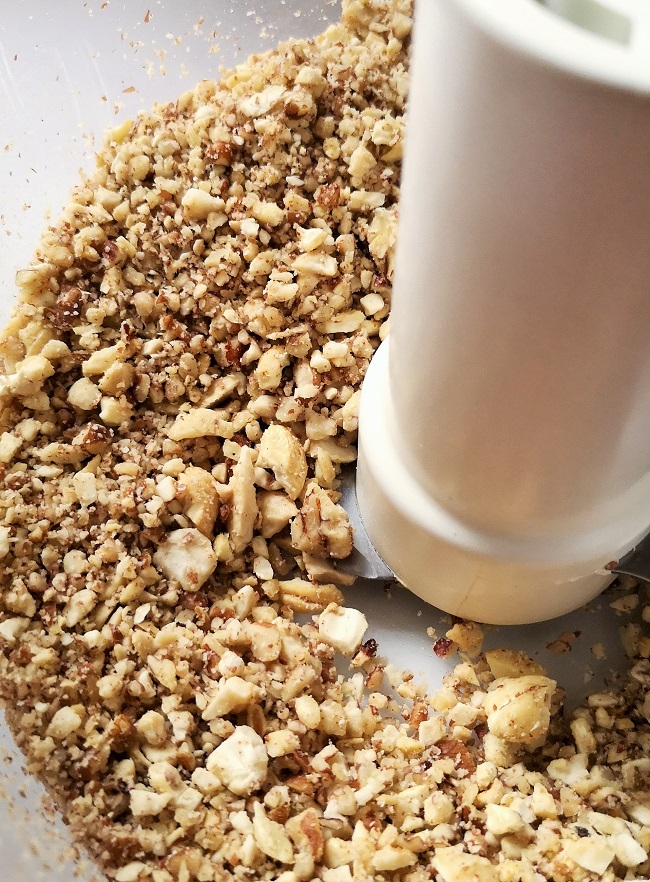
Combined with ground sesame seeds, chia seeds and unblanched almonds the resulting “flour” makes a perfect sprinkle over breakfast cereals and salads and as a nutrient-rich addition to smoothies and baking mixes.

Untoasted_sesame_and_chia_deeds_in_coffee_grinder
Sesame and chia seeds. Images: Kathryn Hawkins
Whole_almonds_and_ground_in_coffee_grinderWhole
Chopped, unblanched, whole almonds. Images: Kathryn Hawkins
Natural_calcium_seed_and_nut_mix
A perfect calcium-rich sprinkle. Images: Kathryn Hawkins

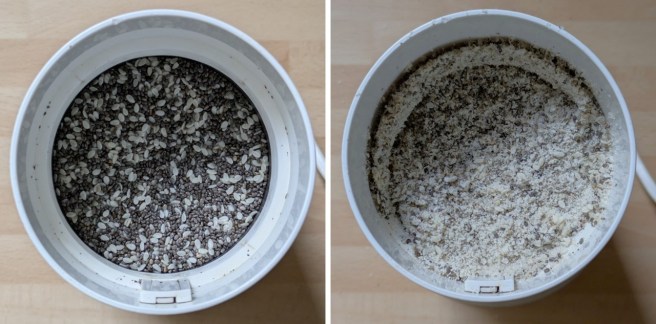
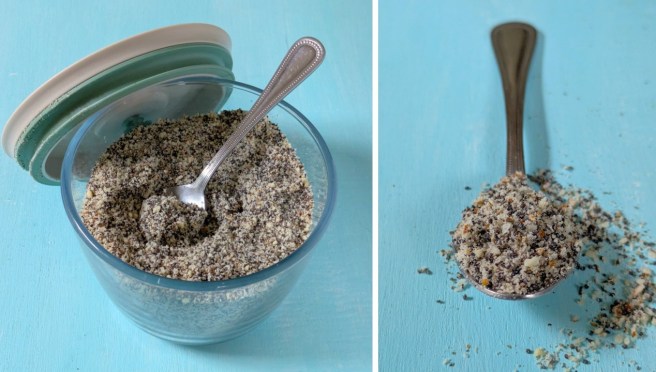
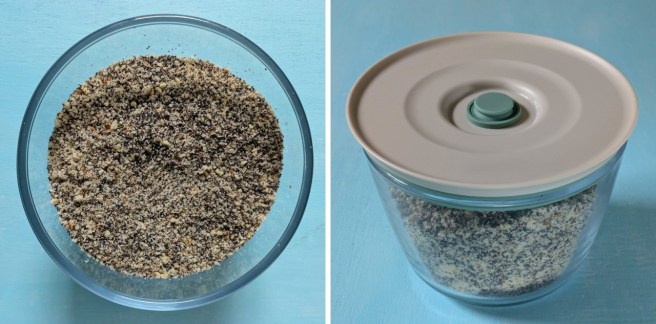
The blend is made up with 50g poppy seeds, 25g each sesame and chia seeds plus 75g unblanched almonds to make 11-12 servings. One heaped tablespoon or 15g of this mix will give you a very useful 115mg calcium (81 calories). Don’t be tempted to make up too much in one go, it is better to consume the mix as fresh as possible; keep it in an airtight container, in the fridge for maximum freshness.

Calcium-rich_ground_seeds_and_almond_mix
Store in an airtight container, in the fridge. Images: Kathryn Hawkins

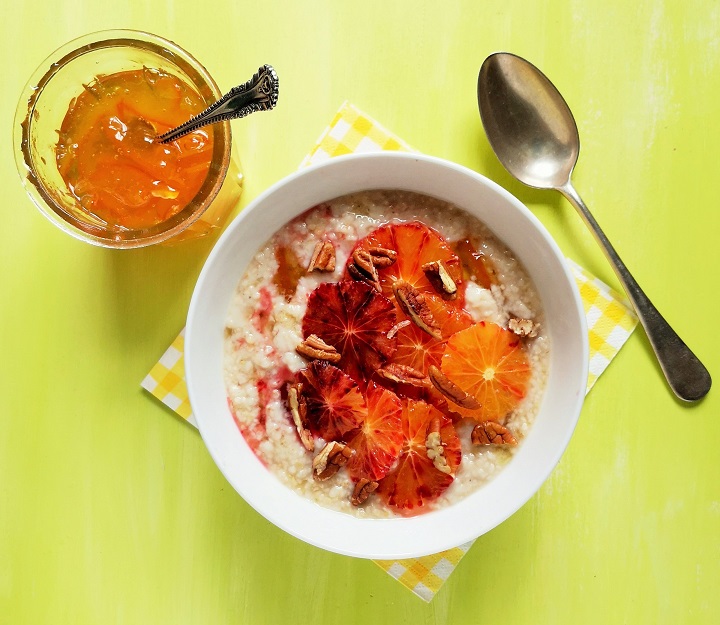
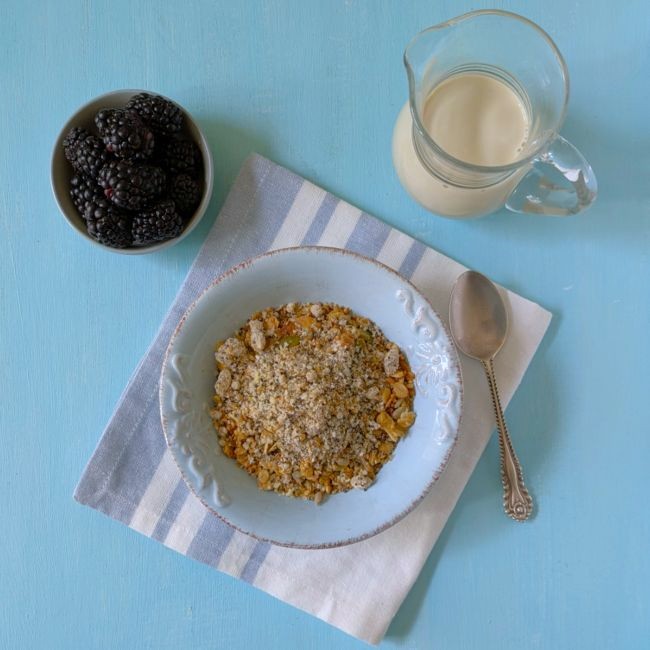
I have gone back to fortified plant milk (around 120mg calcium/100ml) for the time being, so with the smaller amounts of calcium in my breakfast cereal and some fresh berries (blackberries contain a useful 33mg calcium/100g) my breakfast now gives me over one third of my daily recommended intake (700mg) 🙂

Ground_seeds_and_almonds_sprinkled_over_breakfast_cereal
Calcium-rich breakfast. Image: Kathryn Hawkins

I’ll be making up some more calcium-boosting recipes in the future so watch this space if your interested. Thanks for stopping by and see you again next time.

Chestnut rolls (gluten-free; dairy-free; vegan)

Close-up_vegan_gluten-free_chestnut_roll
Chestnut roll close up. Image: Kathryn Hawkins

Hello again. It’s my last recipe post of the year. How 2024 has flown by. It’s been a busy one for me, and I’ll admit to not feeling 100% festive as I sit down to write this post as there is always so much to do at this time. If you’re feeling the same, perhaps this simple, tasty recipe will help get you in the right frame of mind.

Vegan_gluten-free_chestnut_rolls_ready_for_Christmas
Festive chestnut rolls. Images: Kathryn Hawkins

These rolls make the perfect snack or party food. Easy to make from a combination of sage and onion stuffing mix, chopped chestnuts and chutney. You can vary the flavour by using your favourite chutney, I use tomato but an onion one or more fruity one would work just as well as would cranberry sauce. Here’s what to do…

Makes:16

Ingredients

  • 65g sage and onion stuffing mix
  • 225g cooked peeled chestnuts
  • 100g tomato or other flavour chutney plus extra to serve
  • 1tsp onion or plain salt
  • 280g vegan-friendly gluten-free puff pastry sheet
  • 10g soya flour
  • Fresh sage to garnish

1. Put 50g stuffing mix in a heatproof bowl and mix in 90ml freshly boiled water. Mix well and leave to cool completely.

2. Finely chop the chestnuts in a food processor or by hand and mix into the cold stuffing mixture along with the chutney and salt to make a firm paste.

Making_a_vegan_gluten-free_chestnut_filling
Making the filling. Images: Kathryn Hawkins

3. Unroll the pastry and use the lining paper to line a large baking tray. Cut the pastry lengthways and divide the stuffing mix between the 2 pastry strips, shaping the stuffing into a long sausage shape down the middle of each.

Vegan_gluten-free_puff_pastry_rolled_and_filled
Forming the chestnut rolls. Images: Kathryn Hawkins

4. Mix the soy flour with 5tsp water to make a glazing paste and brush a little down one side of each pastry strip. Roll the pastry over the filling and press down gently, then roll each pastry back and forth on the work top to neaten and seal.

Making_vegan_gluten-free_chestnut_rolls
Shaping the rolls. Images: Kathryn Hawkins

5. Cut each roll into 8 equal portions and arrange spaced apart on the lined baking tray. Brush the tops and sides with the soy paste and sprinkle with the remaining dry stuffing mix. Chill until ready to bake.

Cutting_and_glazing_vegan_gluten-free_chestnut_rolls_ready_for_baking
Ready for baking. Images: Kathryn Hawkins

6. To cook, preheat the oven to 200°C, 180°C fan, gas mark 6. Bake the rolls for about 20 minutes until golden and crisp. Transfer to a wire rack to cool. Best served slightly warm with extra chutney, garnished with sage.

Freshly_baked_vegan_gluten-free_chestnut_rolls
Fresh chestnut rolls just out of the oven. Image: Kathryn Hawkins

That’s a wrap from me for this year. I hope you all have a good festive season and wish you a happy and healthy time. Until next year, Merry Christmas 🙂

Almond scone round (gluten-free; dairy-free; vegan)

Round_of_gluten-free_dairy-free_vegan_homemade_almond_scone
Freshly baked scone round ready to serve. Image: Kathryn Hawkins

Hello there. I hope the month of August is going well for you. I have a simple recipe for you this week, although it is one that has been challenging me for a while. I do like a nice scone but my attempts to make a gluten-free version of this very familiar and much-loved favourite have been disappointing up until now.

Overhead_jammy_gluten-free_dairy_free_vegan_almod_scone
A simple pleasure: scone, butter and jam. Image: Kathryn Hawkins

The recipe below is my best attempt yet and worth a share I think. Adding ground almonds to the mixture helps make the texture more moist, and adding a pinch of xanthan gum helps bind the crumb together. I think I have added too much XG in the past which has made the scones quite hard and dry. I’m not a huge fan of adding XG to my bakes but without it, the mixture falls apart completely. Here’s the recipe and I hope you enjoy them.

Makes 1 round; serves: 6

Ingredients

  • 150g gluten-free self raising flour
  • 50g ground almonds
  • ¾tsp gluten-free baking powder
  • ⅛tsp or a large pinch xanthan gum
  • 50g salted plant-based butter
  • 1tbsp caster sugar
  • A few drops natural almond extract (optional)
  • Approx.75ml plant-based milk
  • 15g flaked almonds

1. Preheat the oven to 220°C, 200°C fan oven, gas 7. Sift the flour into a bowl. Add the ground almonds, baking powder and xanthan gum. Mix well.

2. Rub in the butter until well blended and stir in the sugar. Add a few drops of almond extract, if liked, and gradually mix in between 50 and 60ml milk to make a softish dough.

3. Turn on to a lightly floured work surface and knead lightly until smooth. Roll or press into a 15cm round, neaten the edge and score into 6 equal portions.

6_steps_to_make_gluten-free_dairy_free_almond_scone_round
Making and shaping scone dough. Images: Kathryn Hawkins

4. Transfer to a non-stick baking tray and brush the top lightly with the remaining milk. Scatter with the almonds and bake for 15-20 minutes until risen and lightly golden.

5. Stand for 10 minutes then re-cut the indents and transfer to a wire rack. Cool for about an hour before pulling apart to serve. Best served slightly warm.

Baking_homemade_gluten-free_dairy-free_vegan_almond_scone_round
Glazing and baking. Images: Kathryn Hawkins

Delicious spread with soft butter and topped with homemade jam. Best eaten on the day of baking but scones freeze well for enjoying later on.

Close-up_on_peach_jam-filled_gluten-free_vegan_almond_scone
Jammy scone. Image: Kathryn Hawkins

Thanks for stopping by and I hope to see you again soon. All the best for now 🙂

Just peachy: Peach and almond bake (gluten-free; dairy-free, vegan)

Peach_and_almond_bake_freshly_cooked
Fresh out of the oven. Image: Kathryn Hawkins

Hello everyone. I hope life is treating you well. Time for a foodie post this week, and something to celebrate the fabulous fruit around at the moment. I picked Victoria plums from the garden last weekend and have been busy making compote and jam, and it won’t be long now until the apples and pears are ripe and ready. One of the most delicious fruits I have eaten recently have been fresh peaches (sadly not homegrown). As well as enjoying them just as they are in all their juicy-sweet deliciousness, I made this bake which I thought to share with you.

Fresh_peach_still-life
Just peaches. Image: Kathryn Hawkins

The bake will work with other seasonal fruits like plums and greengages – you’ll just need to adjust the sweetness accordingly. As well as adding flaked almonds to the topping, I have added my beloved marzipan but this can be left out and sweeten the topping with sugar instead. If you’re not an almond fan, try pecans or toasted hazelnuts and maple syrup, and add finely grated orange rind or vanilla extract for extra flavour.

Fresh_peach_halves_and_slices_with_lemon_juice
Preparing fresh peaches. Images: Kathryn Hawkins

I did struggle a bit to remove the stones from the fruit as they were a little bit soft, so slightly less ripe work better for neat slices. I add lemon juice to the slices before sweetening as I find that peaches often discolour when cooked.

Overhead_and_scooped_out_peach_and_almond_bake
Looking peachy. Image: Kathryn Hawkins

Serves: 6

Ingredients

  • 6 firm to ripe peaches
  • Juice of 1 lemon
  • 2 tbsp caster sugar
  • 1 tbsp cornflour (cornstarch)

For the topping:

  • 150g gluten-free plain flour blend
  • 75g dairy-free block margarine (or butter), cut into pieces
  • A pinch of salt
  • 75g marzipan, grated
  • 50g toasted flaked almonds
  • 15g chopped pistachios

1. Preheat the oven to 200°C, 180°C fan oven, gas 6. Wash and pat dry the peaches, then cut in half and remove the stones. Cut into thick slices and place in a baking dish. Toss in the lemon juice to help prevent browning. Set aside.

2. For the topping, put the flour in a bowl and add the margarine and salt. Rub the margarine into the flour until well blended. Stir in the marzipan making sure it is well distributed and then stir in the flaked almonds.

6_steps_to_making_the_almond_topping_for_peach_and_almond_bake
Almond topping preparation. Images: Kathryn Hawkins

3. Mix the sugar and cornflour (cornstarch) into the peaches and sprinkle the topping over the fruit. Put the dish on a baking tray and bake for 30-35 minutes until lightly golden. Best served warm, sprinkled with pistachios.

Prepared_peaches_and_peaches_with_almond_topping
Peaches and almond topping. Images: Kathryn Hawkins
Serving_of_peach_and_almond_bake
Inside peach and almond bake. Images: Kathryn Hawkins

That’s all for another week. I hope enjoy the recipe and I look forward to posting again in a few days time. Until then, take care and stay safe 🙂

Raspberry and almond shorties (gluten-free; dairy-free; vegan)

Raspberry_and_almond_shorties_on_a_wire_rack
Freshly dusted shorties. Image: Kathryn Hawkins

Hello everyone. I hope you are enjoying some sunshine. It’s been incredibly hot here in the UK these past few days, lots of blue sky and high temperatures. I have been outside enjoying the warmth but also seeking the shadier parts of the garden to work in. I have lots of produce to water as well, so I am hoping for some (night-time) rain to refill the water butts again.

Homegrown_Scottish_raspberries_on_the_bush
Ripe and ready for picking, this year’s homegrown Scottish raspberries. Images: Kathryn Hawkins

My recipe post this week is inspired by one of the best and most successful home-grown Scottish fruits, the raspberry. I have been picking a bowlful a day for the past week or so, enjoying some for breakfast and putting the rest in the freezer, ready for jam making later in the year.

Heart-shaped_bowl_of_freshly_picked_raspberries
Freshly picked July Scottish raspberries. Image: Kathryn Hawkins
Overhead_image_of_raspberry_and_almond_shorties_with_fresh_berries_and_leaves
Berry nice shorties. Image: Kathryn Hawkins

This is a very simple recipe. The texture of these little fruity bakes lives up to their name, it is incredibly short, crumbly and melt-in-the-mouth. The Shorties are best eaten from the cases. You could try adding a little xanthan gum to the mixture for a firmer bite, but I love the crumbliness. They are also very moreish – you have been warned.

Pink_polka_dot_paper_cake_cases
Pretty pink cake cases. Images: Kathryn Hawkins

I use smaller cake cases for this recipe, so not the large muffin or cup-cake size. These are the cases you would use for fairy cakes or small buns. You can see from the image above that the cases don’t quite fit the depth of the muffin tins. However, I like to use the deeper tins to hold the cases as the deeper sides give support to the cases while the mixture bakes.

Jar_of_homemade_raspberry_and_beetroot_jam
Raspberry and beetroot jam. Image: Kathryn Hawkins

You can use any jam you like for the filling. I made some reduced sugar raspberry jam using a recipe I posted last year. It replaces some of the sugar with cooked beetroot. You can find the recipe here if you fancy trying some. One other thing to mention is that most of the jam added before baking will become buried once the mixture cooks, so you might want to add some more on top along with a few more almonds just before serving.

Makes: 12

Ingredients

  • 75g white vegetable fat (such as Trex) or coconut oil, softened
  • 75g dairy-free margarine, softened
  • 1 teasp good quality vanilla extract
  • 100g gluten-free plain flour blend (such as Doves Farm) + extra for dusting
  • 50g ground almonds
  • 25g cornflour (cornstarch)
  • 45g icing sugar + extra for dusting
  • 3g gluten-free baking powder
  • 150g your favourite jam
  • 40g toasted flaked almonds

1. Preheat the oven to 200°C, 180°C fan oven, gas 6. Line 12 muffin tins with paper cake cases (fairy cake size).

2. Mix together all the ingredients except the jam and flaked almonds until smooth and creamy. Spoon into a piping bag fitted with a 1.5cm diameter plain nozzle.

3_steps_to_making_almond_shortie_batter
Making the shortie batter. Images: Kathryn Hawkins

3. Pipe an approx. 3cm diameter mound in each paper case. If you don’t want to pipe the mixture, use a teaspoon to spoon the mixture into the cases instead and then smooth the tops.

4. Dust the end of a wooden spoon with more flour and use to make a neat pocket in the centre of each.

Raspberry_and_almond_shorties_preparation
Filling the cases. Images: Kathryn Hawkins

5. Spoon about 1 teaspoon of jam into each and sprinkle with a few flaked almonds. Bake for about 20 minutes until lightly golden. Leave to cool for about 20 minutes to firm up before transferring to a wire rack to cool completely.

6. Just before serving, top with a little more jam and a few more flaked almonds, then dust lightly with icing sugar and serve. The Shorties will keep in a sealed container for 4-5 days but the texture will soften.

Close-up_on_raspberry_and_almond_shorties_with_fresh_raspberries_and_leaves
Shorties ready to eat. Image: Kathryn Hawkins
Raspberry_and_almond_shortie_broken_open
Inside a shortie. Image: Kathryn Hawkins

That’s me for another week. I hope you enjoyed my post and I look forward to seeing you again in a couple of weeks. Until then, take care and keep safe.

Crumpet-style pancakes with peanut filling and caramel coconut sauce (gluten-free; dairy-free; vegan)

Stack_of_crumpet-style_pancake_wedges_with_peanut_filling
Wedges of pancakes topped with banana, coconut and caramel sauce. Image: Kathryn Hawkins

Hello again. I hope you are well. It’s nearly Shrove Tuesday or Pancake Day if you prefer. I often make pancakes, and at this time of year there is another excuse to make some more. I decided to venture into new territory this time, and have combined a plain pancake batter with a yeasted tea-time favourite, the crumpet. Very easy to make, you just need to get organised and make the batter up the day before so that the yeast can work away overnight in the fridge. I wish I could have come up with a more witty name for them but neither “pan-pet” nor “crump-cake” really did it for me 🙂

Overhead_image_of_crumpet-style_pancake_wedges
Crumpet-pancake wedges. Image: Kathryn Hawkins

I used a chopped salted peanut and sugar mix to fill the pancake, but you can add whatever you fancy. Chopped chocolate and coconut would work well, or even small berry fruits and a little jam. I have also included a recipe for a caramel coconut sauce which you may want to try. Otherwise a chocolate or fruit sauce would be an equally delicious choice to serve with your pancake.

Peanut_and_sugar_filling_for_crumpet-style_pancakes
Chopped salted roast peanuts and sugar. Image: Kathryn Hawkins

Time for the recipe. Just remember that you need to make the batter the day before you want to serve the pancakes.

Makes: 4 wedges

Ingredients

  • 125g gluten-free self raising flour
  • ½ tsp xanthan gum (I add this to give a more chewy texture; the pancake will be softer without it)
  • 1 tsp fast-action dried yeast (This is the yeast that requires no activation and is added to the dry ingredients before liquid is added.
  • 4 tbsp caster sugar
  • 250ml dairy-free milk (I use oat milk)
  • 1 flax egg (1 tbsp ground flax seeds mixed with 3 tbsp cold water)
  • 1 tbsp vegetable oil plus extra for frying
  • 75g chopped salted roasted peanuts + extra to serve

For the caramel coconut sauce:

  • 50g golden syrup
  • 50g light brown sugar
  • 20g dairy-free margarine
  • 90ml coconut milk (If you don’t want the coconut flavour, use a dairy-free pouring cream instead)
  • ½ tsp salt or 1 tsp vanilla extract

1. Sift the flour and xanthan gum into a bowl. Stir in the yeast and 2 tbsp sugar. Make a well in the centre and gradually blend in the milk, flax egg and 1 tbsp oil to make smooth, thick batter. Cover with film and put in the fridge overnight.

Steps_1_to_3_making_crumpet-style_pancake_batter
Making the batter. Images: Kathryn Hawkins

2. The next day, remove the batter from the fridge and let it stand at room temperature for about an hour or until bubbles form on the surface.

3. Brush a 25cm base diameter frying pan lightly with a little oil and heat until hot. Stir the batter and then pour it into the hot pan. Reduce the heat to medium/low, spread the batter to the edge of the pan and a little up the sides, and cook gently for 6-7 minutes until bubbles appear and the top begins to set.

Prepared_batter_and_cooking_crumpet-style_pancake_batter
Cooking the batter. Images: Kathryn Hawkins

4. Mix the peanuts with the remaining sugar and sprinkle over one half of the batter. Cover with a lid and cook for a further 5 minutes until the pancake is completely set and the bottom is crisp and richly golden.

Filling_crumpet-style_pancakes_with_peanuts_and_sugar
Filling and final cooking. Images: Kathryn Hawkins

5. Carefully flip the plain side of the pancake over the peanuts and slide on to a board. Slice into 4 wedges and serve while still warm with your chosen toppings and sauces. I served mine with sliced banana, toasted coconut flakes and extra chopped peanuts.

Crumpet-style_pancake_folded_and_ready_for_slicing_and_serving
Folded and ready to serve. Image: Kathryn Hawkins

If you fancy making your own caramel coconut sauce to go with the pancake. Put all the ingredients into a small saucepan. Heat gently, stirring, until everything has melted together, then raise the heat and simmer for 4-5 minutes until thick and slightly caramelised. Leave to cool. The sauce will thicken as it cools. Serve hot or cold, flavoured with salt or vanilla.

4_steps_to_making_caramel_coconut_sauce
Making caramel coconut sauce. Images: Kathryn Hawkins
Close-up_on_peanut-filled_crumpet-style_pancake_wedges
Salty-sweet, nutty and delicious. Image: Kathryn Hawkins

I hope you have a good few days ahead, and enjoy making and eating pancakes. Until then, take care and keep safe.

My raspberry round-up plus recipe for Raspberry and pistachio cake (gluten-free; dairy-free; vegan)

Fresh_raspberry_and_pistachio_nut_cake_with_crumble_top
Combination of fresh raspberries, pistachio nuts and marzipan. Image: Kathryn Hawkins

Hello everyone. I hope you are keeping well. I’ve had a busy few days since my last post. There seems to be lots to do in the garden and kitchen at the moment. Plenty of tidying up (and weeding!) in the garden, and the much anticipated home-grown fruit and veg is ripe and ready so lots to cook up and freeze as well.

This week’s post is an homage to my Glen Ample raspberry canes which have produced a phenomenal 6.3kg of berries this year. Rather forlornly, I picked the last few berries this week.

Homegrown_Scottish_raspberries_first_half_of_July_2020

Second_half_of_July_2020_home-grown_raspberries
My 2020 raspberry haul. Images: Kathryn Hawkins

The canes are now having a well-earned rest and enjoying some sunshine – they had been covered with fleece for over a month as the birds took a fancy to the berries early on.

Glen_Ample_raspberry_canes_covered_in_fleece_ and_post-harvest
My exhausted raspberry canes. Images: Kathryn Hawkins

As you can imagine, I’ve had a lot of berries to play with but a combination of jam, vinegar, compote and a couple of large bags for the freezer has seen them all used up. By the way, compote makes the dish sound a bit grander, I literally cooked them with a bit of sugar to eat with my morning porridge!

Multiple_images_of_fresh_raspberry_compote_raspberry_jam_frozen_raspberries_and_raspberry_vinegar
Raspberry compote, jam, freezer packs and vinegar. Images: Kathryn Hawkins

Links to all my other raspberry recipes can be found by clicking on the key-words below:

On with this week’s recipe. Another reinvention of a crumble-topped cake – they are so easy to make, and taste delicious, I just can’t resist making them! Leave out the pistachios or replace with almonds or hazelnuts if you prefer, and the marzipan layer is optional (I realise it’s not to everyone’s taste) but you may want to add some sugar to the raspberry mixture if you don’t use it.

Raspberry_and_pistachio_crumble_cake_overhead_and_side_on
Fruit and nut, a winning flavour combination. Images: Kathryn Hawkins

Serves: 10-12

Ingredients

  • 180g dairy-free margarine, softened
  • 100g vanilla or plain caster sugar
  • 100g ground almonds
  • 260g gluten free plain flour blend (such as Doves Farm)
  • 50g unsalted pistachio nuts, finely chopped + extra pistachios to decorate
  • 150g marzipan, grated (optional)
  • 300g fresh raspberries
  • 1 tbsp cornflour
  • Icing sugar to dust
  1. Preheat the oven to 180°C, 160°C fan oven, gas 4. Grease and line a deep 20cm round cake tin – I used a spring-clip tin for ease. In a mixing bowl, beat together the margarine and sugar until creamy, then stir in the almonds, flour and pistachios to make a crumbly mixture.
  2. Press half of the mixture into the bottom of the tin, prick with a fork and put the in on a baking tray. Bake for about 20 minutes until lightly golden round the edge. Sprinkle the marzipan all over the cooked base if using and put to one side. Steps_1_to_6_in_the_making_of_raspberry_and_pistachio_crumble_cake

    Steps_7_to_9_in_making_raspberry_and_pistachio_crumble_cake
    Making the crumble and assembling the cake. Images: Kathryn Hawkins
  3. Mash the raspberries with a fork and add the cornflour – if you are not using marzipan add 2 tbsp caster sugar to the raspberry mix as well. Spoon over the marzipan layer and spread out evenly.
  4. Sprinkle over the remaining crumble mixture, pat down lightly with the back of a spoon and bake for about 40 minutes until lightly golden. Leave to cool in the tin on a wire rack for at least 10 minutes before releasing and transferring to a serving plate to serve warm, or leave to cool completely in the tin to serve cold.

    Steps_10_to_15_in_making_raspberry_and_pistachio_crumble_cake
    Adding the raspberries and crumble top. Images: Kathryn Hawkins

    Serve this cake warm as a dessert with cream, yogurt or custard or cold as a delicious and indulgent slice to accompany a cup of coffee.

    A_slice_of_homemade_raspberry_and_pistachio_crumble_cake
    Melt-in-the-mouth crumble cake. Image: Kathryn Hawkins

    Until next time, thanks for stopping by. Take care. I will be posting again soon 🙂

Rise and shine oatmeal porridge (gluten-free; dairy-free; vegan)

Bowl_of_oatmeal_porridge_with_blood_oranges_pecan_and_marmalade
A super sunny start to the day. Image: Kathryn Hawkins

Hello everyone! I have something bright and cheerful for you this week. Given all the doom and gloom in the news, this tasty and super-charged breakfast will get your day off to a bright and cheerful start. It’s a seasonal update on a recipe I posted a couple of years ago.

Skinless_blood_orange_slices
Blood orange slices. Image: Kathryn Hawkins

No sooner has the bitter marmalade orange season finished, the next citrus beauties are on the horizon, coming into the shops and markets in mid-February. Actually, the season is coming to an end but I’ve been enjoying the ruby-red fleshed oranges for a couple of weeks already. This orange seems to have had a name change, and is now, rather boringly, called red orange, but I will always think of them as the blood orange or Sanguinelli. The flavour is sweet and tart at the same time. They are very juicy and you never quite know how red the flesh will be until you start peeling.

4_steps_showing_how_to_peel_and_slice_oranges
Perfect peeling. Images: Kathryn Hawkins

For the past few days the weather has been decidedly chilly here; it’s been the kind of temperature that calls for porridge. My recipe for an overnight oatmeal porridge which cooks in the slow-cooker means it is ready for you to enjoy the next morning without any fuss. The oatmeal is cooked the traditional Scottish way in just water with some salt to season. Everything else is added afterwards. I posted the original recipe back in March 2018 – you can find it here.

Slow-cooker_oatmeal_porridge_ingredients_water_salt_and_pinhead_oatmeal
Slow-cooker + water + salt + oatmeal. Image: Kathryn Hawkins

To make 6 hearty servings, put 150g pinhead oatmeal in your slow-cooker. Add a generous pinch of salt and pour over 950ml cold water. Cover with the lid and switch on to the low setting. Leave for 8 hours (up to 10). After the cooking time, the surface of the porridge will form a light skin, but give it a good stir and the creaminess of the cooked oats will be appear. Once I’ve got my portion in my cereal bowl, I mix in oat milk (I love the Barista versions for extra richness) to loosen up the texture. Once the porridge has cooled it will solidify. It will keep in the fridge for up to a week, and reheats very well in the microwave – just mash with a fork, mix in some milk and reheat.

3_steps_showing_the_cooking_of_oatmeal_porridge_in_the_slow-cooker
Slow-cooker oatmeal porridge. Image: Kathryn Hawkins

So with the cooking taken care of, you just need to make up your mind what to eat with it. To prepare the orange slices, slice the top and bottom off an orange and then remove the peel by slicing downwards with a sharp knife, trying to take only the skin and white pith away. Slice into rounds or chop smaller.

Adding_a_generous_spoonful_of_homemade_Seville_orange_marmalade_to_oatmeal_porridge
Homemade marmalade for extra citrus flavour. Images: Kathryn Hawkins

Back in January, I posted my recipe for Seville orange marmalade. I’ve been putting my stocks to good use this week. It makes a great addition to a bowl of porridge, adding some sweetness and also more orange-flavour. All in all, this is a seriously citrusy and sunshiny breakfast bowl, with a few pecans sprinkled over for some crunch. I’m looking forward to my breakfast already 🙂 Until next time, I hope you have a good few days and stay healthy.

Close-up_on_oatmeal_porridge_with_marmalade_blood_oranges_and_pecan_nuts
A breakfast bowl of sunshine, Image: Kathryn Hawkins

My favourite nut loaf (gluten-free; dairy-free; vegan)

Whole_nutloaf_with_slice_on_board_with_roast_veg_and_gravy
Super-easy nut loaf. Image: Kathryn Hawkins

If you’re planning a meat-free Christmas menu for yourself or guests this year then my recipe this week maybe one to consider. Time to post my favourite nut loaf recipe. It is very easy to assemble, can be made in advance, and freezes well. What’s more, you can use any combination of nuts and seeds you fancy – it’s the perfect recipe to use up any nuts or seeds that you have already opened. And above all else, it’s very tasty 🙂

Overhead_image_of_homemade_nut_loaf_with_a_bow_of_roast_vegetables_and_vegetable_gravy
Serve with roast veg and veggie gravy. Image: Kathryn Hawkins

I prefer to use roasted peanuts and cashews if I have them, but pecans and almonds are favourites too. The mixture is bound together with lentils, flax seed “egg” and nut butter – choose whichever cooked pulses or nut butter you fancy to suit your taste. If you fancy some extra crunch, toast a handful of your favourite seeds and add to the mixture when you bind everything together.

Food_processor_with_peanuts_and_cashew_nuts_being_ground
Ground peanuts and cashews. Image: Kathryn Hawkins

When grinding or chopping the nuts, I like to keep some bigger pieces amongst the finer grinds so that the loaf has some texture but you may prefer something smoother.

On with the recipe, and then on with the festive countdown.

Serves: 4 to 6

Ingredients

  • 2 tbsp. olive oil + extra to drizzle
  • 1 stick celery, trimmed and chopped
  • 1 small onion, peeled and chopped
  • 2 garlic cloves, peeled and chopped
  • 115g grated carrot
  • 115g cooked green lentils (cooked and mashed cannellini, butter or haricot beans work well too)
  • 200g roasted peanuts and cashews (or your favourite nut and seed combination)
  • 40g gluten-free sage and onion stuffing mix
  • 1 tsp dried sage
  • 1 tsp salt
  • 125g whole nut peanut or other nut butter, softened
  • 1 tbsp. flax seeds
  • Chopped parsley to garnish
  1. Heat the oil in a small frying pan and add the celery, onion and garlic, mix well, cover, and cook gently for 10 minutes until softened. Cool for 20 minutes.
  2. Preheat the oven to 200°C, 180°C fan oven, gas 6. Line a 1kg loaf tin with a paper liner or baking parchment. Put the remaining ingredients, except the flax seeds and parsley, in a bowl and stir in the softened mixture.
  3. Now make the flax egg. Grind the flax seeds until powdery – I use a coffee grinder. Put in a small bowl and mix in 3 tbsp. water. Leave for about 5 minutes to thicken then stir into the nutty vegetable mixture to bind everything together.

    6_Steps_to_making_a_flax_egg
    Making flax “egg”. Images: Kathryn Hawkins
  4. Spoon the loaf mixture into the prepared tin, smooth the top and drizzle with a little olive oil. Cover with foil and bake for 30 minutes, then remove the foil and bake for a further 25-30 minutes until lightly crusty on top.

    Home-made_nut_loaf_before_and_after_cooking
    Before and after baking. Images: Kathryn Hawkins
  5. To serve, carefully remove the loaf from the tin. Discard the lining paper and transfer to a warmed serving plate or serving board. Sprinkle with parsley and serve immediately, sliced thickly and accompanied with roasted vegetables and vegetable gravy or a fresh tomato sauce.

    Plate_of_homemade_nut_loaf_and_roast_vegetables
    Nut loaf serving suggestion. Image: Kathryn Hawkins

    I hope you have a good few days  and I look forward to seeing you again just before Christmas!


Tutti frutti semifreddo (gluten-free; dairy-free; vegan)

Tutti_frutti_semi_freddo_dairy-free_iced_dessert
Easter dessert. Image: Kathryn Hawkins

I’ve been back in the kitchen this week, making something deliciously sweet and impressive for the Easter holidays. I’ve come up with a  dessert that is very easy to make, inspired by the flavours of Italy, and is everything you want to round off a celebratory Easter meal (but with no chocolate in sight – gasp, shock, horror!).

Tutti_frutti_semifreddo_iced_loaf_with_slice
Iced tutti frutti loaf. Image: Kathryn Hawkins

You can add your own choice of chopped dried or candied fruit and nuts – it’s a great recipe to use up the bits and pieces you have leftover (and you could even add chunks of chocolate if you really want to!). Flavoured with marzipan, mincemeat and Marsala wine, it’s a dessert that would also be right at home on the Christmas table as well.

Italian_inspired_tutti_frutti_semifreddo_ingredients
Easter semifreddo ingredients. Images: Kathryn Hawkins

Up_close_on_tutti_frutti+semifreddo_spoonful
A spoonful of semifreddo. Image: Kathryn Hawkins

Here’s what to do:

Serves: 8

Ingredients

  • 115g golden marzipan (use plain if you prefer but the golden variety adds a little colour to the semifreddo), chopped
  • 600ml dairy-free single “cream” (I use oat cream, but soya cream or canned coconut milk would also work)
  • 150g vegan mincemeat
  • 100g glacé cherries, chopped
  • 25g pistachio nuts, chopped
  • 3 tbsp. Marsala wine (or use sweet sherry or cherry brandy)
  • Extra cherries and pistachios to decorate
  1. Line a 1kg loaf tin with a double layer of cling film. Put the marzipan in a saucepan and pour over the dairy-free “cream”. Heat gently, stirring, until melted together.

    1kg_loaf_tin_lined_with_cling_film
    Cling film lined load tin. Image: Kathryn Hawkins
  2. Remove from the heat, mix well then stir in the remaining ingredients and leave to cool completely.
  3. Transfer to a freezer container at least 1.1l capacity, cover and freeze for 2 to 2½ hours until starting to turn slushy. Mix well then freeze for a further hour or so until icy and stiffened. Mix well to distribute all the pieces and pack into the loaf tin. Freeze for at least 2 hours to firm up enough to slice. For prolonged freezing, fold over the cling film and wrap in foil. Keep in the freezer for up to 3 months.

    4_steps_showing_freezing_process_of_tutti_frutti_semifreddo
    Freezing semifreddo. Images: Kathryn Hawkins
  4. To serve, gently ease the semifreddo from the tin using the cling film. Place on a serving plate and discard the cling film. Scatter with more cherries and pistachios. Slice, serve and enjoy! Happy Easter everyone 🙂

    Two_slices_tutti_frutti_semifreddo_ice_on_individual_serving_plates
    Sliced and ready for eating. Image: Kathryn Hawkins