Welcome to my blog all about the things I love to grow and cook. You'll find a collection of seasonal gluten-free, dairy-free and vegan-friendly recipe posts, as well as a round up of my gardening throughout the year. I wish you good reading, happy cooking and perfect planting!
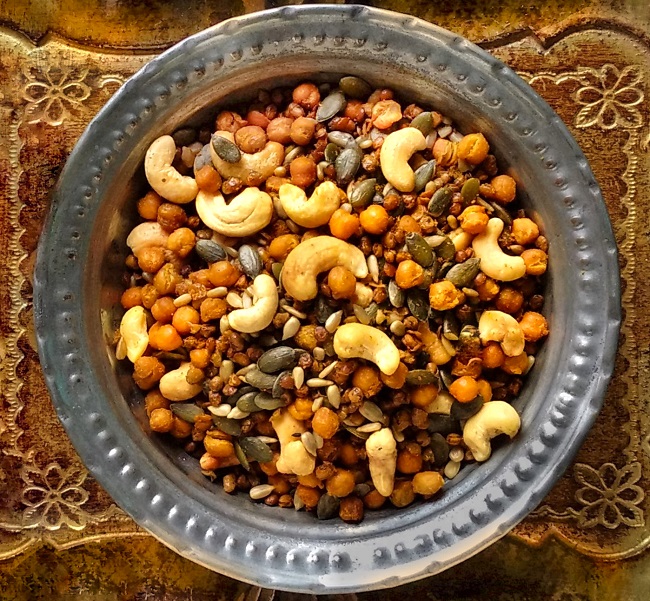
Spiced roast chana and dal. Image: Kathryn Hawkins
A mix of roast pulses, nuts and seeds flavoured with warming spice is a tempting snack, a delicious sprinkle for soups and salads, and a great diversion if, like me, you are forever fighting a battle against a sweet-tooth.
Ingredients ready for mixing and roasting. Image: Kathryn Hawkins
Easy to make, tasty and less fatty than the shop-bought mixes, this is my interpretation of the Asian snack, Bombay Mix. The bulk of the mix is made up of cooked chickpeas (chana) and green split lentils (dal). You can add any nut or seed, but choose the unsalted, natural varieties so that you can adjust the seasoning to suit your taste. I use Madras curry powder but garam masala is also a good blend to use. Here’s what to do:
Makes: 300g
Ingredients
250g cooked chickpeas
250g cooked green lentils
2 tbsp. vegetable oil
4 teasp Madras curry powder
1 teasp salt
65g pumpkin seeds
65g sunflower seeds
100g unsalted cashew nuts
Preheat the oven to 150°C (130°C fan oven, gas 2) . Line a large baking tray with baking parchment. Dry the chickpeas and lentils thoroughly on kitchen paper.
Transfer them to a large bowl and toss in the oil and curry powder. Spread evenly over the baking tray and bake for 1 hour, turning occasionally.
Mix in the seeds and cashews, turning them well on the tray so that they become flavoured with the spices and oil. Spread out evenly again and put back in the oven to roast for a further 30 minutes, turning halfway through, until everything is golden and the pulses have dried out. Leave to cool on the tray.
Drying, flavouring and roasting. Images: Kathryn Hawkins
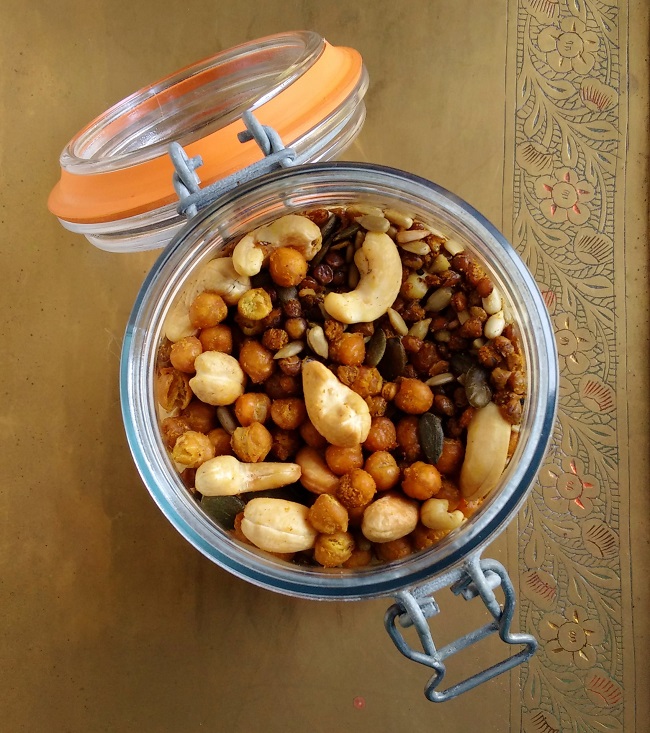
When the mix is completely cold, pack into an airtight container or storage jar, and keep in a cool, dry place. The mix should stay fresh for about 2 weeks, after this time, the pulses may begin to soften.
Storage jar of home-made “Bombay Mix”. Image: Kathryn Hawkins
Oatmeal and seed porridge with berry compote. Image: Kathryn Hawkins
It still feels more wintry than spring-like here in central Scotland. We have had a blue-sky day today, the first for a while, and the temperature is slowly rising. The snow is beginning to thaw slowly, but most of the garden is still covered in a thick, white crust of powdery snow. The snowdrops under the hedge are the first to emerge at long last and I am relieved to see that they have survived their week inside a snow-cave – what robust little flowers they are 🙂
After-the-snow snowdrops. Image: Kathryn Hawkins
One of my favourite warming breakfast dishes is porridge, and it seems a lot of people agree: porridge has become the super-star amongst breakfast cereals, and the supermarket shelves are stacked out with different varieties and all sorts of flavours.
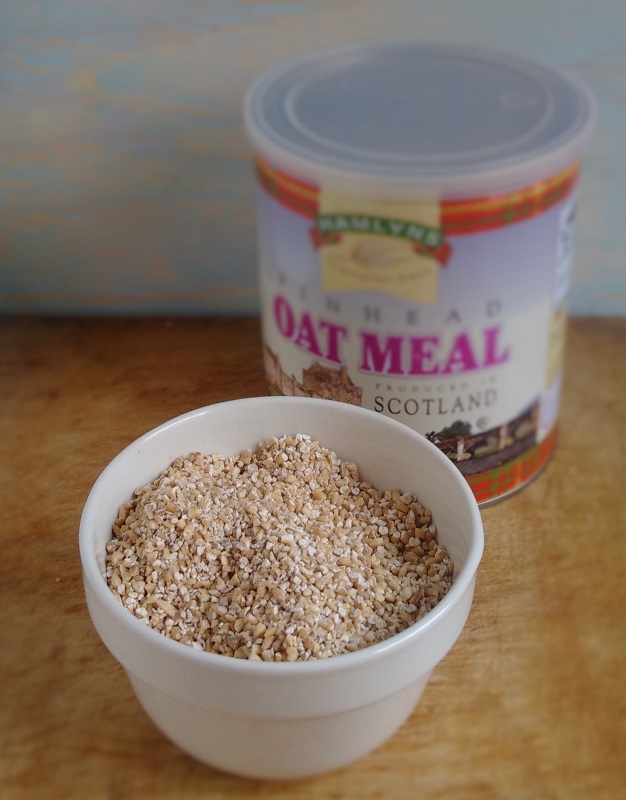
Pinhead oatmeal for “proper” porridge”. Image: Kathryn Hawkins
I like my porridge made the traditional way, which means I prefer to use oatmeal (or groats) rather than rolled oats. However, it’s not an instant breakfast and requires some organisation: the oatmeal requires overnight soaking before it can be cooked. But if you have a slow-cooker, you can cut down on the preparation: just mix everything up in the slow-cooker the night before and leave it on a low setting until the next morning, by which time it’s ready to eat as soon as you want it.
The oatmeal in the picture above is a local Scottish brand and is not guaranteed gluten-free. As you will know, oats themselves don’t contain gluten, but there is a contamination risk from other grains during processing, so if you do have a serious gluten allergy, you should seek out gluten-free oatmeal.
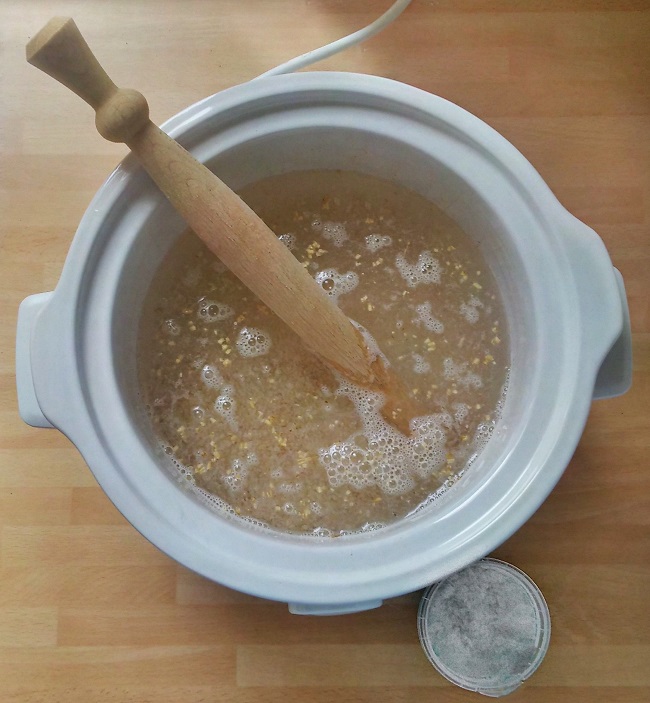
Slow-cooker porridge: oatmeal, water and salt. Image: Kathryn Hawkins
If you don’t fancy leaving your slow-cooker on overnight, slow-cook the porridge as you like, and once cooked and cooled, the porridge will keep in the fridge for a few days. You can take out a portion and reheat it with you favourite soya, rice, nut or oat milk when you’re ready. Just pop a portion in a microwave-proof bowl, mash it with a fork and stir in some milk, then reheat on High for about 1 ½ minutes. Alternatively, you can reheat the porridge in a saucepan, with milk, in the same way.
The following quantity will make about 8 servings: pour 1.1litre water into your slow-cooker and stir in 175g pinhead oatmeal. Add a pinch of salt and mix well. Cover with the lid and switch the cooker on to the Low setting. Leave to cook, undisturbed, overnight (for 8-10 hours), until thick and soft. To serve, stir well and serve with hot, non-dairy milk mixed in. Add sugar or syrup to sweeten if you like, and top with sliced banana, fresh berries, grated apple, dried fruit etc.
Homemade seed mix and my frozen summer berries. Images: Kathryn Hawkins
For an extra nutritious start to the day, I like to stir a heaped tablespoon of ground seeds into my bowl porridge and top with some summer berry compote.
For the seed mix, grind 3 tbsp. flax seeds with 2 tbsp. sunflower seeds, 1 tbsp. chia seeds and 1 tbsp. sesame seeds – I use a coffee grinder to do this. Stir in 1 to 2 tbsp. ground almonds, pecans or Brazil nuts. Store in the fridge in an airtight container and use to sprinkle over anything you like for some extra nutritious nuttiness!
The berry compote is made from my freezer supply of home-grown raspberries, blackberries and blueberries. I simply put a quantity, still frozen, in a saucepan with the lid on and sit the pan over a very low heat until the berries soften and cook. I add a little vanilla sugar once the berries are cooked. Delicious eaten hot or cold.
A spoonful of my favourite oatmeal porridge. Image: Kathryn Hawkins
A bit of a departure from my usual gluten-free cookery this week. It’s been Real Bread week here in the UK and my thoughts turned to one of my old favourite loaves made from wholemeal spelt flour. Incidentally, it’s also been a week of “Real Snow” here as well – we are currently in the throes of a snow-storm coming across our shores from Siberia. Bread-making is a perfect excuse to enjoy some baking time.
A stormy start to the new month. Image: Kathryn Hawkins
I first started using spelt flour in my cookery about 20 years ago. Whilst I am intolerant to traditional wheat flours, the lower gluten content of the ancient spelt wheat grain is easier on my digestion, and providing I don’t over-indulge, every now and then it is a real treat to include this flour in my baking.
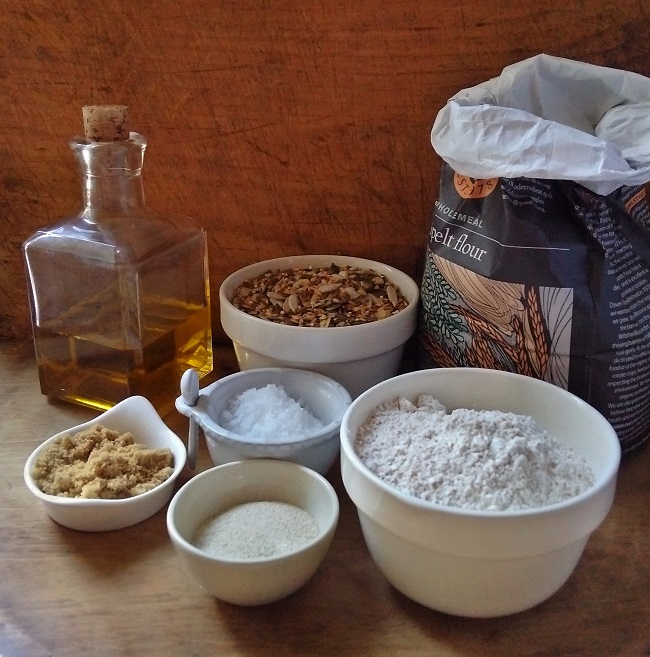
Basic ingredients for my spelt loaf. Image: Kathryn Hawkins
For this loaf, I used the wholemeal variety of spelt flour, but you’ll also find it as white flour as well which is good for cakes where a lighter coloured sponge is required. Other than the flour, my bread recipe is a very standard dough with a blend of my favourite seeds added (pumpkin, sunflower, sesame, fax, linseed and chia). The loaf works just as well without the seeds or you can add chopped nuts and dried fruit instead if you prefer something sweeter. Because spelt flour is lower in gluten, the resulting bread is denser and more cake-like in texture, but it still has the familiar chewy texture of real bread. The flavour is slightly sweet, earthy and nutty.
Wholemeal spelt flour and my favourite seed mix. Image: Kathryn Hawkins
Makes 1 x 700g loaf
Ingredients
450g wholemeal spelt flour (I use Dove’s Farm)
1 ½ level teasp easy-blend dried yeast
1 tbsp. light Muscovado sugar
100g mixed seeds
1 level teasp salt
275ml tepid water
2 tbsp. olive oil
Put the flour in a bowl and stir in the yeast, sugar, 75g seeds and salt. Make a well in the centre and gradually pour and mix in the water along with 1 tbsp. oil, to make a softish, mixture. Turn onto a lightly floured work surface and knead until smooth and slightly elastic – about 10 minutes. Note: to save time when bread-making, I often put the dough in my electric bread-maker to mix together and prove while I get on with other things. I then do the shaping, final rise and baking by conventional means.
Put the dough in a large, lightly floured glass, china or plastic bowl and cover the bowl with a clean tea-towel. Leave at a coolish room temperature for a couple of hours until doubled in size.
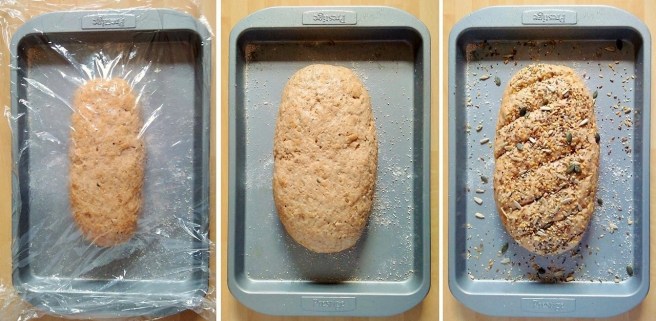
Once risen, turn out on to a lightly floured surface and knead gently (or “knock back”). Shape into a ball and let the dough rest for 5 minutes before shaping into an oval shape about 25cm long. Transfer to a lightly floured baking tray, cover with a large sheet of oiled cling film and leave in a warm place for about an hour until well risen.
Proving and shaping the spelt dough. Image: Kathryn Hawkins
Preheat the oven to 200°C (180°C fan oven, gas 6). Remove the cling film. Using a sharp knife, cut diagonal slashes in the top of the loaf. Brush with the remaining oil and sprinkle with the remaining seeds. Bake for about 45 minutes until golden and crisp – the loaf should sound hollow when tapped underneath. Transfer to a wire rack to cool.
Freshly baked spelt loaf. Image: Kathryn Hawkins
I’d like to have brought you up to date with my garden this week but all the newly sprung snowdrops and crocus are buried under several centimetres of snow. This glorious hyacinth stands proud on my kitchen window-sill just now, and is a reminder of things to come. Until next week……. 🙂
I’ve had a busy few days with my work, and subsequently only had time for one quick baking session this week. I turned to an old favourite of mine, shortbread. Easy to make and lovely to eat, and open to so many variations. This time, I had a break with tradition and made a super rich seeded version and replaced some of the fat with tahini.
I often replace a portion of the flour in cakes and bakes with ground almonds, and, if I don’t have enough ready-ground, I blitz up my own in a coffee grinder. If you use the non-blanched almonds, you’ll find the ground meal gives a more earthy to your bakes.
Sesame seed paste and home-made ground almonds. Images: Kathryn Hawkins
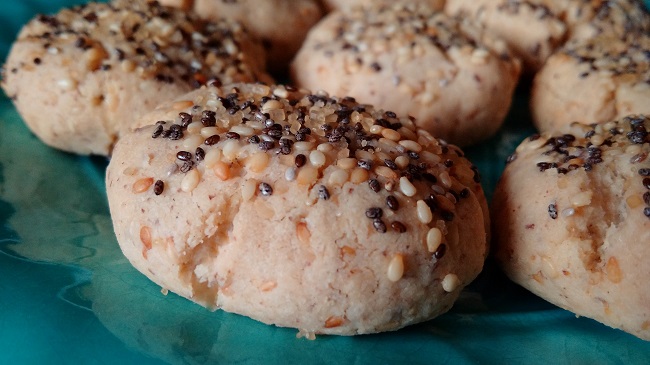
These tasty shortbreads have a soft, crumbly texture, and a rich, nutty flavour; they are delicious with a cup of coffee and keep well for a few days in an airtight tin. I find them impossible to resist. I’m away to eat the last one after I finish typing this!
Makes: 18
Ingredients
150g gluten-free plain flour (such as Dove’s Farm)
65g icing sugar
75g ground almonds
25g toasted sesame seeds
85g tahini (sesame seed paste)
50g very soft dairy-free margarine (or butter if you eat it)
1 tbsp. each of chia seeds, toasted sesame seeds and Demerara sugar, mixed, for the topping
Sieve the flour and icing sugar into a bowl and stir in the ground almonds and toasted sesame seeds.
Mix the tahini and margarine together until well blended, then stir into the dry ingredients until well mixed.
Bring the ingredients together using your hands, then turn out on to a lightly floured work surface and knead gently to form a smooth dough. Divide into 18 portions and form each into a ball.
Arrange on the baking tray, press down lightly to make chunky rounds and sprinkle lightly with the sugary seed mix. Chill for 30 minutes.
Preheat the oven to 180°C (160°C fan oven), gas 4. Line a large baking tray with baking parchment. Bake the shortbreads for about 25 minutes until lightly brown and crisp. Leave to cool on the tray.
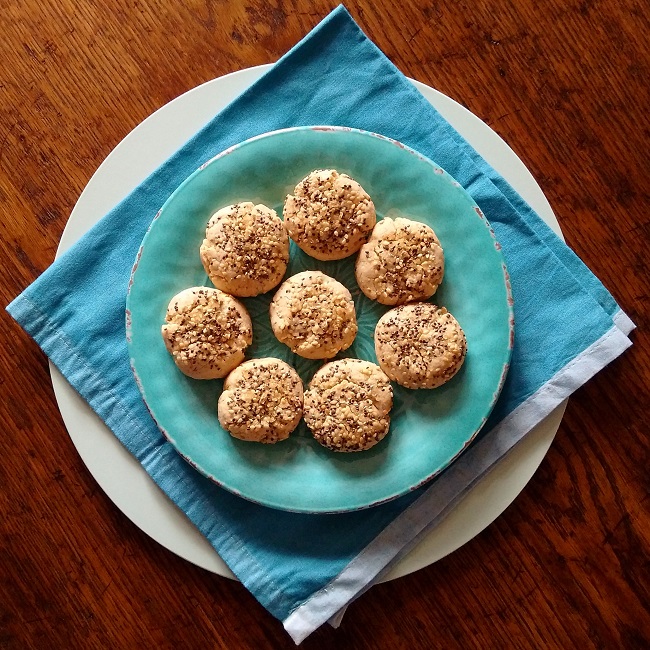
Ready for eating, sesame shortbreads. Image: Kathryn Hawkins
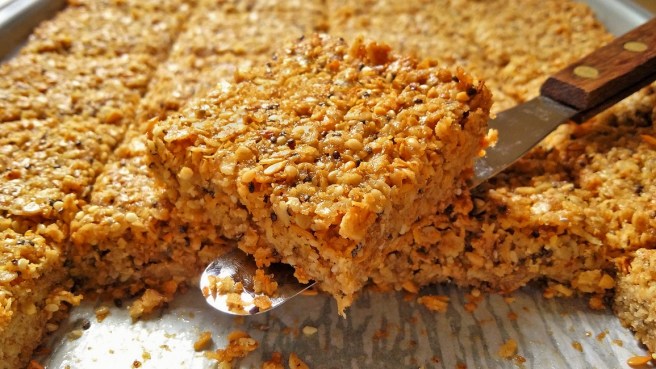
Straight out of the tray, super-seed flapjack. Image: Kathryn Hawkins
Over the past year or so, I have been trying to include as many different seeds in my diet as I am able. Seeds are crammed full of protein, minerals and fibre, and unusually for such a worthy food, I find them utterly delicious and a pleasure to eat.
I have been making flapjack since my school days; it’s a real family favourite. Over the years I’ve adapted the recipe to include flavours and ingredients that take my fancy, and for the last few weeks, I’ve been packing this much-loved bake with tiny seeds.
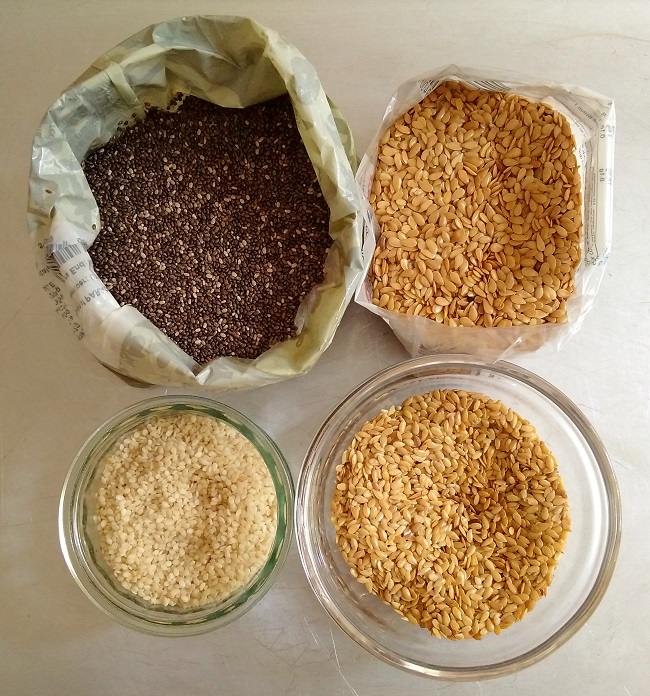
A delicious foursome: chia seeds, flax seeds, linseed and sesame seeds. Image: Kathryn Hawkins
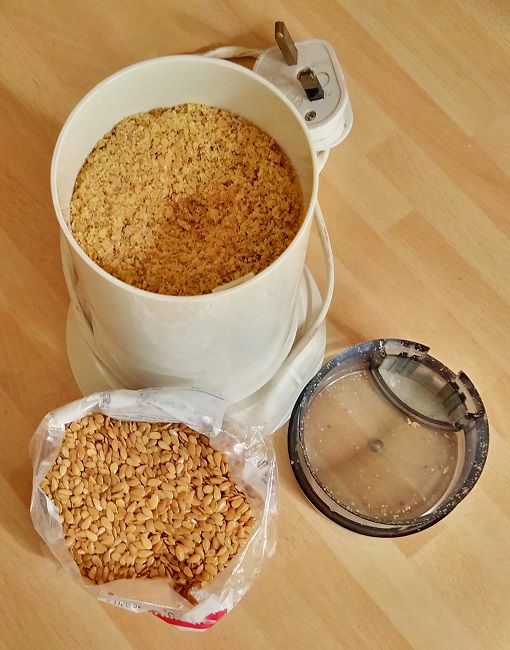
In order to benefit from as many of the nutrients in seeds as possible, it is important to make sure you chew them thoroughly. A bake like flapjack is a perfect recipe to make this happen naturally because the oats help increase the chewy texture. If you pre-grind seeds that have a more slippery texture in the mouth, like linseed and flax, you’ll help yourself to more nutrition with ease. I pop a handful in an electric coffee grinder and blitz them for a short while before I put them in the mix.
Grinding linseeds. Image: Kathryn Hawkins
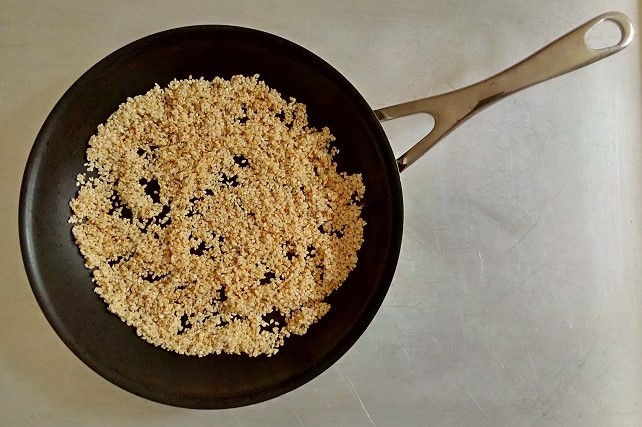
Sesame seeds are a real gold mine of nutrients and a valuable source of calcium for anyone on a dairy-free diet. I love their intense nutty flavour which I enhance by toasting them lightly in a dry, hot frying pan before adding them to a recipe. Keep an eye on them and keep them moving around the pan, as they brown very quickly once they reach a certain temperature.
Toasting sesame seeds. Image: Kathryn Hawkins
My flapjack recipe makes a large quantity, perfect for batch baking, but you can easily educe the quantity by half and press into an 18cm square tin instead.
175g mixed small seeds such as chia seeds, linseeds, flax seeds and toasted sesame seeds
Preheat the oven to 180°C (160°C fan oven, gas 4). Grease and line a 20 x 30cm oblong cake tin. Put the margarine, sugar, syrup and nut butter in a large saucepan and heat gently, stirring, until melted.
Remove from the heat and stir in the oats and seeds until well mixed. Press evenly into the prepared tin and bake for about 25 minutes until lightly golden all over.
Whilst the bake is hot, gently score the top into 24 squares and then leave to cool in the tin. Once cold, cut through the squares completely and remove from the tin. Store in a air-tight container for up to a week. Flapjack freezes well too!
A stack of freshly baked super-seed flapjack. Image: Kathryn Hawkins
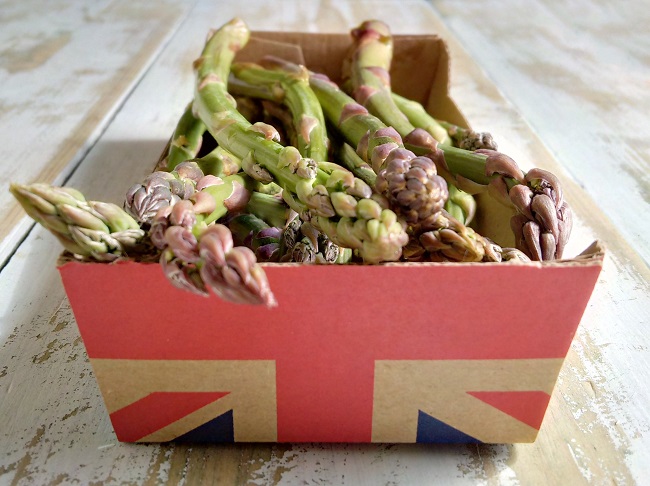
Asparagus is my favourite vegetable. It has been highly prized since Roman times, and it is peak asparagus season at the moment. I had my first taste of the new season’s crop a couple of weeks ago when I was on holiday in Sussex, and I have consumed quite a lot more since then!
The season here in the UK is brief: just 6 short weeks in late spring. In my mind, asparagus is one of the vegetables that tastes noticeably different when locally grown and freshly picked. The flavour is sweeter, fresher and nuttier than the varieties that are flown in all year round. I think it is well worth the wait each year and I am taking every opportunity to savour and enjoy it whilst these magnificent steams are available.
New season British asparagus. Image: Kathryn HawkinsKeeping asparagus fresh. Image: Kathryn Hawkins
As with any vegetable, buy and eat asparagus as soon as possible after picking to enjoy the freshest flavour and juiciest texture. But if you do end up with more than you can eat, trim away the woody ends as you would with fresh flowers and pop the stems in a vase or jug of cold water. Either store in a cool place or put in the fridge. This way, the stems will stay fresh for at least 48 hours. You can freeze it, but I really don’t like the softer texture of frozen asparagus once it is cooked – I think it over-cooks too easily – however it makes the perfect base for soup-making or blending with mayonnaise or very ripe avocado for a dip, so it is worth freezing a few stems for this purpose alone.
Preparing fresh asparagus for cooking and keeping. Image: Kathryn Hawkins
I like my asparagus best when it has been griddled or roasted. Thin spears cook very quickly in a hot, lightly oiled frying pan or on a griddle pan brushed with oil. Larger stems are good for roasting – brush with oil and spread out on a lined baking tray, and bake in a moderately hot oven for 10-15 minutes. If you prefer to use water, try to cook the stems so that the tips stay out of the water. You can buy tall upright asparagus steamers if you’re a big asparagus fan – these enable you to stand the stems upright in bunches – only the stalks are in the water whilst the tops cook in the steam. Otherwise, steaming, covered, over a saucepan of water is the next best way – keep the cooking water to add to your recipe as stock if you’re making a soup or risotto.
Here’s my recipe for sushi rice bars topped with asparagus tips – a delicious light snack for a spring lunch. If you need to trim away lots of stalk to make this recipe, keep the leftovers, and either use them to make stock or soup, or slice them into thin rounds and add to a stir fry.
Homemade asparagus and sesame sushi bars. Image: Kathryn Hawkins
Makes: 12
150g sushi rice
25g piece root ginger
1 large clove garlic
1 tsp vegetable oil
2 tbsp toasted sesame seeds
3 tbsp freshly chopped chives
4 tsp mirin, sweet sherry or white balsamic vinegar (Agredolce)
¼ tsp salt
12 fine asparagus spears
Fresh chives and flowers to garnish
1. Double line a shallow 18cm square cake tin with cling film so that the film overhangs the sides. Rinse the rice in cold running water. Put in a small saucepan and pour over 200ml cold water. Bring to the boil, reduce to a simmer, cover and cook for 10 minutes undisturbed. Turn off the heat and leave to stand with the lid on for 20 minutes. It is worth checking the manufacturer’s cooking instructions for the particular rice you are using as timings and water quantities may vary between brands.
2. Meanwhile, peel the ginger and garlic and chop finely. Heat the vegetable oil in a small frying pan and gently fry for 2-3 minutes until softened but not browned. Leave aside.
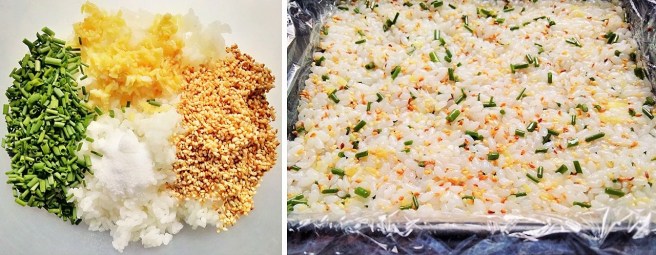
3. When the rice is ready, scrape it into a heat-proof bowl and fork through to break up the grains. Add the ginger and garlic along with the seeds, chives, wine, sherry or vinegar and salt. Mix well.
4. Pile into the prepared tin, press down with the back of a spoon and leave to cool completely, then fold over the cling film and chill for 2 hours until firm.
Making seasoned sushi rice. Images: Kathryn Hawkins
5. Bring a saucepan of water to the boil. Trim the asparagus to approx. 8cm lengths and place in a steaming compartment over the water. Cover and cook for 2-3 minutes until just tender – insert the tip of a sharp knife into the end of the stalk is a good way to check it is perfectly tender. Cool under cold running water, then drain, place on damp kitchen paper and chill until required.
6. To serve, remove the rice cake from the tin and remove the cling film. Place on a board, cut into 12 bars and arrange asparagus on top of each bar. If liked, wrap a length of chive stem around each piece and arrange on a serving platter. Sprinkle with chive flowers, and serve with wasabi paste if liked.
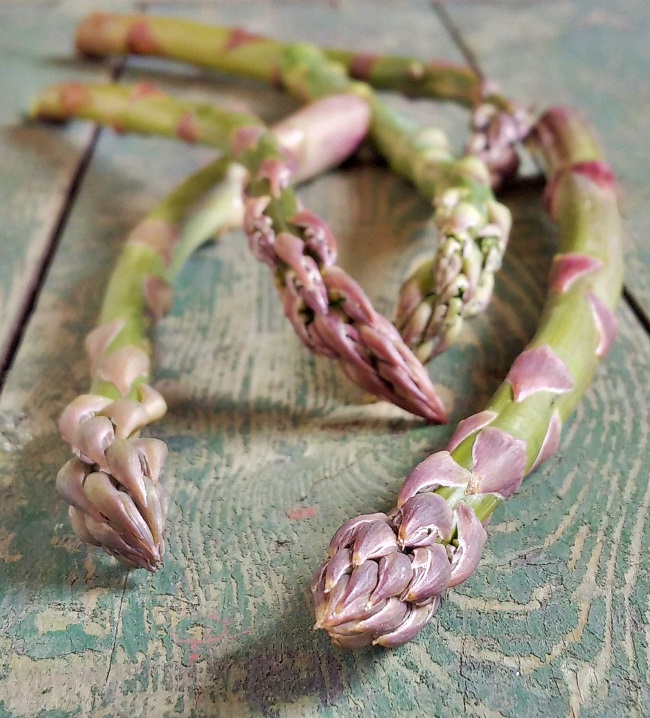
New season fresh, British asparagus spears. Image: Kathryn Hawkins
Every now and then I try very hard to cut back on the amount of sugar I eat. I find it challenging to find something to stave off the cravings. and I usually turn to seeds to do the job. This week, I started my latest “health-kick” and I found that I had built up quite a collection of different seed varieties from the last time. Many of the seeds are in half-opened bags stored in the fridge and are now coming up to the “best before” date; it seemed the perfect time for a healthy, and very much savoury, baking session. Bursting with nutrition and flavour, and with super crunchy textures, seeds are one of the best foods to snack on without feeling too guilty.
Some of my current seed collection. Image: Kathryn Hawkins
You can use any seeds in this recipe, but a mixture of different sizes works the best. Introduce your own flavourings if you like; I kept mine plain and simple this time, but black pepper, smoked paprika, cumin, chilli, thyme and rosemary are good flavours to try if you like to experiment. I use the thicker milled, porridge (or Scottish Porage) oats, the finer milled varieties seem to go a bit mushy and give a less crisp texture to the final bake. There is a small amount of gram (chickpea) flour added to the mix to help bind the ingredients together but the recipe works fine with other gluten-free blends if you prefer.
These crunchies are very easy to make and will keep for a week or so in an airtight container. Enjoy them broken into large shards as a crispbread, or crumble them on to soups or salads for extra nutty flavour. Here’s what to do…….
Makes at least 10 big pieces
90g thick or coarse milled oats
175g assorted seeds – I used chia, sunflower, pumpkin, sesame and flax seeds
25g gram (chickpea) flour
½ tsp salt
2 tsp soft dark brown sugar or maple syrup
1 tbsp sunflower oil
Approx. 100ml warm water
Preheat the oven to 190°C (170°C fan oven, gas mark 5) Line a large baking tray with baking parchment. Put the oats and seeds in a large bowl and mix well. Stir in the remaining ingredients until thoroughly combined.
Gradually pour and stir in approx. 100ml warm water to make a clumpy mixture. Leave aside to soak for 15 minutes, then squeeze the ingredients together with your hands to make a ball. Add a little more water if the mixture is still a bit dry.
Put the mix on to the prepared baking tray and flatten with your hands. Place another sheet of parchment on top and roll using a rolling pin to make a rectangle approx. 36 x 25cm minimum. Remove the top layer of parchment.
Making the oat and seed dough. Images: Kathryn Hawkins
4. Bake in the oven for about 20 minutes until lightly browned around the edges. Place a sheet of parchment on the surface of the bake, lay another baking tray on top and carefully flip the mixture over. Peel away the top parchment and return to the oven for a further 15-20 minutes until crisp and lightly golden all over. Cool for 10 minutes then slide on to a wire rack to cool completely.
A freshly baked slab of oat and seed crunchies. Image: Kathryn Hawkins
When cold, transfer to a board and either snap into pieces with your fingers, or break into shards using the tip of a knife.
Oat and seed crunchies. Image: Kathryn Hawkins
As an alternative way to bake, you can divide the dough into 10 or 12 portions, flatten each one separately, and roll into thin rounds. Bake in the same way for about 5 minutes less cooking time. The crunchies are delicious with all kinds of savoury spreads, but I prefer mine with crunchy wholenut peanut butter.