Welcome to my blog all about the things I love to grow and cook. You'll find a collection of seasonal gluten-free, dairy-free and vegan-friendly recipe posts, as well as a round up of my gardening throughout the year. I wish you good reading, happy cooking and perfect planting!
Hello again. Thank you for stopping by. So, here we are at the end of another month. A chance for me to take a look back on what’s been happening out of doors since my last post.
Garden snowdrops, February 2023. Images: Kathryn Hawkins
It’s been a bumper year for snowdrops here in central Scotland. Along the roadside verges, riverbanks and country walkways, the tiny white bulbs are flowering prolifically. And, in my own garden, there are green and white clumps of the delicate little flowers in the beds, borders and paths all over the place.
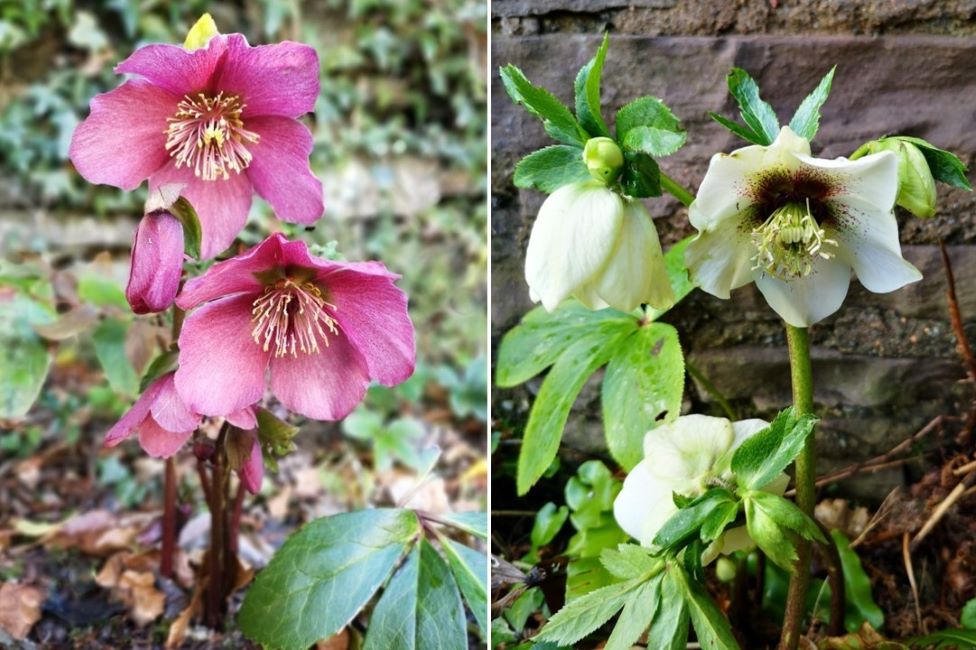
New season Scottish garden Hellebores. Images: Kathryn Hawkins
February crocus and primroses. Images: Kathryn Hawkins
Other spring classics are opening up in the garden as well. In the shady borders, the Hellebores are unfurling, as are the primroses. In the sunshine, the crocus are flowering and giving bold, bright, blasts of colour all over the garden.
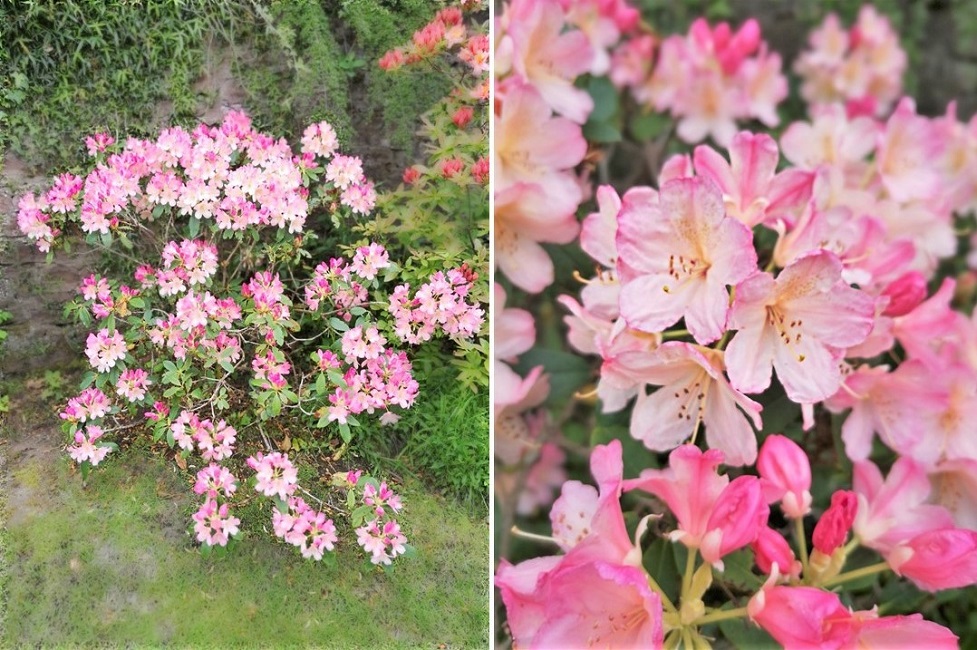
Pale pink Rhododendrons, February 2023. Images: Kathryn Hawkins
The delicate pink Rhododendrons are blossoming in the back and front garden. Fingers crossed that the frost keeps at bay.
Early spring heather, February 2023. Images: Kathryn Hawkins
More hardy are the spring heathers. I haven’t seen many bees yet, but there are some tempting blooms out there in wait for our important little pollen collectors.
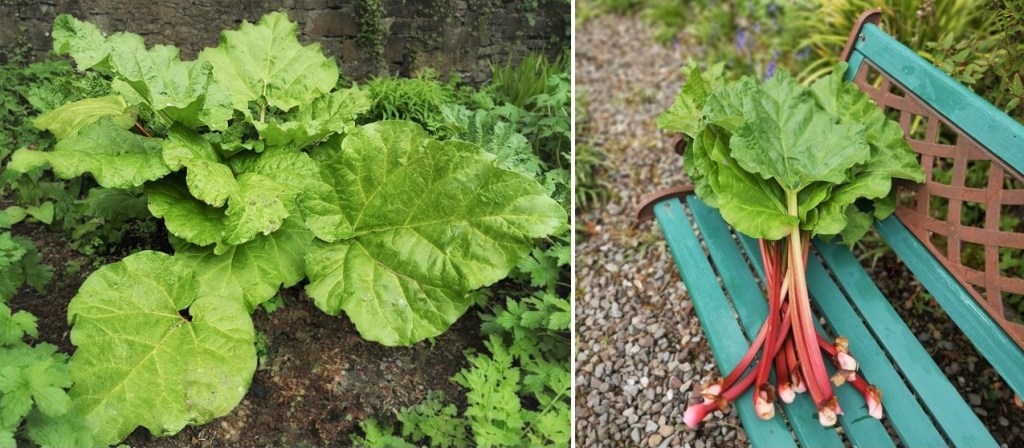
Garden rhubarb and rabbits. Image: Kathryn Hawkins
Very happy to see the first of the garden produce beginning to grow. Looking forward to my first harvest of fresh pink stems in a few weeks time.
My final image this week is of a glorious winter sunset I captured at the beginning of the month, and it was a real beauty.
Early February sunset. Image: Kathryn Hawkins
That’s me for this month. I will be back with a recipe post very soon. Until then, have a good few days and enjoy the unfurling of spring.
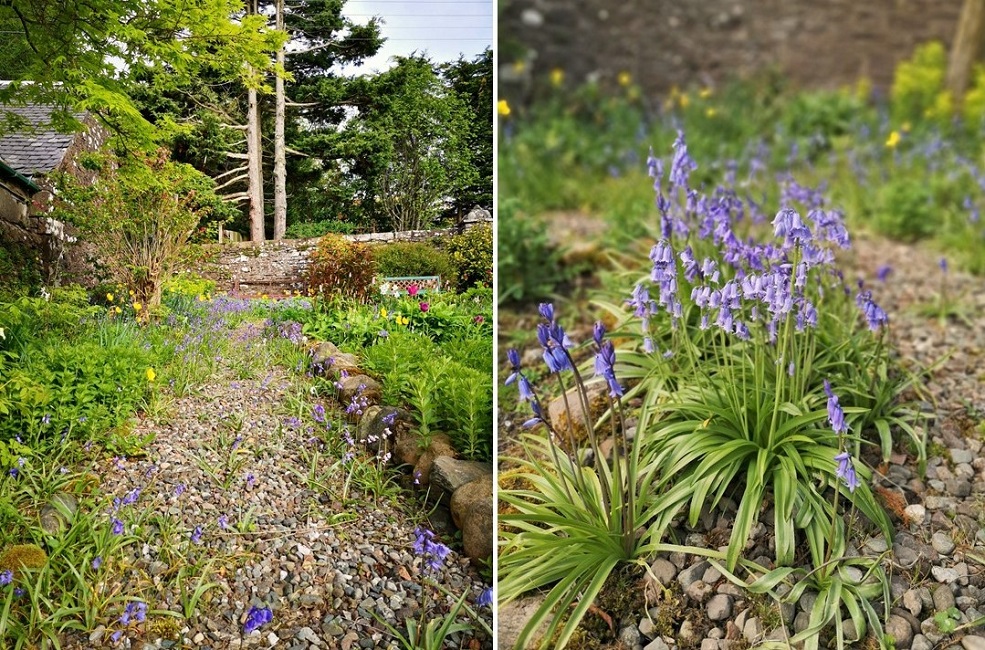
Blossom and bluebells in mid May. Image: Kathryn Hawkins
Hello again. What a colourful month it has been in the garden. May is my favourite month of the year for the sheer variety of plants and flowers springing to life. I hope you enjoy the images I have been capturing over the past 3 weeks of my garden as it bursts into bloom.
May 2022 Apple blossom season. Images: Kathryn Hawkins
The apple blossom this year was remarkable. I took these images about 10 days ago. The petals have now dropped and the fruit is beginning to set. Fingers crossed for a bumper harvest.
May 2022 bluebells. Images: Kathryn Hawkins
There has been another carpet of bluebells all over the garden. Those in the lighter borders are beginning to go over now, but the ones in the shadier parts are still vibrant and fresh.
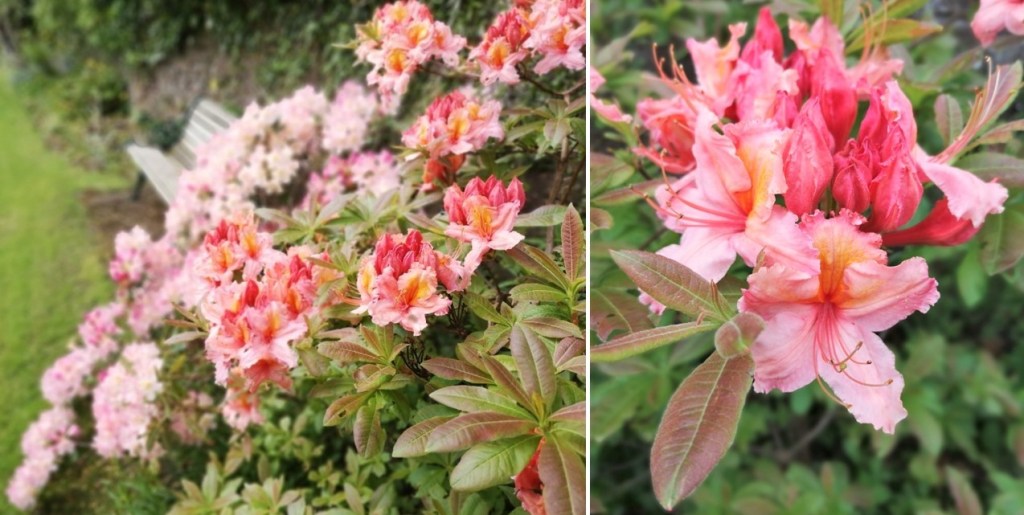
The best in the garden this month has to be the many colours and varieties of Rhododendrons and Azaleas in flower. They love the acidic soil here and always do very well.
May garden borders. Images: Kathryn Hawkins
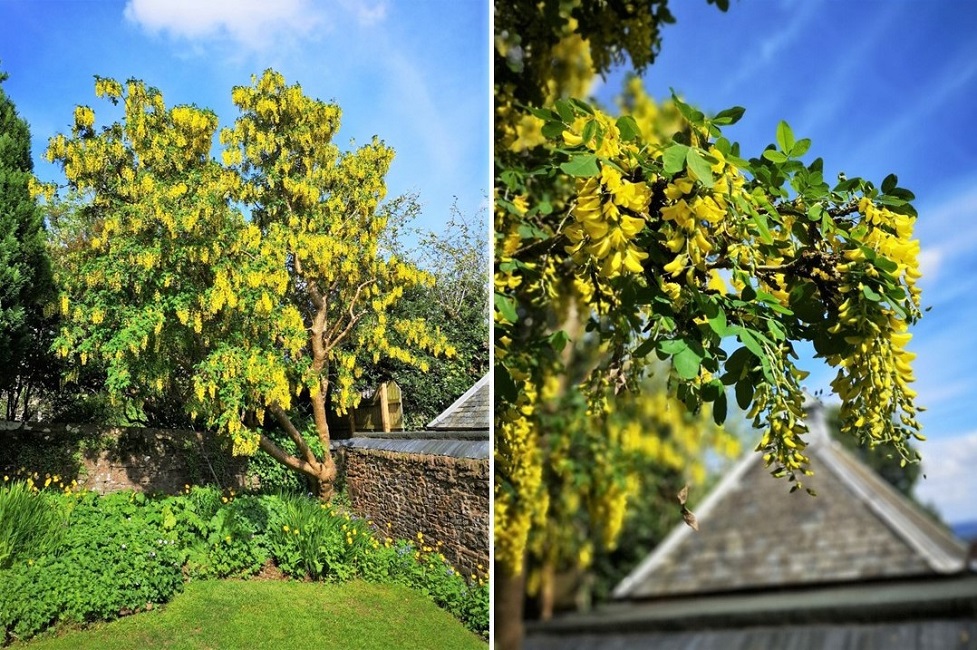
These two flowers, the Himalayan cornflower and the yellow Welsh poppies will continue to flower throughout the next 3 months or so in the garden. Great value, low maintenance and lovely bright colours. Below, under a blue sky earlier this week, the golden yellow Laburnum flowers look stunning.
Laburnum in full glory. Images: Kathryn Hawkins
I’m back to where I started with my images. The image below was taken a couple of days ago. You can see that the apple blossom has finished. There are still a few bluebells about, but now the lupins are on their way and it won’t be long before the peonies open.
The garden this week. Image: Kathryn Hawkins
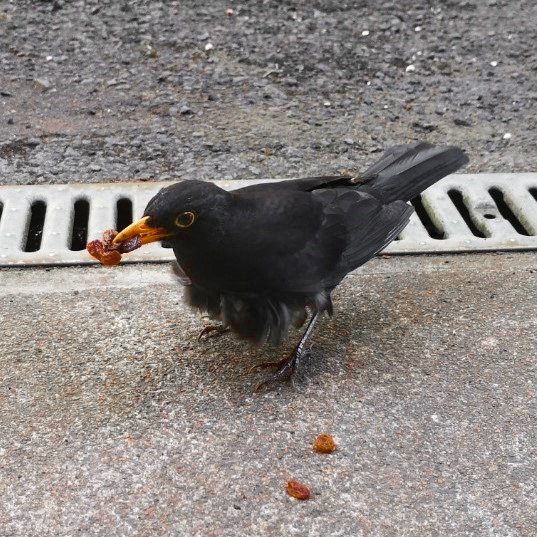
To finish my post this week, not only is the garden full of flowers at the moment, it is visited by many birds collecting food for their babies. This fellow, rather scruffy in attire, has been my companion in the garden this week. I am amazed at how many sultanas he can fit in his beak!
Until next time, take care and enjoy the sights and scents of the season.
My garden companion, Scruffy the Blackbird. Image: Kathryn Hawkins
Hello again. How lovely it is to be well and truly in the season of spring, my favourite time of year. It is a joy to be out of doors and in among all the new growth and activity in the garden.
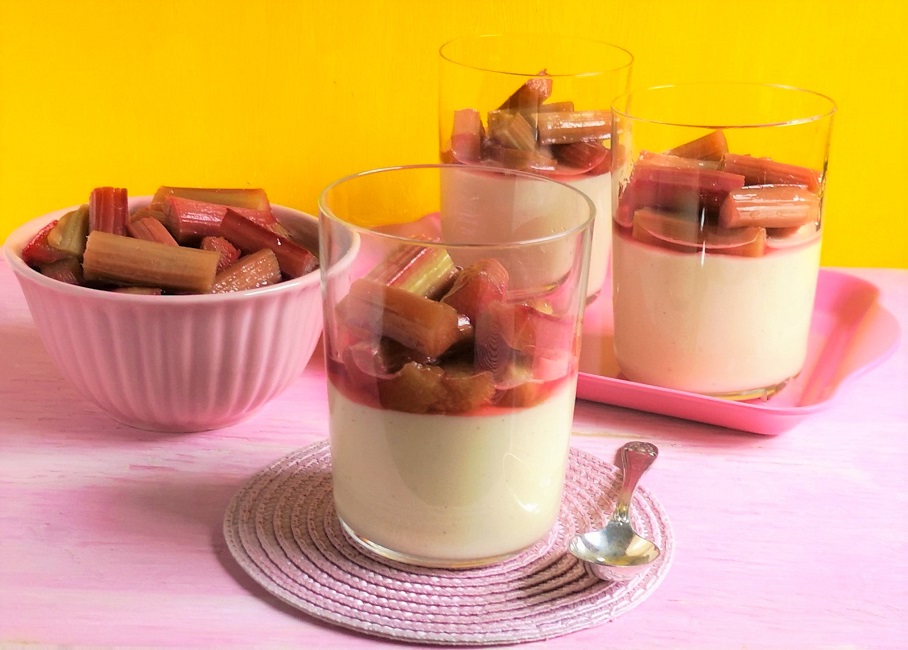
May 2022, fist rhubarb harvest. Images: Kathryn Hawkins
Earlier in the month, I picked my first rhubarb of the season. It was a good harvest of tender, thin, colourful stems with a tangy, fruity flavour. My recipe this week is not so much about the rhubarb but about an indulgently, rich recipe to serve with this tasty seasonal treat.
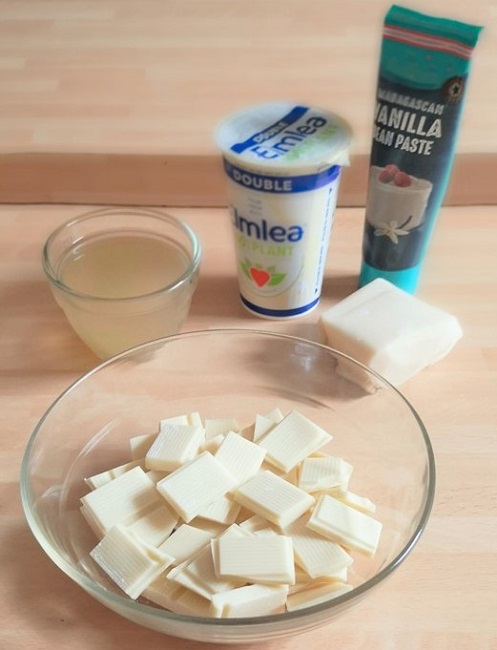
Mousse ingredients. Image: Kathryn Hawkins
My very simple combination of vegan white chocolate, plant-based cream, coconut and vanilla, lightened with aquafaba foam makes a very delicious mousse to serve with any acidic fruit. If you’re not vegan, dairy-based products will work fine. Leave out the foam if you want a denser more custardy texture. If you don’t want to use cream, replace the creamed coconut and plant-based cream with full fat or reduced fat coconut milk.
The mousse is very rich and can easily spread to 6 portions if you use small serving glasses. Here’s the recipe.
Serves: 4-6
Ingredients
350g prepared rhubarb, cut into short lengths
2-3tbsp caster sugar
40g creamed or block coconut
approx. 60ml plant-based double cream
1tsp vanilla bean paste
300g free-from white chocolate
100ml aquafaba (I used canned cannellini bean liquid)
1. Put the rhubarb in a shallow pan with 2tbsp sugar and 3tbsp water. Heat until steaming, then cover with a lid and cook gently for 10-15 minutes until tender. Cool slightly, taste and add more sugar if required. Leave to cool completely, then chill until ready to serve.
May rhubarb on the hob. Images: Kathryn Hawkins
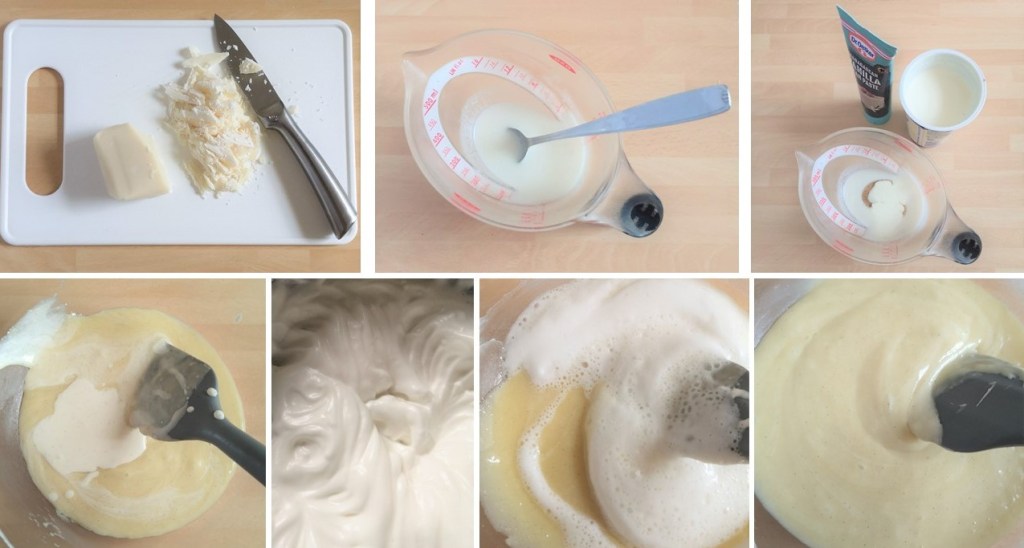
2. Shave the creamed coconut into thin pieces using a small sharp knife or vegetable peeler and put into a measuring jug. Spoon over 3tbsp boiling water and stir until dissolved. Make up to 100ml by adding sufficient plant-based cream. Stir in the vanilla paste.
3. Melt the chocolate in the microwave or in a bowl over barely simmering water. Keep warm.
4. In a clean, grease-free bowl, whisk the aquafaba for 4-5 minutes until thick and foamy – you should be able to leave a trace of the whisk in the foam when it is sufficiently whipped.
5. Mix the coconut cream into the warm melted chocolate until well blended and then gently fold in the whisked foam in several batches. The chocolate mixture will begin to thicken quite quickly once it starts to cool.
White chocolate and coconut mousse prep. Images: Kathryn Hawkins
6. Divide the mousse between 4 or 6 serving glasses and leave to cool completely before chilling until ready to serve.
Ready to set. Image: Kathryn Hawkins
Spoon cooked rhubarb on top of each mousse just before serving. Delicious 🙂
Fruity and creamy. Image: Kathryn Hawkins
That’s me for another week. I will be posting again at the end of the month. Until then, enjoy marvellous May!
I’ve been wanting to have a go at making my own sushi-style sticky rice rolls for some time, but have never quite got round to it. But having the right combination of ingredients at last, I have finally been able to experiment, and I am very pleased with the results. Sushi Master I am not, but hopefully good enough to tempt you into giving my easy recipe and method a try.
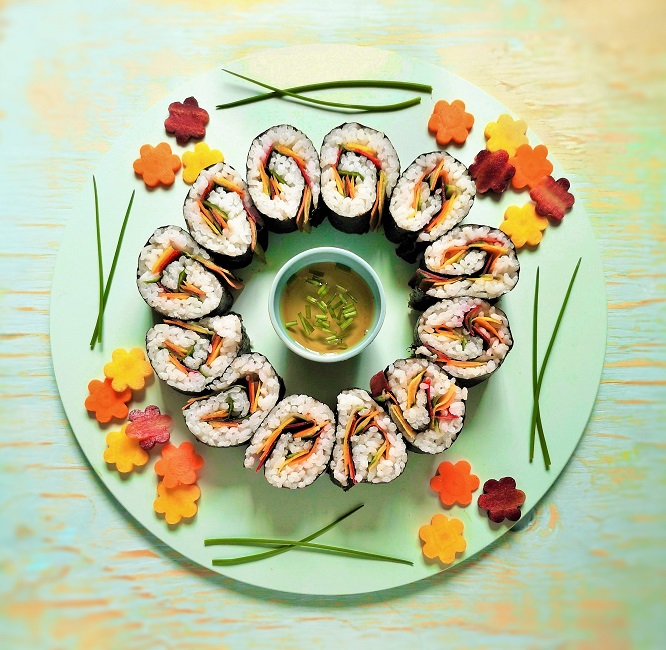
Rainbow rice rolls. Image: Kathryn Hawkins
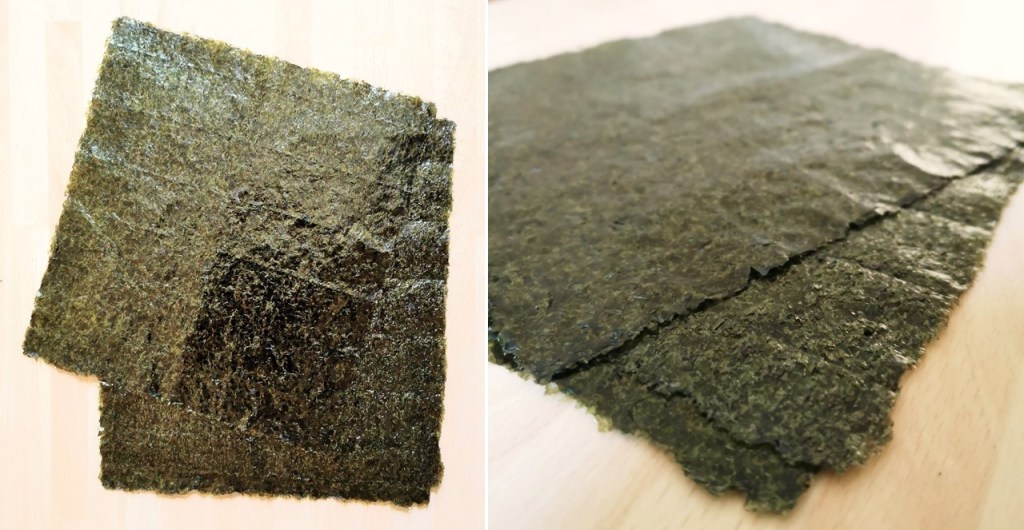
The basic “must-have” ingredients are sheets of dried seaweed called Sushi Nori – I used 19 x 21cm sheets made by Clearspring. They have a rougher-textured side and a shiny side. Shiny side faces down when you make up the rolls. The sheets are dry and fairly crisp until you put the rice and filling on them, and then they soften and form a tasty edible wrapping for the rolls.
Dried nori seaweed sheets. Images: Kathryn Hawkins
For the filling, you need sushi rice or sticky rice. This is a short-grain variety which is very starchy so when it is cooked it clumps together. You can use other grains but they probably won’t cling together enough for neat slicing. I should imagine that Chinese glutinous rice and Arborio rice might also work but you’d need to do some experimenting with cooking times to make sure they don’t overcook and become mushy.
Sushi rice in the raw. Images: Kathryn Hawkins
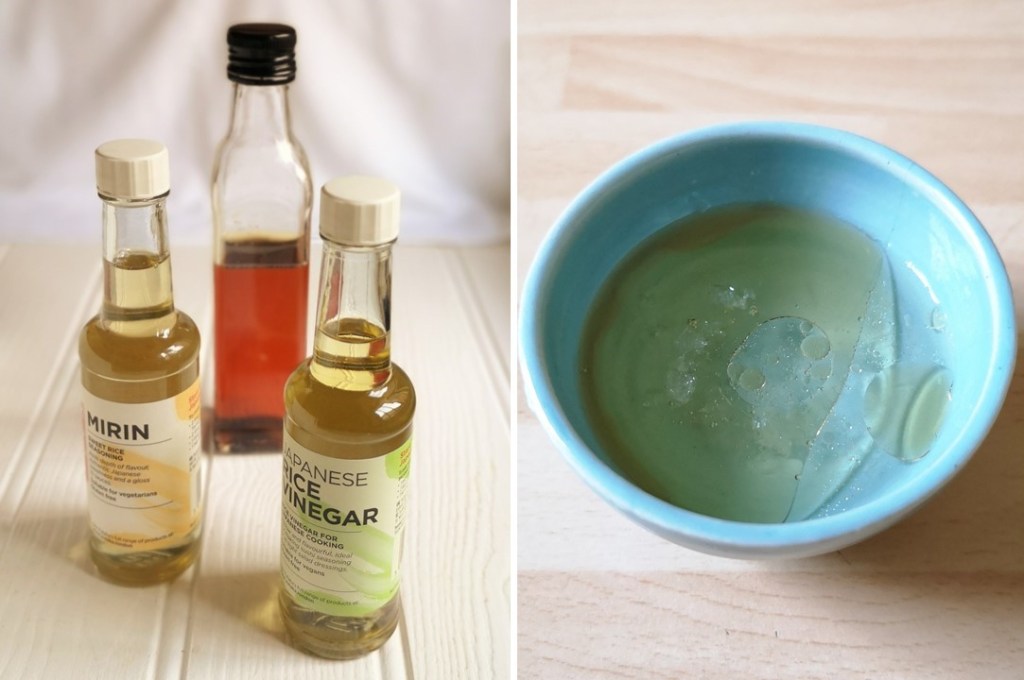
How you season the freshly cooked rice is up to personal taste. I do like the traditional subtle Japanese flavours of mirin and white rice vinegar. I also added a little sesame oil for some nuttiness, and of course a little salt and sugar for classic seasoning.
Seasonings for sticky rice. Images: Kathryn Hawkins
And finally, the filling. This needs to be thinly sliced and quite flexible for easy rolling. The key to a good roll is not to overfill it and to keep the covering nice and even. I went for thin ribbons of vegetables which I prepared with a vegetable peeler. Grated vegetables would also work in a thin layer. Other things to try could be a sprinkling of toasted seeds; some thinly sliced or grated smoked tofu, or mashed avocado.
Rainbow carrots. Images: Kathryn Hawkins
Makes: 12
Ingredients
125g raw sushi rice
1 tbsp mirin
1 tsp white rice vinegar
1 tsp caster sugar
½ tsp sesame oil
½ tsp sea salt
2 sheets sushi nori
A few thin strips of rainbow carrots and cucumber (approx. 22 carrot and 8 cucumber)
Dipping sauce to serve – I mixed sesame oil with mirin, a little salt and sugar and freshly chopped chives
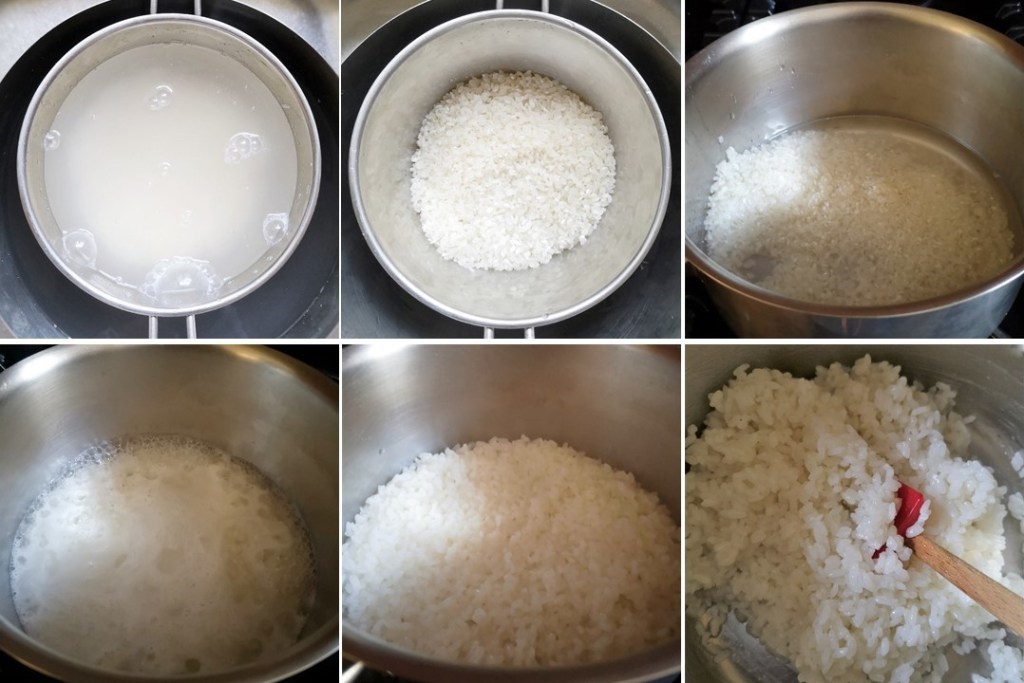
First prepare the rice. Rinse the rice several times in cold water. Drain and put in a saucepan with 200ml cold water. Bring to the boil, cover and simmer gently for 10 minutes until the water is absorbed. Turn off the heat and leave to stand for 15 minutes.
2. Mix together the mirin, vinegar, sugar, oil and salt. Stir into the rice and leave to cool.
Sticky rice preparation and cooking. Images: Kathryn Hawkins
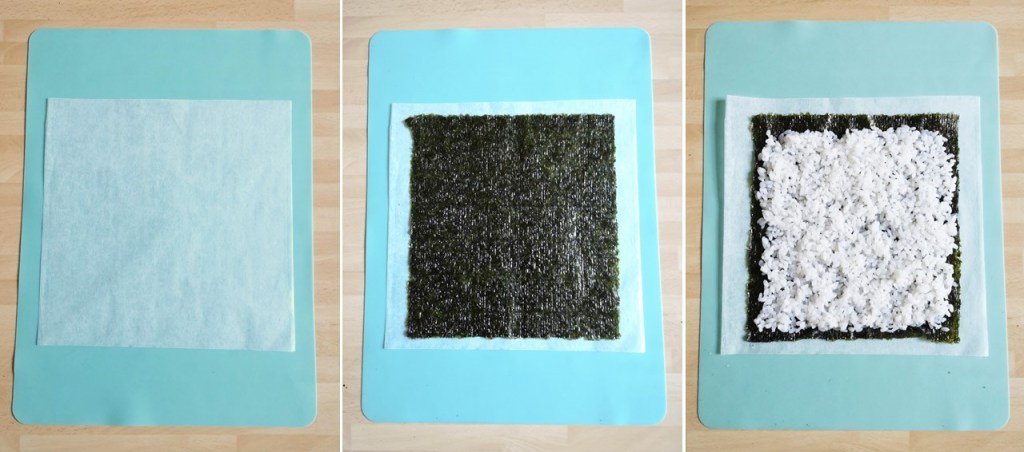
3. Lay a piece of parchment just bigger than the nori sheet on a dry silicone mat or chopping board. Lay the nori, shiny-side down, on top and spoon over half the rice.
4. Carefully spread the rice over the seaweed, leaving 1cm clear at one end and at both sides. At the other end, leave a 2cm gap where the roll will finish. Make sure that the rice is evenly spread and flattened.
Ready to roll. Images: Kathryn Hawkins
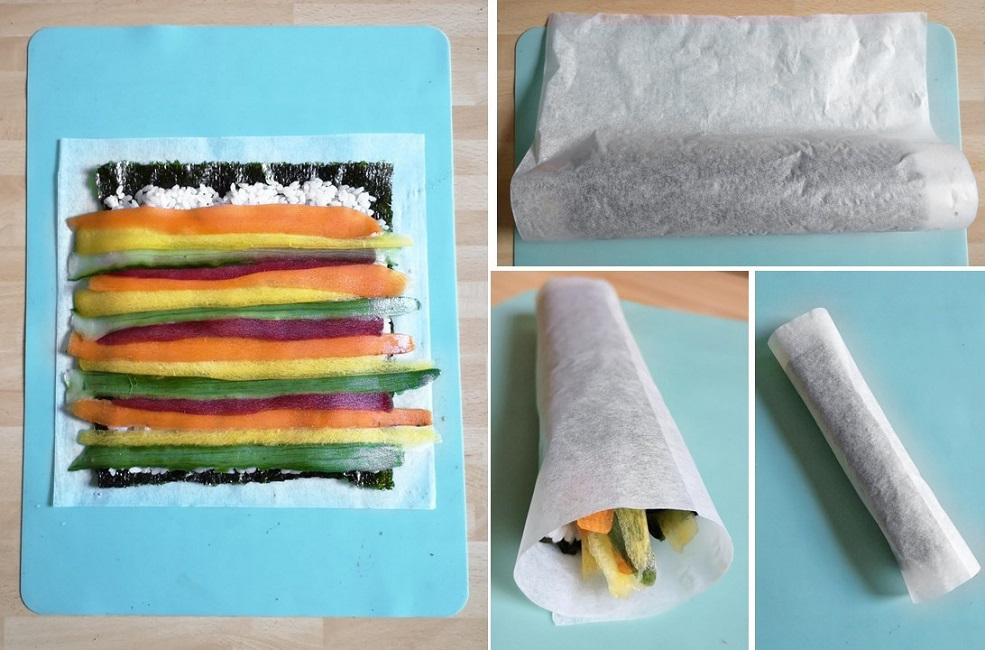
5. Lay the filling neatly on top. Using the parchment to help you, begin rolling from the near edge, keeping the filling in place with your fingers. Roll firmly without pressing to avoid squashing the filling. Once rolled, wrap the parchment around the roll completely and chill for at least an hour before slicing. Repeat with the remaining ingredients to make up another roll.
Sticky rice roll filling and rolling. Images: Kathryn Hawkins
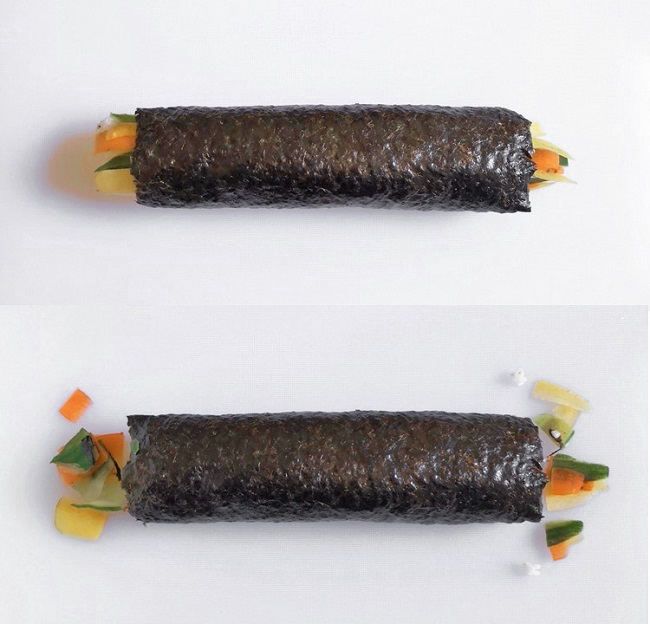
6. When ready to serve, unwrap the rolls and discard the parchment. Slice off any overhanging vegetables from each end to neaten, then ussing a sharp knife, cut each roll into 6 slices.
Rolled rolls before and after trimming. Images: Kathryn Hawkins
Your sticky rice rolls are now ready to serve. I arranged mine on a serving platter with the dipping sauce in the middle. I cut out some flower shapes from thin carrot slices and added a few chives to garnish.
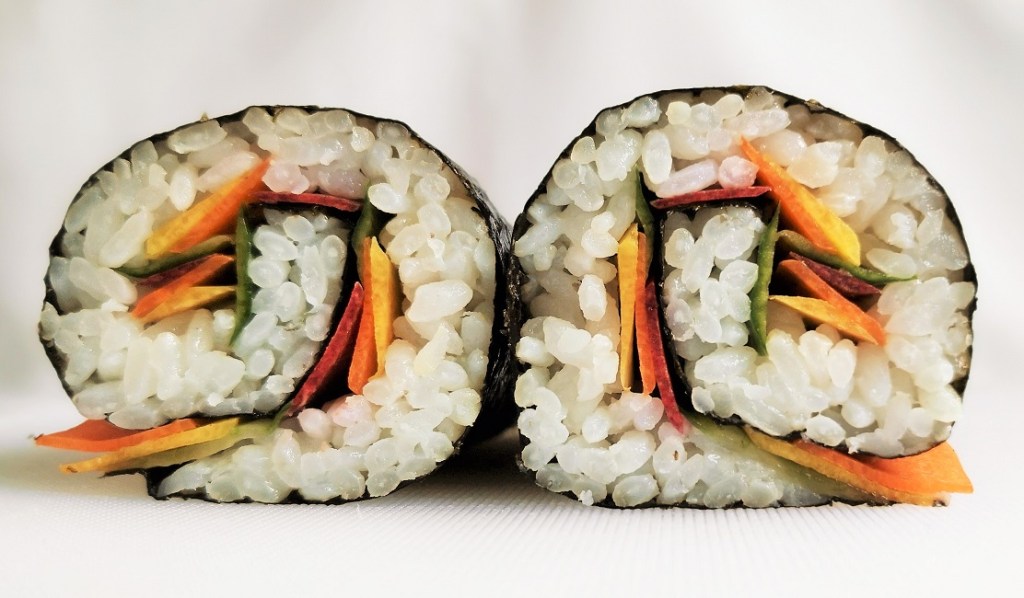
Rice roll sliced in half. Image: Kathryn Hawkins
I love the colours of the rainbow carrot and cucumber combination, very cheery for the soul, healthy and delicious to eat on a spring day for or a picnic.
That’s me for another month. Until next time, take care and keep safe.
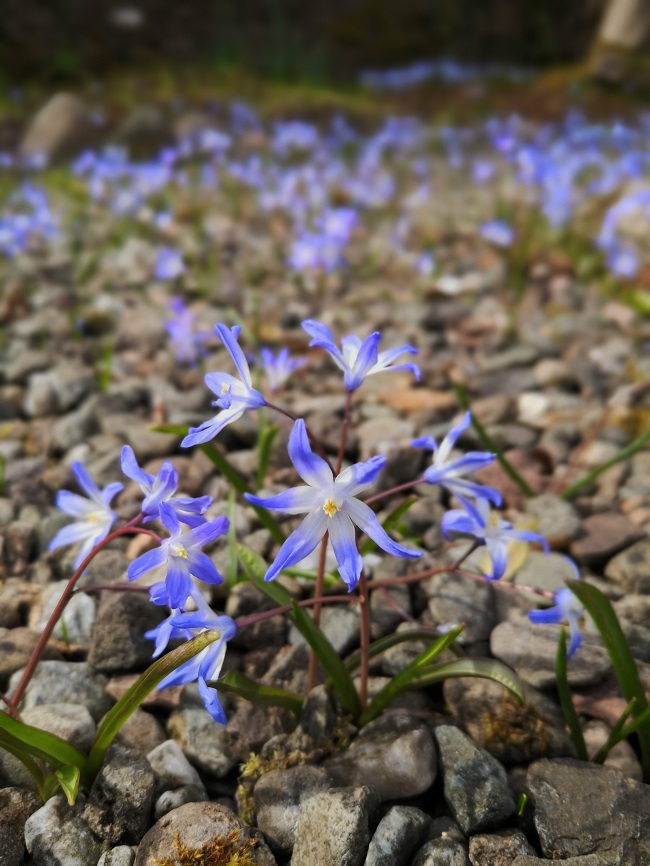
Chionodoxa, Spring’s little gem. Image: Kathryn Hawkins
Hello again everyone. I hope you are keeping well. The weather has turned fine these past few days since my last post and it has been a joy to be able to escape into the garden. Whilst the world is in shut-down, Mother Nature is carrying on as usual.
This very week, 16 years ago, I moved to Scotland and took over a much neglected garden. There was not much in flower back in April 2004, but by the following spring, with a little TLC, the first Chionodoxa magically appeared (I didn’t plant them) and have been coming up each spring ever since. They love the sunny flowerbeds and paths and are poking through everywhere at the moment. In contrast, their relation, Scilla, prefer the cooler, damper, shadier part of the garden. In the low light, their bluish-lilac flowers seem to glow with a luminous quality.
In the shade of a tree, Scilla flowers blooming. Images: Kathryn Hawkins
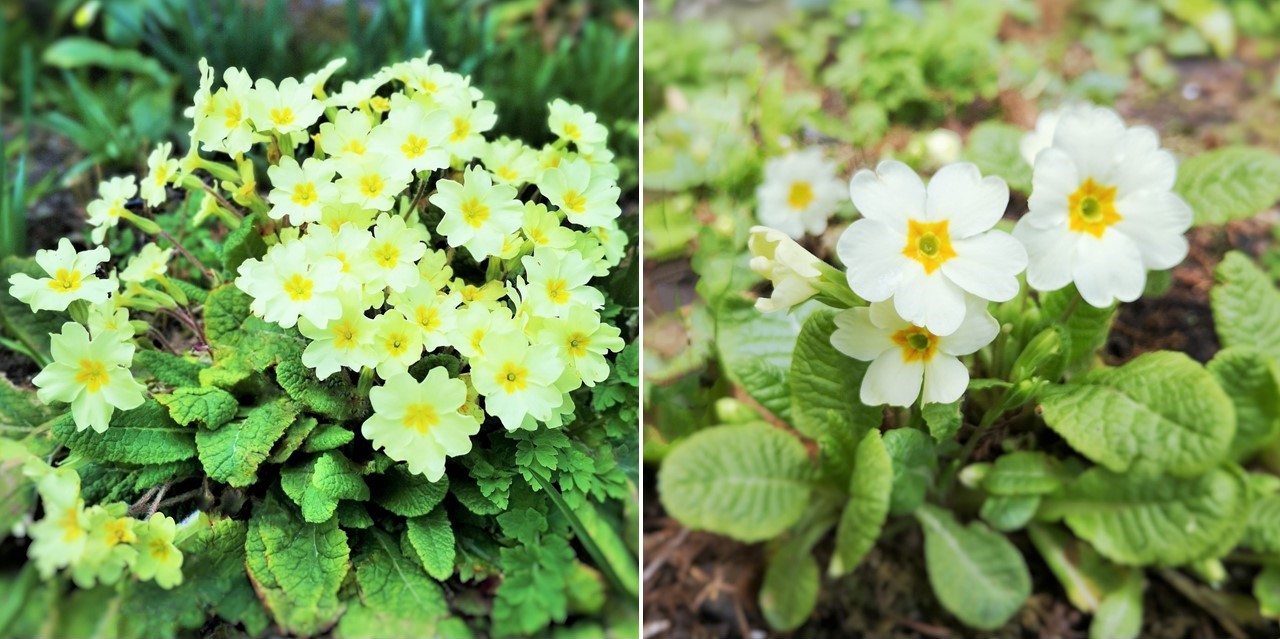
Another shade lover, is the primrose. There are 2 varieties in the garden at the moment. The bushy yellow one flowers just for spring whilst the paler variety is in bloom and and off for several months of the year. There are several primrose clumps now; they seed themselves and multiply every year, and really do brighten up a dark corner.
Scottish primroses. Images: Kathryn Hawkins
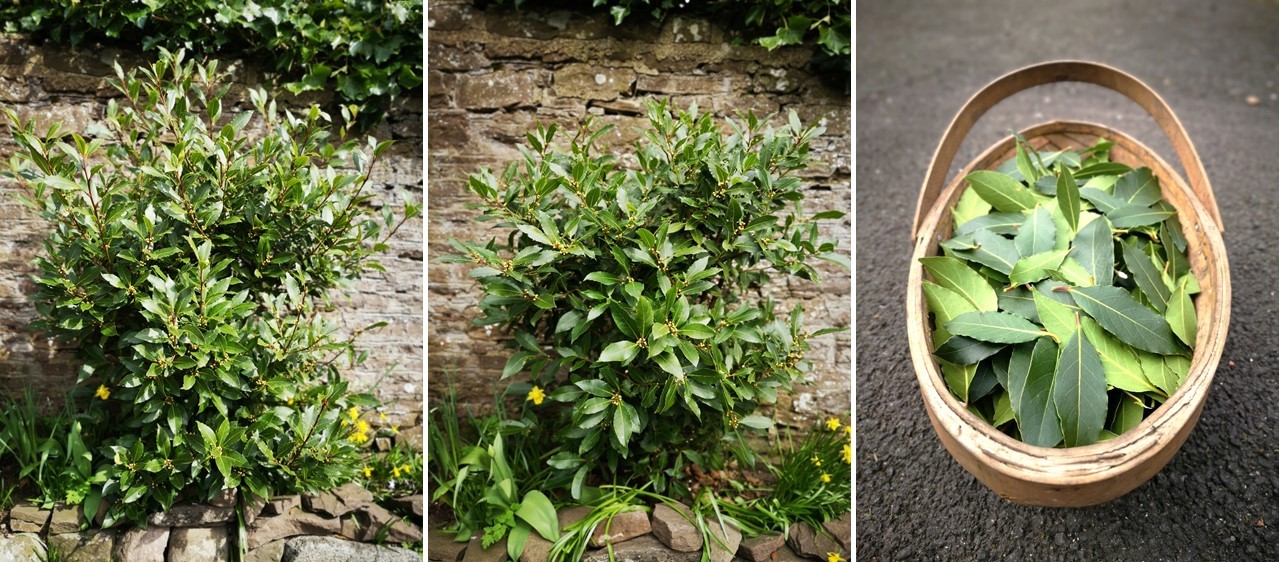
There were a few tasks to get on with at the weekend. One of which was to prune the bay tree-bush which has got a bit wild. I ended up with a huge trug full of bay leaves – they will keep me going for a very long time!
Springtime bay pruning. Images: Kathryn Hawkins
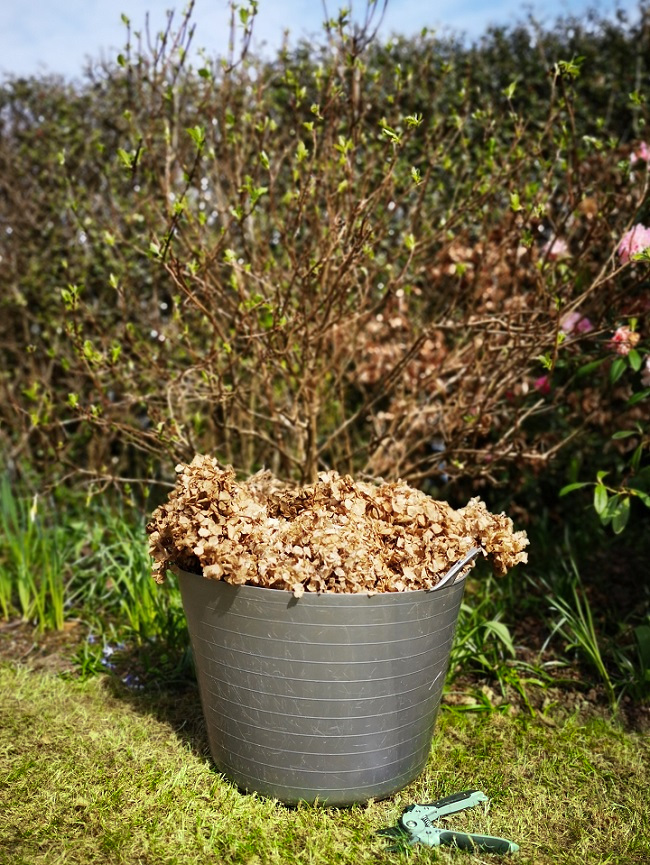
One of the first tasks I can remember tackling in the garden that first spring, was to dead-head the Hydrangeas. The papery flower heads act as a natural frost protector for the buds and leaves forming on the stem below. This is one of my most enjoyable annual tasks in the garden mainly because it doesn’t involve too much bending 🙂
Bucket of dry Hydrangea flowers. Image: Kathryn Hawkins
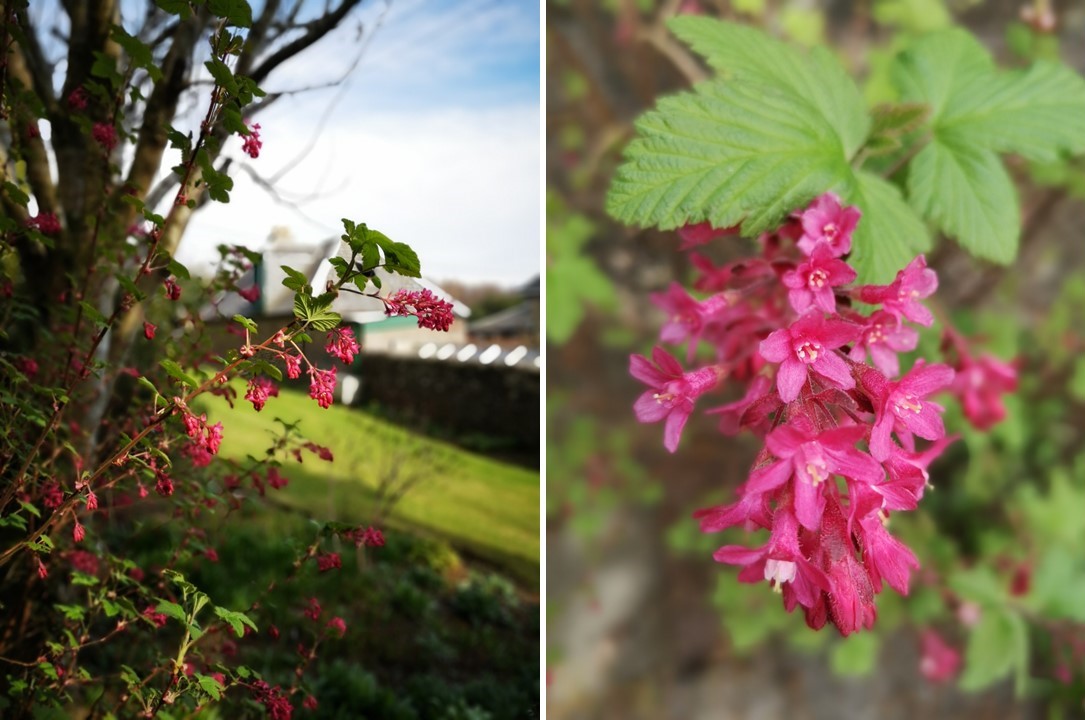
My final image this week is of a Ribes Sanguineum or the flowering currant bush. It has been looking a bit sad for the past couple of years, but after a rigorous pruning last Autumn, it has come back to full flower and is looking much healthier. I love the blackcurrant aroma that the flowers have.
Flowering currant bush. Images: Kathryn Hawkins
That’s me for another week or so. Enjoy the outdoors if you are able, and keep safe. Until next time, take care.
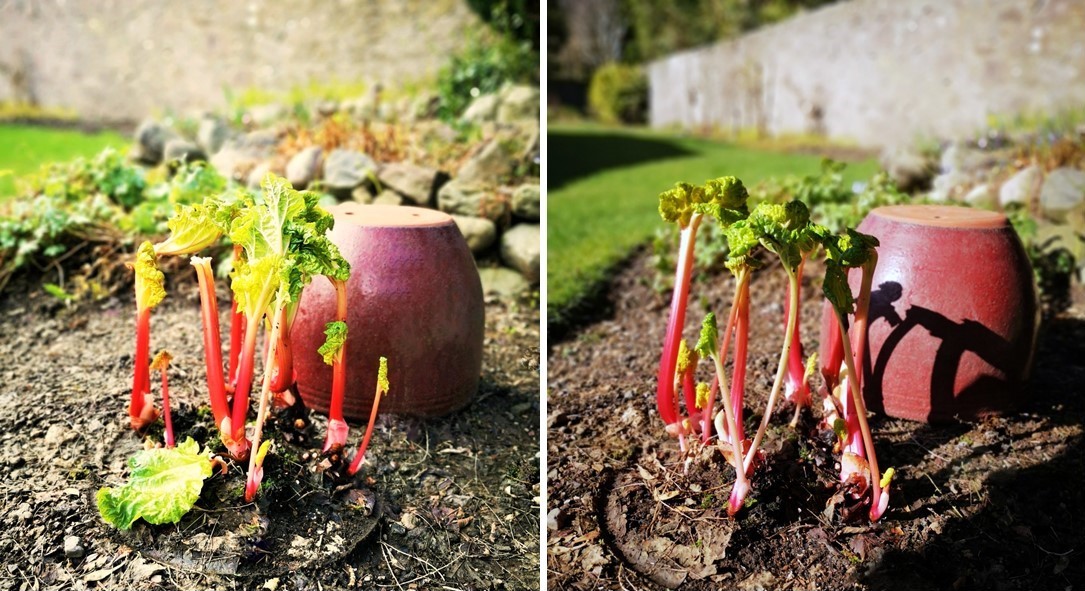
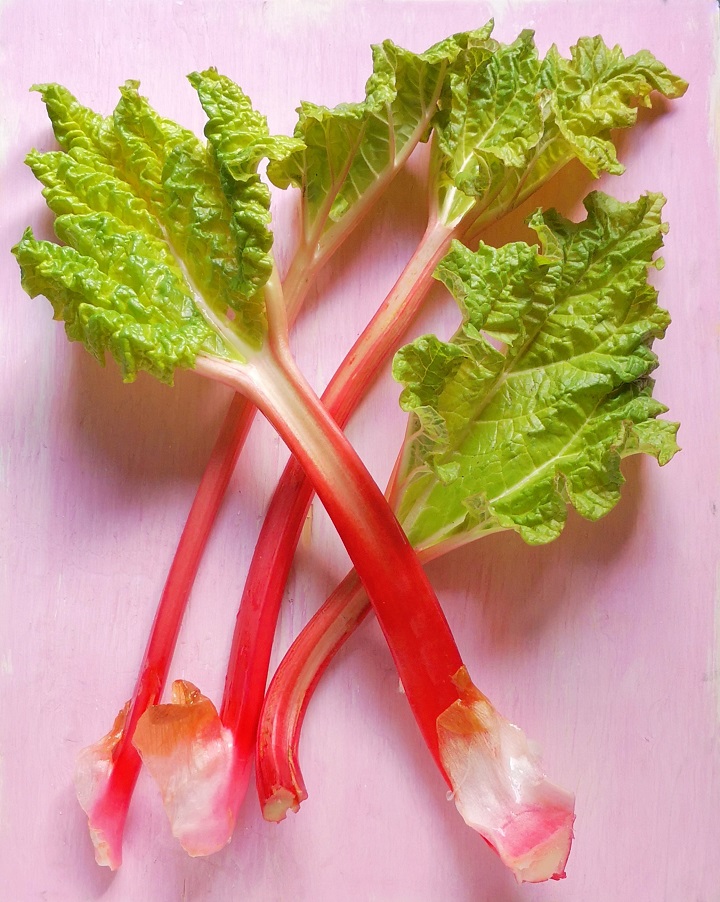
This year’s first and second stems of spring rhubarb. Images: Kathryn Hawkins
Hello everyone. I hope you are all keeping safe and well. Over the past couple of weeks, with the growing limitations on social interaction and movement, I have felt more grateful than ever before to have my own outside space. Not only are there cheery spring flowers everywhere and the joyful sounds of birds singing, I have been able to pick the first of this year’s home-grown produce.
At the beginning of the month, I had my first taste of this year’s bright pinkish-red, tender stems of forced rhubarb which I covered in early February. The stems weren’t very long because the pot I used wasn’t that tall and it made the stems grow a bit wonky and squat. However, the colour was intensely vibrant and the flavour was fruity and tangy.
My home-grown forced rhubarb. Image: Kathryn Hawkins
With more undeveloped stems peaking through, I re-covered the clump and was able to pick a second harvest a fortnight later. I have left the remaining stems to grow naturally. I have covered up another clump which will (hopefully) yield a few more stems ready for another harvest next month.
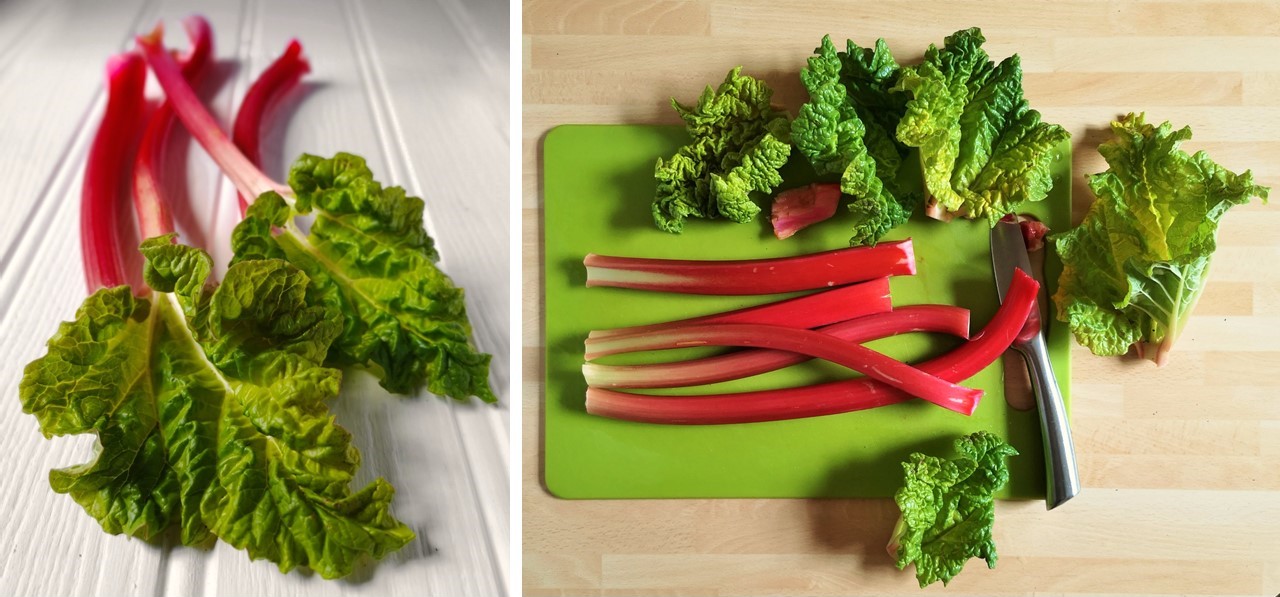
Freshly picked and prepared, forced rhubarb. Images: Kathryn Hawkins
I didn’t do anything fancy with the rhubarb this year. I roasted the first batch with vanilla (recipe below), and the second harvest of stems got poached in the juice of my last blood orange of the season (sob) and some of last summer’s frozen raspberries (recipe below). Both very simple serving suggestions, but utterly delicious.
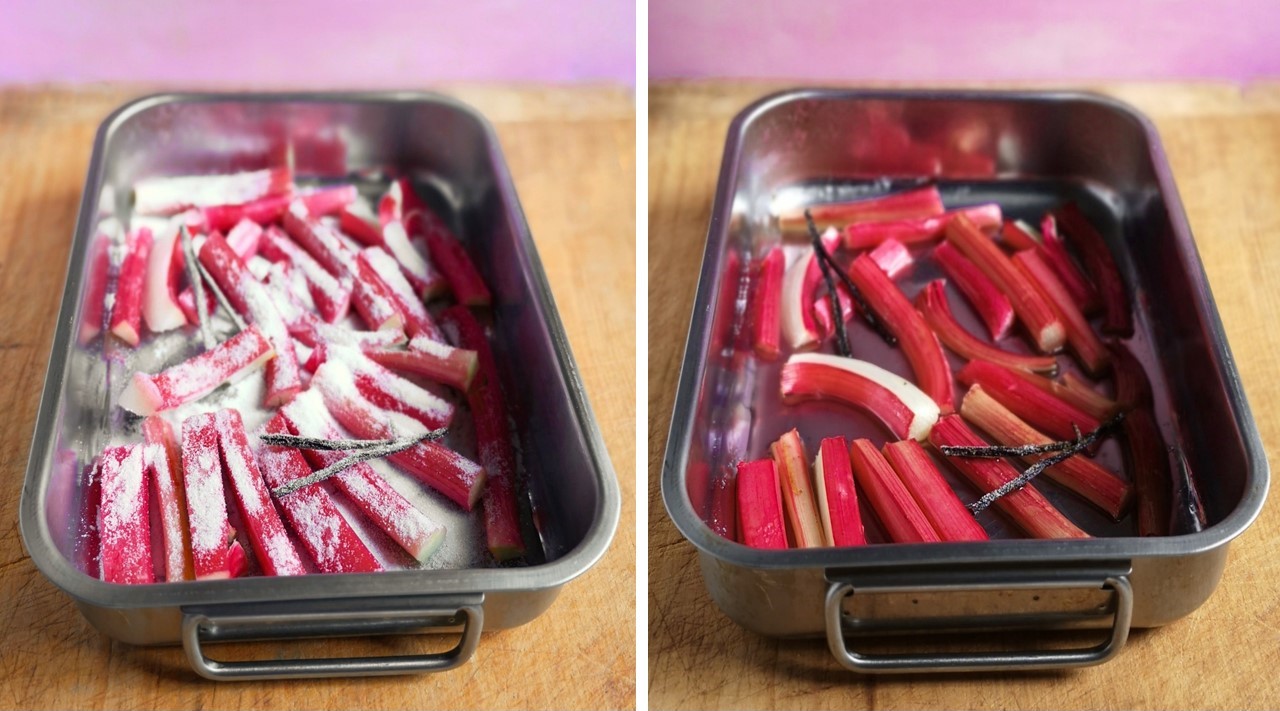
Roast rhubarb with vanilla. Images: Kathryn Hawkins
Roast vanilla rhubarb – I used 200g prepared spring rhubarb stems cut into even thickness pieces, about 8cm long. Put the rhubarb in a small roasting tin and sprinkle with 2 tbsp vanilla sugar and 3 tbsp water. Add a split vanilla pod and bake at 200°C, 180°C fan oven, gas 6 for 15-20 minutes until just tender. Serve warm or cold.
Spring rhubarb with orange and raspberries. Images: Kathryn Hawkins
Rhubarb with raspberries and orange: I used 250g prepared rhubarb stems, cut into 5cm lengths. Put the rhubarb in a frying pan with 300g frozen raspberries and the juice and rind of 1 orange. Sprinkle over 5 tbsp granulated sugar. Heat gently until steaming, then put the lid on the pan and simmer for about 15 minutes until just tender and cooked through. Stand for 10 minutes before serving hot, or allow to cool completely. Discard the orange peel before serving.
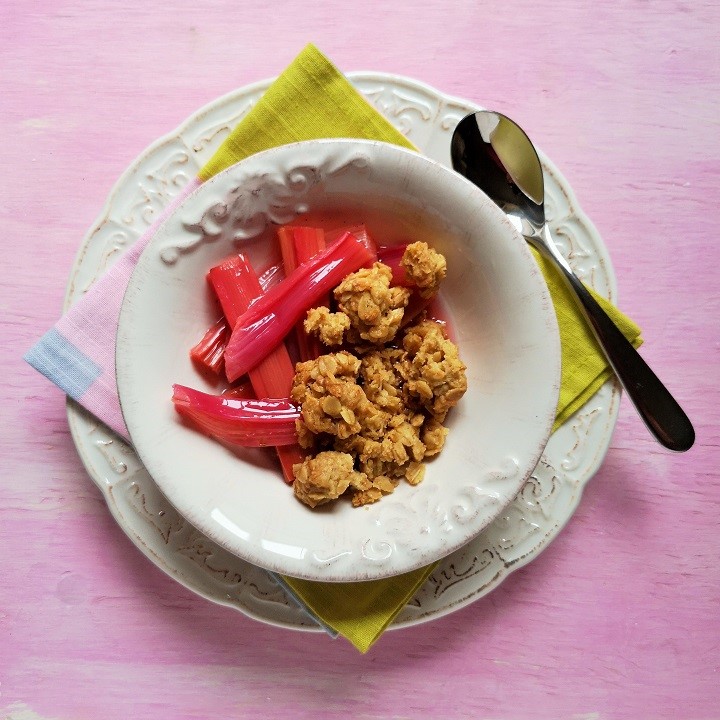
I do enjoy eating rhubarb with a crumble topping but I find that spring rhubarb overcooks under a a crust of any kind. I came up with an idea which means you can cook a crumble topping separately and sprinkle it over fruit just before serving.
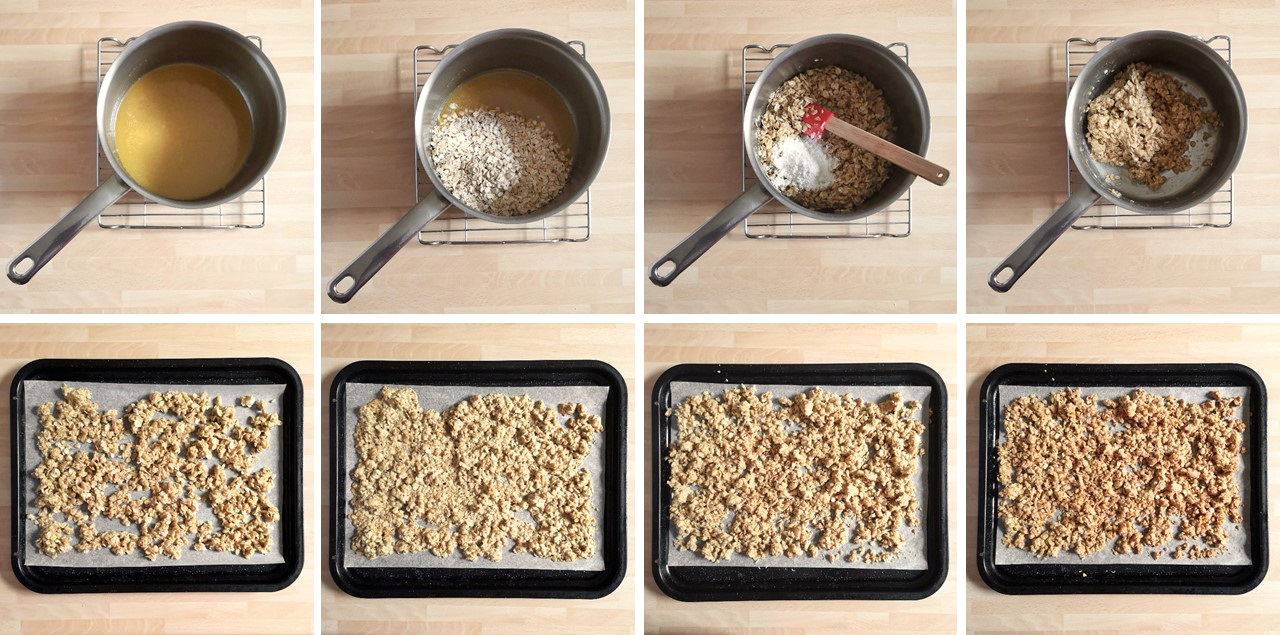
Oaty crumble topping (serves 4): in a saucepan, melt 110g dairy-free margarine with 25g golden syrup and 25g Demerara sugar. Remove from the heat and stir in 150g gluten-free jumbo oats and 50g gluten-free plain flour blend. Spread out thinly over a lined baking tray and bake at 190°C, 170°C fan oven, gas 5 for about 15 minutes until merged together. Break up the mixture into clusters and return to the oven to bake for a further 7-8 minutes until golden and crisp. Serve hot or cold. Once cold, the mixture will keep in an air-tight container for several days, and it freezes well too.
Roast rhubarb with oaty crumble. Image: Kathryn Hawkins
That’s me for this month. I look forward to posting in April. Until then, keep well and stay safe 🙂
A peaceful place for wild garlic foraging, River Lednock, Perthshire. Image: Kathryn Hawkins
Hello everyone. What a weird and surreal spring this is turning out to be. In many ways life goes on as usual: the spring flowers are blossoming; the birds are chirping and calling to each other; the days are drawing out, and the weather is brightening up. Yet, we humans are having to behave very differently.
I hope you are all getting along ok. It seems we’re affected by the spread of the virus throughout the world, and we’re all having to do our bit to keep it at bay. In the UK, we have been asked to keep our distance from each other, to stay at home as much as possible, and to only go out for exercise and essential shopping. At the weekend, I was able to find a quiet spot and combine a spot of foraging along with a walk along a nearby riverbank and woodland.
River bank lush with wild garlic. Image: Kathryn Hawkins
The air was warm and heavy with the scent of the garlic leaves. It was a joy to be out of doors and away from the troubles of the world, hearing only the water bubbling and the birds singing. I picked a few leaves here and there from the river bank. The garlic seems to be very abundant this year.
If you are able to go foraging, always forage responsibly by taking one or two leaves from a plant rather than stripping a whole one bare. And, wash the leaves thoroughly before cooking.
Freshly picked and washed my harvest of wild garlic leaves. Image: Kathryn Hawkins
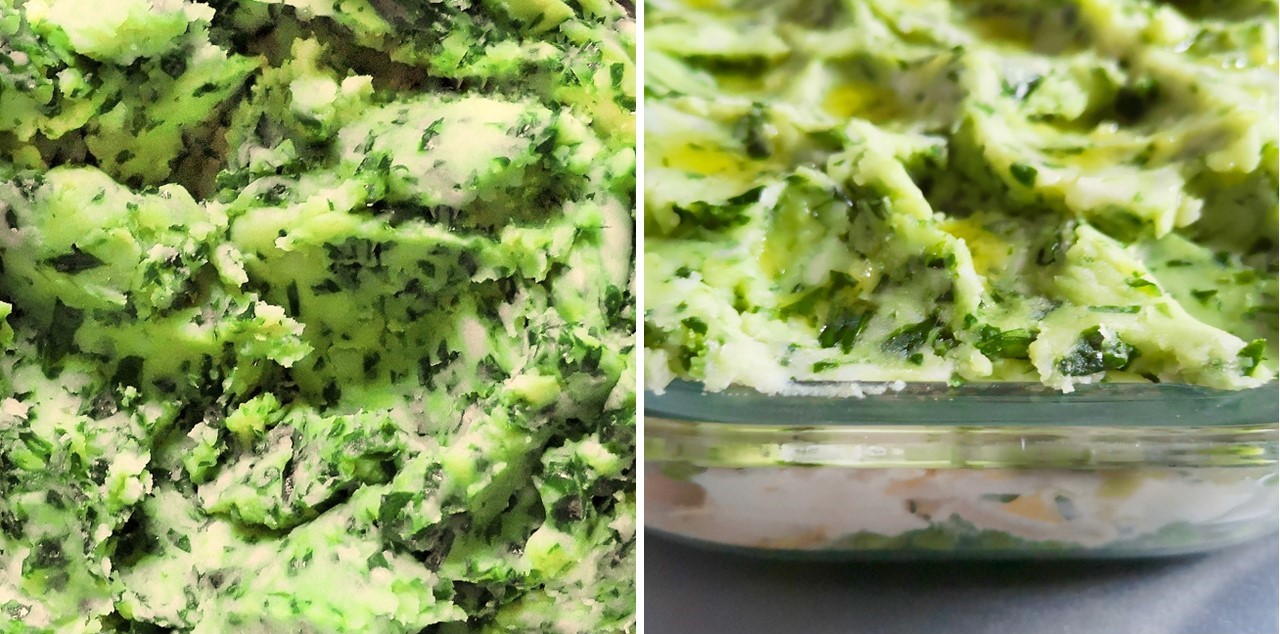
Back at home, I used some of the leaves to make a version of my favourite mash recipe using seasoned 500g mashed potato, 50g chopped wild garlic leaves and 50ml olive oil. I spread this on top of a creamy vegetable sauce and drizzled with more olive oil before baking.
Wild garlic and olive oil mash. Image: Kathryn Hawkins
The next day, I cooked up more leaves with spring greens and leeks – deliciously tasty with pasta or over rice. A version of this recipe can be found here.
Wild garlic, leeks and spring greens. Image: Kathryn Hawkins
This time I used 100g shredded cabbage with 75g each wild garlic and leek. Season and stir fry in 20ml olive oil for 2-3 minutes, then lower the heat, put the lid on and cook gently for about 10 minutes until wilted down. Simple but delicious.
Wild garlic and spring greens. Image: Kathryn Hawkins
I wish you well over the next few days. Until next time, keep safe, and enjoy spring as best you can 🙂
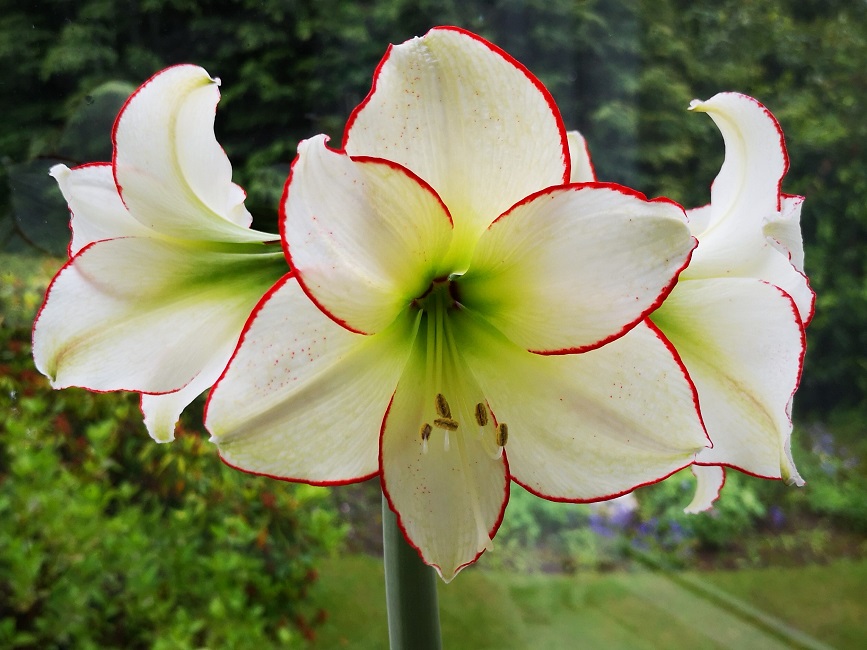
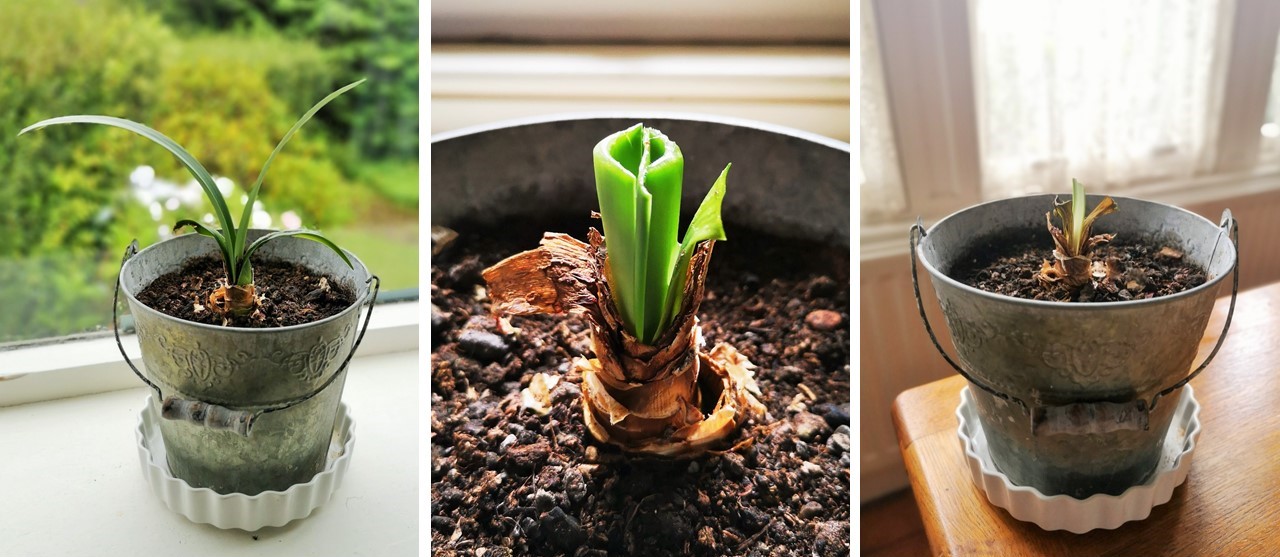
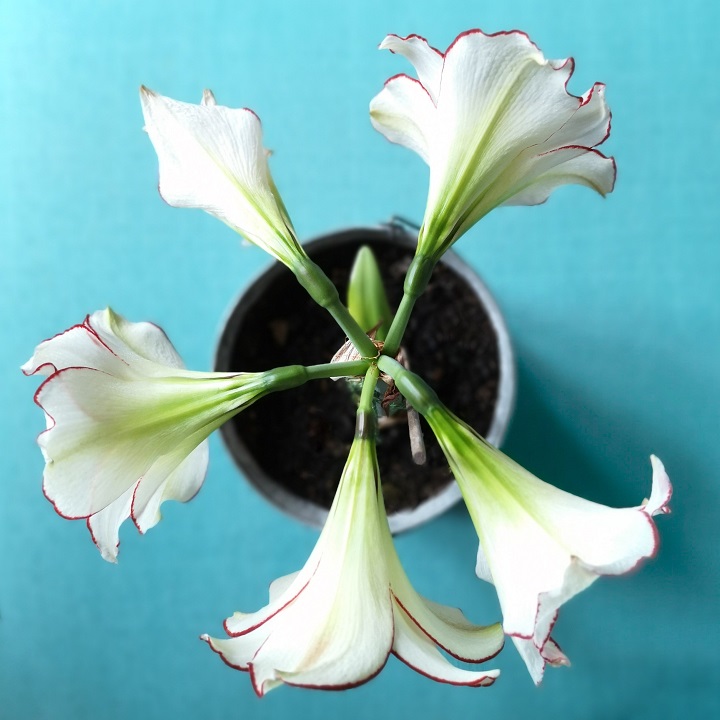
Amaryllis Picotee in spring last year. Image: Kathryn Hawkins
I’ve been compiling this week’s post for a while, and I have been in a bit of a dilemma as to the best time to go public with it.
Often given as Christmas presents, Hippeastrum hybrida, commonly known as Amaryllis, will begin to grow soon into the new year if they have sufficient warmth and light, but where I am in the north of the UK, I find it a challenge to get the bulbs started much before late spring. I do love their big voluptuous blooms, so flamboyant for something that grows in such a confined space. I’ve purchased many a variety over the years but it’s only recently that I have realised that you can keep the bulbs from one year to the next, and have them flower again. So while I wait for mine to start shooting, I thought I would post this week for the benefit of anyone who has been enjoying their Amaryllis already this year and who wants to do so again.
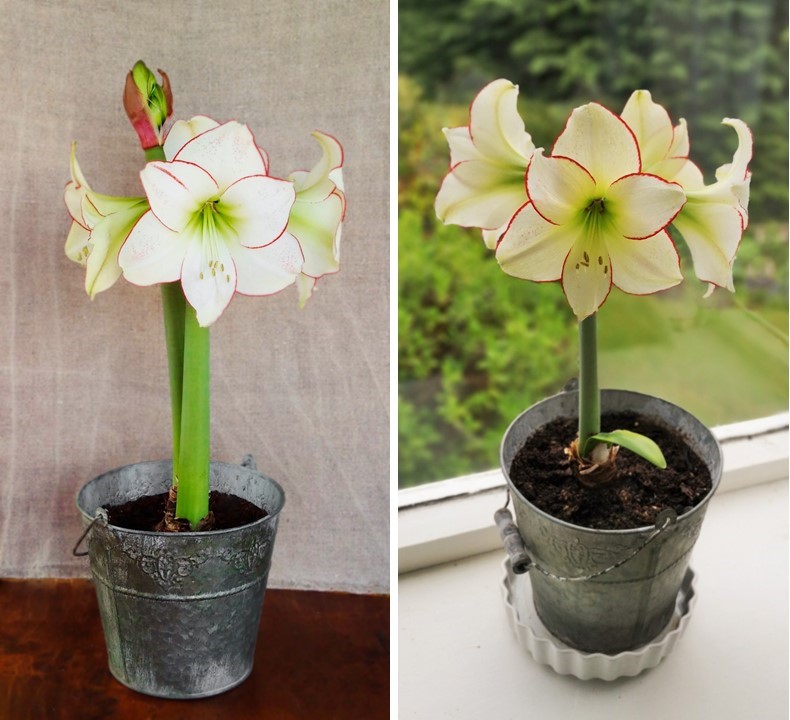
Amaryllis first and second time around. Images: Kathryn Hawkins
When I first planted the Amaryllis bulb back in 2017, the following spring, I was delighted to see 2 strong stems of flowers forming, I ended up with 4 blooms on each stem and they lasted in succession for several weeks. Once the flower buds form, move the plant to a cooler spot, still in the light as too much warmth and mean that the flowers will go over quickly.
When the floral show is over. Images: Kathryn Hawkins
When the final flower has faded, cut off the stalk but leave the plant in the light and warmth, and continue to water and feed as usual. You need to encourage the plant to grow foliage so that it can photosynthesize and build itself up for next year. These plants are best left indoors; they are not very robust and can’t tolerate variable climates.
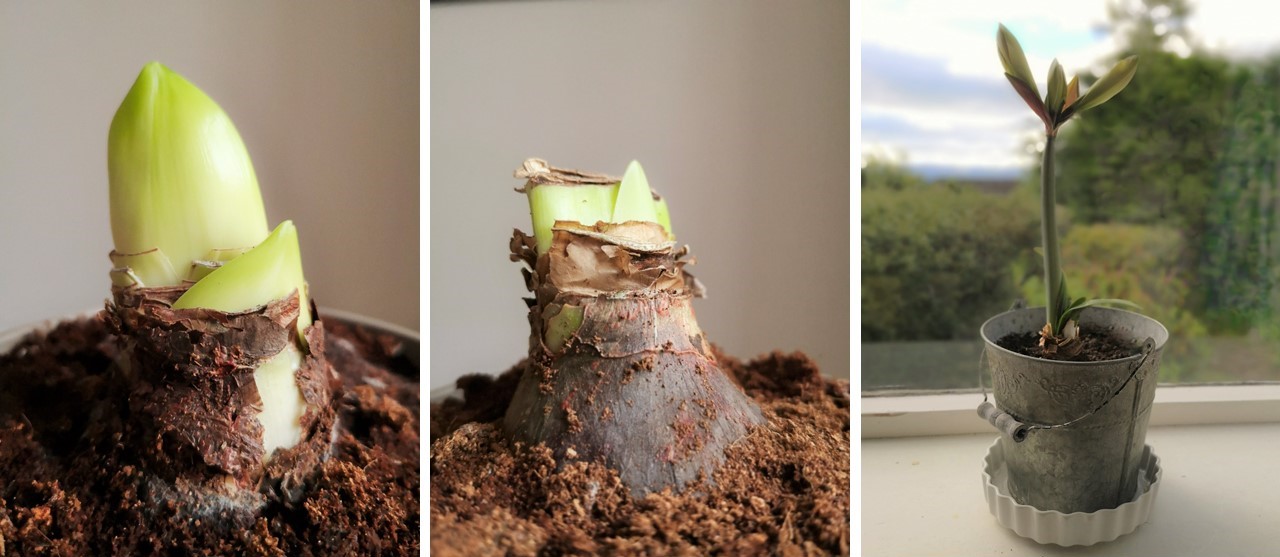
Green foliage and the dormant season. Images: Kathryn Hawkins
In late summer, you will notice that the foliage will begin to die back. Stop watering at this point and allow the foliage to dry and shrivel. Store the bulb, still in its pot, in a cool place, unwatered, so that it can become dormant over the Autumn and into winter. Leave it like this for at least 6 weeks, and don’t let the temperature get below 10°C.
New shoots. Images: Kathryn Hawkins
As the coolness of winter approaches, bring the bulb back into the warm and start watering and feeding again, and soon the shoots will appear. Don’t over-water otherwise the bulb will rot, but make sure the soil doesn’t dry out completely. In the second year, my Amaryllis produced one flower stem with five blooms attached.
After the second year of flowering, you might want to re-pot the bulb when the flowers have died down. They don’t like too much space, so only upsize if really necessary and then only transfer to a pot one size up from the original. Take care with the roots, they don’t like root disturbance either.
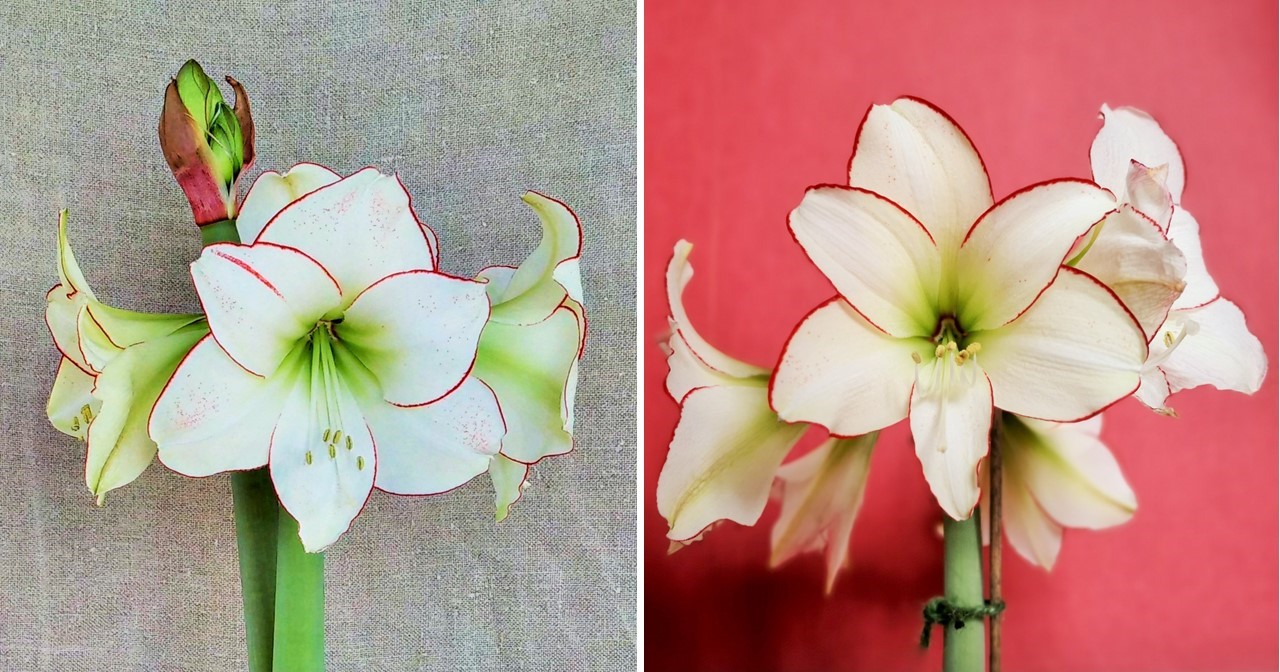
A stunning floral display, 2 years running, Images: Kathryn Hawkins
It looks like my bulb is a long way from doing anything at the moment. The weather is too cold and dull for it to get it started. But I am looking forward to it’s splendid display in a couple of months time. Until my next post, I wish you well and hope you have a good few days ahead.
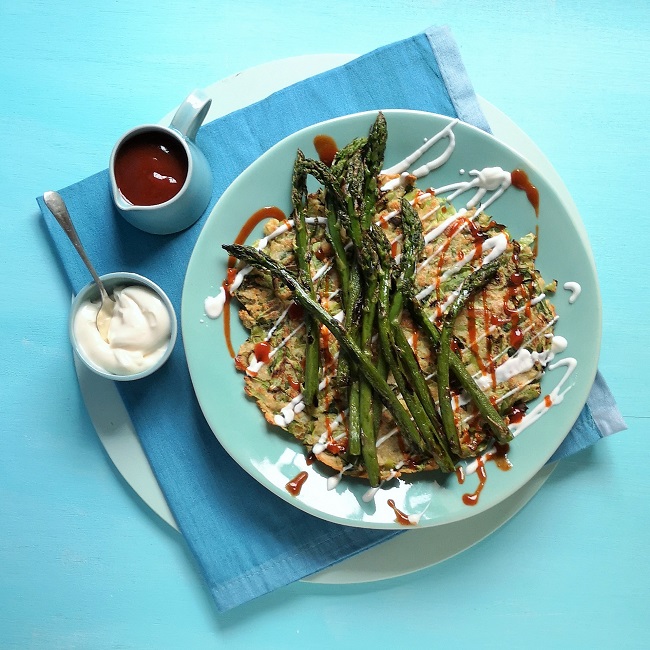
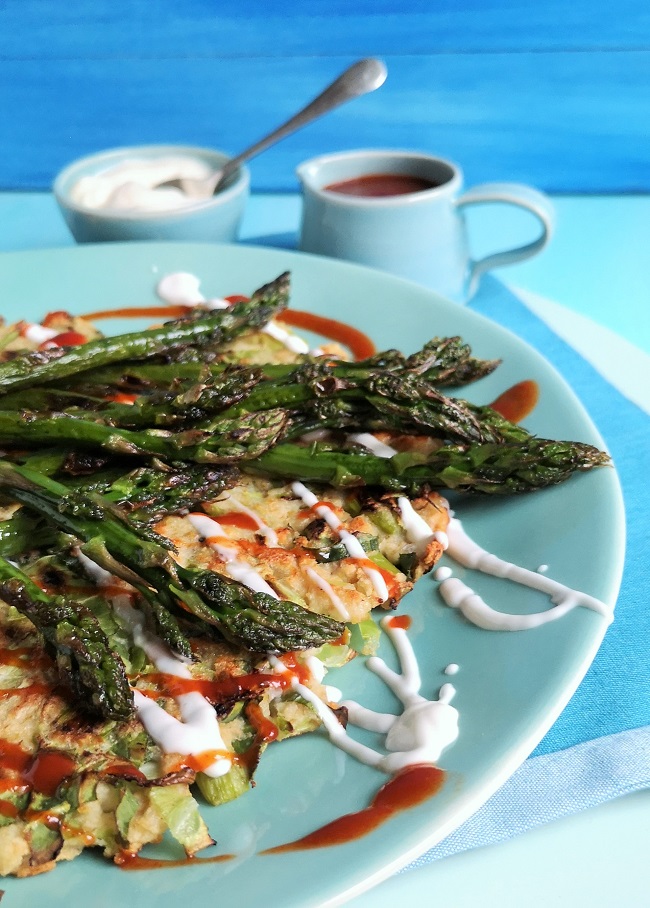
Spring vegetable pancake with new season asparagus. Image: Kathryn Hawkins
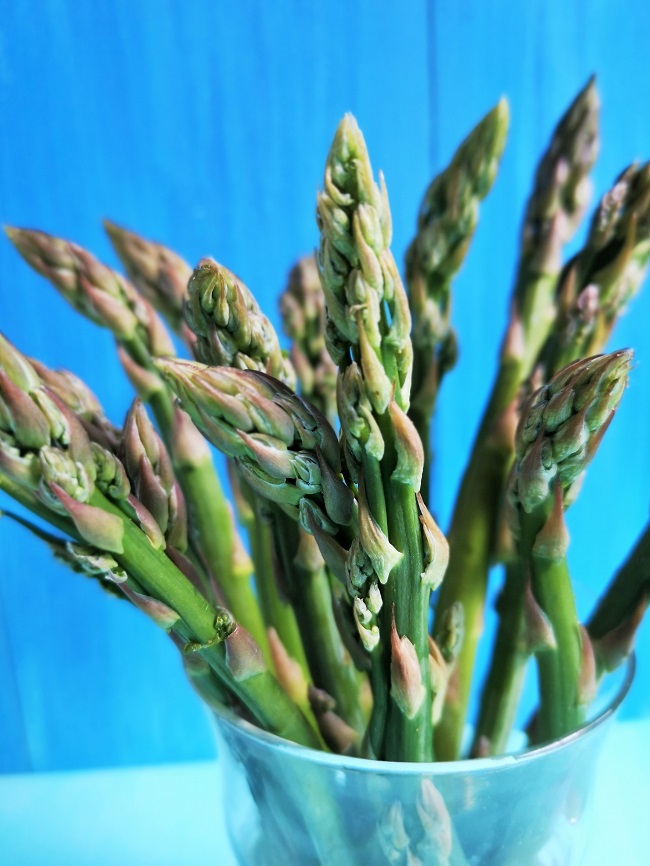
If you’ve read my previous posts at this time of the year, you’ll know that spring is my favourite season. Not just because I love the flowers and the feeling that everything is coming to life, but my favourite vegetable is available right now for a very short period of time, British asparagus.
Fresh British asparagus. Image: Kathryn Hawkins
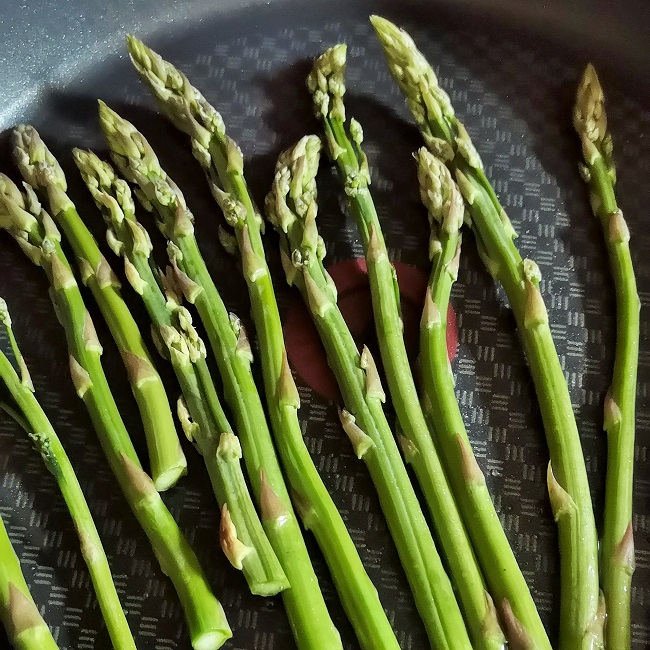
I rarely do very much with asparagus. I like to savour the tender green stems just as they are. Either a quick flash in a hot frying pan or a blast in a hot oven, to give them a subtle smokiness, and that’s all the extra flavour I need.
Fresh asparagus in a hot pan. Image: Kathryn Hawkins
This week’s recipe is based on a Japanese dish called Okonomiyaki which caught my eye recently. Originally made with wheat flour and eggs, my version of the pancake is gluten-free and egg-free. There’s a bit of vegetable preparation, but once that’s out of the way, everything else is very straightforward. The pancake makes a lovely lunch or light supper, and is the perfect base for a topping of freshly cooked asparagus.
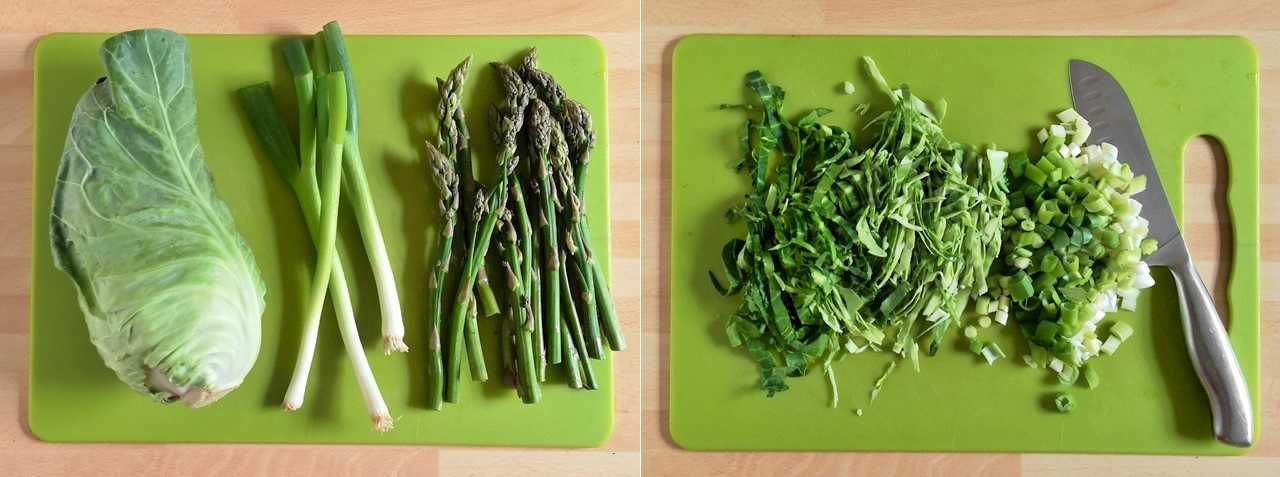
Spring-vegetables for pancake making. Images: Kathryn Hawkins
If you don’t want the hassle of a cooked topping, try sliced avocado and baby spinach or a pile of fresh pea shoots and wild rocket for a salad topping instead. If you have the inclination and the extra ingredients, I recommend making the barbecue dressing that accompanies the pancake. Utterly delicious, simple to make, and far tastier than any barbecue sauce I’ve ever been able to buy. A great finishing touch to any grilled or barbecued food.
75g soft-leaved cabbage, such as Sweet-heart or Hispi, shredded
3 spring onions, trimmed and chopped
2 tbsp. vegetable oil
150g thin fresh asparagus stems, trimmed
Vegan mayonnaise to serve
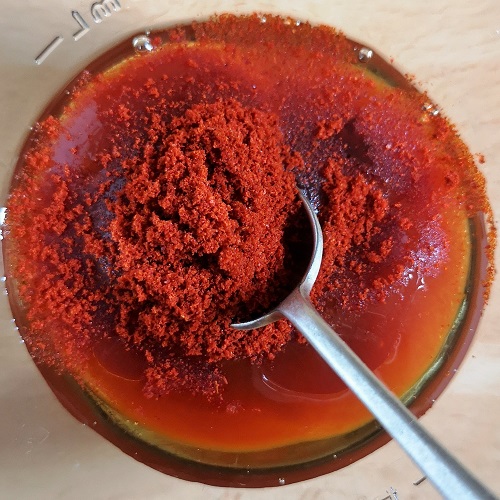
For the barbecue dressing:
1 tsp maple syrup
2 tbsp. tomato ketchup
1 tsp sesame oil
1 tsp gluten-free light soy sauce
½ tsp smoked paprika
Put the flax seeds in a coffee grinder or small food processor and blend until finely ground. Transfer to a bowl and stir in 6 tbsp. cold water. Leave to soak for 5 minutes by which time the mixture will thicken.
Sift the rice flour on top and mix together with the stock to make a smooth batter.
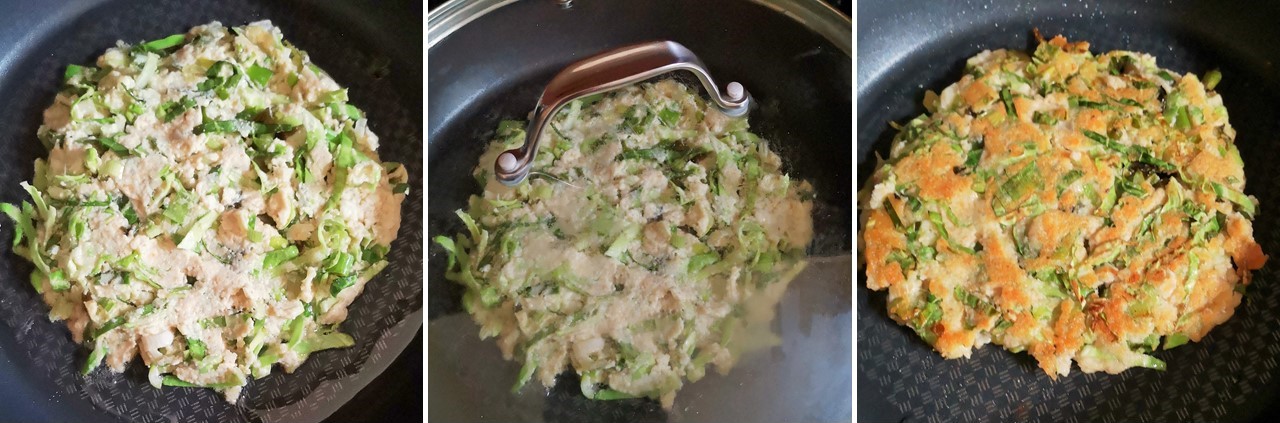
Making the pancake batter. Images: Kathryn Hawkins
Add the cabbage, spring onion and breadcrumbs and mix everything together to make a thick, stiff batter – add a little water if the mixture is very dry, but this is not a pourable batter, it is more like a firm cake mixture.
Heat 2 teaspoons of oil in a frying pan with a lid and add half the batter. Press the mixture to form a thick round approx. 16cm diameter. Fry over a medium heat with the lid on for 5 minutes. Carefully flip over, and cook on the other side, covered with the lid, for another 5 minutes. Drain and keep warm, whilst you cook the remaining mixture in the same way.
Cooking spring vegetable pancake. Images: Kathryn Hawkins
Once the pancakes are cooked, heat the remaining oil in the frying pan until hot and quickly cook the asparagus, turning, for 3-4 minutes until just wilted. Drain and keep warm.
To serve, mix all the dressing ingredients together. Slip the pancakes on to warm serving plates and drizzle with mayonnaise and the barbecue dressing. Top with asparagus and serve immediately.
Asparagus-topped spring vegetable pancake. Image: Kathryn Hawkins
Until next week, I’ll leave you with another image of my favourite vegetable. Have a good week and I look forward to seeing you next time 🙂
Early May British asparagus. Image: Kathryn Hawkins
I’ve been back in the kitchen this week, making something deliciously sweet and impressive for the Easter holidays. I’ve come up with a dessert that is very easy to make, inspired by the flavours of Italy, and is everything you want to round off a celebratory Easter meal (but with no chocolate in sight – gasp, shock, horror!).
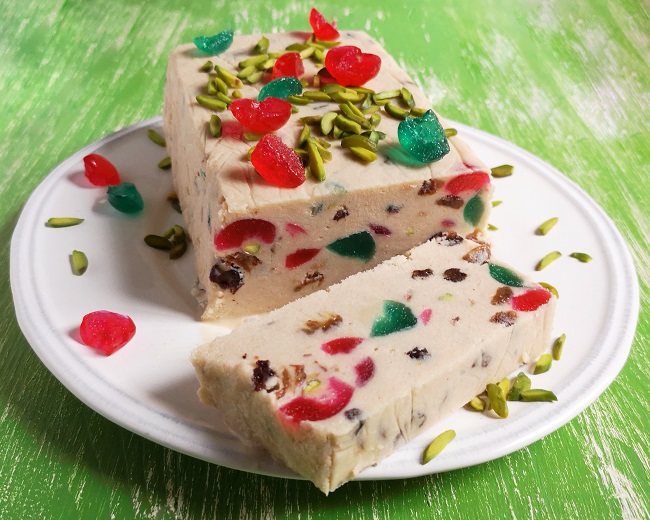
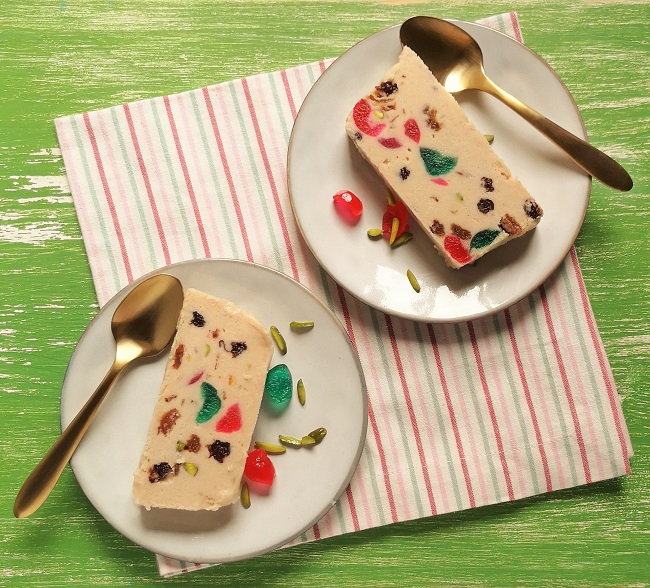
Iced tutti frutti loaf. Image: Kathryn Hawkins
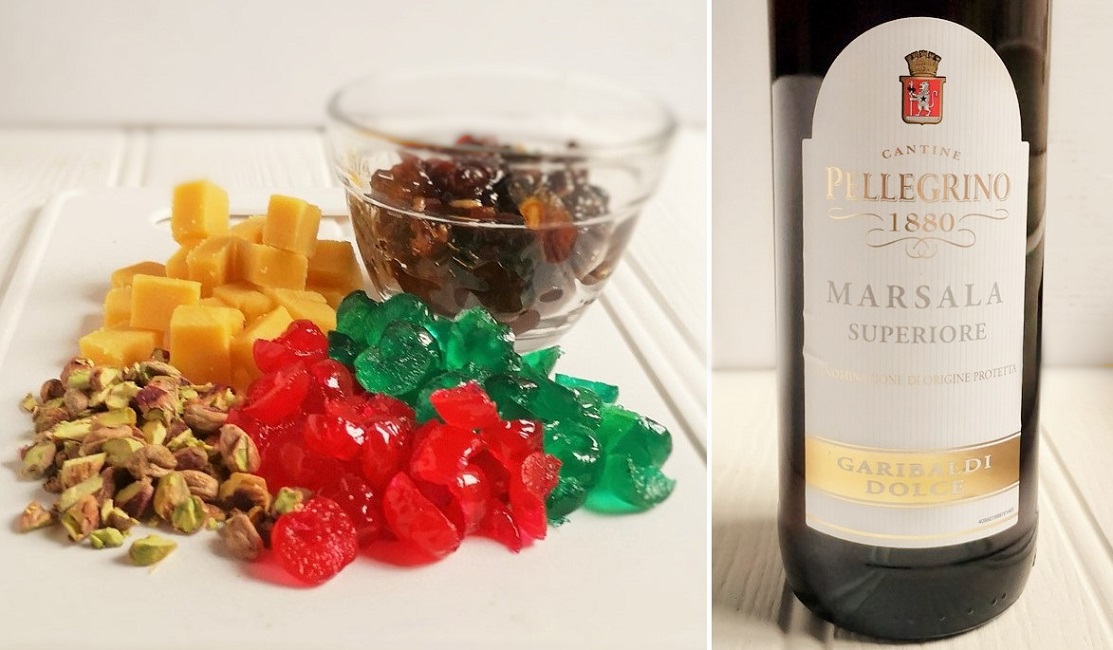
You can add your own choice of chopped dried or candied fruit and nuts – it’s a great recipe to use up the bits and pieces you have leftover (and you could even add chunks of chocolate if you really want to!). Flavoured with marzipan, mincemeat and Marsala wine, it’s a dessert that would also be right at home on the Christmas table as well.
115g golden marzipan (use plain if you prefer but the golden variety adds a little colour to the semifreddo), chopped
600ml dairy-free single “cream” (I use oat cream, but soya cream or canned coconut milk would also work)
150g vegan mincemeat
100g glacé cherries, chopped
25g pistachio nuts, chopped
3 tbsp. Marsala wine (or use sweet sherry or cherry brandy)
Extra cherries and pistachios to decorate
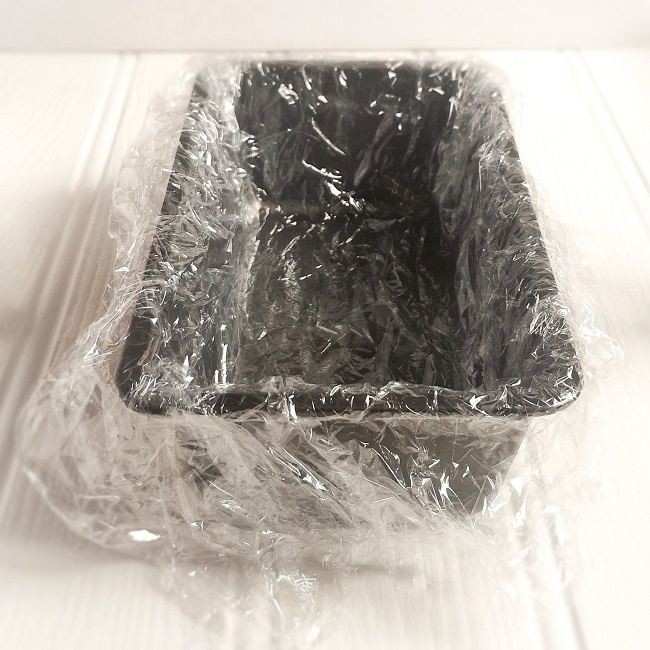
Line a 1kg loaf tin with a double layer of cling film. Put the marzipan in a saucepan and pour over the dairy-free “cream”. Heat gently, stirring, until melted together.
Cling film lined load tin. Image: Kathryn Hawkins
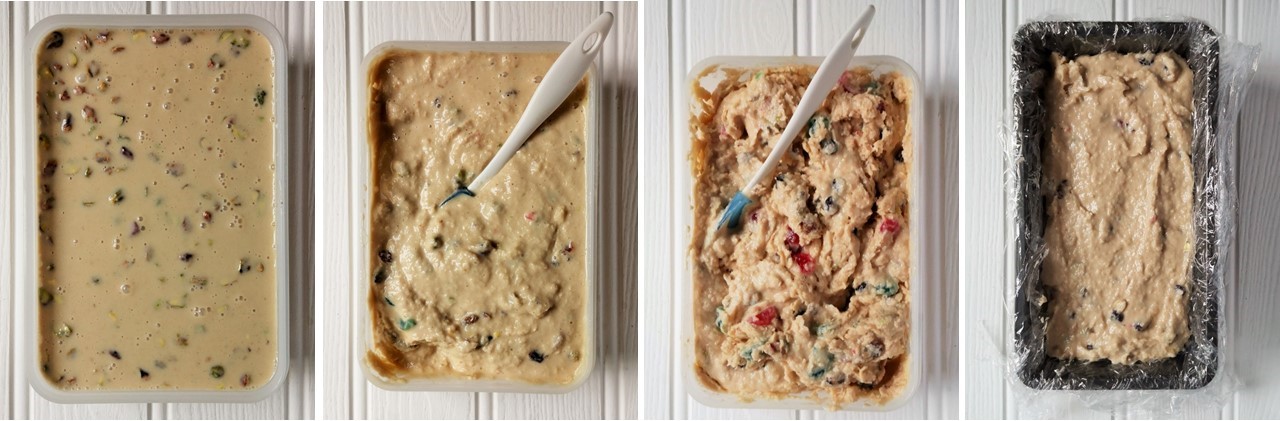
Remove from the heat, mix well then stir in the remaining ingredients and leave to cool completely.
Transfer to a freezer container at least 1.1l capacity, cover and freeze for 2 to 2½ hours until starting to turn slushy. Mix well then freeze for a further hour or so until icy and stiffened. Mix well to distribute all the pieces and pack into the loaf tin. Freeze for at least 2 hours to firm up enough to slice. For prolonged freezing, fold over the cling film and wrap in foil. Keep in the freezer for up to 3 months.
Freezing semifreddo. Images: Kathryn Hawkins
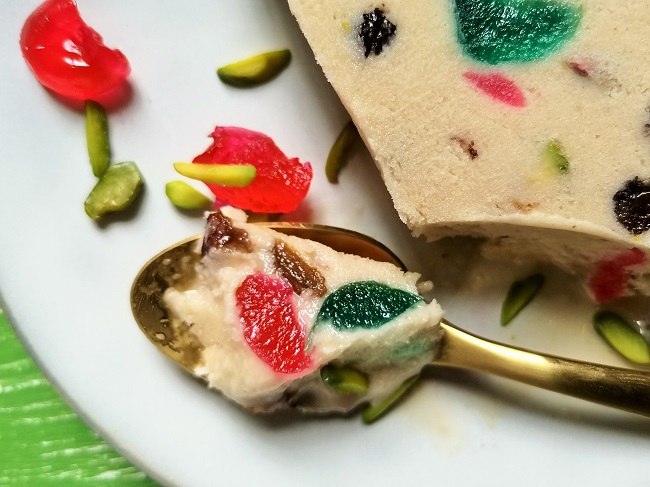
To serve, gently ease the semifreddo from the tin using the cling film. Place on a serving plate and discard the cling film. Scatter with more cherries and pistachios. Slice, serve and enjoy! Happy Easter everyone 🙂
Sliced and ready for eating. Image: Kathryn Hawkins