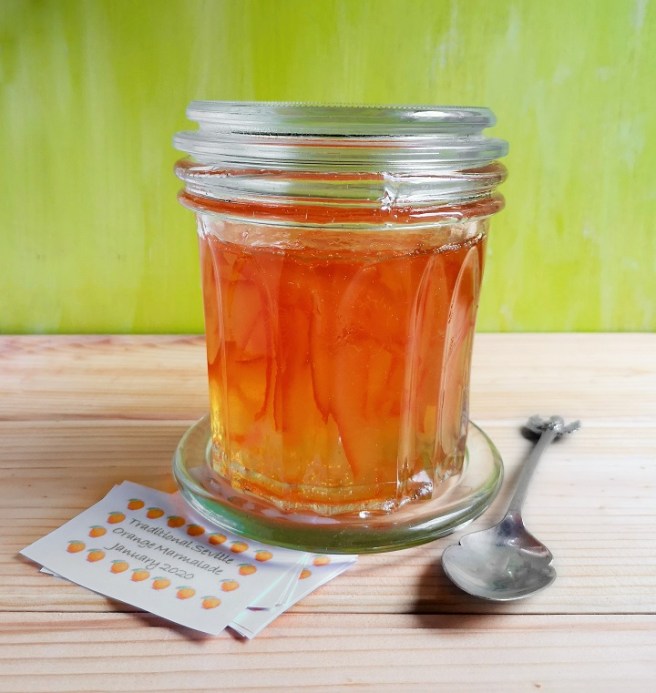
Hello everyone. I have two lighthearted recipes for you this week. One for cake and one for cookies, and if you choose to, you can make either or both 🙂
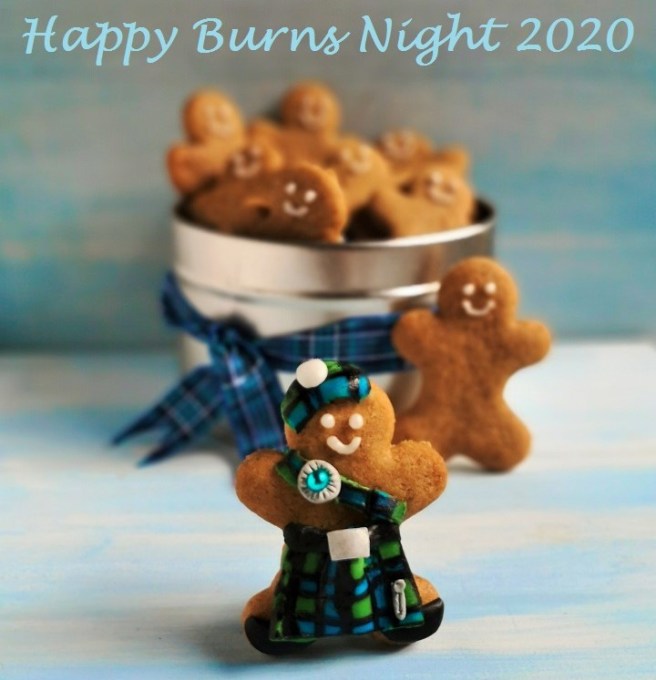
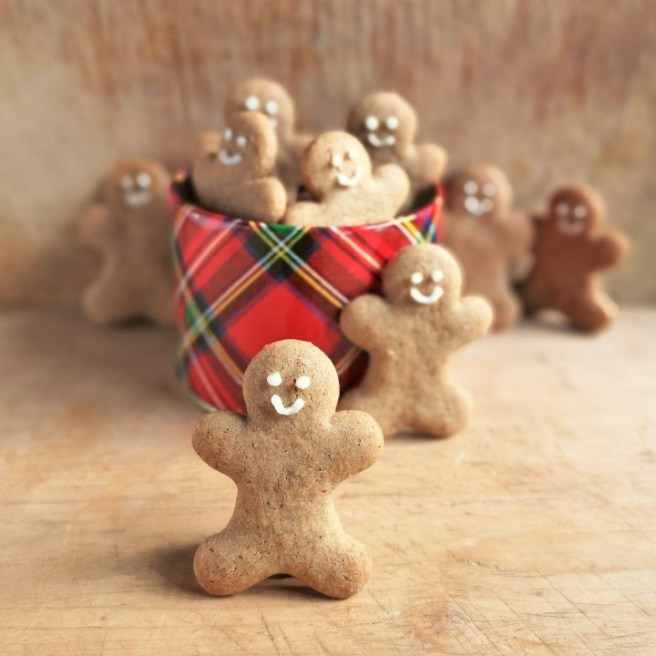
I don’t think there are many people who can resist a gingerbread man cookie. They look so cute for one thing and then there is the sweetness and the mellow spiciness of gingerbread itself. It is a perfect bake for this time of year with its warming and comforting aroma and flavour.
The gingerbread men cookies keep very well in an airtight container for over a week, and also freeze well. The cakes are best eaten within 24 hours, so you may want to ice a few at a time. After 24 hours, I find that the cake dries. The cake batter has a relatively low fat content compared to other cake recipes so the keeping qualities are reduced. No matter, the cakes and the frosting freeze fine too. By the way, the uniced cakes can be served warm as a pudding, just pop in the microwave for a few seconds and voila!
On with the recipes. They are remarkably similar in ingredients and straightforward to make so I hope you enjoy making them 🙂
Gingerbread men cookies
Makes: approx. 25
Ingredients:
- 75g plain gluten-free flour blend (such as Doves’ Farm) + extra for dusting
- ¼ tsp bicarbonate of soda
- 1 tsp ground ginger
- ½ tsp ground mixed spice
- 25g dairy-free margarine
- 40g soft dark brown sugar
- 25g golden or corn syrup
- 1 tbsp white icing for decorating (I make mine simply with 2 tbsp icing sugar and a few drops of water)
- Line 2 baking trays with baking parchment. Sieve the flour, bicarbonate of soda and the spices into a bowl and rub in the margarine with your fingertips until well blended. Stir in the sugar.
- Make a well in the centre and add the syrup, then mix everything together well to make a softish, smooth dough.
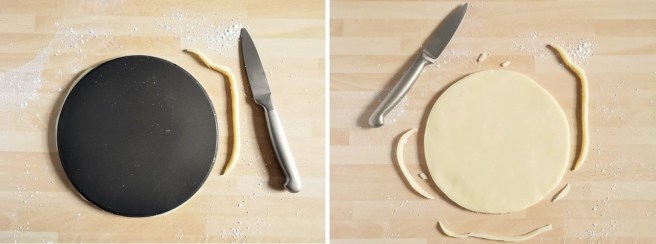
- Lightly dust the work surface with a little more flour and roll out the dough to a thickness of about 3mm. Use a small gingerbread man cutter to cut out shapes, gathering and re-rolling the trimmings as necessary. My cutter is 6cm tall, and I made 25 cookies. Transfer to the baking trays and chill for 30 minutes.
- Preheat the oven to 190°C, 170°C fan oven, gas 5 and bake the cookies for about 10 minutes until firm and lightly golden. Transfer to a wire rack to cool.
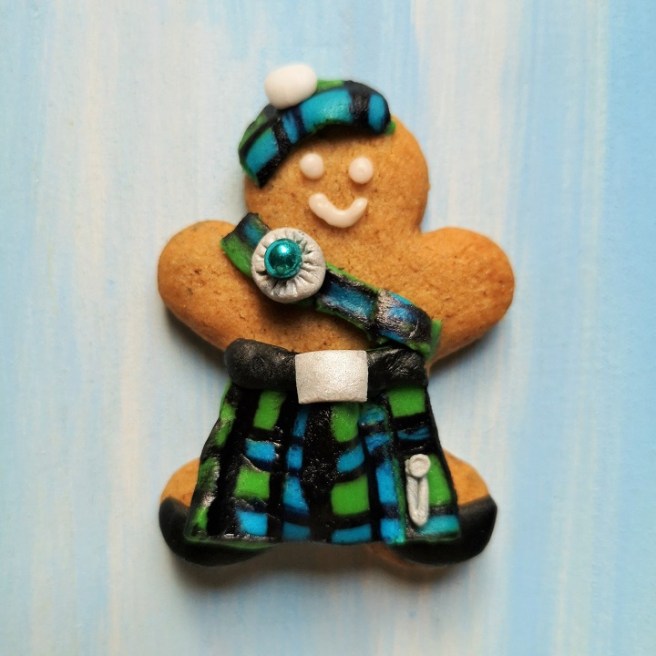
- When cool, put the icing in a piping bag (no nozzle necessary). Snip off a tiny piece from the end and pipe features on each cookie. Leave for a few minutes to dry before storing in an airtight container.
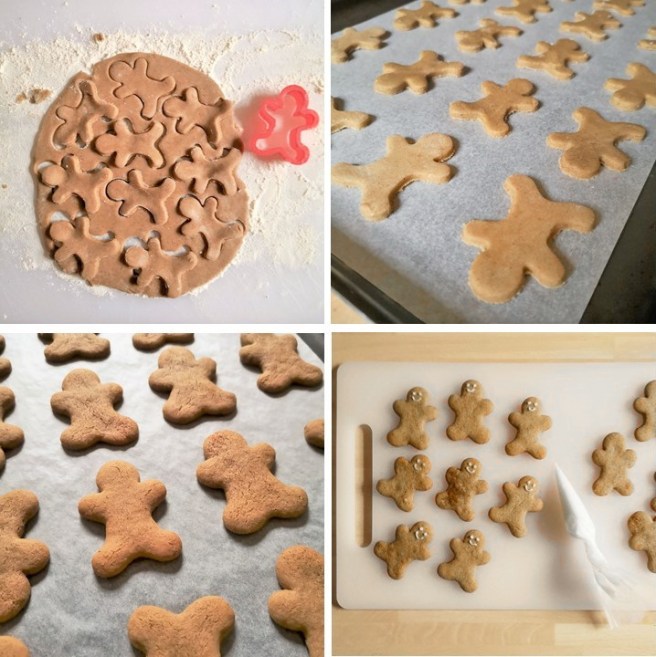
Making, baking and decorating gingerbread men cookies. Images: Kathryn Hawkins
Gingerbread cupcakes
Makes: 12
Ingredients
- 300g plain gluten-free flour blend
- 20g gluten-free baking powder
- 2 tsp ground ginger
- 1 tsp ground mixed spice
- 190g soft dark brown sugar
- 2 pieces stem ginger, finely chopped (optional)
- 75ml vegetable oil
- 225ml plant-based milk (I used oat milk)
Lightly spiced frosting
- 100g dairy-free margarine, softened
- 200g icing sugar
- 2 tsp ground ginger
- ½ tsp ground mixed spice
- 1 tbsp ginger wine or the syrup from stem ginger jar if using (optional)
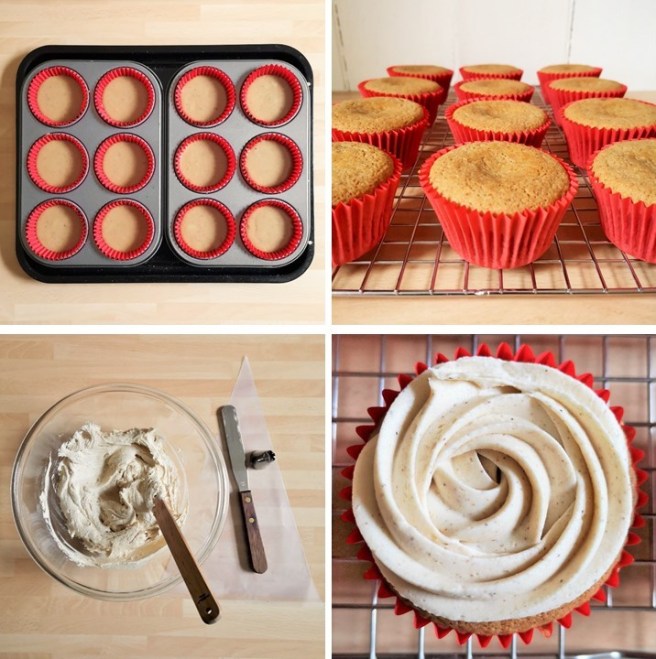
- Preheat the oven to 180°C, 160°C fan oven, gas 4. Line 12 muffin or cupcake tins with paper cases. Sieve the flour, baking powder and spices into a bowl. Add the sugar and stem ginger if using. Mix everything together.
- Make a well in the centre and add the oil and milk. Gradually work the dry ingredients into the liquid and continue mixing until all the ingredients are well blended and make a smooth, thick batter.

Gingerbread cupcake batter. Images: Kathryn Hawkins - Divide between the cases and bake for about 30 minutes until just firm to the touch – they do sink a little bit so don’t worry. Transfer to a wire rack to cool.
- For the frosting, put the margarine in a bowl and beat to make it smooth and glossy, then gradually sieve over the icing sugar, in small batches, mixing it in well after each addition, to make a smooth, soft and fluffy icing. Stir in the spices and ginger wine or syrup if using.
- Transfer to a piping bag fitted with a small closed star nozzle, and pipe a swirl on top of each cupcake. If you don’t fancy piping, simply smooth some frosting on top using a small palette knife.
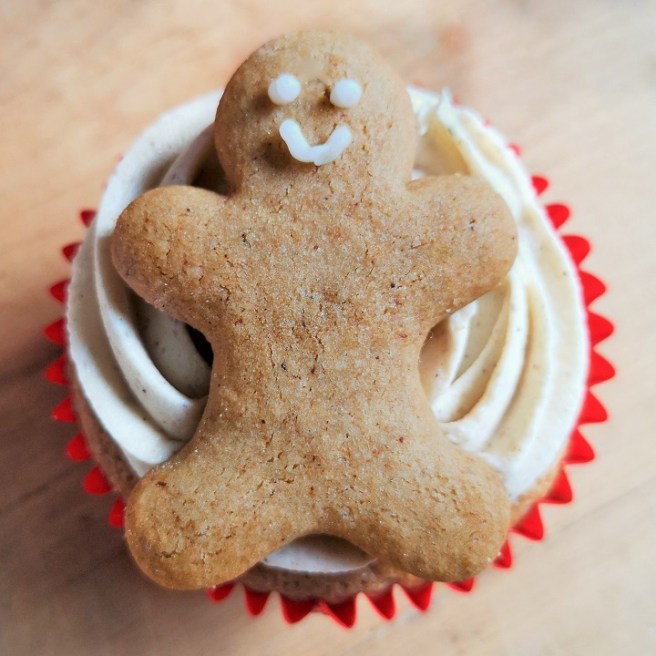
Baking and decorating gingerbread cupcakes. Images: Kathryn Hawkins Just before serving, pop a gingerbread man cookie on top of each cupcake. The cookies will go soft if left on top of the cakes for more than half an hour, so best leave the arranging until the last minute to eat them at their crisp best.
Have a good few days. Until next time, happy baking!

Love at first bite. Image: Kathryn Hawkins