Welcome to my blog all about the things I love to grow and cook. You'll find a collection of seasonal gluten-free, dairy-free and vegan-friendly recipe posts, as well as a round up of my gardening throughout the year. I wish you good reading, happy cooking and perfect planting!
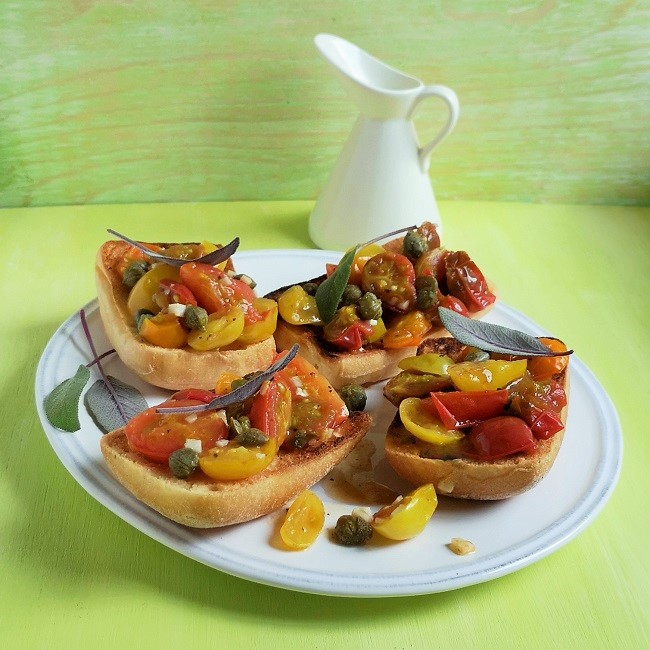
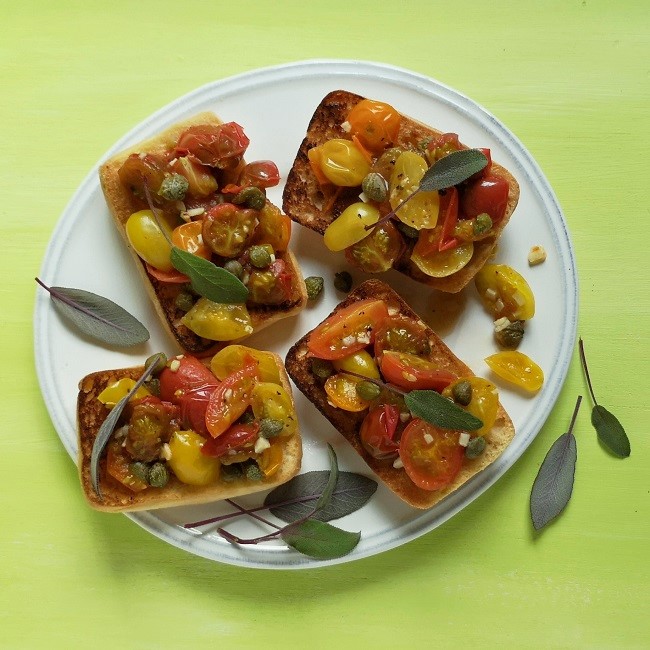
Warm tomato, sage and caper bruschetta. Image: Kathryn Hawkins
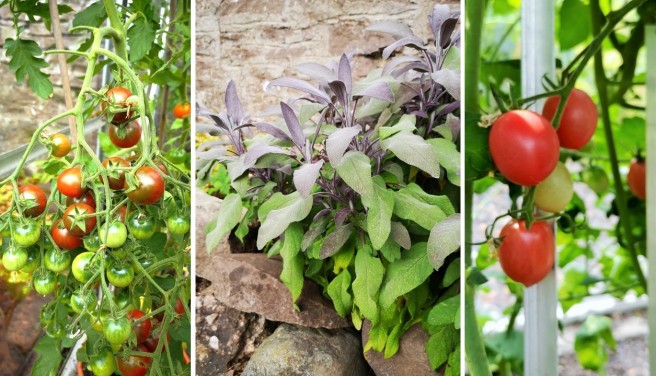
I have never been able to pick home-grown tomatoes this early before. Usually, my tomatoes don’t ripen until at least September, and I’m always left wondering whether I will be making pots-loads of green tomato chutney. This year, the tomatoes are ripening at least one month ahead, and I am delighted 🙂
I planted 8 different varieties this year in the greenhouse, and all are doing very well. I’m going to be eating a lot of tomatoes this year!
Early August tomato harvest. Image: Kathryn Hawkins
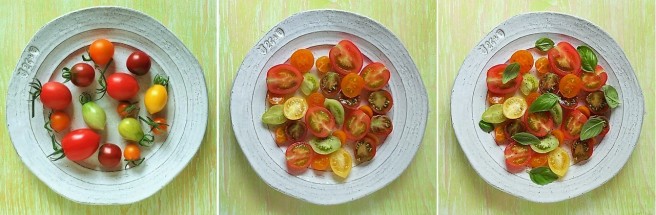
I enjoy eating tomatoes raw, simply sliced, sprinkled with a little seasoning, and a pinch of sugar to bring out the sweetness, and topped with a few fresh basil leaves.
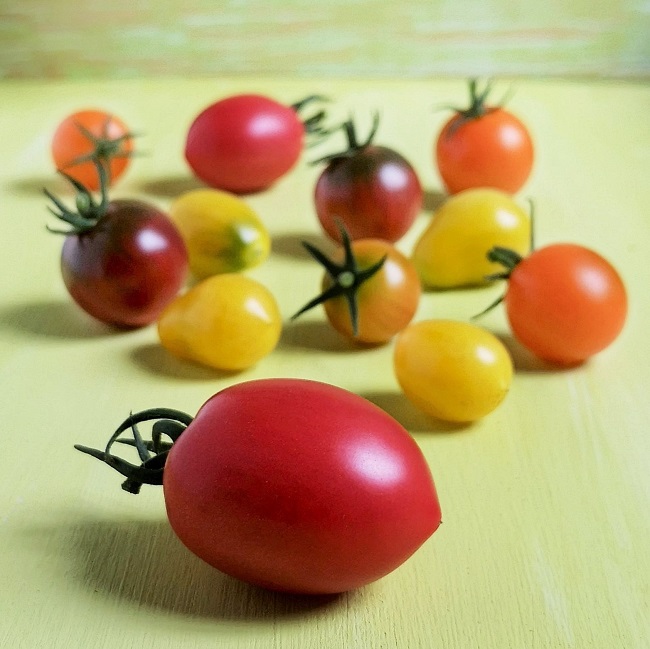
A colourful variety of tomatoes. Images: Kathryn Hawkins
However, I do cook with them occasionally, and my recipe this week is for a lightly cooked tomato dish which I put on top of gluten-free ciabatta-style bread to eat as a light lunch or quick supper snack. The topping also makes a great sauce to serve over pasta or roast veg. The tomatoes are flavoured with fresh sage, garlic and capers, and for a tangy sweetness, I’ve added a little white balsamic vinegar.
Rosella tomatoes, fresh sage, and Flamingo tomatoes. Images: Kathryn Hawkins
To enjoy all the flavours of the recipe, leave the mix to cool slightly before serving rather than eating it too hot or fresh out of the saucepan.
Bruschetta ready to serve. Image: Kathryn Hawkins
Serves: 2
Ingredients
225g small tomatoes, halved or quartered
A few leaves fresh sage
1 clove garlic, peeled and finely chopped
1 tbsp. capers
1 tbsp. white balsamic vinegar
Salt and freshly ground black pepper
Extra virgin olive oil
4 slices of freshly toasted bread
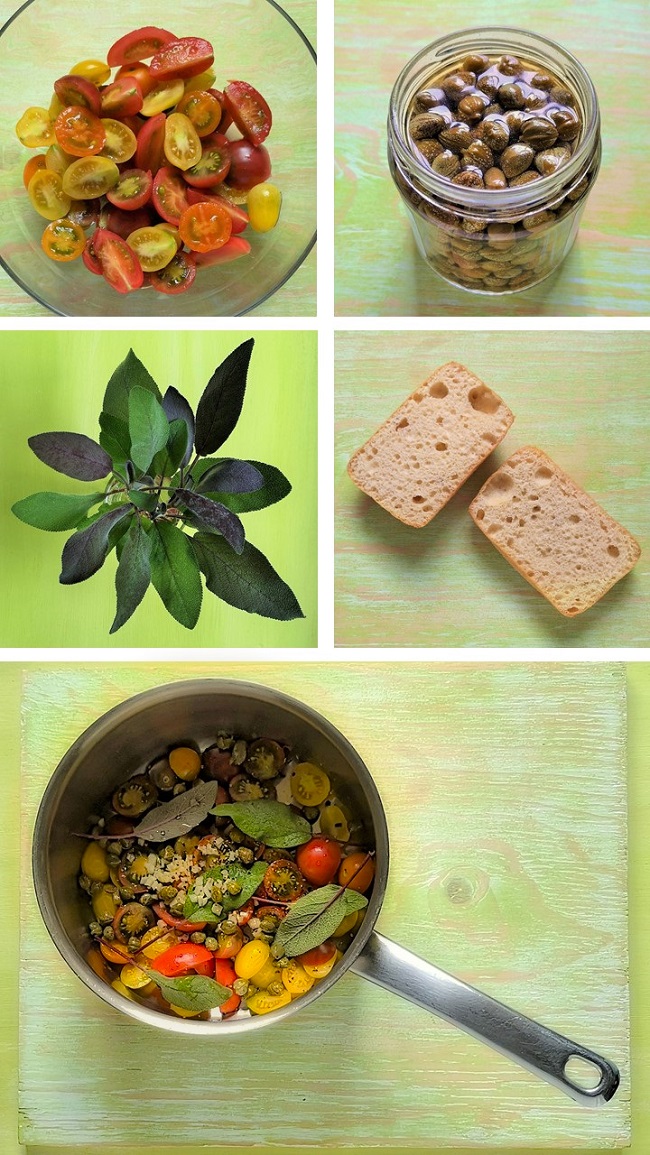
Put the tomatoes, sage, garlic, capers and vinegar in a small saucepan. Season to taste and heat gently until simmering. Cover with a lid, turn down the heat to low and cook the tomatoes very gently for 10 minutes, until soft. Leave to cool for about 30 minutes.
Bruschetta ingredients and preparation. Images: Kathryn Hawkins
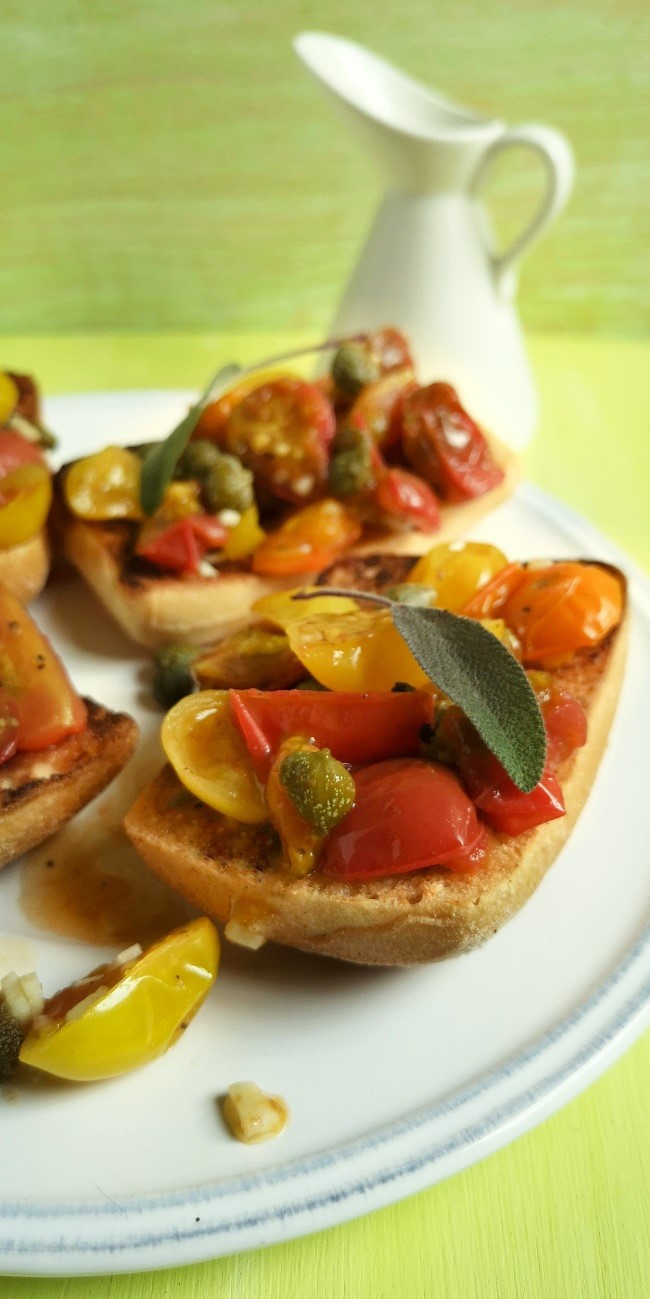
To serve, discard the sage leaves. Drizzle freshly toasted bread with olive oil and spoon over the tomato topping. Garnish with fresh sage.
Bruschetta, ready to serve. Image: Kathryn Hawkins
I had planned a garden round-up for this week’s post. However, the long spell of fine weather has finally broken and I haven’t been able to get outside that much this past week. To be honest, the hot spell has left the garden looking a bit sad and lacking in colour. So, instead of a weekend in the garden, I got the jam pan out of the cupboard and made some jelly preserve with the last of my raspberries.
Rhubarb and raspberries after a heavy shower of rain. Images: Kathryn HawkinsThe last of my raspberries make a perfect match with some freshly pulled summer rhubarb. Image: Kathryn Hawkins
A jelly preserve takes a bit more time to make than most other jams, but if you do find yourself in a preserving mood, I can recommend having a go, as the reward is great and the flavour, intense and rich.
You will need some clean muslin if you don’t have a jelly making bag, but if you are only making a small amount, as per the quantity below, you don’t need any other special equipment, although a sugar thermometer will help take the guess-work out of judging when the jelly has cooked sufficiently. All you need to ensure is that all the equipment and jam-jars you use are very clean; this will enable you to store your preserves for as long as required.
Makes: approx. 650g
Ingredients:
450g prepared raspberries, washed
450g prepared rhubarb, washed and chopped into small pieces
Approx. 500g granulated sugar
Approx. 25ml fresh lemon juice
Mash the raspberries to release the juices and place in a saucepan. Stir in the chopped rhubarb and 2 tbsp. water. Heat gently until steaming, then cover and cook for 6-7 minutes until very soft.
Cooking the fruit. Images: Kathryn Hawkins
2. While the fruit is cooking, set up the muslin or jelly bag ready for straining the juice. I use a tall jug which I can suspend a jelly bag over the top. Otherwise, a large nylon sieve lined with muslin, suspended over a bowl will work well. The volume of liquid produced by following this recipe will not be much greater than 500ml, so you don’t need a massive collecting container. Make sure it is stable so that it can’t tip over when you add the fruit.
3. Carefully spoon the hot fruit and juices into the bag or muslin, and then leave undisturbed for several hours until the fruit stops dripping. Don’t be tempted to press or squeeze the fruit as this will make a cloudy preserve. Discard the pulp. Measure the juice and work out the quantity of sugar and lemon juice required. You need 75g sugar and 5ml lemon juice per 100ml juice.
How to strain fruit for jelly preserve. Images: Kathryn Hawkins
4. Pour the juice into a large saucepan and heat gently until hot, then stir in the sugar and lemon juice, and continue stirring over a low heat until the sugar dissolves.
5. Raise the heat and bring to the boil, then boil rapidly until setting point is reached – between 104° and 105°C on a sugar thermometer. Skim away any scum that rises to the surface during boiling. Pour into clean, hot jars and seal immediately. Leave to cool, then label and store in a cool, dark cupboard for up to 6 months, but the preserve is ready to eat as soon as you want! Delish 🙂
Spoonfuls of freshly made jelly preserve on a home-made Welsh cake. Image: Kathryn Hawkins
All the fabulous sunshine we’ve been having has done wonders for the fruit this year in the garden, although it has meant a lot of watering.
I picked my precious harvest of Morello cherries last weekend. I had had the tree netted for several weeks and successfully managed to fend off the birds. One small espalier tree produced just under one kilo of cherries 🙂
So what to do with such a precious harvest. Decisions, decisions. Last year I made my usual compote and with the remainder I made cherry jam. Sadly, I over-cooked the mixture and ended up with cherry toffee! This year, I was determined not to be so fool-hardy. I got my old-fashioned cookery books out and bottled a jar for a treat later in the year. With the rest, I made this rice dish, based on the Iranian recipe for Alo-balo polo or sour cherry rice. Traditionally chicken is added and the dish is served at a celebration. I made my meat-free version to serve as a side dish. It is only mildly spiced so will go with anything.
Fragrant spices for cooking with basmati rice. Images: Kathryn HawkinsBowl of home-grown Morellos ready for pitting. Image: Kathryn Hawkins
I appreciate that not everyone will have access to fresh Morello cherries, but dried sour cherries are readily available, and cranberries will work well as an alternative. Just stir dried cherries or cranberries into the rice towards the end of cooking time – use about 150g dried. If you have fresh or frozen cranberries, you can follow the recipe below exactly, using 250g berries.
Serves: 4 as a side dish
Ingredients
250g basmati rice
Generous pinch of saffron strands
300g fresh whole sour cherries
65g caster sugar
1 tsp salt
5 cardamom pods
1 cinnamon stick, broken
3 tbsp. olive oil
1 large red onion, peeled and sliced
Handful of chopped pistachio nuts
Put the rice in a bowl and cover with cold water. Leave to soak for 2 hours, then drain and rinse well. Meanwhile, put the saffron in a small bowl and spoon over 1 tbsp. very hot water. Leave to infuse and cool.
Stone the cherries and place in a saucepan with the sugar. Heat gently, stirring carefully, until the sugar dissolves, then bring to simmering point and cook gently for 2-3 minutes until tender and juicy. Leave to cool.
Bring a large saucepan of water to the boil. Add the salt, and gradually sprinkle in the rice so as to keep the water boiling. Cook in the boiling water for 3-4 minutes until slightly opaque, then drain, rinse well and shake off the excess water.
Divide the rice equally between 2 saucepans. Stir the saffron water into one portion and level off the surface of the rice. Mix the cardamoms and cinnamon into the other and level off the surface. With the end of a wooden spoon, make indents in the rice and drizzle 1 tbsp. oil into each saucepan.
Preparing saffron and spiced basmati rice for steaming. Images: Kathryn Hawkins
Cover each with a layer of foil across the top of the saucepan; put the lid on top, and cook over a very low heat, undisturbed, for 30 minutes. After this time the grains of rice will be tender and slightly crisp on the bottom of the saucepan. Fork through the rice in each saucepan to mix well. Discard the spices.
While the rice is cooking, heat the remaining oil in a frying pan and gently fry the onion, covered, for about 15 minutes until very tender.
To serve, drain the cherries, reserving the juice, and mix the cherries into the spiced rice along with the onion. Pile into a warmed serving dish. Spoon the saffron rice on top and gently mix the two rices together. Sprinkle with pistachio nuts and serve immediately with the cherry juice to pour over – reheat this if preferred.
Ready to serve, Persian-inspired sour cherry rice. Image: Kathryn Hawkins
It’s peak raspberry season here in central Scotland, and the juicy red fruits are coming thick and fast. I have bags of berries in the freezer already for jam making later on in the year, but right now, I’m enjoying them cooked in a compote with rhubarb on my breakfast granola and as an occasional treat in a fruity dessert.
Ripe and ready for picking, home-grown Glen Ample raspberries. Images: Kathryn Hawkins
My recipe this week takes me back to my childhood. We often had jelly for dessert as kids. Using fresh fruit takes a bit of effort but the flavour can’t be beaten. The variety of raspberries I grow are called Glen Ample. They are ideal for cooking because they are very juicy and flavoursome, but they do lack sweetness when eaten fresh. You may need to alter the amount of sugar and water in the recipe if you have a different variety.
Freshly picked and ready for cooking. Image: Kathryn Hawkins
To set jellies, I use the Dr Oetker product ‘Vege-Gel’, which is a gelling powder made from Carrageenan. It gives a lovely silky, smooth soft texture. You’ll need to alter the preparation instructions if you prefer to use another setting agent.
To finish the jellies off, I made a free-from white ‘chocolate’ and coconut ganache to top the jellies for an extra special indulgence. Use dark chocolate if you prefer something less sweet.
Makes: 4
Ingredients
450g fresh raspberries
100g caster sugar (or amount to taste)
6.5g sachet Vege-Gel (Dr Oetker)
100g free-from white ‘chocolate’
50g dairy-free coconut milk yogurt
Fresh raspberries and raspberry leaves to decorate
Rinse the raspberries and shake off the excess water. Put in a saucepan with the sugar and 75ml water. Heat gently, stirring occasionally and carefully, until the sugar dissolves. Bring to the boil and simmer for 5 minutes without stirring. Leave to cool for 10 minutes.
Place a nylon sieve over a heatproof jug and strain the raspberry mixture through. Leave to cool completely then discard the pulp. Try to avoid squeezing the raspberry mixture in the sieve as this will make the jelly cloudy.
Pour 200ml cold water into a bowl and sprinkle over the Vege-Gel powder. Whisk until completely dissolved. Pour into a saucepan and add the raspberry juice. Heat the mixture to boiling point and then leave to cool for about 30 minutes. As the liquid cools, the mixture begins to set, so keep an eye on it to avoid it setting completely in the saucepan.
Making vegan raspberry jelly. Images: Kathryn Hawkins
Divide the mixture between tumblers or heatproof glasses – the glasses need to be at least 150ml capacity. Leave to cool completely, then chill for an hour until firm.
Making free-from white chocolate ganache. Images: Kathryn Hawkins
For the topping, melt the free-from chocolate in a small heatproof bowl over a saucepan of barely simmering water. Leave to cool for 10 minutes, then stir in the yogurt. Spoon on top of each jelly and return to the fridge for a further hour to set. Decorate, serve and enjoy 🙂
Free-from fresh raspberry jelly with white ‘chocolate’ ganache-style topping. Images: Kathryn Hawkins
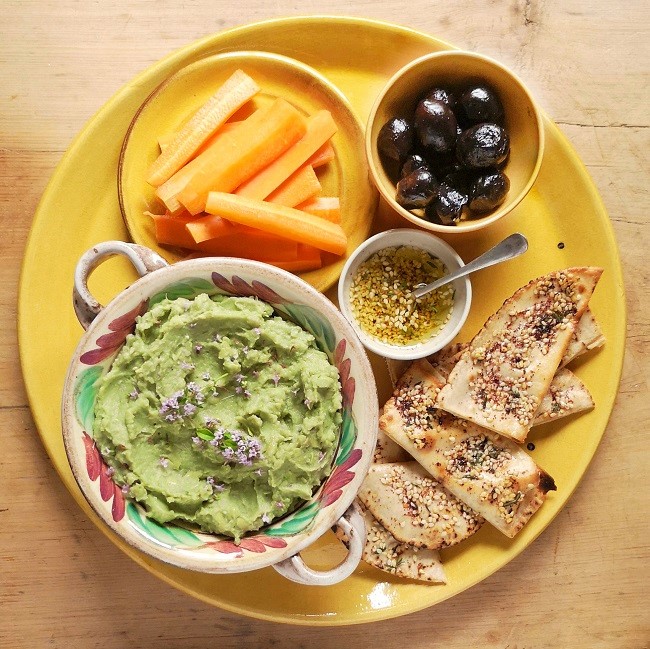
Broad bean byessar served with fresh thyme za’atar on flat breads, with carrots and black olives. Image: Kathryn Hawkins
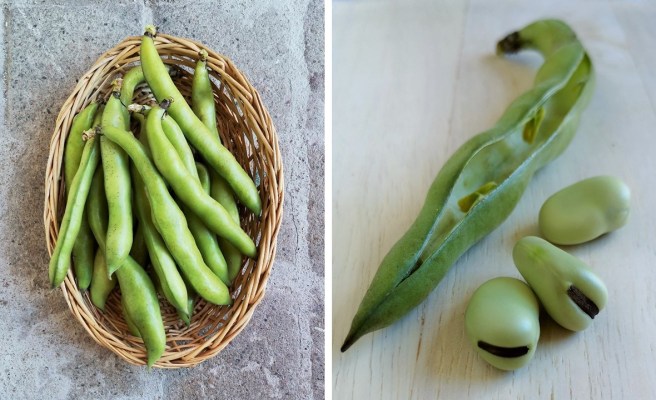
This is a great time of year for fresh fruit and vegetables. The first of the home-grown beans, broad beans, have arrived in the shops these past couple of weeks, and I have made one of my favourite dips with my first batch. If you like hummus (houmous), you’ll love byessar. Usually made with dried broad beans (fava beans), I prefer to make my version with fresh when the beans are in season, or frozen, at other times of the year.
Fresh broad beans. Images: Kathryn Hawkins
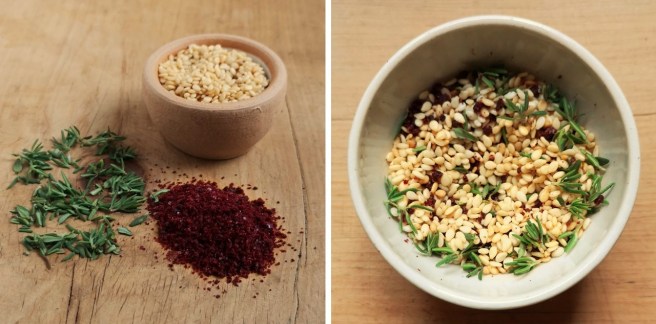
To accompany the dip, I have made up a batch of za’atar (zaatar or zahtar), a blend of thyme, sesame seeds and sumac powder. This is a traditional blend from the Middle East and it is used as a seasoning for lots of meat dishes; it is sprinkled over salads and vegetable dishes, and used as a topping for breads. Simply make it into a paste with olive oil, spread it on flat breads or pittas and pop under the grill to toast. As I have lots of fresh thyme in the garden, I’m using fresh leaves, but dried thyme is more traditional. Using dried also means that you can keep it for longer as a dry mix, in a sealed container as you would any other spice blend.
Za’atar ingredients. Images: Kathryn Hawkins
If you can’t find sumac powder, something tangy and zesty like lemon rind would bring a bit of zing to the mix.
Free-from flat breads, carrot sticks and olives to serve
1. To make byessar, bring a small saucepan of lightly salted water to the boil, and cook the beans with the thyme, garlic and cumin or curry powder for 4-5 minutes, until tender. Drain, reserving the cooking liquid, and cool for 10 minutes. Discard the thyme.
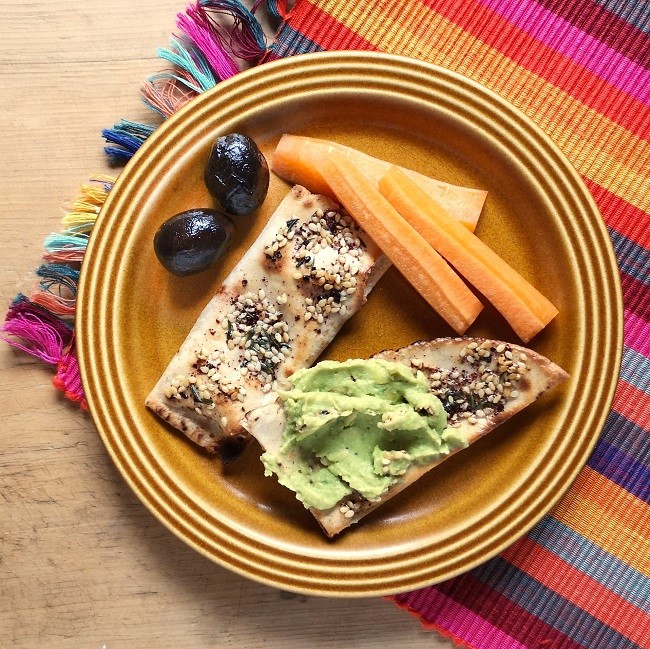
2. Put the beans and garlic in a food processor or blender. Add 75ml of the cooking liquid and the oil. Blitz until smooth. Taste and season with salt. Transfer to a serving bowl and leave to cool, then chill until ready to serve. Accompany with bread and carrots to dip; garnish with fresh thyme flowers or leaves, if liked
Making byessar. Images: Kathryn Hawkins
To make za’atar, mix the dry ingredients together. When ready to serve, mix with sufficient olive oil to make a paste. Lightly toast flat breads, cut into strips, then spread lightly with the za’atar paste. Toast under a hot grill for a few seconds to warm through. Serve as an accompaniment to dips and salads.
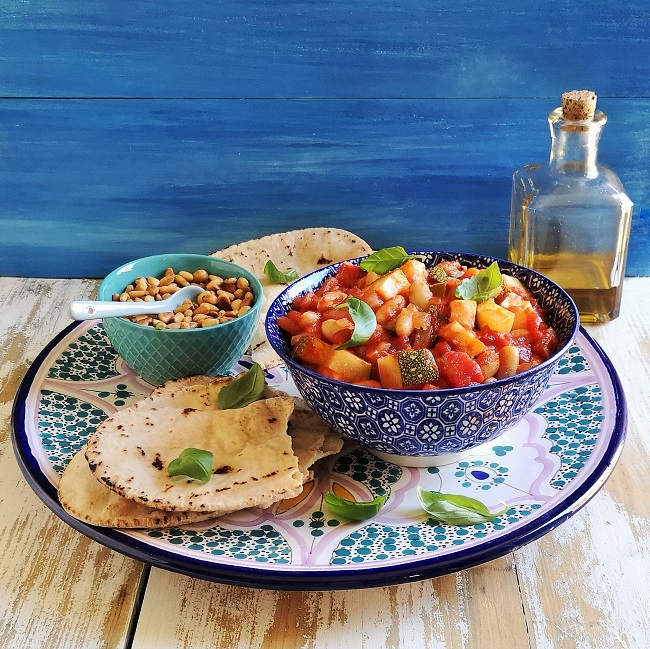
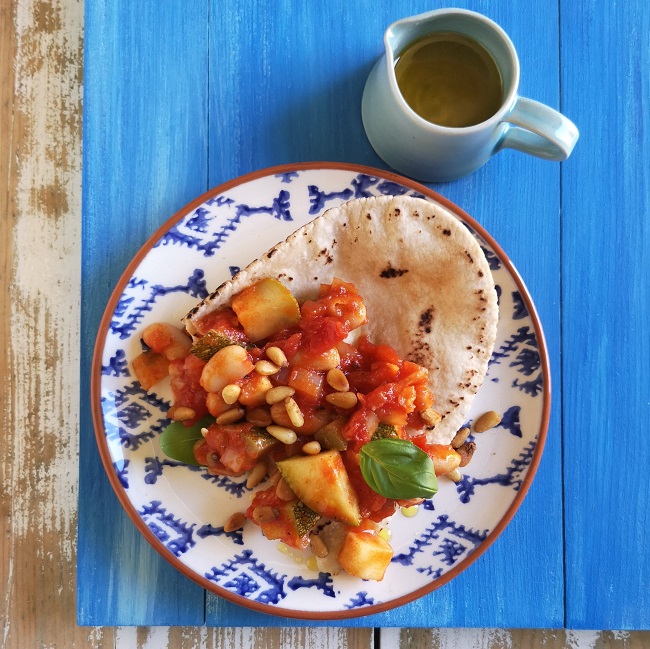
Courgette and white bean salad with fried pine nuts, basil, gluten-free flat bread and extra virgin olive oil. Image: Kathryn Hawkins
Amazingly, the heat is still on full blast here in the UK. The sky has been gloriously blue, day after day, and the sun is shining down strongly. No rain in the forecast; the water butt has been dry for days!
Plenty of time to enjoy the garden at a more leisurely pace. The thought of preparing and eating hot food is not so appealing at the moment, so salads are featuring heavily on my menu. I picked my first courgettes this week – all the extra watering by hand has been worth it – and made an exception by doing a little bit of cooking. I made them into a tasty cold dish with some canned beans and a rich tomato sauce.
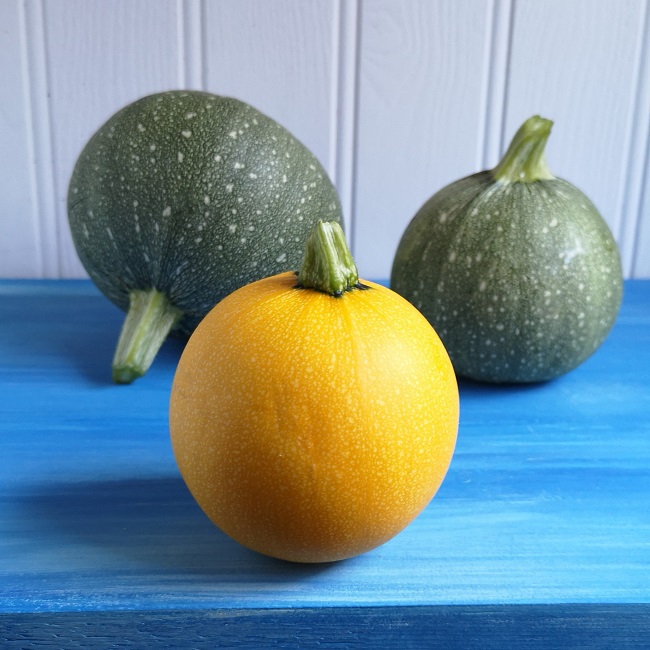
The first of this year’s home-grown courgettes. Image: Kathryn Hawkins
You can adapt the recipe to use other vegetables and pulses – aubergine and chickpeas make a good combination too, especially seasoned with some cumin and fresh coriander. The salad makes a good sauce for pasta when served freshly made, and I have also served it as a filling for a warmed pastry case.
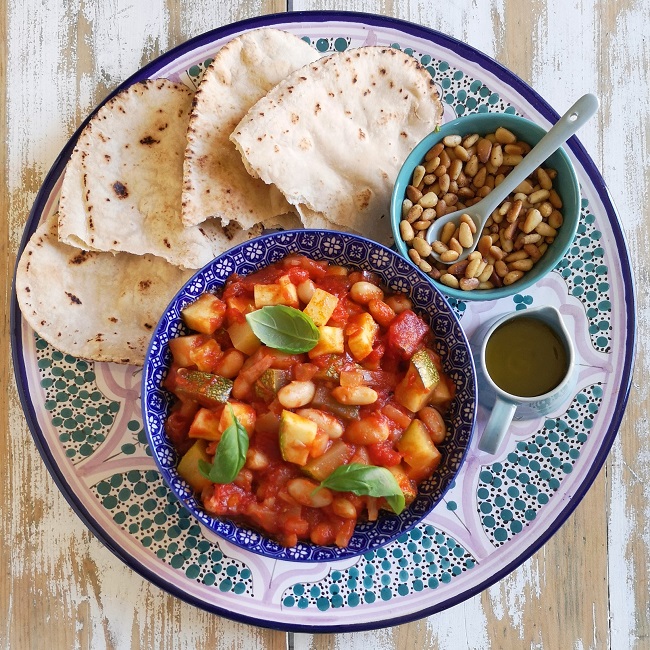
Platter of salad and accompaniments. Image: Kathryn Hawkins
Serves: 4
Ingredients
2 tbsp. olive oil
2 onions, peeled and chopped
2 garlic cloves, peeled and chopped
2 fresh bay leaves or 1 dried
2 sprigs fresh rosemary
150ml dry white wine
400g can chopped tomatoes
2 tbsp. tomato purée
2 teasp caster sugar
1 teasp salt
Freshly ground black pepper
250g cooked cannellini beans
500g courgettes, trimmed and chopped into 2cm dice
Fresh basil, fried pine nuts, gluten-free flat bread and extra virgin olive oil to serve
Heat the oil in a large covered frying pan and gently fry the onion, garlic and herbs, with the lid on, over a low heat, for 15 minutes, to soften without browning.
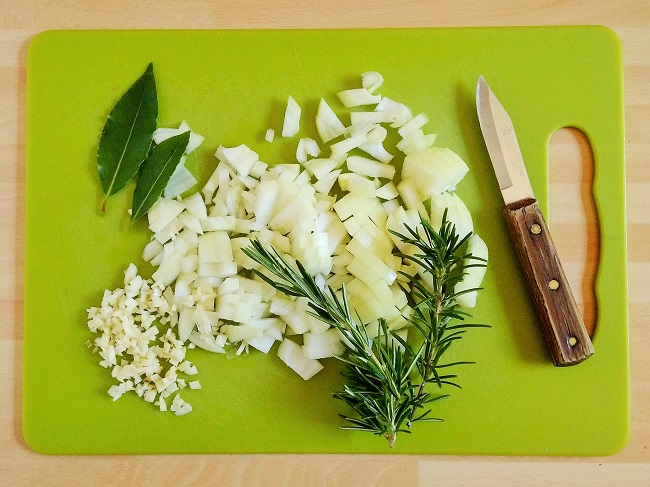
Prepared onion and garlic with fresh bay and rosemary, ready for the pot. Image: Kathryn Hawkins
Pour in the wine and stir in the chopped tomatoes, tomato purée, sugar, salt and pepper. Bring to the boil, then simmer for 5 minutes. Remove the rosemary and bay leaves.
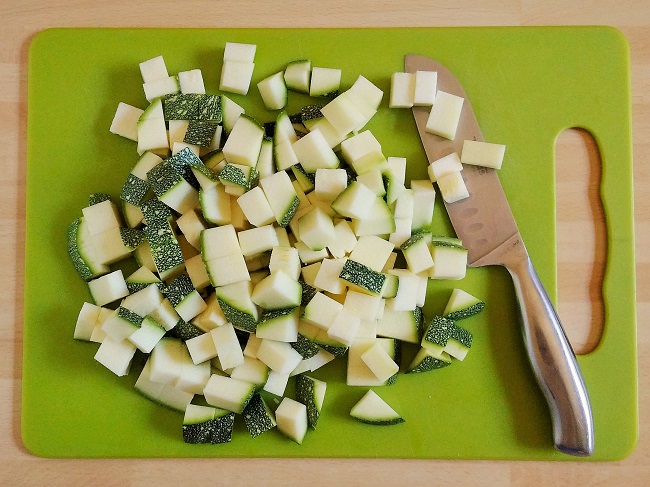
Courgette cut into 2cm dice. Image: Kathryn Hawkins
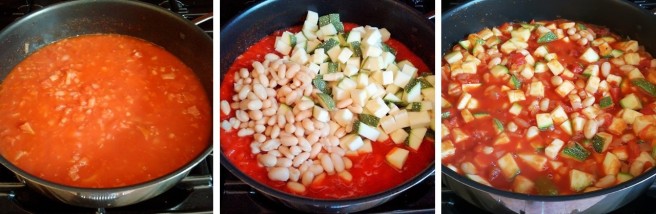
Stir in the beans and courgette, making sure they are well covered in the sauce. Bring to the boil, cover, reduce the heat, and simmer gently for 7-8 minutes until the courgette is just tender. Leave to cool completely.
Making the sauce and cooking the salad. Images: Kathryn Hawkins
Transfer to a bowl and chill until ready to serve. Best served at room temperature for more flavour. Delicious spooned over warm flat breads, sprinkled with fresh basil, fried pine nuts and a drizzle of extra virgin olive oil. Bon Appétit 🙂
The perfect lunch for a sunny day. Image: Kathryn Hawkins
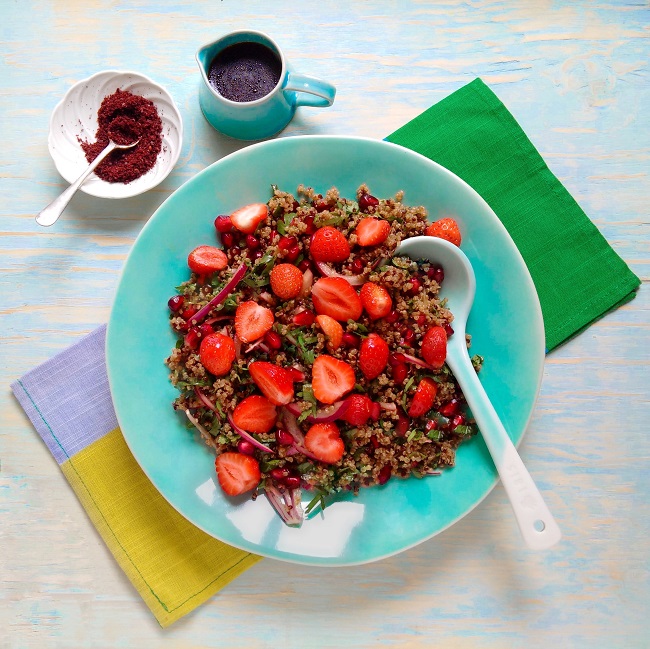
Sweet and savoury combination of fruit, grain and herbs. Image: Kathryn Hawkins
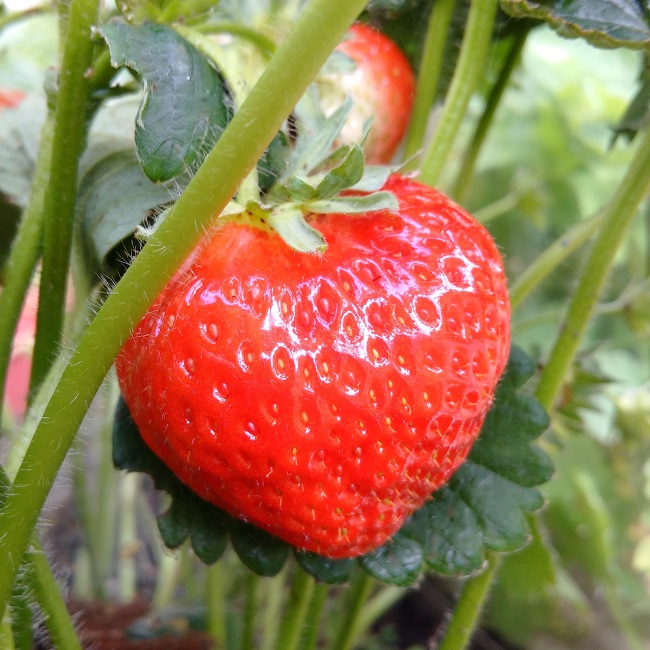
I’ve been enjoying home-grown strawberries for a couple of weeks now. They have grown quite small this year, but they are still sweet and tasty. As usual, I never have more than a handful to use at any one time (jam-making is out of the question) and I usually end up eating them on their own. However, following a recent trip to London’s Edgware Road, where I was able to stock up on a few of my favourite, more exotic, ingredients, I felt inspired to try something different.
My micro-harvest of home-grown strawberries. Images: Kathryn Hawkins
Pomegranate molasses make an ideal accompaniment to fresh strawberries. I love the thick texture and semi-sweet flavour. It reminds me of sherbet sweets as it has a light acidic fizz on the tongue. It makes a good ingredient for a salad dressing as it adds fruitiness as well as subtle sweetness and tempers any vinegar you may add. Its thick texture means you can cut down on the amount of oil you use without noticing.
Dressing ingredients for my strawberry and pomegranate salad. Image: Kathryn Hawkins
Choose a fruit vinegar or white balsamic to add extra sweetness, and use a mild tasting olive oil or other vegetable oil to help bring out the fruit flavours without dominating the dressing.
One of my other purchases was sumac powder. An astringent, fruity powder made from dried berries. It has a high tannin content and reminds me of rosehips. It is the perfect seasoning for sweet berries. Just sprinkle a little on before serving as you would black pepper. A final note on seasoning, I didn’t add any salt to my salad as I didn’t think it needed any. Everyone’s taste is different, so add a pinch to the dressing or mix some into the quinoa if you prefer a more savoury note.
Strawberry salad sprinkled with sumac powder. Image: Kathryn Hawkins
Serves: 2 as a main course; 4 as a side
Ingredients
250g cooked, cold quinoa
1 small red onion, peeled and thinly sliced
Small bunch fresh parsley and coriander, roughly chopped
A generous handful of pomegranate seeds
Dressing:
2 tbsp. pomegranate molasses
2 tbsp. fruit vinegar or white balsamic vinegar
2 tbsp. light olive oil
To serve:
150g fresh strawberries, washed and hulled
Sumac powder or freshly ground black pepper, to season
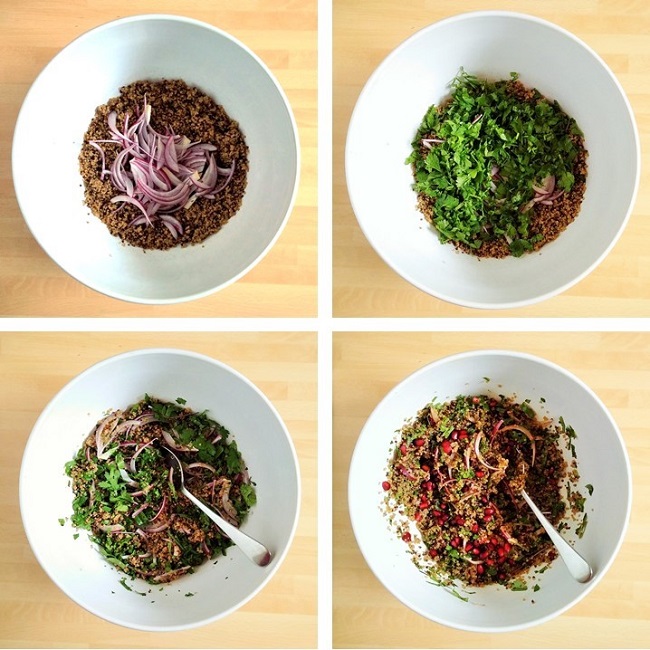
Mix the quinoa, onion, herbs and pomegranate seeds together, then whisk all the dressing ingredients together and toss half into the salad, and pile into a serving dish.
Preparing the salad. Images: Kathryn Hawkins
Halve or quarter larger strawberries, leave smaller ones whole, and sprinkle on top of the salad. Season with a little sumac and serve at room temperature for maximum flavour.
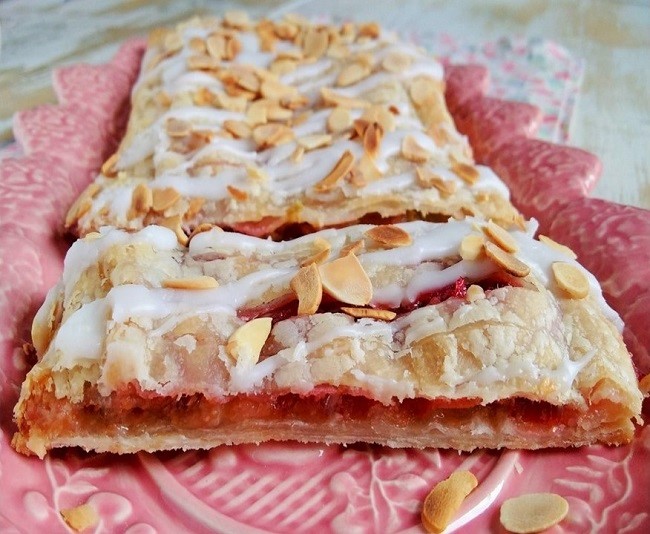
Iced and sliced, rhubarb and almond jalousie. Image: Kathryn Hawkins
I pulled my first stems of rhubarb at the weekend. The 3 crowns I re-planted back in the Autumn are doing well in their new patch (watched over by 2 stone rabbits), and it is looking likely that there will be plenty more stems before the summer is over.
My first harvest of home-grown rhubarb. Images: Kathryn Hawkins
To celebrate my first harvest, I have a simple rhubarb recipe to share this week. It’s a pastry classic, and gets its name from a slatted louvre window because it has thin slits cut across its top which give a glimpse of the filling inside. I’ve combined the tartness of the fresh rhubarb with the sweet, richness of marzipan, but I realise this is an ingredient not to everyone’s taste, so if you’re not a marzipan fan, simply leave it out altogether or make a thick vanilla custard instead and spread this across the pastry instead.
Iced and ready to serve. Images: Kathryn Hawkins
I gave a recipe for a Gluten-free rough puff pastry (with dairy-free & vegan variation) on my blog last year which you can use for this recipe, but if you don’t have time to make your own, SillyYak make a very good gluten-free, vegan-friendly pastry. Alternatively, for wheat eaters, roll out ready-made traditional puff pastry thinly and instead.
Serve this delicious pastry warm as a dessert with custard or leave to go cold and enjoy a slice as a pastry with a cup of coffee.
Serves: 6
Ingredients
300g fresh rhubarb
40g caster or vanilla sugar
325g gluten-free, vegan puff pastry (such as Silly Yak)
125g natural marzipan, coarsely grated
A little dairy-free milk, optional
50g icing sugar
A few drops almond extract
A few toasted flaked almonds
Trim the rhubarb and cut into short, even-thickness lengths. Place in a frying pan, sprinkle over the sugar and heat gently until steaming. Cover and cook gently for about 5 minutes until tender. Leave to cool completely. Cooking rhubarb this way means you will have little juice which is important in this recipe in order to keep the pastry crisp.
When ready to cook, preheat the oven to 220°C (200°C fan oven, gas 7). Line a large flat baking tray with baking parchment. Divide the pastry into 2 equal portions. On a lightly floured surface, roll out one piece of pastry to make a rectangle 28 x 15cm.
Sprinkle over the marzipan, leaving about 2cm pastry showing all round the edge, and spread the rhubarb on top. Brush the pastry edge with water or little dairy-free milk if preferred.
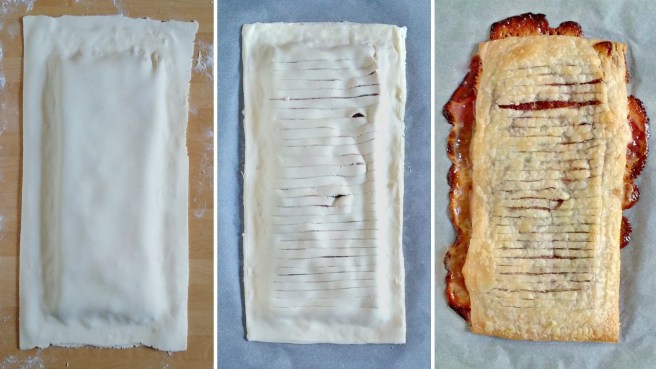
Preparing the bottom layer of the jalousie. Images: Kathryn Hawkins
Roll the other piece of pastry to a rectangle slightly larger than the bottom piece and carefully lay the pastry on top. Press down the edges well to seal them together and slice off any ragged pastry to neaten the edge.
Using a sharp knife, cut thin slashes through the top of the pastry to make the slatted effect. Carefully transfer the pastry to the baking tray, brush with dairy-free milk if liked and bake for about 30 minutes until browned. Leave on the tray to cool for 30 minutes before transferring to a wire rack to cool further.
Finishing and baking the jalousie. Images: Kathryn Hawkins
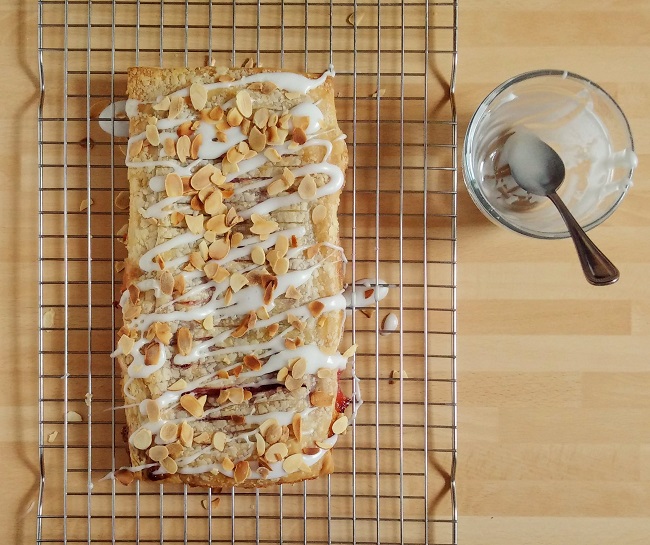
To decorate, sieve the icing sugar into a small bowl and mix in a few drops of almond extract and about 2 teasp warm water to make a smooth, drizzling icing. Use a teaspoon to drip the icing all over the top of the warm or cold pastry and then scatter with almonds. Transfer to a serving plate or board to slice and serve.
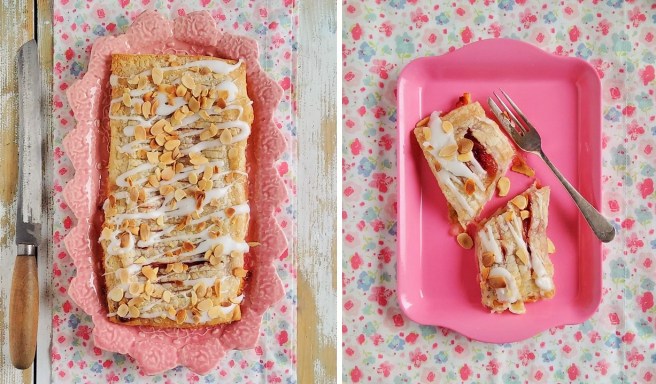
Freshly drizzle-iced jalousie, sprinkled with toasted flaked almonds. Image: Kathryn Hawkins
An iced slice, ready to eat. Image: Kathryn Hawkins
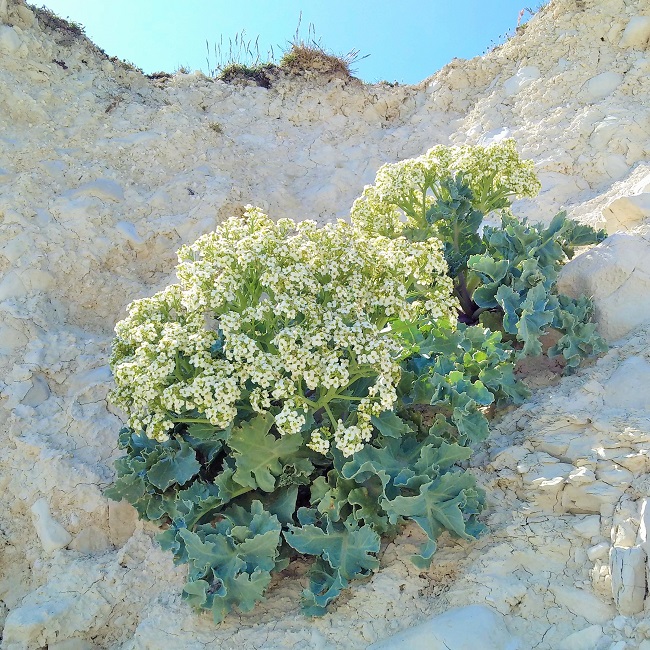
Sea kale growing on chalky cliff face. Image: Kathryn Hawkins
A bit of a departure from my usual blog posts this week. I’ve had some time away from my home in Scotland, and spent a few days in Sussex, where I grew up, visiting friends and family, and enjoying some fine late spring weather.
On a walk along the South Downs, I climbed down to a secluded cove, only accessible when the tide is low, to discover sea kale growing on the sand and shingle beach and out of the chalky cliffs. The afternoon was still and warm, and the frilly edged, grey/blue-green leaves of the kale appeared silvery in the bright sunlight; the sweet smell of honey hung in the air from its many flowers which grow in clusters above the leaves.
I’ve never discovered sea kale growing wild before, and have never cooked nor eaten it. The opportunity and temptation was too great and I picked 2 or 3 of the smaller leaves from a few established plants. I knew that sea kale kept well – sailors used to take it on voyages as a source of vitamin C – so I put the leaves in a jug of water, in the fridge for a couple of days, before taking them back to Scotland to experiment in the kitchen.
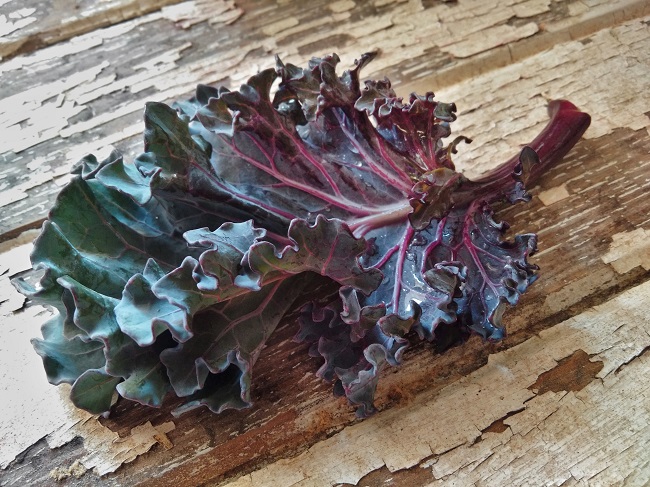
As with most leafy vegetables, I guessed that the smaller leaves would be the most edible. Apparently, sea kale (Crombemaritima) is not actually kale, it’s a type of chard and belongs to the cabbage family. All parts are edible, raw and cooked. but in the interests of conservation, I picked just a few leaves.
Small sea kale leaf. Image: Kathryn Hawkins
And so, to the kitchen. I treated the sea kale as if it were a leafy cabbage or curly kale. I gave it a good soak to remove any sand, etc, and then sliced out the stems. I shredded some of the leaves, and decided to roast the rest whole as I do with kale.
Preparing sea kale. Images: Kathryn Hawkins
Stems with balsamic vinegar – trim the ends and then slice the stems down the centre, lengthways. Blanch in boiling water for 1 minute, drain well and pat dry with kitchen paper. Heat a frying pan until hot, drizzled with a little olive oil and stir fry the stems for 2-3 minutes until softened and browned a little. Turn off the heat, season with balsamic vinegar, salt and black pepper. Cover with a lid and stand for 5 minutes. Serve sprinkled with freshly chopped chive stems and flowers.
Leaves with garlic, chilli and soy – shred the leaves as you would Savoy cabbage and cook in boiling water for 3 minutes. Drain well. Stir fry chopped leek and garlic in a little oil until softened and then add the boiled sea kale and stir fry for 2-3 minutes until tender. Season with dark soy sauce and sweet chilli sauce.
Cooked sea kale stems and leaves. Images: Kathryn Hawkins
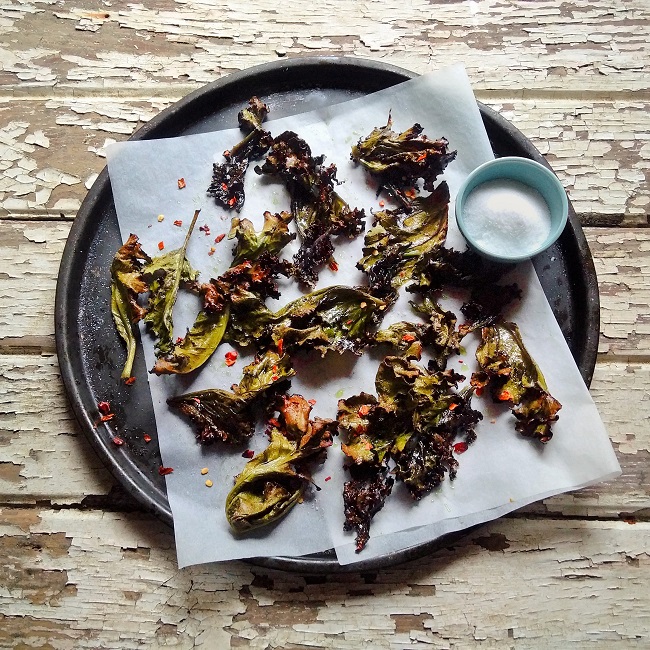
To bake sea kale, choose the thinnest leaves, remove the stems if coarse, and pat dry with kitchen paper. Place in a bowl and toss in a little olive oil, and massage it through the leaves to coat them lightly. Spread out on a baking tray lined with baking parchment and season well with smoked salt, pepper and caster sugar. Bake at 200°C (180°C fan oven, gas 6) for 10 minutes, turn the leaves and bake for a further 5-10 minutes until dark and crispy. Season with chilli flakes and serve with extra sugar and smoked salt for dipping.
Roast sea kale leaves with smoked salt, chilli and sugar. Image: Kathryn Hawkins
The verdict: if you like strong-tasting cabbage and seaweed ( which I do), then you’ll like sea kale. It’s not a flavour for the faint-hearted that’s for sure. It can be also be seasoned with other strong flavoured ingredients. I was surprised that it is not salty at all. Some of the slightly larger leaves had a slight medicinal bitterness to them, which makes me think that the much larger leaves would be inedible.
If you’re lucky enough to find some, it’s definitely worth trying. I feel fortunate to have stumbled across such a fabulous freebie courtesy of Mother Nature 🙂
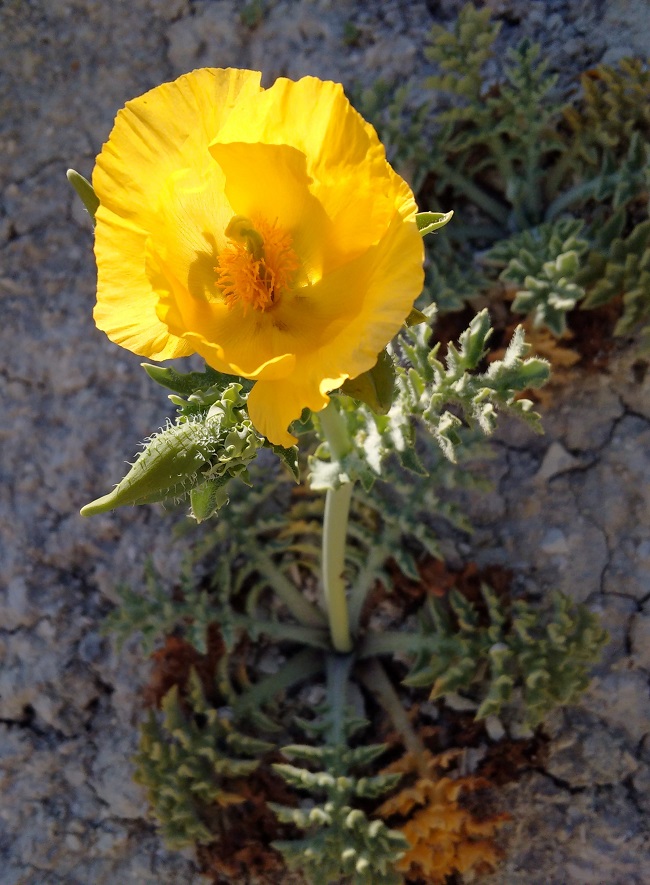
Also growing out of the chalky cliffs, a beautiful sea poppy. Image: Kathryn Hawkins
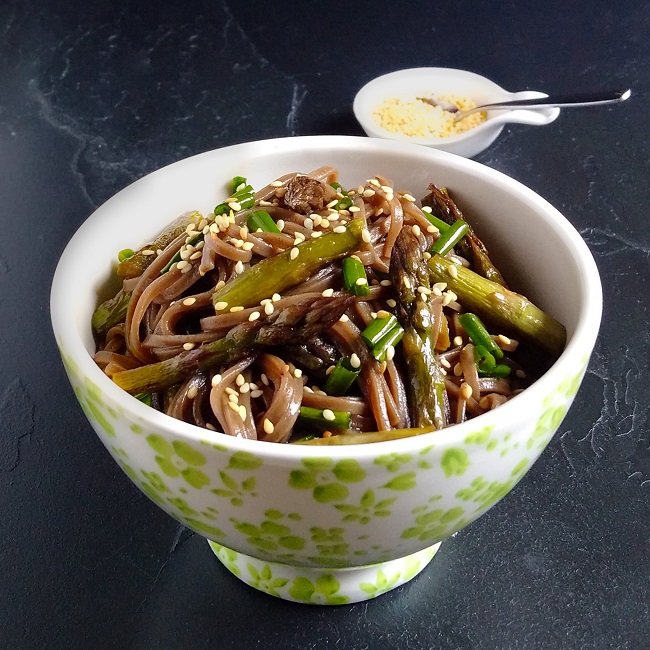
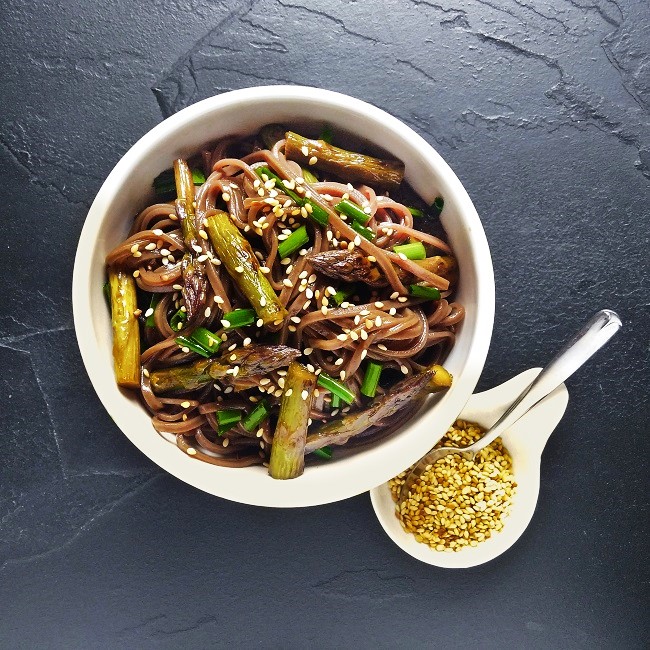
Soba noodles with asparagus. Image: Kathryn Hawkins
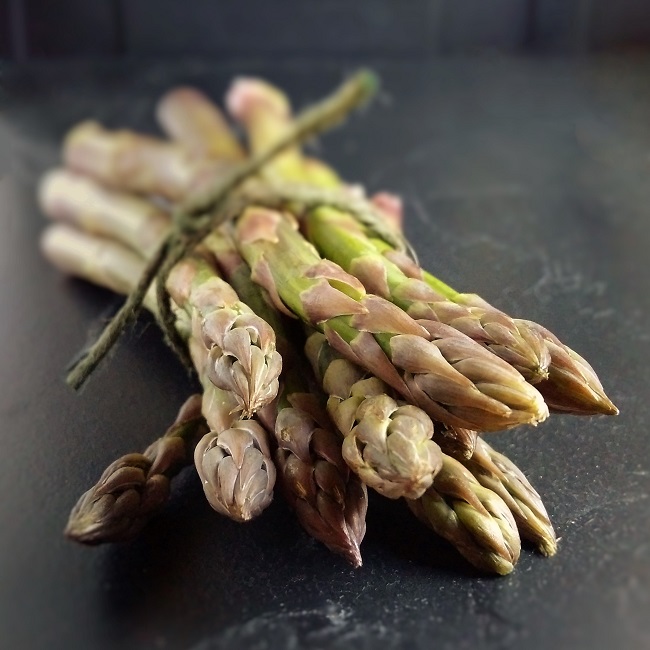
It is the height of the home-grown British asparagus season right now, and I’m eating as much as I can while these fresh, green, juicy stems are available to buy. I rarely do anything fancy with asparagus, just enjoy it on its own, steamed, griddled, or baked in the oven, and seasoned simply with a little salt and pepper. Delicious.
In season. British asparagus. Image: Kathryn Hawkins
This is a very simple, yet very tasty, combination that makes a lovely light lunch or quick supper dish. If you want to make it in advance, it’s just as good eaten cold as a salad, or boxed up for a picnic or packed lunch.
Three favourite seasonings for soba noodles. Images: Kathryn Hawkins
To serve 2: prepare 200g fresh asparagus spears by trimming away about 3cm of the stem – this is usually a bit woody and tough to eat. Then cut the rest of the stems into short lengths. Brush a non-stick frying pan with a little sunflower oil and heat until hot. Stir fry the asparagus for 3-4 minutes until just tender. Turn off the heat and add a good glug of gluten-free teriyaki marinade. Immediately cover with a lid and leave to stand. Leave to one side while you cook the noodles, or leave to cool completely for serving as a salad.
Trimming fresh asparagus, and stir-frying. Images: Kathryn Hawkins
Meanwhile, bring a large saucepan of unsalted water to the boil and add 100g soba (buckwheat) noodles. Cook for about 5 minutes until tender, then drain well and place in a heatproof bowl, or rinse in cold running water, and leave to drain and cool completely.
When ready to serve, toss the asparagus and pan juices into the noodles along with 4 tbsp. freshly chopped chives, 2 teasp sesame oil and 1 tbsp. mirin. Pile into serving bowls and sprinkle with toasted sesame seeds. Enjoy 🙂