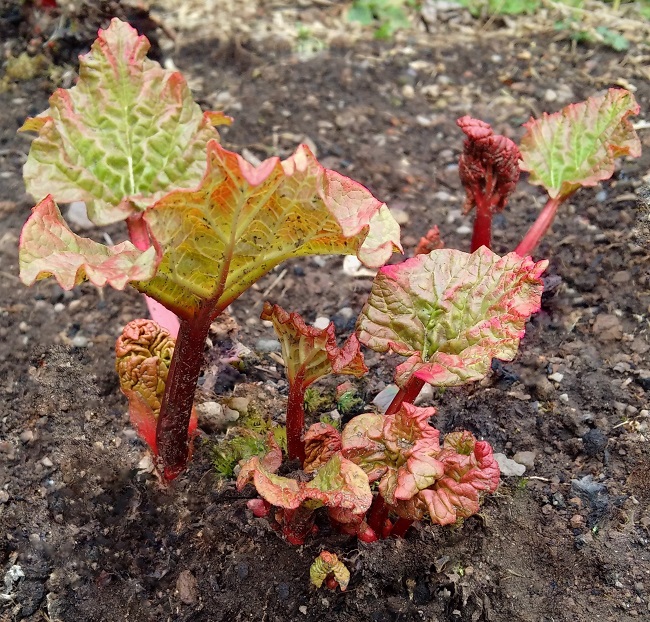
For the first time in a while, I didn’t have a clump of rhubarb to put under a forcer pot back in January. I had transplanted all my rhubarb crowns to a new bed at the end of last year, and I decided that I would be sensible and let them recover and leave them to grow in the open for a harvest later in the year. Now, of course, I regret not having the lovely pink, tender stems to cook, but, never mind, I look forward to a home-grown harvest whenever it is ready. Actually, the clumps are doing very well, so I don’t think it will be too long before I get to pull my first stems of the year.
In the meantime, I bought some rhubarb from the local farm shop this week and baked up a batch of muffins. Serve them hot with extra stewed rhubarb and custard as a pudding, or enjoy them slightly warm for a spring-time breakfast or tea. Best eaten on the day they are made, although they will freeze, and can be reheated successfully in the microwave for a few seconds.
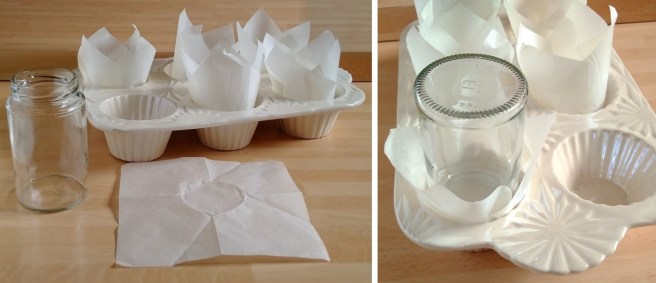
I made my own tulip-style paper cases, which make large “coffee shop” sized muffins. You will need 15cm squares of baking parchment and a jar or glass the same size as a muffin tin, and then it’s just a case of pressing the paper into the tins to make the case shape. If you prefer, divide the mixture between 12 ready-made paper muffin/cupcake cases and cook for slightly less time.
Makes 7 large muffins (or 12 traditional size)
Ingredients
For the crumble top:
- 85g gluten-free plain flour blend (such as Dove’s Farm)
- 2g gluten-free baking powder (such as Dr Oetker)
- 55g dairy-free margarine, softened
- 55g caster sugar
For the muffin mix:
- 225g gluten-free plain flour blend
- 8g arrowroot (optional, but I find it does help bind the ingredients together and gives a chewier texture)
- 10g gluten-free baking powder
- 115g caster sugar (or half caster and half vanilla sugar)
- 60g dairy-free plain or coconut yogurt
- 115g dairy-free margarine, melted
- 150ml soya milk
- 2 teasp good quality vanilla extract
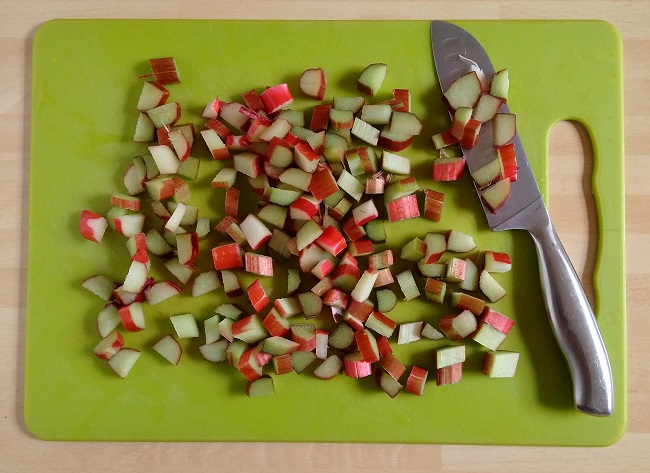
- 175g rhubarb, trimmed and finely chopped
- 150ml free-from custard
- First make the crumble top. Put the flour and baking powder in a bowl and rub in the margarine until well blended. Stir in the sugar and mix until it all clumps together. Cover and chill until required.
- Preheat the oven to 200°C (180°C fan oven, gas 6). Line a muffin tin with 7 large tulip-style paper cases or 12 traditional sized cases. For the muffin batter, sift the flour, arrowroot and baking powder into a bowl. Stir in the sugar and make a well in the centre.
- Mix the yogurt, melted margarine, non-dairy milk and vanilla extract together in a jug. Gradually pour into the dry ingredients, mixing well to blend everything together. Stir in the chopped rhubarb.
- Spoon half of the mixture equally between the paper cases, and spoon a dollop of custard on top, then cover the custard with the remaining muffin batter. Sprinkle the tops generously with the prepared crumble mixture.

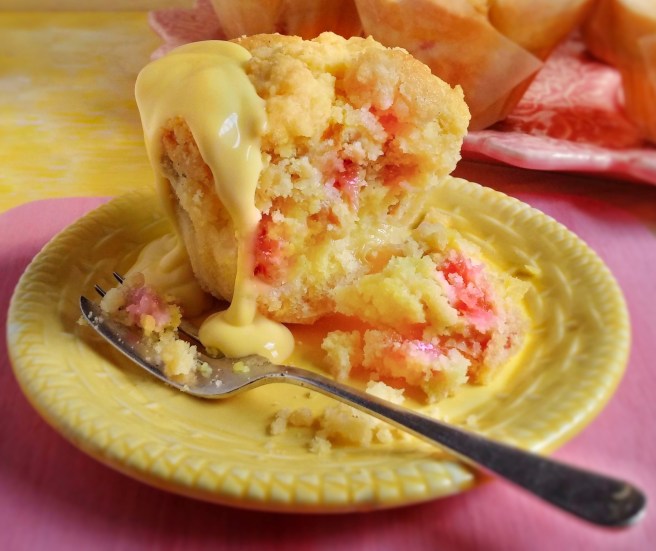
Filling the muffin cases. Images: Kathryn Hawkins. - Bake for about 35 minutes for large muffins, and 25-30 minutes for the smaller size. Cool in the tins for 10 minutes, then transfer to a wire rack to cool. Best served warm and eaten on day of baking.
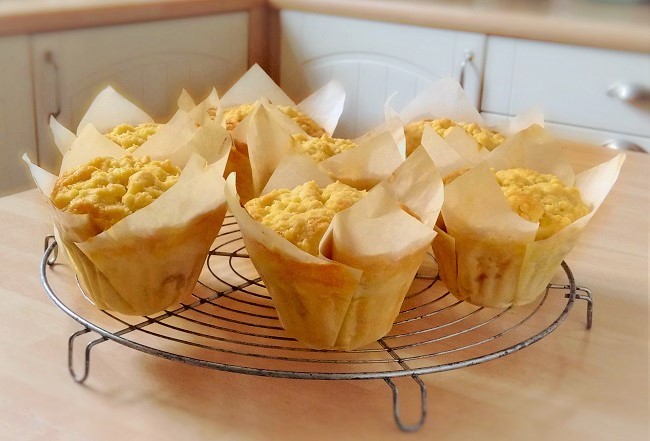
Straight out of the oven. Image: Kathryn Hawkins The recipe works well with chopped apple or pear (add a little cocoa powder to your custard for a chocolate filling), or you can add fresh small berries like raspberries, blueberries or cherries. Until next week…….happy cooking!