Welcome to my blog all about the things I love to grow and cook. You'll find a collection of seasonal gluten-free, dairy-free and vegan-friendly recipe posts, as well as a round up of my gardening throughout the year. I wish you good reading, happy cooking and perfect planting!
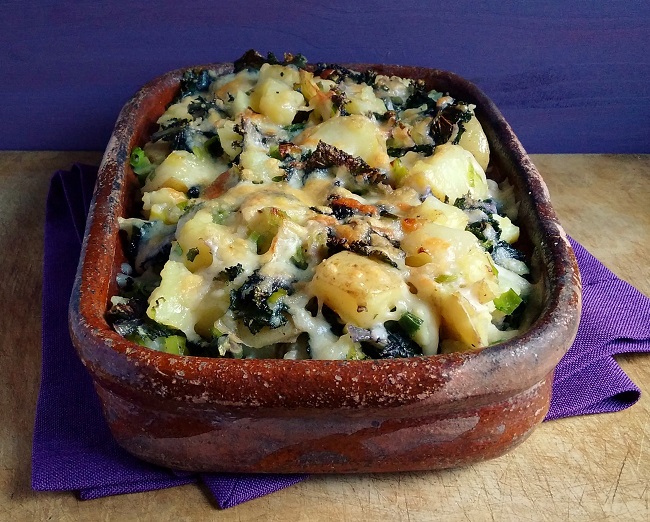
Great name for a recipe eh? What’s more, I haven’t made it up. This is a Scottish classic, and I’ve chosen to post it now for 2 reasons. It’s been very cold here this week and this is fabulous comfort food, and also with the festive season nearly upon us, it is an excellent recipe for using up leftovers. It uses 2 of my favourite vegetables, potatoes and kale (or cabbage).
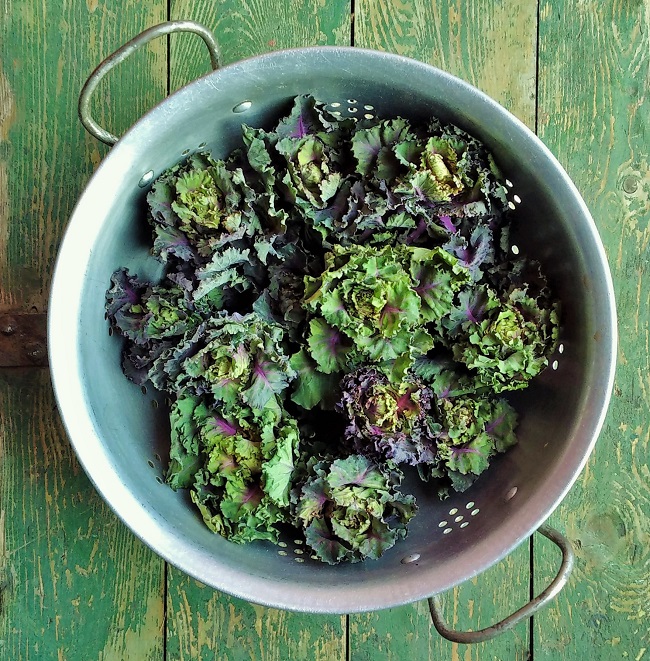
I love kale. So much flavour and texture, I think it out-strips cabbage and other greens in every way. Up until a couple of years ago, Cavelo Nero, Italian black kale, was my favourite variety, but then along came mini kale and my mind was changed. Very quick to cook, simple to prepare, with a milder, slightly sweet and nutty flavour, it looks very pretty too. The small leaves are also excellent raw in winter salads.
Mini kale. Image: Kathryn HawkinsHeads of mini kale, up close. Image: Kathryn Hawkins
So on with the recipe. Traditionally, this is a very simple combination of leftover cooked potatoes and cabbage fried with onion and then grilled with cheese on top. What’s not to like? The name, by the way, is believed to come from the combination of the “thumping” sound associated with mashing potato and the mixing together of the ingredients (a “rumble”). Here’s my version.
Serves: 3 to 4 as a side dish
Ingredients
150g mini kale, kale, cabbage or other greens (if you have leftovers, you’re halfway there with the recipe already)
500g cooked potatoes (I had some boiled small potatoes with skins on to use up)
25g butter or dairy-free margarine
1 tbsp. vegetable oil
1 leek, trimmed and shredded (or use thinly sliced onion if you prefer)
Salt and freshly ground black pepper
50g grated Scottish Cheddar or dairy-free/vegan grated cheese
If you are starting from scratch, prepare the greens and cook them in lightly salted water for 3-5 minutes until just tender. Drain well.
Put the potatoes in a bowl and mash them to crush slightly.
In a large frying pan, melt the butter with the oil and gently fry the leek for 3-4 minutes until softened (if you’re using onion, cook it gently for longer, until tender).
Stir in the potatoes and greens, and stir fry the vegetables gently together for 5-6 minutes until thoroughly heated. Season well and transfer to a heatproof dish.
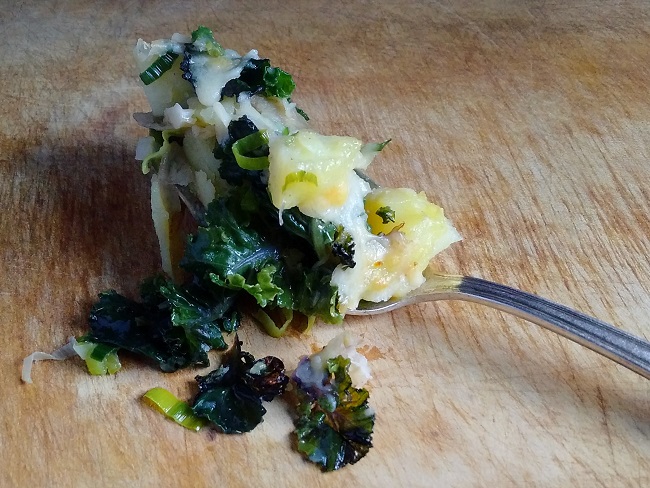
Basic preparation of Rumbledethumps. Image: Kathryn Hawkins
Preheat the grill to medium/hot. Sprinkle the vegetables with grated cheese and grill for about 5 minutes until golden and bubbling. Serve immediately.
Comfort with every spoonful. Image: Kathryn Hawkins
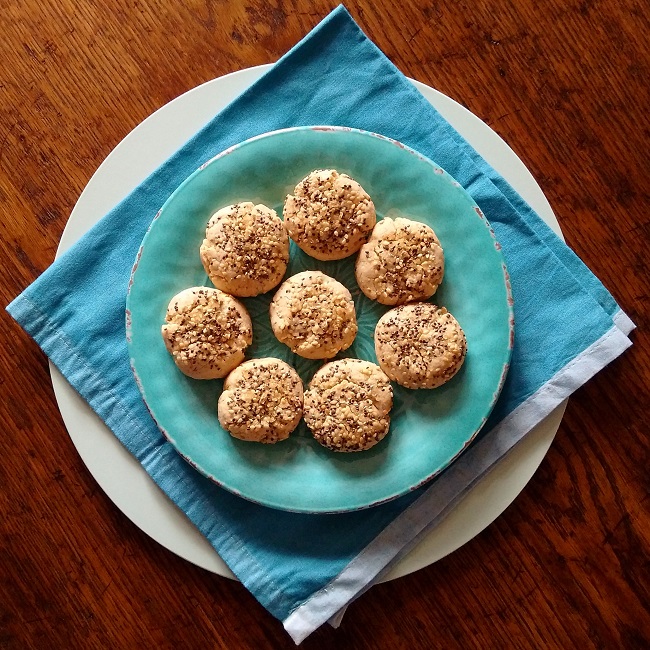
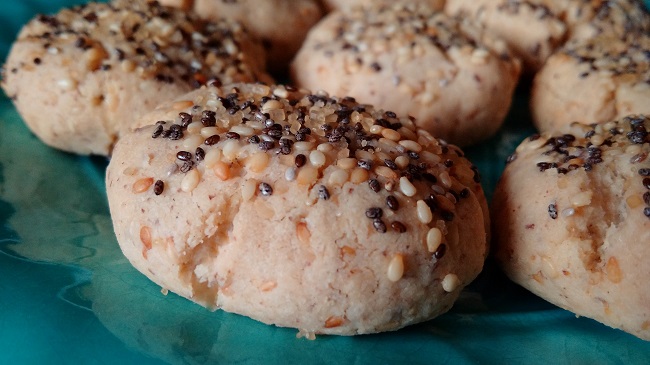
I’ve had a busy few days with my work, and subsequently only had time for one quick baking session this week. I turned to an old favourite of mine, shortbread. Easy to make and lovely to eat, and open to so many variations. This time, I had a break with tradition and made a super rich seeded version and replaced some of the fat with tahini.
I often replace a portion of the flour in cakes and bakes with ground almonds, and, if I don’t have enough ready-ground, I blitz up my own in a coffee grinder. If you use the non-blanched almonds, you’ll find the ground meal gives a more earthy to your bakes.
Sesame seed paste and home-made ground almonds. Images: Kathryn Hawkins
These tasty shortbreads have a soft, crumbly texture, and a rich, nutty flavour; they are delicious with a cup of coffee and keep well for a few days in an airtight tin. I find them impossible to resist. I’m away to eat the last one after I finish typing this!
Makes: 18
Ingredients
150g gluten-free plain flour (such as Dove’s Farm)
65g icing sugar
75g ground almonds
25g toasted sesame seeds
85g tahini (sesame seed paste)
50g very soft dairy-free margarine (or butter if you eat it)
1 tbsp. each of chia seeds, toasted sesame seeds and Demerara sugar, mixed, for the topping
Sieve the flour and icing sugar into a bowl and stir in the ground almonds and toasted sesame seeds.
Mix the tahini and margarine together until well blended, then stir into the dry ingredients until well mixed.
Bring the ingredients together using your hands, then turn out on to a lightly floured work surface and knead gently to form a smooth dough. Divide into 18 portions and form each into a ball.
Arrange on the baking tray, press down lightly to make chunky rounds and sprinkle lightly with the sugary seed mix. Chill for 30 minutes.
Preheat the oven to 180°C (160°C fan oven), gas 4. Line a large baking tray with baking parchment. Bake the shortbreads for about 25 minutes until lightly brown and crisp. Leave to cool on the tray.
Ready for eating, sesame shortbreads. Image: Kathryn Hawkins
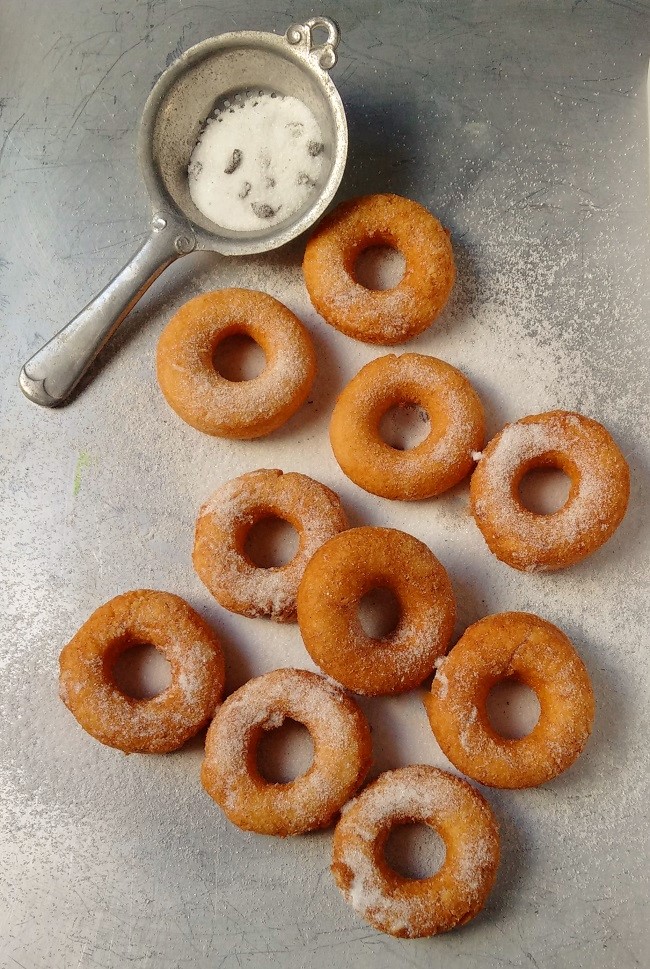
Vanilla sugar-dredged mini sco-nuts. Image: Kathryn Hawkins
The weather has turned colder this past week, and my thoughts have turned to comfort food. In my opinion, food doesn’t come much more comforting than a light, fluffy doughnut with a crunchy, sugary coating. Sadly, not usually a choice for anyone on a gluten-diet, but I think these little treats are a good alternative, and best of all, they can be made in a fraction of the time that it takes to make the real thing.
Mini sco-nut, fresh out of the pan. Image: Kathryn Hawkins
As the name suggests, the recipe derives from a scone mix that is cut and fried like a doughnut. I coated mine in home-made vanilla sugar but plain sugar is just as good. Leave them plain and dip them in a little of your favourite jam or sweet dipping sauce. Sometimes, I drizzle them with a little vanilla or cocoa flavoured glacé icing and decorate with a few sprinkles.
Drizzled and decorated, mini sco-nuts. Image: Kathryn HawkinsHome-made vanilla sugar. Image: Kathryn Hawkins
I always have a pot of vanilla sugar in the cupboard. I chop up bits of vanilla pod that is past its prime, or any part of the pod that has dried out, and just keep topping up the pot with caster sugar. Every now and then I give the pot a shake to distribute the vanilla pieces, and I keep the pot well sealed. You do need to sieve it when you use it, but keep the bits of pod trapped in the sieve and put them back in the pot along with a top up of sugar, and you can replenish your supply more or less indefinitely. Here’s the recipe.
Makes: 14 mini sco-nuts
Ingredients
150g gluten-free self-raising flour (such as Dove’s Farm)
5g gluten-free baking powder (such as Dr Oetker)
2g xanthum gum, optional – I have started adding this to my scone mixture as it really does improve the crumb texture
25g caster sugar
2 tbsp sunflower oil + extra oil for deep-frying
1 teasp good quality vanilla extract
Approx. 6 tbsp. soya or other non-dairy milk
Vanilla sugar or caster sugar to dredge
Sieve the flour, baking powder and xanthum gum into a bowl and stir in the caster sugar. Make a well in the centre, and spoon in the oil and vanilla, then bind together with sufficient milk to form a softish scone dough.
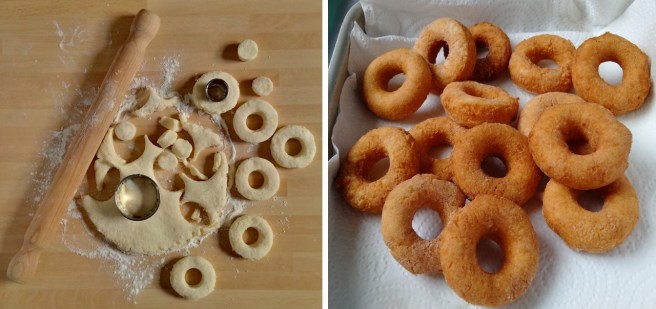
Pour the oil for deep-frying into a saucepan or wok and begin heating – the oil temperature needs to be around 180°C to fry the sco-nuts properly. While the oil is heating, turn the dough out on to a lightly floured surface and knead gently to bring the mixture together and make smooth, then roll or press to a thickness of 1cm.
Cut out rounds using a plain 5cm cookie cutter, and press out the middles using a 2cm round cutter. Re-roll the trimmings nd middles to make 14 mini rings in total.
Fry the sco-nuts in 2 batches, turning them gently in the oil, for 2-3 minutes, until golden and crisp all over. Drain well on kitchen paper and keep warm while cooking the second batch.
Preparing and cooking mini sco-nuts. Images: Kathryn Hawkins
Dredge in sugar if liked, or drizzle with icing. Best served while still warm. Sco-nuts do freeze well if you have any leftover; just bag them up, seal and freeze. You can reheat them gently in a moderate oven for about 5 minutes if you want to eat them warm.
Extra indulgence, dipping mini sco-nuts in vanilla sugar. Image: Kathryn Hawkins
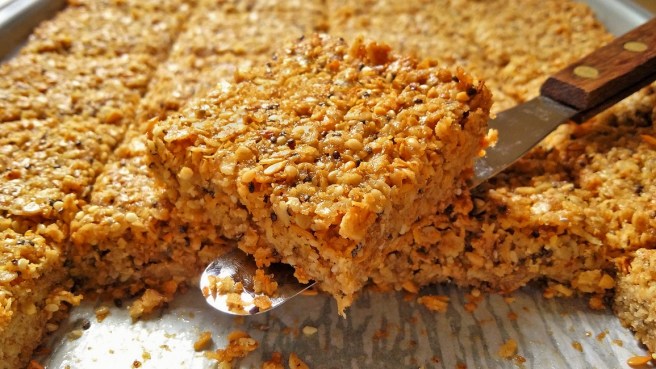
Straight out of the tray, super-seed flapjack. Image: Kathryn Hawkins
Over the past year or so, I have been trying to include as many different seeds in my diet as I am able. Seeds are crammed full of protein, minerals and fibre, and unusually for such a worthy food, I find them utterly delicious and a pleasure to eat.
I have been making flapjack since my school days; it’s a real family favourite. Over the years I’ve adapted the recipe to include flavours and ingredients that take my fancy, and for the last few weeks, I’ve been packing this much-loved bake with tiny seeds.
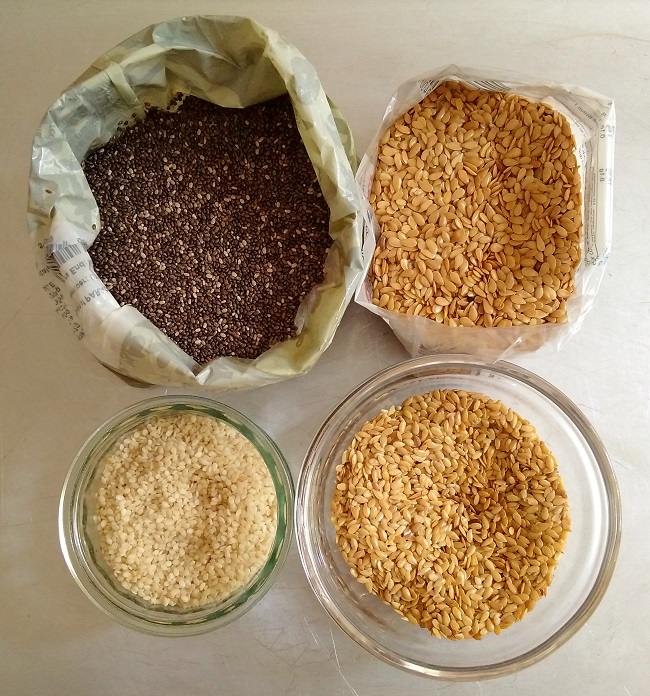
A delicious foursome: chia seeds, flax seeds, linseed and sesame seeds. Image: Kathryn Hawkins
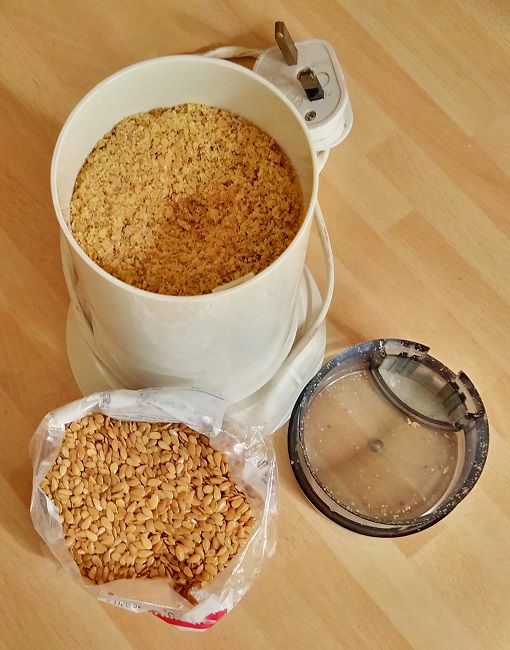
In order to benefit from as many of the nutrients in seeds as possible, it is important to make sure you chew them thoroughly. A bake like flapjack is a perfect recipe to make this happen naturally because the oats help increase the chewy texture. If you pre-grind seeds that have a more slippery texture in the mouth, like linseed and flax, you’ll help yourself to more nutrition with ease. I pop a handful in an electric coffee grinder and blitz them for a short while before I put them in the mix.
Grinding linseeds. Image: Kathryn Hawkins
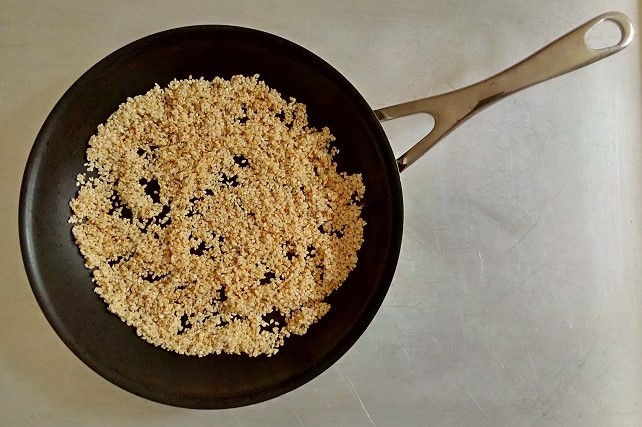
Sesame seeds are a real gold mine of nutrients and a valuable source of calcium for anyone on a dairy-free diet. I love their intense nutty flavour which I enhance by toasting them lightly in a dry, hot frying pan before adding them to a recipe. Keep an eye on them and keep them moving around the pan, as they brown very quickly once they reach a certain temperature.
Toasting sesame seeds. Image: Kathryn Hawkins
My flapjack recipe makes a large quantity, perfect for batch baking, but you can easily educe the quantity by half and press into an 18cm square tin instead.
175g mixed small seeds such as chia seeds, linseeds, flax seeds and toasted sesame seeds
Preheat the oven to 180°C (160°C fan oven, gas 4). Grease and line a 20 x 30cm oblong cake tin. Put the margarine, sugar, syrup and nut butter in a large saucepan and heat gently, stirring, until melted.
Remove from the heat and stir in the oats and seeds until well mixed. Press evenly into the prepared tin and bake for about 25 minutes until lightly golden all over.
Whilst the bake is hot, gently score the top into 24 squares and then leave to cool in the tin. Once cold, cut through the squares completely and remove from the tin. Store in a air-tight container for up to a week. Flapjack freezes well too!
A stack of freshly baked super-seed flapjack. Image: Kathryn Hawkins
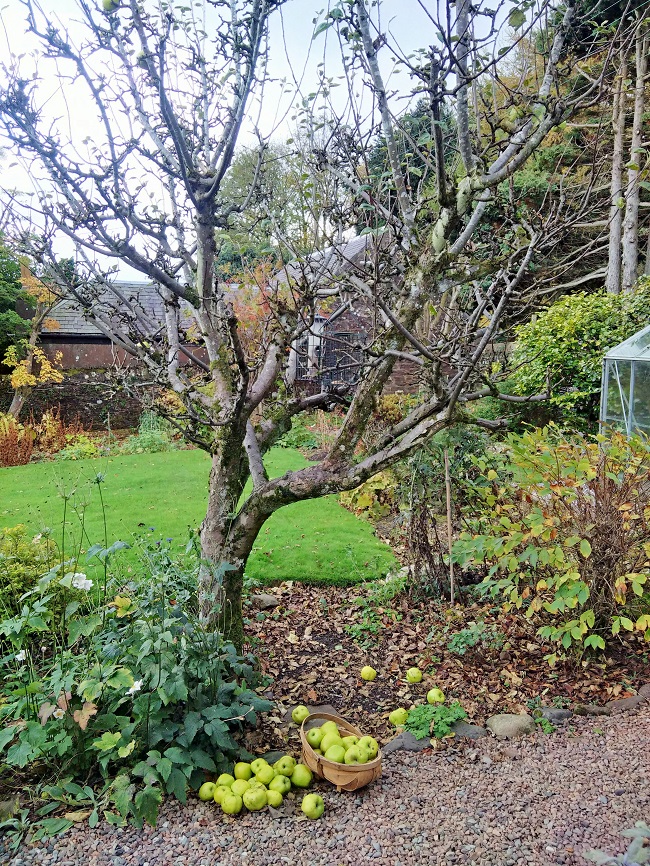
Last weekend, I finally got round to gathering the last of the windfall apples from underneath and around the old apple tree in the garden. There were quite a few; some badly bruised, others almost entirely unscathed. I had picked a good harvest from the tree a couple of weeks previously and have these apples safely stored away in an old fridge for later use. In my kitchen, windfalls are destined for the cooking pot and for making preserves.
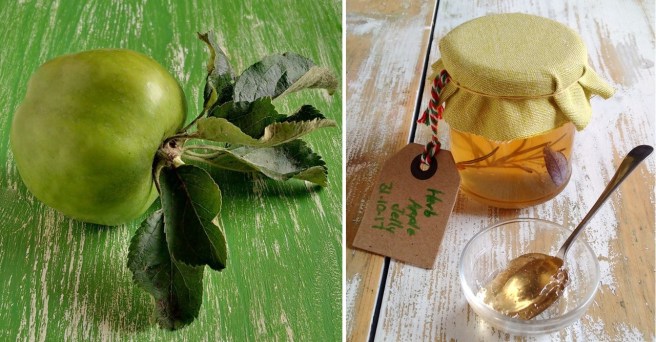
Lord Derby apples, just before picking earlier in October. Image: Kathryn Hawkins
I find it very satisfying making chutneys, jams and jellies, although jelly making does take a bit of planning and time, and can not be rushed. However, the finished result is very rewarding and worth the wait. This apple variety (Lord Derby) isn’t particularly flavoursome (it is reminiscent of a very large Granny Smith apple), but it is a great cooking apple as it holds its shape and some texture when baked or stewed. It’s not the juiciest for jam making, but as I had so many to use up this year, I decided to get all the jelly making stuff out of the cupboard and get preserving.
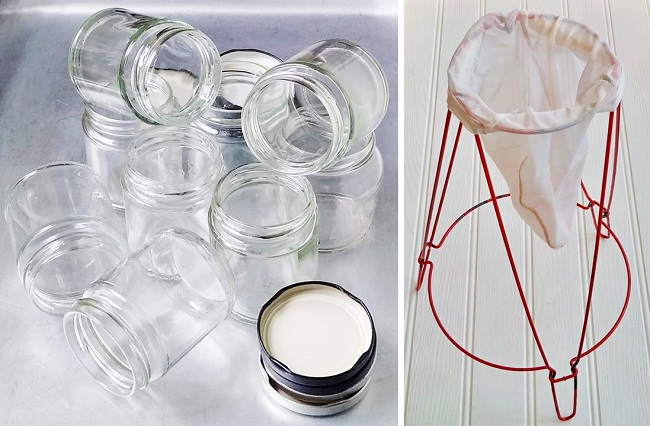
Jelly making kit. Images: Kathryn Hawkins
I always keep a good supply of glass jars on stand-by throughout the year, ready for filling as different fruit and veg comes into season. I give them a good rinse with hot soapy water and then sterilise them along with the lids – I gave up boiling jars to sterilise them, I now use a sterilizing fluid followed by a thorough rinse. I haven’t had any problems with any preserves spoiling since I switched to this less time-consuming method.
The jelly strainer is a piece of kit I’ve had for a few years. The whole contraption stands over a bowl or jug to catch the juice. If you don’t have a purpose-made jelly bag, line a large nylon sieve or strainer with some muslin and suspend over a deep bowl. Make sure you thoroughly clean all the equipment that comes into contact with the fruit or vegetable juice to maximise the keeping qualities for your preserves.
Homemade herb apple jelly. Images: Kathryn Hawkins
I’ve written a couple of savoury variations on a basic apple jelly recipe I made with my windfalls during the week. Both jellies are delicious with cheeses, barbecue food or roast meats and cold cuts. If you want a plain, sweet apple jelly (the best choice if you have a really tasty apple variety), just follow the recipe for the herb jelly below, and leave out the herbs.
Herb apple jelly
Makes: 1kg
Ingredients
1.5kg prepared cooking apples, roughly chopped – this is the overall weight once they have been thoroughly washed and all the bad bits taken out
Approx. 825g granulated sugar
A few sprigs of fresh rosemary and sage
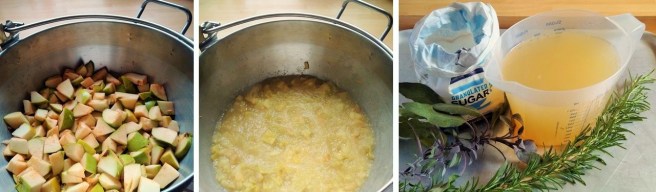
Put the chopped apples (unpeeled, pips and stalks attached!) in a large saucepan. Pour over 1l cold water, bring to the boil, cover and simmer for about 10 minutes, mashing occasionally, until tender.
Carefully ladle into a suspended jelly bag and leave to drip into a clean bowl or jug, in a cool place, lightly covered, overnight. Don’t be tempted to squeeze the bag, just let it drip through naturally. Jelly making is an excellent test of the patience!
The next day, remove the juice bowl, and cover and chill it. Scoop the pulp back into a large saucepan and add a further 500ml water. Bring to the boil, then strain again as above, for a few hours – there won’t be so much juice the second time around, so 5-6 hours should be long enough.
Measure both juice yield together and calculate the amount of sugar required as 450g per 600ml juice. My yield was 1.1l which needs 825g sugar, but if you have a juicy apple variety you will capture more juice.
Herb apple jelly preparation in pictures. Images: Kathryn Hawkins
Rinse and pat dry a large sprig of rosemary and sage. Pour the juice into a preserving pan or large saucepan, add the herbs, and heat until steaming. Stir in the sugar until it is dissolved, then raise the heat and boil rapidly until the temperature reaches 105°C on a sugar thermometer – this will take several minutes.
Meanwhile, prepare the jars by adding a small sprig of washed rosemary and a sage leaf in each. Remove the jelly from the heat and let the bubbles subside. Skim away any surface residue from the top and discard the cooked herbs. This jelly begins to set quite quickly so ladle it into the jars and seal them while the jelly is piping hot. Leave to cool, then label and store in a cool, dark place for up to 12 months. The jelly is ready for eating right away if you can’t wait! Once opened, store in the fridge for up to a month.
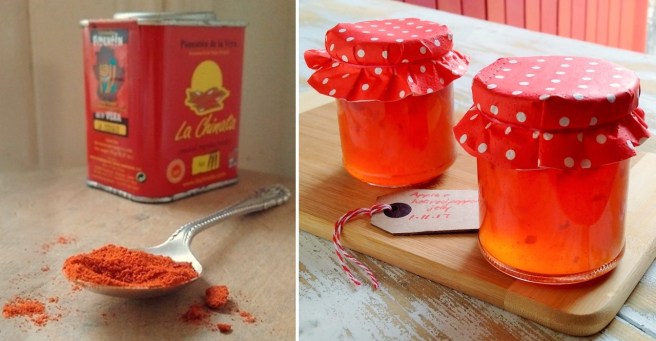
Apple and hot red pepper jelly flavoured with hot smoked paprika. Images: Kathryn Hawkins
Apple and hot red pepper jelly
Makes: 900g
Ingredients
1.25g prepared, chopped cooking apples (see above)
500g prepared weight chopped red peppers (capsicum) (approx. 4 medium peppers), seeds and stalks removed
6 garlic cloves, peeled and roughly chopped
60ml cider or white wine vinegar
Approx. 675g granulated sugar
2 bay leaves
1 tsp salt
1 tsp hot smoked paprika
Put the chopped apples, peppers and garlic in a large saucepan and pour over 1l cold water. Bring to the boil, cover and simmer for about 20 minutes, mashing occasionally, until tender.
Carefully ladle into a suspended jelly bag and let the mixture drip into a bowl or jug underneath. Leave in a cool place, covered lightly, overnight.
The next day, put the pulp to on side and measure the collected juice. You will need 450g sugar per 600ml juice. Pour the juice into a preserving pan or large saucepan and add the vinegar and bay leaves. Heat until steaming hot and then stir in the sugar until dissolved.
Making apple and hot red pepper jelly. Images: Kathryn Hawkins
Bring the juice to the boil and boil rapidly until the temperature reaches 105°C on a sugar thermometer. While the juice is boiling, pick out 50g of the cooked pepper and garlic, rinse, pat dry and chop finely – discard the rest of the pulp. Divide the chopped vegetables between your prepared jam jars.
Once the jelly has reached the correct temperature, turn off the heat, discard the bay leaves and stir in the salt and smoked paprika. Divide between the jars – for even distribution of the vegetable pieces, wait for about 10 minutes before sealing the jars, then give them a quick stir with a teaspoon to suspend the vegetable pieces throughout the jelly before putting the lids on tightly. Cool, label and store as above. Best left for a month to mature before eating.
I’m a bit of a wimp when it comes to spicy heat in my food, so, although I call this “hot”, it’s pretty mild. However, if you can stand the heat, this is a good recipe to add as much chopped red chilli to suit your taste. Just cook the prepared chilli with the apples and peppers at the beginning of the recipe – leave the chilli seeds in as well if you like!
I’ve had a very “light” pear harvest this year. In fact, just 4 fruit developed on one tree and the other had no fruit at all. Not sure why, the spring was fine, there was so much blossom and plenty of bees around to pollinate it. Perhaps the pear trees decided to have a bit of a holiday this year.
Just before harvest. Image: Kathryn Hawkins
So with such a precious harvest, what to cook? I picked the pears a couple of weeks ago, and they have been ripening gently and slowly in a cool spot in the kitchen. They remained quite firm, so I decided I would cook them.
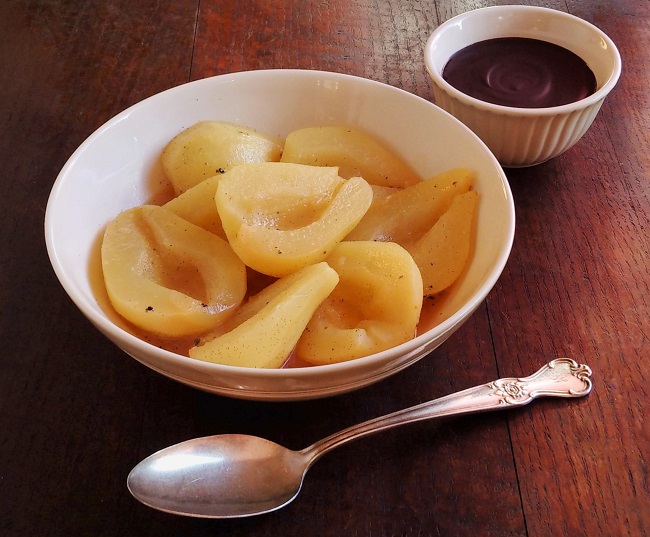
Vanilla baked pears with chocolate “butter”. Image: Kathryn Hawkins
Vanilla is one of my favourite spices, and it is a particularly delicious flavouring for pears. This is a very simple recipe, but it tastes a little bit more special because the pears are cooked in Moscatel de Valencia – the floral notes of this sweet Spanish wine are a perfect match for both pears and vanilla.
Chocolate is another “must have” with pears as far as I’m concerned, and this easy “butter” makes an interesting alternative to the usual chocolate sauce. Moscatel is one of the few wines I think goes well with chocolate, so this is a “win win” recipe for me. Serve the pears very slightly warm or at room temperature so that the cooking juices don’t begin to set, and avoid chilling the chocolate accompaniment (unless the room temperature is very warm) as it will become very hard to spoon.
Serves: 4
Ingredients
4 firm pears
Juice of ½ a lemon
1 vanilla pod
300ml Moscatel de Valencia wine (or white grape juice if preferred)
1 tbsp. agave syrup (or clear honey if you eat it)
40g dairy-free margarine (or unsalted butter)
100g dairy-free 85% cocoa chocolate
50g golden syrup
Preheat the oven to 180°C (160°C fan oven, gas 4). Peel and core the pears, and cut in half. Brush lightly with lemon juice and place cut-side up in a shallow baking dish.
Split the vanilla pod and scoop out some of the seeds using the tip of a sharp knife. Push the rest of the pod into the dish of pears, mix the scooped-out seeds with the wine and pour over the pears.
Dot the pears with 15g of the margarine and drizzle with agave syrup. Cover with foil and bake for 30 minutes. Remove the foil, turn the pears over, baste with the cooking juices, and return to the oven to bake, uncovered, for a further 20 minutes or until the pears are tender.
Cool for 30 minutes in the cooking juices, discard the vanilla pod, then lift out the pears using a slotted spoon and place in a heatproof dish. Pour the cooking juices into a small saucepan.
Bring the cooking juices to the boil and simmer for about 5 minutes until reduced by half. Pour over the pears and leave to cool.
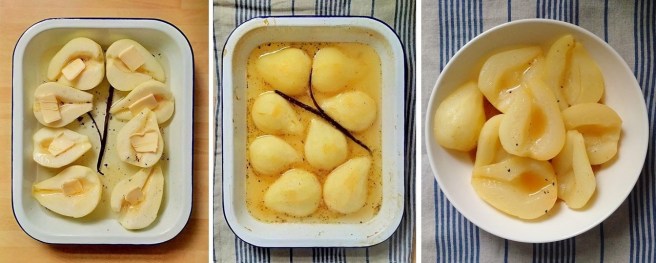
Preparing baked pears with vanilla. Images: Kathryn Hawkins
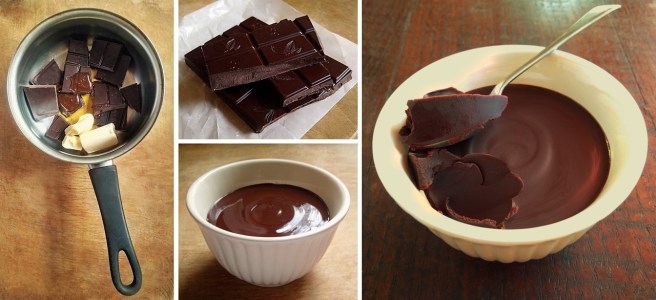
For the chocolate “butter”, break the chocolate into pieces and put in a saucepan with the remaining margarine and the golden syrup. Heat very gently, stirring, until melted. Remove from the heat, mix well and pour into a small, heatproof dish. Leave to cool – the “butter” will solidify when it becomes cold.
Making chocolate “butter”. Images: Kathryn Hawkins
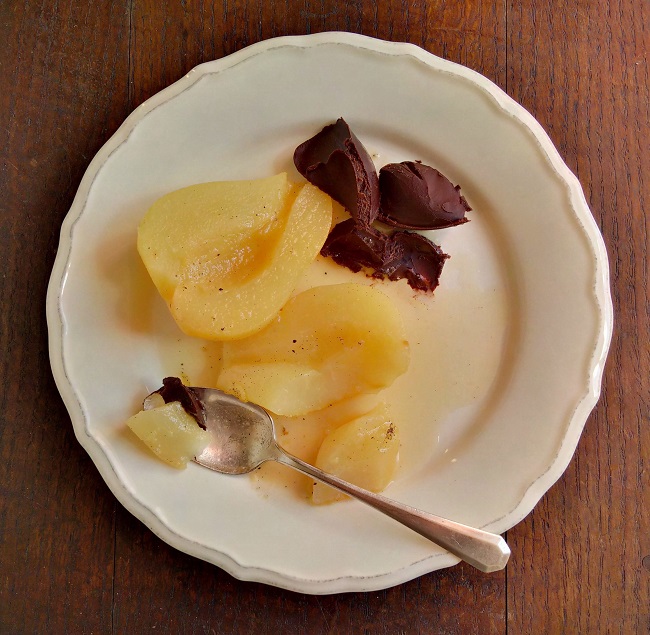
Serve the pears at room temperature accompanied with the chocolate “butter”. If you prefer, leave the chocolate mixture to cool for about 30 minutes and serve warm as a thick, glossy chocolate sauce.
Vanilla baked pears with chocolate “butter”. Image: Kathryn Hawkins
The best things in life are often the simplest. These wise words certainly apply to my recipe this week. There aren’t many dishes more straightforward than a tattie scone. Just 3 ingredients, plus some oil to cook them in, and that’s it.
The tattie (potato) scone is synonymous with Scotland. Just about every self-respecting baker makes his or her own, and no supermarket bakery aisle is complete without them. The scones are a good way of using up leftover boiled potato which is mashed and bound with wheat flour, but gluten-free works fine. Tattie scones are usually quite thin, but I make mine a bit thicker (about 1cm) as I find the mixture easier to work with. Eat them warm as part of a savoury meal (often served as part of a hearty breakfast) or as a snack spread with butter and jam. The scones make a great alternative to bread as an accompaniment to a soup or stew as they are perfect for mopping up gravy or a sauce.
A tea-time favourite: tattie scones and jam. Image: Kathryn Hawkins
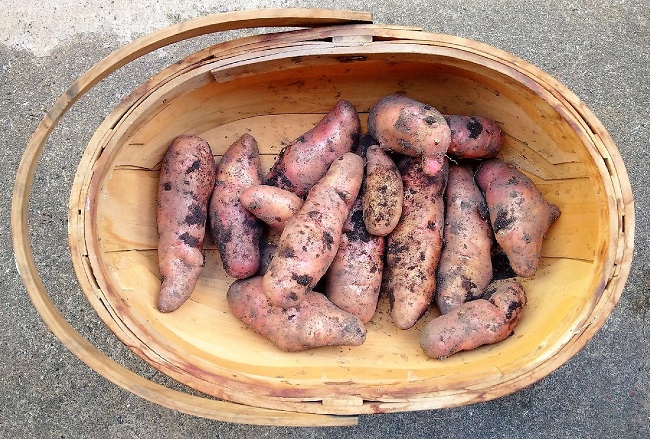
I dug up the last of my home-grown potatoes this week, and decided that there was no better way to enjoy them, than by making up a batch of my own scones. I’ve been growing the same main crop variety (Pink Fir Apple) for a few years now, and haven’t found any other to rival it in texture or flavour. The potatoes are pink-skinned and can be very knobbly indeed. The flesh is creamy-yellow in colour, sometimes flecked or ringed with pink, and when cooked, it becomes dry and floury in texture. The flavour is slightly sweet and earthy. Pink Fir Apples potatoes are perfect for crushed or mashed potato. and also roast well. They can be cooked and eaten peeled or unpeeled.
My last harvest of Pink Fir Apple potatoes. Image: Kathryn Hawkins
Here’s my recipe.
Makes: 6
Ingredients
400g main crop potatoes
1 tsp salt
40g gluten-free self-raising flour blend (such as Dove’s Farm)
Vegetable oil for frying
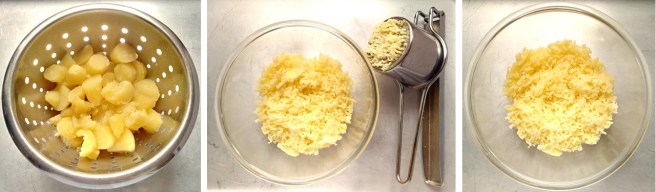
Peel the potatoes thinly, cut into small pieces, and place in a saucepan. Cover with water and add half the salt. Bring to the boil and cook for 8-10 minutes or until completely tender. Drain well through a colander or strainer, and leave to air-dry for 10 minutes.
Return the potatoes to the saucepan and mash finely with a potato masher. If you have a ricer, use this to achieve a super-smooth texture.
While the mash is still fairly hot, add the remaining salt and sift the flour on top. Gently work the ingredients together to make a pliable dough.
Ricing the potatoes. Images: Kathryn Hawkins
Making and rolling the potato dough. Images: Kathryn Hawkins
Turn the dough on to a lightly floured work surface and roll to form a round about 18cm diameter – roll to 20cm for slightly thinner scones. Cut into 6 triangular wedges.
Brush a large frying pan or flat griddle pan generously with oil and heat until hot. Cook the scones for 2-3 minutes on each side until lightly golden. Drain and serve warm. You can reheat the scones successfully, by either popping them in the frying pan again or under the grill to lightly toast them.
Straight out of the pan and spread with my favourite topping: homemade raspberry jam. Image: Kathryn Hawkins
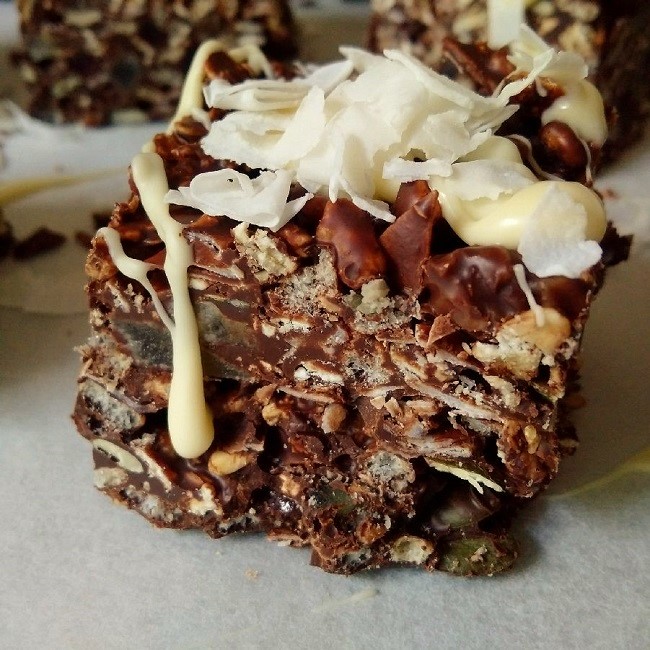
The perfect pick-me-up. Image: Kathryn HawkinsOut of the tin and ready for slicing. Image: Kathryn Hawkins
It’s that time of year when the weather turns a bit dull, the nights draw in fast, and it begins to feel a bit chilly. For me, it’s time for a pick-me-up. My standby on these occasions is always some kind of melted chocolate-based mix; it’s easy to put together, requires no baking, and keeps for several days in the fridge.
The recipe is the perfect way to use up all the bits of seeds, fruit and nuts you have in the fridge or cupboard. I usually end up with a different combination of flavours every time I make this recipe. If you prefer, simply half the quantities, pack the mixture into an 18cm square tin and cut into 12 portions instead.
Makes: 24 chunky pieces
Ingredients
500g 90% cocoa solids, dairy-free chocolate
100g coconut oil
60g golden syrup
200g gluten-free, vegan granola
75g crisp rice cereal
100g pumpkin seeds
75g shredded coconut + extra to decorate
400g chopped dried, glacé and candied fruit such as pineapple, cherries, orange peel, golden sultanas, etc.
100g dairy-free, vegan white “chocolate”
Line a 20 x 30cm cake tin with baking parchment or cling film. Break up the 90% cocoa chocolate into pieces and place in a heatproof bowl with the coconut oil and golden syrup. Stand the bowl over a saucepan of barely simmering water and leave to melt. Remove from the water, stir well and cool for 10 minutes.
Mix in all the remaining ingredients except the white chocolate. Stir well until everything is coated, then pack into the prepared tin, pressing down well with the back of a spoon. Cool for at least an hour or until firm.
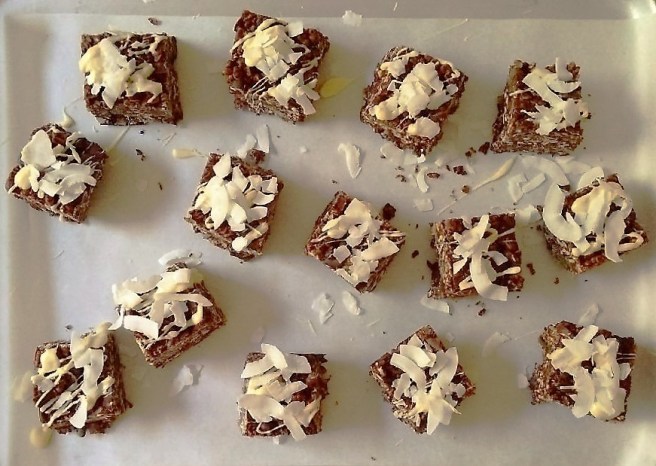
Carefully remove from the tin and peel away the lining parchment or cling film. Place on a board. Use a large bladed knife to cut into strips and then chunks – the mixture is quite firm to slice.Line a large tray or board with baking parchment and arrange a few pieces on top. Melt the white chocolate as above and then drizzle over each piece. Sprinkle with shredded coconut if like. Leave in a cool place for several minutes to set before serving. Decorate the remaining pieces in the same way. Enjoy!
Drizzled, sprinkled and ready to eat. Image: Kathryn Hawkins
The month of May seems like a long time ago now, but this is when my quest to grow my own sweetcorn began. I am quietly astounded that I managed to raise 12 plants from seed to fruit in an unpredictable Scottish climate, yielding their first harvest this very week. It seems that Mother Nature’s combination of a mild spring, intermittent sunshine and showers, along with my interventions – fussing like an old mother hen, protecting the plants from the slightest breath of wind and giving them an occasional feed – has paid off.
Sowing sweetcorn seeds in early May, and planting out one month later. Images: Kathryn Hawkins
I chose a hard variety of baby corn called Snowbaby. All varieties of sweetcorn need to develop a firm root structure in order to grow to the height they needs to produce cobs. If you take this into account from the very beginning, you will find the crop easy to grow. Pack the sowing compost firmly into compostable pots – using biodegradable pots will enable you to plant the young seedlings into the soil without disturbing the roots. From sowing the seeds at the beginning of May and keeping them sheltered in an unheated greenhouse, it took 4 weeks to develop seedlings with 5 or 6 leaves which were then ready to plant out after acclimatization.
Sweetcorn likes a nutritious, well-draining soil; a sheltered spot; plenty of sunshine, and frequent watering. I put 6 plants in an old barrel and the other 6 went in a suitable spot in the garden. Sweetcorn requires little maintenance and is virtually pest resistant. Triumphant, some 4 months later, I picked my first bunch of cobs.
The tall sweetcorn stems with their draping, long, ribbon-like leaves and fine feathery flowers make an attractive architectural plant display, and the way the baby corn cobs develop is very intriguing. The cobs form in the gap between stem and leaf. Once the cobs are large enough, the silky threads protecting the cobs inside the leaf wrapping, burst out of the tops to indicate that the baby corn cobs inside are ready to be picked. Simply twist the cobs from the stalks or snap them off outwards. Cook them quickly as they are prone to drying out, although I have kept the cobs, still wrapped in leaf, in a jug of water in the fridge for 3 or 4 days, and they stayed perfectly fresh.
Preparing baby sweetcorn. Image: Kathryn Hawkins
Carefully strip away the outer leaves and gently pull away the silky strings to reveal the mini cob in the centre. Either steam or boil the cobs for 3-4 minutes and serve immediately. For best results, don’t salt the cooking water but add a pinch of sugar instead to bring out the sweetness. Freshly picked cobs have an earthy, sweet flavour so avoid over-seasoning in order to appreciate the difference between home-grown and mass-cultivated crops.
Serving suggestions:
Strip away a few leaves from the cob but keep a few in place so that you are able to wrap the cob up again; carefully remove the strings. Secure the remaining leaves round the cob again with string and blanch in boiling water for 1 minute. Drain well and cook over hot coals for 2-3 minutes until tender and lightly charred. Remove the string and leaves and serve as part of a barbecue feast.
Simmer baby corn cobs in coconut milk with a little chilli and garlic and serve sprinkled with chopped coriander and toasted sesame seeds.
Slice into chunks and stir fry with shredded leek, pak choi and chopped garlic for 3-4 minutes until tender. Dress lightly with soy sauce, rice wine vinegar and a spoonful of honey or sweet chilli sauce.
Blanch sliced baby corn pieces for 1 minute; drain, cool and mix with cooked sweetcorn kernels, a handful of raisins, and toasted pine nuts. Dress with olive oil and a little balsamic vinegar.
No recipe pictures from me this week. I enjoyed my first harvest of freshly picked baby corn cobs steamed and served with a dollop of lightly salted butter and a sprinkling of black pepper – nothing fancy but completely and utterly delicious. I couldn’t resist taking this last picture though. I hope “she” makes you smile.
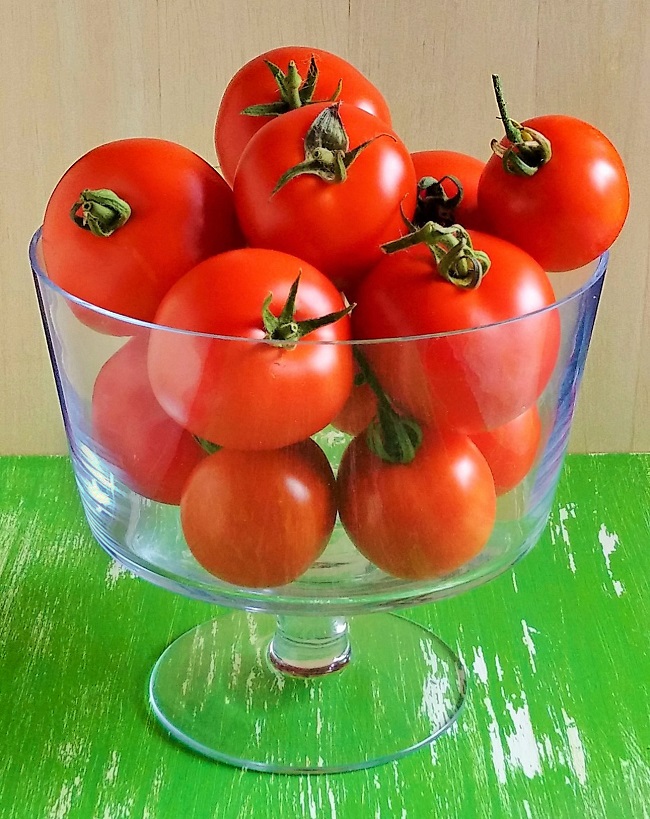
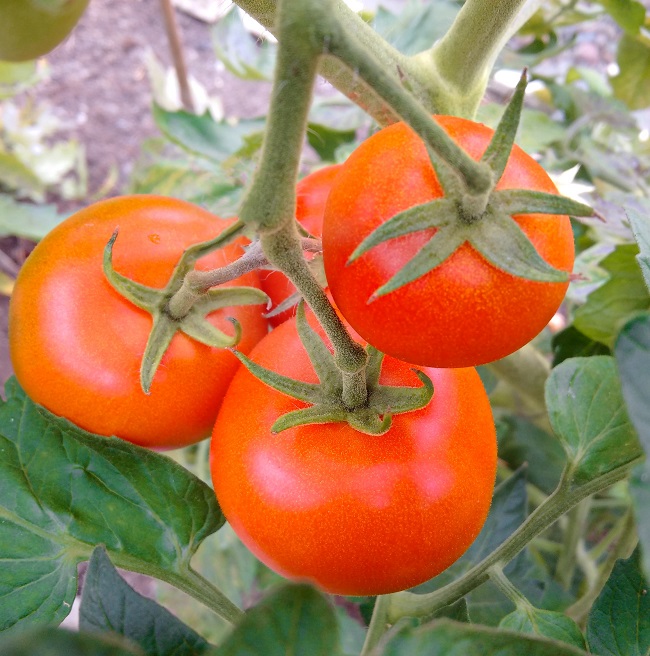
With the fine, warm spring weather we had this year, my tomato plants have done very well. The fruit started to ripen earlier than usual, and I have been picking a steady supply tomatoes since the end of July. By this time of the year, I’m usually left with a greenhouse filled with hard, green fruit, wondering how on earth they are all going to ripen as the days shorten and the weather turns.
Ripe and ready to pick. Image: Kathryn Hawkins
Of all the fruit and vegetables you can grow yourself, the tomato has to be in my top 5 as having the most marked difference in flavour compared to most commercially grown varieties, and it is one that I never tire of; I would happily consume a plateful every day if given the opportunity.
To preserve the flavour, avoid putting tomatoes in the fridge as this seems to destroy a lot of the taste – the unique fragrance also seems to disappear. I try to pick only what I need for eating or cooking that day, but if there are a lot that are ripe, I store them in a cool place in the kitchen and use within a couple of days.
Last month I made a batch of my favourite tomato preserve: Smoky Tomato Jam (gluten-free, dairy-free, vegan) and semi-dried a batch which I have preserved in olive oil – Preserving the Summer (Semi-cuit tomatoes – gluten-free, dairy-free, vegan) If preserving isn’t your thing, and you have too many ripe tomatoes to eat, you can freeze them whole in bags for use in sauces and soups later on. Making a batch of tomato sauce is a good way to use them up too, and it also freezes well. Homemade tomato sauce makes a deliciously intense flavoured base for soups and pasta dishes, or as a tasty pouring sauce for meat, fish and vegetables.
Homemade tomato sauce. Image: Kathryn Hawkins
To make about 450ml fresh tomato sauce: simply wash and pat dry 1 kg tomatoes; cut in half and place in a large lidded frying pan or saucepan. Try and keep them in a single layer if possible, for even cooking. Season lightly with salt and pepper and add a bunch of fresh herbs – I use rosemary, thyme, oregano and a bay leaf. Place over a low heat until beginning to steam, then cover with a lid and continue to cook very gently for about 40 minutes to 1 hour, depending on the size of the tomatoes, until soft and collapsed. Cool for 10 minutes, then discard the herbs and push the tomatoes through a nylon sieve to make a pulpy juice.
Preparing tomato sauce. Image: Kathryn Hawkins
Pour into a clean saucepan, add 25g butter or vegan margarine, 1 tbsp. good quality olive oil, and 1 tsp caster sugar. Taste and add more seasoning if necessary. Heat gently until the butter or margarine melts, then raise the heat and simmer steadily for about 20 minutes, stirring occasionally, until thickened, but still thin enough to pour. Use as per recipe or allow to cool completely, then cover and store in the fridge for up to 3 days. Freeze in sealable containers for up to 6 months. Note: you can add garlic to the tomatoes before cooking – peeled, whole cloves work fine and will cook into a pulp with the tomatoes. I prefer to keep the sauce plain and add my garlic when I use the sauce in a recipe.
Homemade tomato sauce, ready to serve. Image: Kathryn Hawkins
Here are a few other ideas for serving up fresh tomatoes:
Dress a plate of sliced fresh tomatoes by simply seasoning with a light dusting of white sugar, a little salt, freshly ground pepper and a few toasted and crushed cumin seeds.
For a quick “chutney”, gently fry 2 finely sliced red onions with a crushed clove of garlic in olive oil. Add a pinch or 2 of chilli flakes and cook until very soft. Add 225g chopped fresh tomatoes, 2 tbsp. balsamic vinegar and 2 tbsp. caster sugar. Season and cook gently, stirring occasionally, until thick. Leave to cool, then store in the fridge for up to a week. Lovely with barbecued meat, vegetables and as an accompaniment to cheeses.
Roughly chop a few ripe tomatoes. Blitz in a blender; push through a nylon sieve into a jug. Season with Tabasco sauce and/or Worcestershire sauce. Put ice in a tumbler, add a slug of vodka and pour over the seasoned juice.
Bake halves of tomato, side by side in a shallow dish, in a moderate oven with a topping of fresh breadcrumbs, capers, slivers of garlic and a drizzle of olive oil, until tender. Serve scattered with lots of freshly chopped parsley.
Small pieces of sweet tomato make and interesting addition to a citrusy fruit salad. Pour over a plain sugar syrup and scatter with chopped, fresh mint to serve.
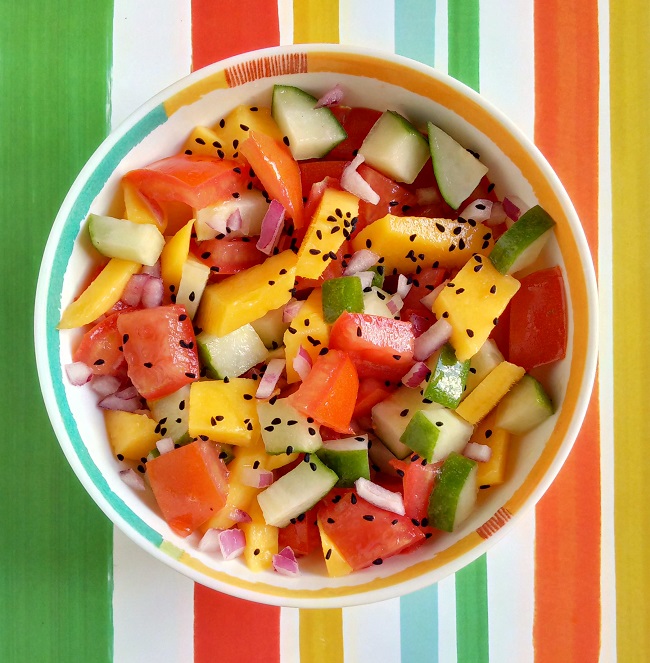
For a delicious salsa to go with Indian food: combine chopped tomatoes, cucumber, and fresh mango with a little finely chopped red onion. Sprinkle with black onion seeds and toss in a little white balsamic vinegar. Serve at room temperature for the best flavour.