Welcome to my blog all about the things I love to grow and cook. You'll find a collection of seasonal gluten-free, dairy-free and vegan-friendly recipe posts, as well as a round up of my gardening throughout the year. I wish you good reading, happy cooking and perfect planting!
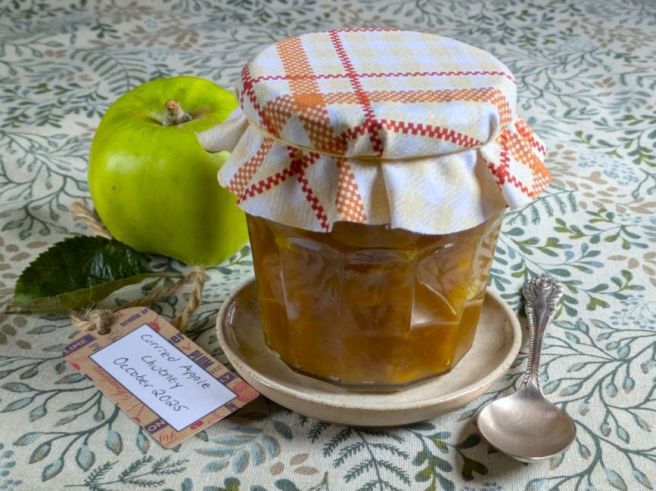
Sweet and spicy homemade chutney. Image: Kathryn Hawkins
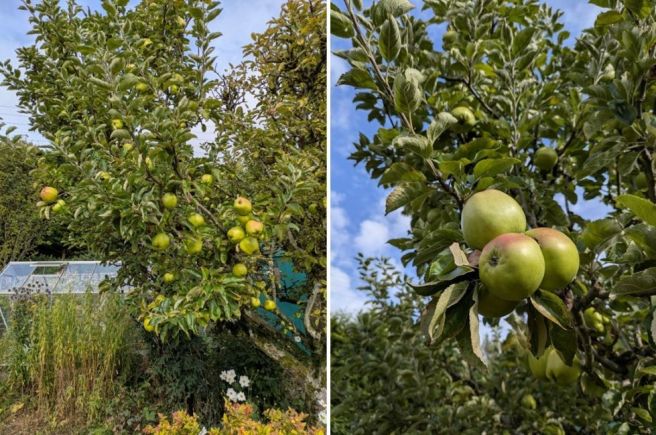
Hello again. I hope you are keeping well and enjoying the colours of Autumn. It’s remained quite dry here in central Scotland and the trees are looking very colourful around and about. Everywhere I look, it really has been a bumper year fruit especially plums and apples in my garden. The old apple tree produced yet another bountiful crop of some 70kg! Now that the harvest is in, it’s enjoying a well earned rest I’m sure.
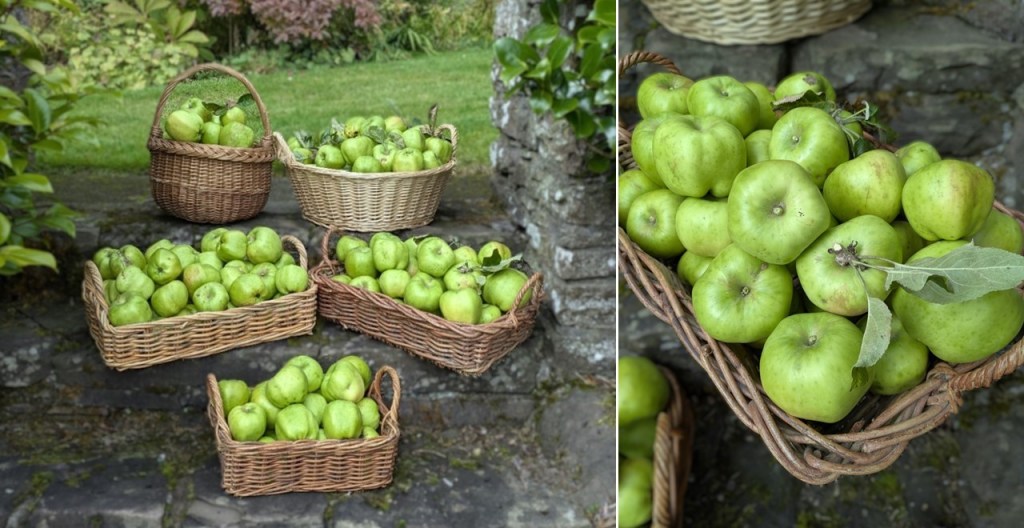
A tree full of apples. Images: Kathryn Hawkins
Harvest gathered, this year’s bumper crop of cooking apples. Images: Kathryn Hawkins
We did a lot of the apples away this year as there were far too many to cook up or freeze down. But I still have a box full to work through and one of the first things to make was some apple chutney. I made this batch in the slow cooker. It’s very easy to make and tastes delicious. One slight difference to this slow cooker recipe is that it uses less vinegar and sugar than traditional recipe so the chutney does need to be stored in the fridge.
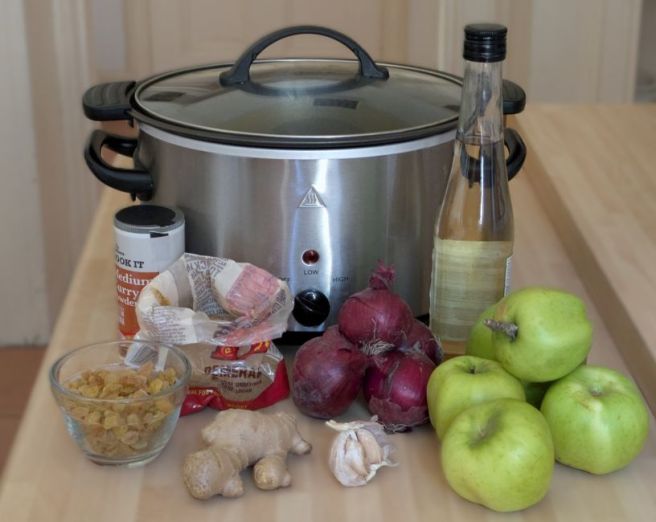
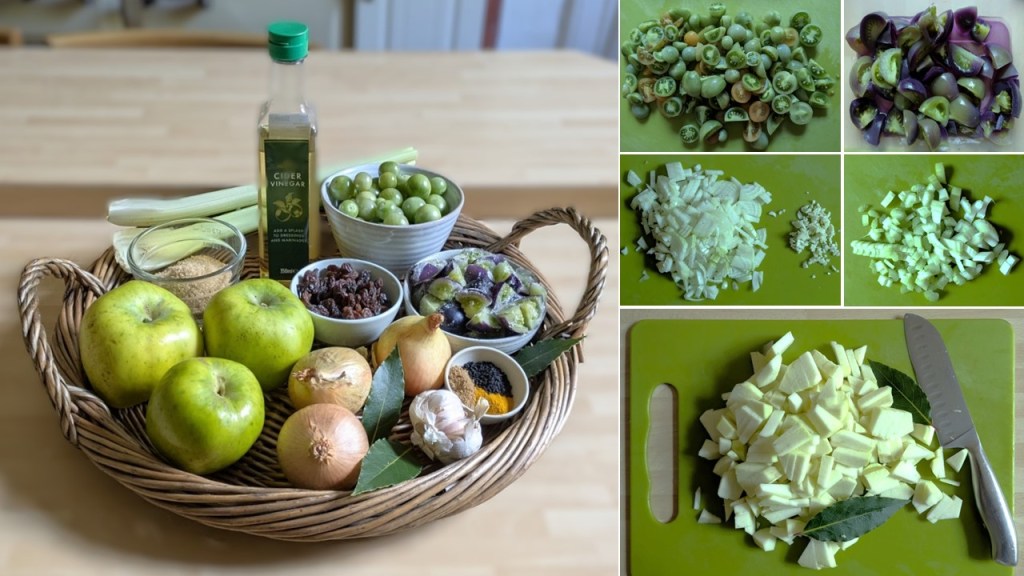
Curried apple chutney ingredients. Image: Kathryn Hawkins
Makes: approx. 1.2kg
Ingredients
300g prepared red or white onions, chopped
15g peeled root ginger, grated
10g peeled garlic, grated
750g prepared cooking apples, chopped
125ml cider or white wine vinegar
1tbsp medium curry powder
100g sultanas
200g Demerara sugar
1 1/2 tsp salt
1. Put the onion, ginger, garlic and apples in the slow cooker. Pour over the vinegar, mix well, cover with the lid and cook on High for 4 hours.
Apple chutney preparation. Images: Kathryn Hawkins
2. Stir in the remaining ingredients, cover and cook for 30 minutes longer to dissolve the sugar. After this time, remove the lid and if the mixture looks watery, leave the chutney to cook without the lid on for up to 2 hours, stirring occasionally, until thick and jam-like.
The 4 stages of slow cooker chutney. Images: Kathryn Hawkins
3. Leave to cool completely then pack into clean jars, seal tightly and store in the fridge for up to 3 months. It’s ready to eat immediately and doesn’t need to mature. Great news for the impatient preserve-makers amongst us 🙂
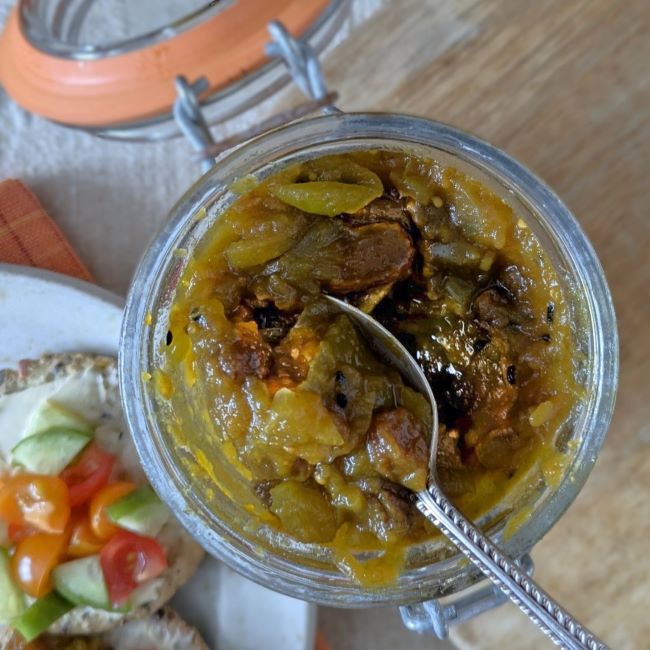
A spoonful of homemade chutney. Images: Kathryn Hawkins
This chutney makes a great alternative to mango chutney with and Indian meal as well as a delicious finishing touch to a sandwich.
That’s me for another month. Enjoy the rest of the season and I’ll see you again next month when winter will be upon us. Until then, take care and thanks for stopping by.
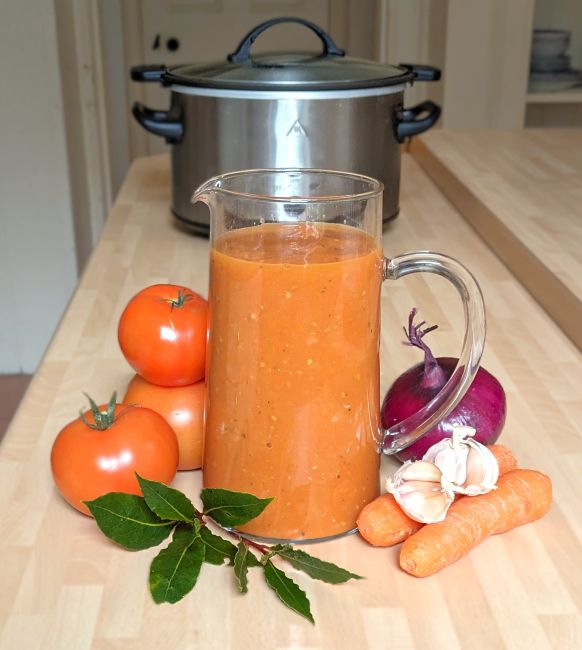
Easy to make, slow cooker tomato sauce. Image: Kathryn Hawkins
Hello again. It’s that time of year when there is so much produce ready at the same time. My fridge is groaning with vegetables and fruit, and I really need to get down to some serious recipe/meal planning and freezing.
For a simple tomato sauce, put 1.5kg washed and chopped fresh tomatoes in the slow cooker with 2 peeled and sliced medium carrots. Add a peeled and chopped large onion and 4 peeled and halved garlic cloves. I seasoned the mix with 2 teaspoons celery salt, 1/2 teaspoon black pepper and 4 teaspoons caster sugar. Add a couple of bay leaves and drizzle over 3 tablespoons olive oil. Mix well, cover with the lid and switch to the High setting. Leave to cook for 4 to 5 hours, until completely soft.
Blitz and freeze. Images: Kathryn Hawkins
Discard the bay leaves and blitz with a hand blender then leave to cool before packing into freezer containers. This quantity will make around 1.75kg sauce. It will keep in the fridge for about 5 days, and in the freezer for 6 months or so.
Reduced and thickened slow cooker tomato sauce. Images: Kathryn Hawkins
The sauce is quite thin which is fine for some recipes but if you want it thicker, transfer a few ladles of sauce to a deep frying pan, drizzle with a little olive oil, bring to the boil and simmer for a few minutes, stirring occasionally, until it is thickened to you liking.
Using homemade tomato sauce. Images: Kathryn Hawkins
Thinner sauce is perfect for soups and risotto stocks, whilst thicker sauce clings better to pasta shapes or can be used as a spread for tarts and pizza bases.
That’s all for this post. I hope you are enjoying some good weather and fine homegrown produce. Until next time, thanks for stopping by 🙂
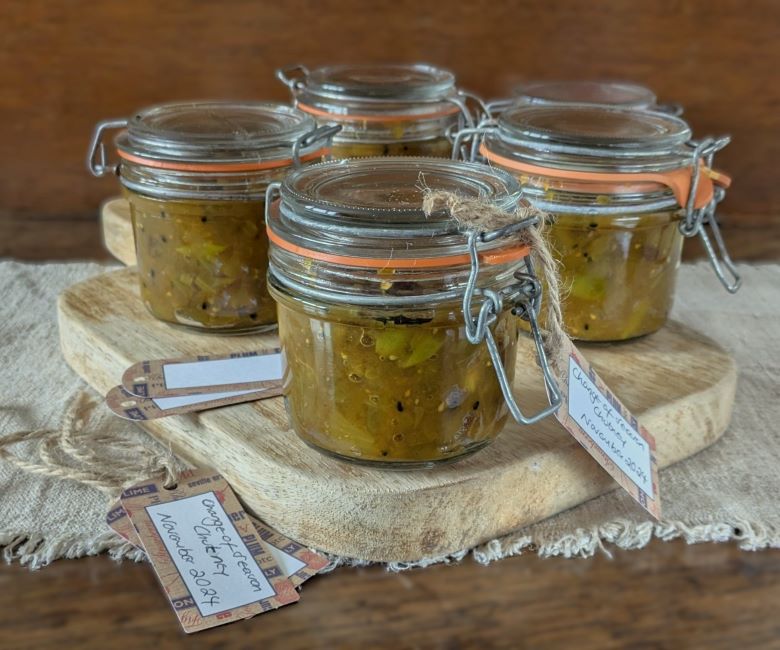
Last of the Autumn produce preserved. Image: Kathryn Hawkins
Hello there. When I planned to make this chutney a couple of weeks ago, it was very much still Autumn. I picked off the last of the tomatoes and put the greenhouse to bed during a lovely sunny afternoon. I was going to call the chutney “End of Autumn”.
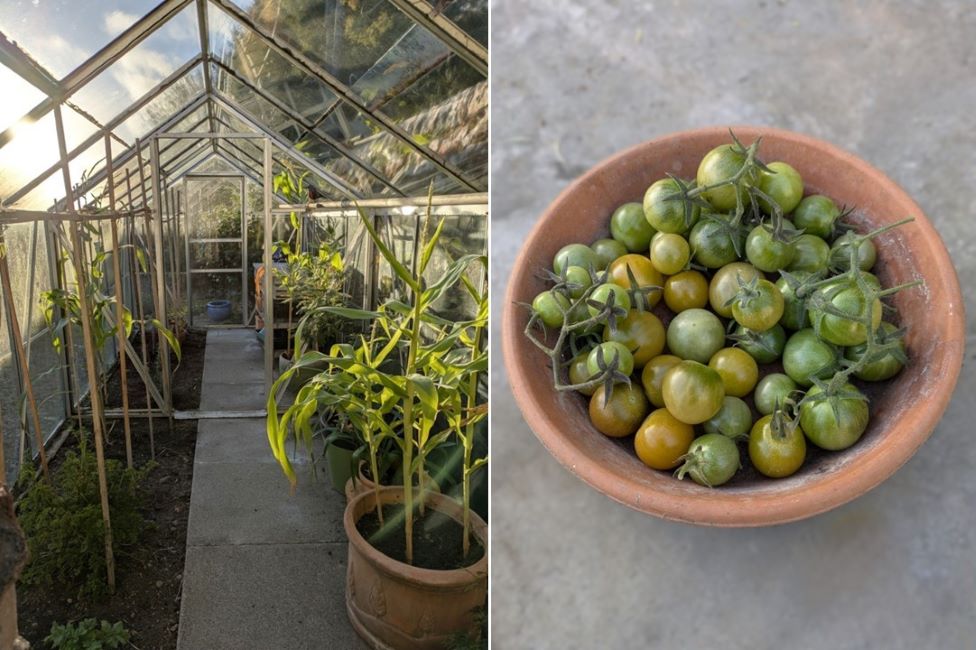
Last of the greenhouse tomatoes, mid-November 2024. Images: Kathryn Hawkins
However, when I came to make the chutney last weekend, snow was falling very heavily and suddenly we were in winter. And so I thought “Change of Season” chutney would be more appropriate 🙂
November snowy garden. Image: Kathryn Hawkins
I made the chutney in my slow cooker. It is ready to eat as soon as it cools and tastes delicious. I used up the last of this year’s apple harvest along with some black-skinned tomatoes that I had frozen down a few weeks ago. The spices I used give a mild curry flavour but you can change them if you prefer – cinnamon, cumin and coriander for a more earthy flavour would work well.
If you haven’t made a preserve in your slow cooker before, the technique is slightly different in that you can’t boil the preserve down like you would in a saucepan on the stove. The chutney is also cooled before putting in jars, and as such needs to be kept in the fridge. It will however keep for a few weeks or can be frozen for longer term storage.
Makes: approx. 1kg
Ingredients
400g green tomatoes, chopped
2 medium onions, peeled and chopped (about 180g prepared weight)
2 garlic cloves, peeled and chopped
2 sticks celery, trimmed and chopped (about 110g prepared weight)
2 large cooking apples, peeled and chopped (about 300g prepared weight)
2 bay leaves
100ml cider vinegar
75g sultanas or chopped dried apricots
2tsp garam masala
1tsp each nigella seeds, turmeric and salt
150g demerara or light brown sugar (or you can use granulated white sugar)
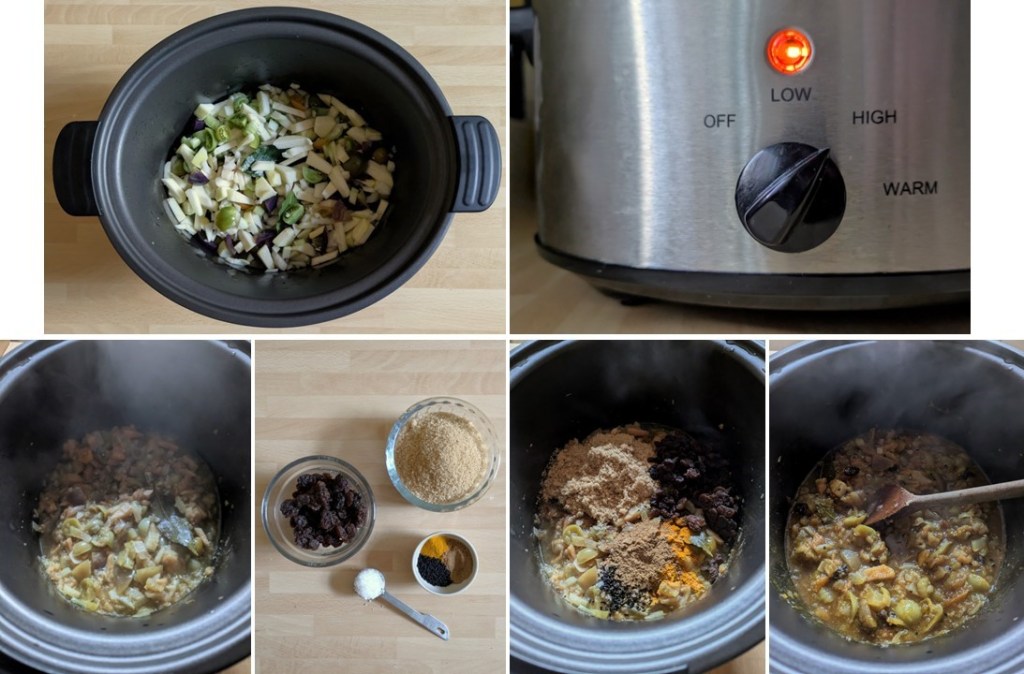
1. Put all the vegetables in the slow cooker with the bay leaves and mix well. Pour over the vinegar, cover with the lid and cook on High for 4 hours.
2. Add the remaining ingredients, mix well, re-cover and cook for 30 minutes to dissolve the sugar.
Slow cooking and seasoning chutney. Images: Kathryn Hawkins
3. Remove the lid, stir well and cook uncovered for a further 2 hours, stirring occasionally until reduced down and jam-like.
4. Switch off the cooker and leave the chutney to cool completely. Discard the bay leaves and spoon into clean jars. Seal, label and store in the fridge for up to 3 months. Once opened, use within a month. Alternatively, freeze the chutney in containers and defrost when required.
Reducing the chutney down ready for storing. Images: Kathryn Hawkins
A sweet and spicy spoonful. Image: Kathryn Hawkins
That’s me for another month. I have one more post before Christmas, so until then take care and keep warm 🙂
Another bumper year from the old apple tree. Images: Kathryn Hawkins
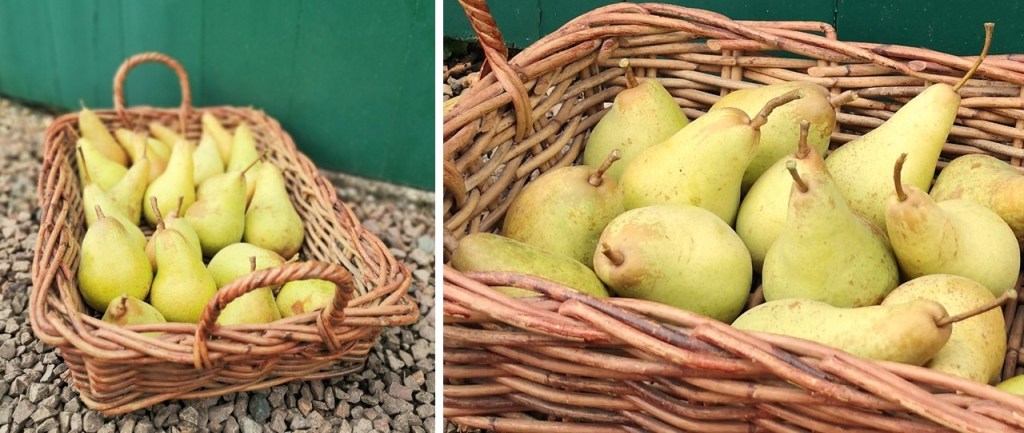
Hello again. Well, that’s just about everything edible in from the garden for another year. It was a fine bright day yesterday, perfect weather for apple and pear picking. What a bumper harvest this year: 35kg apples and 10kg pears – woo hoo!
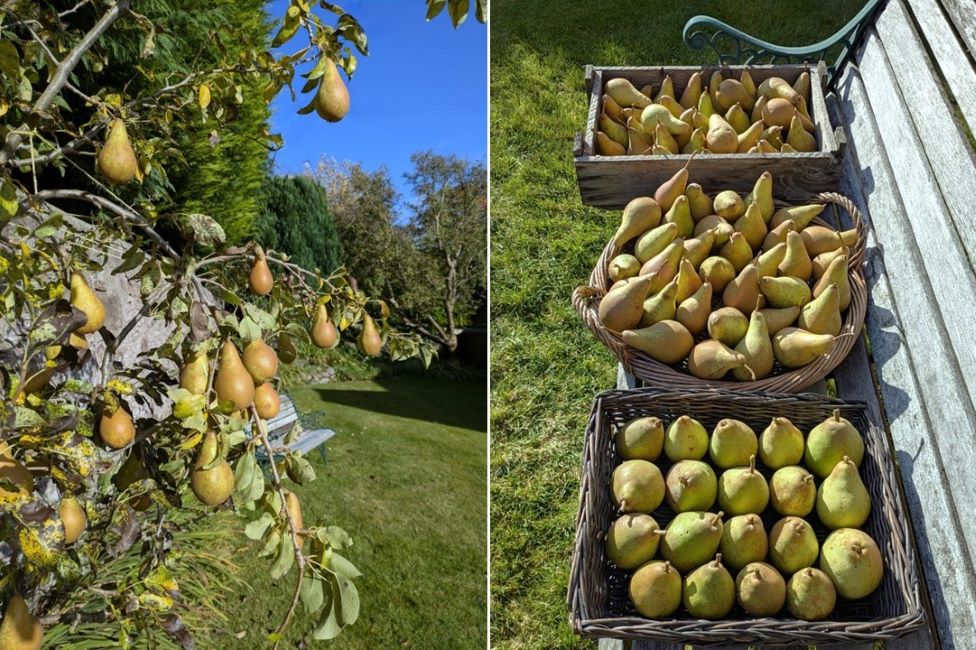
This year’s Concorde and Comice pear harvest. Images: Kathryn Hawkins
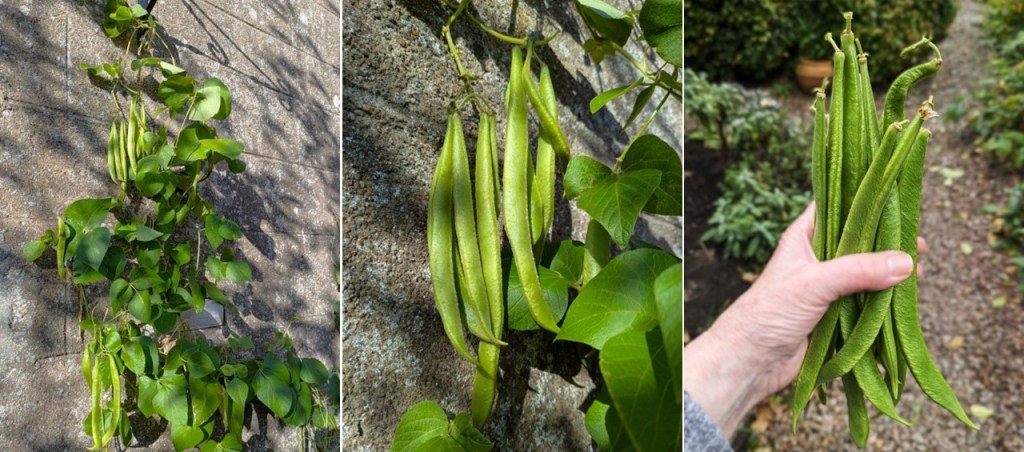
I’m glad to report on the back of last month’s post, there have been runner beans to enjoy at last. I picked off the last of them yesterday and took the plants down. As I type, the weather has become very stormy and I am pretty sure that the beans wouldn’t have survived a pounding from gale force winds.
Runner beans at last! Images: Kathryn Hawkins
In the greenhouse, some plants are shutting down like the French beans, cucumber and tomatoes. There are a few tomatoes left on the vines to ripen, but I was pleased with this basket full. The baby sweetcorn I planted (almost too) late is also about ready to pick.
Last of the runner beans. Image: Kathryn Hawkins
The sweetcorn fairies are coming. Image: Kathryn Hawkins
Looking forward to next spring, the potted mimosa plant is doing well in the greenhouse and has set lots of flower buds. Now all I need to do is keep it from the harm of a potentially very cold Scottish winter.
A hint of spring. Mimosa flower buds. Images: Kathryn Hawkins
Outside the garden is alive with beautiful colours of the Japanese maple and Autumn crocuses.
Glorious Autumnal shades. Images: Kathryn Hawkins
Sunny Autumn crocus. Images: Kathryn Hawkins
The deliciously scented pink rose is out flowering again. Such a heady aroma when you catch the scent in the air.
In the pink in October. Images: Kathryn Hawkins
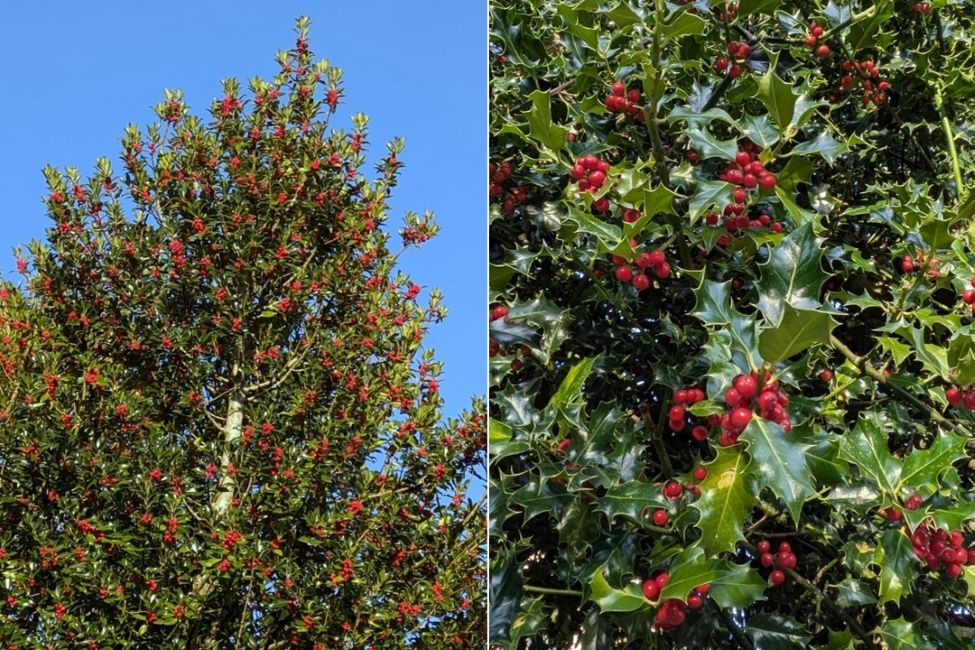
I’ll end my post with a nod to the next season. I’ve been working on Christmas projects for a few weeks already but in the garden the holly trees are bursting with berries this year. Some would say that this means we’re in for a cold winter, but I’d prefer to believe that it simply means that this year has given the trees just the right growing conditions to produce a huge amount of fruit. We’ll see…..fingers crossed I’m right.
Bursting with berries. Images: Kathryn Hawkins
I’ll be back recipe posting in a few days, something suitably spooky for Hallowe’en. Until then, thanks for stopping by.
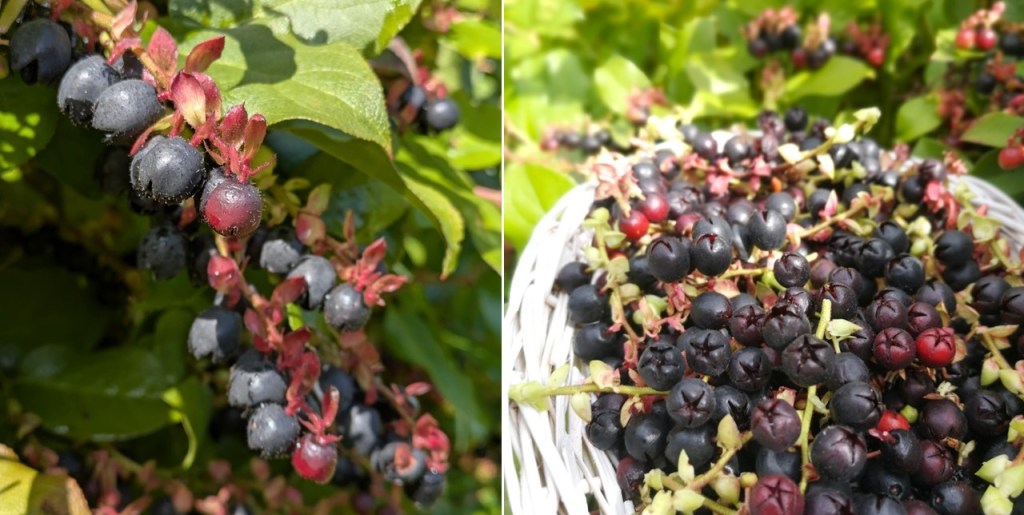
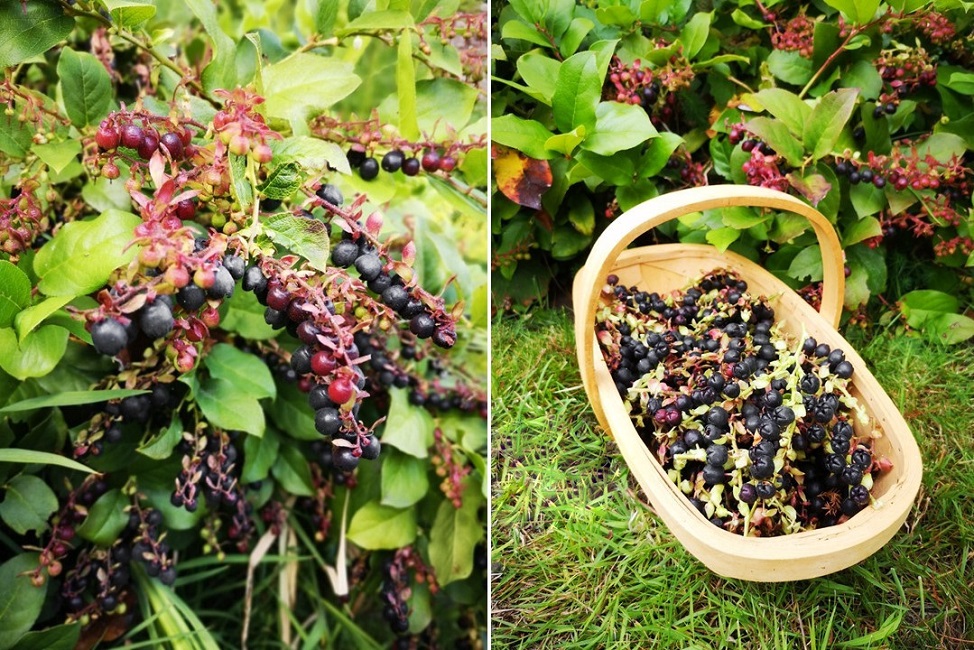
It’s that wonderful time of the year when the garden begins to yield produce thick and fast. My latest pickings are from the many Salal (Gaultheria shallon) bushes around the garden which have provided a very abundant crop of berries this year. Too many for me to deal with, so I’m happy to say that the birds are enjoying a feast as well.
This year’s Salal berry harvest. Images: Kathryn Hawkins
The berries are quite challenging to pick individually as they often go to mush in your fingers when they are very ripe. Last year I found a better way of dealing with the problem. Harvest them on their stalks – they grow in clusters so it is easy to snip off the stems with the berries attached.
Preparing berries for the freezer. Images: Kathryn Hawkins
Wash and dry the berries well, then lay on trays and place in the freezer until you are ready to deal with them. Once frozen solid, they pull away easily from the stems and the berries can then be packed and returned to the freezer for future use.
If you want to use them fresh though, you’ll have to persevere and pull them gently from the stems after washing and drying them.
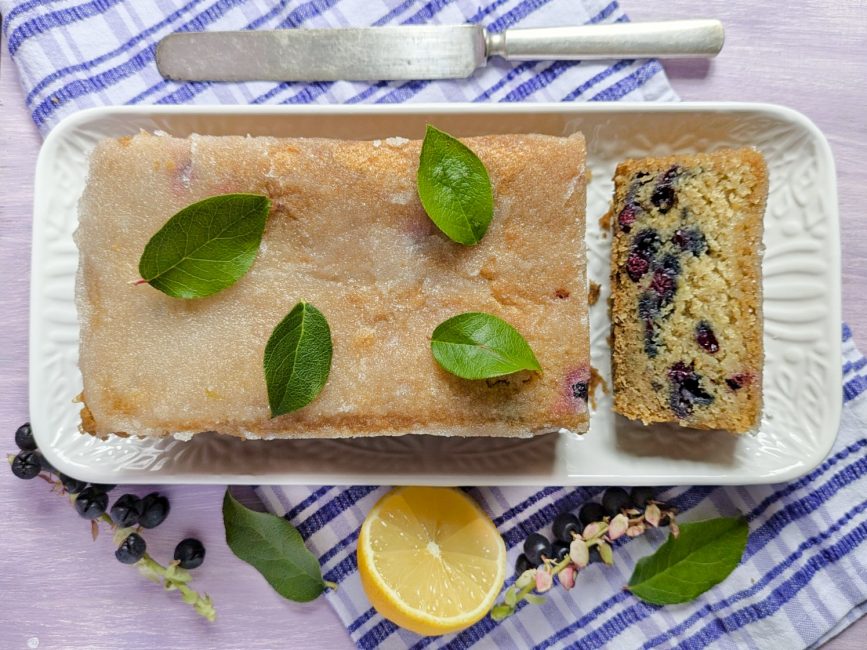
Zesty, fruity loaf cake. Image: Kathryn Hawkins
My recipe this week uses the berries fresh, but you don’t need that many for the mixture. I did try it with frozen and it worked fine, but the texture was a little wet for my taste. Blueberries would make a good substitute if you prefer. This is one of those cakes that gets better the longer you leave it. The flavours become more fruity and the texture is denser and richer. Store in an airtight container for up to a week if you can leave it alone. The initial crunchiness of the lemon sugar top will disappear on storing, but it is replaced by a sticky lemony crust instead. It freezes fine as well 🙂
A berry nice slice. Image: Kathryn Hawkins
Serves: 8
Ingredients
1tbsp ground linseed
Juice and rind 1 unwaxed lemon
185ml plant milk (I use a barista-style oat milk)
115g plant butter, softened
150g caster sugar
175g gluten-free plain flour blend
50g ground almonds
¼tsp xanthan gum (optional, but the cake is very crumbly without it)
¾tsp bicarbonate of soda (baking soda)
80g fresh Salal berries, washed
75g granulated sugar
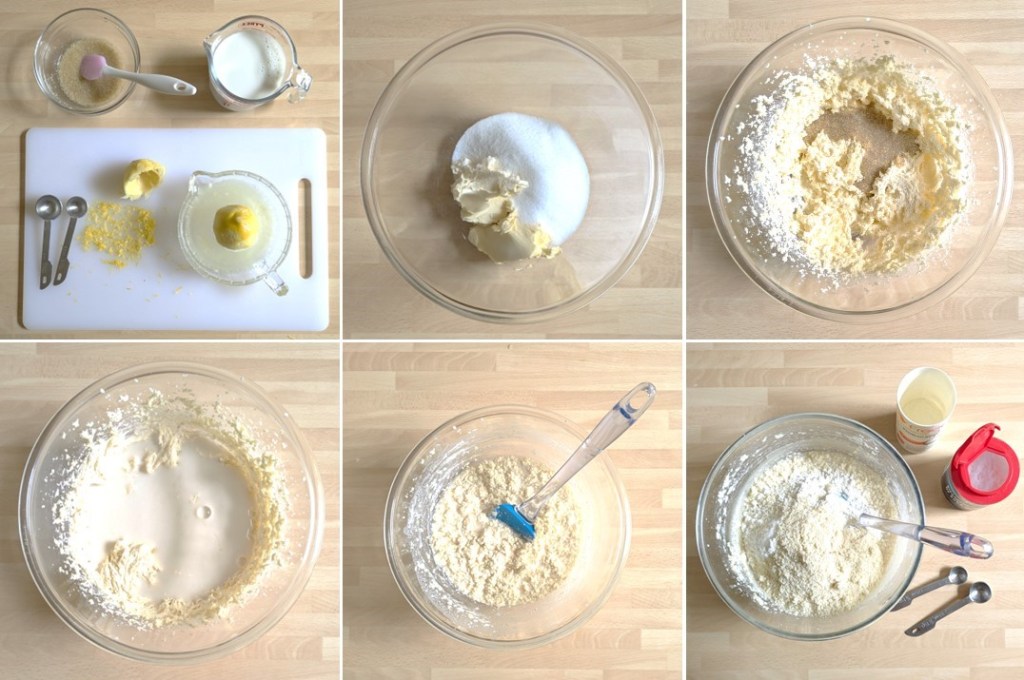
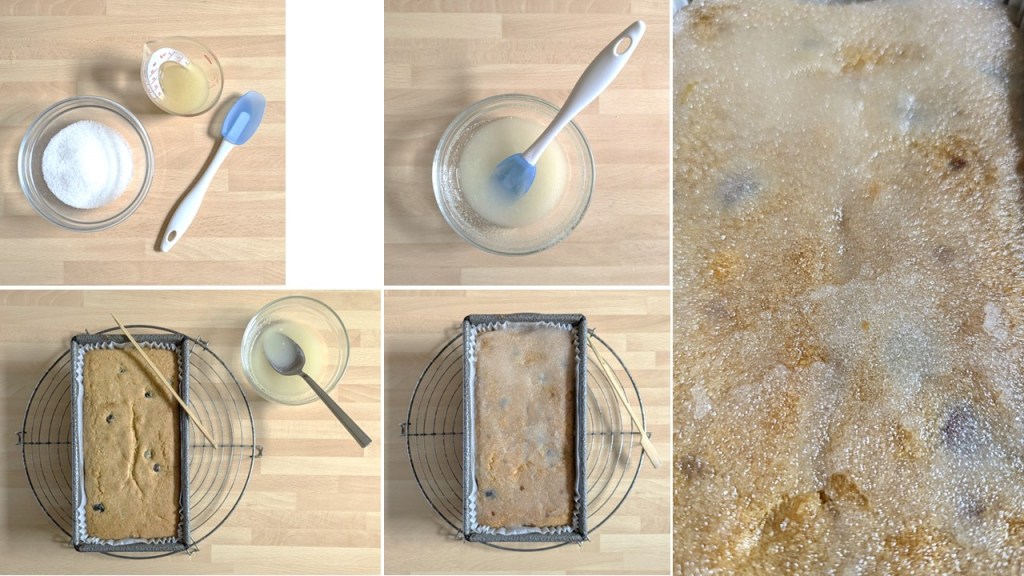
1. Preheat the oven to 180°C, 160°C fan oven, Gas Mark 4. Line a 1kg loaf tin. Mix the linseed with 3tbsp cold water and put to one side to thicken. Mix 2½tsp lemon juice into the milk and leave for a few minutes at room temperature to thicken.
2. Whisk the butter and caster sugar together until creamy and well blended then gently whisk in the linseed and milk mixtures – don’t panic, the batter will look very lumpy!
Making the loaf cake batter. Images: Kathryn Hawkins
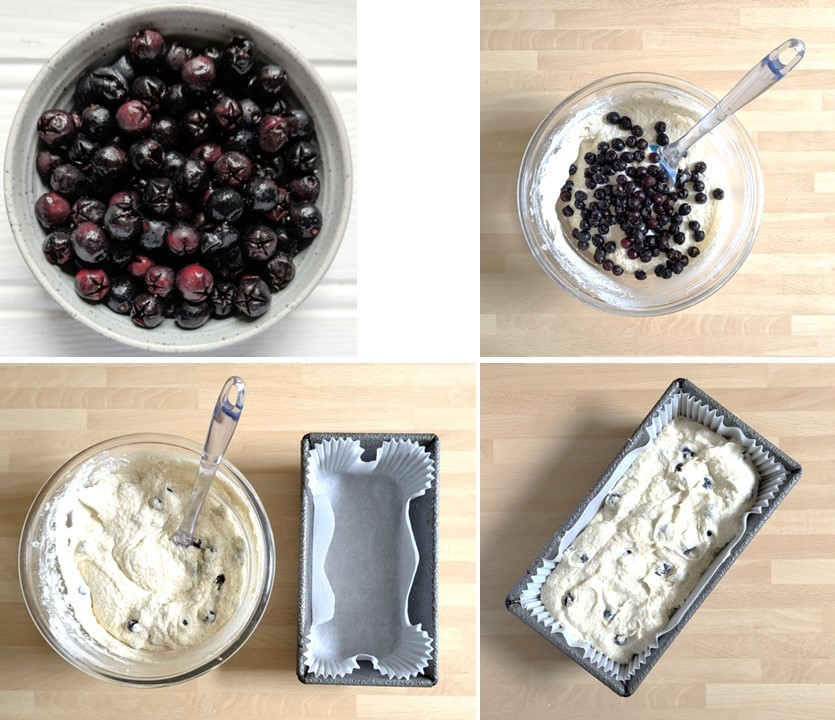
3. Add the lemon zest, flour, almonds, xanthan gum and baking soda, and mix well until the batter is smooth and creamy. Gently stir in the berries.
4. Transfer the mixture to the loaf tin, smooth the top and bake for about 1hr 15 minutes until risen and firm to the touch.
Adding the berries. Images: Kathryn Hawkins
5. While the cake is in the oven, prepare the lemon topping by simply mixing 2tbsp lemon juice with the granulated sugar.
6. When the cake is cooked, place the tin on a wire rack and skewer the cake in a few places. Spoon over the lemon sugar evenly to form a crust and leave the cake to cool in the tin.
Making the lemon sugar crust. Images: Kathryn Hawkins
As the cake cools, the sugar sets in a crusty layer on top whilst the juices soak into the cake. Delish. I served my cake decorated with a few (washed) Salal leaves for a splash of colour – just for show, these are not edible.
Freshly sliced loaf cake. Image: Kathryn Hawkins
Thanks for stopping by. I hope to see you again soon. Best wishes and happy baking 🙂
It has turned much colder here since my last post. Frosty mornings and an increasing number of sub-zero nights. Back in late August, I planted a few Arran Pilot seed potatoes in the green house. With the wintry feel in the air and knowing potatoes are not frost-hardy, I decided it was time to dig them up.
Late season greenhouse-grown potatoes. Images: Kathryn Hawkins
The foliage had all but withered away over the month, but under ground a few little potatoes had formed. I was a couple of weeks later planting them than usual and subsequently, the plants hadn’t had time to develop properly before the days got shorter and the temperature lower. No matter, there were enough to make one of my favourite potato dishes, and they tasted just as delicious as the potatoes grown earlier in the year.
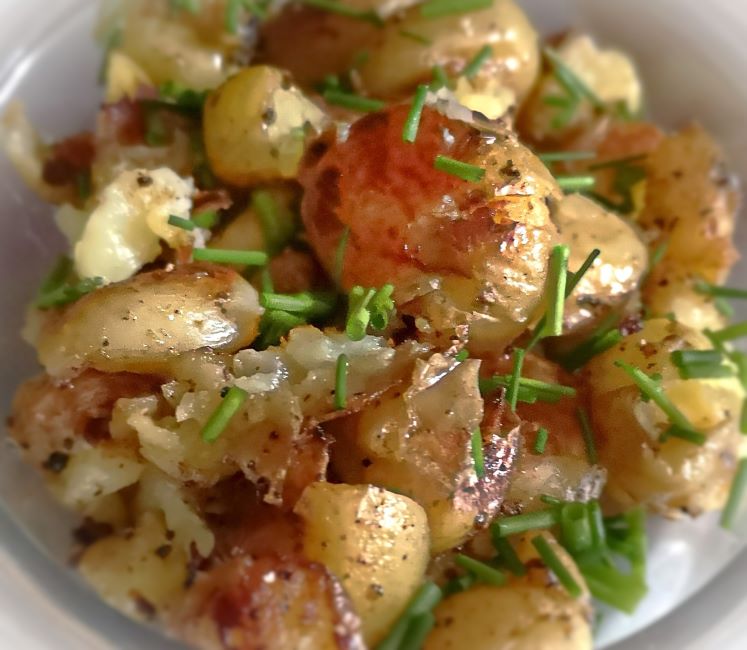
Smashed new potatoes sprinkled with chives. Image: Kathryn Hawkins
I took a few images of the preparation of this potato dish back in the late summer when I had some pink fir potatoes. Choose a waxy or floury textured potato for best results. Scrub the potatoes and boil them in their skins until tender, then drain well and cool for about 10 minutes. Transfer them to a board and squish them with a masher or large fork.
Smashed pink fir potatoes. Images: Kathryn Hawkins
I usually melt butter with some olive oil in a pan and heat until bubbling – either will work on their own, it’s personal taste which you use. Add the potatoes and seasoning and cook over a fairly high heat, turning them until they are crispy. Towards the end of cooking, I add chopped garlic and cook it for a couple of minutes until just cooked through. Serve straight from the pan, sprinkled with chopped parsley or chives.
Smashed pink fir potatoes with garlic and parsley. Image: Kathryn Hawkins
Well there’s just one more post before Christmas – I can’t believe it will all be over by this time next month. Until then, take care and thanks for stopping by 🙂
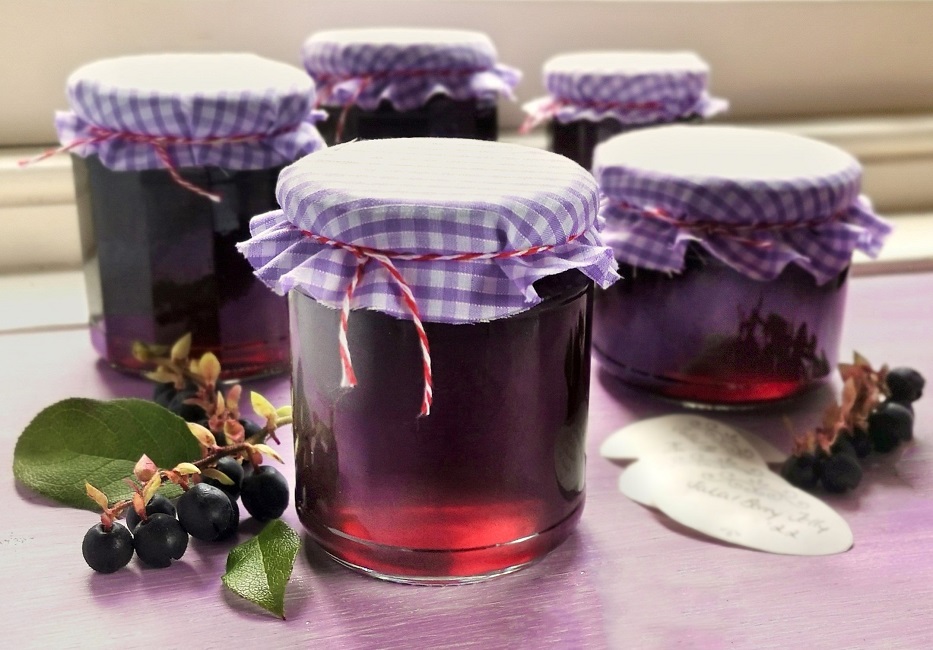
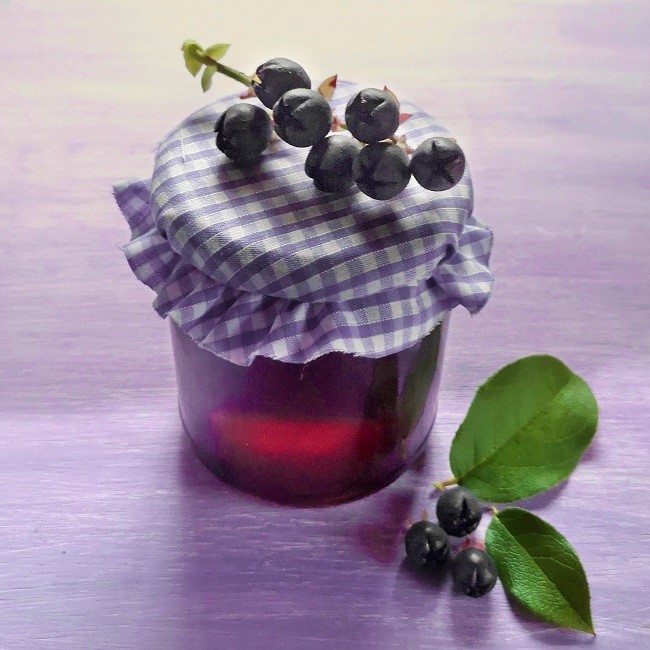
Homemade apple and salal berry jelly. Image: Kathryn Hawkins
Hello there. I hope you are keeping well. It’s that time of year when I get the jam pan out and start making preserves and chutneys for the months ahead.
Back in August I harvested a lot of salal berries from the garden. I did compote a few but the rest went in the freezer for making preserves. There are still a few on the bushes now but I am leaving those for the garden birds to enjoy.
August 2022 harvest of Salal berries. Images: Kathryn Hawkins
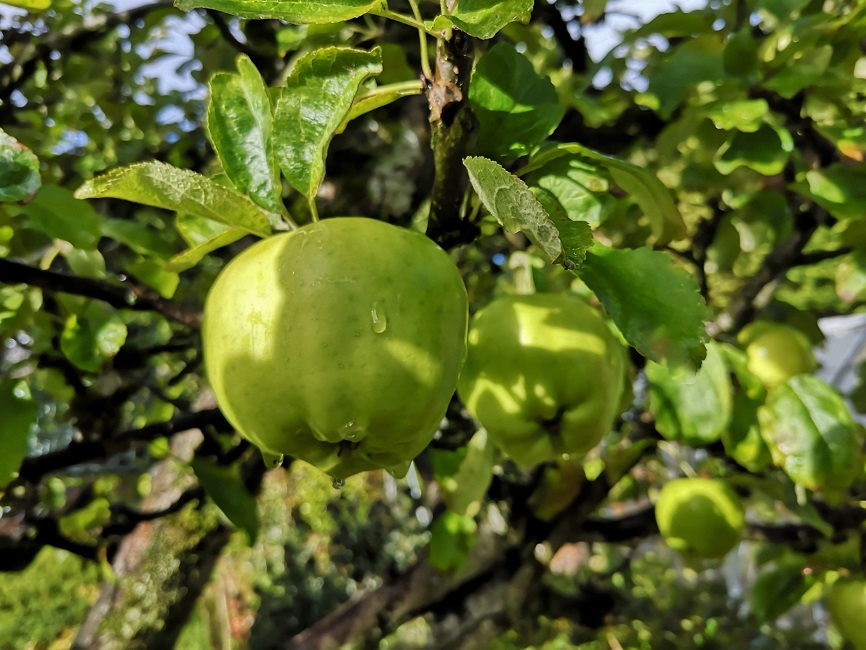
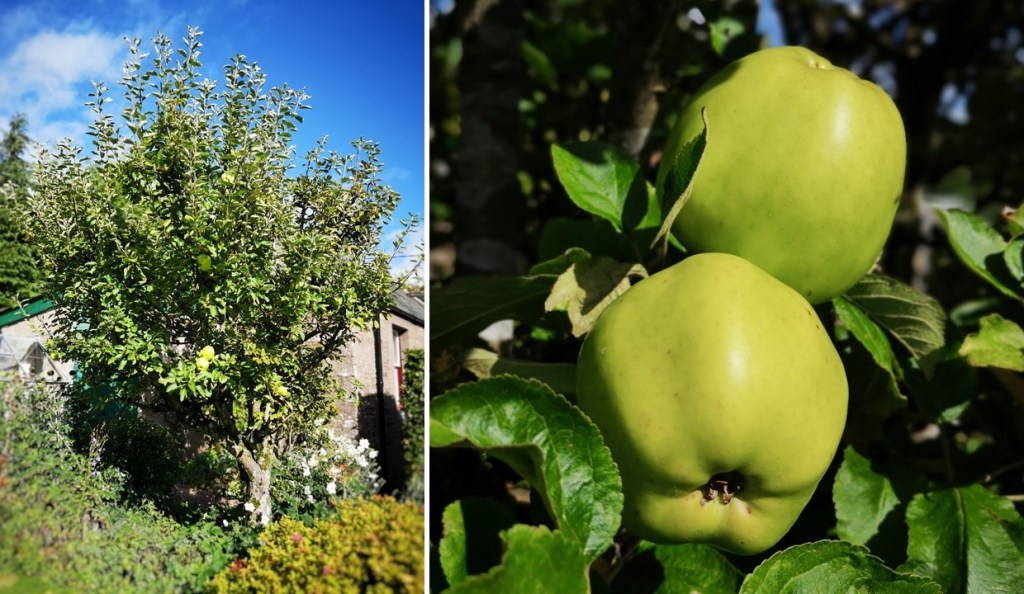
I haven’t picked all the apples yet, but I have been taking one or two as and when I need them for cooking. The old tree in the garden is looking heavy with fruit this year, so I think I will be gathering in the apples very soon.
October 2022, cooking apples ready for picking. Image: Kathryn Hawkins
My recipe is a very simple jelly preserve. If you don’t have salal berries, blueberries or blackberries will work just as well. Salal berries can be quite challenging to pick as they are quite squishy when ripe so I usually pick short branches and then remove the berries when I get back into the kitchen. Have a look at this post from last year for an easy preparation technique Salal berries – jam and muffins (gluten-free; dairy-free; vegan)
Single jar. Image: Kathryn Hawkins
The recipe below makes a small quantity of preserve and as such can be easily doubled or trebled should you have more berries and apples. Making a smaller amount means that you can strain the fruit through a sieve rather than in a jelly bag; it is quicker to strain, and it also cooks down in less time.
Makes: approx. 650g
Ingredients
200g prepared salal berries, washed
400g cooking apples, washed and chopped, but left unpeeled or cored
approx. 450g granulated or preserving sugar
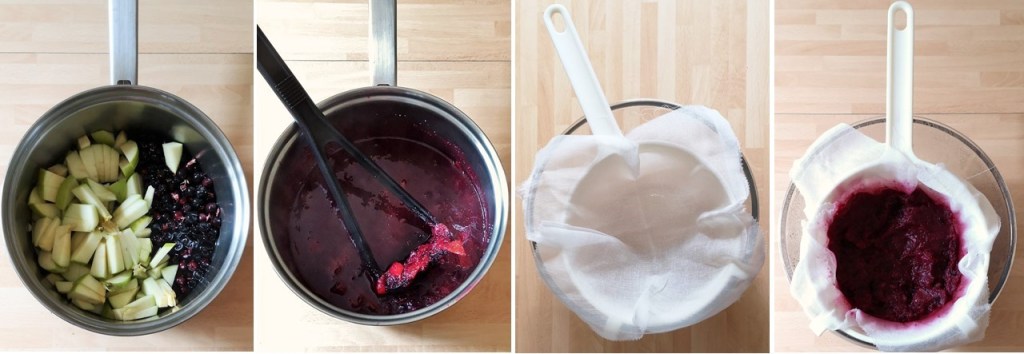
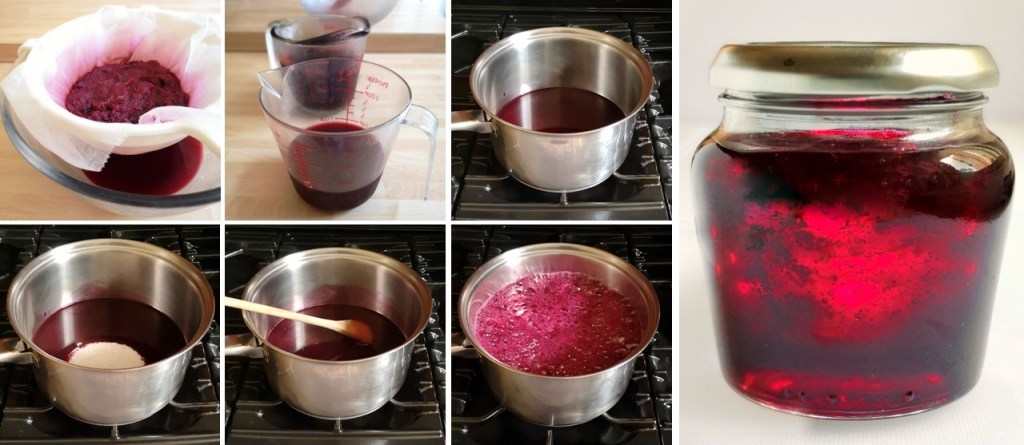
1. Put the fruit in a large saucepan with 350ml water. Bring to the boil, cover and simmer for 10-15 minutes until soft and pulpy. Mash the fruit occasionally to help break it down.
2. Place a large sieve over a jug or bowl and line with clean muslin. Carefully ladle in the pulp and leave to strain for 3-4 hours.
3. Put the pulp back in a saucepan and the harvested juice in the fridge. Re-cook the pulp, this time with 200ml water, for about 5 minutes, and then strain again as above.
Preparing and cooking the fruit for jelly making. Images: Kathryn Hawkins
4. Measure the juice and pour into a large clean saucepan. Add sugar to the ratio of 450g per 600ml juice – I had 575ml juice and added 430g sugar.
5. Heat, stirring, until the sugar is dissolved, then raise the heat and bring to the boil. Cook rapidly until the temperature reaches between 104°C and 105°C – this will probably take around 10 minutes.
Making the jelly. Images: Kathryn Hawkins
6. Pour into small, clean, sterilised jars and seal immediately. When cold, label and store for 6-12 months, although the jelly is ready to eat immediately. Serve with cold cuts, cheeses or as a sweet spread on toast or crackers.
Apple and salal berry jelly on oatcakes. Image: Kathryn Hawkins
Well that’s the end of my post for this week. I will be back in the kitchen again next time. Until then, I hope you have a good few days ahead 🙂
Pesto pancake and tomato layer. Image: Kathryn Hawkins
Hello again. What a mixed bag of weather there has been here since my last post. Plenty of rain to restore the water supplies with thundery downpours and a few sunny days here and there. The garden has bucked up again and the green grass has been restored.
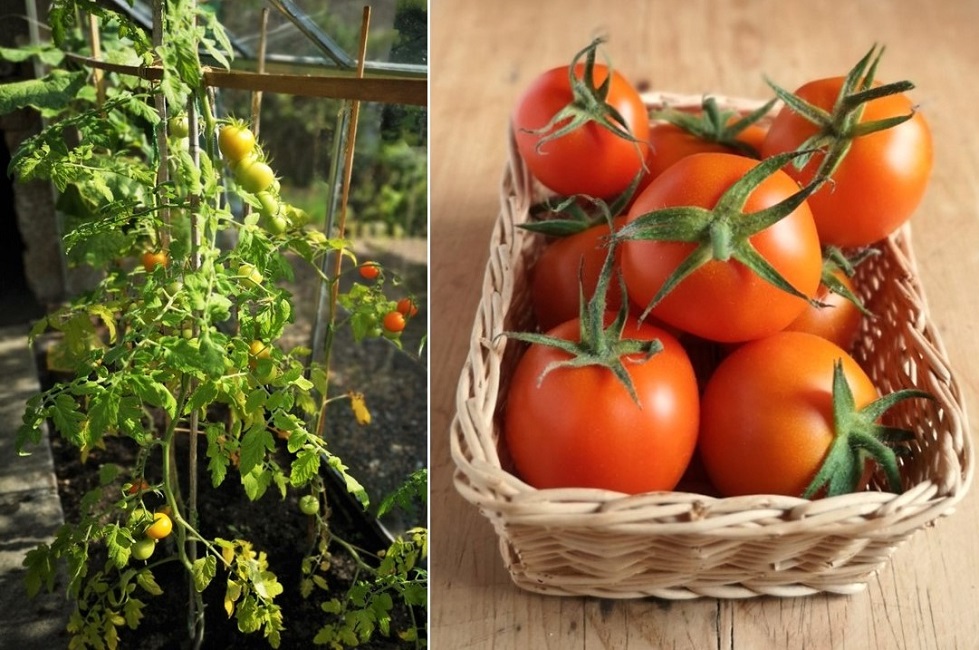
My recipe post this week gives a little nod towards the change of month and season. The greenhouse tomatoes are ripening now. I planted only 3 plants this year, but I am enjoying a steady supply to eat in salads. The variety is called Golden Zlatava, orange on the outside with reddish flesh inside. Whilst I haven’t grown enough for cooking this year, there are plenty of delicious locally grown tomatoes around, like these fantastic small plum tomatoes, which are perfect for sauce-making.
Fresh plum tomatoes. Image: Kathryn Hawkins
The greenhouse basil really enjoyed the hot weather we had last month and has grown very bushy and bold. I love the flowers as well. Plenty of leaves to make one of my most favourite savoury sauces, pesto, which seems to be the best way to preserve the flavour of the herb once it has been frozen.
Greenhouse basil. Images: Kathryn Hawkins
There are 2 main components to the recipe this week: making the pancakes and making a tomato sauce. Both elements freeze well in case you want to make the recipe in stages. I made pesto in a previous post, so if you fancy having a go at that as well, here’s the link to the recipe Runner bean and pesto fritters (gluten-free; dairy-free; vegan)
Serves: 4
Ingredients
Tomato sauce
1kg fresh tomatoes, washed and chopped
6 garlic cloves, peeled
A selection of fresh herbs such as sage, bay, marjoram and oregano
2tbsp olive oil
1tsp caster sugar
100g drained sundried tomatoes in oil, blotted on kitchen paper
Salt to taste
Pesto pancakes
110g tapioca flour
110g gram (chickpea or garbanzo) flour
6g gluten-free baking powder
1tsp salt
65g fresh vegan pesto
250ml plant-based milk (I used oat milk)
160ml chickpea canning liquid (or other aqua fava)
Vegetable oil for brushing
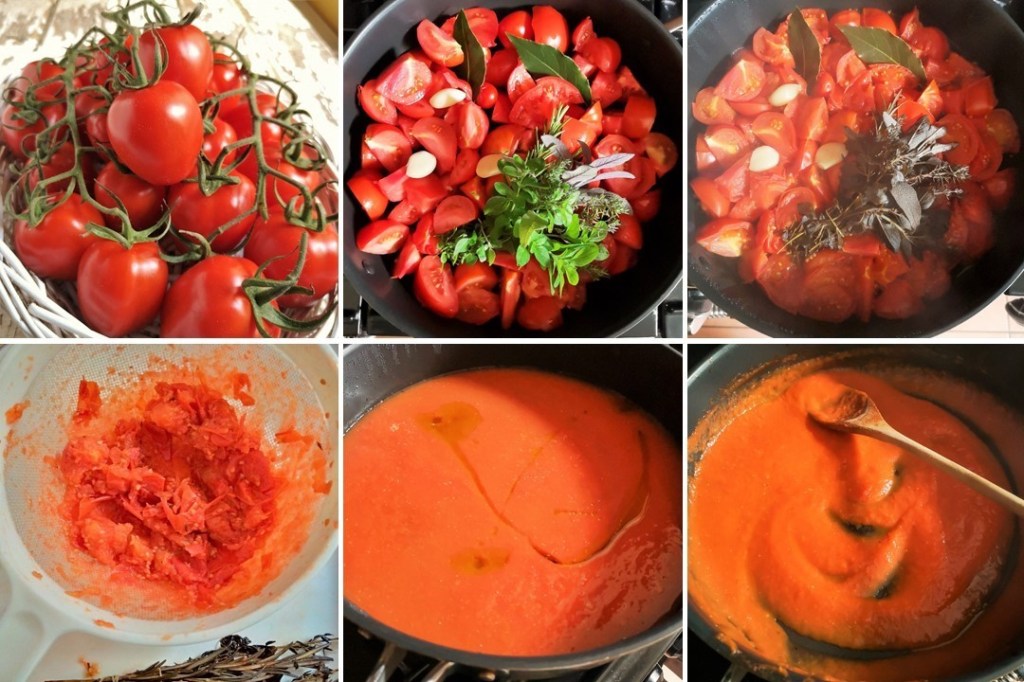
1. First make the sauce. Put the tomatoes in a large pan with a lid and add the garlic and herbs. Heat until steaming, then cover, and simmer gently for about 45 minutes until very tender. Turn off the heat and leave to cool with the lid on.
2. Discard the herbs. Push the tomatoes and garlic through a nylon sieve, in batches, to remove the skins and seeds. Depending on the juiciness of your tomatoes, you should end up with around 700ml pulp.
3. Pour the pulp into a clean pan. Add the oil and sugar, heat gently, stirring, until boiling, then simmer for about 20 minutes until thickened and reduced to about 300ml. Leave to cool.
4. Put the sundried tomatoes in a blender or food processor and blitz until smooth, then stir into the cold tomato sauce. Taste and season. Cover and chill until ready to use.
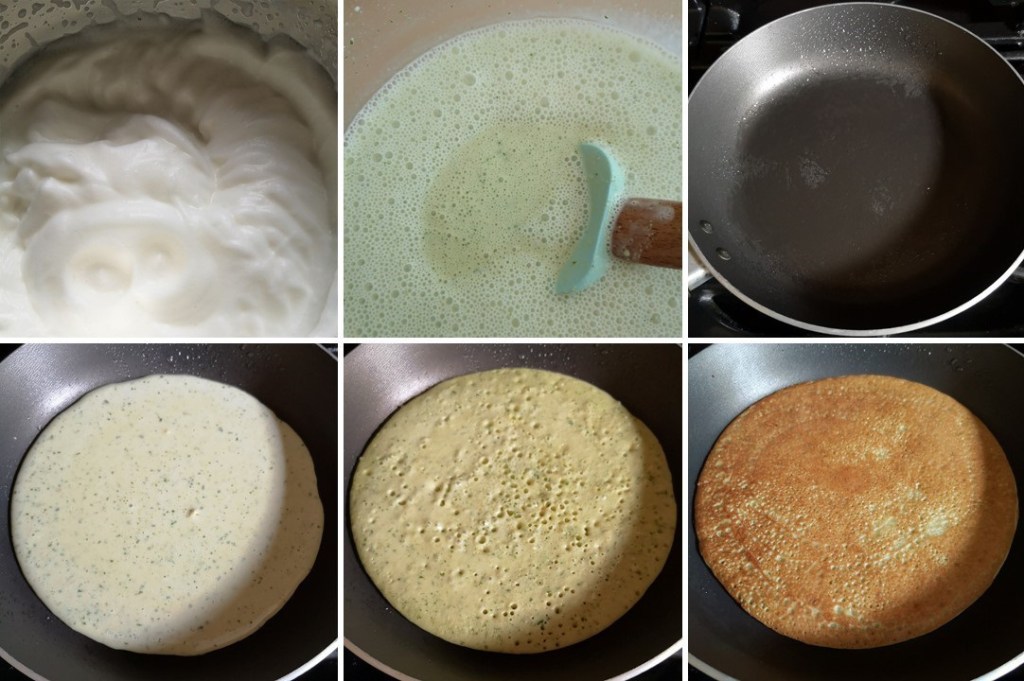
5. For the pancakes, put the flours, baking powder and salt in a bowl and make a well in the centre. Add the pesto, and gradually blend in the milk to make a smooth batter.
Making the pesto batter. Images: Kathryn Hawkins
6. In another bowl, whisk the chickpea water until very thick and foamy, then gently mix into the batter to make a bubbly mixture.
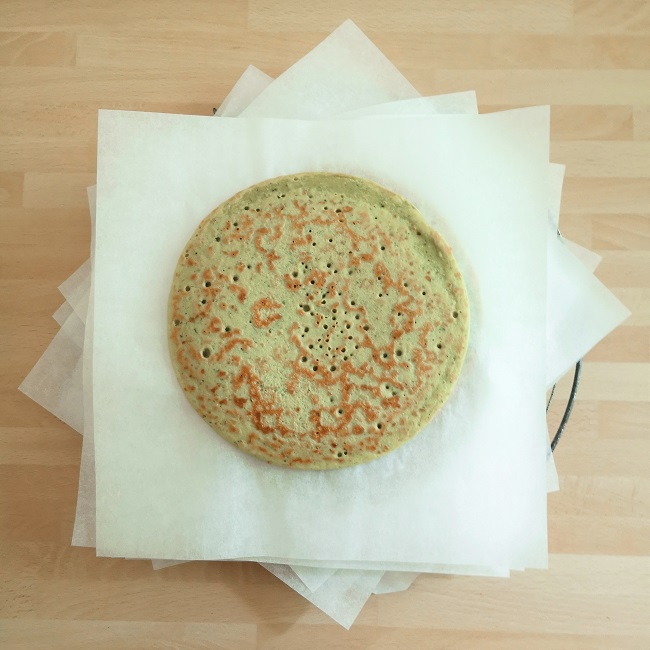
7. Brush a small frying pan (15-16cm base diameter) lightly with oil and heat until hot. Spoon in 4-5tbsp batter, tilting the pan to cover the base with batter. Cook over a medium/low heat for 2-3 minutes until set and bubbles appear on top. Flip over and cook for a further 2 minutes until cooked through.
8. Layer the cooked pancake on a sheet of baking parchment on a wire rack, and cover while you make another 7 pancakes. Stack the pancakes on top of each other, between sheets of parchment to help keep them from drying out. If you are making the pancakes in advance, leave them to cool, then wrap them well and keep in the fridge for up to 3 days or freeze for up to 6 months.
Cooking the pancakes. Images: Kathryn Hawkins
Pesto pancake stack. Image: Kathryn Hawkins
9. To assemble, spread a pancake with cold tomato sauce, almost to the edge of the pancake. Transfer to a lined baking tray and continue the spreading and layering with the remaining sauce and pancakes. If you have leftover sauce, keep it to serve with the pancakes.
Layering before baking. Images: Kathryn Hawkins
10. Cover the pancake stack with foil and place in a preheated oven at 190°C, 170°C fan oven, gas 5. Heat through in the oven for about 45 minutes. Best served warm. Top with fresh chopped tomato and fresh basil to serve and accompany with wild rocket and any leftover tomato sauce.
Hello there. So here we are at the end of another month. I hope you have had a good couple of weeks since my last post. I had been intending to show you round my garden at this point in time, but to be honest, there is not a lot to see. Most things are looking rather soggy and bedraggled after recent heavy rain . It feels like Autumn has been cut short this year by the rain washing the leaves from the trees.
No matter, I have some cheery images of my apple and pear harvests earlier in the month. I was able to capture the images under mostly blue skies which should make for better viewing. I hope you enjoy them 🙂
Lord Derby cooking apple harvest 2021. Images: Kathryn Hawkins
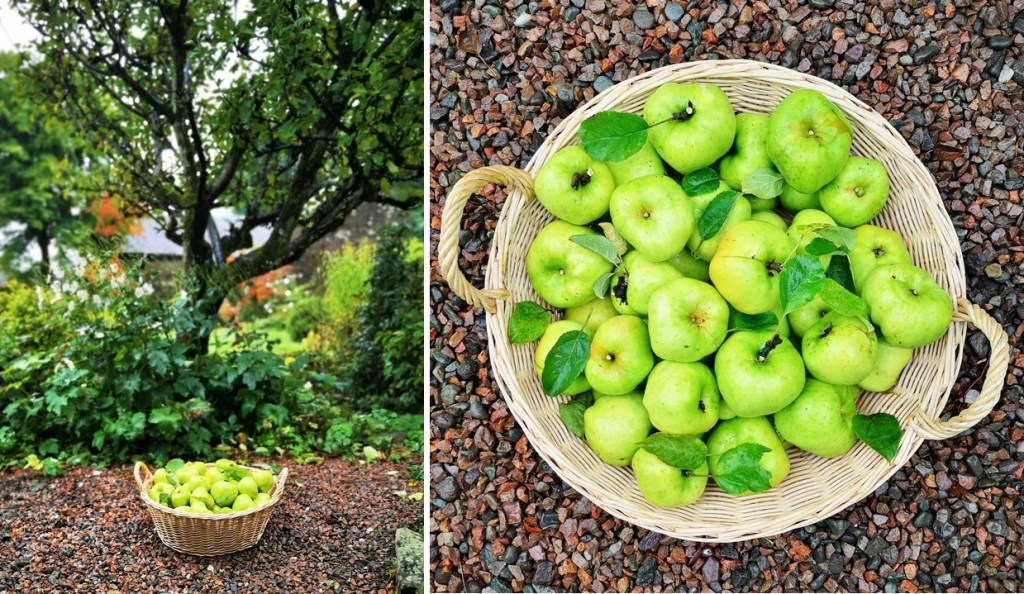
The old apple tree in the garden produced a fraction of the apples it provided last year. In 2020, I had at least 4 times the amount. However, I still have a good basketful and have started cooking them down. I think they will last a few weeks yet.
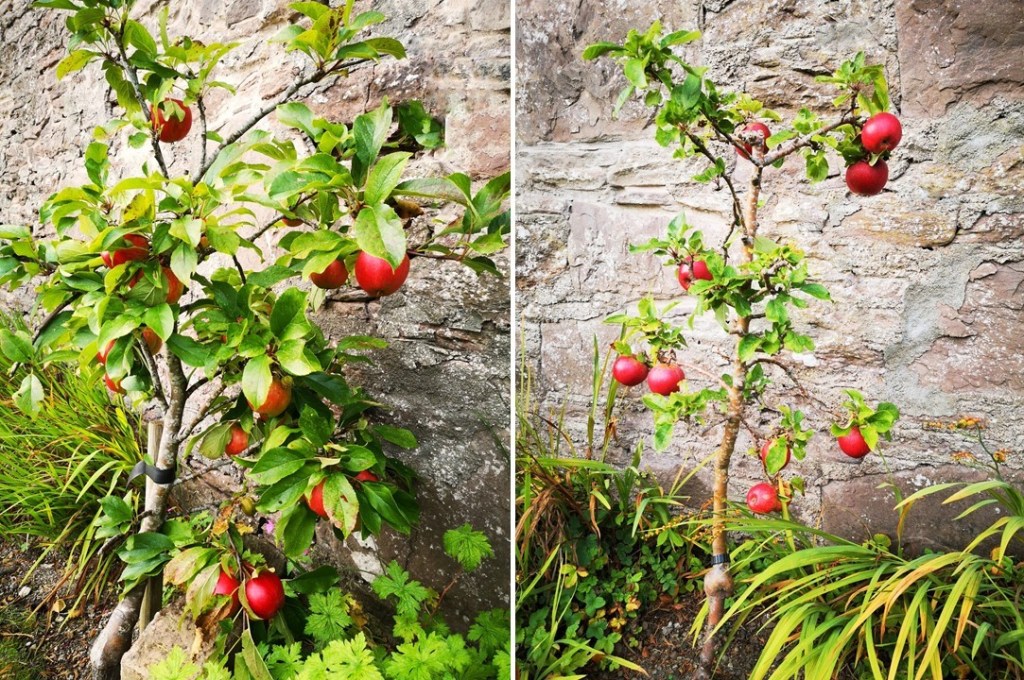
Miniature eating apple trees. Images: Kathryn Hawkins
Harvested eating apples. Images: Kathryn Hawkins
It’s been a bumper year for eating apples. Only a handful from one tree last year and nothing from the other, but this year I have been rewarded with a huge crop by comparison. The very red apples are called Katy but sadly I can’t remember the other variety now, however both varieties are sweet, juicy and very delicious, and they keep well.
Concorde pear tree and fruit. Images: Kathryn Hawkins
And so to the pears trees. They have also had a good year, providing a generous basketful after a very poor crop last year. Both trees are still small although they have been planted in the garden for about a decade now. The pears store well so there will be fruit to enjoy for a while yet.
Homegrown Concorde and Comice pears. Images: Kathryn Hawkins
I have posted many apple and pear recipes over the years, but these are my top 3 which you might like to try – just click on the links for the recipes:
Pear, pecan and maple crostata. Image: Kathryn Hawkins
I hope you are enjoying Autumn/The Fall wherever you are and I look forward to sharing some more recipes and images with you in my next post. My best wishes to you until then.
Hello again. Well it’s certainly feeling much more autumnal since my last post. After a few bright and sunny days, the weather has turned much cooler and, as I type this, it is pouring with rain.
Towards the end of last month, I harvested my first crop of coriander (cilantro) seed. When I sowed the herb seeds back in late spring, my only intention was to grow the herb for its leaves for use in salads, curries and salsas. However, once the seedlings appeared, I never quite got round to thinning out the crop. I kept them all in the same pot, in the greenhouse, just picking off a few leaves here and there, and never quite finding the time to separate them and plant them outside.
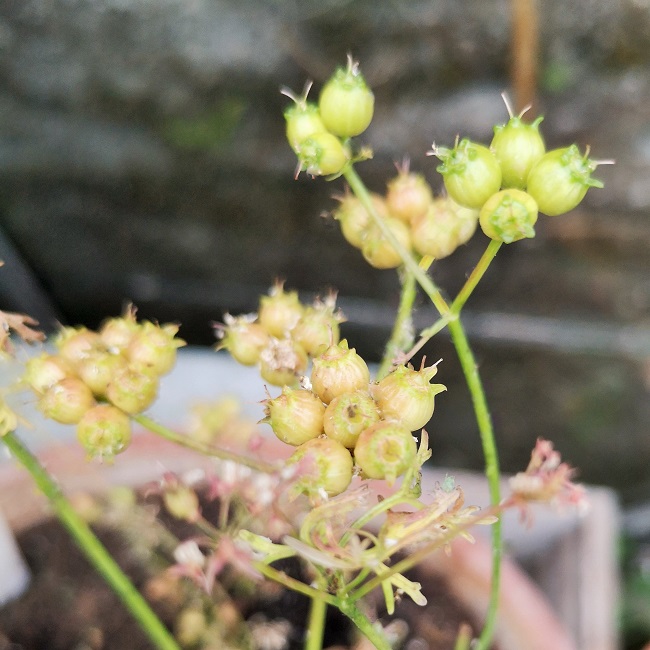
After a while, the individual plants became leggy and formed flower stalks. I enjoyed the flowers for their aroma and the splash of brightness they offered. The leaves had started to become coarser in texture and had a bronze edge, and weren’t quite so appealing to eat. In early August, I decided it was time to get rid of them altogether as the flowers had dried and were falling. However, on closer inspection, the fallen petals had left behind bright green “berries”.
Bright green seeds. Images: Kathryn Hawkins
After a bit of research and a quick change of plan, I decided to keep the plants with the hope of being able to harvest the seeds. You can pick the green fruit and use it in cooking, but they don’t store well. I tried one or two, the flavour was mild, fresh and slightly sweet, and would be good chopped up in a salad or added to a relish. The green berries can be pickled as well.
However, I read that if you leave the fruit on the stems long enough, the berries will dry naturally and can be harvested for longer storing, and used as the familiar fragrant spice.
Beginning to dry out. Image: Kathryn Hawkins
By the end of August the seeds had turned light gold, and in another month, they had dried out completely. At the time, we were blessed with some dry weather so I think this helped with the drying process. I guess that a damp atmosphere could cause the seeds to turn mouldy.
Coriander seed dried and ready for harvesting. Images: Kathryn Hawkins
I found it easier to pull the stems from the soil and pick off the seeds into a small bowl. I left them in the greenhouse for a few more days to finish ripening naturally in the sunshine.
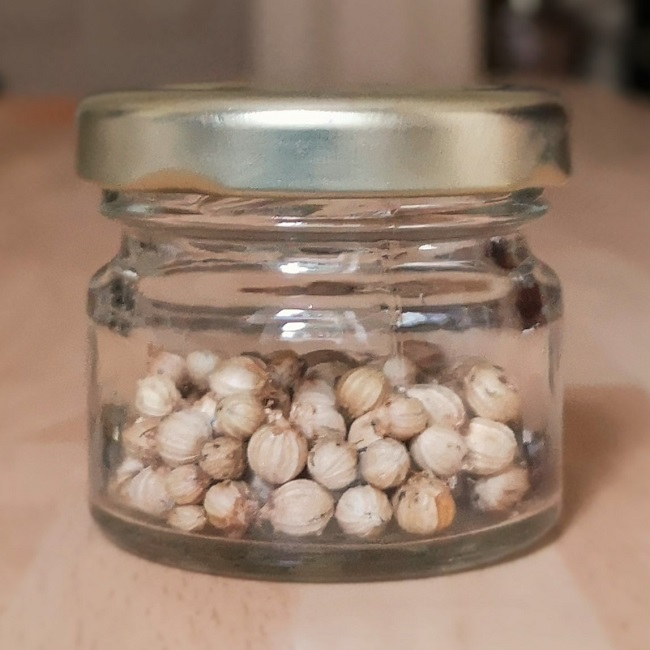
It was a very small harvest, accidental by nature but rewarding all the same. Now the seeds are in a tiny jam jar in my spice cupboard waiting for the right recipe to include them in.
Precious seed harvest ready for storing. Image: Kathryn Hawkins
Until next time, take care, my best wishes to you, and thank you for stopping by again 🙂