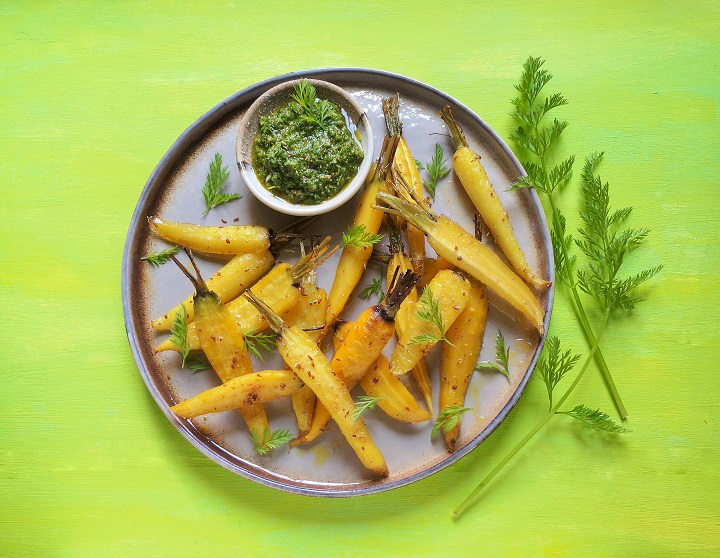
Hello there. It’s another “golden” post from me this week, all be it a recipe-led one rather than one from my garden. To be honest, I had intended this to be a “rainbow carrot” feature but Mother Nature stepped in and things turned out a little different to what I was expecting. Let me explain.

Back in September last year, I decided to experiment by sowing some carrots seeds as a late crop. All being well, I should end up with baby carrots in the early winter. I chose a rainbow mix, and planted them in 2 trench-style containers in the (unheated) greenhouse. I was delighted when they started growing, but as the daylight hours dwindled, and the temperature cooled, the seedlings, unsurprisingly, stopped growing.

I decided to leave them alone and allowed them to overwinter in the same spot in the greenhouse. Nothing much happened until the weather warmed up in March this year when the seedlings started growing again. By April they were thriving so I put the pots outside. With the benefit of hindsight, the carrots were probably ready for pulling about a month ago, but nevertheless, this month, I finally enjoyed a bunch of homegrown carrots with fine flavour, all be they with a distinct lack of rainbow 🙂

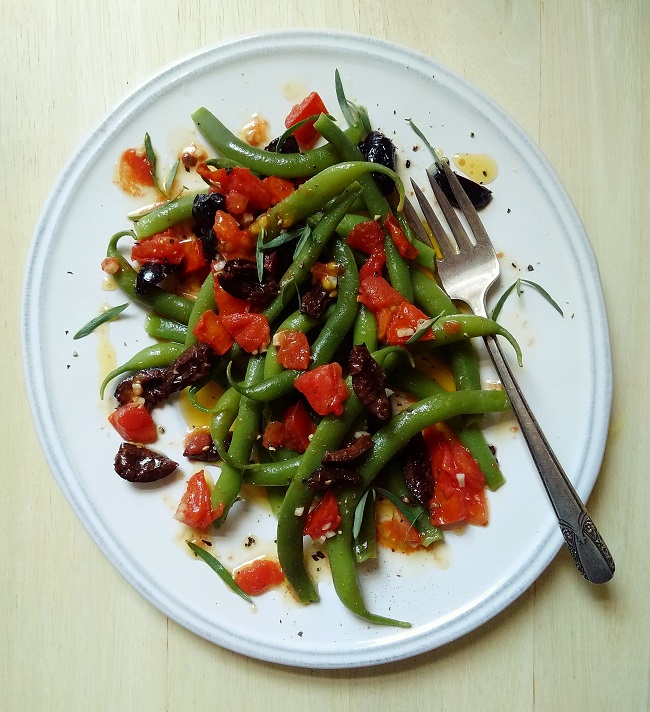
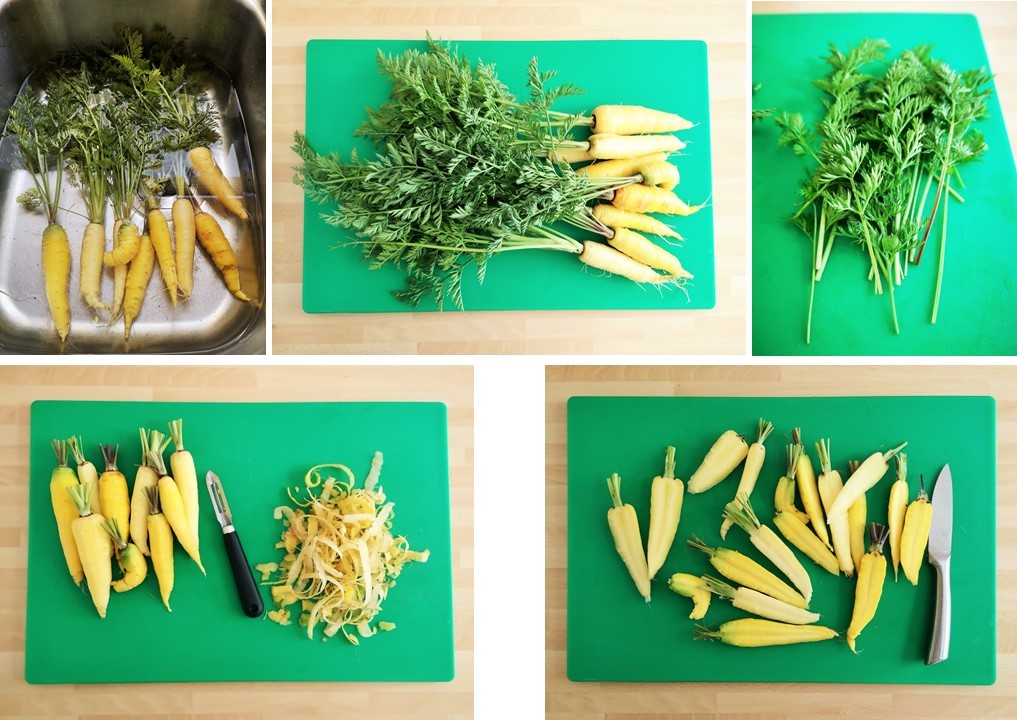
Only white and yellow carrots grew, although there was one orange one which didn’t quite make the grade for this recipe. It had split and grown in a very strange shape, much like a crossed pair of legs. It went in a salad instead and tasted delicious.

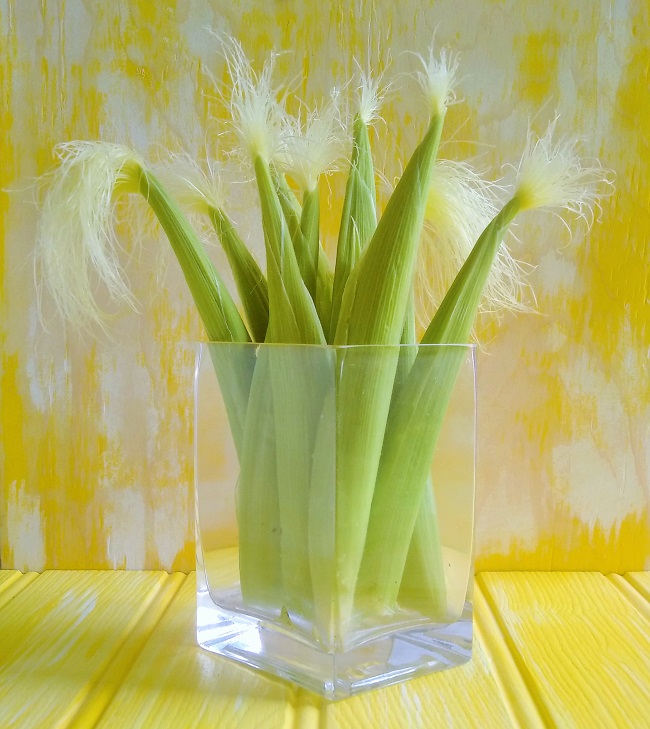
On with the carrot recipe which uses up all parts of the vegetable. I peeled the carrots because they were a little hairy, but ideally homegrown carrots are best left unpeeled. I also wanted an excuse to make crispy carrot peelings which I love. I used some of the carrot tops in a dressing and the rest I am working my way through as a sprinkling over salads and soups. I keep them in a jug of water in the fridge; they last for several days if you change the water regularly. If you have carrots without the tops, you can make the dressing with all coriander instead. Give all parts of the carrot a good wash to remove grit, dust and soil from the ground.
Serves: 2-3
Ingredients
- 350g carrots, washed and peeled if preferred (don’t forget to keep the peelings!)
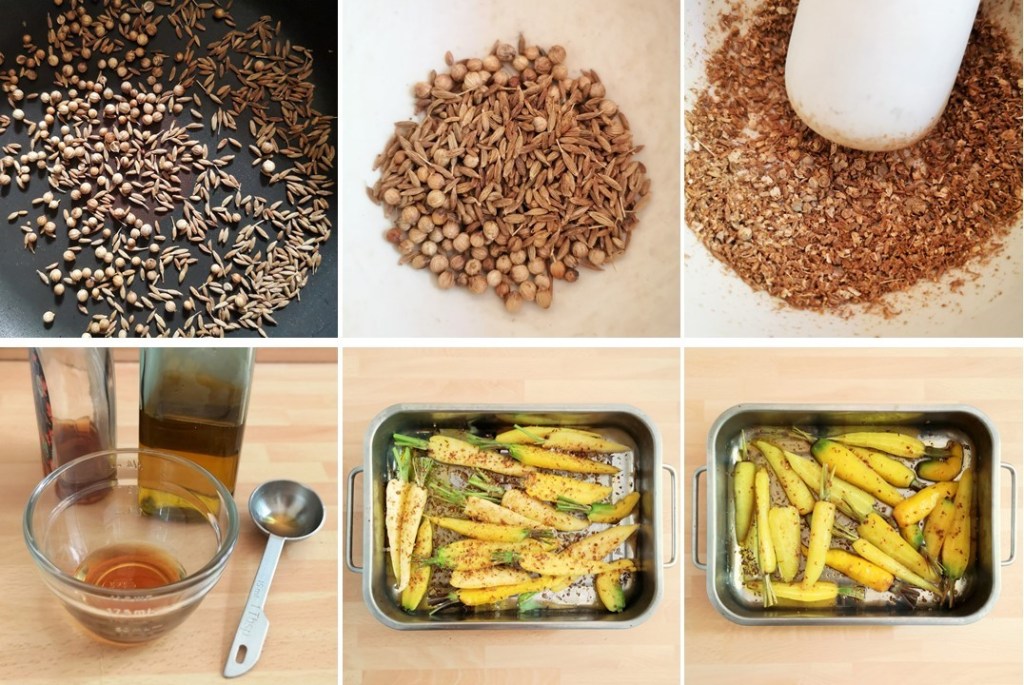
- 1 tsp each coriander and cumin seeds, toasted and ground
- 1 tbsp maple syrup + a little extra if you are going to cook the peelings
- 4 tbsp cold pressed rapeseed oil (I chose this for the nutty flavour and golden colour, but any vegetable oil is fine) + a little extra for cooking the peelings
- Sea salt
- 15g carrot top leaves, washed (use the leafy fronds rather than the stalks which can be tough) + a few extra for garnish
- 15g coriander leaves, washed
- 2 garlic cloves, peeled and roughly chopped
- ¼ tsp ground fenugreek (use a mild curry powder if this is unavailable)
1. Preheat oven to 200°C, 180°C fan oven, gas 6. If the carrots are different sizes, cut them into even sized pieces. My carrots were about 10cm long, and I simply cut them in half. Put in a roasting tin and sprinkle with half the toasted seeds.
2. Mix the maple syrup and 1 tbsp oil together and toss into the carrots. Season with salt, cover with foil and bake for 30 minutes.
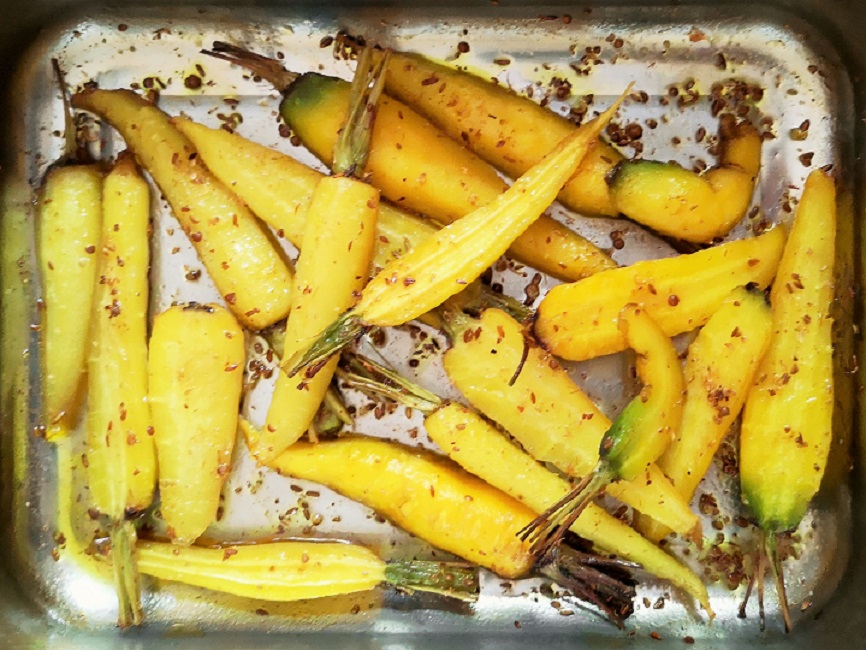
3. Remove the foil, mix the carrots in the pan juices and return to the oven for a further 15 minutes, this time uncovered, until tender and lightly golden.
4. While the carrots are cooking, make the dressing. Put the remaining ingredients in a blender or food processor and with the remaining toasted seeds and oil, and blitz until well blended. Season with salt to taste. Cover and leave at room temperature for the best flavour.

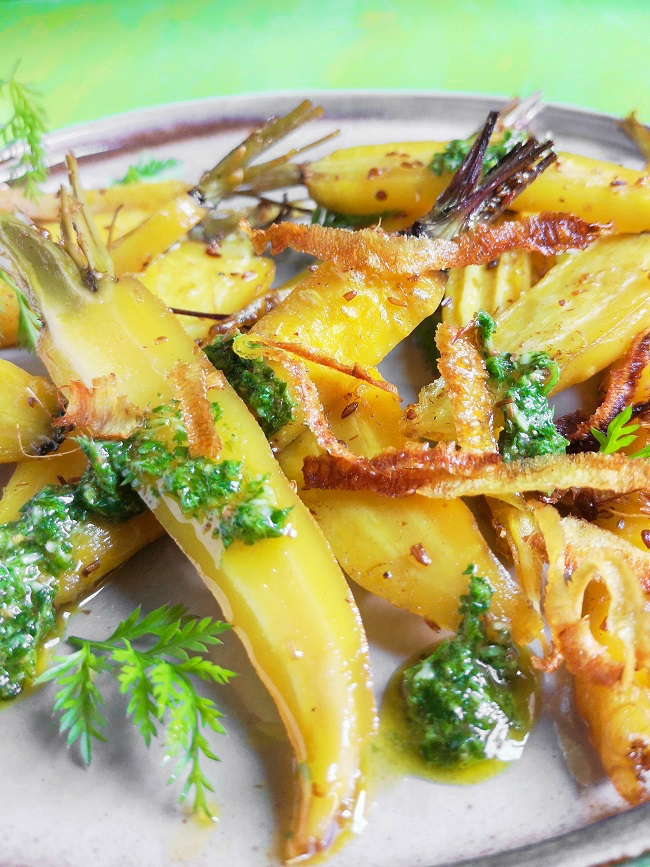
5. If you want to cook the peelings, mix them with a drizzle of maple syrup and oil, then spread them out on a baking tray, season and bake for 10-15 minutes until crisp and golden. Drain on kitchen paper.

6. To serve, drain the carrots and arrange on a warm serving plate. Sprinkle with chopped carrot tops and serve with the dressing and crispy peelings.
I have chosen to grow a purple variety of carrot this year, and the first seedlings are quite well advanced already. If all goes to plan you may well see another carrot-led post from me in a few weeks.

I hope you have a good few days ahead. Until my next post, take care and keep safe 🙂