Welcome to my blog all about the things I love to grow and cook. You'll find a collection of seasonal gluten-free, dairy-free and vegan-friendly recipe posts, as well as a round up of my gardening throughout the year. I wish you good reading, happy cooking and perfect planting!
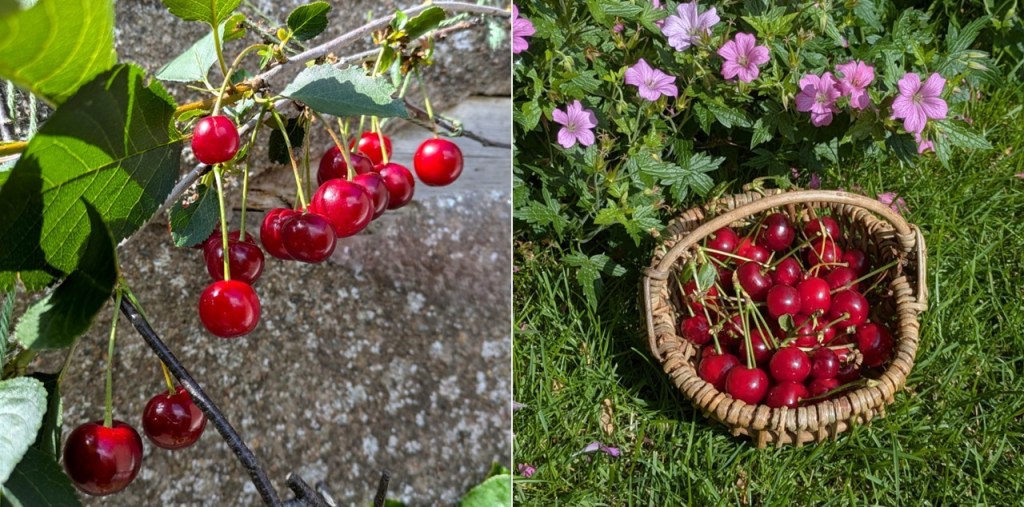
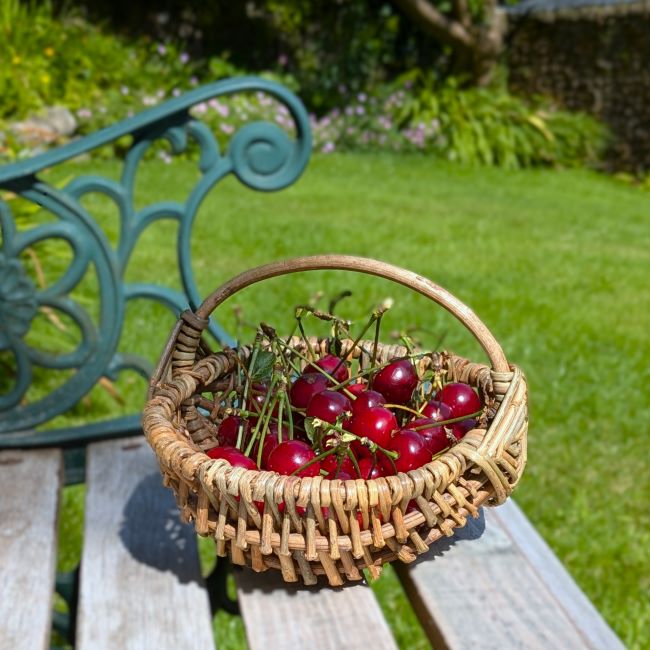
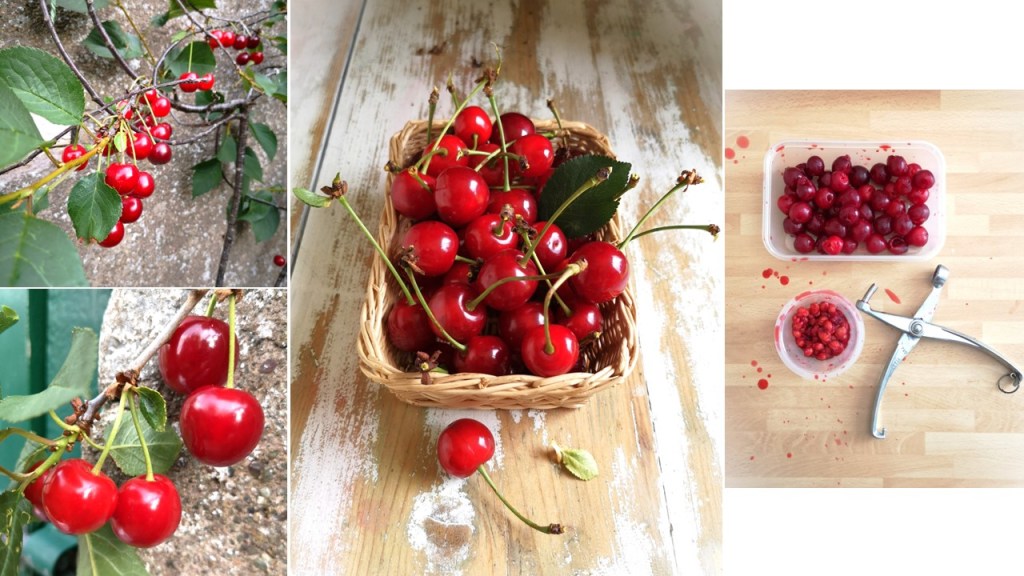
Hello again. I thought I’d take a look back at the month and post a few pics of what’s been happening in the garden. This is the time of year when the soft fruit is ready. The cherries were picked a few days ago. The Morello tree is only very small, but I picked enough for a pie and managed to keep them protected from our feathered friends.
Ripe and juicy pickings. Image: Kathryn Hawkins
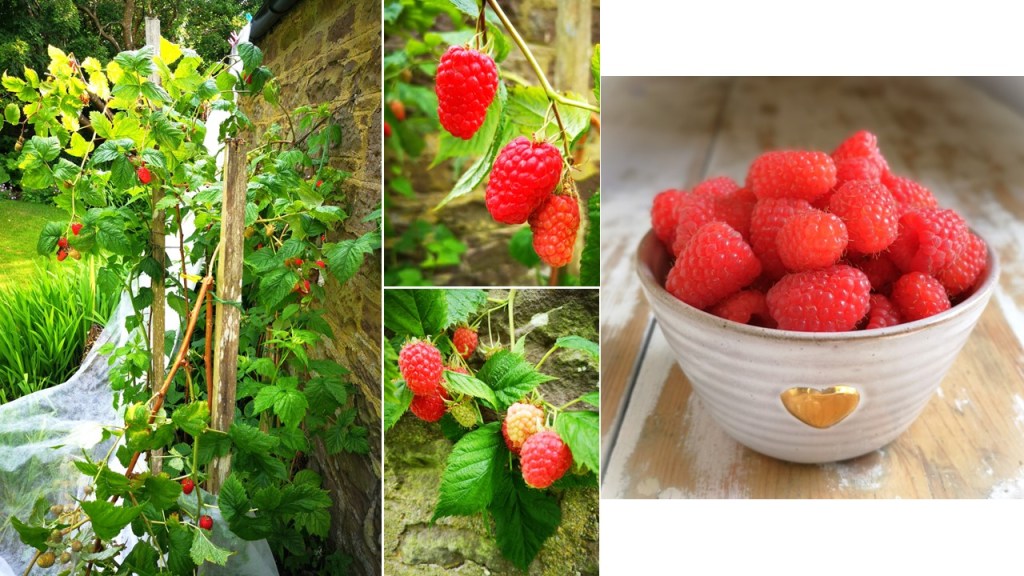
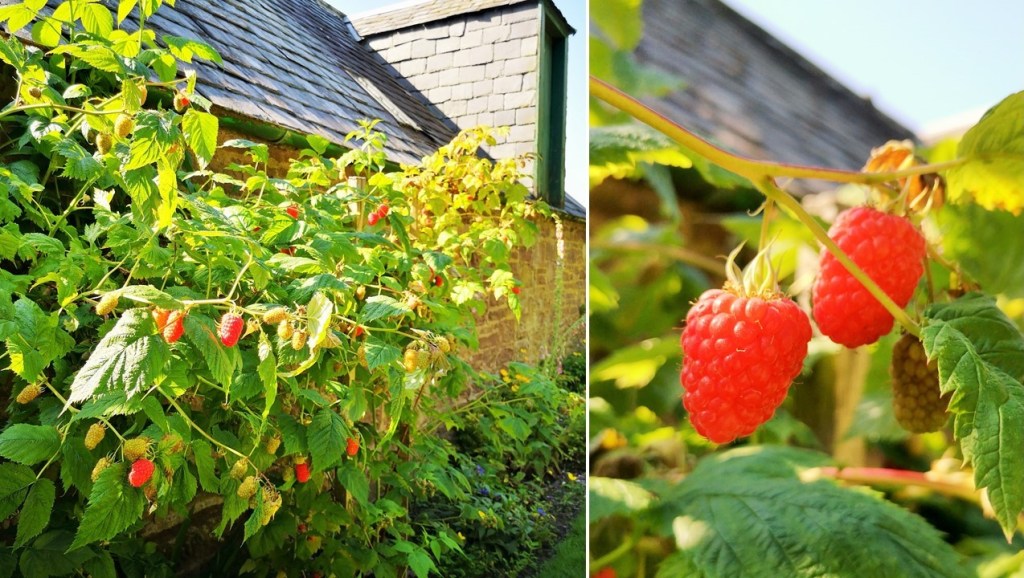
Only a few of the original canes of raspberries remain in the garden now. PLanted about 18 years ago, they still produce a fair few berries over the month. There are still a few left to ripen.
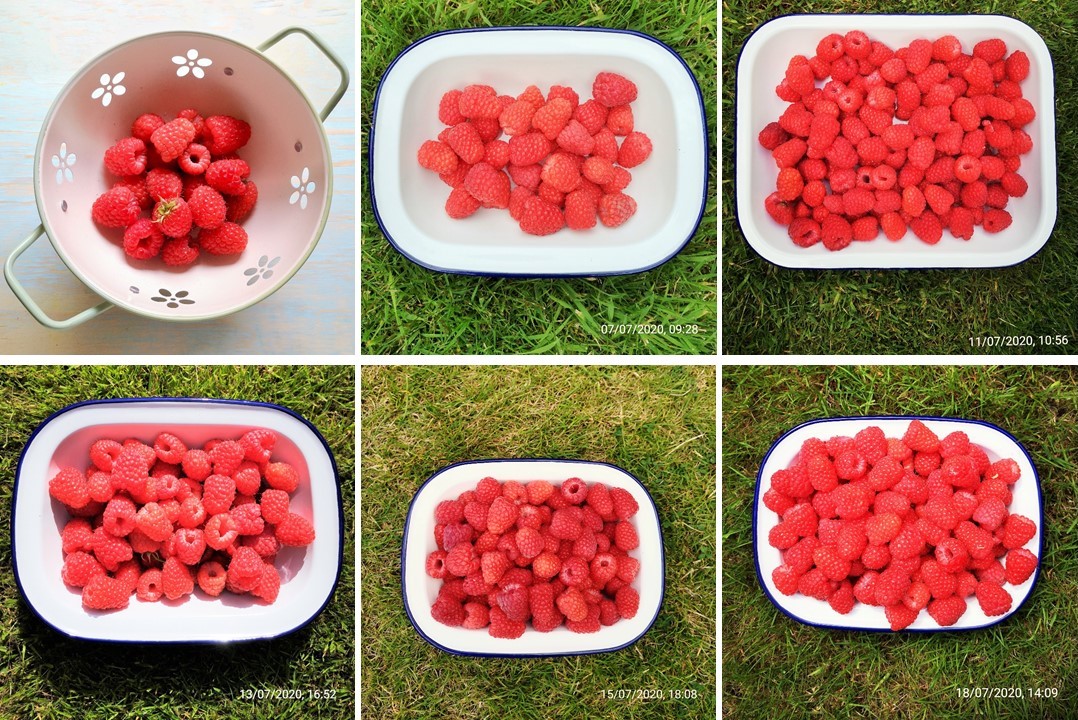
This year’s raspberry haul so far. Images: Kathryn Hawkins
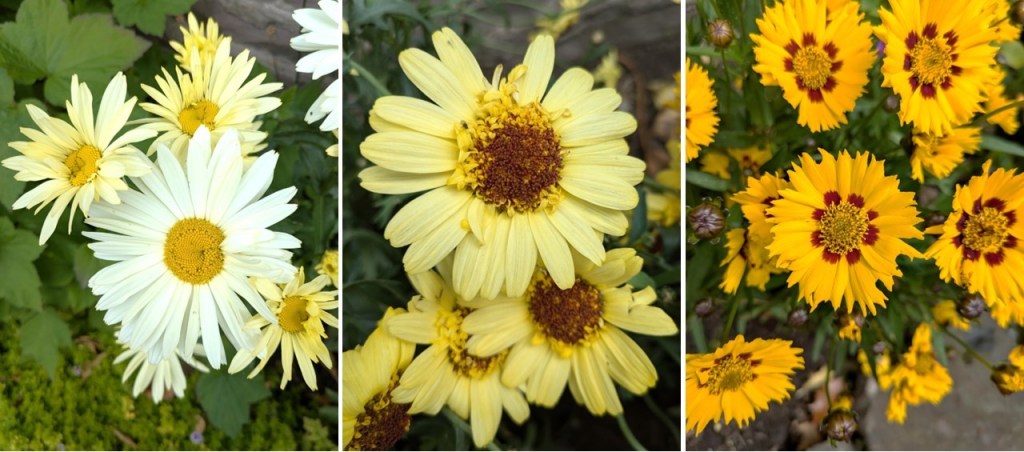
Brightening up what continues to be a very up and down summer season this year, are some very colourful blooms. These 3 golden beauties produce new flowers right through until early Autumn.
Left to right: Bananas cream Leucanthemum, Argyranthemum, and Sunfire Coreopsis. Images: Kathryn Hawkins
All the lavenders and bellflowers (Campanulas) in the garden have done very well this year – they obviously appreciate the mix of sunshine and showers we’ve been having for the past few weeks. Very popular with our little winged, buzzing friends as well.
Lovely lavender and beautiful Bellflowers. Images: Kathryn Hawkins
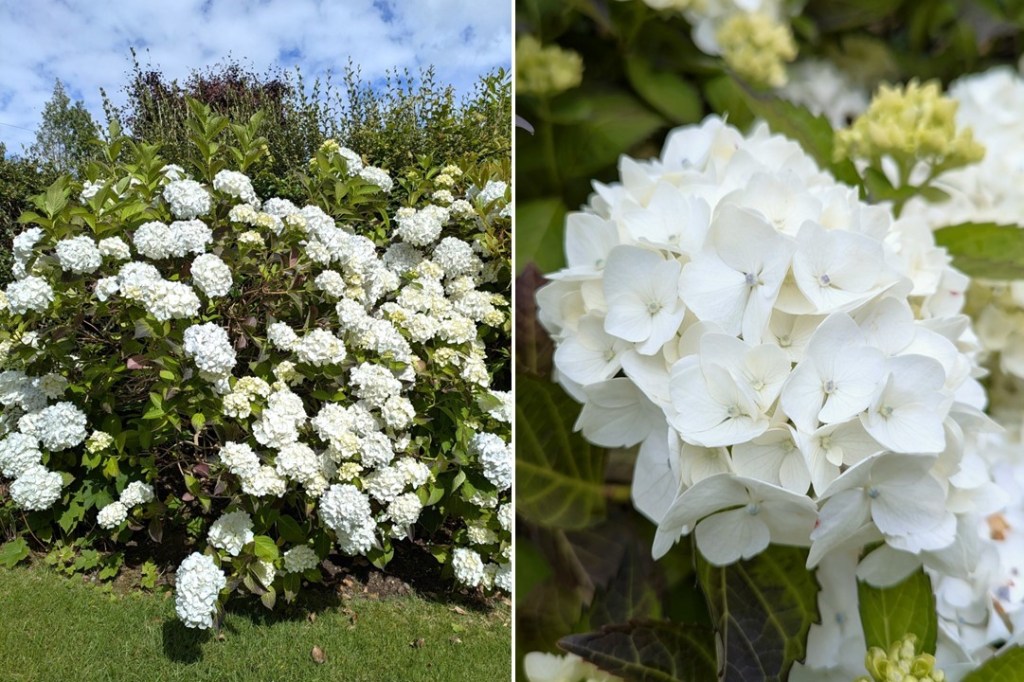
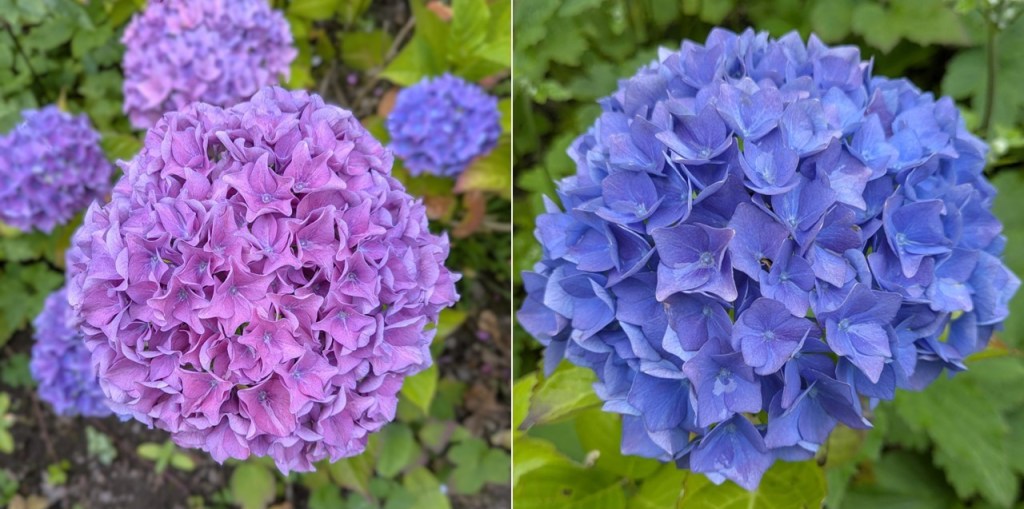
The old white Hydrangea bush is putting on a great display of blooms this year. Elsewhere in the garden, these more recently planted mauve and blue varieties are also thriving. The colours are at their most vivid at the moment.
Gloriously white Hydrangea blooms. Images: Kathryn Hawkins
Cool coloured Hydrangeas. Images: Kathryn Hawkins
Last year a white Delphinium was added to this flowerbed which did so well, another one was planted a few weeks ago. The tall stems add great height to the beds and make the Hydrangeas look even bolder in colour.
Bold and bright Summer shades. Images: Kathryn Hawkins
And that’s me for another post. Looking forward to the month ahead, I’ll be back in the kitchen for my next post. Until then, thanks for taking the time to stop by 🙂
Hello again. July has been a busy month in the garden and greenhouse. The weather’s been cooler than usual, with a mix of bright days and rain showers, but the plants have really been growing very well and yielding lots of goodies throughout the month.
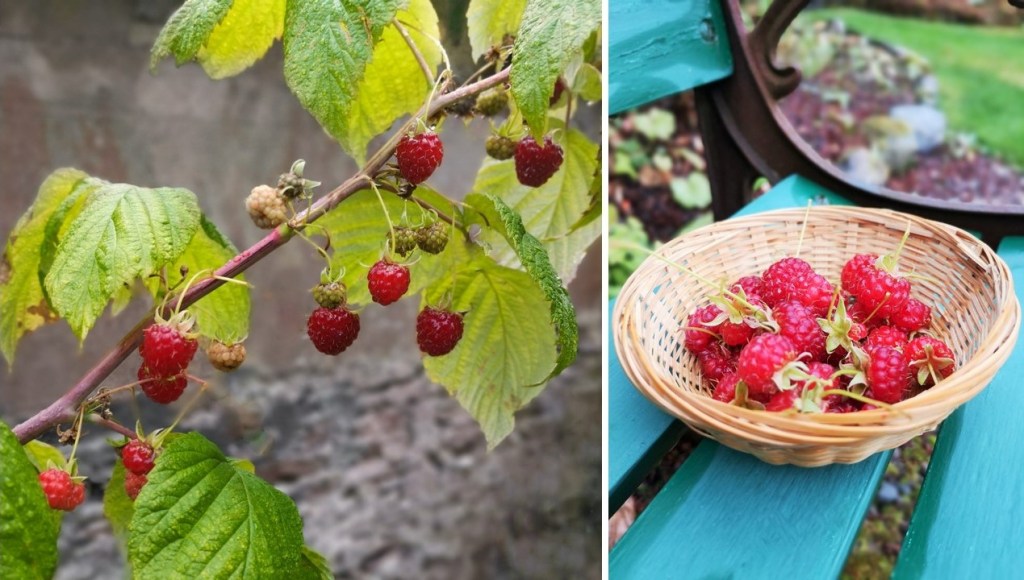
July here in central Scotland is the month for raspberries and cherries. I have been training some new raspberry canes for a couple of years and the rewards are starting to show. Sadly the older canes suffered storm damage earlier in the month, so this may be their last season. Not bad going really, they were planted some 18 years ago! Berries are still ripening on the new canes, so it looks like I’ll be picking for a couple more weeks yet.
Broken canes but still a good harvest. Images: Kathryn Hawkins
The small espalier Morello tree didn’t produce quite as many cherries this year, but I did manage to get the fleece on earlier enough to stop the birds having a lovely feast. I have enough for a pie later in the year, and that’s good enough for me 🙂
2023 Morello harvest. Images: Kathryn Hawkins
In the greenhouse, I’ve been picking mini cucumbers throughout the month. The tomatoes have started to turn colour, and the aubergine (eggplant) plants have a few flowers on them now – I hope they form fruit.
A plentiful greenhouse. Images: Kathryn Hawkins
The greenhouse yielded a few surprises earlier in the year when small seedlings started appearing in the soil. I realised after a while that they were sunflower seedlings. I think a mouse must have stashed some of the bird seed in the soil and perhaps had forgotten to retrieve it. Anyway, I ended up with several seedlings which I planted outside back in May, and this month they have started flowering. Not the biggest sunflowers you’ll ever see, but a quirky addition to the garden nonetheless.
Mini sunflowers. Images: Kathryn Hawkins
None of my garden produce would be possible without the help of the gardener’s best friend, the bees. They have clearly been busy since the spring blossom was out, and now they have all the garden flowers to feast on.
Bees at work in July. Images: Kathryn Hawkins
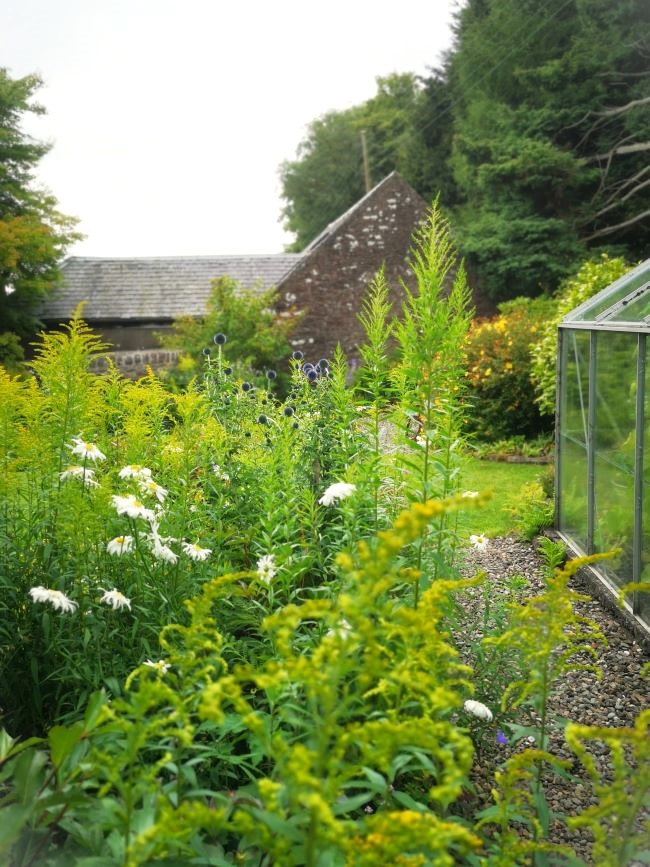
My last image for this post is another view of the garden. It’s been cool and mostly cloudy this past week, and at times it has felt a little bit autumnal. I think this image captures the mood, especially as the globe thistles (Echinops) are beginning to open up and the later summer flowers are coming into bloom. Until next time, thanks for stopping by and I hope to be posting again soon.
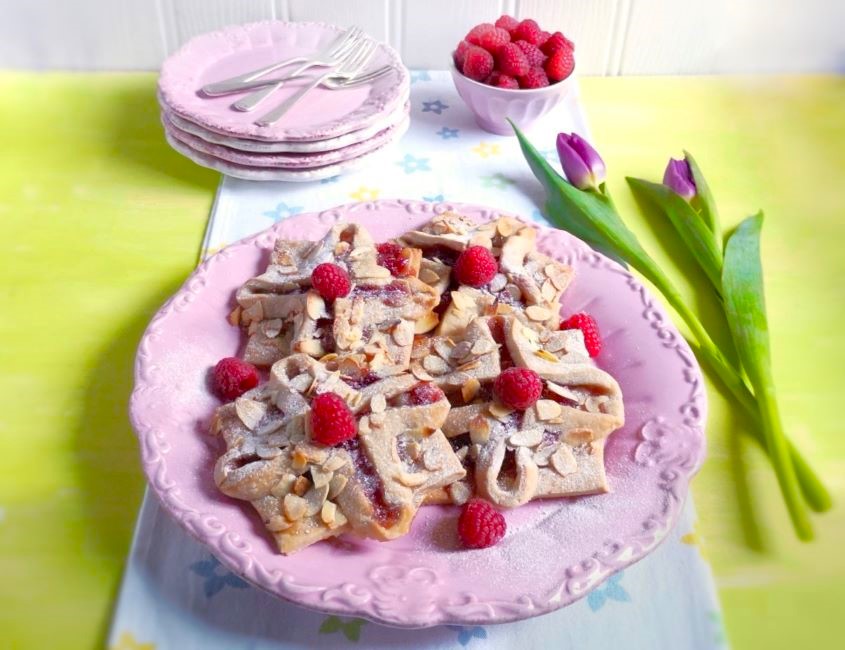
Homemade raspberry and almond pastries. Image: Kathryn Hawkins
Hello again. I hope you have had a good Easter holiday. I had intended to post this recipe before the holidays began, but time ran away with me. I have had a few days away visiting family and friends, and now I’m back home and ready to post again.
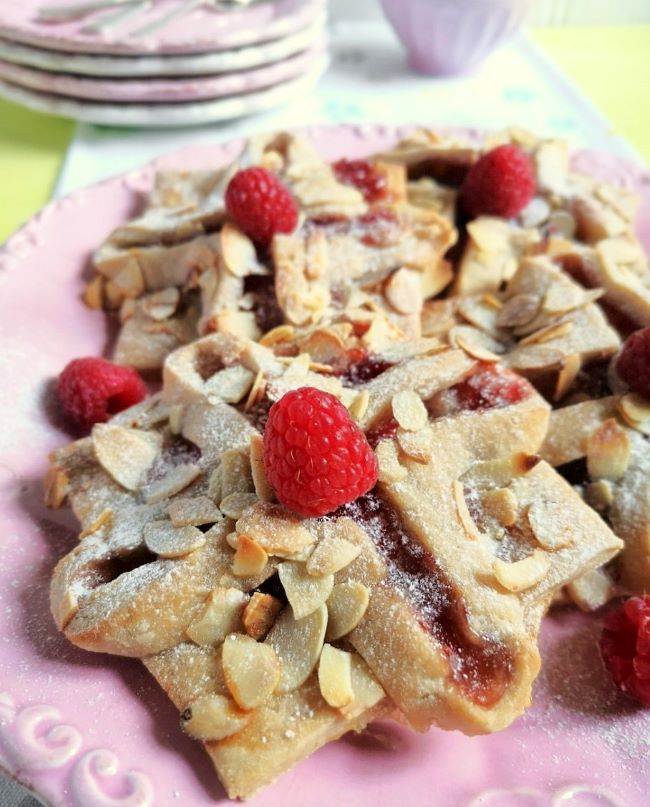
Up close on raspberry and almond pastries. Image: Kathryn Hawkins
One of my first blog posts was a recipe for gluten-free rough puff pastry. It has had many hits but I am always looking for ways to tweak the recipe. Here’s the original if you are a newcomer to my blog: Gluten-free rough puff pastry (with dairy-free & vegan variation) The latest version of the recipe uses my favourite combination of gluten-free flours and also adds psyllium husk to the dough. The latter makes a much more silky dough which is very much easier to roll and shape. If you don’t have the individual flours, just use a ready blended plain flour. I also use all plant butter in this version. However, whilst the dough is quite puffy and light, it has lost some of the flakiness of the original recipe. I guess it’s up to personal taste which version you prefer and for what purpose you want to use it.
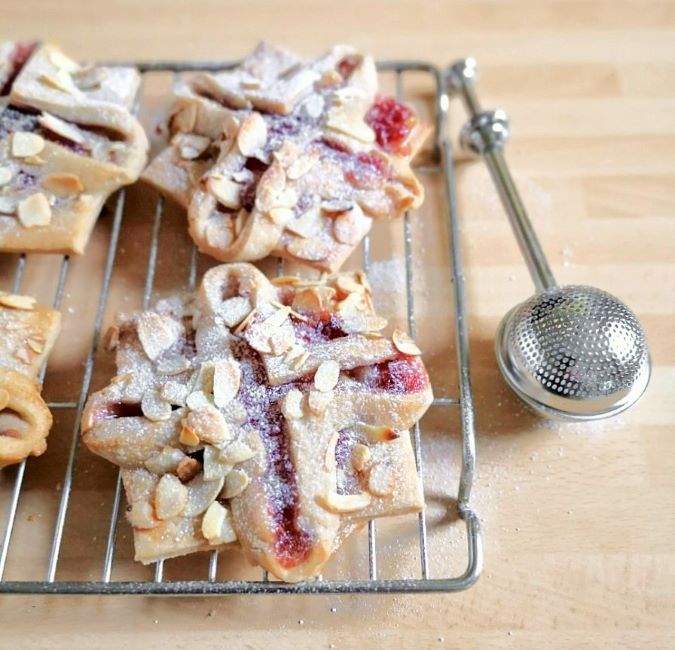
Pastries with a light dusting of sugar. Image: Kathryn Hawkins
The pastries tasted pretty good though despite the lack of pastry layers. The texture of this latest pastry is crisp and chewy, and I am pleased with the flavour. If you do compare the 2 recipes yourself, let me know what you think, and which you prefer. By the way, the recipe makes twice as much pastry you need for making 4 pastries so you can freeze the other half to make something else at a later date.
Makes: approx. 625g pastry. Use half the pastry quantity to make 4 pastries
Ingredients
For the pastry dough:
70g cornflour (corn starch)
60g tapioca flour
60g white rice flour
60g glutinous rice flour
½tsp salt
2tsp psyllium husk powder
150g plant butter, cut into small pieces
For the pastries:
100g marzipan
60g raspberry jam
1tbsp oatmilk
1tsp carob syrup
20g flaked almonds
Icing sugar to dust
Fresh raspberries to serve
1.Put all flours in a large mixing bowl with the salt and psyllium husk powder, and mix together until well blended. Stir the butter into the flour to coat each piece in flour.
2. Gradually stir in between 260-275ml cold water until the mixture comes together to make a soft, very lumpy dough. Turn out on to a lightly floured work surface and roll the dough into a flat, roughly rectangular shape approx. 35cm x 12cm.
Pastry ingredients and making the dough. Images: Kathryn Hawkins
3. Now the rolling and folding begins. The aim is to consistently roll out the pastry to the same dimensions, and then to fold it, turn it and seal it in the same way each time; this is how the pastry layers form. Fold the top one third of the pastry down and the bottom one third up and over the top pastry; twist the pastry round so that the open edge is facing to the right, and gently press the 3 open edges of the pastry together with the rolling pin.
4. Repeat this rolling, folding, turning and sealing 3 more times and then chill the pastry for 30 minutes. The mixture will be sticky but try to refrain from dusting with too much flour as this will dry the texture of the pastry.
5. After chilling, repeat the rolling, folding, turning and sealing another 3 times, working the pastry each time in the same direction. You should now begin to feel that the fat is more blended into the flour. Chill the pastry for a further 30 minutes.
6. Repeat the process 3 more times and you should see that the fat pieces have practically disappeared. Wrap and chill for at least 1 hour before using. From start to finish, you should aim to roll and fold the pastry 10 times.
7. Cut the pastry in half, and use half to make the pastries – wrap and freeze the other half for later use. Roll out the pastry to make a 24cm square. Trim the edges as necessary.
Rolling and folding rough puff pastry. Images: Kathryn Hawkins
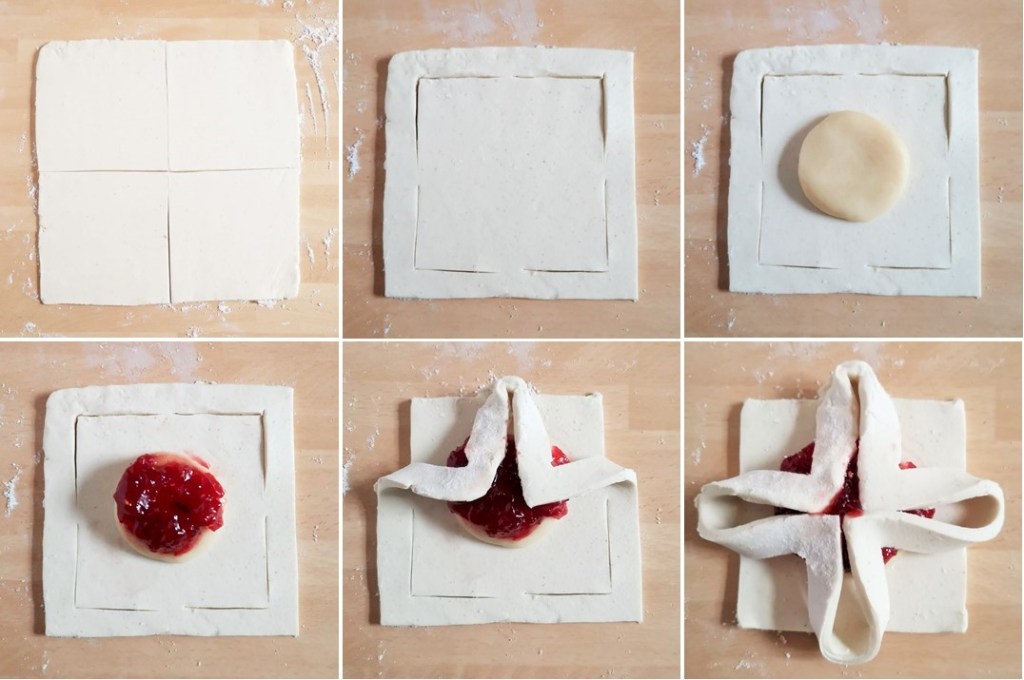
8. Cut the pastry into 4. Working on 1 square at a time, starting cutting 1cm inside the edge of one side as if about to cut out an inner square. Just before you reach the centre point, leave a 1cm space of uncut pastry then continue the cutting down the rest of the side. Repeat this cutting on the other 3 sides, and then cut the other pastry squares in the same way.
9. Knead the marzipan; cut into 4 and shape each piece into a small round to fit in the centre of each square. Top with jam. Bring the corners together in the centre of the pastry.
Shaping the pastries. Images: Kathryn Hawkins
10. Place on a lined baking tray. Chill for at least 1hr before baking.
11. When ready to cook, preheat the oven to 220°C, 200°C fan oven, gas 7. Mix the milk and syrup together and glaze the pastries. Sprinkle with flaked almonds and bake for about 20 minutes until risen and lightly golden. Dust with icing sugar and serve warm.
Glazing, sprinkling, baking and dusting. Images: Kathryn Hawkins
Single pastry. Images: Kathryn Hawkins
I hope you enjoy the pastries. It is a bit of a long recipe this week, but if you do have the time, the pastries certainly make a lovely treat. As the for pastry update, my jury is out on which version I prefer but I will keep adapting and reposting any progress I make. Until next time, take care and best wishes 🙂
Hello again. It’s the time of year for me when I try and use up as much from the freezer as I can, both for reasons of economy and also to make sure there is room for any new season produce that comes along. In the past few days, the freezer fruit drawer has attracted my attention; the jam pan came out of the cupboard and another cooking session began.
Frozen Summer berries from 2021. Images: Kathryn Hawkins
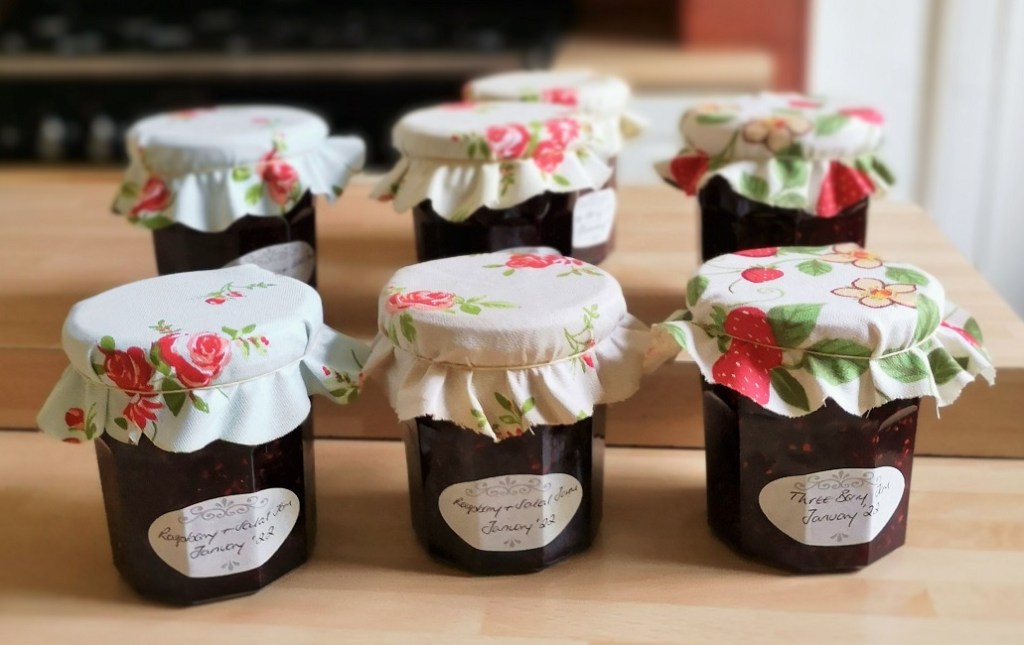
I wasn’t that sure how the jam would taste if I put all the berries I had in one pot. I always have lots of raspberries from the garden but last year also produced some great hedgerow blackberries as well as homegrown salal berries and a few strawberries I decided to freeze down. I settled on 2 combinations: raspberry, strawberry and blackberry, and raspberry with salal berries. I made 2 separate batches of the recipe below.
The vital ingredient. Image: Kathryn Hawkins
When raspberries are fresh they have a lot of the setting agent pectin present, and any jam made with the fresh berries sets very quickly. However, freezing fruit destroys some of the pectin, so it is important to add freshly squeezed, pectin-rich lemon juice to any frozen fruit mix to compensate for the loss – redcurrant juice will also work. Otherwise, jam-making with frozen fruit is exactly the same as with fresh.
Jars ready for jam. Image: Kathryn Hawkins
Make sure your jars and lids are sound – no signs of corrosion on the lids if you are recycling – and thoroughly clean them in hot soapy water. This should mean that your jams, jellies and other preserves will store in perfect condition for many months ahead.
I have reduced the sugar content slightly in the recipe. Usually berry-based jam recipes suggest equal sugar to fruit, but I have found you can reduce the quantity slightly and still maintain a good set and a lengthy period of storage time.
Makes: approx. 1.2-1.4kg
Ingredients
900g frozen berries – I used 300g each frozen raspberries, blackberries and strawberries, and then for the second batch, 450g each of raspberries and salal berries
750g granulated white sugar
2tbsp freshly squeezed lemon juice
Put the berries in a large saucepan or preserving pan and allow them to semi-defrost so that the juices begin to run. When slushy, heat the fruit gently until steaming, cover with a lid and simmer for about 10 minutes or until very soft and pulpy.
2. Add the sugar and lemon juice, and stir over a low heat until the sugar dissolves.
Cooking the fruit. Images: Kathryn Hawkins
3. Raise the heat, bring to the boil and cook the fruit uncovered until the temperature reaches 104 – 105°C on a sugar thermometer. If you don’t have a thermometer, check the jam after about 5 minutes of rapid boiling by spooning a small amount on to a cold plate. If you can push the jam with your finger and see wrinkles on the surface, the jam has reached setting point.
4. Turn off the heat and let the jam settle for 5 minutes. Stir and skim away any scum from the surface of the jam. Spoon into clean jars and seal with the lids while the jam is still very hot.
Testing for setting point and spooning into jars. Images: Kathryn Hawkins
Homemade jam sealed properly and stored in a cool, dry cupboard should keep for many months. If you have insufficient jam to fill a jar completely, let the jam cool before putting the lid on and then keep in the fridge for up to 6 weeks. I had some jam leftover from both batches which meant I could taste the fruits of my jam-making labours instantly 🙂
Ready to enjoy, three berry jam. Images: Kathryn Hawkins
Homemade raspberry and salal berry jam. Images: Kathryn Hawkins
Great set, lovely rich colours, and above all else, delicious homegrown berry flavours in the depth of winter.
It looks like a wintry week ahead for this part of Scotland so I may just have to tuck into another jar to remind me of the summer just gone. All the best for now. Until next time, take care.
Hello everyone. I hope you are enjoying some sunshine. It’s been incredibly hot here in the UK these past few days, lots of blue sky and high temperatures. I have been outside enjoying the warmth but also seeking the shadier parts of the garden to work in. I have lots of produce to water as well, so I am hoping for some (night-time) rain to refill the water butts again.
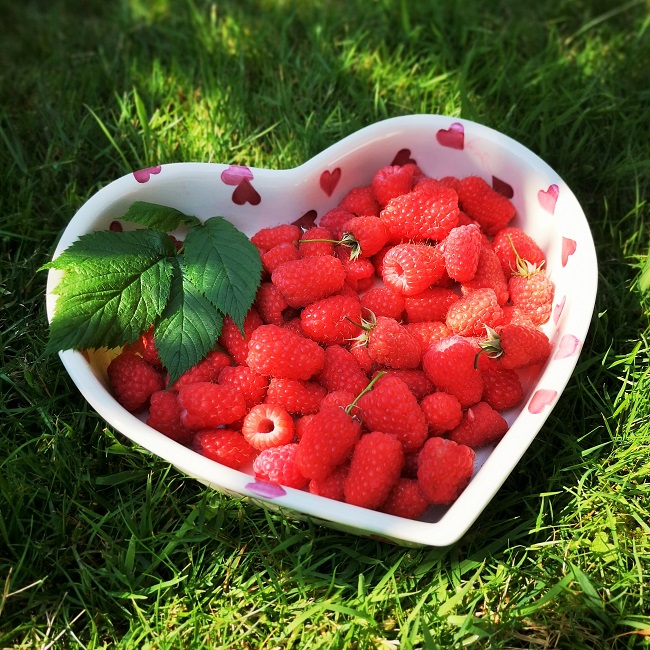
Ripe and ready for picking, this year’s homegrown Scottish raspberries. Images: Kathryn Hawkins
My recipe post this week is inspired by one of the best and most successful home-grown Scottish fruits, the raspberry. I have been picking a bowlful a day for the past week or so, enjoying some for breakfast and putting the rest in the freezer, ready for jam making later in the year.
Freshly picked July Scottish raspberries. Image: Kathryn Hawkins
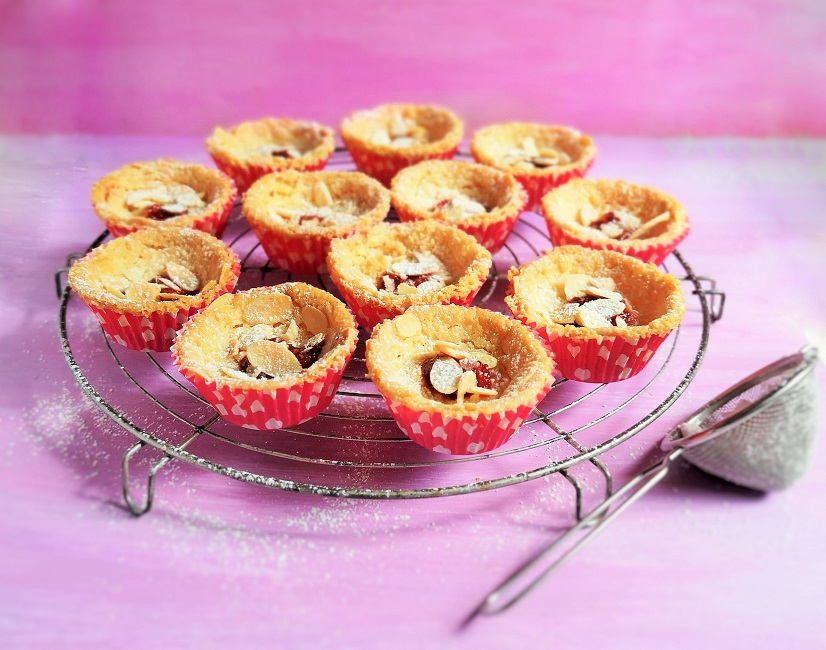
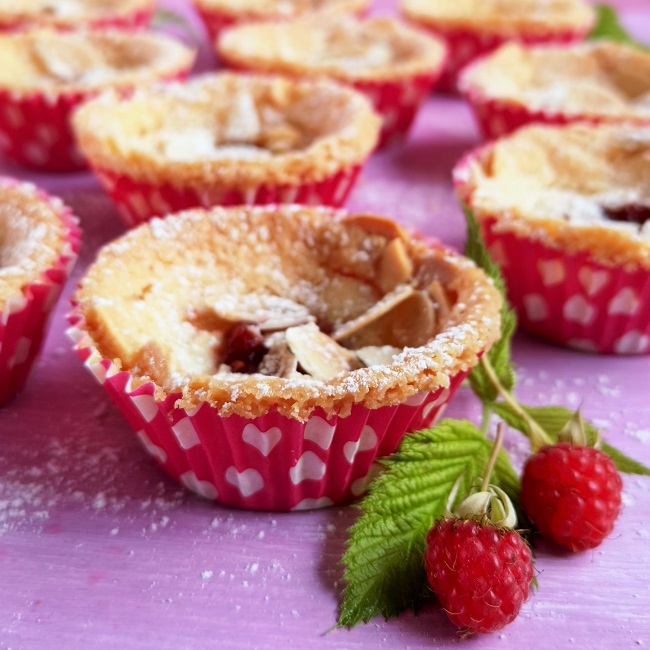
Berry nice shorties. Image: Kathryn Hawkins
This is a very simple recipe. The texture of these little fruity bakes lives up to their name, it is incredibly short, crumbly and melt-in-the-mouth. The Shorties are best eaten from the cases. You could try adding a little xanthan gum to the mixture for a firmer bite, but I love the crumbliness. They are also very moreish – you have been warned.
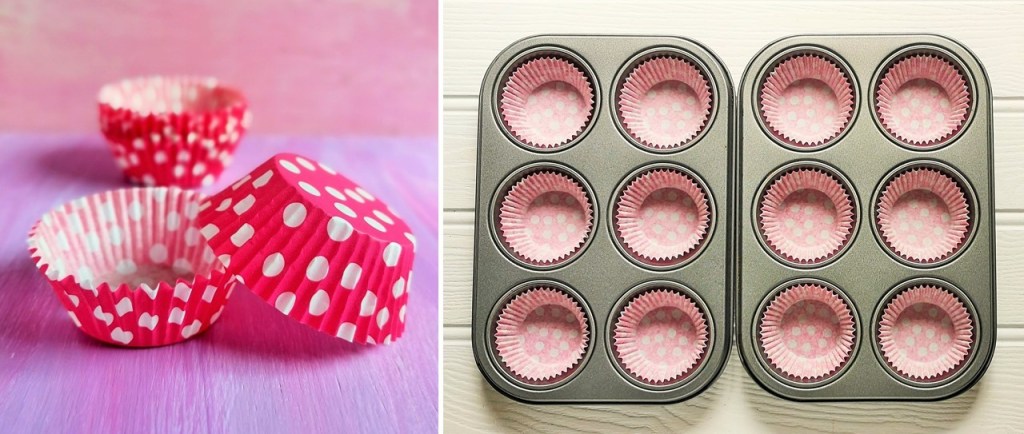
Pretty pink cake cases. Images: Kathryn Hawkins
I use smaller cake cases for this recipe, so not the large muffin or cup-cake size. These are the cases you would use for fairy cakes or small buns. You can see from the image above that the cases don’t quite fit the depth of the muffin tins. However, I like to use the deeper tins to hold the cases as the deeper sides give support to the cases while the mixture bakes.
Raspberry and beetroot jam. Image: Kathryn Hawkins
You can use any jam you like for the filling. I made some reduced sugar raspberry jam using a recipe I posted last year. It replaces some of the sugar with cooked beetroot. You can find the recipe here if you fancy trying some. One other thing to mention is that most of the jam added before baking will become buried once the mixture cooks, so you might want to add some more on top along with a few more almonds just before serving.
Makes: 12
Ingredients
75g white vegetable fat (such as Trex) or coconut oil, softened
75g dairy-free margarine, softened
1 teasp good quality vanilla extract
100g gluten-free plain flour blend (such as Doves Farm) + extra for dusting
50g ground almonds
25g cornflour (cornstarch)
45g icing sugar + extra for dusting
3g gluten-free baking powder
150g your favourite jam
40g toasted flaked almonds
1. Preheat the oven to 200°C, 180°C fan oven, gas 6. Line 12 muffin tins with paper cake cases (fairy cake size).
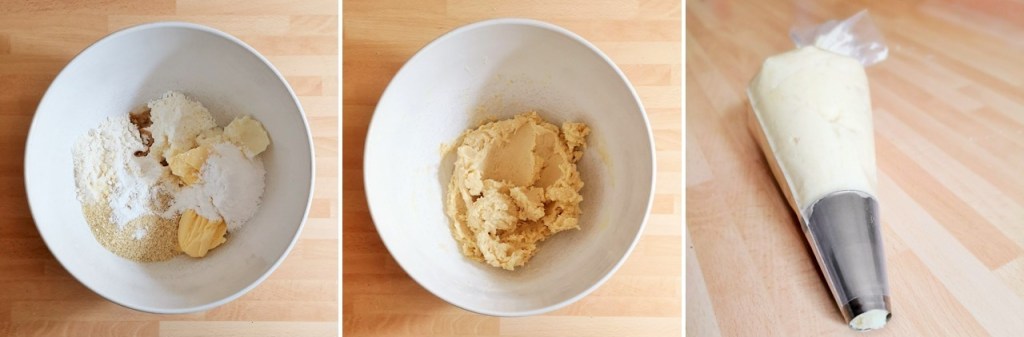
2. Mix together all the ingredients except the jam and flaked almonds until smooth and creamy. Spoon into a piping bag fitted with a 1.5cm diameter plain nozzle.
Making the shortie batter. Images: Kathryn Hawkins
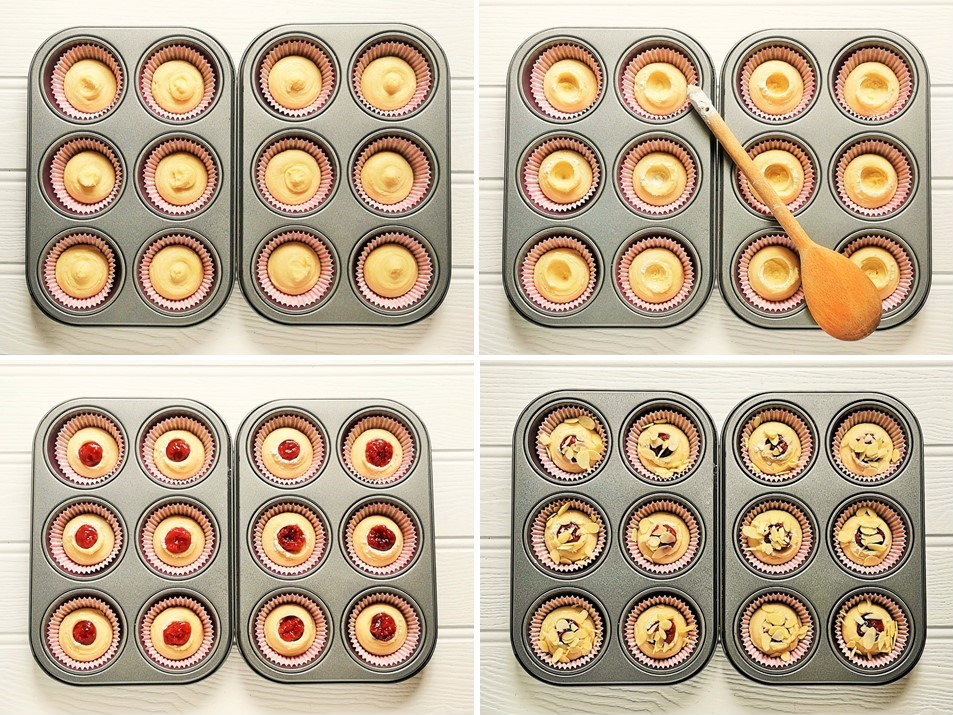
3. Pipe an approx. 3cm diameter mound in each paper case. If you don’t want to pipe the mixture, use a teaspoon to spoon the mixture into the cases instead and then smooth the tops.
4. Dust the end of a wooden spoon with more flour and use to make a neat pocket in the centre of each.
Filling the cases. Images: Kathryn Hawkins
5. Spoon about 1 teaspoon of jam into each and sprinkle with a few flaked almonds. Bake for about 20 minutes until lightly golden. Leave to cool for about 20 minutes to firm up before transferring to a wire rack to cool completely.
6. Just before serving, top with a little more jam and a few more flaked almonds, then dust lightly with icing sugar and serve. The Shorties will keep in a sealed container for 4-5 days but the texture will soften.
Shorties ready to eat. Image: Kathryn Hawkins
Inside a shortie. Image: Kathryn Hawkins
That’s me for another week. I hope you enjoyed my post and I look forward to seeing you again in a couple of weeks. Until then, take care and keep safe.
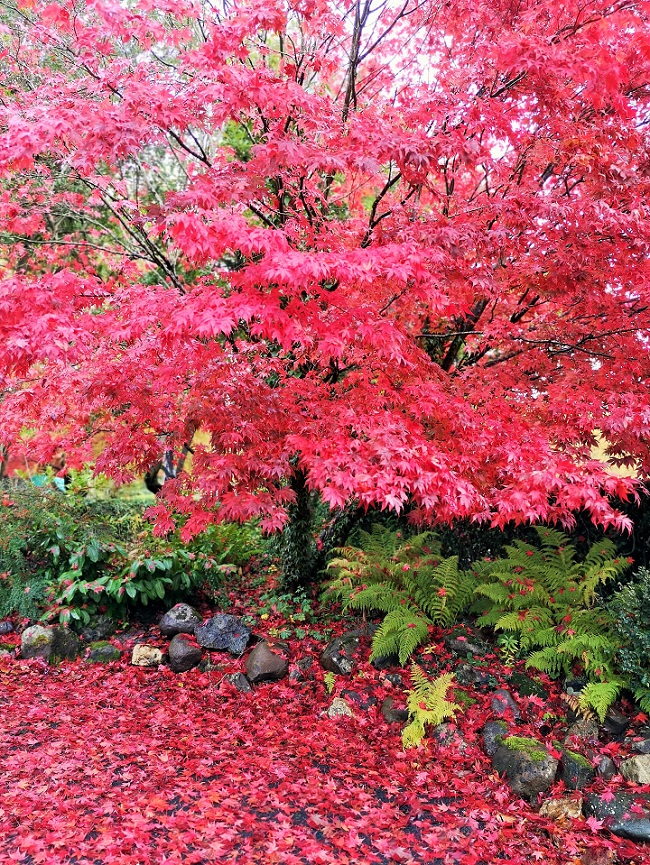
Acer Palmatum in Autumn splendor. Image: Kathryn Hawkins
Hello again. I hope you are keeping well. As I sit down to compile this week’s post, it is very wet and dull outside. In fact it has been raining just about all week and there is very little end in sight. During the very few brief dry spells, I have been outside to capture some of the bright colours that are on show in the garden at the moment. One positive thing about the low light levels is that natural colours do seem to stand out all the more.
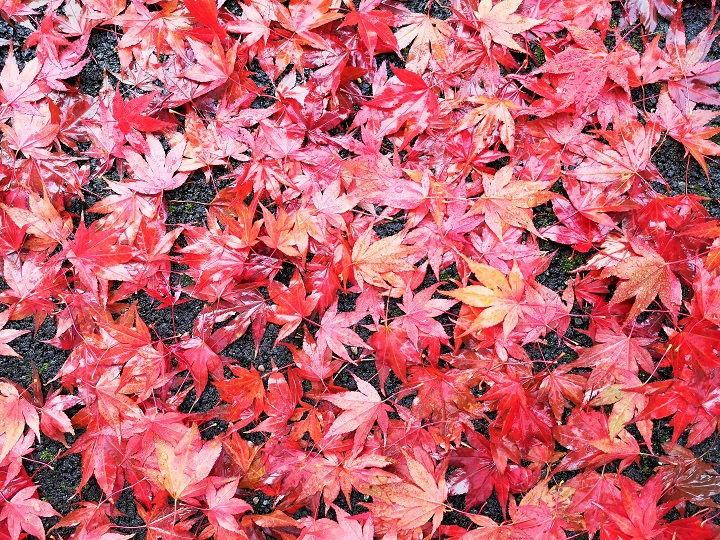
Maple leaf ground cover. Image: Kathryn Hawkins
The rain rather than the wind has driven many leaves from the trees this year. The colour of the Japanese maple is stunning – so many shades of pink, orange and red from just one tree.
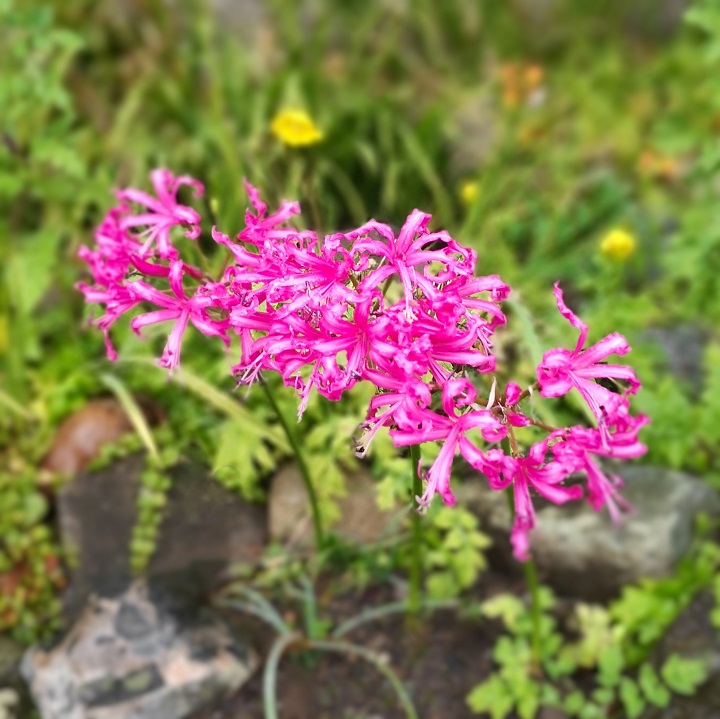
3 Nerines. Images: Kathryn Hawkins
In the rockery in the back garden, the foliage is mostly fading green or dying back now, but the Nerines are standing proud, bright and bold.
Second flowering of Rosa Felicia. Images: Kathryn Hawkins
Just along the border from the Nerines, is my old faithful rose bush and true to form, it is in flower once again. The heads are heavy and drooping with the weight of rain drops but the perfume is just as sweet and fragrant.
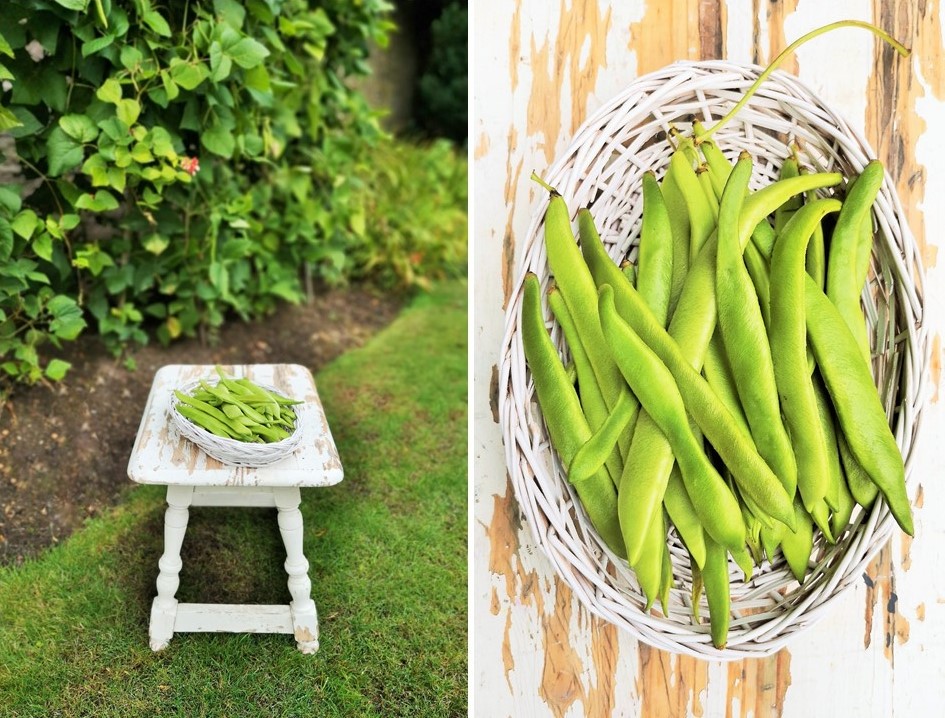
October Runners. Images: Kathryn Hawkins
In between the rockery and the rose are my runner bean plants. Still going strong and still providing me with beans. This latest basketful weighed just under 500g. We have had neither very cold weather nor strong winds so far this autumn and these factors seem to have given the beans an extended lease of life.
Late Autumn raspberries. Images: Kathryn Hawkins
The Autumn raspberry canes are still fruiting well. Another wee basket picked ready for my morning granola.
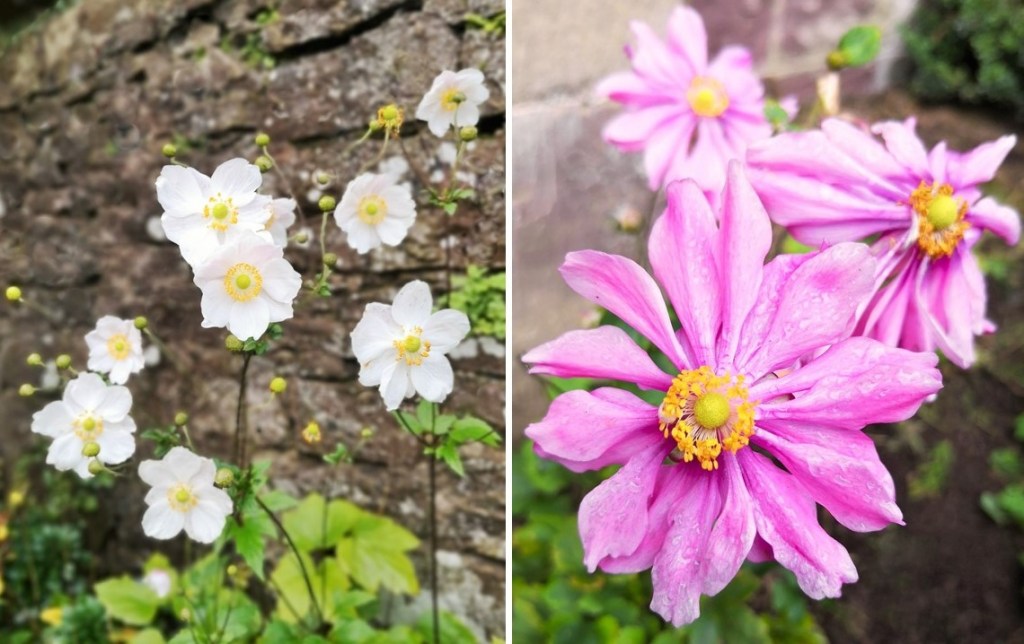
Anemones still flowering. Images: Kathryn Hawkins
The white Japanese anemones are still going strong, and now the garden has a new addition to the collection, this pink hybrid anemone called Pamina. Lots of pointed pink petals. I hope it does well in its new home.
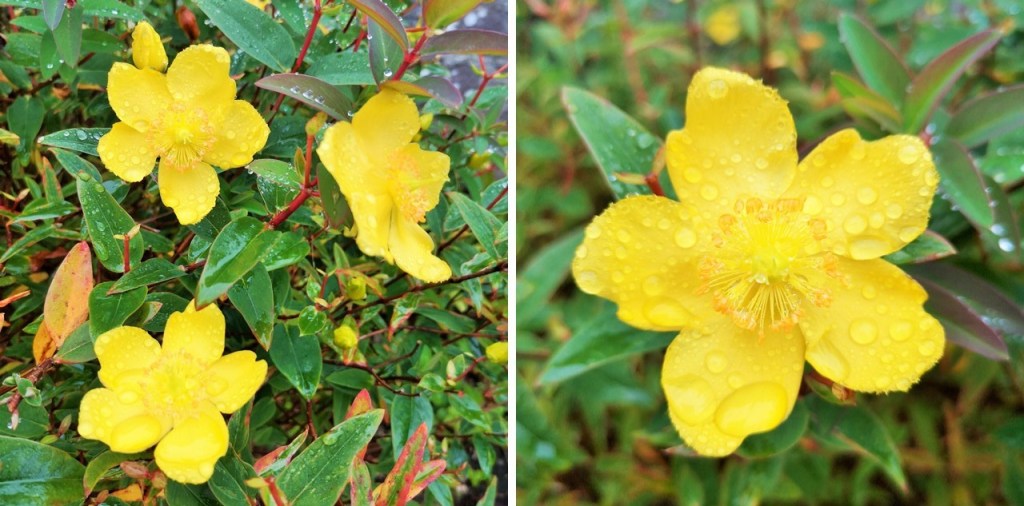
Hypericum Rose of Sharon. Images: Kathryn Hawkins
I gave the Rose of Sharon Hypericum a big “hair-cut” early last month. It had flowered very well but had become too large for the flower-bed. I am amazed to see that it is flowering again already.
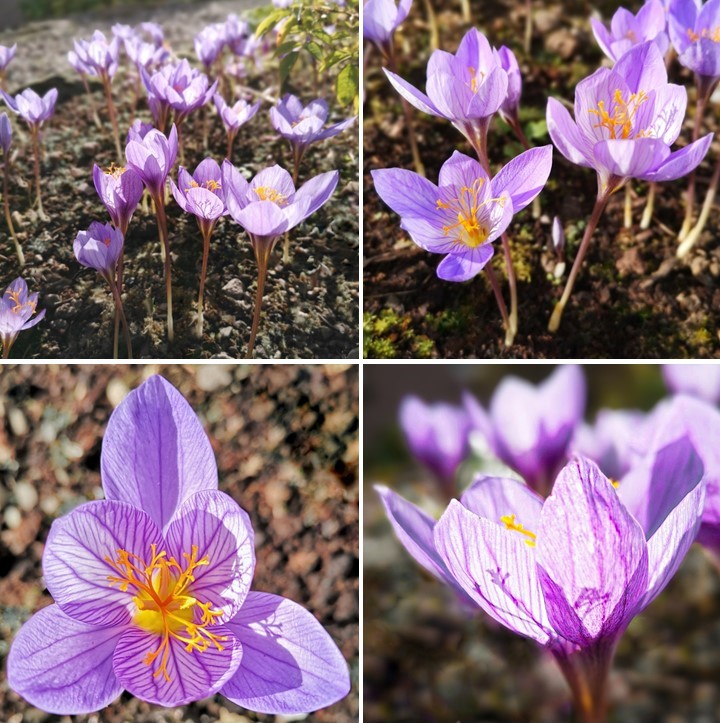
Saffron crocus. Images: Kathryn Hawkins
As you can see, it wasn’t raining when I captured these delicate little saffron crocus. To be honest, is was over a week ago when I took the pictures. Sadly, they haven’t survived the rain battering this week. I love the shadows of the saffron-scented stamens just visible through the petals.
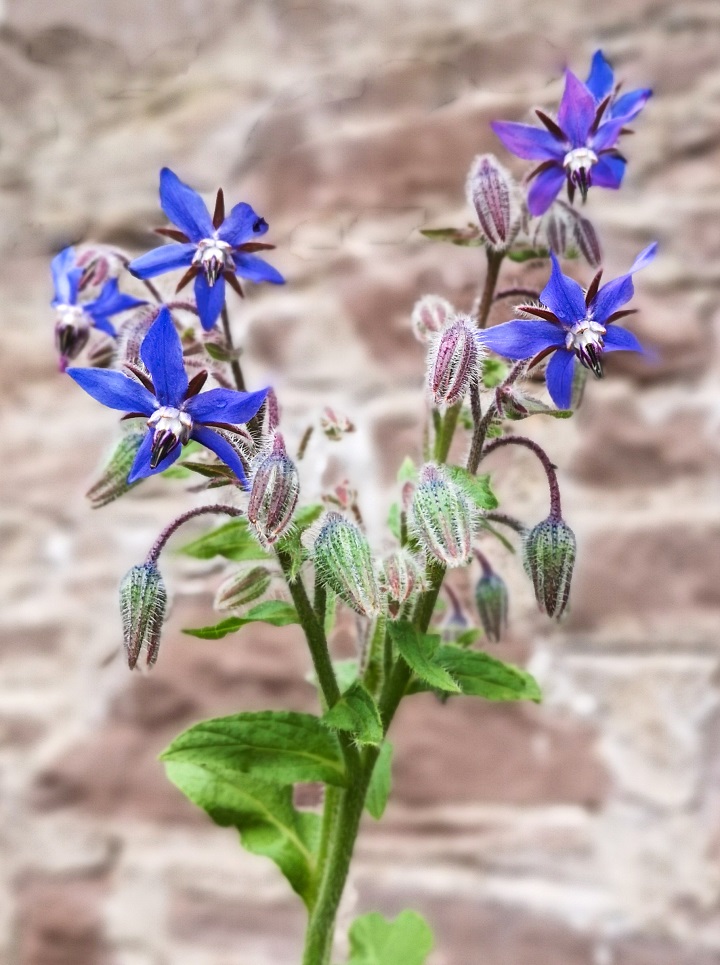
Second time around Borage. Image: Kathryn Hawkins
It’s been a very good year for Borage and I have had a continuous supply of bold star-shaped flowers since early summer. Long may they continue adding their vibrant splash of electric blue colour.
Already decorated for Christmas. Image: Kathryn Hawkins
I’m returning to the Japanese Maple for my last image. As I was capturing the leading image for my post, I noticed that the small conifer next to the tree was covered in red leaves giving it a rather festive look 🙂
That’s all from me this week. I will be back in the kitchen and recipe posting again soon. Until then, take care and keep safe 🙂
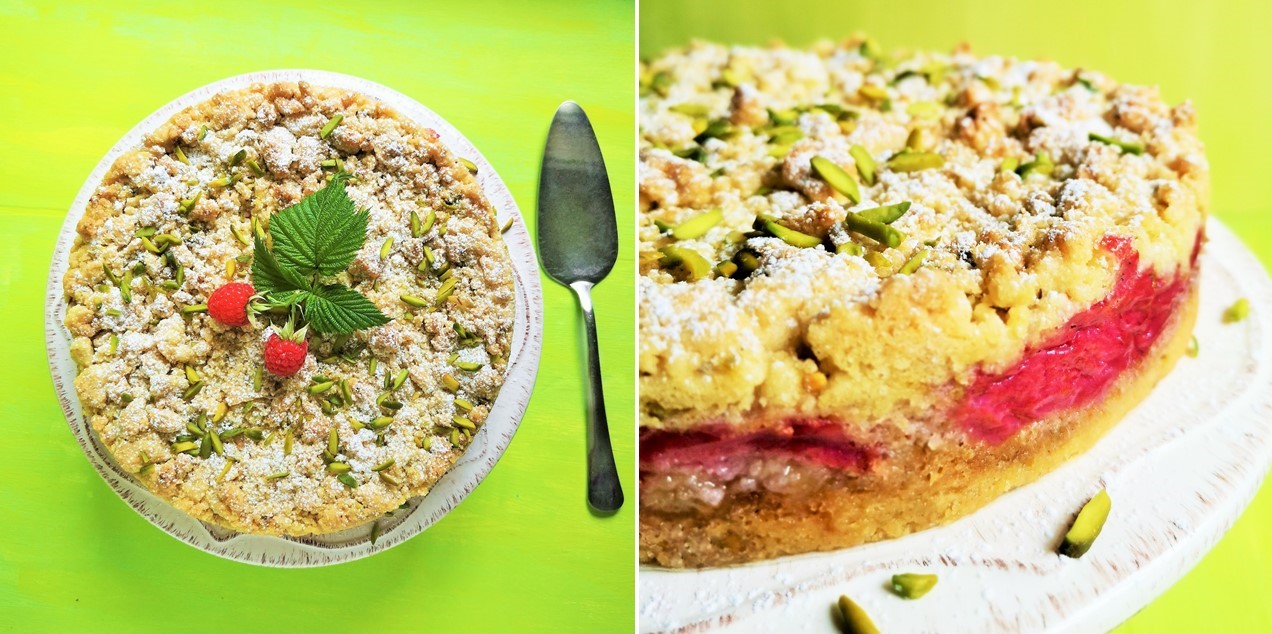
Combination of fresh raspberries, pistachio nuts and marzipan. Image: Kathryn Hawkins
Hello everyone. I hope you are keeping well. I’ve had a busy few days since my last post. There seems to be lots to do in the garden and kitchen at the moment. Plenty of tidying up (and weeding!) in the garden, and the much anticipated home-grown fruit and veg is ripe and ready so lots to cook up and freeze as well.
This week’s post is an homage to my Glen Ample raspberry canes which have produced a phenomenal 6.3kg of berries this year. Rather forlornly, I picked the last few berries this week.
My 2020 raspberry haul. Images: Kathryn Hawkins
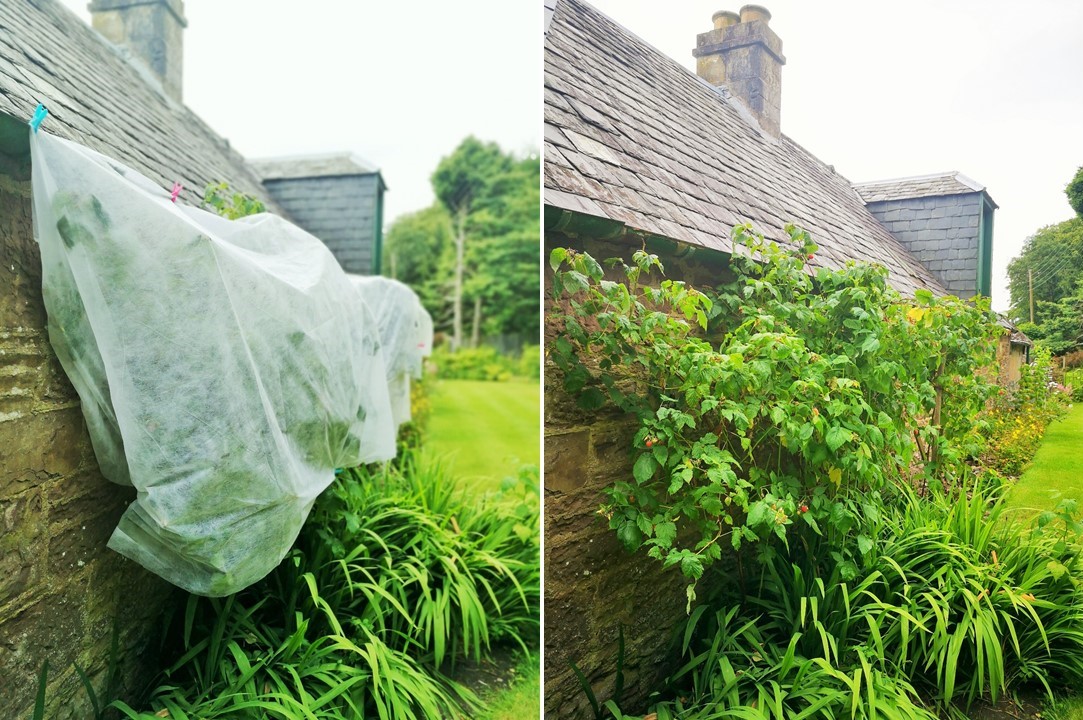
The canes are now having a well-earned rest and enjoying some sunshine – they had been covered with fleece for over a month as the birds took a fancy to the berries early on.
My exhausted raspberry canes. Images: Kathryn Hawkins
As you can imagine, I’ve had a lot of berries to play with but a combination of jam, vinegar, compote and a couple of large bags for the freezer has seen them all used up. By the way, compote makes the dish sound a bit grander, I literally cooked them with a bit of sugar to eat with my morning porridge!
Raspberry compote, jam, freezer packs and vinegar. Images: Kathryn Hawkins
Links to all my other raspberry recipes can be found by clicking on the key-words below:
On with this week’s recipe. Another reinvention of a crumble-topped cake – they are so easy to make, and taste delicious, I just can’t resist making them! Leave out the pistachios or replace with almonds or hazelnuts if you prefer, and the marzipan layer is optional (I realise it’s not to everyone’s taste) but you may want to add some sugar to the raspberry mixture if you don’t use it.
Fruit and nut, a winning flavour combination. Images: Kathryn Hawkins
Serves: 10-12
Ingredients
180g dairy-free margarine, softened
100g vanilla or plain caster sugar
100g ground almonds
260g gluten free plain flour blend (such as Doves Farm)
50g unsalted pistachio nuts, finely chopped + extra pistachios to decorate
150g marzipan, grated (optional)
300g fresh raspberries
1 tbsp cornflour
Icing sugar to dust
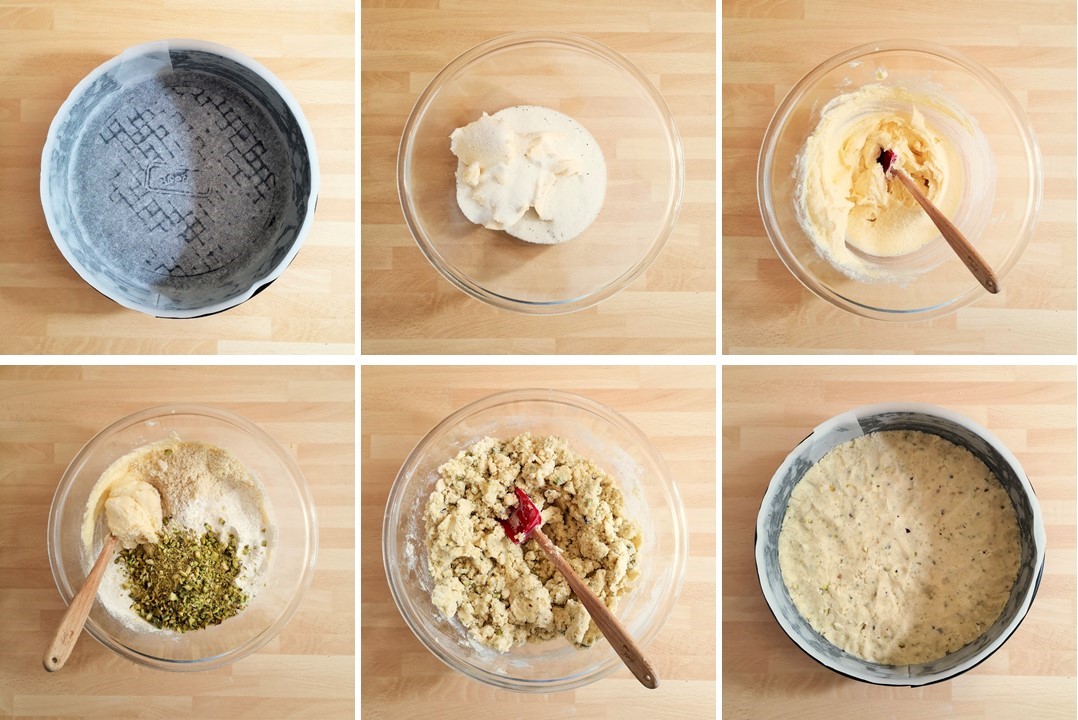
Preheat the oven to 180°C, 160°C fan oven, gas 4. Grease and line a deep 20cm round cake tin – I used a spring-clip tin for ease. In a mixing bowl, beat together the margarine and sugar until creamy, then stir in the almonds, flour and pistachios to make a crumbly mixture.
Press half of the mixture into the bottom of the tin, prick with a fork and put the in on a baking tray. Bake for about 20 minutes until lightly golden round the edge. Sprinkle the marzipan all over the cooked base if using and put to one side.
Making the crumble and assembling the cake. Images: Kathryn Hawkins
Mash the raspberries with a fork and add the cornflour – if you are not using marzipan add 2 tbsp caster sugar to the raspberry mix as well. Spoon over the marzipan layer and spread out evenly.
Sprinkle over the remaining crumble mixture, pat down lightly with the back of a spoon and bake for about 40 minutes until lightly golden. Leave to cool in the tin on a wire rack for at least 10 minutes before releasing and transferring to a serving plate to serve warm, or leave to cool completely in the tin to serve cold.
Adding the raspberries and crumble top. Images: Kathryn Hawkins
Serve this cake warm as a dessert with cream, yogurt or custard or cold as a delicious and indulgent slice to accompany a cup of coffee.
I am very much hoping that by publishing this week’s recipe, the weather will become more appropriate for enjoying an icy dessert. It’s been much cooler here these past few days, but the forecast is hotting up again so hopefully my post will be quite timely.
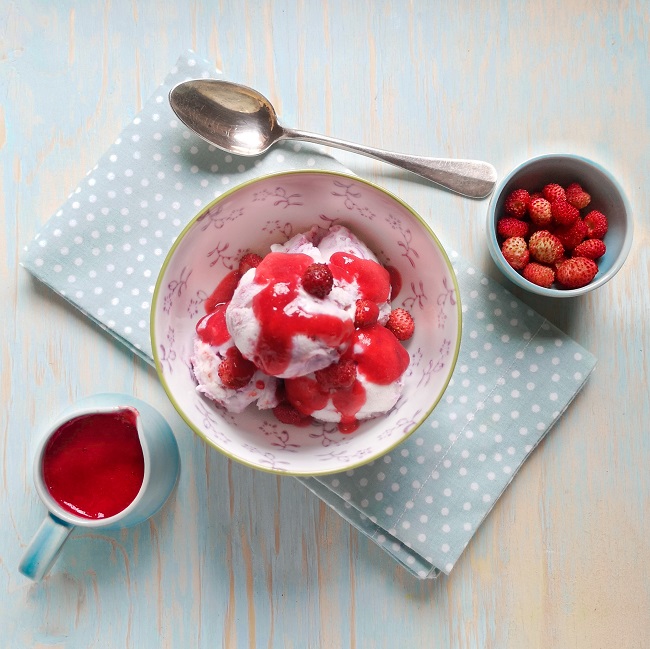
Vegan berry-flavoured ice cream with fresh strawberry sauce and wild strawberries. Image: Kathryn Hawkins
To be perfectly honest, I’m not a huge fan of frozen desserts, but when the heat is on, I can be persuaded by a scoop or two of a good non-dairy ice. I’ve been trying to perfect a recipe of my own for a while, and at last, I think I’ve cracked it.
Cooling, creamy and delicious. Image: Kathryn Hawkins
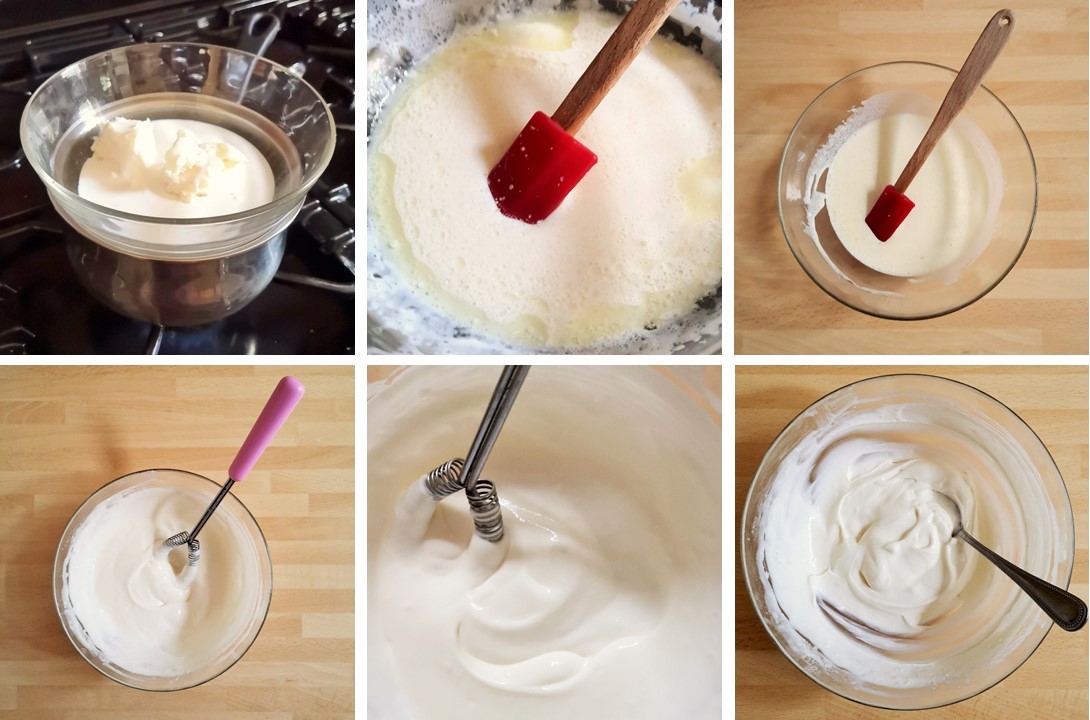
My recipe is a combination of a thick vegan cream I made a posted a few weeks ago and an uncooked aquafaba meringue mixture. Once the two are combined, the resulting mixture doesn’t require any stirring, you just pop it in the freezer for a few hours until frozen. Easy-peasy.
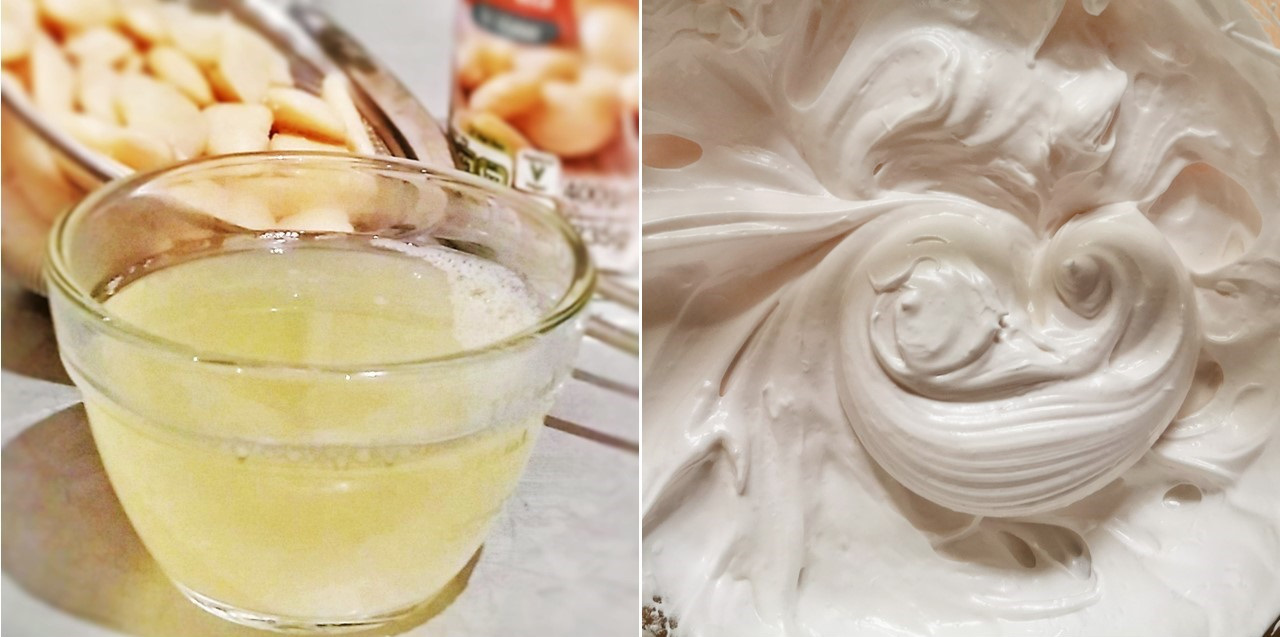
Homemade vegan cream. Images: Kathryn Hawkins
Bean water (aquafaba) meringue. Images: Kathryn Hawkins
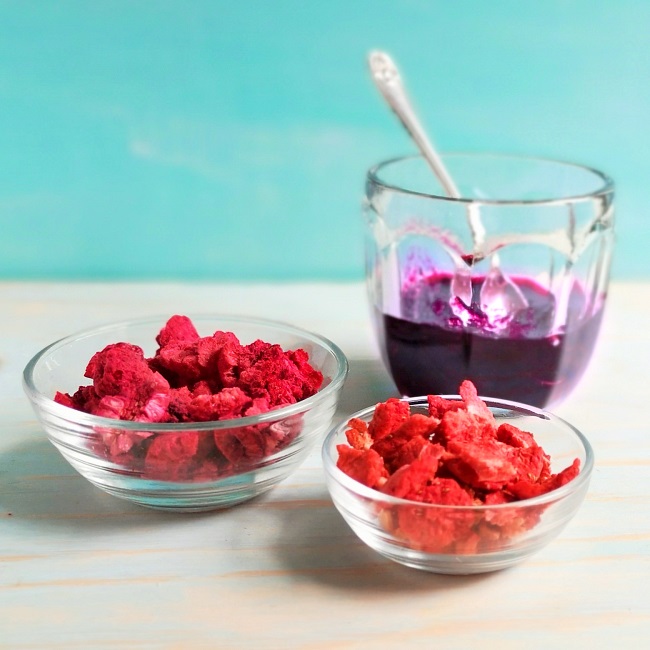
To flavour the ice cream, I added some freeze-dried fruit pieces and a little soft-set blueberry jam I’d made. If you want to experiment with other flavours, I would suggest using dry ingredients like chocolate chips, crushed caramel, small pieces of dried fruit, cocoa powder, etc. Adding anything too sloppy or saucy will water down the mixture; you will lose air, and the resulting ice cream will be solid and icy, rather than soft and creamy.
Freeze-dried berry pieces and soft-set blueberry jam. Image: Kathryn Hawkins
The recipe below makes a small quantity (around 350g) which is enough for 2-3 servings. I have a cute little ice cream scoop which dishes up a perfect 30g scoop. This is just right for me, and is why my bowl is piled high with scoops! You may want to double the quantities in the recipe for more hearty portions.
Serves: 2 to 3
Ingredients
For the cream:
100ml readymade soya pouring cream
40g solid white vegetable fat such as Trex or flavourless coconut oil (or use traditional coconut oil for a coconut flavoured ice cream)
¼ tsp xanthan gum
A few drops vanilla extract or a pinch of salt
For the meringue:
75ml canning liquid from beans or chickpeas (aquafaba)
¼ tsp cream of tartar
60g caster sugar
¼ tsp xanthan gum
To flavour:
A few drops vanilla extract if liked
5g freeze-dried fruit pieces
25g soft-set jam
First make the cream. Pour the soya cream into a small heatproof bowl and add the fat. Place on top of a small saucepan of barely simmering water and leave to melt, stirring occasionally.
Remove from the heat, mix well, then stir in the xanthan gum until completely blended. Leave to cool, stirring occasionally. The mixture thickens on cooling.
When cold, have a taste and see if you like the flavour as it is. Otherwise add a few drops of vanilla extract or you might prefer a pinch of salt. Whisk for about a minute with an electric whisk, then cover and chill the cream for at least 2 hours. After this time, the cream should be the consistency of thick, spoonable yogurt. It will keep covered in the fridge for up to a week.
Making thick vegan cream. Images: Kathryn Hawkins
When the cream is thick and chilled, make the meringue. Pour the aquafaba into a large clean bowl, add the cream of tartar and whisk for a full 2 minutes.
Whisk in the sugar 1 tbsp at a time, whisking well in between additions, and then continue whisking for another full minute.
Add the xanthan gum and whisk for 1 more minute to make a thick meringue.
Gently and gradually mix the meringue into the cream taking care not to lose too much air, then gently stir in more vanilla if liked along with the berries. Lightly stir in the jam to give a rippled effect.
Scrape into a freezer container, seal and freeze for 3-4 hours until solid.
Frozen and ready to scoop. Image: Kathryn Hawkins
To serve, stand the ice cream at room temperature for about 10 minutes until soft enough to scoop. I served my ice cream with a fresh strawberry sauce made from purée’d fruit sweetened with a little icing sugar, and a scattering of wild strawberries which I happened upon in the garden 🙂
Just one more scoop. Image: Kathryn Hawkins
Until next time, I hope you have a good few days and may the warm weather be with us all.
Morello cherries just picked today. Image: Kathryn Hawkins
Hello again. I hope you are well and enjoying some fine weather. It’s been a busy few days since my last post. The garden is thriving thanks to a mixture of sunshine and showers. There’s lots to do, and at last the soft fruit is ripe. I picked these cherries from the small espalier tree in the garden today. Just under 800g. Not bad at all 🙂
Glen Ample raspberries. Image: Kathryn Hawkins
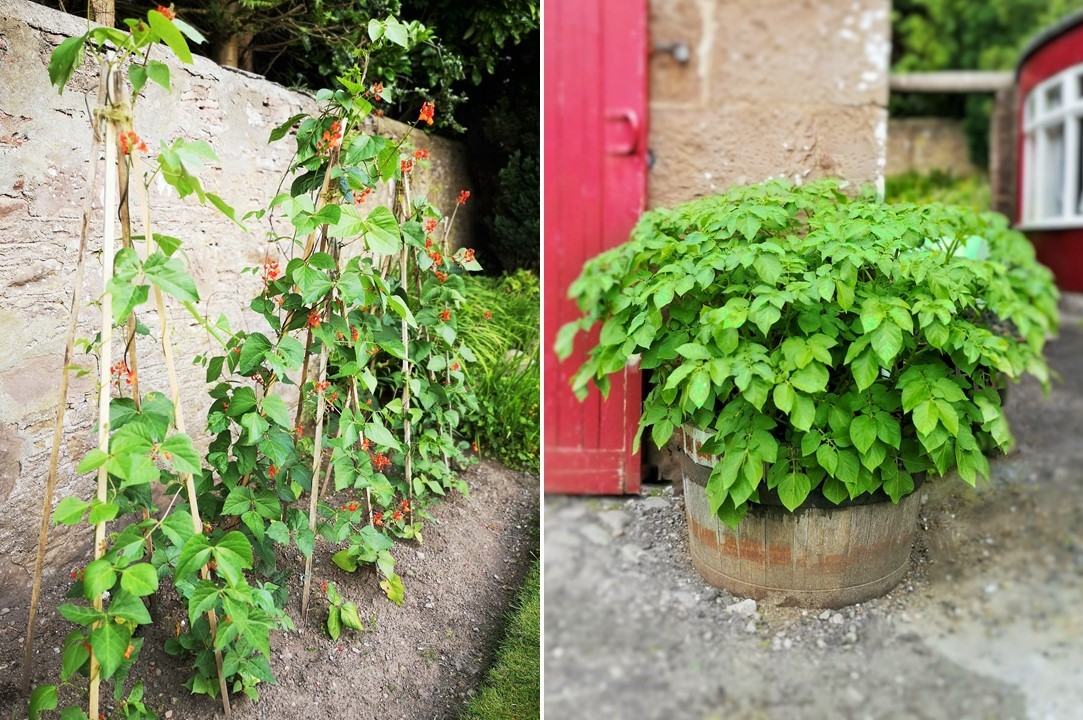
The raspberries have been coming thick and fast since my last post too, and there are still lots more to come. As well as the cherries and berries, my runner beans and potatoes are coming along nicely.
Runner beans and my tub of tatties. Images: Kathryn Hawkins
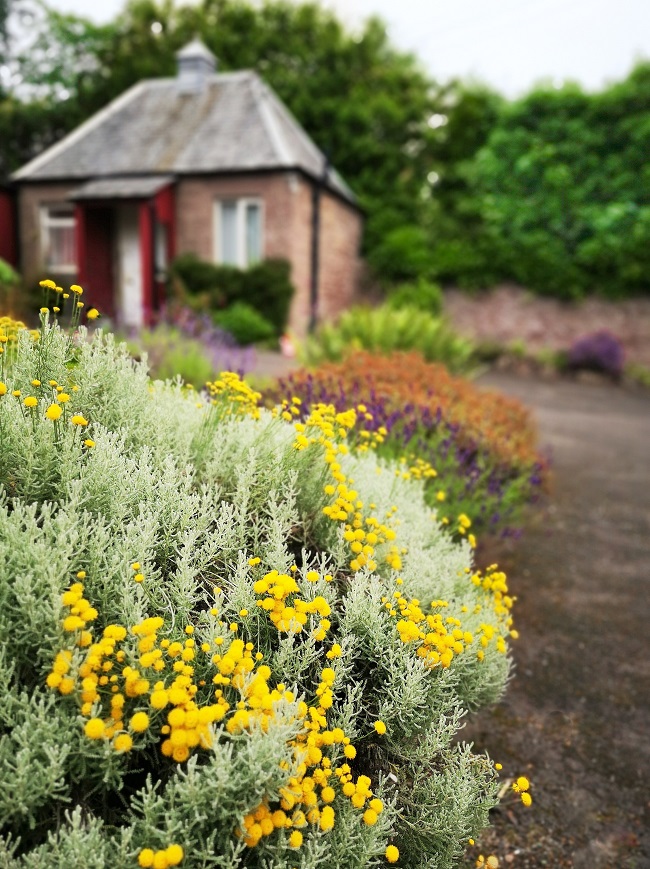
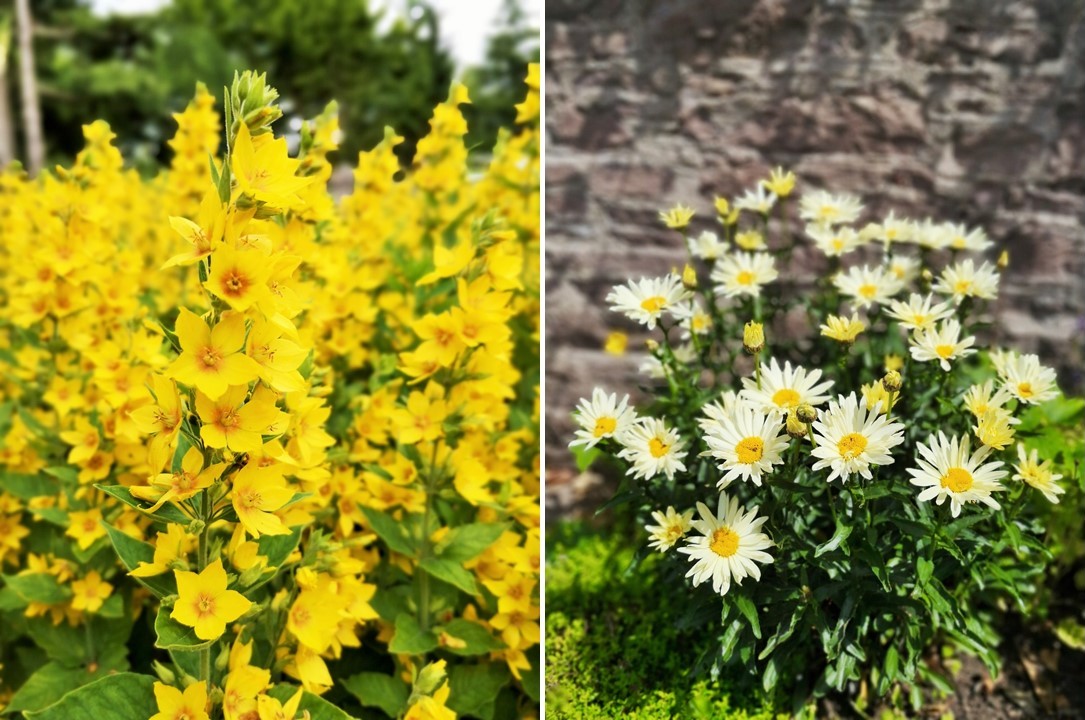
In the flower borders, there is a predominance of yellow interspersed with shades of pink and lilac. The lavender season is in full swing here at the moment. I love the yellow cotton lavender with its silvery foliage which grows alongside the purple and lilac varieties. This is a very fragrant part of the garden.
The lavenders. Image: Kathryn Hawkins
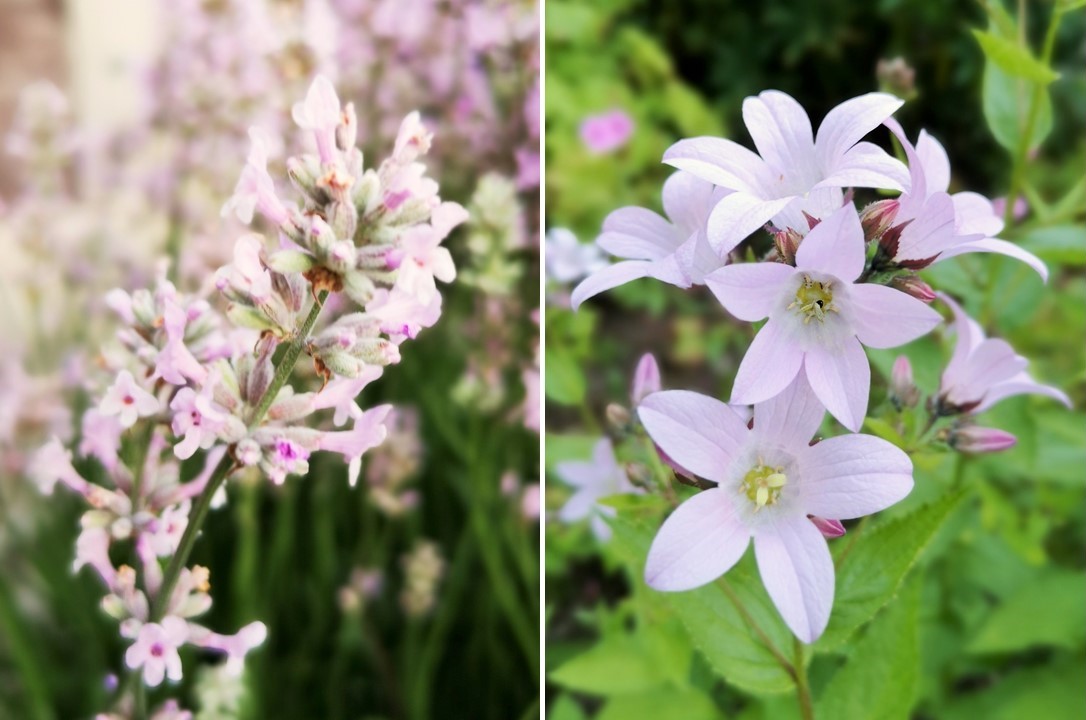
The palest coloured lavender is at the front of the house. It is full of blooms this year and the bees love it. This pale pink Campanula has just come out this past week. It was new in the garden last year and I am very pleased to see that it is blooming again and seems to have doubled in size.
Lavender and Campanula. Images: Kathryn Hawkins
More splashes of vibrant colour from the Lysimachia which has run a bit wild down one border but it does provide colour for several weeks; and the delightfully named “Banana Cream” Leusanthemum which sounds good enough to eat!
Lysimachia and Leusanthemum. Images: Kathryn Hawkins
Happy to see so many bees in the garden again this year. My recent gardening activity has been accompanied by the sound of gentle buzzing; they are always busy gathering pollen and enjoying the summer flowers no matter which part of the garden I am in.
Busy bees on Scabious, Salvia and Geranium flowers. Images: Kathryn Hawkins
As well as the bees, the garden attracts many feathered friends too. Blackbirds and robins are by far the friendliest and really do seem to make themselves at home in amongst the plants and flowers.
Baby blackbird and robin, and a sunbathing adult blackbird. Images: Kathryn Hawkins
That’s it from me this week. I hope you enjoyed the post and pictures. I will be back in the kitchen before the end of the month. See you then. Best wishes and take care 🙂
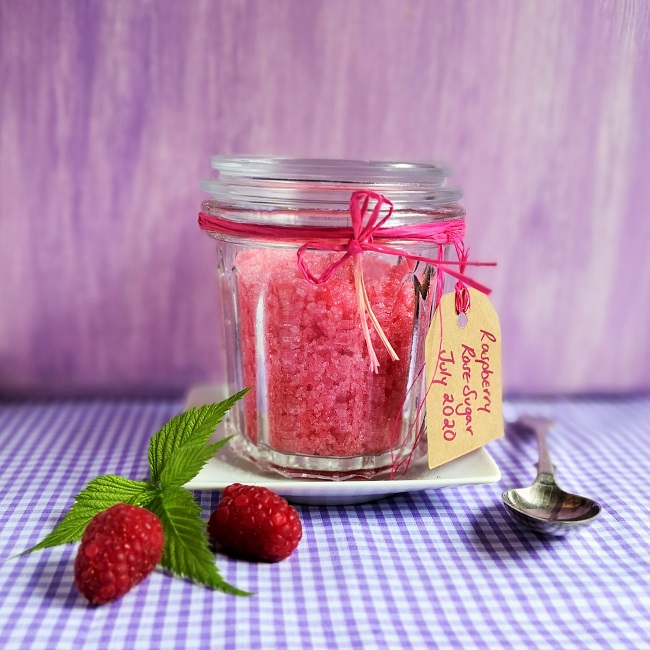
Homemade raspberry and rose sugar. Image: Kathryn Hawkins
Hello again. I hope this post finds you keeping well and enjoying some good weather. It’s been a mixed bag here since my last post. Quite a lot of rain, some strong winds and some sunshine in between. Apart from the wind which no plant likes, the combination of rain and sunshine has been perfect for the ripening of the raspberries in the garden.
This past week, quite randomly, one or two berries have turned red almost overnight. I have been able to harvest a handful so far, which, believe it or not, is more than you need for my recipe this week.
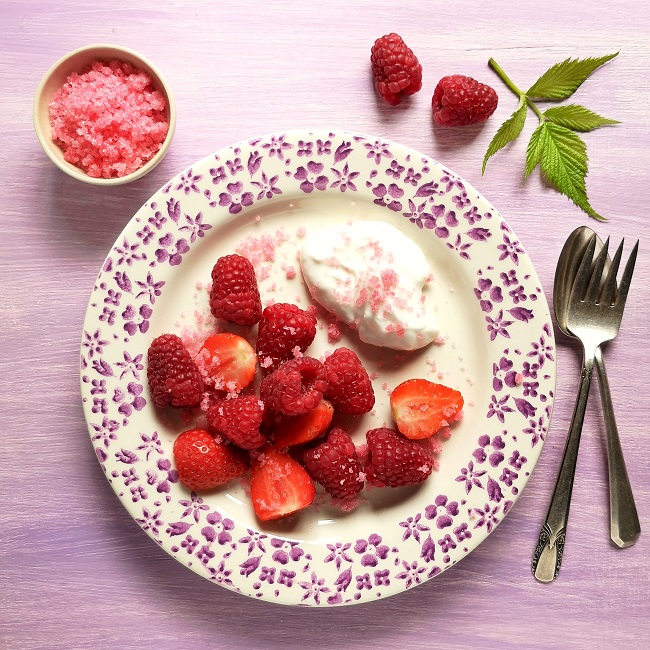
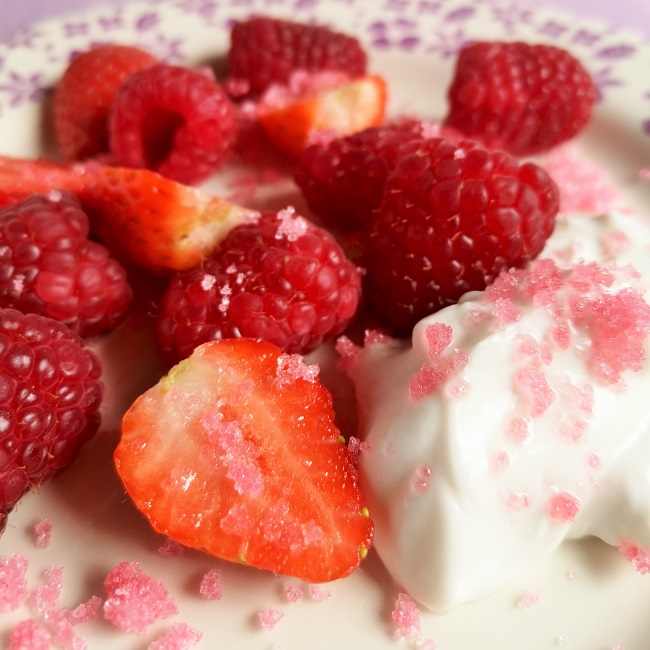
Berries and yogurt sprinkled with raspberry sugar. Image: Kathryn Hawkins
This very simple recipe for fruit-flavoured sugar can be made with strawberries if you have them and makes a pretty sprinkle over fruit desserts or as a cake or cookie decoration. It doesn’t take long to make but if you want to store the sugar for a while, you need to leave the sugar to dry out for a few hours before putting it into a storage container. If the flavour of rose isn’t to your taste, leave it out of the mix altogether, or add some finely grated orange rind or vanilla seeds instead. Here’s what you do……
Makes: 200g
Ingredients
Approx. 25g fresh raspberries
A few drops rosewater
200g granulated sugar
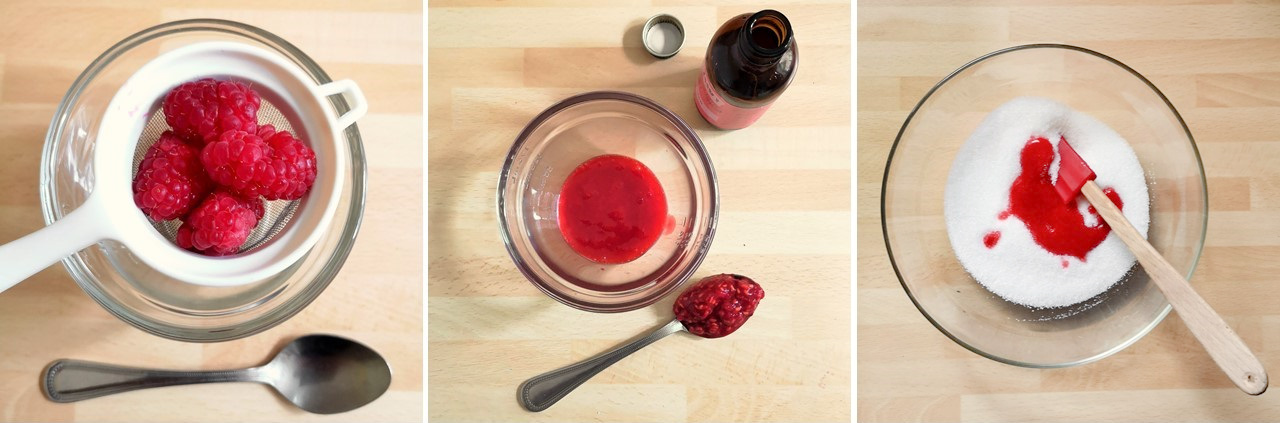
Wash and pat dry the raspberries. Push through a small sieve to remove the seeds and make a purée – you need 1 tbsp of sieved raspberry purée.
Add a few drops of rosewater to taste.
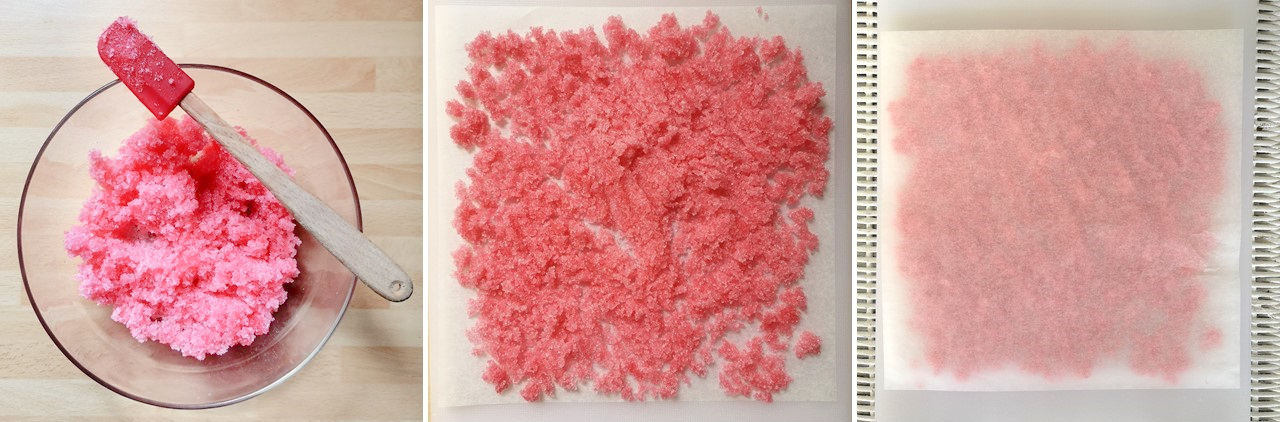
Put the sugar in a bowl and mix in the raspberry purée until well blended. The sugar can be used immediately but will be too soft and damp for long-term storage.
Mixing and drying raspberry sugar. Images: Kathryn Hawkins
Spread the sugar evenly on a sheet of greaseproof paper on a board, then cover with another sheet of paper and leave in a dry, warm place for a few hours (or overnight) until dry and crisp.
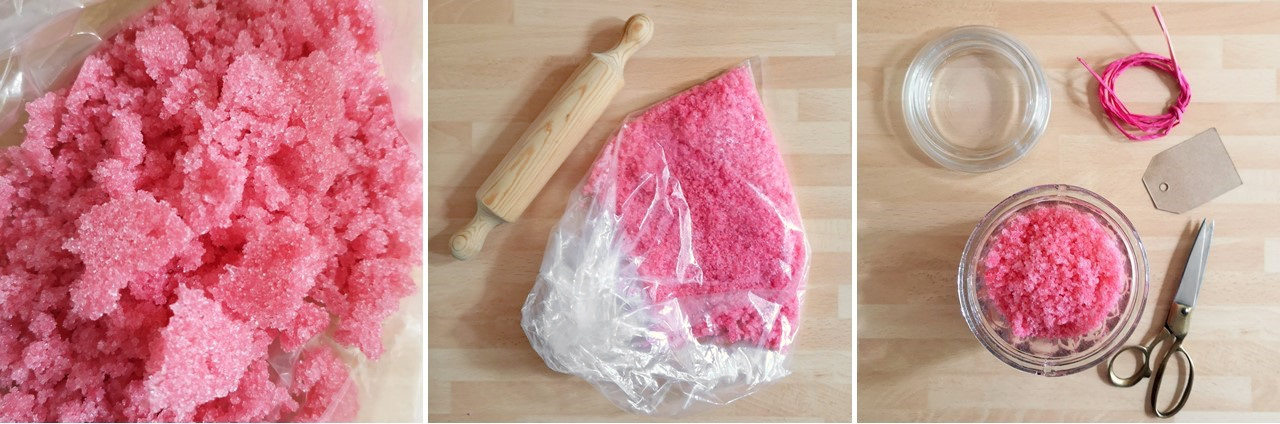
Transfer the sugar to a clean plastic bag – it will dry in clumps. Twist the bag closed and and crush with a rolling pin to break up the clumps of sugar crystals.
Preparing dry raspberry sugar for storage. Images: Kathryn Hawkins.
Spoon into clean jam jars and seal well. Store in a cool, dry place, away from the light for up to 6 to 8 weeks.
Sugar dusted berries with coconut yogurt. Image: Kathryn Hawkins
I am looking forward to a good crop of raspberries this year, the bushes look full of berries. I netted the bushes today – I want to make sure I get to them before the birds do! Until next time, I hope you have a good few days and that you are able to enjoy eating fresh seasonal fruit and vegetables 🙂