Welcome to my blog all about the things I love to grow and cook. You'll find a collection of seasonal gluten-free, dairy-free and vegan-friendly recipe posts, as well as a round up of my gardening throughout the year. I wish you good reading, happy cooking and perfect planting!
The perfect pick-me-up. Image: Kathryn HawkinsOut of the tin and ready for slicing. Image: Kathryn Hawkins
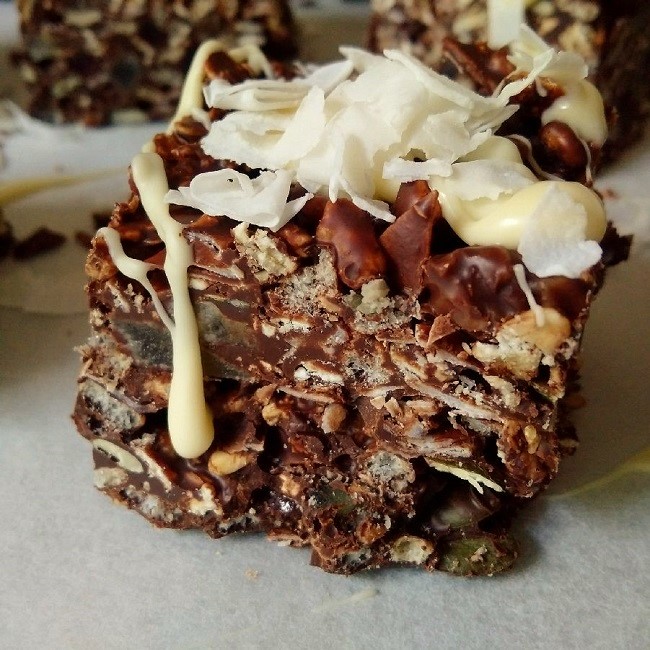
It’s that time of year when the weather turns a bit dull, the nights draw in fast, and it begins to feel a bit chilly. For me, it’s time for a pick-me-up. My standby on these occasions is always some kind of melted chocolate-based mix; it’s easy to put together, requires no baking, and keeps for several days in the fridge.
The recipe is the perfect way to use up all the bits of seeds, fruit and nuts you have in the fridge or cupboard. I usually end up with a different combination of flavours every time I make this recipe. If you prefer, simply half the quantities, pack the mixture into an 18cm square tin and cut into 12 portions instead.
Makes: 24 chunky pieces
Ingredients
500g 90% cocoa solids, dairy-free chocolate
100g coconut oil
60g golden syrup
200g gluten-free, vegan granola
75g crisp rice cereal
100g pumpkin seeds
75g shredded coconut + extra to decorate
400g chopped dried, glacé and candied fruit such as pineapple, cherries, orange peel, golden sultanas, etc.
100g dairy-free, vegan white “chocolate”
Line a 20 x 30cm cake tin with baking parchment or cling film. Break up the 90% cocoa chocolate into pieces and place in a heatproof bowl with the coconut oil and golden syrup. Stand the bowl over a saucepan of barely simmering water and leave to melt. Remove from the water, stir well and cool for 10 minutes.
Mix in all the remaining ingredients except the white chocolate. Stir well until everything is coated, then pack into the prepared tin, pressing down well with the back of a spoon. Cool for at least an hour or until firm.
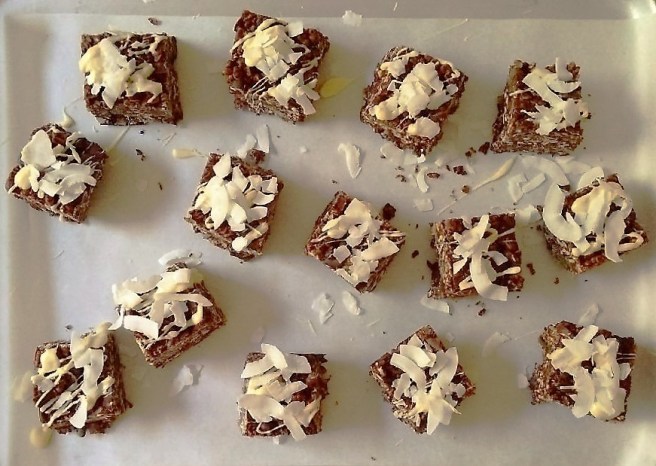
Carefully remove from the tin and peel away the lining parchment or cling film. Place on a board. Use a large bladed knife to cut into strips and then chunks – the mixture is quite firm to slice.Line a large tray or board with baking parchment and arrange a few pieces on top. Melt the white chocolate as above and then drizzle over each piece. Sprinkle with shredded coconut if like. Leave in a cool place for several minutes to set before serving. Decorate the remaining pieces in the same way. Enjoy!
Drizzled, sprinkled and ready to eat. Image: Kathryn Hawkins
The month of May seems like a long time ago now, but this is when my quest to grow my own sweetcorn began. I am quietly astounded that I managed to raise 12 plants from seed to fruit in an unpredictable Scottish climate, yielding their first harvest this very week. It seems that Mother Nature’s combination of a mild spring, intermittent sunshine and showers, along with my interventions – fussing like an old mother hen, protecting the plants from the slightest breath of wind and giving them an occasional feed – has paid off.
Sowing sweetcorn seeds in early May, and planting out one month later. Images: Kathryn Hawkins
I chose a hard variety of baby corn called Snowbaby. All varieties of sweetcorn need to develop a firm root structure in order to grow to the height they needs to produce cobs. If you take this into account from the very beginning, you will find the crop easy to grow. Pack the sowing compost firmly into compostable pots – using biodegradable pots will enable you to plant the young seedlings into the soil without disturbing the roots. From sowing the seeds at the beginning of May and keeping them sheltered in an unheated greenhouse, it took 4 weeks to develop seedlings with 5 or 6 leaves which were then ready to plant out after acclimatization.
Sweetcorn likes a nutritious, well-draining soil; a sheltered spot; plenty of sunshine, and frequent watering. I put 6 plants in an old barrel and the other 6 went in a suitable spot in the garden. Sweetcorn requires little maintenance and is virtually pest resistant. Triumphant, some 4 months later, I picked my first bunch of cobs.
The tall sweetcorn stems with their draping, long, ribbon-like leaves and fine feathery flowers make an attractive architectural plant display, and the way the baby corn cobs develop is very intriguing. The cobs form in the gap between stem and leaf. Once the cobs are large enough, the silky threads protecting the cobs inside the leaf wrapping, burst out of the tops to indicate that the baby corn cobs inside are ready to be picked. Simply twist the cobs from the stalks or snap them off outwards. Cook them quickly as they are prone to drying out, although I have kept the cobs, still wrapped in leaf, in a jug of water in the fridge for 3 or 4 days, and they stayed perfectly fresh.
Preparing baby sweetcorn. Image: Kathryn Hawkins
Carefully strip away the outer leaves and gently pull away the silky strings to reveal the mini cob in the centre. Either steam or boil the cobs for 3-4 minutes and serve immediately. For best results, don’t salt the cooking water but add a pinch of sugar instead to bring out the sweetness. Freshly picked cobs have an earthy, sweet flavour so avoid over-seasoning in order to appreciate the difference between home-grown and mass-cultivated crops.
Serving suggestions:
Strip away a few leaves from the cob but keep a few in place so that you are able to wrap the cob up again; carefully remove the strings. Secure the remaining leaves round the cob again with string and blanch in boiling water for 1 minute. Drain well and cook over hot coals for 2-3 minutes until tender and lightly charred. Remove the string and leaves and serve as part of a barbecue feast.
Simmer baby corn cobs in coconut milk with a little chilli and garlic and serve sprinkled with chopped coriander and toasted sesame seeds.
Slice into chunks and stir fry with shredded leek, pak choi and chopped garlic for 3-4 minutes until tender. Dress lightly with soy sauce, rice wine vinegar and a spoonful of honey or sweet chilli sauce.
Blanch sliced baby corn pieces for 1 minute; drain, cool and mix with cooked sweetcorn kernels, a handful of raisins, and toasted pine nuts. Dress with olive oil and a little balsamic vinegar.
No recipe pictures from me this week. I enjoyed my first harvest of freshly picked baby corn cobs steamed and served with a dollop of lightly salted butter and a sprinkling of black pepper – nothing fancy but completely and utterly delicious. I couldn’t resist taking this last picture though. I hope “she” makes you smile.
Looking down the driveway from my office window I can see the wonderful shades of an Acer tree. As the seasons change the foliage turns from bright, lush green in spring, to more coppery tones in summer and now, the leaves are shades of rich red and brown.
There is still a lot of green in the garden, but now that the pinks and blues of the summer borders have faded, it is the time of year when the reds flowers and shrubs really stand out.
Antirrhinum. Image: Kathryn Hawkins
The fine specimen above was planted last year and has been producing flower stems for several weeks. It’s still going strong, adding a splash of colour to a flower-bed which was alive and vibrant with lupins a few weeks ago. The Antirrhinum is a nostalgic plant for me; we had them growing in most of my family gardens as I grew up. I used to think that the flower heads looked like little faces staring up at me from the borders.
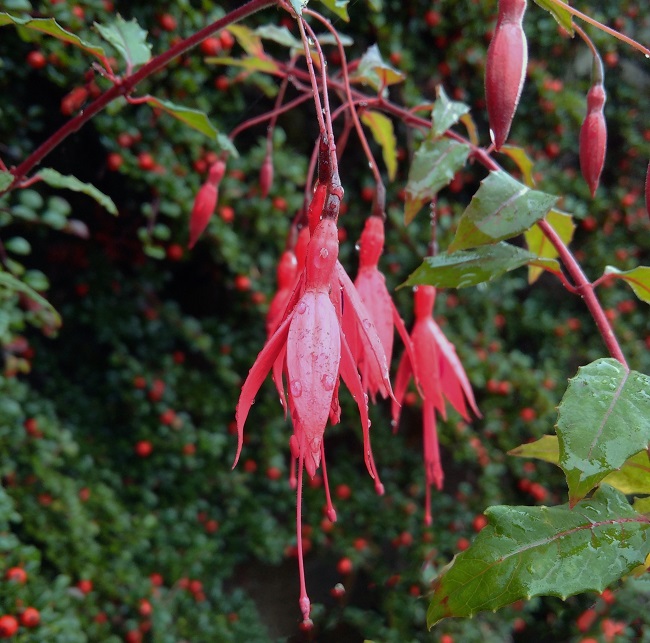
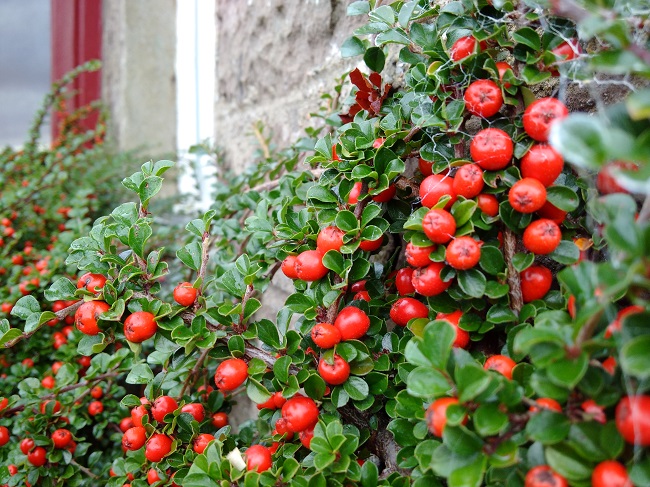
The Fuchsia bushes have also been in flower for a while. This dainty variety grows in front of a magnificent Cotoneaster horizontalis, which is splayed out against a wall. Together the two plants look very bright and bold, one in front of the other. The Cotoneaster is laden with berries which tend to stay in place throughout the winter – for some reason the birds aren’t that interested in them.
The ballerina-like petals of a Fuchsia. Image: Kathryn HawkinsCotoneaster horizontalis. Image: Kathryn Hawkins
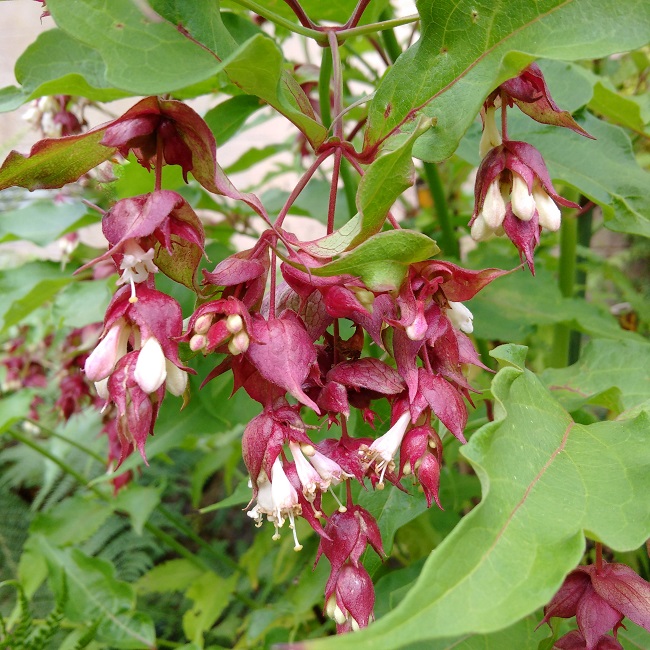
Another later flowering plant in the garden is Lyceteria, more familiarly known as Pheasant Berry. Occasionally there has been a pheasant in the garden but I have yet to see one anywhere near this bush. The unusual flowers last a long time, and look like a succession of dark red lampshades hanging from a thin red cord.
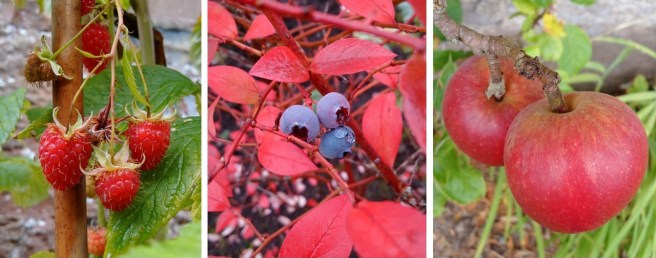
Apart from the flowers and foliage, there is also red colour from late ripening fruit. The Autumn raspberries are not as prolific as the earlier variety I grow, but it is lovely to be picking berries at this time of year. The last of my blueberry bushes is in fruit, but it is the leaves and stems that offer so much at the moment; on a dull day, the vivid red is a sight to behold. The little red apples were picked just after I took the image. Just five small fruit on a miniature tree, but crisp, sweet and delicious with every bite.
Autumn raspberries, blueberries and miniature eating apples. Images: Kathryn Hawkins
To finish my red-themed post this week, while I was taking these pictures, I came across two aptly named butterflies having a bit of a stand-off on the white Hydrangea bush. One clapped its wings together as soon as I got the camera out and couldn’t be tempted to open them again. The other fellow was more obliging and sat there for quite a while as I clicked away. It wasn’t until later on that I realised the poor thing only had one antennae. Until next time, enjoy the Autumn shades 🙂
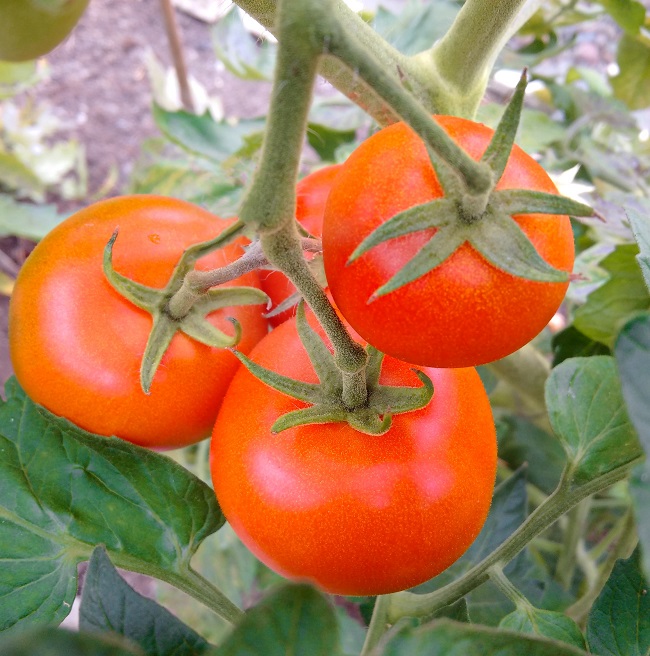
With the fine, warm spring weather we had this year, my tomato plants have done very well. The fruit started to ripen earlier than usual, and I have been picking a steady supply tomatoes since the end of July. By this time of the year, I’m usually left with a greenhouse filled with hard, green fruit, wondering how on earth they are all going to ripen as the days shorten and the weather turns.
Ripe and ready to pick. Image: Kathryn Hawkins
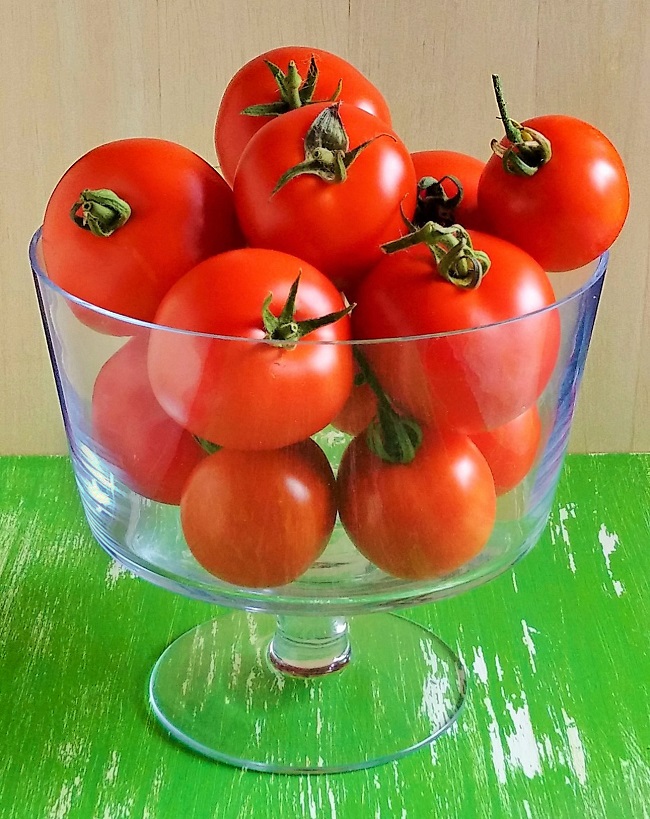
Of all the fruit and vegetables you can grow yourself, the tomato has to be in my top 5 as having the most marked difference in flavour compared to most commercially grown varieties, and it is one that I never tire of; I would happily consume a plateful every day if given the opportunity.
To preserve the flavour, avoid putting tomatoes in the fridge as this seems to destroy a lot of the taste – the unique fragrance also seems to disappear. I try to pick only what I need for eating or cooking that day, but if there are a lot that are ripe, I store them in a cool place in the kitchen and use within a couple of days.
Last month I made a batch of my favourite tomato preserve: Smoky Tomato Jam (gluten-free, dairy-free, vegan) and semi-dried a batch which I have preserved in olive oil – Preserving the Summer (Semi-cuit tomatoes – gluten-free, dairy-free, vegan) If preserving isn’t your thing, and you have too many ripe tomatoes to eat, you can freeze them whole in bags for use in sauces and soups later on. Making a batch of tomato sauce is a good way to use them up too, and it also freezes well. Homemade tomato sauce makes a deliciously intense flavoured base for soups and pasta dishes, or as a tasty pouring sauce for meat, fish and vegetables.
Homemade tomato sauce. Image: Kathryn Hawkins
To make about 450ml fresh tomato sauce: simply wash and pat dry 1 kg tomatoes; cut in half and place in a large lidded frying pan or saucepan. Try and keep them in a single layer if possible, for even cooking. Season lightly with salt and pepper and add a bunch of fresh herbs – I use rosemary, thyme, oregano and a bay leaf. Place over a low heat until beginning to steam, then cover with a lid and continue to cook very gently for about 40 minutes to 1 hour, depending on the size of the tomatoes, until soft and collapsed. Cool for 10 minutes, then discard the herbs and push the tomatoes through a nylon sieve to make a pulpy juice.
Preparing tomato sauce. Image: Kathryn Hawkins
Pour into a clean saucepan, add 25g butter or vegan margarine, 1 tbsp. good quality olive oil, and 1 tsp caster sugar. Taste and add more seasoning if necessary. Heat gently until the butter or margarine melts, then raise the heat and simmer steadily for about 20 minutes, stirring occasionally, until thickened, but still thin enough to pour. Use as per recipe or allow to cool completely, then cover and store in the fridge for up to 3 days. Freeze in sealable containers for up to 6 months. Note: you can add garlic to the tomatoes before cooking – peeled, whole cloves work fine and will cook into a pulp with the tomatoes. I prefer to keep the sauce plain and add my garlic when I use the sauce in a recipe.
Homemade tomato sauce, ready to serve. Image: Kathryn Hawkins
Here are a few other ideas for serving up fresh tomatoes:
Dress a plate of sliced fresh tomatoes by simply seasoning with a light dusting of white sugar, a little salt, freshly ground pepper and a few toasted and crushed cumin seeds.
For a quick “chutney”, gently fry 2 finely sliced red onions with a crushed clove of garlic in olive oil. Add a pinch or 2 of chilli flakes and cook until very soft. Add 225g chopped fresh tomatoes, 2 tbsp. balsamic vinegar and 2 tbsp. caster sugar. Season and cook gently, stirring occasionally, until thick. Leave to cool, then store in the fridge for up to a week. Lovely with barbecued meat, vegetables and as an accompaniment to cheeses.
Roughly chop a few ripe tomatoes. Blitz in a blender; push through a nylon sieve into a jug. Season with Tabasco sauce and/or Worcestershire sauce. Put ice in a tumbler, add a slug of vodka and pour over the seasoned juice.
Bake halves of tomato, side by side in a shallow dish, in a moderate oven with a topping of fresh breadcrumbs, capers, slivers of garlic and a drizzle of olive oil, until tender. Serve scattered with lots of freshly chopped parsley.
Small pieces of sweet tomato make and interesting addition to a citrusy fruit salad. Pour over a plain sugar syrup and scatter with chopped, fresh mint to serve.
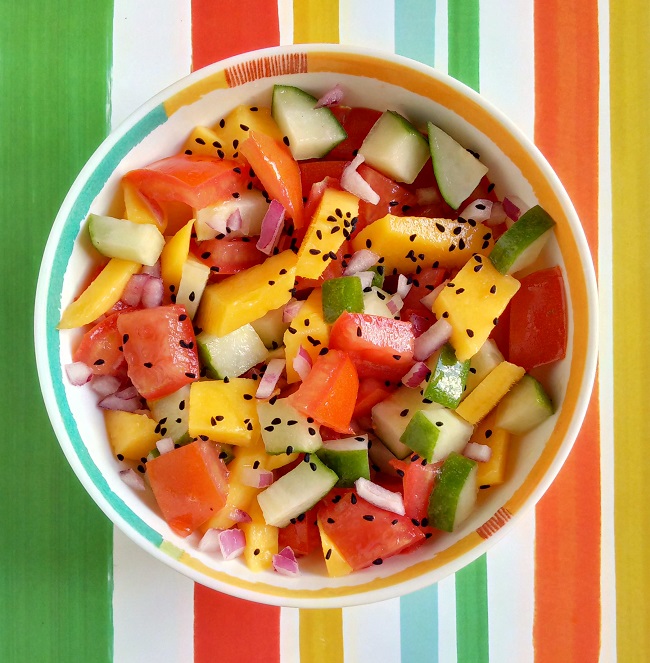
For a delicious salsa to go with Indian food: combine chopped tomatoes, cucumber, and fresh mango with a little finely chopped red onion. Sprinkle with black onion seeds and toss in a little white balsamic vinegar. Serve at room temperature for the best flavour.
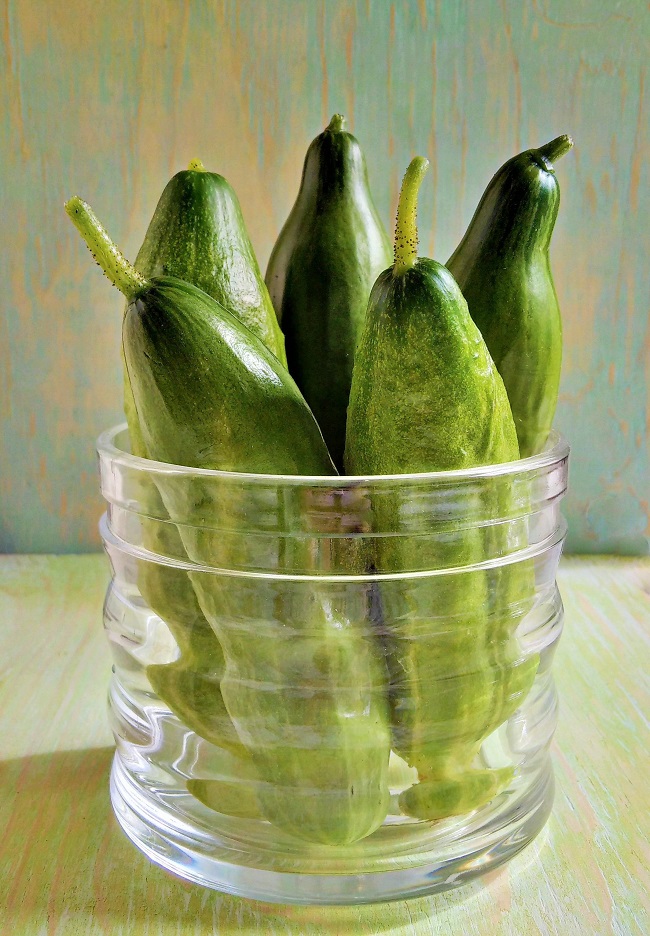
This week has seen the end of my home-grown cucumber supply. I picked the last one yesterday. The greenhouse is beginning to look a wee bit shabby and tired. I have only the tomato plants bearing fruit and still standing proud alongside the withered vines of the once productive cucumber plants.
I love experimenting with vegetables in baking. Carrots and courgettes get a lot of coverage in cake making, as do beetroot and sweet potato, but the humble cucumber doesn’t get much of a look in, until now.
Fresh cucumber. Image: Kathryn Hawkins
The delicate, refreshing flavour of is just about detectable in the finished bake, and the texture of the cooked skin gives a little bite to the mix, but above all else, cucumber as a cake ingredient, gives a lovely moist consistency to the cake.
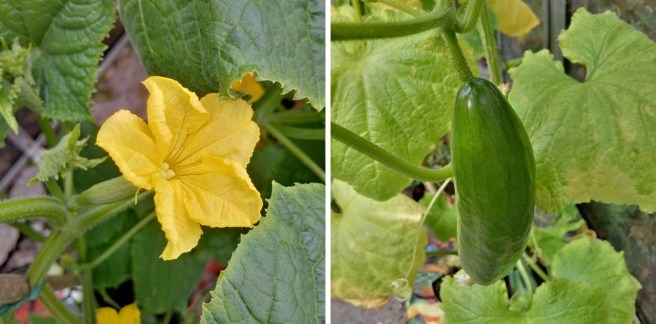
There aren’t many flowers left on cucumber plants at this time of year, but in the height of the season, you can pick off a few male flowers (the ones without the fairy-sized fruit attached) and add the to salads or a mild cucumber flavour. They make pretty edible decorations, and look good floating in a glass of Pimms of a gin and tonic. Don’t pick off too many otherwise you won’t get any more cucumbers.
Male and female cucumber flowers. Images: Kathryn Hawkins
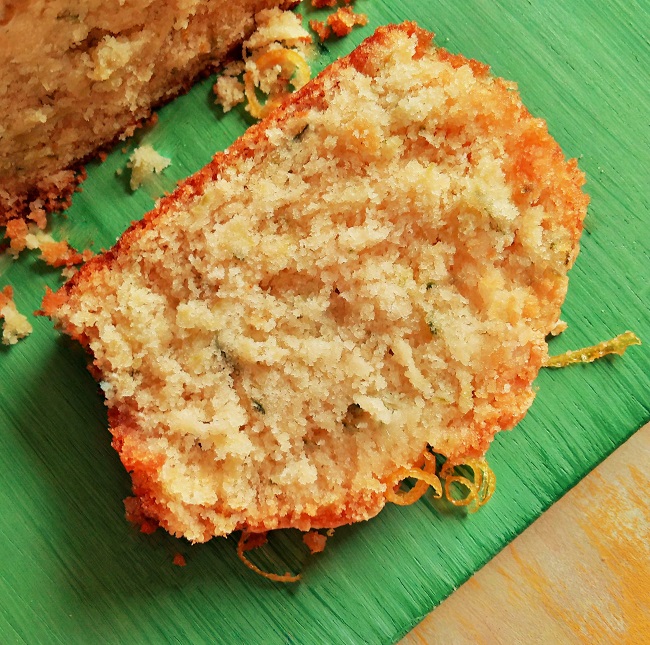
Here’s my recipe for a lemon and cucumber cake. Let me know what you think.
Serves: 10
Ingredients
1 lemon
225g caster sugar
2 medium eggs, beaten, or 100g silken tofu, mashed
150ml sunflower oil
225g gluten-free plain flour (such as Dove’s Farm)
2 level teasp gluten-free baking powder (such as Dr Oetker)
8g arrowroot
115g grated cucumber
Cucumber flowers to decorate, optional
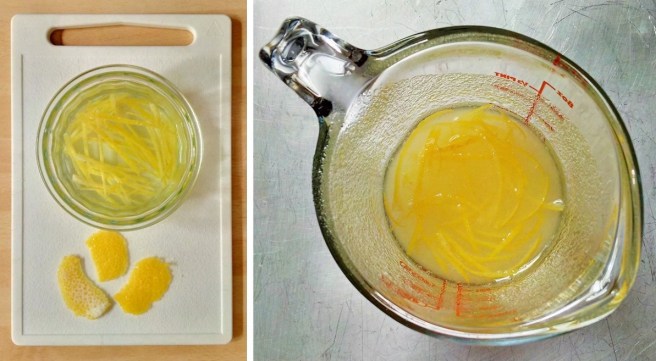
Preheat the oven to 180°C (160°C fan oven, gas 4). Grease and line a 1kg loaf tin. Using a vegetable peeler, pare away 2 strips of lemon rind, and put to one side. Finely grate the remaining lemon rind and extract the juice.
Put 150g sugar in a bowl and whisk in the eggs or tofu and sunflower oil until well blended. Sift the flour, baking powder and arrowroot on top, and gently mix all the ingredients together until combined. Stir in the cucumber and lemon rind.
Pour into the tin and bake for about 55 minutes until risen, golden, and a skewer inserted into the centre comes out clean.
While the cake is cooking, prepare the lemon glaze. Very thinly slice the reserved strips of lemon rind and place in a heatproof bowl. Cover with boiling water and leave to soften for a couple of minutes. Drain. Mix the remaining sugar with the lemon juice and stir in the blanched lemon rind to make a sugary glaze.
As soon as the cake is cooked, skewer the cake all over, and spoon the lemon glaze all over the top of the cake. Leave the cake to cool completely in the tin. Then remove, wrap and store for 24 hours to allow the flavours to develop.
Preparing the cake mix. Images: Kathryn HawkinsPreparing the lemon glaze. Images: Kathryn Hawkins
The next day, your delicious cake is ready to serve. Decorate with cucumber flowers if you have them, then simply slice, sit back and enjoy! Until next week, I’m off to the greenhouse for a tidy up…….
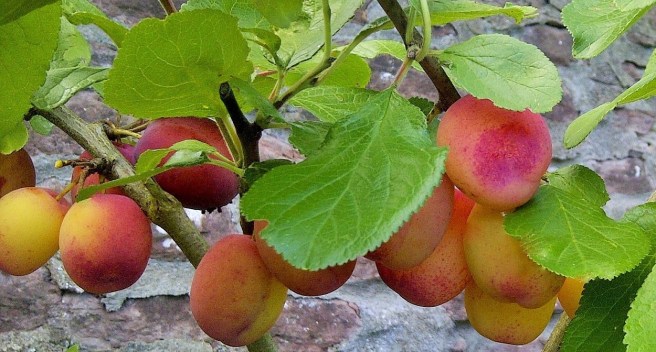
Freshly baked home-grown Victoria plums in red wine, scented with fresh bay. Image: Kathryn Hawkins
My first harvest of plums in the year marks the end of summer in my mind. There is, of course, something to celebrate in having such lovely fruit to pick, and yet, I feel a bit sad that autumn is approaching. I managed to get a head-start on the wasps this year, picking about 1kg of unblemished fruit. There are plums a plenty yet to ripen, so I need to work on my timing over the next few days and harvest them before the wee sugar-seeking beasties move in.
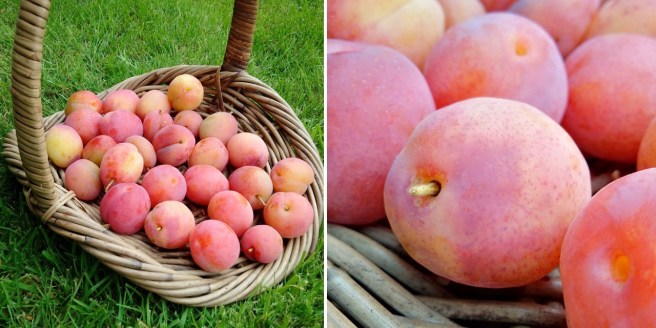
Ripe and ready to pick, home-grown Victoria plums. Image: Kathryn HawkinsMy first plum harvest of the year. Images: Kathryn Hawkins
My plum cookery isn’t very adventurous or fancy. I usually make jam or a plum sauce. Sometimes I make a compote. Baking them in wine is another very simple way I enjoy the rich, distinctive flavour of this particular fruit. Fresh bay-scented orchard fruit is something I tasted for the first time in Cyprus. The familiar glossy-leaved herb has become a flavour I use a lot in my kitchen, both in sweet and savoury cooking, and now that I have a bay tree in the garden, I use the herb all the more. Fresh bay gives a refreshing, herbal taste to fruit. You can use dry leaves, but as the flavour is much more intense than the fresh, you may want to experiment by reducing the quantity of leaves by at least half. If you don’t have any wine, or prefer not to use it, cranberry juice makes a good alternative in this recipe. If you don’t have plums, the recipe works equally well with apricots, peaches or nectarines. The baked fruit also freezes well too.
Serves: 6
Ingredients
750g fresh Victoria plums
60g Demerara sugar
4 fresh bay leaves
300ml fruity red wine or unsweetened cranberry juice
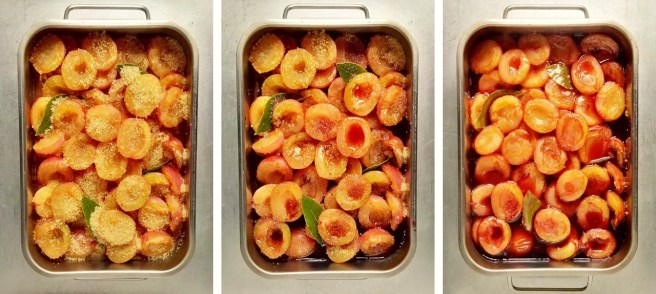
Preheat the oven to 180°C (160°C fan oven, gas 4). Wash and pat dry the plums. Cut in half and remove the stones. Arrange the halves neatly, cut side up, preferably in a single layer, in a baking dish or tin.
Sprinkle with sugar and push in the bay leaves, then pour over the wine or juice. Bake for 30-40 minutes, basting every 10 minutes, until tender.
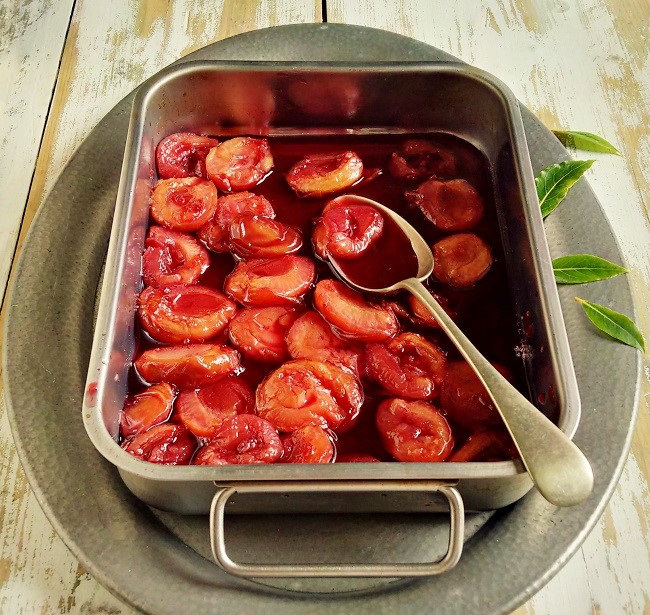
Baked plums with bay and red wine preparation. Images: Kathryn Hawkins
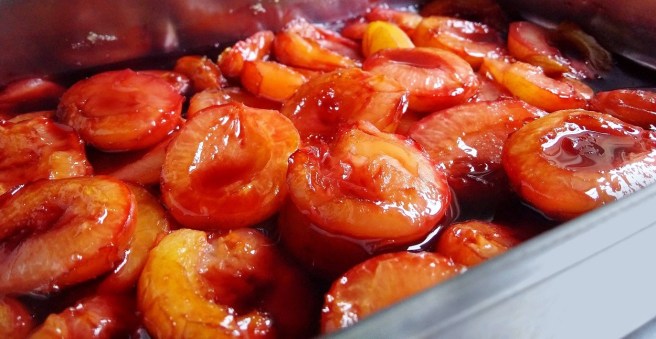
Discard the bay leaves. Carefully strain off the cooking juices into a saucepan . Bring to the boil and boil rapidly for about 5 minutes until reduced and syrupy. Pour over the fruit and leave to cool. Cover and chill for 2 hours before serving. Best served at room temperature for maximum flavour. Delicious accompanied with coconut yogurt or rice pudding.
Glazed plums cooling in the tin. Image: Kathryn Hawkins
Baked plums served with coconut yogurt. Image: Kathryn Hawkins
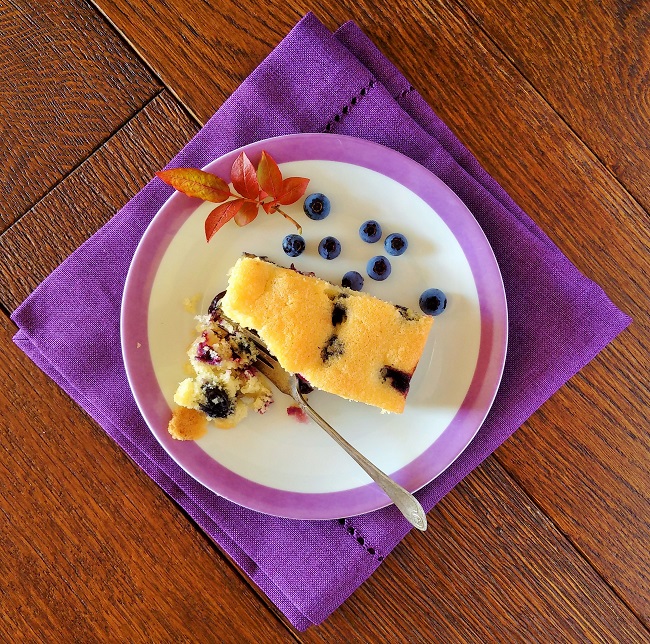
Blueberry and marzipan cake. Image: Kathryn Hawkins
It’s been feeling a wee bit autumnal here in central Scotland for the past couple of weeks. Some of the leafy foliage in the garden is on the turn and the nights are drawing in fast. I also have blueberries ready for picking.
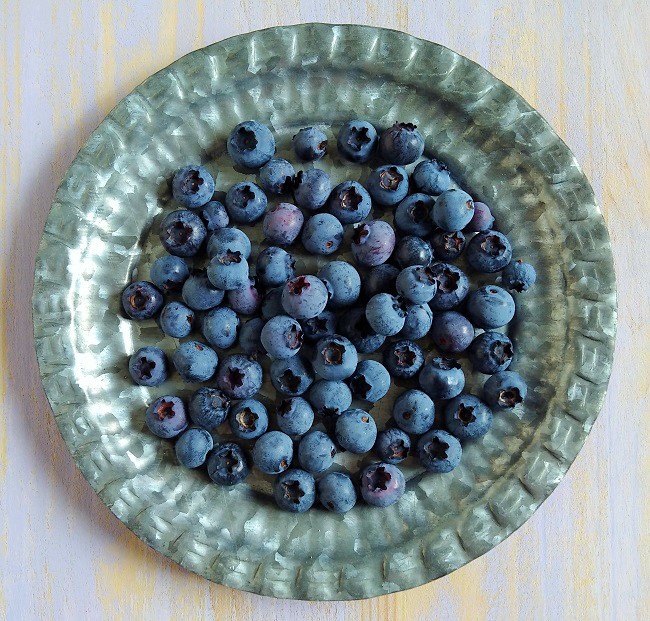
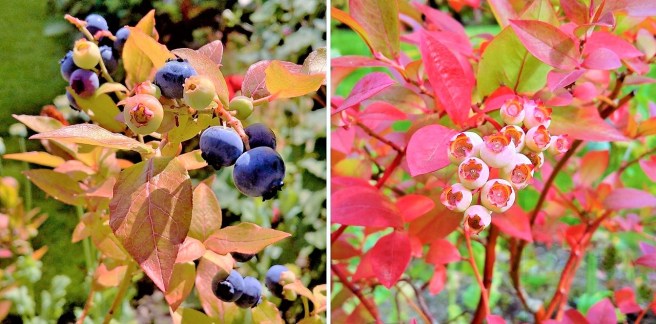
Home-grown blueberries are a delight to behold and eat. The skin is much bluer than any variety I can buy, and the skin has a silvery, almost downy bloom. The fruit is firmer in texture and has a slightly tart, more pronounced flavour. The plants are easy to grow, require little maintenance, and love the acidic Scottish soil. The leaves turn pink as the season progresses, and make a wonderful display in the fruit beds.
Freshly picked, home-grown Scottish blueberries. Image: Kathryn HawkinsMid-season blueberries ripe and ready for picking alongside a later variety. Images: Kathryn Hawkins
I planted 3 blushes about 5 years ago. One fruits end of July/beginning of August, one is in full ripening mode now, and the other has fruit that is just turning pink. It is unusual for me to be able to harvest enough berries to make anything substantially blueberry flavoured in one go. Usually I keep adding to a bag of berries in the freezer until I have enough to make jam – blueberries do freeze very well and make very good jam from frozen fruit. This year has been an exception, and I have harvested sufficient fresh berries for this unbelievably easy blueberry cake.
Slice of homemade blueberry and marzipan cake. Image: Kathryn Hawkins
Serves: 8
Ingredients
115g dairy-free margarine, softened
115g caster sugar
115g gluten-free self raising flour (such as Dove’s Farm)
2 large eggs
50g ground almonds
100g marzipan, cut into small pieces
200g fresh or frozen blueberries
Preheat the oven to 180°C (160°C fan oven, gas 4) Grease and line an 18cm square cake tin. Put the margarine, sugar, flour, eggs and ground almonds in a bowl. Using an electric mixer on a low speed, gently whisk the ingredients together until loosely blended. Increase the mixer speed and continue to whisk for a few seconds longer until creamy and smooth.
Gently stir in the marzipan and blueberries and spoon into the tin. Smooth the top and bake for about 45 minutes until lightly golden and just firm to the touch. Leave to cool in the tin, then slice into 8 portions and serve. If you can leave it alone, the cake tastes even better the next day. It is also delicious served warm as a pudding.
Easy to make, blueberry and marzipan cake. Images: Kathryn Hawkins
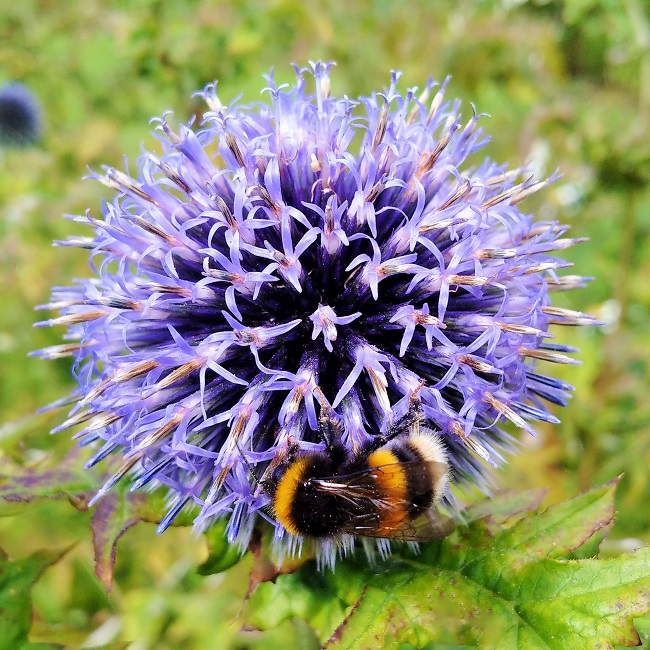
There are other signs of Autumn in the garden. The Autumn Crocus opened out this week, and the globe thistles (Echinops) are in various stages of blooming. I was delighted to see so many bees still hard at work when I was taking these pictures. Until next week, enjoy the late summer/very early autumn sunshine.
New season Autumn Crocus. Image: Kathryn HawkinsShades of silvery-blue, Echinops (globe thistles). Image: Kathryn HawkinsA very busy bee. Image: Kathryn Hawkins
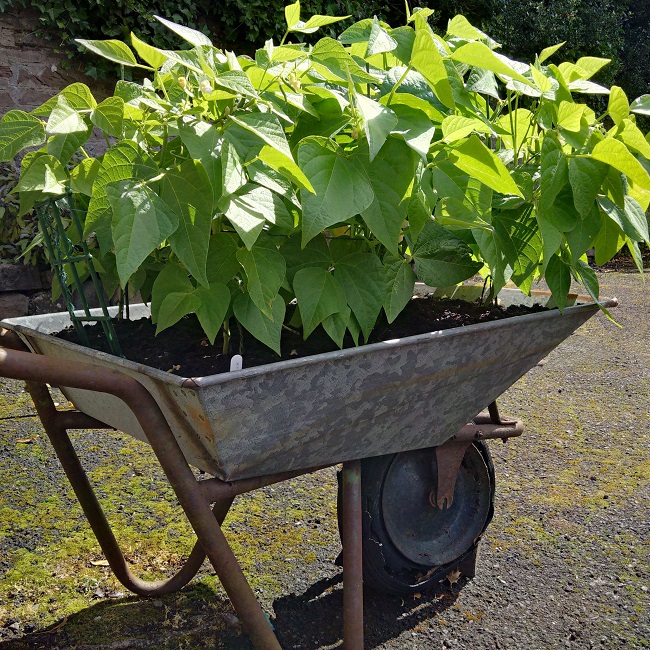
My first French beans of the season. Image: Kathryn Hawkins
I haven’t grown French beans for a few years. I like the vegetable very much but have preferred to grow runner beans instead. This year I fancied a change. I decided to make holes in the bottom of an old wheelbarrow, fill it with compost and raised a few plants from seed. Much to my delight, my first harvest was ready to pick this week, and there are plenty more to come. I had my doubts about the barrow; we have had so much rain on and off over the past few weeks, I was convinced it would become water-logged and the beans would drown. In fact, I have been fussing around them like an old mother hen for weeks. But all to the good, the plants seem very healthy and my efforts have paid off.
My barrowful of beans. Image: Kathryn Hawkins
I grew a dwarf variety, which doesn’t usually require support. However, I did tie each plant to a thin cane as the barrow is quite shallow and the plants were beginning to sway around in the wind. Ideally, French beans thrive at their best in a sheltered spot; they love the sunshine, plenty of feeding, and whilst they like a lot of water, they need a free-draining soil – hence my worry over the barrow becoming water-logged.
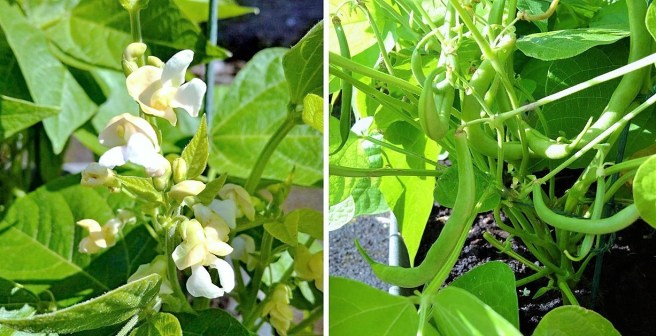
French bean plant in flower and in bean! Images: Kathryn Hawkins
Once the dainty, cream-white flowers have formed, the young beans develop quite quickly, and the full-grown beans are ready for picking in 4 to 6 weeks – the perfect bean for the impatient gardener! Pick the beans young to enjoy the super-tender texture, and also to encourage the other beans on the plant to grow. In spite of their name, it appears the beans originated in South America, although they have long been associated with the cooking of France. If you leave the bean pods on the plants, they will form beans inside the pods which can be picked, shelled and eaten as flageolet beans (another French delicacy and favourite of mine). Leave them longer still, and you’ll have your own haricot beans for drying and storing. Sadly, I don’t have the climate for haricots, or for that matter, the ability to resist picking the pods!
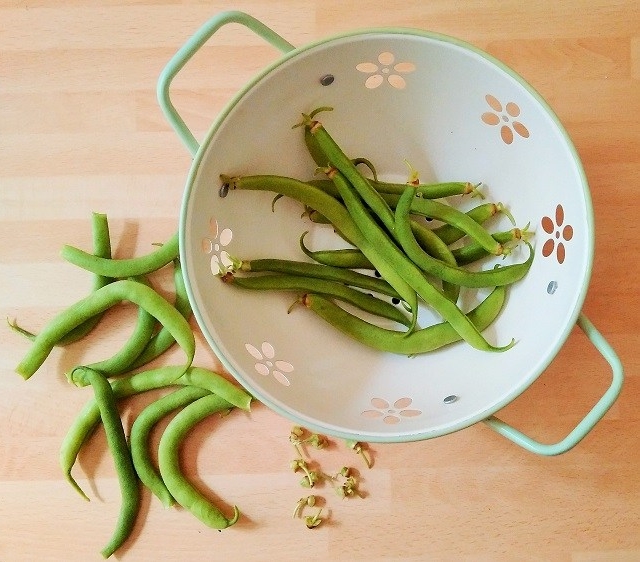
Preparing French beans. Image: Kathryn Hawkins
Preparation is simple, just nip off the stalk end and cook the beans whole, either steaming them for 6-8 minutes, or cooking in a little boiling water for 4-5 minutes. They freeze well: just blanch them in boiling water for barely a minute and then refresh, dry and pack as for any other freezer-destined vegetable.
Serving suggestions:
All beans are best picked, cooked and served as fresh as possible. Dress with a knob of butter or a drizzle of olive oil, a pinch of salt and pepper and a few freshly chopped, soft-leaved herbs sprinkled over the top – basil, mint, parsley, coriander, tarragon and chives are great flavours for all beans.
Once cooked, chop French beans into short lengths and mix with lightly cooked and mashed butter beans. Season and mix in lots of chopped parsley, then dress with a lemon and honey vinaigrette. Perfect served on freshly toasted bread.
Add chopped, cooked French beans to a frittata, omelette or scrambled egg, and flavour with chopped chives.
Dress a plate of freshly cooked warm beans with a few shakes of balsamic vinegar and a light dusting of brown sugar.
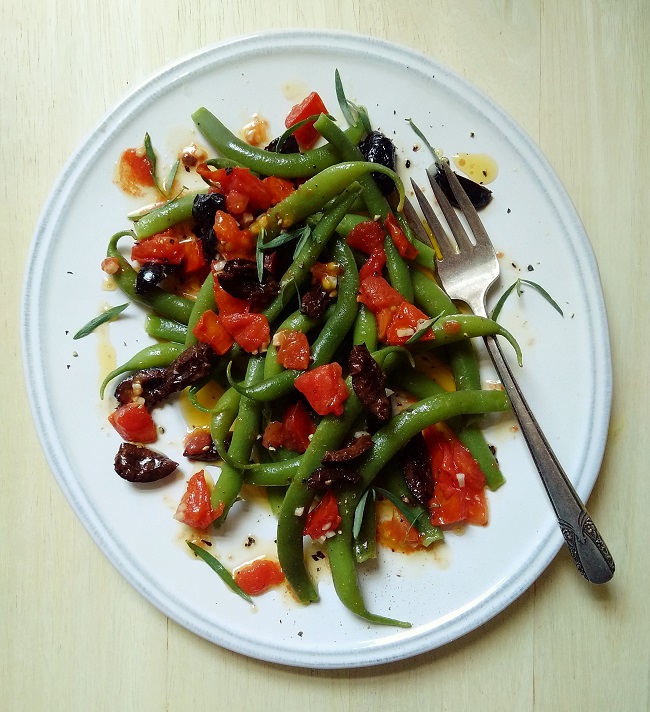
This is one of my favourite French bean recipes: heat 2 tbsp. olive oil with a finely chopped garlic clove for 1 minute over a low heat. Add a chopped ripe tomato and a few chopped, pitted dry-pack black olives. Season with a pinch of salt and a pinch of sugar. Heat through gently for 2-3 minutes. Pour over freshly cooked warm French beans, and serve sprinkled with freshly ground black pepper and a few tarragon leaves. Bon appétit!
A favourite warm French bean salad. Image: Kathryn Hawkins
I think it’s safe to say that growing cucumbers is one of my fortes. Every year I raise a bumper crop from seed, without really trying very hard. As with any watery vegetable (or fruit) that doesn’t freeze well, you have to get creative in order to make the most from your harvest when it’s fresh. Over the years, I have accumulated a few recipe ideas which I am happy to share with you and anyone else in a similar “glut” situation.
Home-grown grow-bag cucumbers in my unheated greenhouse. Images: Kathryn Hawkins
Originally, the cucumber was a wild plant with origins in India. Now it is cultivated and grown the world over, and few salads are complete without it. If left to their own devices, cucumbers will grow to enormous proportions. Just a couple of weeks ago, I discovered one hiding at the back of a plant, behind a very large leaf; it looked more like a marrow than a cucumber, and I have no idea how the plant was supporting it! In general, the bigger they grow, the less flavour they have. As with all watery produce, cucumbers are best cut and used immediately. For slightly longer storage, wipe them dry and then wrap individually and tightly in cling-film, and this way they will keep in the fridge for 3-4 days without losing texture.
Cucumber preparation. Image: Kathryn Hawkins
To eat raw, all you need to do is rinse, dry, and then trim away either end, and that’s it, you’re ready to slice, dice or grate. Peeling is unnecessary unless the skin is tough – some varieties have rough, knobbly skins (ridged varieties) which can get tough on larger fruit – you can just whip off the skin with a vegtable peeler. If the seeds are a problem, cut the cucumber in half and scoop out the centre using a teaspoon before slicing.
For cooking, the skin can become bitter. You can temper it by blanching the cucumber in boiling water for a few seconds, or simply peel the cucumber before cooking. Prepared chunks of cucumber will cook in lightly salted water for 2-3 minutes, or steam in 5 minutes, depending on thickness. Strips or ribbons of cucumber (pared using a vegetable peeler), make a delicious and healthy bed or wrapping when steaming fish.
Because cucumber has such a delicate, mild flavour, it can easily be overpowered by strong flavours. Some of the soft-leaved fresh herbs go very well with the crisp texture and fresh flavour of cucumber. As well as the herbs below, dill and fennel also make tasty choices. The herb salad burnet (below) does have a mild cucumber flavour and is the ideal herb for flavour enhancement.
Cucumber-loving herbs: tarragon, salad burnet, chives flowers and stems, parsley, and mint. Image: Kathryn Hawkins
Cucumber recipe suggestions
Peel and chop cucumber, then blitz in a blender with chopped green melon or kiwi fruit, yogurt, mint and a little unsweetened apple juice. Pour over ice and enjoy as a cooling smoothie.
Add a few slices of cucumber to a glass of iced water or a spritzer for a refreshing taste. A few slices also make a good addition to a gin and tonic!
Finely dice peeled cucumber and simmer gently in a little stock and white wine. Stir in cream and chopped tarragon to finish. Makes a great sauce to serve with fish, chicken or over roasted vegetables or pasta.
Bake peeled cucumber in thick slices in a baking dish, drizzled with olive oil (or dotted with butter). Season lightly and add some fresh dill or fennel. Cover with foil and bake at 190°C (170°C fan oven, gas mark 5) for 25-30 minutes.
Add slices or small chunks to a prawn stir fry for the last minute of cooking.
Grate fresh cucumber and mix with a little grated root ginger. Sprinkle with rice vinegar, a little sugar and light soy sauce. A tasty, instant relish to accompany sushi.
Replace grated courgette in a cake, bread or muffin recipe with grated cucumber, just reduce the quantity by a quarter as cucumber is much more watery. I have a cucumber-enriched cake recipe to share in a later post – Lemon-soaked cucumber cake (gluten-free; dairy-free; vegan option).
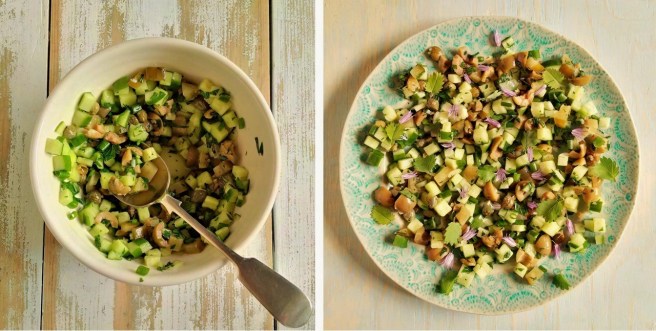
For a tangy salad to accompany smoked or barbecued food, try this recipe for gremolata-style cucumber salad: mix 150g finely chopped cucumber with a little crushed garlic. Stir in 40g chopped pickled cucumber or gherkins, 25g pickled capers, 40g chopped, pitted green olives along with 2 tbsp. each freshly chopped parsley and chives. Mix in a little white balsamic vinegar and serve. Delicious as a sandwich filler too!
Cucumber gremolata salad served sprinkled with chive flowers and leaves of salad burnet. Images: Kathryn Hawkins
To make your own cucumber pickle, see my post from last year In a bit of a pickle
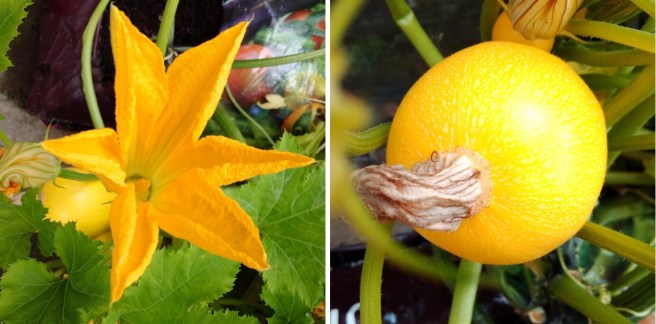
My supply of courgettes is coming to an end now. For several weeks, I’ve had a plentiful supply of produce from the four plants in grow-bags, in my greenhouse. Not only do home-grown courgettes taste delicious, I love the large, bright yellow, star-shaped flowers that the plants produce; they are a very cheery sight even on the dullest of days.
Homegrown courgette flower and yellow, globe-shaped fruit Images: Kathryn Hawkins
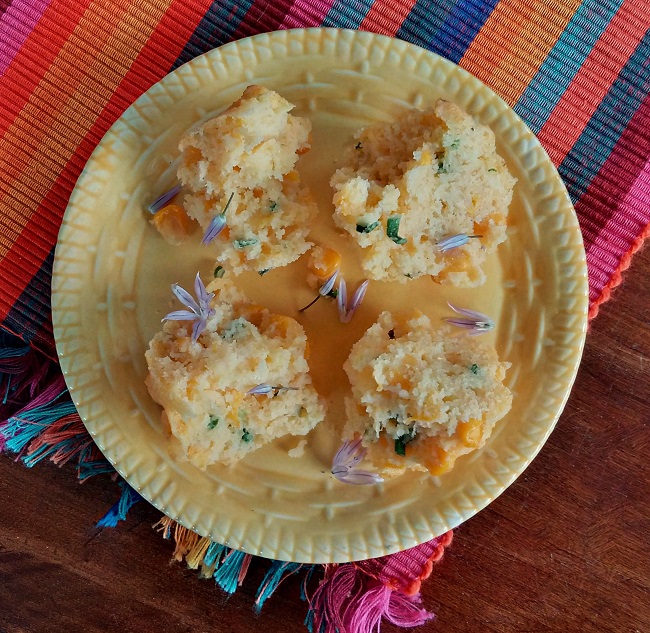
These muffins are full of golden coloured ingredients and are based on a classic American cornbread recipe. Easy to make, delicious served warm, and perfect for freezing – they will only keep fresh for a couple of days, so freezing is the best option for longer storing. The chives add a mild oniony flavour, and you could try adding a pinch of chilli flakes or some hot smoked paprika for a bit of a kick. They make a good accompaniment to a bowl of soup or stew, or just as a tasty snack on their own.
The main ingredients. Image: Kathryn Hawkins
Makes: 10
Ingredients
115g gluten-free plain flour (such as Dove’s Farm)
2 level teasp gluten-free baking powder (such as Dr Oetker)
150g polenta or fine cornmeal
1 medium egg, beaten, or 50g soft tofu, mashed
225ml dairy-free milk (I used soya)
50g butter or vegan margarine, melted
100g cooked sweetcorn kernels
150g grated courgette (yellow or green)
4 tbsp. freshly chopped chives
50g grated Parmesan cheese or vegan alternative, optional
Preheat the oven to 180°C (160°C fan oven, gas 4). Line a 10-cup muffin tin with paper cases. Sieve the flour and baking powder into a bowl and stir in the polenta or cornmeal. Make a well in the centre.
Put the egg or tofu in the centre and pour in the milk and melted butter or margarine. Gradually mix the ingredients together until well blended, then stir in the remaining ingredients.
Divide between the cases, smooth the tops and bake for 25-30 minutes until lightly golden and firm to the touch. Transfer to a wire rack to cool. Best served warm.
Freshly baked courgette and corn cakes. Image: Kathryn Hawkins
Ready to serve, sprinkled with fresh chive flowers. Image: Kathryn Hawkins