Welcome to my blog all about the things I love to grow and cook. You'll find a collection of seasonal gluten-free, dairy-free and vegan-friendly recipe posts, as well as a round up of my gardening throughout the year. I wish you good reading, happy cooking and perfect planting!
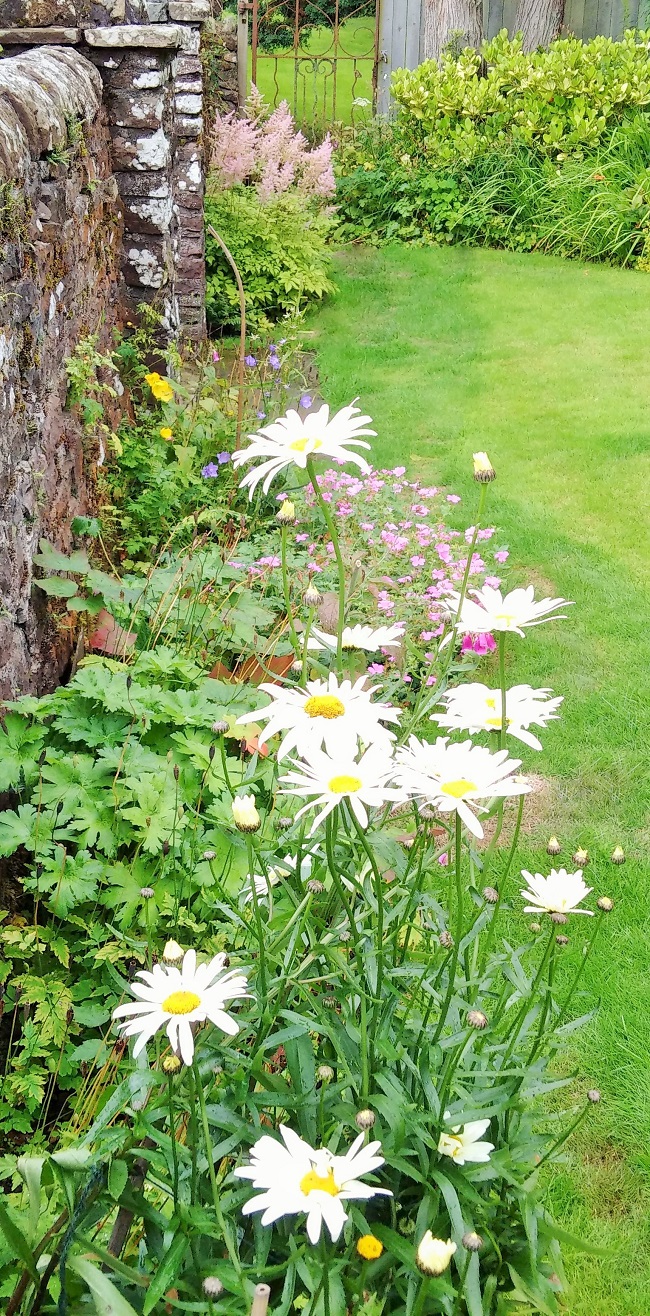
August flower border with Ox-eye daisies. Image: Kathryn Hawkins
Since the end of last month, it has felt like summer has left us here in central Scotland. There have even been a couple of chilly nights when it’s felt like Autumn is on the way. Whilst there has been some warm sunshine, the blue sky days have been peppered with heavy rain showers, and the poor plants, flowers and shrubs have been taking a battering.
Soft pink Astilbe. Images: Kathryn Hawkins
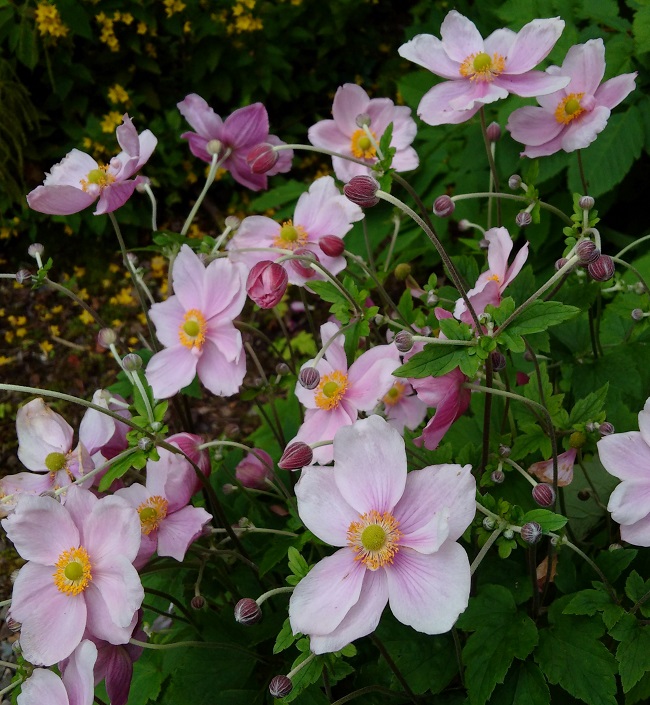
This baby pink-coloured Astilbe reminds me of candy-floss. The tiny, soft flowers bunch together to give a fluffy-looking display which seems to bounce back even after the heaviest of showers. Just as pink and delicate-looking (and able to withstand the rain!) are the Japanese anemones which grow in a cluster at the base of one of the trees in the back garden. I also have a white variety but this year, the pinks are well ahead of the whites.
Pale pink Japanese anemones. Image: Kathryn Hawkins
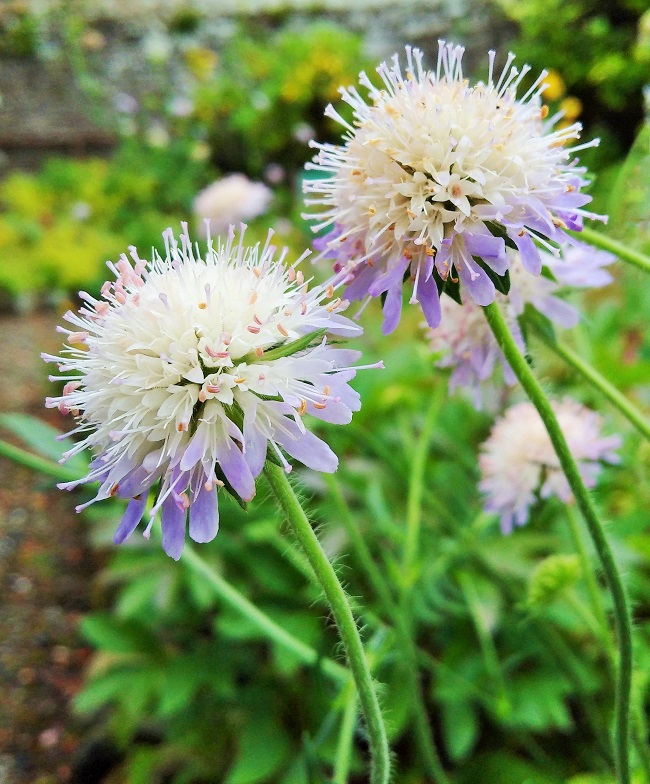
On the opposite flowerbed to the anemones is where the wispy Scabious grow. I tie the wiry floral stems in loose bunches, supported with canes, to keep them from falling over and splaying all over the place. The blooms form small white globes, tinged with pale blue-lilac petals; they are so pretty, and the bees love them!
Wispy Scabious blooms. Image: Kathryn Hawkins
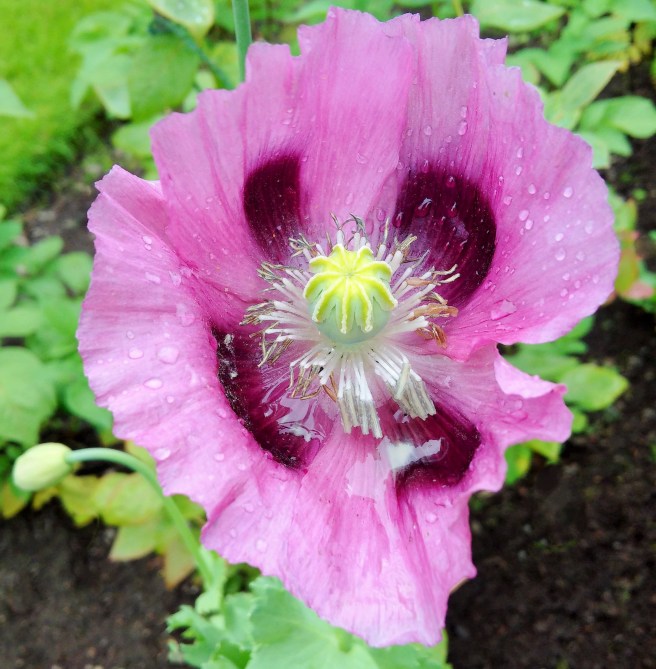
There are lots of flamboyant red and mauve poppies growing alongside the fruit bushes at the moment, but sadly, each one is only surviving no longer than a single day. These beauties are just too fragile to withstand the heavy rain drops. I managed to enjoy this one for a few hours this week, but sadly the next morning, all the petals had fallen.
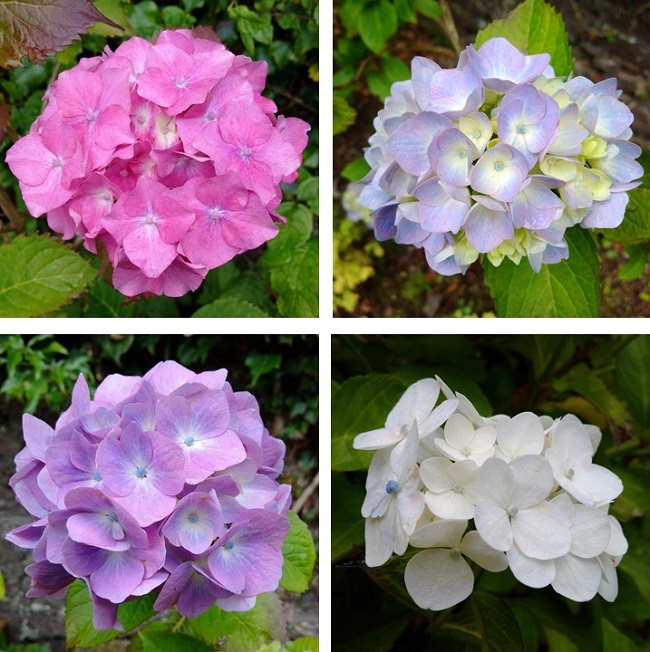
I’m glad of some longer lasting colour in the garden from my ever-faithful Hydrangeas. All the bushes are in flower now and they will continue to bloom for several weeks, subtly changing colour as time goes on. At the moment, the colours are soft and muted, but as Autumn draws nearer, the petals will deepen in colour and become more intense.
Fresh in bloom, assorted Hydrangeas. Images: Kathryn Hawkins
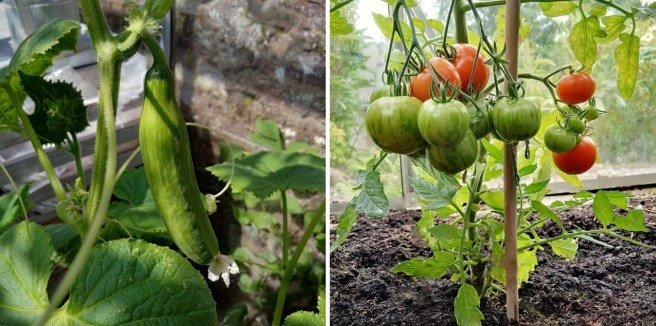
To finish my garden round-up for this month, the greenhouse is pretty colourful at the moment as well. I’ve been picking cucumbers and tomatoes for a few days now, and it looks like I am going to have plenty of produce for the weeks to come. So, until next month, I bid you: happy gardening!
In the greenhouse, cucumber and Tigerella tomatoes. Images: Kathryn Hawkins
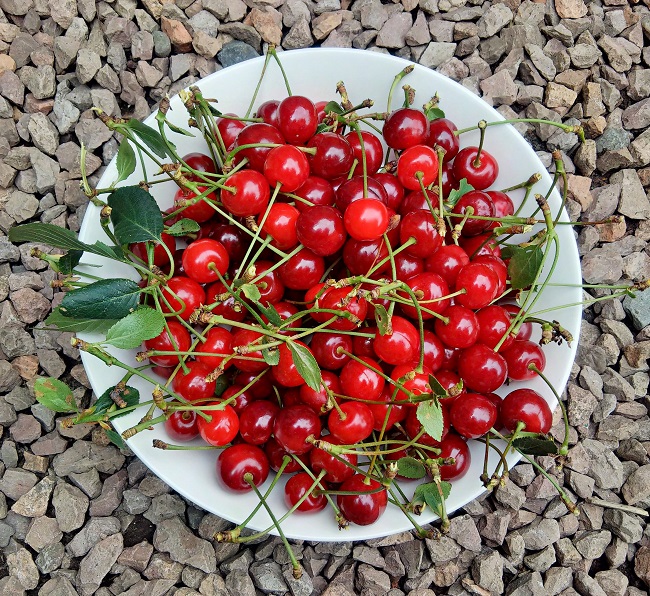
Morello cherries, ripe and ready for picking. Image: Kathryn Hawkins
Picking the cherries from my espalier Morello cherry tree is one of the highlights of my fruit growing calendar. Having had such a mild Scottish spring this year, all the fruit in the garden seems to be ripening a bit earlier than in other years. The cherries are no exception. Usually I pick them in the middle of August, but this week, they were ripe and ready. The harvest was pretty good too: from one small tree, I picked ¾kg.
This year’s Morello cherry harvest. Image: Kathryn Hawkins
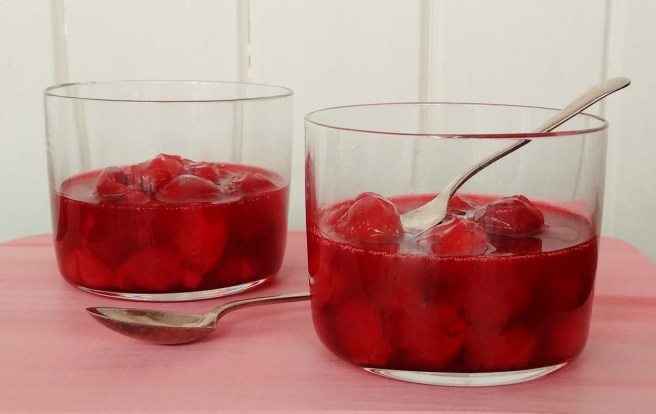
I’m not that adventurous when it comes to cooking with cherries. I suppose it’s because I never have that many to play with, therefore, I want to make sure I enjoy what I cook. Morellos are a sour cherry and are too tart to eat as a fresh fruit. This year I made a large pot of jam and, my favourite, a compote flavoured with vanilla and lemon – recipe below.
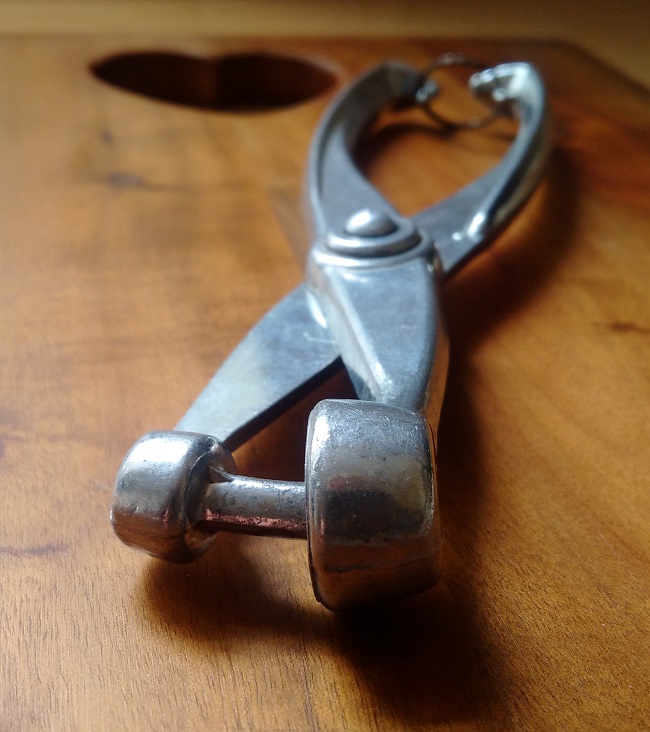
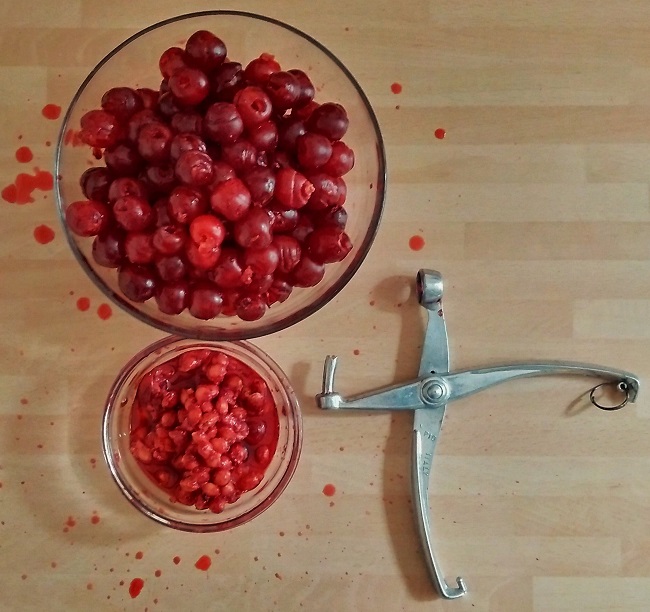
I use a cherry stoner to remove the pits; I’ve had it for years, and it does the job perfectly. This years cherries were so ripe, the pit just plopped out without any effort. Wash the cherries first and then prepare them over a bowl to catch the stones and the juice that falls; you can then easily drain off the stones, keeping the juice. If you don’t have a specialist stoner, a small knife with a pointed blade should enable you to prise out the stones with ease. After preparation, the final weight of the cherries I picked this year, along with the juice from the bowl, was around 650g.
Vital piece of kit: my cherry stoner. Image: Kathryn HawkinsPitting cherries. Image: Kathryn Hawkins
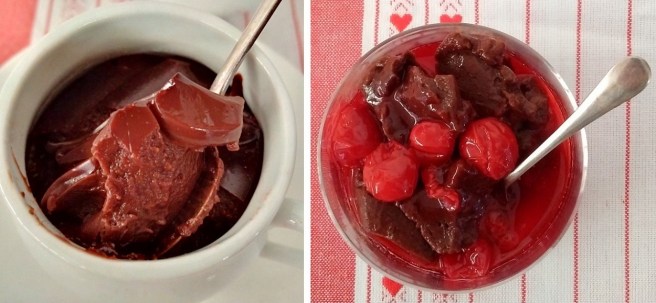
Flavours that go well with cherries are: almond (especially marzipan); citrus fruit; vanilla; cinnamon (just a pinch); coconut, and chocolate. I often make something chocolatey to go along side the compote, and this year, it was a nostalgic chocolate blancmange, deliciously velvety and thick. A perfect combination. So here are my recipes for both compote and blancmange. By the way, if you are using sweet cherries for the compote, you’ll need to reduce the quantity of sugar you add to the compote by at least half.
300g prepared ripe Morello cherries (about 350g with stones)
100g caster sugar
2 level teasp cornflour
½ vanilla pod, split
Juice of ½ small lemon or half a lime
For the blancmange:
50g cornflour
25g cocoa powder
50g vanilla sugar (use plain caster if preferred)
500ml non-dairy milk (I used soya milk)
1. To make the compote, put the cherries in a saucepan and gently mix in the caster sugar and 3 tbsp. water. Heat gently, stirring until the sugar dissolves, then bring to the boil, reduce to a gentle simmer, and cook for about 3 minutes until just tender – take care not to over-cook, ripe cherries need very little cooking.
2. Blend the cornflour with 2 tbsp. water to make a paste, then stir into the cherries. Bring back to the boil, stirring, and cook for a further 1 minute until slightly thickened. Remove from the heat, push in the vanilla pod and leave to cool completely. Remove the pod and stir in the lemon juice. Chill lightly before serving – about 30 minutes.
3. For the blancmange, mix the cornflour, cocoa and sugar in a saucepan, and gradually stir in the milk, making sure it is thoroughly blended – I find a balloon whisk is good for mixing powders into liquids.
4. Keep stirring the mixture over the heat, until it reaches boiling point and becomes very thick. Continue to cook for 1 minute to make sure the cornflour is completely cooked then spoon into small individual heat-proof dishes – there is enough to fill 6 x pot au chocolat dishes (it is quite rich, so these little dishes are the perfect size for me). Leave to cool completely, then chill for an hour until ready to serve.
Chocolate blancmange and Morello cherry compote. Images: Kathryn HawkinsMy espalier Morello cherry tree with spring blossom, and in fruit earlier this week. Images: Kathryn Hawkins
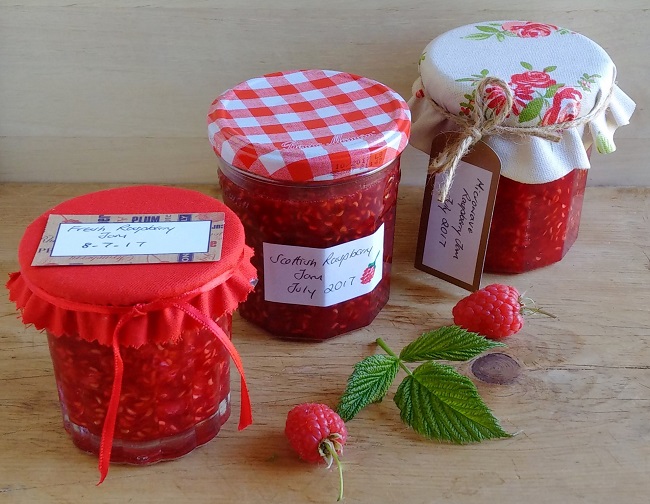
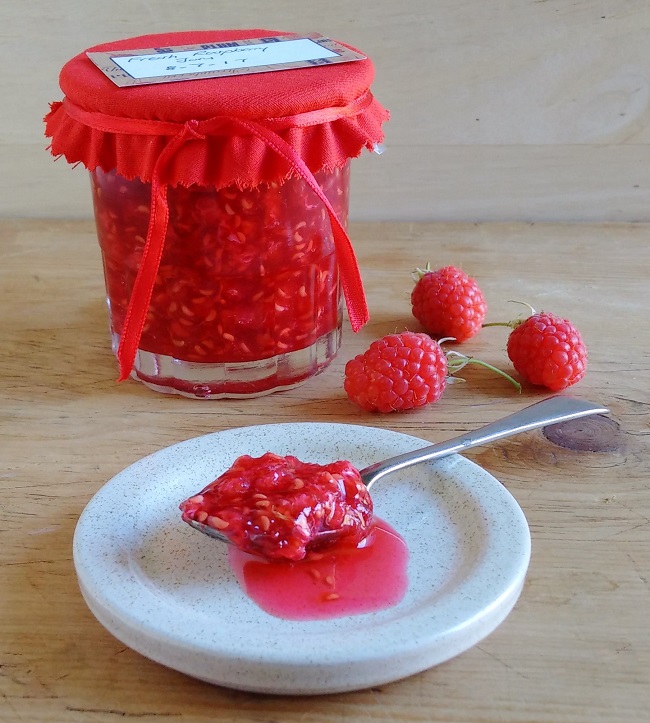
Homemade raspberry jam x 3. Image: Kathryn Hawkins
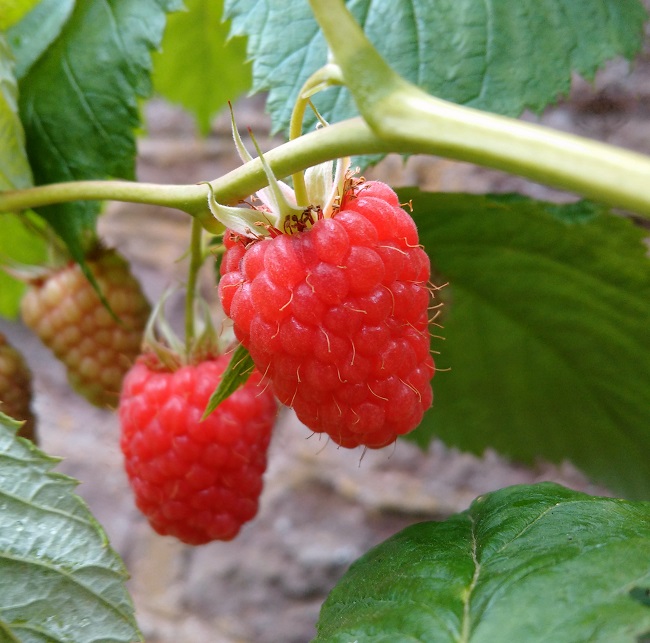
Raspberries love the Scottish climate (lots of rain!). The plump, juicy berries carry on ripening even on the most dreary of summer days. I have been picking my raspberries since the end of last month. Sadly, it looks like the end is nearly nigh; the supply is dwindling, but there are still enough to bag up for the freezer for later in the year, and then I will leave the rest for the blackbirds!
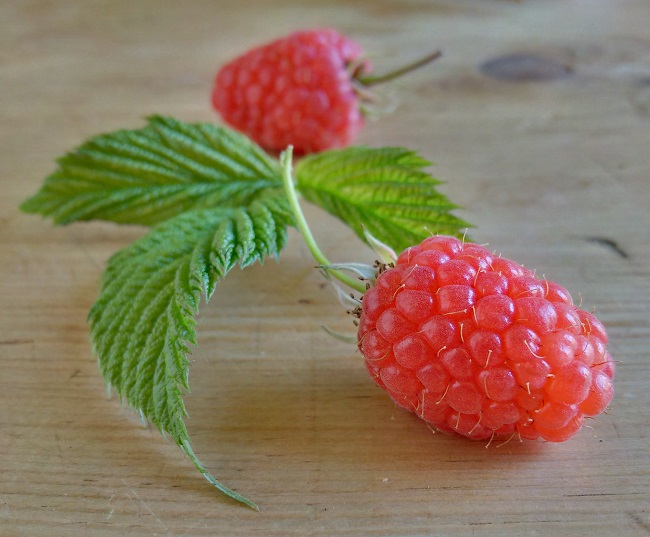
The bushes in the garden are now in their twelfth year, and have given me a good harvest every season. However, I think this autumn, it will be the time to plant some new canes. The variety I chose to grow is Glen Ample; selected for the large-sized fruit, and as the label said at the time, “perfect for cooking and jam-making”. And, they have certainly proven to be.
Glen Ample raspberries. Image: Kathryn Hawkins
If you’ve never made jam before, raspberry jam is the easiest to make. It practically sets as soon as the fruit and sugar boils. Frozen raspberries work equally as well for jam-making; whilst other fruit loses pectin (the natural setting agent found in many fruits) after freezing, I have found little difference in setting jam made with the frozen berries.
I have 3 methods for making my raspberry jam, depending on how much fruit I have picked, and how much time is available. The first method, is the traditional saucepan method, great if you have a large amount of fruit and a bit of time. This method works well with frozen berries – just let them thaw out in the saucepan you’re going to use to cook them in so that none of the juices are wasted.
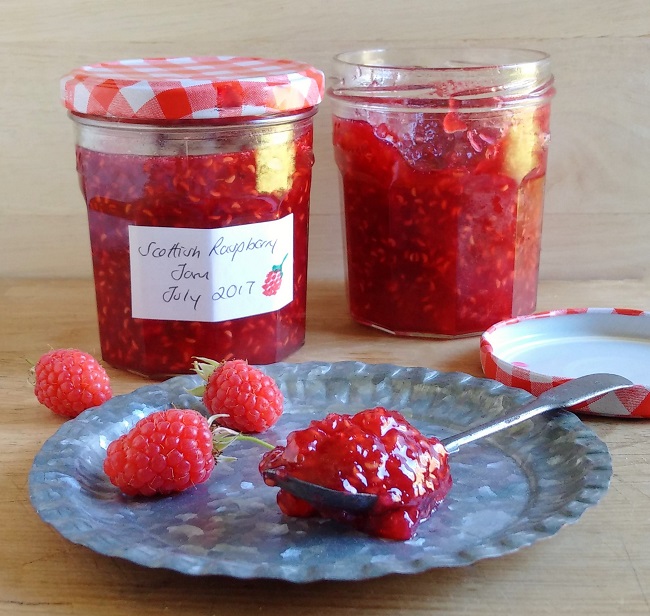
Traditional homemade Scottish raspberry jam. Image: Kathryn Hawkins
Traditional raspberry jam – use equal amounts of prepared fresh (or frozen) raspberries to granulated sugar. The yield is approximately the same as the weight of the 2 ingredients combined, so 500g raspberries and 500g sugar should give you 1kg of jam.
Heat the fruit by itself in a clean, large saucepan, stirring, until it steams and starts to break down. Mash it a little with a wooden spoon, reduce the heat and stir in the sugar. Heat, gently, stirring, until the sugar is completely dissolved, then raise the heat, bring the jam to a rapid boil, and stop stirring. Cook for 2 minutes. Turn off the heat and let the jam settle for about 5 minutes. Stir, and then transfer to clean, sterilised jars whilst still very hot. Seal immediately. Cool and label. In a cool, dark, dry cupboard, this jam will keep unopened for up to 12 months. Store in the fridge once opened, and eat within a month.
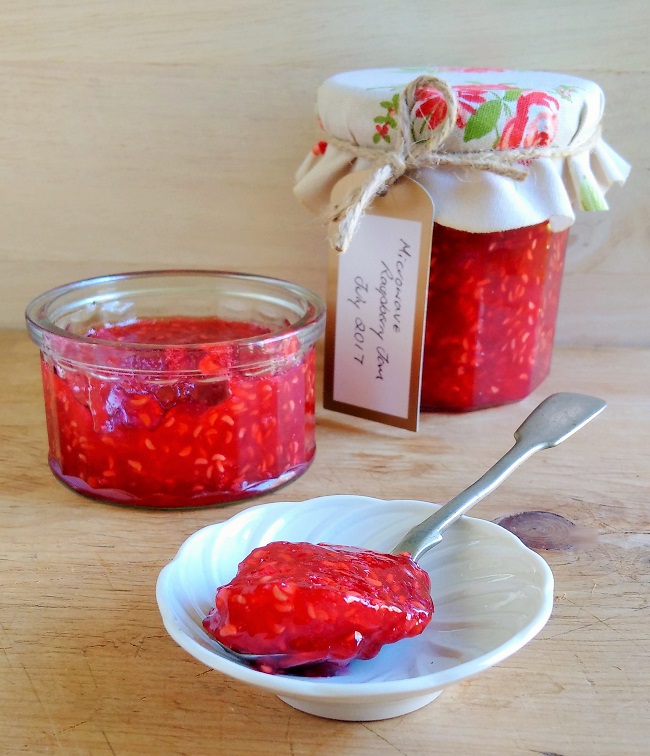
Microwave raspberry jam. Image: Kathryn Hawkins
Microwave raspberry jam – super-speedy; hassle free; the perfect jam method for smaller amounts of fresh berries (I haven’t tried this with frozen berries but I can’t see why it wouldn’t work). Use finer, caster sugar for this jam as it heats and dissolves more quickly. The jam has a good set, and I find the colour is brighter than the traditional method; the flavour is much the same. My microwave is 900W so you may need to adjust timings accordingly.
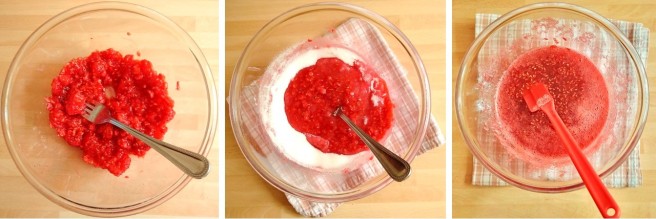
Wash and pat dry 250g prepared fresh raspberries and mash with a fork in a large, perfectly clean microwave-proof bowl ( the mixture needs room to boil in the microwave, so choose a good size to prevent the mixture boiling over).
Put 250g caster sugar in a microwave-proof bowl and cook on Medium for 10 minutes, stirring every 2 minutes. The temperature of the sugar should be around 80°C (I use a food probe to check). Carefully pour the sugar over the mashed raspberries and stir well – the mixture will be very sloppy at this stage.
Put back in the microwave, and cook on High for 3 minutes to reach boiling point, then boil for 2 minutes. The jam is now ready to put in jars and seal as above. The jam has the same keeping qualities as with the traditionally made jam above.
Steps to making microwave raspberry jam. Images: Kathryn Hawkins
My third method for making jam is probably the most delicious and it involves no cooking of the raspberries at all. You do need to select the perfect, unblemished, fresh specimens for best results, and wash the berries well before using. Use caster sugar for speedier heating and dissolving.
This fresh jam has a much softer texture than the other 2. You need to store it in the fridge – I find it keeps well for 4 to 6 weeks. It also freezes so you can keep it for longer and then take out small portions as and when you fancy. If you haven’t got a microwave, you can heat the sugar in a saucepan – just keep the heat very low and keep stirring the sugar so that it doesn’t melt or burn.
Fresh raspberry jam Image: Kathryn Hawkins
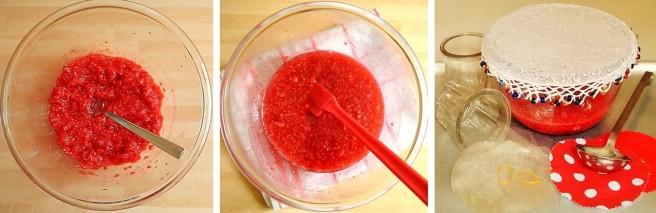
Fresh (uncooked) raspberry jam – wash and pat dry 250g prepared, unblemished, very fresh raspberries and mash with a fork in a large, perfectly clean, heat-proof bowl. Sit the bowl on a clean tea-towel.
Put 250g caster sugar in a microwave-proof bowl and cook on Medium for 15 minutes, stirring every 2 minutes. The temperature of the sugar should be around 120°C (I use a food probe to check). Carefully pour the hot sugar over the mashed raspberries and stir well – it will hiss and steam. Cover loosely and leave to cool completely, then spoon into clean, sterilised jars or containers. Seal and label, and store in the fridge or freezer.
Fresh raspberry jam preparation. Images: Kathryn Hawkins
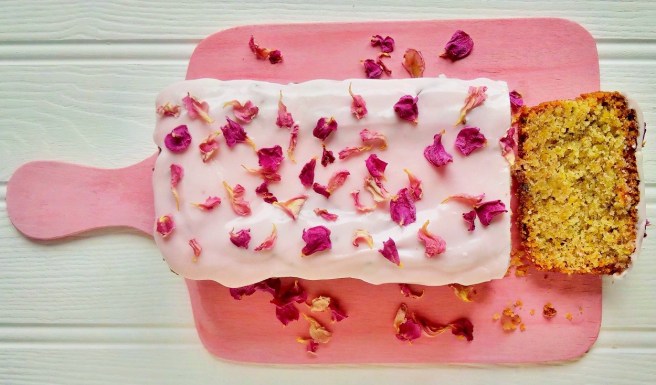
Rose and pistachio loaf cake. Images: Kathryn Hawkins
When I lived in London, a trip to the Edgware Road meant I could get my fix of my favourite Middle Eastern pastries. Full of chopped almonds and pistachios, the crisp, buttery, layers of filo pastry soaked in rose and lemon flavoured syrup were so sweet, my whole mouth “jangled” with the sensation of a sugar-overload.
Those days are long past me now, but this cake combines the flavours and some of the textures I love so much. In my post last week Cooking with rose petals – make your own rosewater, rose petal syrup and dried rose petals (gluten-free, dairy-free, vegan) you’ll find all the rose-scented recipes you need if you want to make this very floral cake from scratch. However, I realise that rose isn’t to everyone’s taste so if you fancy the cake without the floral flavours, it works very well with the grated rind of a lemon added to mixture instead of vanilla, and make the icing made up with freshly squeezed lemon juice instead of rosewater. It is utterly delicious however you flavour it, I guarantee!
Serves: 8-10
Ingredients
150g ground almonds
100g gluten-free plain flour blend (such as Dove’s Farm)
8g arrowroot (optional, but I add it to gluten-free cake mixes to help bind the textures together)
2 level teasp gluten-free baking powder (such as Dr Oetker)
100g finely chopped unsalted pistachio nuts
175g caster sugar
Pinch of salt
175g silken tofu
175ml sunflower oil
2 teasp good quality vanilla extract
3-4 tbsp rose petal syrup (optional)
To decorate:
115g icing sugar
2-3 tbsp homemade rosewater
A few drops natural pink food colouring
Dried rose petals
Preheat the oven to 180°C (160°C fan oven, gas mark 4). Grease and line a 1kg loaf tin. Mix all the dry ingredients together in a large mixing bowl. Make a well in the centre.
Blend the tofu, oil and vanilla extract together in a food processor or blender for a few seconds until smooth. Spoon the mixture into the centre of the dry ingredients and gradually combine all the ingredients together until well blended.
Spoon into the prepared loaf tin, smooth the top and stand the tin on a baking tray. Bake for about 1 hour 10 minutes, or until golden, firm to the touch and a skewer inserted into the centre comes out clean. Cool for 10 minutes, then if using rose petal syrup, skewer the top in several places and spoon over the syrup. Leave to cool completely, then remove from the tin, wrap and store for 24 hours to allow the flavours to develop.
To decorate. sieve the icing sugar into a bowl. Add sufficient rosewater to taste (Note: if you’re using distilled or shop-bought rose water, you will need to add less than homemade) then add a few drops of warm water and pink food colouring to make a smooth, spreadable icing.
Spread the icing on top of the cake and sprinkle with dried rose petals. Leave for a few minutes to allow the icing to set before slicing and serving. Enjoy!
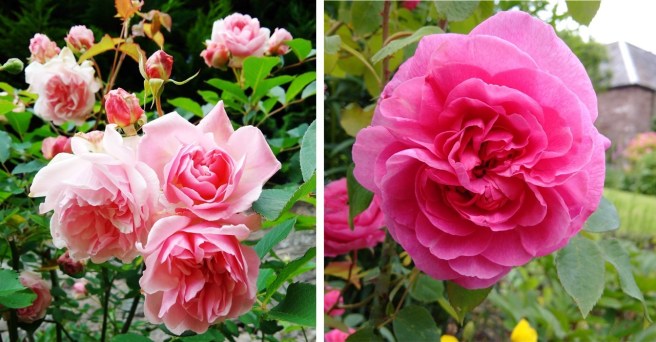
Trug of freshly picked fragrant rose heads. Image: Kathryn Hawkins
It is pleasantly fragrant in the garden at the moment, thanks mostly to two highly scented rose bushes. One variety is very old, a Felicia rose, with gnarled, stooped stems. However old it is, the foliage is vibrant green and healthy-looking and the bush produces an abundant supply of pale pink, Turkish Delight-scented flowers from late spring through to late summer. The other, a Gertrude Jekyll, I planted last year. The flowers are larger, deeper pink in colour and the fragrance slightly sweeter and more aromatic. Both roses have lots of petals per head, and are perfect for use in the kitchen.
Pale pink, Felicia rose, and the deeper pink, Gertrude Jekyll rose. Images: Kathryn Hawkins
The preparation for any recipe using rose petals is the same. Choose fragrant roses with undamaged petals; they need to be free from pests and chemical sprays. Rose heads are best picked when almost fully open and still fresh. Cut the stems in the morning before the sun becomes too hot – this helps preserve colour and fragrance. Carefully pull the petals from the head, keeping them as whole as possible, weigh them, and then place in a colander or strainer. Fill a bowl with cold water and dip the colander in the water to submerge the petals. Swirl gently the colander and then lift out. Shake gently to drain and shake further to remove the excess water.
The petals are fine to use damp for rosewater, syrup and any recipe where they are cooked in liquid, but if you want to dry them, spread them out carefully on sheets of absorbent kitchen paper or a clean tea towel and pat them dry with more paper or clean cloth. Leave to dry naturally, uncovered, at room temperature for about an hour or until they feel dry to the touch.
Making homemade rosewater. Images: Kathryn Hawkins
Rosewater – makes approx. 250ml
25g fragrant rose petals – approx. 4 full heads of rose petals
250ml boiling water
1 tsp vodka (optional) – this helps preserve the rosewater for slightly longer
Prepare and rinse the rose petals as described above. Place in a sterilised, clean preserving jar or heatproof jug, and pour over the boiling water.
Cover the top with a piece of muslin or kitchen paper and leave to steep until completely cold.
Strain through muslin into a sterilised, clean jug and then squeeze the muslin to obtain as much liquid as possible. Mix in the vodka if using.
Decant into a sterilised, screw-top bottle or jam jar. Seal, label and store in the fridge. Use within 4 to 6 weeks.
Note: homemade rosewater is weaker in dilution that the distilled rosewater you can buy ready-made, so you will probably need to use more in your recipes.
How to make homemade rose petal syrup. Images: Kathryn Hawkins
Rose petal syrup – makes 350ml
85g fragrant rose petals – approx. 9 full heads of rose petals
450ml cold water
265g caster sugar
1 tbsp. fresh lemon juice
Prepare and rinse rose petals as above, then place in a clean, large stainless steel saucepan. Pour over the cold water.
Bring to the boil and simmer very gently for 20 minutes – all the colour will come out of the petals. Strain through muslin into a jug, and then squeeze the muslin to obtain as much liquid as possible.
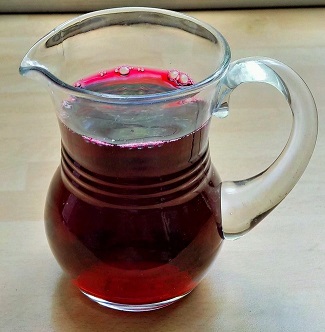
Return the liquid to the saucepan and add the sugar and lemon juice. Stir well over a low heat to dissolve the sugar – the liquid should now be, magically, very pink.
Bring to the boil and simmer for 10 minutes until lightly syrupy. Pour into sterilised bottles or jars and seal well. Label and cool. The syrup will keep unopened for 6 months, once opened keep in the fridge for up to a month.
Rose petal syrup is perfect for fruit salads; adding to cocktails; diluting with sparkling water for a refreshing summer cooler; for pouring over pancakes or for drizzling over freshly baked cakes.
Drying rose petals. Images: Kathryn Hawkins
Dried rose petals – prepare rose petals as described above and dry thoroughly. Spread out across the layers of a dehydrator, making sure they are well spaced out, keeping them in as much of a single layer as possible. Cover and dry at 40°C for 1 ½ to 2 hours, swapping the trays around every 30 minutes, until the petals are dry and parched. Leave to cool then place in a clear screw-top jar and store in a dark, dry place. Petals will fade after a few months, and are best used within 4 to 6 weeks. Sprinkle over salads, fruit desserts or use as a natural cake decoration.
Homemade rosewater, dried rose petals and rose petal syrup. Image: Kathryn Hawkins
My next post will be very rosy and will use all 3 rose recipes. See you in a few days!
Half way through the year already. I can hardly believe it. It’s also just over a year since I published my first post on this blog. What a year it’s been. So many flowers, plants and recipes. So much colour and flavour.
The last week of June has been a turbulent one here in central Scotland. After several days of warm sunshine, suddenly the winds got up and the rain came down. The flowers and shrubs certainly received a bit of a battering, but most have recovered. I have two Kalmia bushes in the garden. When in bud, the bright pink tightly closed flowers remind me of pink icing piped through a star-shaped nozzle (you can see a few in the picture above). As the buds open out, the unusual pink flowers turn into little lanterns or fairy-sized lamp shades. As the petals begin to fade and fall, it looks like someone has scattered pink confetti over the lawn.
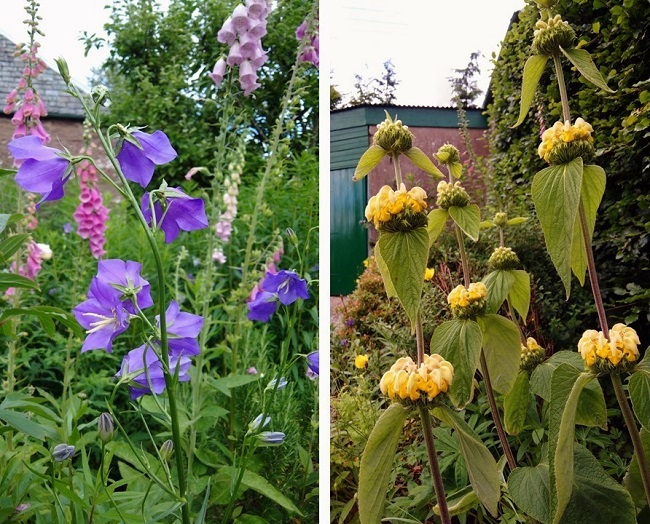
Blue Campanula and pink foxgloves; golden Phlomis. Images: Kathryn Hawkins
Mid-June to early July is probably the best time of the year for colour variation in the garden. There are a lot dainty blue and white Campanula all over the borders as well as different shades of foxgloves – these both seed themselves year after year. I have two clumps of yellow Phlomis, with small crowns of flowers that remind me of little pineapples. The velvety, sage-green foliage comes up in mid spring and lasts long after the flowers have bloomed.
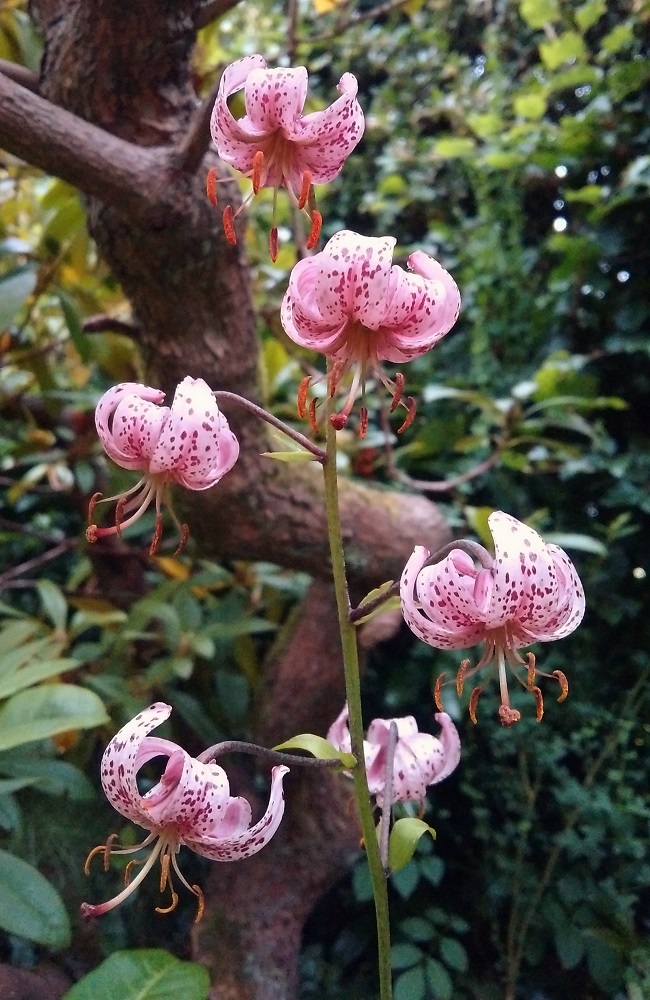
Lilium martagon (Turk’s Head Lily). Image by Kathryn Hawkins
I discovered this small lily underneath a rhododendron in the front garden a few weeks ago. One by one the individual blooms have opened, and finally yesterday, I managed to capture them all open at the same time. It is like a small tiger-lily, so pretty and dainty. I can’t remember planting it, or even having seen it ever before!
Iris Foedissima. Image: Kathryn Hawkins
This fine fellow was new in the garden last year. Actually, it had probably been in the garden for a while, but it was hidden away in an old compost heap. When the compost was distributed, it sprouted up. Given a more prominent position in the garden, it started flowering last summer. This iris is one of only two native varieties in the UK; it is not the most colourful, but certainly interesting, and it has a rather unfortunate and unflattering common name: “stinking iris” – but this one doesn’t seem to smell at all!
My last image to share this month, is a plant not strictly in my garden, but something I am proud to have raised given the climate here. It is a small Oleander bush. I have kept it through the winter months, swaddled in fleece, in my unheated greenhouse, and this spring the flower buds started appearing. On warm days, it does stand outside for a few hours, and brings a hint of the Mediterranean to the more traditional flora and fauna.
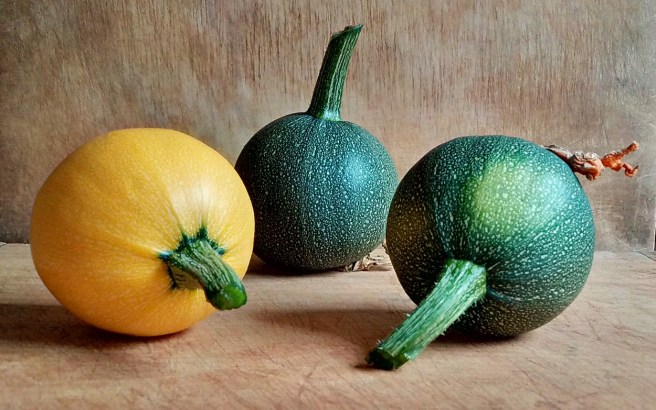
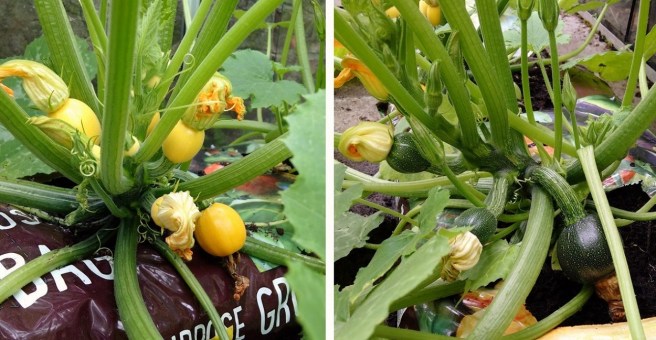
My first vegetable harvest of 2017: home-grown courgettes. Image: Kathryn Hawkins
The mild spring weather and fine, early summer days has brought on my greenhouse vegetables a treat this year. It looks like I’m in for another bumper crop of courgettes. I thought I’d try to grow a new variety, and decided on this round, globe courgette called Tricolour. I only raised 4 plants from seed, so it is completely by chance that I’ve ended up with 2 yellow and 2 dark green vegetable plants. The third colour is pale green, and, I guess, is to be saved for next year.
Providing you give them plenty of water, I think growing courgette plants offers little challenge to the gardener, and for a modicum of effort, you are usually rewarded with plenty of produce. I have mine growing in grow-bags; the roots don’t stretch very deep so it is an ideal way to grow them if space is limited.
My grow-bag courgettes. Images: Kathryn Hawkins
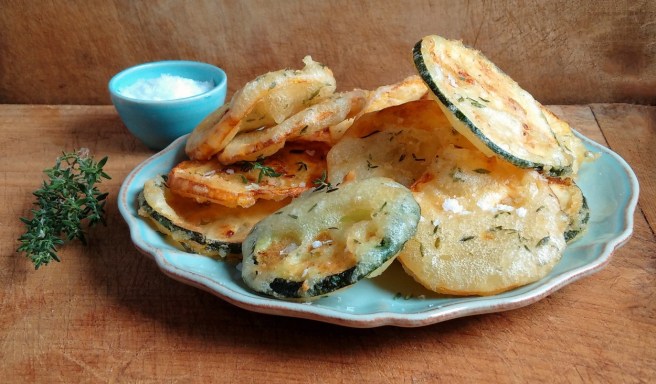
Here’s an easy recipe for a courgette starter or vegetable accompaniment. Chives or rosemary work well in the batter instead of thyme, if you prefer. If you’re not dairy-free, add a couple of tablespoons of freshly grated Parmesan cheese to the batter for extra flavour. The batter goes with any vegetable that’s suitable for deep-frying such as rings of onion, baby leeks, spring onions, sliced mushrooms, strips of pepper and carrot, sliced aubergine, etc.
Courgette and thyme fritters – serves: 4
Ingredients
400g courgettes
65g self-raising gluten-free flour blend (such as Dove’s Farm)
40g cornflour
Salt and freshly ground black pepper
1 teasp freshly chopped thyme leaves + extra for serving
90ml soda water
Vegetable oil for deep-frying
Wash and pat dry the courgettes. Trim away the ends and cut into thin slices, approx. ½ cm thick. Arrange in layers in a wide, shallow dish, sprinkling lightly with 25g of the flour as you go. Make sure both sides of each slice have a light coating of flour.
For the batter, mix the rest of the flour with the cornflour in bowl and season. Stir in the chopped thyme leaves. Using a small whisk, gradually blend in the soda water. Heat the oil for deep-frying to 180°C.
Carefully pour the batter over the courgette slices, lifting them up so that the batter seeps right through to the bottom of the dish – the slices don’t have to be completely covered in batter (this is a very light, crispy batter that cooks better when used sparingly) but make sure there is a little on each slice. Tongs are useful for lifting individual slices.
Cook the slices in the hot oil, in 4 batches, for 4-5 minutes, turning occasionally, until crisp and lightly golden. Drain well and keep warm whilst cooking the remaining slices. Serve as soon after cooking as possible, sprinkled with more fresh thyme and some crushed sea salt flakes.
Courgette and thyme fritters. Image: Kathryn Hawkins
It feels like summer is here now that my strawberries are ripening. The aroma of sweet berries fills the air every time I open the greenhouse door. I have been growing strawberries in my unheated greenhouse for several years. The soil is free draining and the plants have plenty of room to spread. Apart from an occasional feed, and plenty of water, I leave them alone to get on with the business of berry production.
Strawberries are best eaten fresh. They don’t freeze well as a fruit by themselves, but you can purée them and then serve as a sauce. The fresh purée makes excellent ice cream and sorbet too. I sometimes pop a few in with a fruit compote with other berries, but on the whole, I don’t cook them other than to make jam.
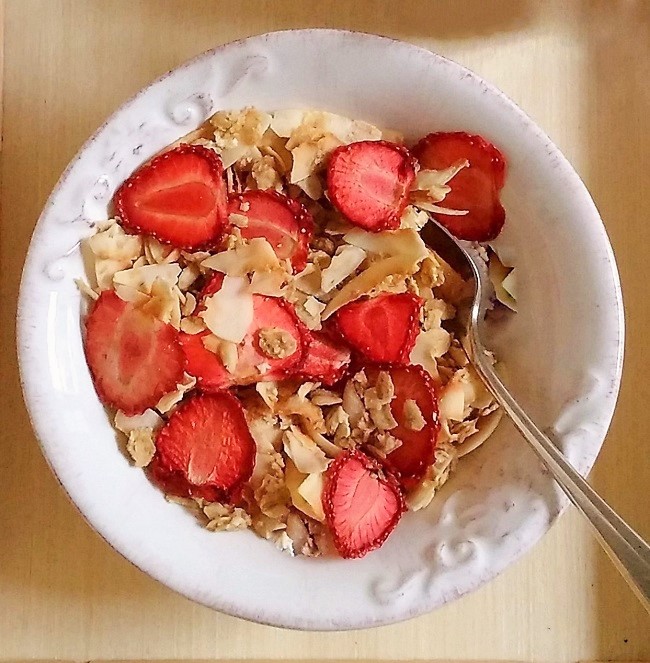
One of the best ways I’ve found to preserve them, is to dry slices in a dehydrator; this way you can enjoy them once the season is over. The perfume of drying strawberries is divine. If you have a dehydrator, slice the berries and brush them with a little lemon juice to help preserve the colour. 500g prepared strawberries, spread over 3 tiers in a dehydrator, will take between 3 ½ to 4 ½ hours at 70°C/158F. This amount yields about 65g. Sealed completely in an air-tight jar, and stored in a dark, dry cupboard, they will keep for several months. The dried slices add a splash of colour and a fragrant, fruity flavour to any bowl of cereal – especially good with Coconut granola (gluten-free, dairy-free, vegan) – and they make a pretty, natural cake decoration too.
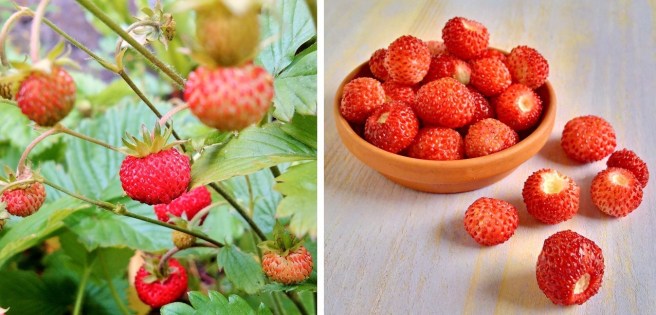
All round the garden borders, the wild strawberries are also beginning to turn colour. Whilst they are much more time-consuming to pick, they have a more perfumed flavour and make a lovely addition to a fruit salad. Leave them to ripen fully for the sweetest flavour, and eat them as soon after picking as possible – they really don’t keep well. I have a battle with the birds every year to get to them before they do! The plants are prolific spreaders, but give good ground cover and make a pretty display when in flower.
Alpine strawberries. Images: Kathryn Hawkins
Strawberry serving suggestions
Fresh strawberries go well with smoked salmon, Parma or Serrano ham, and peppery leaves like rocket or watercress. They are also delicious with slices of ripe avocado.
Spread almond nut butter over warm toasted bread and top with lightly mashed strawberries and a little sugar for an indulgent toast topper.
Add finely chopped tarragon, lavender syrup, rosewater or passion fruit juice to a bowl of strawberries to enhance the floral flavour of the fresh berries.
For very sweet strawberries, halve and sprinkle with fruit or balsamic vinegar and freshly ground black pepper. Serve with goat’s cheese as a starter with salad ingredients.
Strawberry and goat’s cheese salad with sweet berry vinegar. Image: Kathryn Hawkins
If you have sufficient wild strawberries, fold them into whipped cream with a little dessert wine and strawberry jam for a topping or filling for meringues.
For a special fruit salad, mix halved strawberries with chopped mint and sugar, then toss in some lime juice, dry white wine or crème de cassis.
Mash strawberries with vanilla sugar and fold into soft cheese to spread over pancakes.
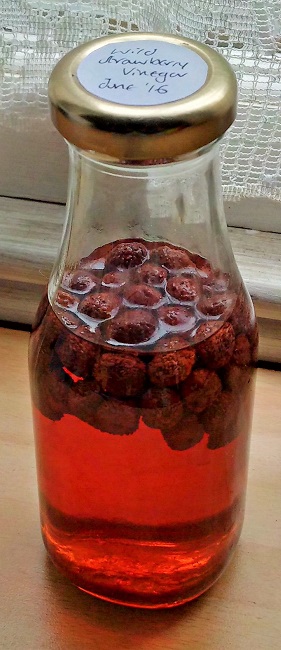
Pop a handful of wild strawberries into white balsamic vinegar to make a sweetly scented berry dressing for fruit or leaf salads later on in the year.
Last year’s wild strawberry vinegar. Image: Kathryn Hawkins
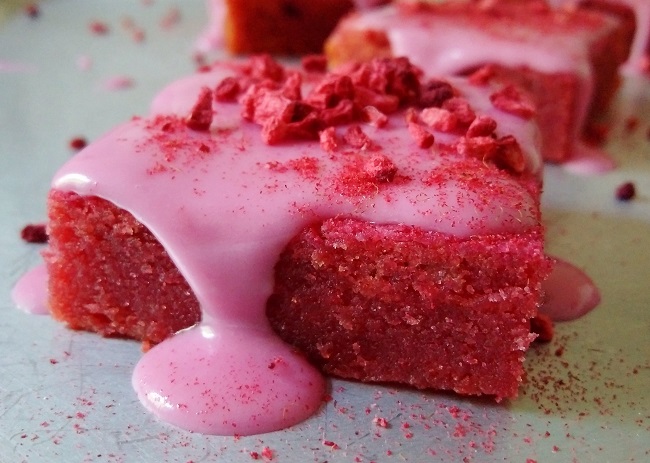
Beetroot and raspberry blondies Image: Kathryn Hawkins
After my post on Fresh globe beetroot a couple of weeks ago, I finally got round to a spot of beetroot-baking with the fine specimens I took pictures of. This is a great tasting recipe which makes the most of how naturally colourful the vegetable is.
You’ll find plenty of recipes for brownies and blondies, so now, here’s one for “pinkies”. For all intents and purposes, it is a blondie recipe with cooked beetroot added to it. I used natural raspberry extract to flavour my recipe but a good quality vanilla extract or freshly grated orange rind would work just as well. As with the more traditional blondie (and brownie) recipes, this one is better the day after baking. By the way, if you cook beetroot from raw, the cooking water turns very pink. I used a little of this to make the icing. The pinkies also freeze well. By the way, the recipe also works with cooked carrot instead of beetroot.
100g white chocolate drops (or dairy-free alternative)
75g butter (or dairy-free alternative)
75g caster sugar
75g silken tofu
115g cooked, peeled beetroot in natural juice
75g gluten-free self raising flour
75g ground almonds
¼- ½ tsp natural raspberry extract
150g icing sugar
2-3 tsp beetroot cooking water or water and natural pink food colouring
Freeze-dried raspberry pieces, to decorate
Preheat the oven to 180°C (160° fan oven, 350° F, gas mark 4). Grease and line an 18cm square cake tin. Put the chocolate chips, butter and sugar in a saucepan and heat gently to melt together. Cool for 10 minutes.
Meanwhile, blend the tofu and beetroot together to make a purée.
Sieve the flour into a bowl. Add the ground almonds, beetroot purée and melted chocolate mixture. Add the extract and mix well to make a smooth batter.
Spoon into the prepared cake tin and bake for about 30 minutes until lightly crusted but slightly soft underneath. Cool for 20 minutes then turn on to a wire rack to cool completely. Wrap in greaseproof paper and foil and store for 24 hours to allow the texture and flavour together.
Preparation of beetroot and raspberry blondies. Images: Kathryn Hawkins
To decorate. remove the wrappings and cut the cake into 9 equal squares. Sift the icing sugar into a bowl. Stir in a little beetroot or tap water to make a smooth, spreadable icing. Add pink colouring if using.
Spoon a dollop of icing of over each piece of cake and spread to cover the tops, allowing it to drip down the sides. Sprinkle with freeze-dried raspberries. Leave to set for about 30 minutes before serving.
Slice of beetroot and raspberry blondie. Image: Kathryn Hawkins
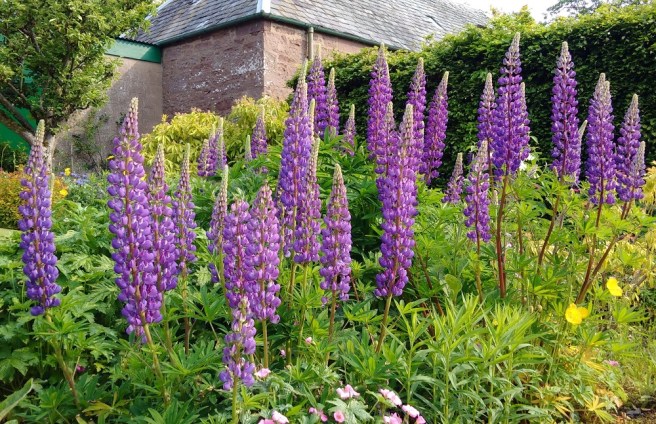
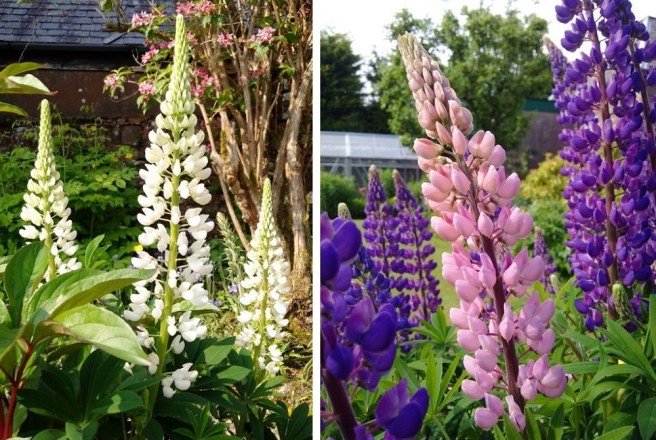
From the last few days of May, I think my garden looks at it’s best. There is so much colour, so many fragrant blooms, it is a real joy to be outside, and even the weeding seems less of a chore! The weather has been kind, and I have been outside more than I have been indoors. The lupins are great value in the garden; the flowers with their rich, spicy aroma, are in bloom for a long time, and once the long heads have finished, cut them off and smaller blooms appear for a second showing.
White and pink lupins. Image: Kathryn Hawkins
The last of my spring bulbs are in flower now. I planted alliums for the first time a couple of years ago, so this is their second late spring showing. I love the intricate web of tiny star-like lilac flowers that make up the globe shaped bloom.
Allium cristophii. Image: Kathryn Hawkins
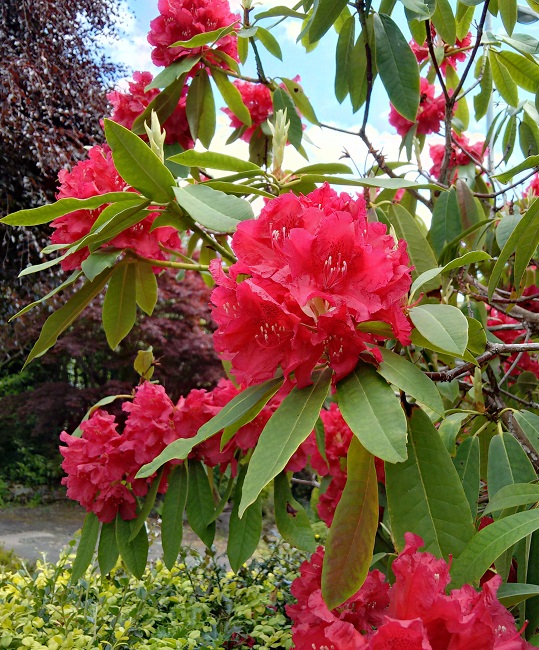
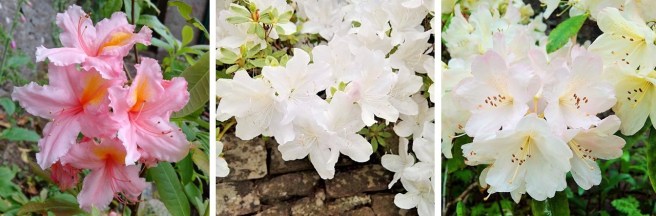
It’s been a fine year for rhododendrons and azaleas. Most have past their best now, but this scarlet beauty stands at the bottom of the drive-way and is always one of the last to flower. It makes a stunning display. The later varieties are particularly sweet-smelling. The peachy-pink one below is heavily scented although sadly not quite so many blooms this year. The pure white azalea and the apple blossom-pink rhododendron, on the other hand, are almost overloaded with blooms.
Scarlet rhododendron. Image: Kathryn HawkinsLater flowering rhododendrons and a white azalea. Images: Kathryn Hawkins
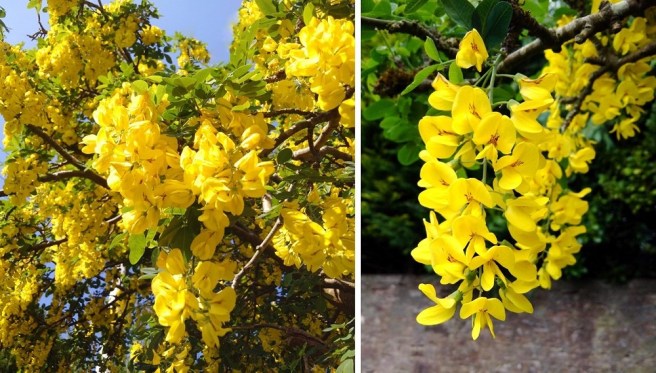
One of the finest trees in the garden is the laburnum. On a bright day, the rich yellow glow from the petals is quite dazzling, and the heavy scent is intoxicating. The flowers look particularly glorious against a blue sky. Sadly it’s not in flower for more than a few days before the petals start falling like vibrant confetti, all over the garden.
In full flower, laburnum tree. Image: Kathryn Hawkins
I have been patiently waiting for this iris to come into flower. For the first time, I split the rhizome back in the Autumn and was delighted (and relieved) when the buds started to form about a month ago. This variety is a real beauty called Iris Pallida; the pale sky blue flowers have the aroma of slightly spicy bubble-gum. It’s planted in a dry, sunny corner by the front house wall, and flowers from the top down. I believe the rhizome of this particular iris is used as a botanical in some gin varieties.
Iris pallida. Images: Kathryn Hawkins
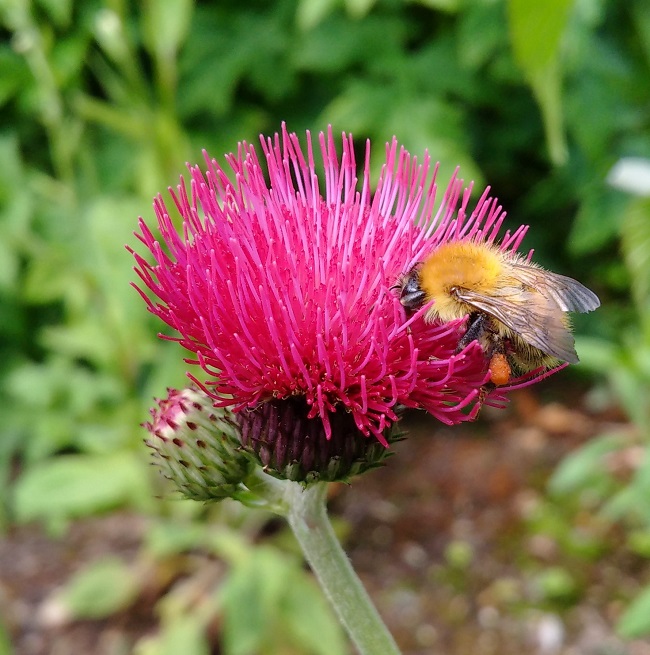
My final image to share this month, is from a crop of plume thistles Atropupureum which are growing in the back garden. Not only popular with me, but the bees love them too 🙂
Plume thistle (Atropupureum) and bee. Image: Kathryn Hawkins