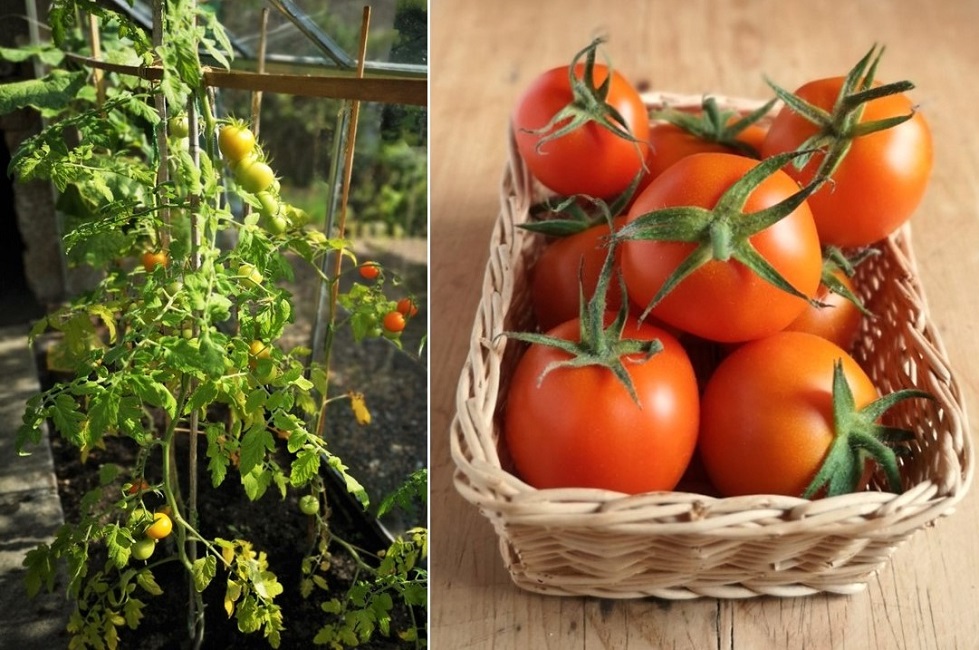
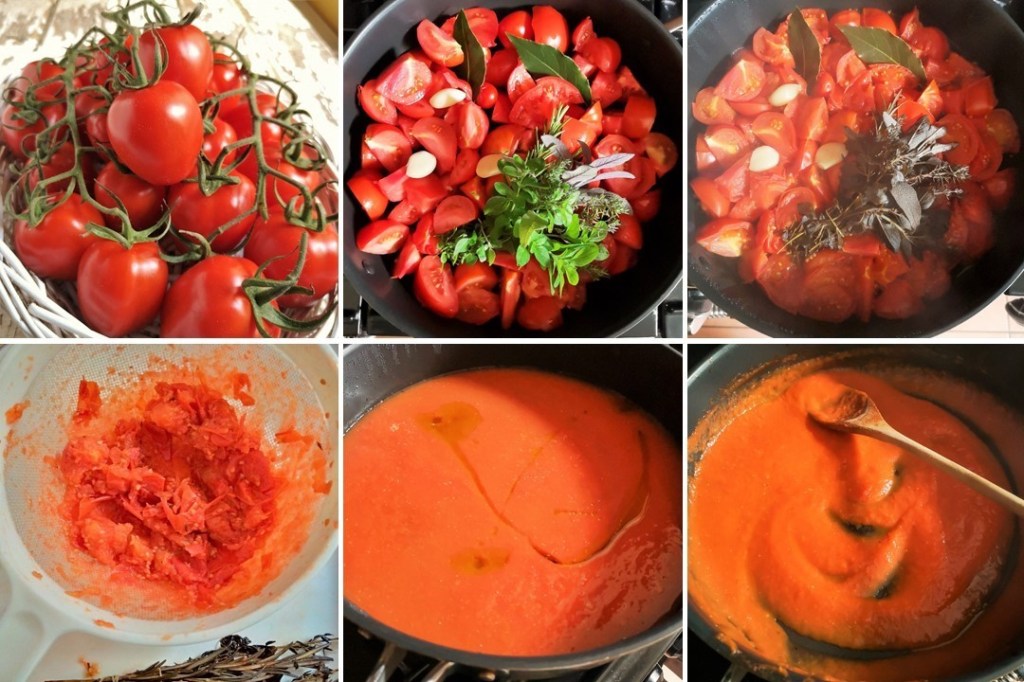
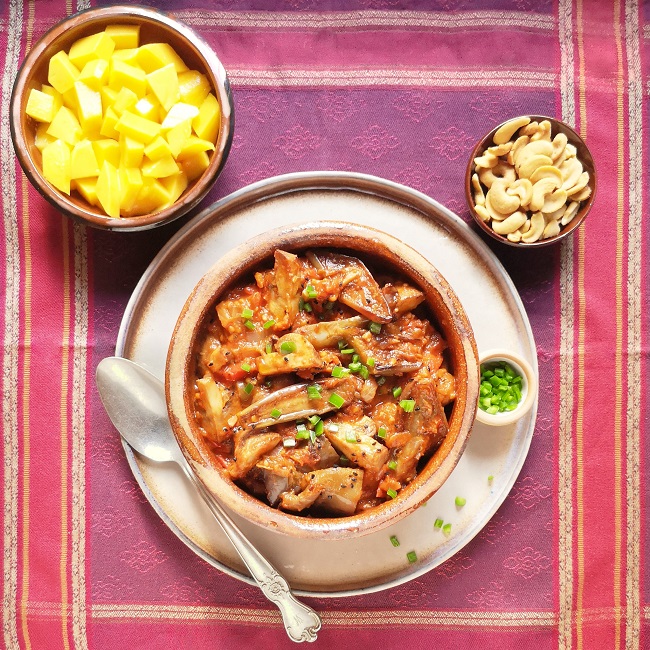
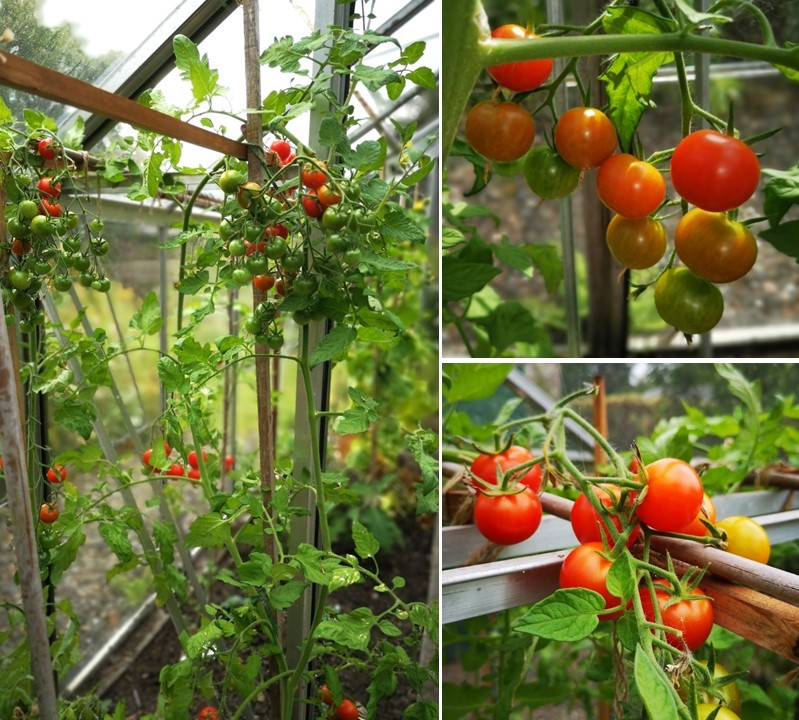
May’s finest: asparagus, purple sprouting broccoli, Jersey Royals and some of my favourite (rain-soaked) flowers

Hello again everyone. I hope you are keeping well. We have been suffering another down-turn in the weather since my last post. Very unseasonal hail storms, winds and heavy rain. It’s been chilly too. The lack of heat has helped keep some of the spring flowers going but delayed later ones like the bluebells, and some of the trees are still bare.

I have been busy with work since my last post and haven’t been able to spend much time in the kitchen. The poor weather has put pay to spending much time out of doors. However, May is my favourite month of the year and I have been eating some fine seasonal produce. And today, I ventured out into the garden to take a few images of some of the best May flowers.

When vegetables taste as good as this selection, I rarely do anything adventurous with them. The asparagus and broccoli get trimmed, brushed with oil and lightly seasoned, then roasted on a tray for a few minutes in a hot oven. As for Jersey Royals, I just steam or boil them and eat them dressed with seasoned oil or a dot or 2 of plant-butter. Simple but delicious.

Most of my flowery images are a little bit rain-soaked this month. The tulips started flowering early this year and many have been out for 3 or 4 weeks. With the heaviness of the downpours, some have started growing horizontally.

This beautiful purple tulip was actually filling up with water as I took the photo.

There are now bluebells in the garden, but the lack of sun is slowing down the opening of the flower-heads, and the rain is holding back the scent in the air which is something I love about this time of year. The forecast for the week ahead is for more of the same, so it may be a while before I am able to enjoy their sweet heady fragrance.

More blue flowers. The forget-me-nots are growing in abundance in one of the raised beds and provide quite a carpet of blue until other flowers take over. I spotted the first Centaurea or Mountain Cornflower in bloom today. These robust, thistle-like, flowers will continue multiplying and flowering well into the autumn. They are a great value garden plant and their vivid blue colour is very striking in the borders.

Usually in my May garden posts I am able to share pictures of abundantly flowering vivid pink and red Azaleas, but at the moment they remain stubbornly in bud. The scarlet rhododendron has come into flower this last week and is putting on a lovely display. It sits next to one of my favourite rhododendrons in the garden, a rich, candy-pink variety. Sadly the frost caught the other side of this mature shrub. These blooms are on the sheltered side and thankfully remain untouched.

Vivid_red_and_candy_pink_May_flowering_rhododendrons
Red and candy-pink rhododendrons. Images: Kathryn Hawkins

That’s all for now. I’m off to start practicing my sun-dance which I hope I can perfect in order to drive the rain away for a while 🙂 Until next time, take care and keep safe.

Soy-braised cauliflower (gluten-free; dairy-free; vegan)

Serving_bowl_of_soy-braised_cauliflower
Soy-braised cauliflower. Image: Kathryn Hawkins

Hello again. Here we are half-way through another month, and here I am not knowing where the time has gone since my last post. I hope you had a good Easter holiday. We had some glorious weather over the Easter weekend, but subsequently, we have had a return to winter with sub-zero temperatures at night, along with snow and hail showers. The fruit blossom had just started to open, and then along came Mr Jack Frost. I think I have managed to save the most delicate blooms, but sadly the rhododendrons got scorched.

With the weather being a little on the chilly side, I have been back in the kitchen cooking up some more heart-warming food. This week I’d like to share with you a very simple cauliflower dish, but it’s a tasty one and it uses up just about every part that this magnificent vegetable has to offer.

Whole_cauliflower_encased_in_leaves
The mighty cauliflower. Image: Kathryn Hawkins

You can adapt the recipe to suit how much cauliflower you have to cook. I had used half of this one in another recipe where just the curds were required, and was left with the other half plus all the leaves and stalks. There is plenty of room for adding your own flavourings to my simple mix of soy sauce, oil and maple syrup, so if you fancy something more spicy or herby, feel free to make your own additions.

Cauliflower_leaves_soaking_in_water
Reviving cauliflower leaves. Images: Kathryn Hawkins

Sometimes when you buy a cauliflower, the outer leaves can look a bit sad and wilted, but I have found that if you soak them in a bowl of cold water, it is quite possible to revive them and make them fresh enough to cook. Discard anything that is too damaged or brown, but the other leaves should perk up quite nicely after a good bath. After soaking, simply drain them and shake off the excess water.

Here’s the rest of the recipe.

Serves: 2 to 4 as a main or side

Ingredients

  • 1 medium cauliflower (approx. 300g curds plus leaves)
  • 1 onion
  • 2 garlic cloves
  • 1 tbsp gluten-free dark soy sauce
  • 1 tbsp vegetable oil
  • 1 tbsp maple syrup
  • 2 tsp sesame oil
  • Fresh coriander to serve

1. Remove the leaves from the cauliflower. Slice out the stalks and put the leafy bits to one side along with the curds. Cut the stalks into small pieces and place in a roasting tin. Peel and slice the onion, and peel and chop the garlic. Mix into the stalks.

Slicing_and_chopping_cauliflower_stalks_for_cooking
Preparing cauliflower leaves and stalks ready for braising. Images: Kathryn Hawkins

2. Mix the soy sauce, oil and syrup together and toss into the vegetables. Cover with foil and put in a cold oven. Set the thermostat to 200°C, 180°C fan oven, gas 6 and cook for 35 minutes.

3_images_ showing_the_cooking_stages_of_cauliflower_stalks_with_soy_and_maple
Cooking cauliflower stalks with soy and maple sauces. Images: Kathryn Hawkins

3. While the stalks are cooking, prepare the curds. Break them into even-sized florets, and cut any larger ones in half. Discard the stump. After 35 minutes cooking time, mix the leaves into the stalk mixture along with 3 tbsp water. Sit the curds on top and brush lightly with sesame oil. Cover the tin with foil again and bake for a further 25 minutes. Remove the foil and bake for 10 minutes, until tender.

Preparing_cauliflower_curds_and_cooking_the_leaves
Adding the curds and leaves. Images: Kathryn Hawkins
Close-up_on_soy-braised_cauliflower
Soy-braised cauliflower curds, leaves and stalks. Image: Kathryn Hawkins

For an extra finishing touch and fresh flavour, sprinkle the cauliflower with fresh coriander.

I hope you have a good few days until my next post. As always, take care and keep safe 🙂

One Savoy cabbage, three recipes (gluten-free; dairy-free; vegan)

Whole_Savoy_cabbage
Savoy cabbage. Images: Kathryn Hawkins

Hello again. I hope you are keeping well. Spring has sprung here, all be it in stops and starts. It is certainly looking and feeling a lot brighter as the days begin to draw out. I thought I’d reflect the main colour of the season in my choice of post this week. I am a huge fan of all green vegetables, especially cabbage, and this week’s recipe post is based around one of the grandest cabbages, the Savoy.

Last year I was fortunate enough to write recipes for a cookery book aimed at reducing food waste, and ever since then I have sharpened up my act in the kitchen and am trying to come up new ways to use up all the ingredients I prepare. This week, I have 3 recipes for you, showing how you can use up one whole cabbage in different ways and waste very little.

Roasting_tray_of_baked_Savoy_cabbage_wedges_sprinkled_with_chopped_chilli_and_black_sesame_seeds
Chilli and sesame baked cabbage. Image: Kathryn Hawkins

First up is a recipe that uses the bulk of the cabbage, and is my favourite of the 3. I’m always looking for an excuse to cook this one. The dish works well as a meal on it’s own with noodles and a sprinkling of roasted peanuts, or serve it up as a side dish to accompany a roast or other vegetables.

Chilli and sesame baked cabbage

Serves: 2-4

Preparation_of_chilli_and_sesame_Marinade_for_baked_Savoy_cabbage
Chilli and sesame marinade for baked cabbage. Images: Kathryn Hawkins

First make the sauce. Mix together 50ml gluten-free sweet chilli sauce with 2tbsp gluten-free light soy sauce, 2tsp sesame oil, 1tbsp sunflower oil and a finely chopped and peeled garlic clove.

Preparation_of_Savoy_cabbage_and_flavouring_with_chilli_and_sesame_marinade
Preparing chilli and sesame baked cabbage. Images: Kathryn Hawkins

Preheat the oven to 200°C, 180°C fan oven, gas 6. Take 1 medium to large Savoy cabbage, strip off and reserve the darker outer, looser leaves (about 5 or 6), then cut the remaining cabbage ball into 8 equal wedges. Trim away any damaged stem from the stump end, and arrange the wedges snuggly in a roasting tin or baking dish. Spoon over the chilli and sesame sauce, cover with foil and bake for 20 minutes. Remove the foil and continue to bake for a further 15 minutes until tender. Serve sprinkled with freshly chopped red chilli and black or toasted sesame seeds.

Close-up_on_freshly_baked_Savoy_cabbage_wedges_sprinkled_with_red_chilli_and_black_sesame_seeds
Freshly baked cabbage wedges. Images: Kathryn Hawkins

My second recipe uses the reserved outer leaves from the recipe preparation above. Again, I have been influenced by Asian flavours, this time using Chinese five spice in the seasoning.

Crispy five spice cabbage

Serves: 2

Serving_of_crispy_deep_fried_Savoy_cabbage_with_five_spice_seasoning
Crispy five spice cabbage. Image: Kathryn Hawkins

Slice either side of the cabbage leaf stems and remove the stalks – keep them for the next recipe. Finely shred the leaves. Bring a saucepan of water to the boil and blanch the cabbage for 1 minute to soften slightly. Drain and cool under cold running water; shake well to remove the excess water, and blot dry using kitchen paper. You can keep the cabbage prepared like this for 24 hours in the fridge if you need to. Make sure the cabbage is thoroughly dry before deep-frying to keep the oil from spitting as much as possible.

Steps_showing_the_preparation_of_Savoy_cabbage_before_deep_frying
Preparing cabbage for deep frying. Images: Kathryn Hawkins

For the cabbage seasoning, mix together 1tsp caster sugar, 1tsp smoked or plain salt flakes, ½tsp Chinese five spice powder and ¼-½tsp dried chilli flakes.

Ingredients_for_sweet_and_chilli_salt_mix
Sweet and chilli salt mix. Images: Kathryn Hawkins

When you are ready to cook the cabbage, heat vegetable oil for deep frying in a large saucepan to 160°C and deep fry the cabbage in batches (handfuls) for 2-3 minutes until crispy. Drain and keep warm while cooking the other batches.

Deep_frying_and_deep_fried_Savoy_cabbage
Deep frying Savoy cabbage. Images: Kathryn Hawkins

Serve the cabbage as soon after cooking as possible in order to enjoy crisp and sprinkle with the prepared five spice sugar and salt.

And so to the third recipe. This is a way to use up the odds and ends from the cabbage that I confess to having thrown away or composted in the past. Discard any part of the vegetable that is damaged or very tough, everything else can be eaten as part of this vegetable dish. I call this Leftover cabbage braise. You can eat it as a side dish, or tossed into pasta, or use it as a base for a soup or vegetable sauce. You can also add any cooked leftover cabbage to the mix for extra bulk, flavour and thriftiness.

Leftover cabbage braise

Serves: 2

Plateful_of_leftover_cabbage_made_into_a_stir-fry
Cumin cabbage braise. Image: Kathryn Hawkins

Finely chop the reserved cabbage stalks and leftovers along with 1 celery stalk and 1 medium leek. Heat 1tbsp vegetable oil in a frying pan and stir fry the vegetables for 2-3 minutes. Add ½tsp ground cumin and season with salt and pepper. Cover with a lid, reduce the heat and cook the vegetables very gently in their own steam for about 15 minutes until tender.

Leftover_cabbage_stir_fry_preparation
Leftover cabbage braise preparation. Images: Kathryn Hawkins

Serve sprinkled with freshly chopped coriander or parsley.

That’s me for another week. I hope you have a good few days. Until my next post, as always, take care and keep safe 🙂

Mixed root “stovies” (gluten-free; dairy-free; vegan)

Large_pot_and_mug_of_mixed_root_vegetable_stovies
Root veg cooked Stovie-style. Image: Kathryn Hawkins

Hello everyone. I hope you are all well and keeping safe. It has turned cold here these past few days and I have hastened towards the kitchen. I’ve been cooking cosy, warming dishes to help keep the chills away.

Until I moved to Scotland, I had never heard of the dish called Stovies. Traditionally, it is made simply with potatoes which are cooked down to a melting tenderness in water or stock with some onion, sometimes with a little meat or bacon added for flavour, and then dotted with butter. The name derives from the French étouffée which means to stew in a closed pot. It is the perfect dish to serve if you’re out of doors, sitting around a bonfire; it is guaranteed to warm you up.

Still-life_of_root_vegetables_for_making_Stovies
Potatoes, turnip, onions and carrots for Stovies. Image: Kathryn Hawkins

I like to use a selection of root vegetables. My stovie-selection consists of onion to flavour, then carrots, yellow turnip (Swede) and potatoes, but parsnip, white turnip, sweet potatoes and celeriac will also work well as part of the mix. The secret to success is to make sure everything is cooked thoroughly so that means cooking denser roots like carrot and turnip first before adding the potatoes. Also, use a potato that will cook very soft – a variety with a floury cooked texture works best or one suited for mashing.

Pot_of_root_vegetable_stovies_and_close-up_on_texture
Freshly cooked Stovies. Images: Kathryn Hawkins

For extra flavour, I like to add a bundle of herbs tied up in some muslin. Using the muslin bag means that the coarser leaves don’t spoil the overall soft texture of the vegetables. Chopped chilli, garlic and curry spices can also be added if you fancy turning up the heat or adding more intense flavours.

Fresh_herbs_being_tied_in_a_muslin_square
Fresh herbs (sage, thyme, rosemary and bay) tied in muslin. Images: Kathryn Hawkins

With one eye on waste, I am including a quick recipe using the potato and carrot peelings. Just make sure you wash the vegetables well before you start preparing the veg. The peelings make a lovely sprinkle to eat with the cooked vegetables, as does crispy kale – my recipe here.

Prepared_vegetables_ready_to_make_stovies
Preparing the veg and keeping the peelings. Images: Kathryn Hawkins

Serves: 6

Ingredients

  • 3 tbsp vegetable oil
  • 2 onions, peeled and sliced
  • 500g yellow turnip (swede), peeled and diced
  • 300g carrots, peeled (peelings reserved) and diced
  • A few herbs tied in muslin (I used bay, rosemary, thyme and sage)
  • 450g main crop potatoes such as Maris Piper or King Edward, peeled (peelings reserved) and diced
  • Salt and freshly ground black pepper
  • 300ml vegetable stock
  • 1 tsp smoked paprika
  • Chopped parsley to sprinkle

1. Heat 2 tbsp oil in a large lidded saucepan or flame-proof casserole until hot. Add the onions, turnip and carrot, and cook, stirring, for 2-3 minutes to coat in the oil.

2. Add the herbs, reduce the heat to low, cover and gently cook the vegetables in their own steam for 30 minutes.

3. Stir in the potatoes, season well and pour over the stock. Bring to the boil, cover and simmer gently for 30 minutes. Remove the lid and continue to simmer for about 10 more minutes, or until everything is well cooked and tender. Discard the herb bag.

3_stages_of_vegetable_cooking_for_stovies
Cooking the veg. Images: Kathryn Hawkins

4. While the roots are cooking, preheat the oven to 200°C, 180°C fan oven, gas 6. Mix the carrot and potato peelings together with the remaining oil, and spread out over a lined baking tray. Season and sprinkle with smoked paprika. Bake for 25-30 minutes until crisp and golden. Drain well.

Before_and_after_baking_potato_and_carrot_peel_crisps
Making potato and carrot peel crisps. Images: Kathryn Hawkins

Serve the stovies sprinkled with chopped parsley and accompanied with the crispy peelings and baked kale crisps. If you have any stovies leftover, use in soup or mash, or as a topping for a vegetable pie.

Large_mug_of_root_vegetable_stovies_with_kale_chips_and_crispy_skins_to_sprinkle
Stovies, ready to eat with kale chips and crispy root veg skins . Image: Kathryn Hawkins

That’s all from me this week. Not so far away from the end of the year now. My next post will be something a little more festive, so until then, keep warm, stay safe and take care 🙂

Spiced spinach tattie scones (gluten-free; dairy-free; vegan)

Dish_of_spinach_tattie_scones_with_serving_suggestion_of_mango_chutney
Lightly spiced spinach and potato scones served with mango chutney. Images: Kathryn Hawkins

Hello everyone. I hope all is well with you this week. With tighter restrictions entering many of our lives for the foreseeable future, I have turned to another comforting recipe this week. I am revisiting a Scottish classic, and also the most popular recipe on my blog to date, the humble tattie (or potato) scone.

Overhead_ image_of_rustic_dish_filled_iwth_spinach_tattie_scones
Freshly cooked and ready to serve. Image: Kathryn Hawkins

You can read my original recipe here but this time I have given the basic ingredients a spicy twist, inspired by one of my favourite Indian dishes, Saag aloo.

Colander_of_spinach_leaves_with_freshly_dug_home-grown_potatoes
Classic combination, spinach and potatoes. Image: Kathryn Hawkins

I have grown a lot of potatoes this year. At the beginning of lockdown back in March, I struggled to find any seed potatoes to buy, and ended up with a variety called Nicola which has turned out to be a very tasty and very high-yielding potato. I planted mostly in pots and the old barrel below. I am storing the leftover crop in dry soil in the greenhouse for winter use.

Home-grown_Nicola_potatoes
Freshly dug Nicola potatoes. Images: Kathryn Hawkins

The recipe is very simple, with just a few ingredients. I have a couple of tips for guaranteed success: use a dry-textured potato for good results and also drain and dry off the cooked spinach as much as possible to avoid soggy scones. When you cook the scones, only brush the pan with oil so that you give them a little colour without making them crispy.

I use a garam masala spice blend for a mild, fragrant spiciness, but try using your favourite curry powder if you prefer something more defined.

Makes: 8

Ingredients

  • 425g potatoes, peeled and chopped
  • Salt
  • 5 tsp vegetable oil
  • 1 medium onion, peeled and chopped
  • 1 garlic clove, peeled and crushed
  • 4 tsp garam masala
  • 300g baby spinach
  • 60g gluten-free plain flour blend
  • 1 tsp gluten-free baking powder

1. Put the potatoes in a saucepan with a pinch of salt. Cover with water, bring to the boil and cook for 7-10 minutes until completely tender. Drain well; leave to air dry, then push through a ricer to make smooth. Leave to cool.

Cooking_and_ricing_potatoes
Boiled potatoes put through a ricer. Images: Kathryn Hawkins

2. Heat 1 tbsp oil in a small frying pan and gently fry the onion, garlic and spices for 2-3 minutes. Cover with a lid, reduce the heat and leave to cook gently in its own steam for about 15 minutes until very soft. Leave to cool.

Cooking_onion_with_spices
Cooking down the onion and spices. Images: Kathryn Hawkins

3. Rinse the spinach and pack into a saucepan whilst wet. Heat until steaming, then cover with a lid, reduce the heat, and cook for about 5 minutes until wilted. Drain well, pressing against the sides of the colander or strainer to remove as much excess water as possible. Leave to cool.

Cooking_spinach_for_spinach_and_potato_scones
Preparing the spinach. Images: Kathryn Hawkins

4. Once the spinach is cold, chop it up and then blot well with kitchen paper to remove any excess water that remains in the mix.

5. To make the dough, put the potatoes, onion and spinach in a bowl. Add the flour, baking powder and some salt. Mix together to form a ball, and roll out on a lightly floured work top to a thickness of about 1cm. Use an 8-9cm round cutter to make 8 scones, re-rolling the dough as necessary. Cover and chill until required.

Making_and_shaping_spinach_and_potato_scone_dough
Making the scone dough. Images: Kathryn Hawkins

6. When you are ready to cook, brush a frying pan lightly with oil, heat until hot then cook the scones gently for about 3 minutes on each side until lightly golden. Drain and keep warm. If you want to store them, cool them on a wire rack, then cover and chill. They will keep for about 5 days in the fridge and also freeze well.

Cooking_spinach_and_potato_scones
Cooking spiced spinach tattie scones. Images: Kathryn Hawkins

To reheat, either give them a quick blast in the microwave for a few seconds, or gently toast on a dry frying pan for a a couple of minutes on each side.

They make a delicious accompaniment to a bowl of soup just as they are, or spread with butter or margarine and topped with mango chutney 🙂

Overhead_image_of_a_buttered_spinach_tattie_scone
Buttered-up and ready to eat. Image: Kathryn Hawkins

That’s all from me this week. Until next time, take care and keep safe.

Runner bean and pesto fritters (gluten-free; dairy-free; vegan)

Runner_bean_fritters_in_a_bowl_with_pesto_mayo_on_the_side
Runner bean fritters. Image: Kathryn Hawkins

Hello everyone. I hope you have had a good few days. I can hardly believe that it is September already! We have had a fine few days of weather this last week, and the garden dried out enough to get gardening again. It felt good to be outside once again.

Runner_bean_plants_and_a_trug_of_freshly_picked_beans
Runner beans 2020. Images: Kathryn Hawkins

At the end of my last post I mentioned that I was about to tackle a glut of runner beans. It has been perfect conditions for a bumper harvest this summer: plenty of rain intermixed with sunshine and warmth. The bean vines are still looking very lush and healthy, and there has been a second flush of flowers which means, if the weather holds, I should be picking beans for a while longer.

Large_pot_of_fresh_basil
Small_food_processor_with_basil_pesto_ingredients_before_and_after_blending
Fresh basil pesto. Images: Kathryn Hawkins

Apart from enjoying runner beans as an accompaniment to meals, so far I have a couple of bags in the freezer for eating later on in the year. I seldom do anything else, although leftover cold beans make a great salad ingredient – click here for a delicious runner bean salad I posted last year. This week’s recipe gives runner beans a leading role. I hope you enjoy the fritters, they are crisp and delicious, and for a little extra effort, I would suggest making your own pesto. I am very proud of my basil plant. It is thriving in the greenhouse; the leaves have a strong, peppery bite. The quantity below will make enough for this recipe. If you double or triple it you can freeze the remainder in small batches. It will also keep for a couple of weeks sealed tight in a jar in the fridge.

Vegan pesto: put a peeled garlic clove in a small food processor with 15g basil leaves, 60g unsalted nuts such as pistachio, pine nuts or almonds (I used a combination of all 3), a pinch of salt, 50ml extra virgin olive oil and 30g grated hard vegan cheese. Blitz for a few seconds until smooth, and that’s it. Pesto perfecto! This combination makes a thick pesto which is perfect for this recipe, but add extra oil to taste for a looser pasta sauce.

Preparing_runner_beans
Freshly_sliced_raw_and_steamed_runner_beans
Preparing and cooking runner beans. Images: Kathryn Hawkins

I have found that strips of bean work well in this recipe. The batter has a larger surface area to cling on to and cooks really crisply. Peel the sides of the beans using a vegetable peeler and remove the stalk end. If you have a bean slicer, push them through that, otherwise, slice them as thinly as you can. Steam them over simmering water for 5 minutes, then cool in cold water and drain well. Pat dry with kitchen paper. Now, let’s get on with the recipe.

Overhead_image_of_runner_bean_fritters_and_a_bowl_of_pesto_mayonnaise
Fritters and pesto mayo. Image: Kathryn Hawkins

Makes: 8

Ingredients

  • 50g polenta
  • 75g gluten-free plain flour
  • 2 tsp gluten-free baking powder
  • 1 tbsp flax seeds, finely ground (I use a coffee grinder)
  • 3 tbsp pesto sauce – see recipe above
  • 120ml dairy-free milk
  • 75ml aqua fava (bean or chickpea canning water)
  • 225g cooked runner beans
  • Vegetable oil for deep frying
  • Vegan mayonnaise
  1. Put the polenta, flour and baking powder in a bowl. Mix together and make a well in the centre. 
  2. Mix the flax seeds with 3 tbsp cold water and leave to stand for about 5 minutes until thickened. Pour into the well.
    Making_fritter_batter_with_flax_egg
    Preparing fritter batter and flax egg. Images: Kathryn Hawkins
  3. Add the pesto sauce and milk and whisk together to make a smooth batter.
  4. In another bowl, whisk the aqua fava to a stiff foam and then gently fold into the batter. Finally, carefully stir in the beans, making sure they are well covered. Adding_homemade_pesto_and_whisked_aqua_fava_to_fritter_batter
    Folding_in_whisked_aqua_fava_and_runner_beans_into_fritter_batter
    Adding pesto, whisked aqua fava and the beans. Images: Kathryn Hawkins

    5. Pour sufficient oil into a large deep frying pan or wok to a depth of about 3cm and heat to 180ºC. Fry bundles of beans in batter in batches of 3 or 4, turning in the oil, for 4-5 minutes until crisp and golden. You should be able to make 8 fritters with this quantity. Drain well on kitchen paper and keep warm until ready to serve.

    Runner_bean_fritters_bubbling_in_oil_and_draining_after_cooking
    Cooking the fritters. Images: Kathryn Hawkins

    6. To serve, mix 1 part pesto to 2 parts vegan mayonnaise and serve with the fritters accompanied with fresh tomatoes. Scatter with fresh basil and runner bean flowers, if liked.

    Single_serving_of_runner_bean)fritters_and_homemade_pesto
    Fritters with homegrown tomatoes, fresh basil and homemade pesto mayo. Image: Kathryn Hawkins

    Use this batter with ribbons of courgette or carrot instead – lightly steam them first. Leave out the pesto if you prefer, or simply add grated vegan cheese to the batter and some chopped chives, shredded leek or spring onion.

    Until next time, take care and best wishes 🙂

No-egg omelette with asparagus (gluten-free; dairy-free; vegan)

Eggless_omelette_filled_with_roasted_British_asparagus
Egg-free omelette with roast asparagus. Image: Kathryn Hawkins

Hello again. I hope you are keeping well. A simple recipe for you this week. Perfect for the time of year. It makes a lovely lunch or light supper, and more than anything else, it gives me the opportunity to show you how you really can make an omelette without breaking a single egg 🙂

Ingredients_for_making_an_egg-free_vegan_omelette
Egg-less omelette ingredients. Image: Kathryn Hawkins

My chosen filling for the month of May would always be fresh asparagus. This magnificent vegetable has been available here, home-grown in the UK, for about 3 weeks now. And very delicious it is too. I roasted a few stems to eat with my omelette and then let the rest go cold to eat with a salad.

A_Union_Jack_design_pot_full_of_British_asparagus
British asparagus. Image: Kathryn Hawkins

To roast asparagus (I find thicker stems cook better this way), trim off the woody ends and lay out, spaced apart on a large lined baking tray. Brush lightly with olive oil and season with salt and pepper. Bake for about 15 minutes at 200°C, 180°C fan oven, gas 6 until tender. Drain and serve hot or cold.

3_steps_to_preparing_and_roasting_asparagus
Preparing and roasting asparagus. Images: Kathryn Hawkins

On with the recipe. I add chopped fresh herbs to the omelette mixture for colour and flavour. I have tried adding shredded leek and spring onion but found that they added water and changed the texture. A few tablespoons of chopped herbs is fine but anything more and the mixture may become more pancake-like. The aqua fava gives added lightness to the mixture which makes it less like a pancake batter. Leave this out if your prefer. By the way, if you’re not gluten-free, plain white flour can replace the tapioca flour.

Makes 4 small omelettes or 2 medium-sized

Ingredients

  • 75ml chickpea or bean water (aqua fava)
  • 50g tapioca flour
  • 50g gram (chickpea) flour
  • 3g gluten-free baking powder
  • ½ tsp salt
  • 150ml dairy-free milk (I use oat milk)
  • 2 tbsp each freshly chopped parsley and chives
  • Sunflower oil for cooking
  1. Pour the chickpea water into a bowl and whisk for 2-3 minutes until thick and foamy.
  2. Sieve the flours, baking powder and salt into another bowl. Make a well in the centre and gradually blend in the milk to make a smooth batter.
  3. Scrape the whisked foam on top and add the herbs. Gently fold everything together until well blended.
  4. Brush a small crepe or frying pan (approx. 15cm base) with a little oil and heat until hot. Reduce the heat to low and pour in ¼ of the batter to cover the bottom of the pan. Cook over a medium/low heat for 2-3 minutes until bubbles form on top and the mixture is almost set. The omelette should be lightly golden underneath.
  5. Turn over and cook for a further 2-3 minutes until cooked through. Turn onto baking parchment and cover with foil whilst preparing the other omelettes. Best served warm with your favourite filling.

    8_steps_to_preparing_and_cooking_egg-less_vegan_omelettes
    How to make an egg-less omelette. Images: Kathryn Hawkins

    Egg-less_vegan_omelette_filled_with_roasted_British_asparagus
    A perfect May-time lunch. Image: Kathryn Hawkins

    I hope you have a good few days ahead. Enjoy the fine weather if you have it and above all else, keep safe.


Gujerati-inspired spiced vegetable cake

Overhead_image_of_a_homemade_Gujerati-style_spiced_vegetable_cake
Spiced vegetable cake. Image: Kathryn Hawkins

Hello again. It feels like a while since I posted a recipe. To be honest, I have been busy with work projects and haven’t had so much time to set aside for my blog. But I about to  rectify that now with this week’s recipe, inspired by a Gujerati dish called “Handvo”. This is a savoury cake made with spices, grated vegetables and a flour made from rice and lentil or dahl. It reminds me of a savoury carrot cake.

Sliced_Gujerati-style_spiced_vegetable_cake
Lightly spiced and full of flavour. Image: Kathryn Hawkins

The cake is best eaten hot with a salad and some fruity chutney. I have eaten it cold, at room temperature, and it was still very tasty but the texture was a little drier. Something different for a picnic or packed lunch perhaps? You need to start the recipe the day before baking because you need to soak the flour and yogurt mixture overnight. After that, it’s all pretty straightforward.

Images_of_the_vegetables_and_spices_in_spiced_vegetable_cake
Vegetables and flavourings. Images: Kathryn Hawkins

The vegetable ingredients can be changed to suit personal preference. Carrots and ordinary potato work instead of sweet potato; chard or spring greens would make a good alternative to spinach; use pea instead of sweetcorn and leek instead of spring onion. The spices I use give a mellow flavour, so you may want experiment with others if you prefer something more robust. For a shortcut, you could replace the lot with a general purpose curry powder.

Gujerati-style_spiced_vegetable_cake_serving_slice
A slice of savoury cake. Image: Kathryn Hawkins

Serves: 6-8

Ingredients

  • 115g gram flour
  • 115g white rice flour
  • 150g plant-based yogurt (I used coconut)
  • 115g grated raw sweet potato
  • 75g cooked sweetcorn kernels
  • 3 spring onions, finely chopped
  • 50g raw spinach, chopped
  • 2 tbsp freshly chopped coriander plus more for serving
  • 1 tsp dried chilli flakes
  • ¼ tsp asafoetida
  • 2 garlic cloves, crushed
  • 1 tsp salt
  • 1 tbsp caster sugar
  • 75ml sunflower oil
  • 1 tsp each cumin and black onion seeds
  • 4 tsp sesame seeds
  1. Sieve the flours into a bowl and mix in the yogurt along with 100ml luke warm water until well blended and the consistency of thick batter. Cover and leave in a cool room temperature for about 12 hours.

    Soaking_rice_and_gram_flour_in_yogurt_and_water
    Soaking the flours in yogurt and water. Images: Kathryn Hawkins
  2. The next day, preheat the oven to 240°C, 220°C fan oven, gas 9. Grease and line a 20cm spring-clip or loose-based cake tin.
  3. Add the vegetables, coriander, chilli, asafoetida, garlic, salt and sugar to the soaked cake batter and mix thoroughly.
  4. Heat the oil and fry the spice seeds gently until starting to pop then add to the cake mixture and mix well.
  5. Spoon into the prepared tin, smooth the top and sprinkle with sesame seeds. Bake for 20 minutes then reduce the oven temperature to 200°C, 180°C fan oven, gas 6, and cook for a further 35-40 minutes until firm to the touch and golden brown. Cool for 10 minutes before removing from the tin. Serve hot or cold with more coriander and salad.

    6_steps_to_making_spiced_vegetable_cake_batter
    Making and baking the cake batter. Images: Kathryn Hawkins

    I hope you enjoy the recipe. Have a good few days. It’s beginning to feel a little more spring-like here, but I expect I’ve put a damper on things now I’ve said that! See you again soon 🙂

    Forkful_of_spiced_vegetable_cake
    A savoury cake with a texture a bit like carrot cake. Image: Kathryn Hawkins

Spicy rice and peas (gluten-free; dairy-free; vegan)

Close-up_of_dish_of_baked_Basmati_rice_and_chana_dal
Spicy rice and peas. Image: Kathryn Hawkins

Welcome to my first recipe post of the year. I hope you’ve all had good Christmas and New Year celebrations. It has seemed like a good long holiday this year. Not only have I had plenty of time to recharge my batteries, but the longer holiday gave me the opportunity to spend time in the kitchen experimenting with different ingredients.

I have noticed that many of the blogs I follow have started the year with spicy offerings. Something about this time of the year usually gets me delving into the spice cupboard too, in search of different flavours to liven up my repertoire of recipes.

Cardamom_ginger
Tray of spices and flavourings for basmati rice and chana dal. Images: Kathryn Hawkins

My recipe this week is based around 2 basic and ordinary ingredients: rice and dried peas. But cooking with some spices, onion and other flavours, they can be transformed into something quite sensational.

The combination of spices I have used in this dish are more fragrant and comforting than spicy. You may want to add something with heat to give it more of a kick if you prefer e.g cayenne pepper or dried red chilli. To mellow the flavour, toast the whole spices first in a dry frying pan, just for a couple of minutes, and then cool and grind them up before using. If you don’t have the time to make your own spice mix, use 2-3 tsp curry powder or garam masala.

Toasting_cumin_and_coriander_seeds_and_making_a_spice_mix
Preparing the spice mix. Images: Kathryn Hawkins

The combination of spiced chana dal (yellow-split peas) and fragrant basmati rice makes this a very tasty accompaniment to serve with a vegetable curry sauce, or you can sprinkle it with roasted cashew nuts or almonds to make a deliciously comforting meal. It freezes well too, so is worth making up as a batch-bake and then portioning up for the freezer, ready to serve at a later date. The recipe takes a bit of time to organise but being able to make it for the freezer is a good incentive to have a go.

Overhead_image_of_Indian-style_rice_and_peas
Ready to serve, Indian-style rice and peas. Images: Kathryn Hawkins

The dish is made up of 2 layers of basmati rice, top and bottom, with an onion, garlic and ginger chana dal layer in the middle, enriched with coconut yogurt. To finish the dish, the spice mix is sprinkled on top along with lemon juice, coconut milk, green chilli and butter (or coconut oil or dairy-free margarine).

Sliced_red_onion_chopped_garlic_and_ginger_with_green_chilli_coconut_milk_lemon_juice_and_Indian_spice_mix
Rice and pea flavourings. Images: Kathryn Hawkins

Once the dish is baked, leave it to stand for a short while, then stir it up before serving so that all the wonderful flavours mingle together.

Indian-style_rice_and_peas_mixed_and_served_in_a_metal_bowl
All mixed up and ready to serve. Image: Kathryn Hawkins

Large_brass_serving_spoon_full_of_rice_and_peas
A spoonful of rice and peas. Image: Kathryn Hawkins.

Serves: 3 to 4 as a main dish, or 4 to 6 as an accompaniment

Ingredients

  • 100g chana dal (yellow split peas)
  • 350g basmati rice
  • 4 tbsp vegetable oil
  • 2 red onions, peeled and thinly sliced
  • 2 garlic cloves. peeled and finely chopped
  • 25g root ginger, peeled and finely chopped
  • 2 fresh bay leaves or 1 dried bay leaf
  • 5 tbsp dairy-free coconut yogurt
  • 1 tsp salt
  • 40g butter or ghee if you eat it, or use coconut oil or dairy-free margarine instead
  • Juice 1 small lemon
  • 3 tbsp coconut milk
  • 1 or 2 large mild green chillies, deseeded and sliced
  • 1 tsp each cumin and coriander seeds, toasted and ground
  • ¼ tsp crushed black peppercorns
  • Seeds of 4 cardamom pods, crushed
  • Fresh coriander and cashew nuts to serve
  1. Rinse the chana dal in cold running water. Place in a bowl and cover with cold water. Leave to soak for 45 minutes. Then drain, rinse and place in a saucepan. Cover with fresh water, bring to the boil and cook in simmering water for 25 minutes until tender but not mushy. Drain well.
  2. Rinse the rice in cold running water. Place in a bowl and cover with cold water. Leave to soak for 30 minutes. Bring a large saucepan of water to the boil. Drain and rinse the rice and then add to the water. Bring back to the boil and cook for 5 minutes only. Drain, rinse and leave to one side.
  3. Heat the oil in a frying pan and fry the onion, garlic and ginger with the bay leaves for 5 minutes over a medium heat until lightly golden. Add the yogurt 1 tbsp at a time, stirring the mixture in between additions, until the liquid is absorbed. Stir in the salt and cooked chana dal. Leave aside. Discard bay leaves if preferred.

    4_stages_to_cooking_the_chana_dal_and_onion_layer
    Preparing the chana dal and onion layer. Images: Kathryn Hawkins
  4. Preheat the oven to 180°C, 160°C fan oven, gas 4. Spoon half the rice into an ovenproof dish and spread to form an even layer. Top with the oniony chana dal mixture and then the remaining rice. Pat down gently.
  5. Dot the top with butter, ghee, coconut oil or margarine, and drizzle with lemon juice and coconut milk. Sprinkle with sliced chilli to taste. Mix the spices together and sprinkle over the top of the rice. Cover the dish tightly with aluminium foil.

    4_steps_to_layering_Indian-style_rice_and_peas
    Layering the rice and peas. Images: Kathryn Hawkins
  6. Stand the dish on a baking tray and cook for 45-50 minutes until piping hot. Leave the covering in place and allow to stand for 10 minutes before removing the foil and gently mixing everything together. Serve with fresh coriander and cashew nuts.

    Indian-style_rice_and_peas_just_out_of_the_oven
    Out of the oven and ready to serve. Image: Kathryn Hawkins

Sweet potato steaks with sweetcorn salsa (gluten-free; dairy-free; vegan)

Griddled_sweetcorn_slices_with_barbecue_dressing_alongside_sweetcorn_salsa
Steaks, barbecue dressing and salsa. Images: Kathryn Hawkins

Now that there’s a bit of a nip in the air and the daylight hours are limited, I feel the need for some comfort food. Very soon “bewitching” date in the calendar will be upon us, and the colours and flavours of my recipe this week make it a perfect dish to serve up on All Hallows Eve.

Platter_of_sweet_potato_steaks_sprinkled_with_sweetcorn_salsa
Salsa-sprinkled sweet potato steaks. Image: Kathryn Hawkins

There is a little heat in my recipe coming from chilli oil to cook the steaks and sweetcorn; green chilli in the salsa, and some sweet chilli sauce in the dressing. I’m a chilli wimp so the flavours are relatively mild,  you can add more to bump up the intensity if you prefer. I make my own chilli oil by adding Mexican chipotle seasoning to sunflower oil, and brush it over the steaks and sweetcorn just before cooking. Use plain oil if preferred.

Chilli_oil_and_griddle-cooked_sweet_potato_steaks
Home-made chilli oil for brushing over sweet potato steaks. Images: Kathryn Hawkins

The salsa salad is consists of fresh sweetcorn flavoured with green chilli (use red for more heat), some spring onions for sharpness. and for nuttiness, toasted sesame seeds and sesame oil. To finish, I add white balsamic vinegar for a little sweetness. You can experiment with the balance of flavours to suit your taste-buds.


Toasted_sesame_seeds_green_chillies_spring_onions_and_fresh_sweetcorn
Sweetcorn salsa basics. Image: Kathryn Hawkins

On with the recipe. I hope you enjoy it, and have a Happy Hallowe’en 🙂

Serves: 4 to 6

Ingredients

  • 900g medium-sized sweet potatoes, scrubbed
  • Chilli oil
  • Salt and freshly ground black pepper

For the salsa:

  • 4 sweetcorn cobs, whole or halved
  • 4 spring onions, trimmed and chopped
  • 2 mild green chillies, deseeded and chopped
  • 3 tbsp. toasted sesame seeds
  • 1 tbsp. sesame oil
  • 2 tbsp. white balsamic vinegar

For the dressing:

  • 2 tbsp. tomato ketchup
  • 3 tbsp. sesame oil
  • 4 tbsp. Thai sweet chilli sauce
  • 2 tsp smoked paprika
  • Chilli flakes to sprinkle
  1. Leaving the sweet potatoes unpeeled, cut them into  ½cm thick slices. Bring a large shallow pan of water to a gentle boil and cook the slices for 3-4 minutes in simmering water to soften them but not cook them completely. Drain well, pat dry with kitchen paper and leave them to air dry on a wire rack.

    Sliced_sweet_potato_softening_in_simmering_water_and_drying_on_a_wire_rack
    Preparing sweet potato steaks. Images: Kathryn Hawkins
  2. When ready to cook, heat a large griddle pan until hot. Brush the slices with chilli oil and season on both sides, then cook the slices a few at a time, for 3-4 minutes on each side, pressing them on to the griddle, until lightly charred. Drain, cover and keep warm until you have cooked all the slices.
  3. For the sweetcorn salsa, cook the cobs in boiling unsalted water (salt can toughen the kernels) for 4-5 minutes until tender. Drain well.
  4. Preheat the grill to a hot setting. Arrange the sweetcorn on  the grill rack and brush with chilli oil. Cook under the grill for about 5 minutes, turning frequently, until golden and lightly blistered. Drain well and leave to cool.

    Boiling_and_grilling_sweetcorn_ready_for_salsa
    Sweetcorn preparation. Images: Kathryn Hawkins
  5. Strip the sweetcorn kernels from the cobs using a sharp knife and mix with the remaining salsa ingredients. Cover and chill until required.

    Slicing_off_cooked_sweetcorn_kernels_from_the_cobs
    Stripping kernels from the cobs. Image: Kathryn Hawkins

    To serve, mix all the dressing ingredients together and place in a dipping bowl. Arrange the sweet potato steaks on a warm platter and serve with the salsa salad and the dressing. Sprinkle with chilli flakes if liked.

    Close-up_of_griddled_sweet_potato_steaks_with_sweetcorn_salsa
    Up close on sweet potato steaks. Image: Kathryn Hawkins